InZOI Tutorial: How to texture Furniture meshes and make them recolourable
Project: InZOI Tutorials
by Lyralei
Uploaded July 8, 2025, 1:08 p.m.
Updated July 8, 2025, 1:08 p.m.
Texturing in InZOI is quite advanced, especially if you just came from the sims. What are all these new terms? Why are textures packed? How do I even make textures?!?! And how do I make my item recolourable!
We'll get to the bottom of all of that in this tutorial, as we will cover how to make textures work as expected, and if you want to, how to make our object recolourable! 😉
What you'll need:
- InZOI Modkit
- Easy Channel Packing
- A mesh you've made/mesh edit if you followed my beginners tutorial on editing in-game meshes
- Blender 4.3 or up
- TexTools
What exactly is InZOI's material technique?
Now this part is going to be a bit advanced, and if you don't understand anything at all of what I'm saying, that's totally cool! Feel free to just follow the step by step guide so it might make more sense later on 😉
InZOI uses materials that are known to be called "PBR materials". They're essentially a bunch of textures all bundled up together that make things look much nicer and realistic compared to the good ol' Phong material (where we only had a Normal Map, a diffuse map and specular map).
The PBR materials for InZOI can include:
- Base Color Map - A texture that only includes the colour of our mesh without any detailing, such as wood grains or shadows.
- Albedo Map - A more complicated Base Color map where details are much more prominent, but we don't have any "lighting" data in it such as shadows.
- Ambient Occlusion - A black and white texture that holds all the shadow and light details in a pre-baked texture, so the engine doesn't have to do all the work. (And it adds cooler details that way :D)
- Normal Map - Adds 3D details to your mesh without needing to mesh it in.
- Metallic Map - Adds whether our mesh needs to appear metallic-y shiny (you know, just like metal!) or not. And by how much.
- Rougness Map - Similar to a specular map. It tells us what parts of the mesh needs to be shiny and what parts shouldn't.
- Curvature Map - essentially a way to visualize and store information about how much a surface curves inwards or outwards, with convex areas being bright (or white) and concave areas being dark (or black). This way we don't have to add it into our mesh 😉
- Emissive Map - What parts of your mesh should shine like a light! Perfect for Neon lights!
- Translucency Map - Exactly what it sounds like, how much transparency your mesh should have. This is different from Opacity! Translucency for example can make light travel through it when it's semi transparent.
- Opacity Map - This is essentially like an "Alpha channel" of our mesh and adds parts that need to be opacity (such as lace-y bits!). Great for cutout-like meshes, such as a flat plane with an icon on it that you want to be transparent.
- Color ID - This is our mask. We can tell it what parts need to be wooden and what other parts should be metal 😉. If you've modded for the sims 3 before, you know what I mean with this. The colour coding is even the same :D
If you'd like to learn more about PBR materials, here's a great tutorial about it: Youtube - PBR explained in 3 Minutes
What is Channel Packing?
Now, you probably noticed I used "Can use" in the wording of the title of this section. And that is, because InZOI uses a technique in their materials called "Channel packing".
Basically, an image has 3 values, which are channels, called "Red" "Green" "Blue" (and if it's transparent: Alpha). The computer combines all those channels together to create a picture on your screen with said 3 colours.
However, some super smart people have come up with a trick here. Most of these maps that I've named actually have no colours. They're all grey-scaled. When channel packing, we put each texture into a channel.
For example:
- The red channel can hold the Ambient occlusion map
- The Green Channel the Rougness map
- The Blue channel the Metallic Map.
That way, games don't have to load 10 different maps to show your object, but instead just 1 or 2! :) Pretty smart right? It's also much lighter on the GPU.
Now, InZOI does have a couple of combinations of how we need to pack our texture and which combinations are allowed.
 (Taken from the Documentation)
Don't run away yet! The whole purpose of this tutorial is to make all this easier, even if you have no idea what you're doing! :p
Setting things up
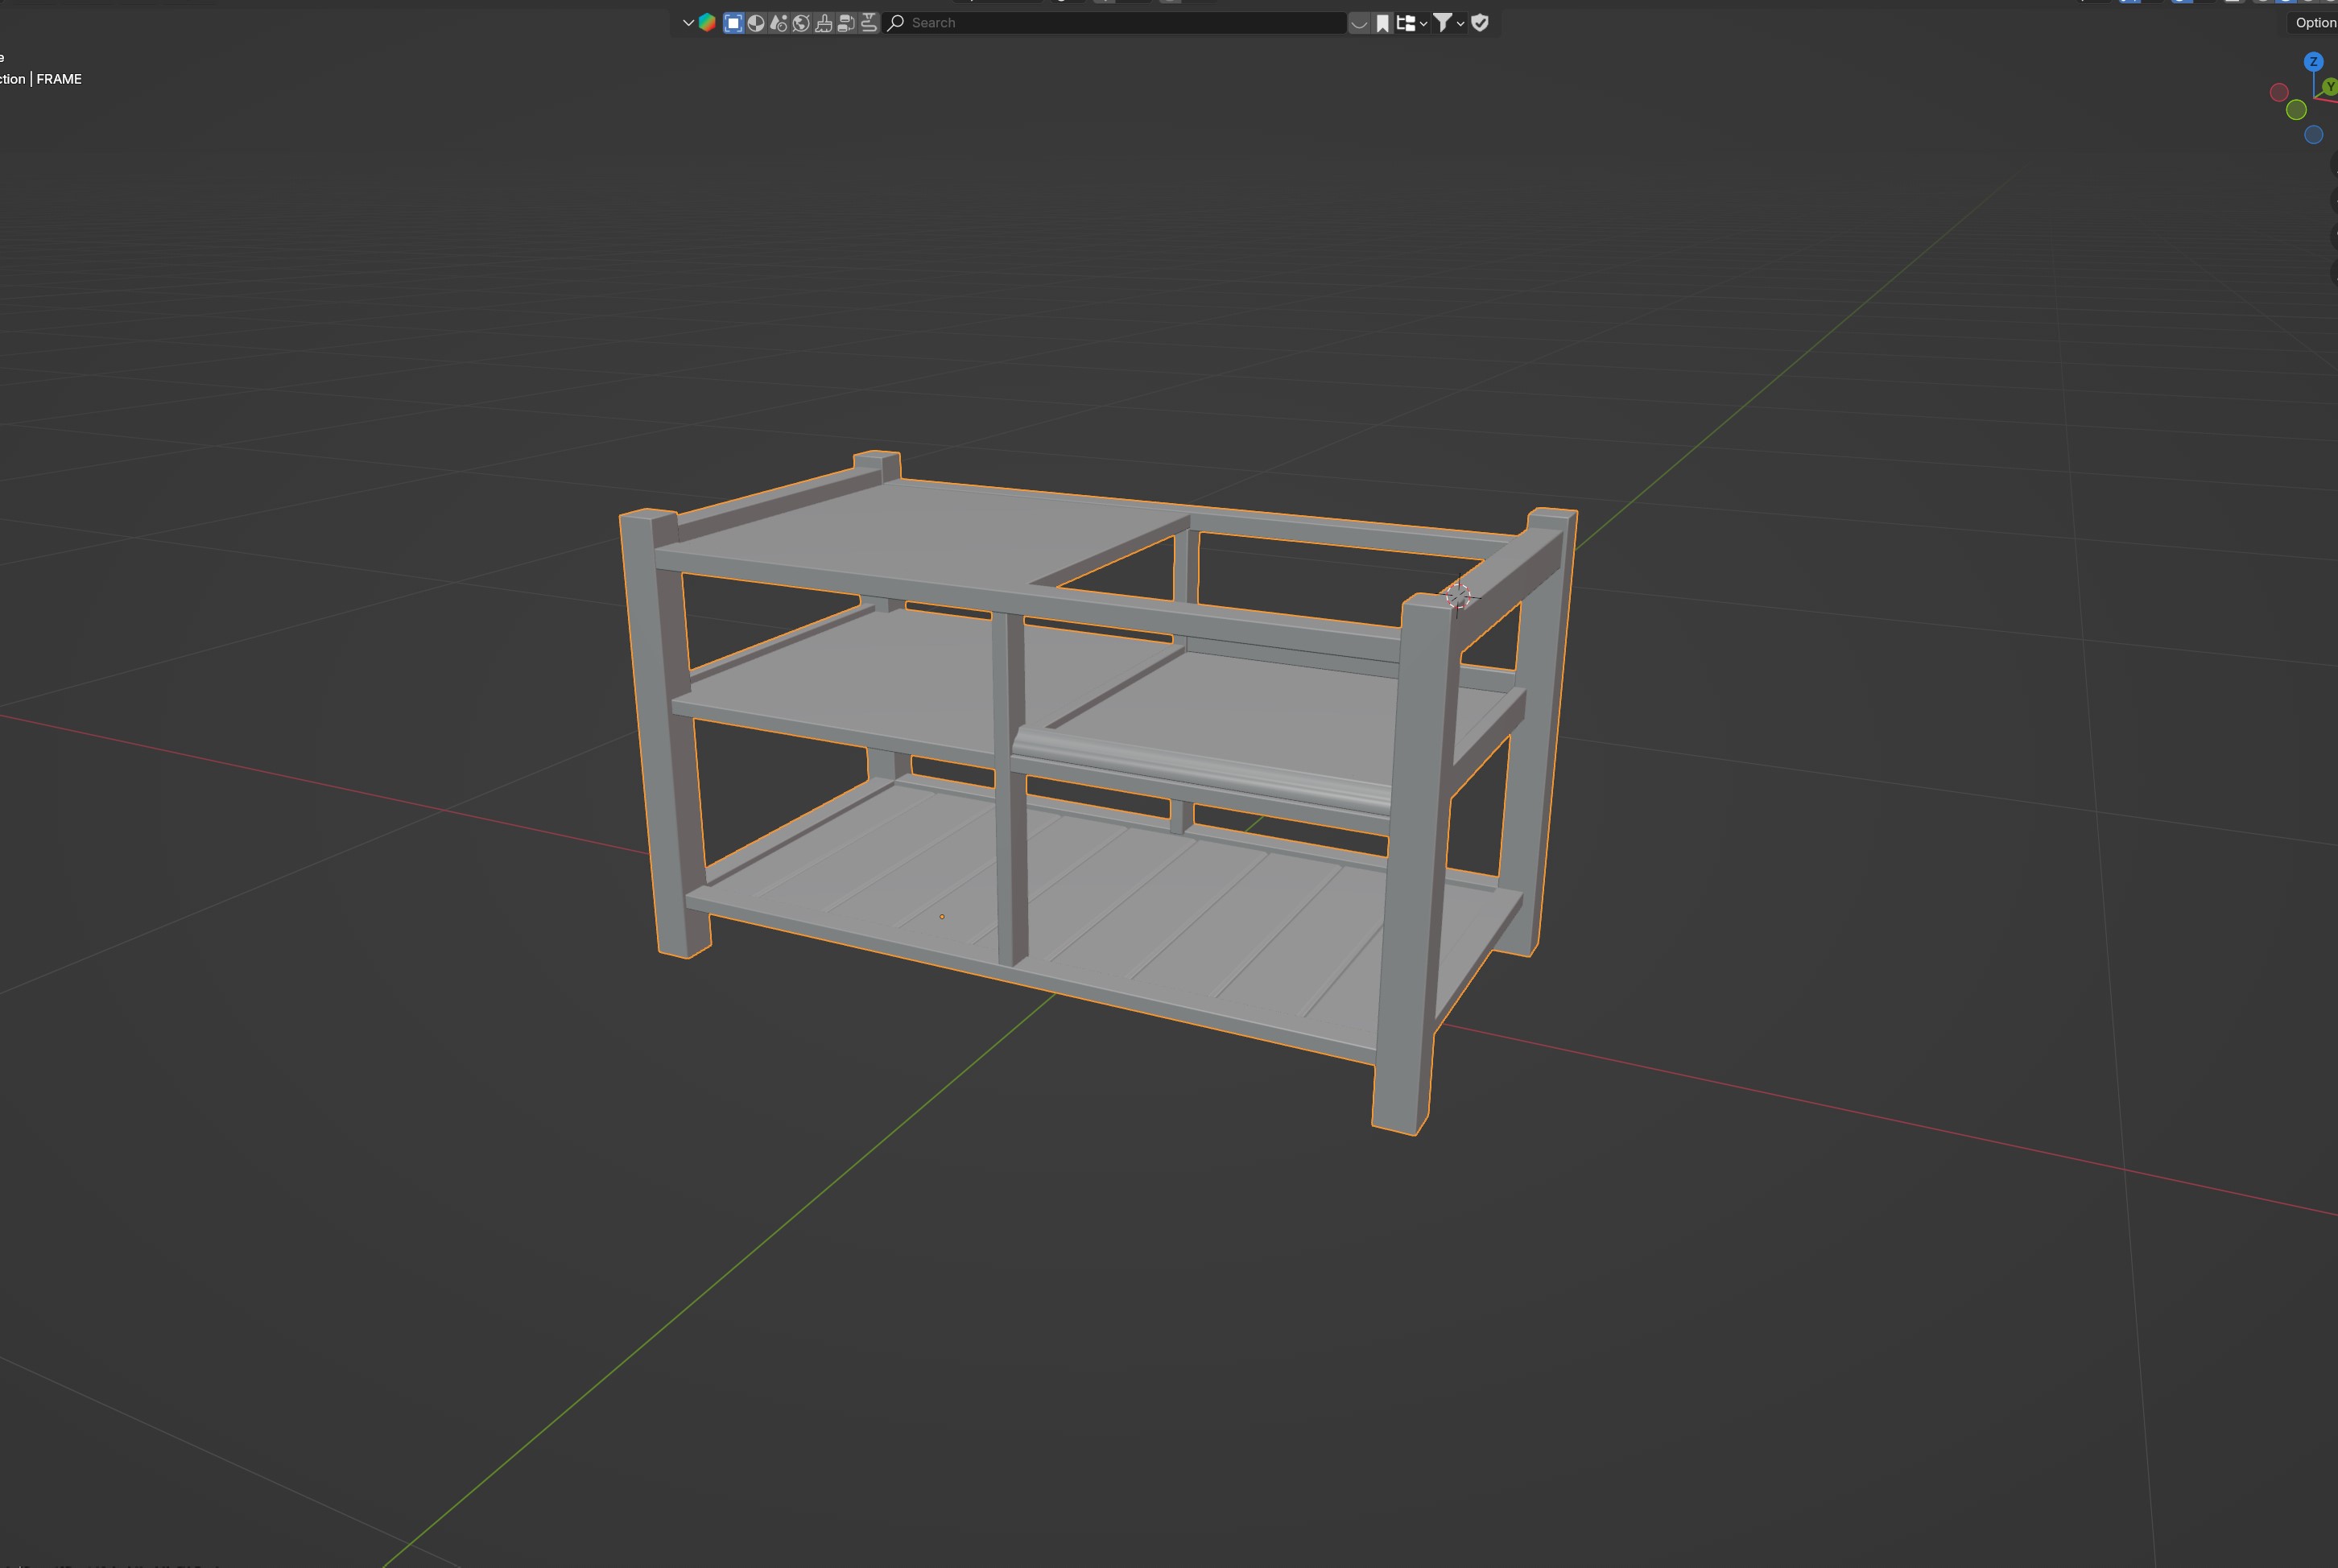
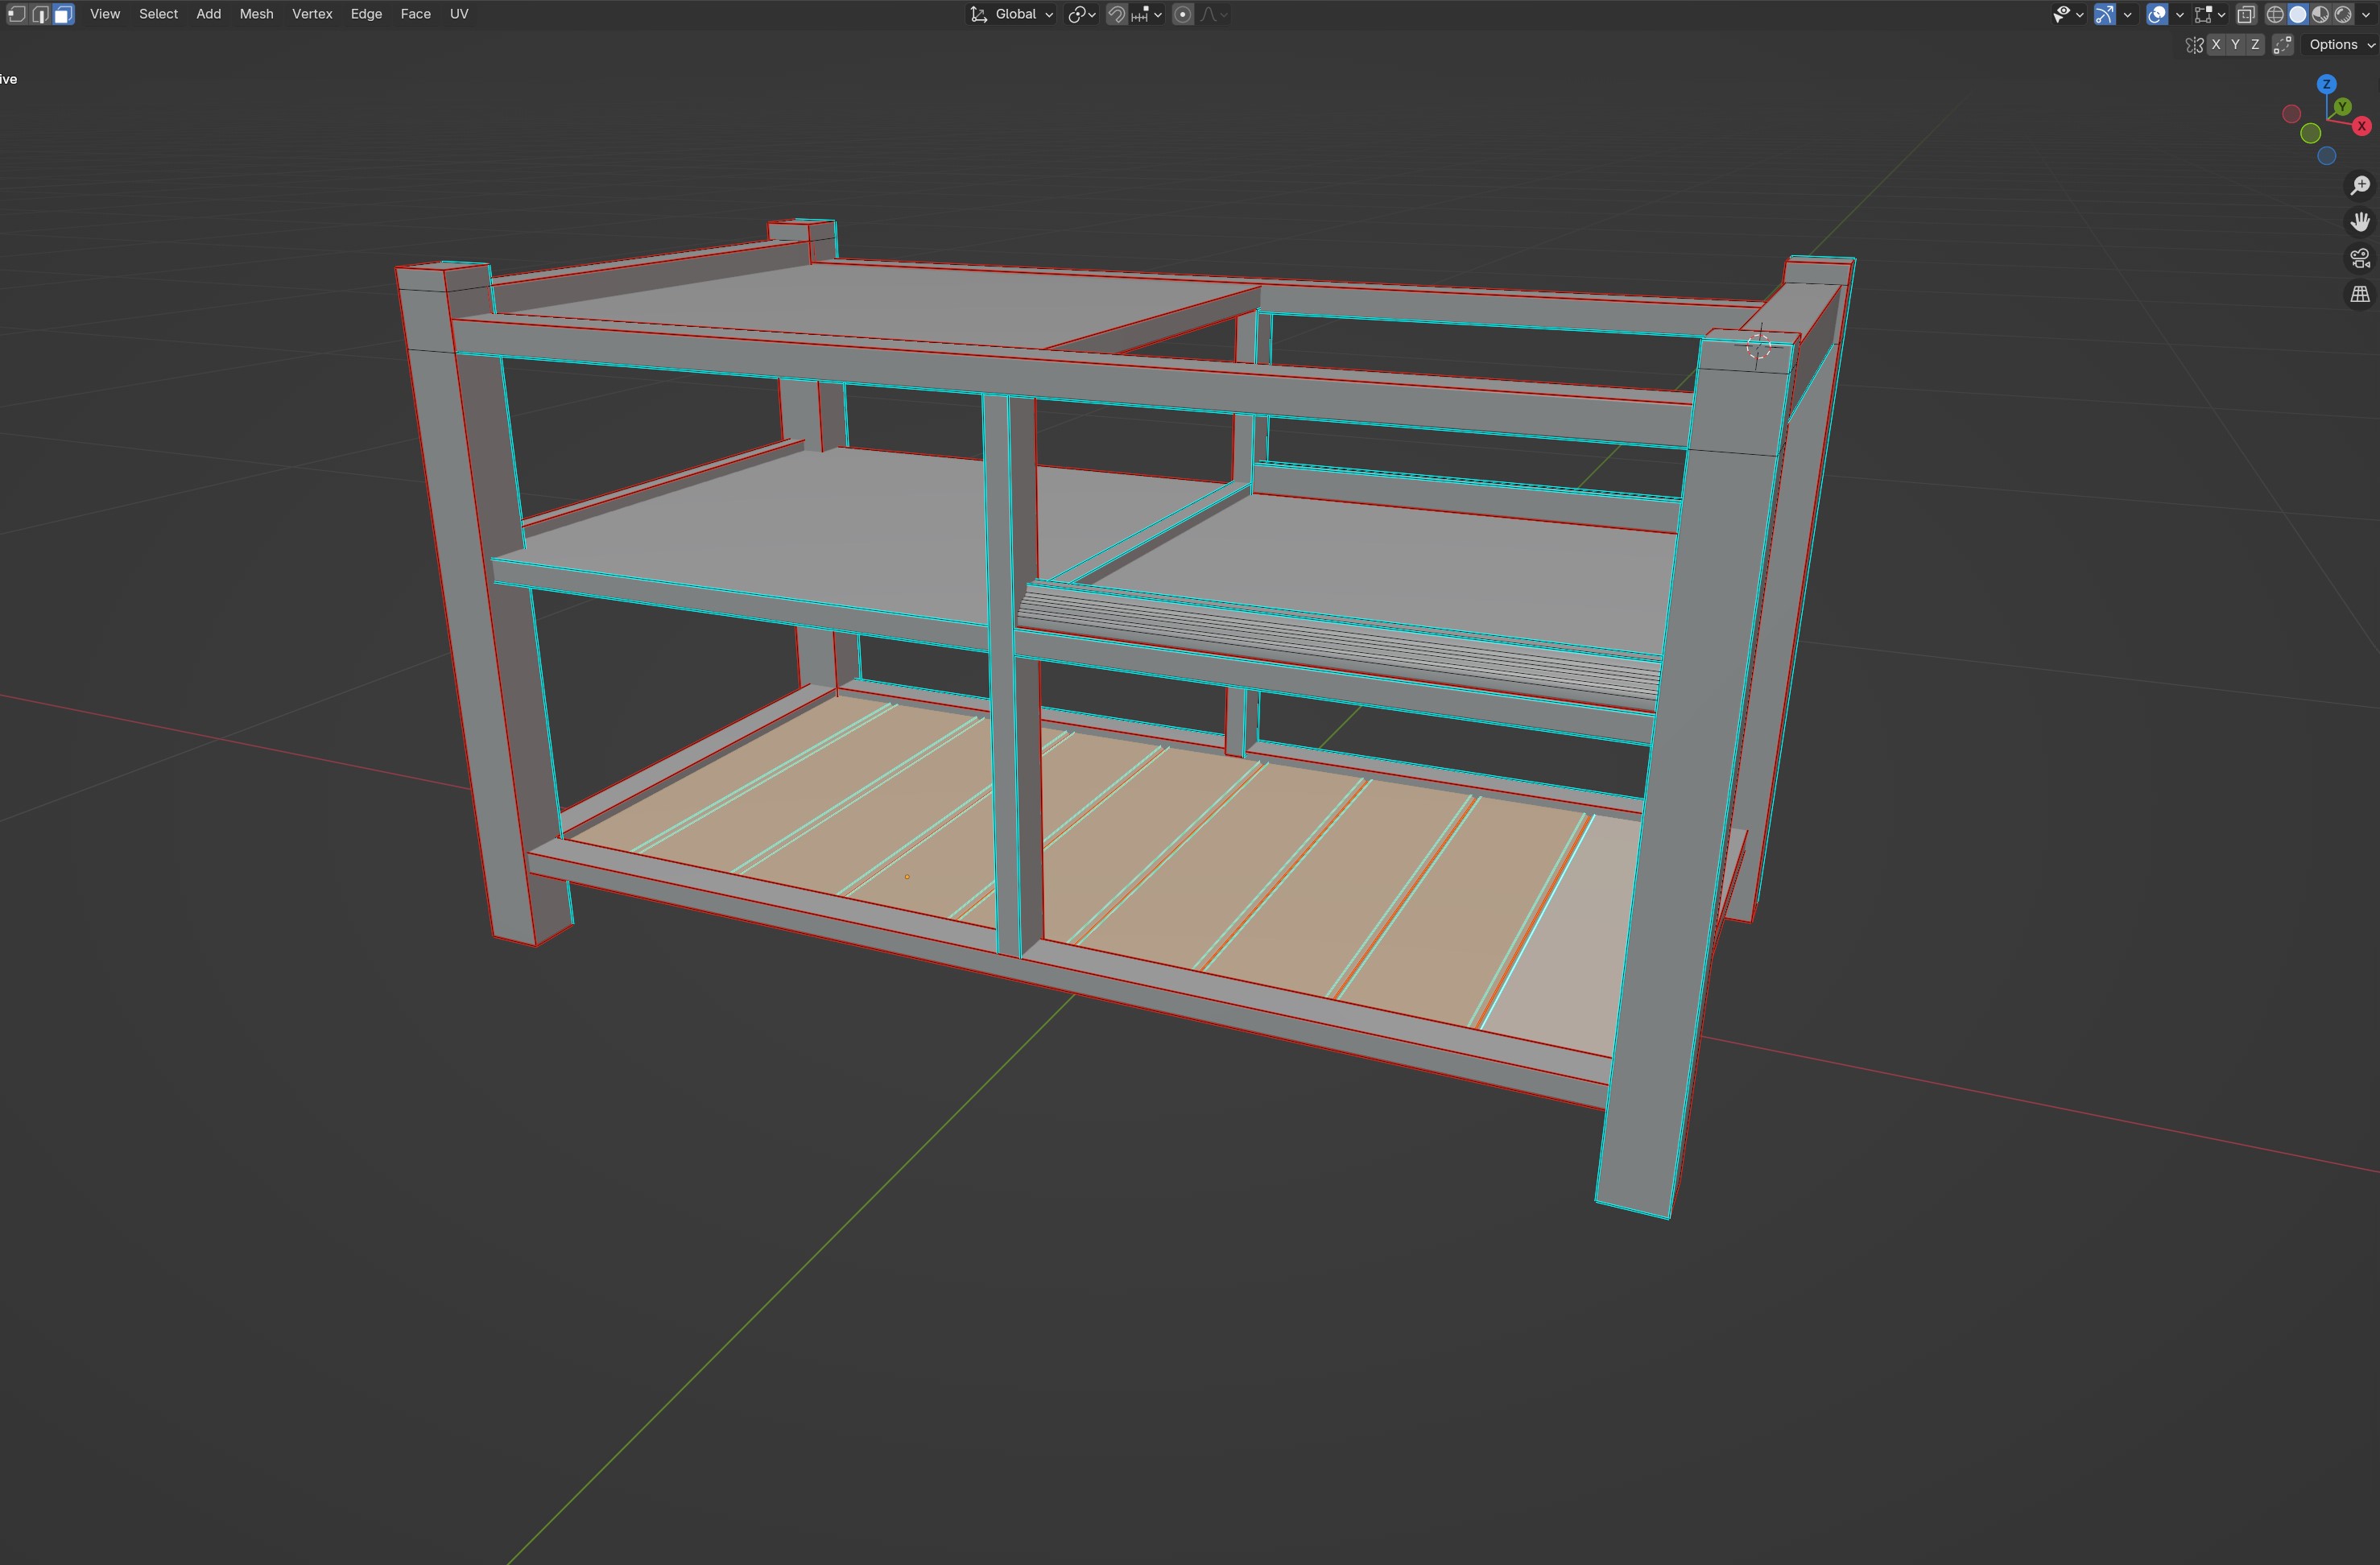
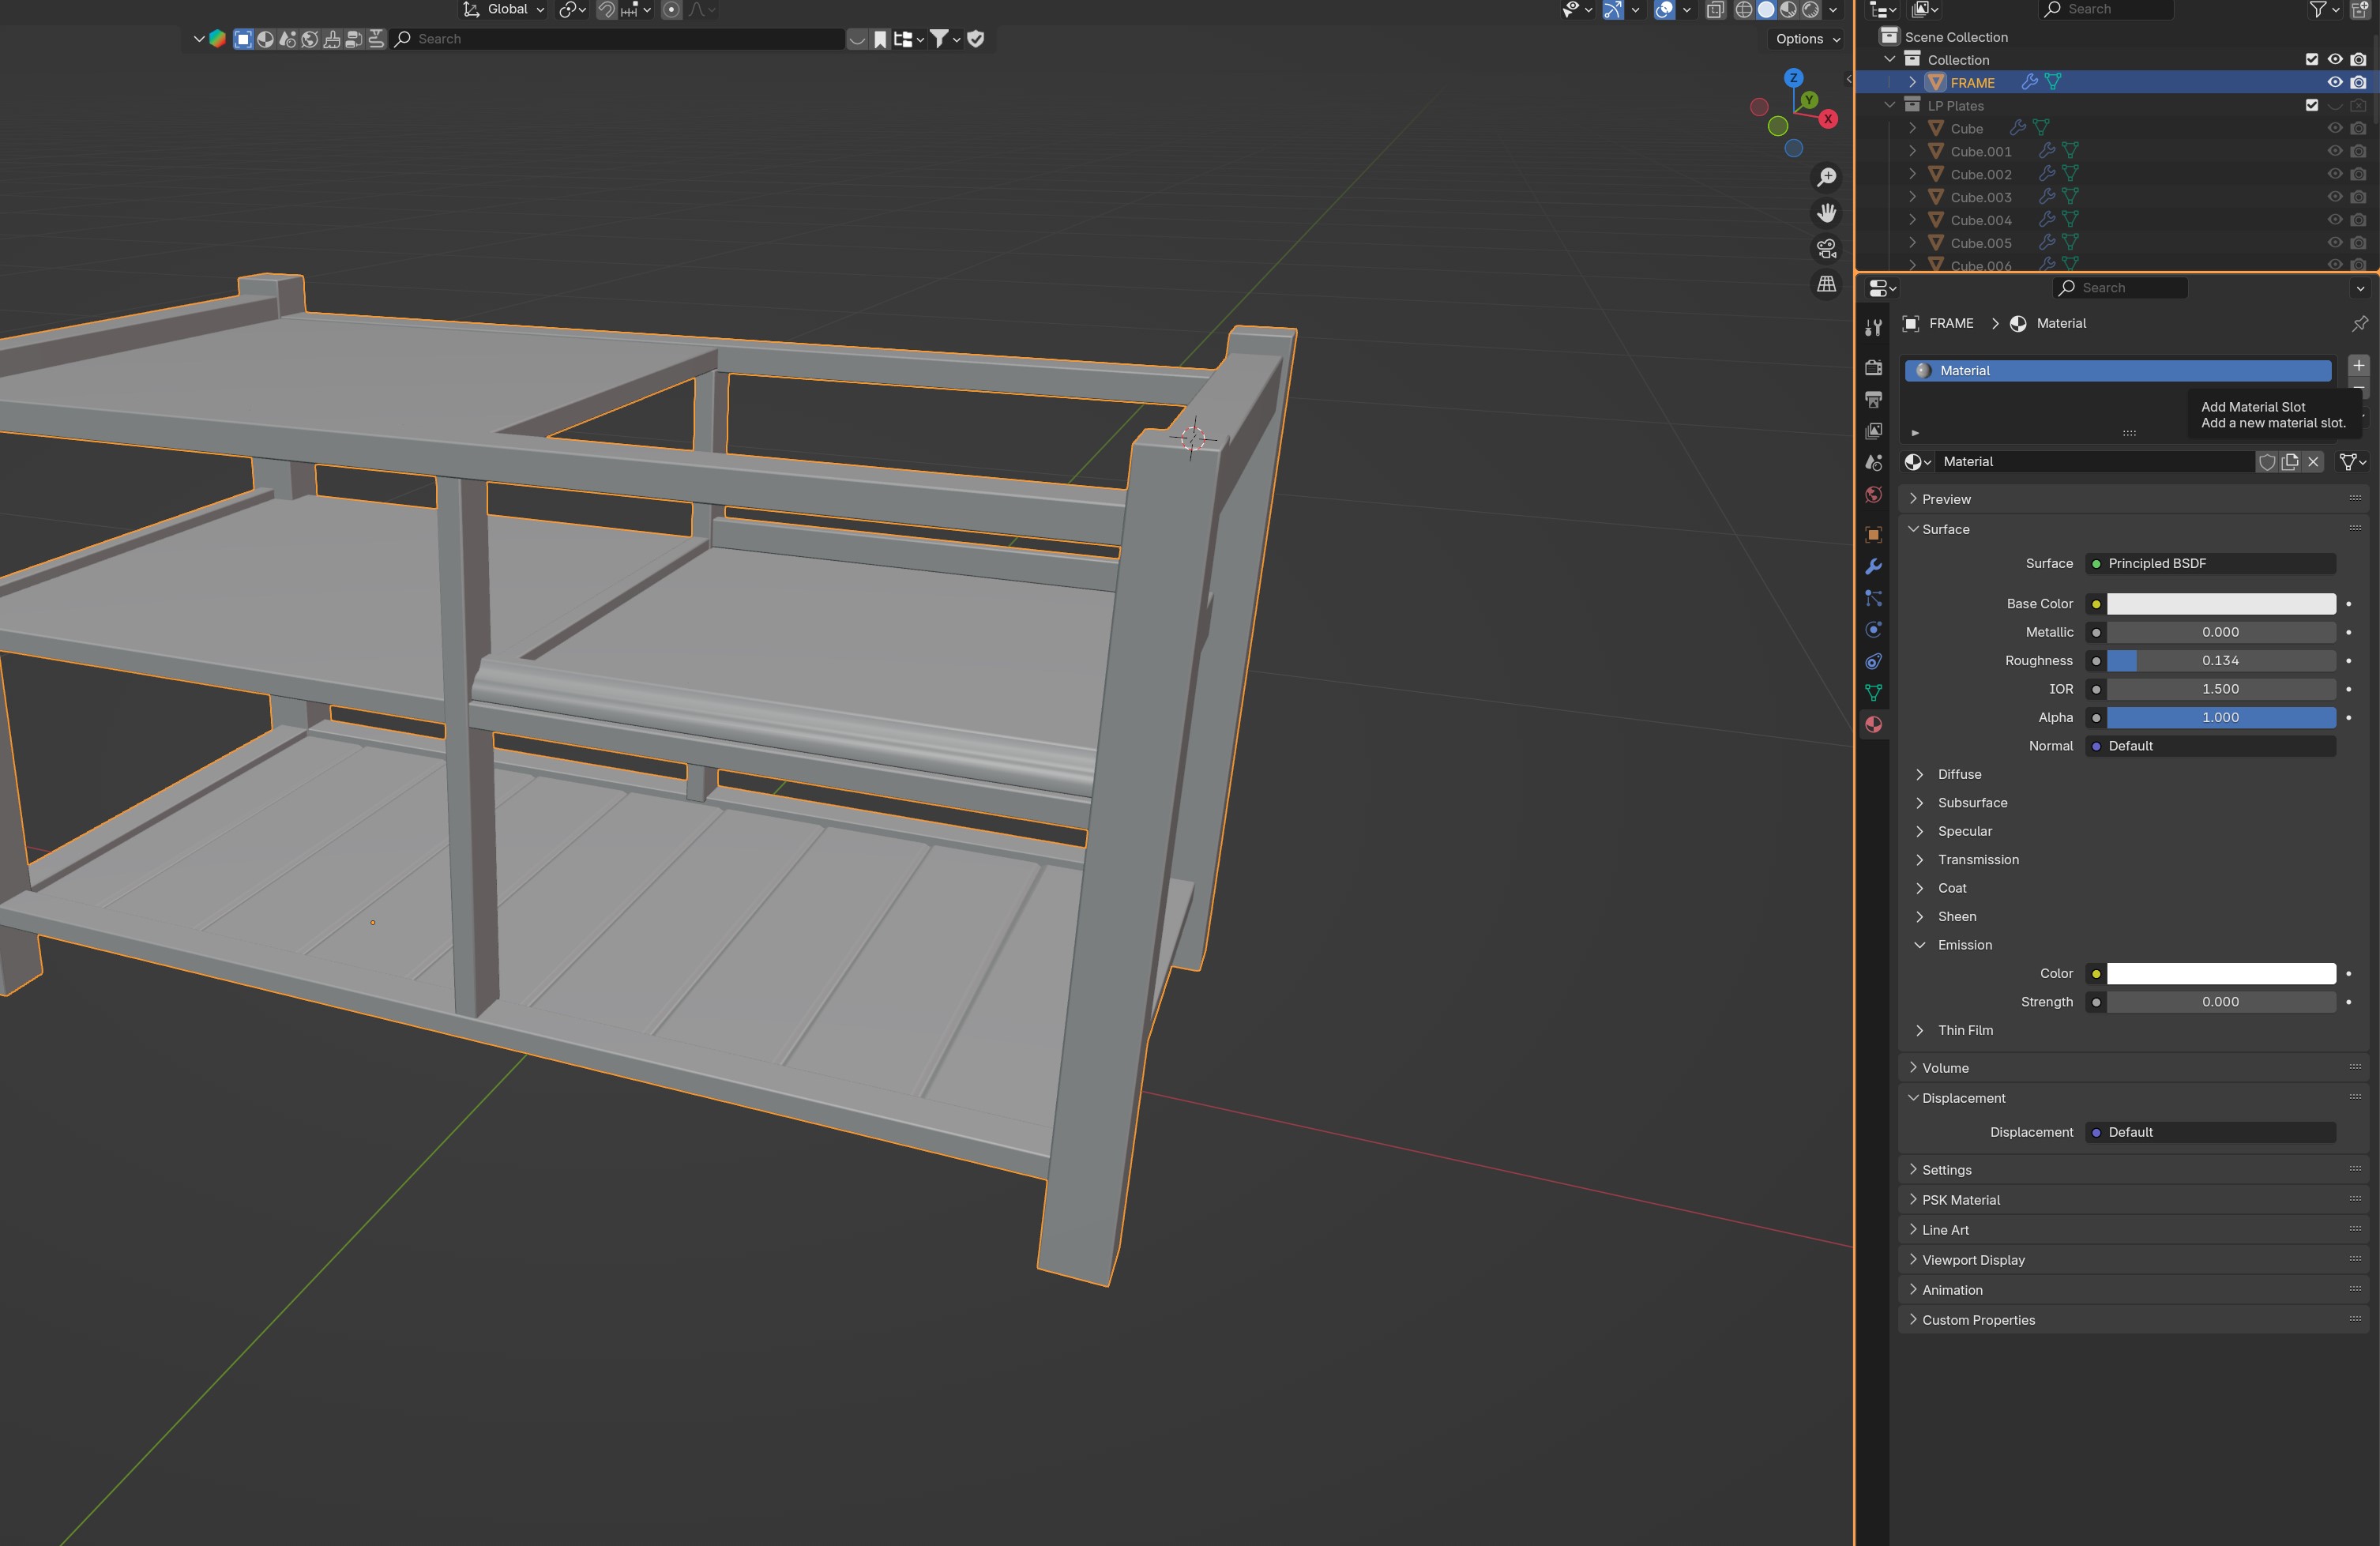
Here's our beloved Tutorial mesh lol. I made sure it's nicely UV mapped before I went ahead and texturing it. (make sure you do too!).
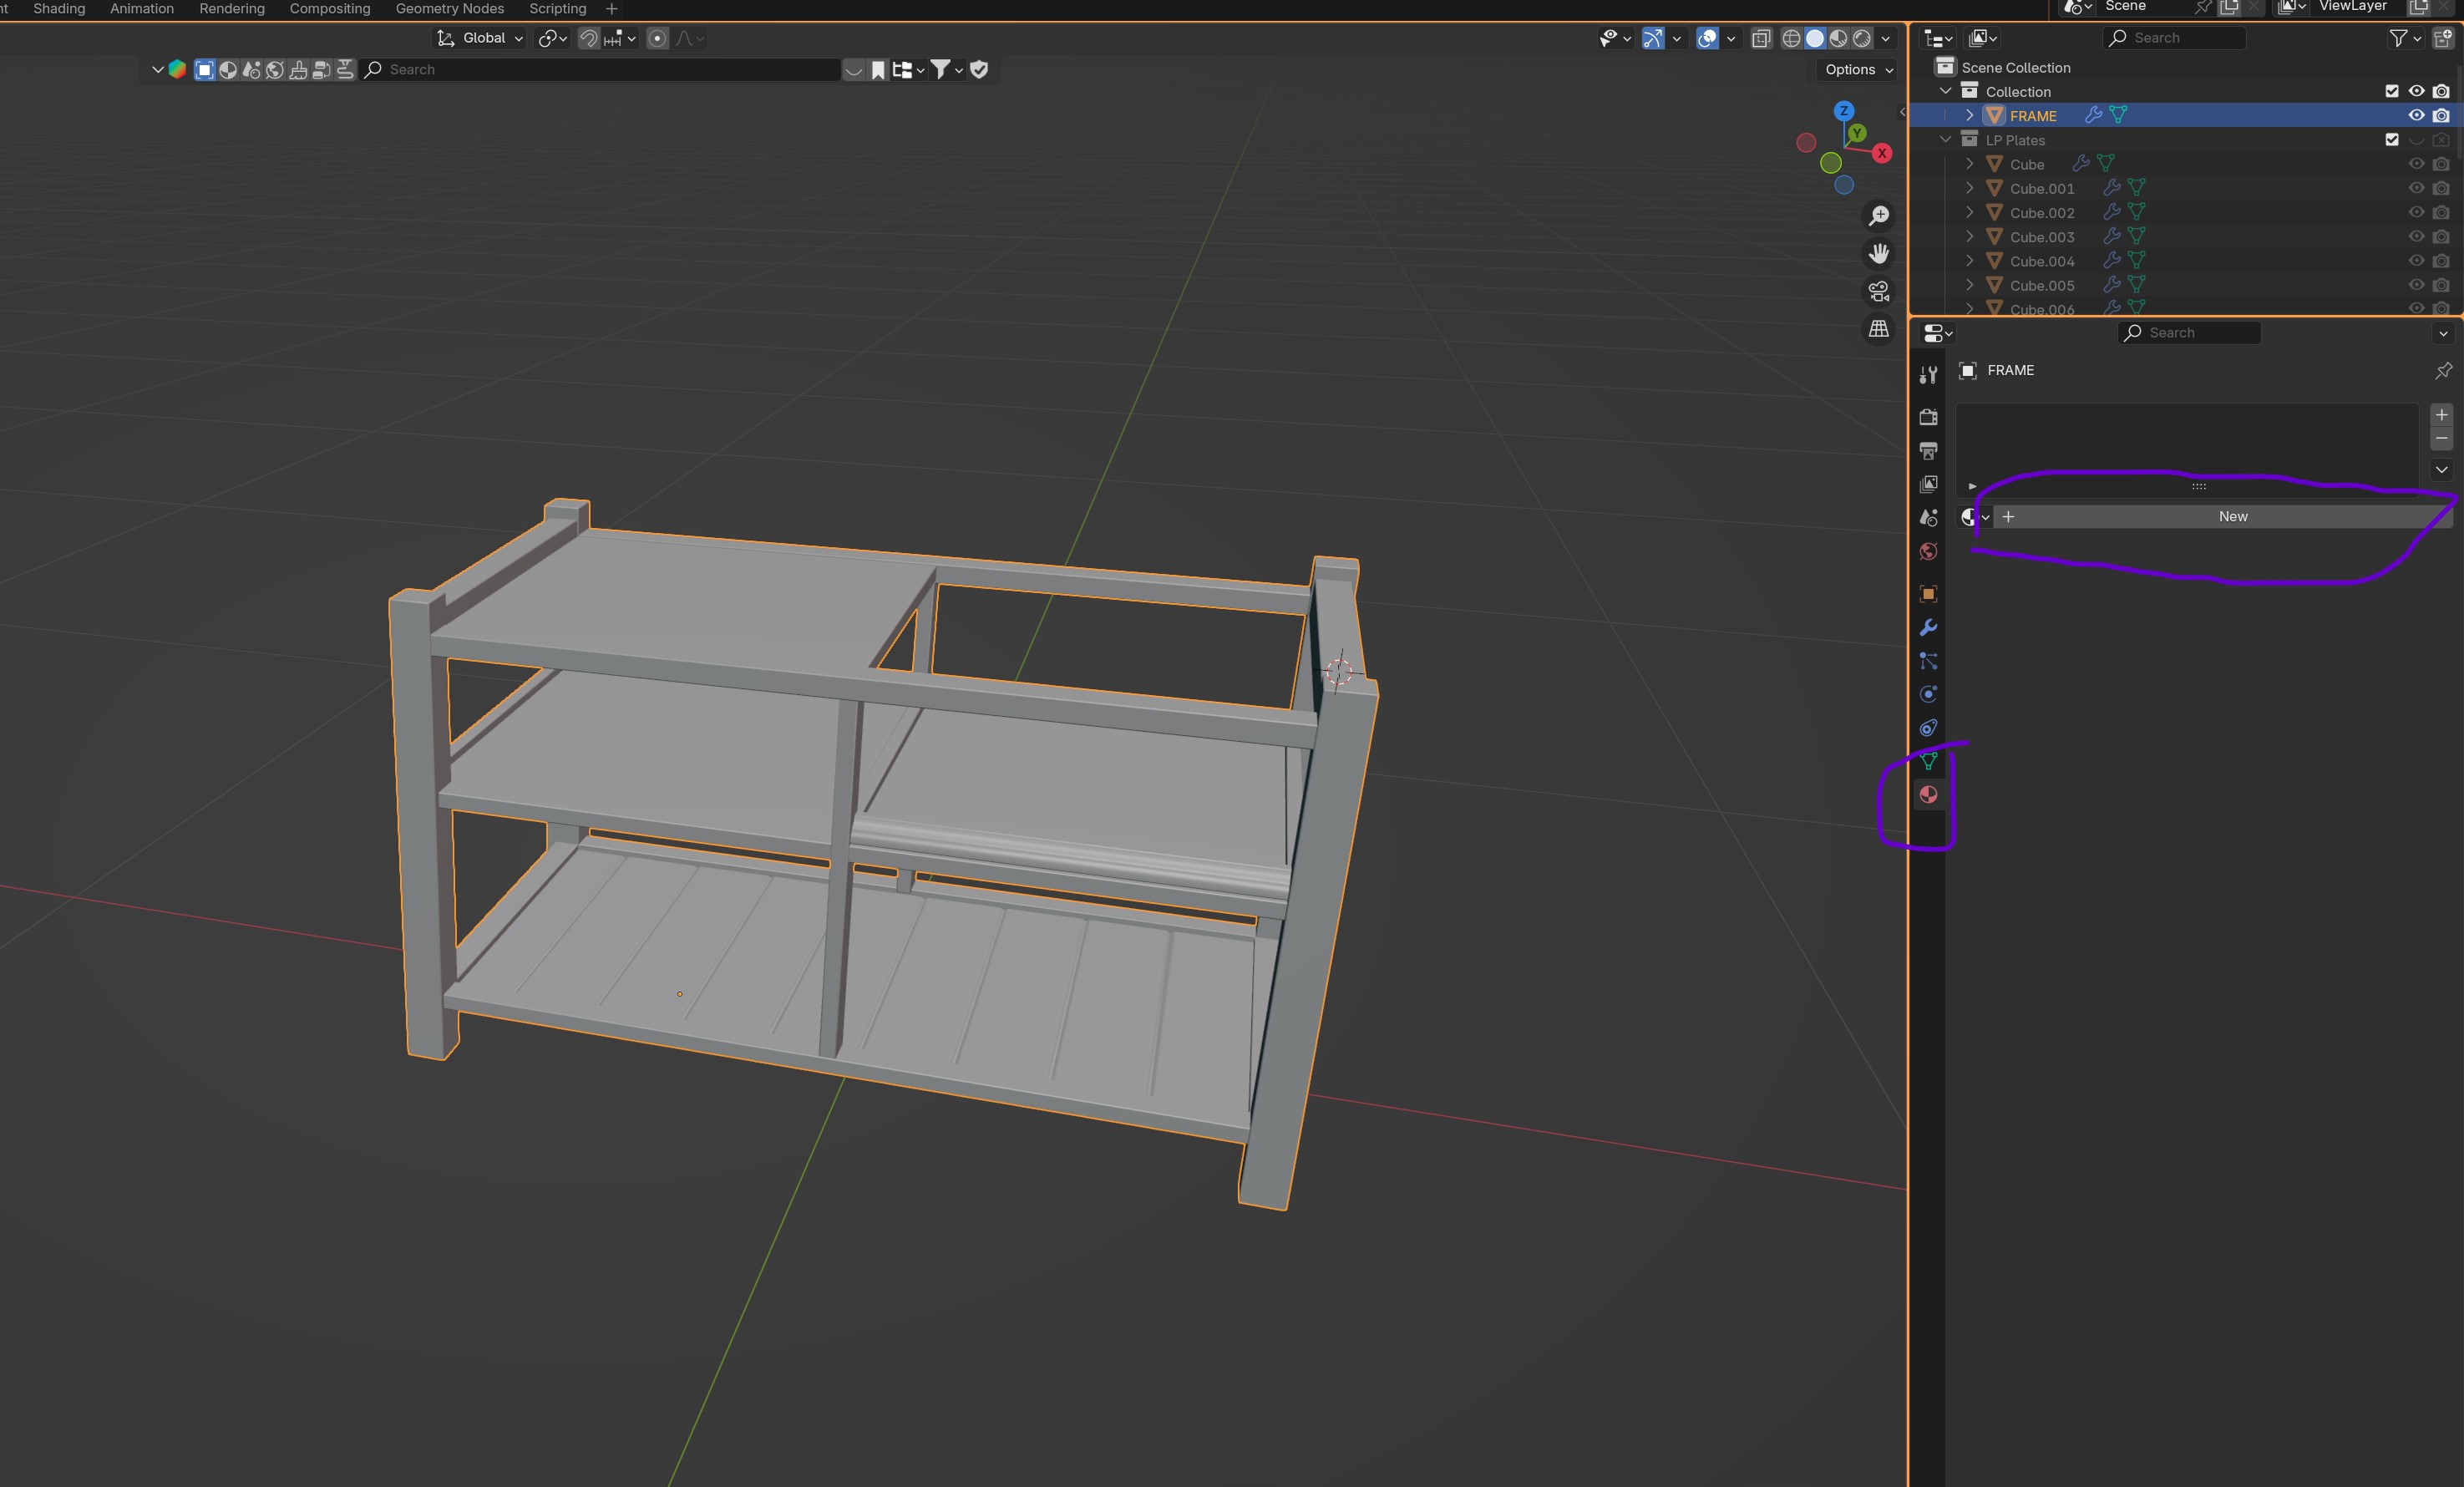
First, we want to go to the material map. Press the red ball icon first.
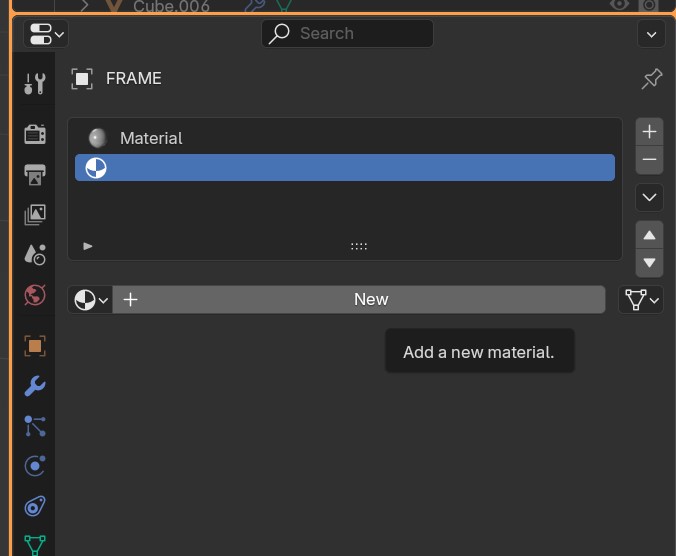
Then, we press the "New" button.
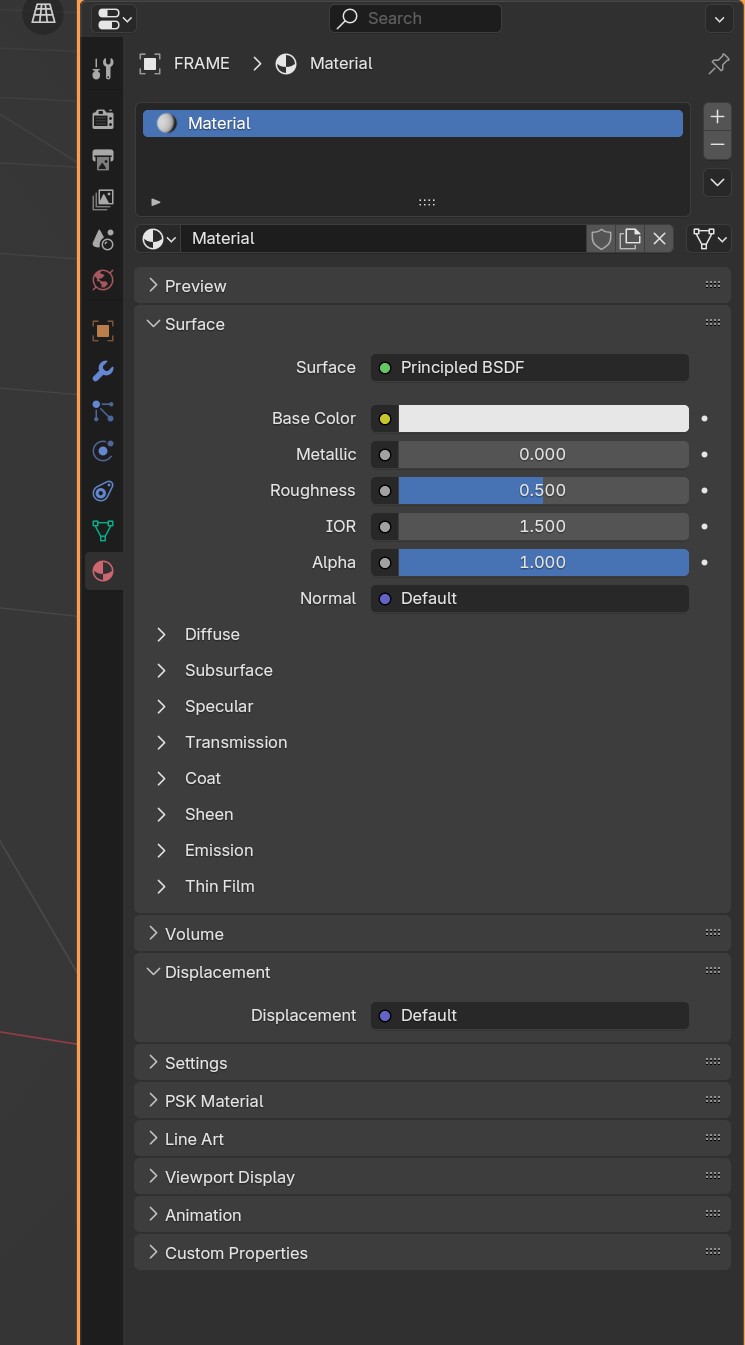
Now you should see something like this! :)
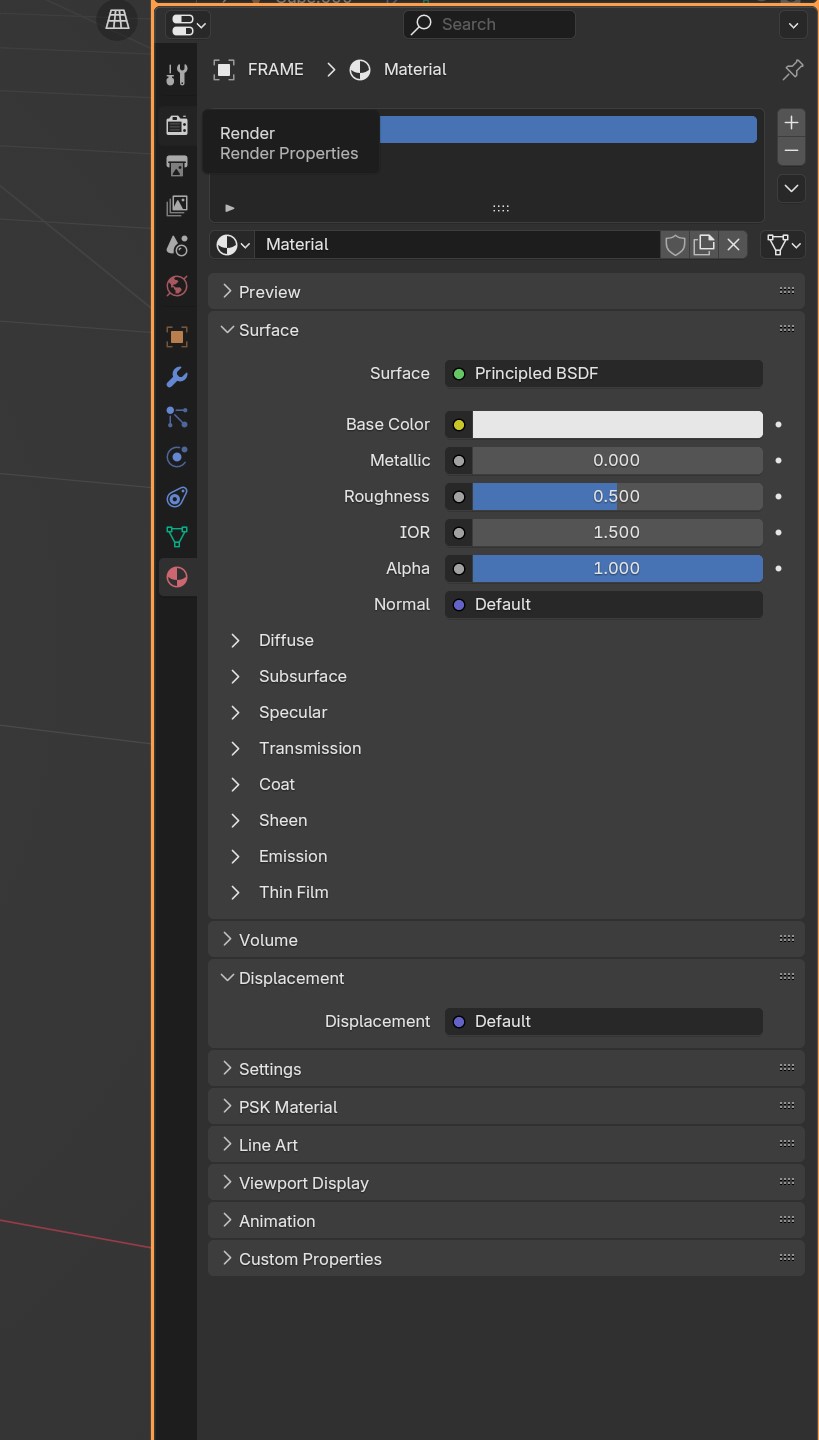
Before I want to do anything with out new material, we should first set up our render-y power-y stuff!
Click on the screen/camera icon first.
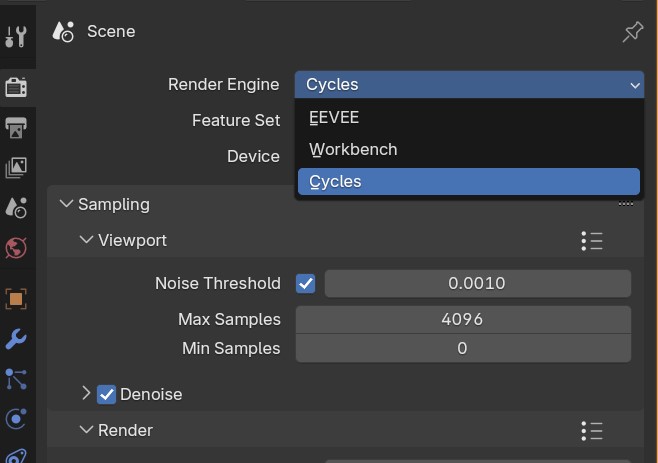
Change Render Engine from "EEVEE" to "Cycles".
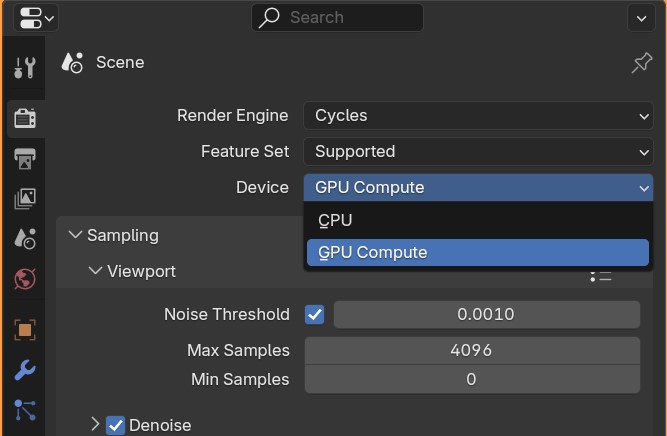
The Device to "GPU Compute"
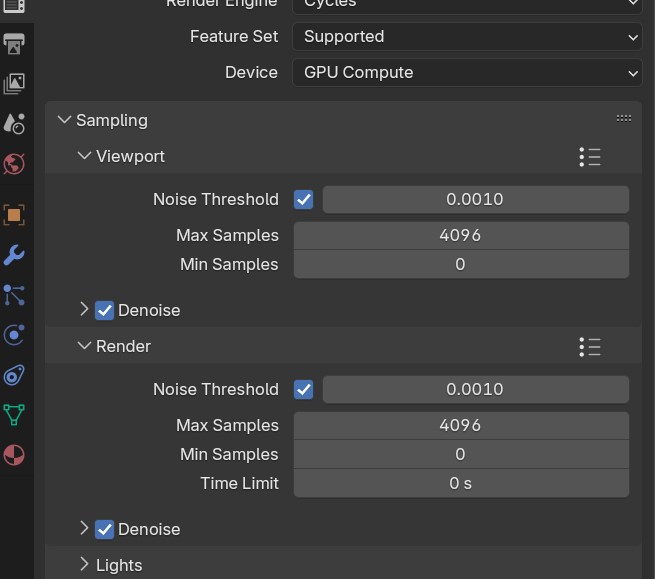
And both our Max Samples to something between 2046 or 4096.
These values purely depends on your graphics card that you own! If it's a low-end potato one, go for even 1024 even. If it's a beast like mine, go for 4096 (although even that's often overkill).
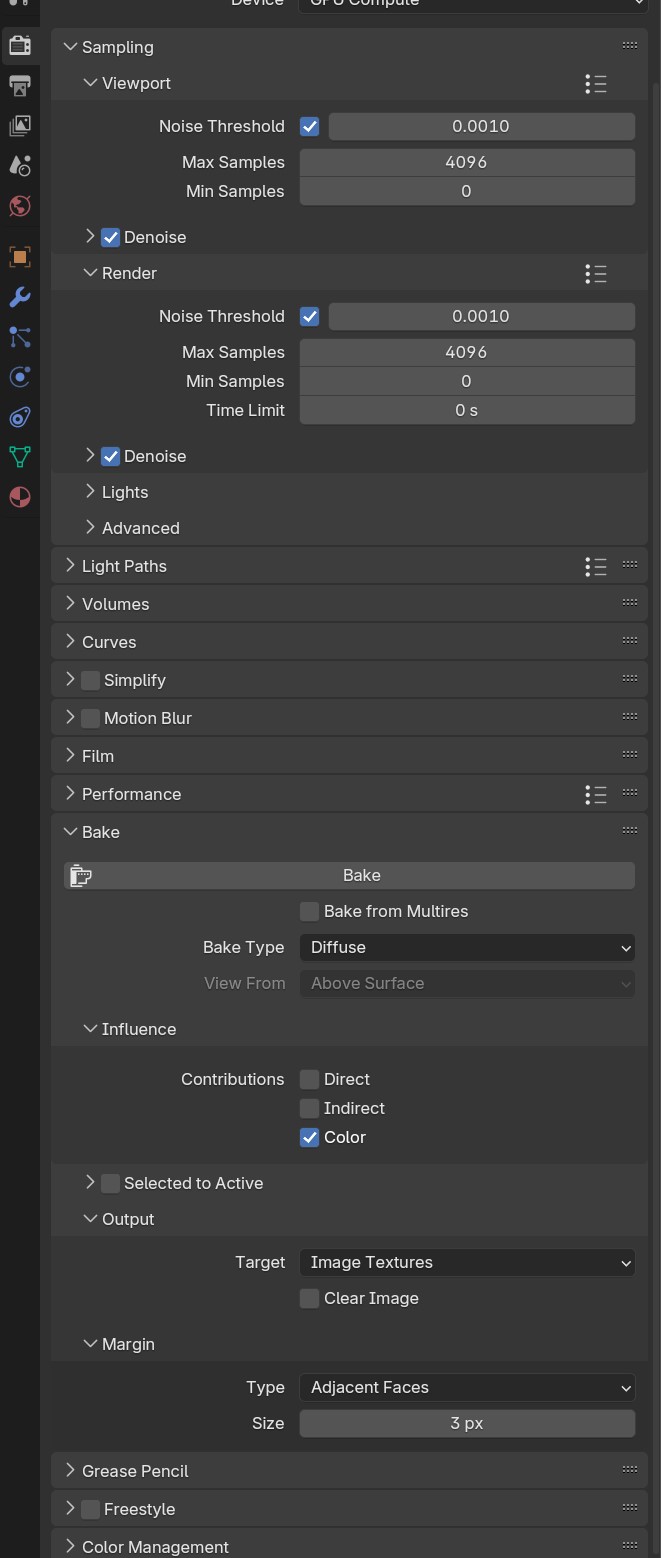
And open the "Bake" tab. This we won't be touching for now, but it's good to have it open ;)
Method 1: Baking Textures Without Tex Tools:
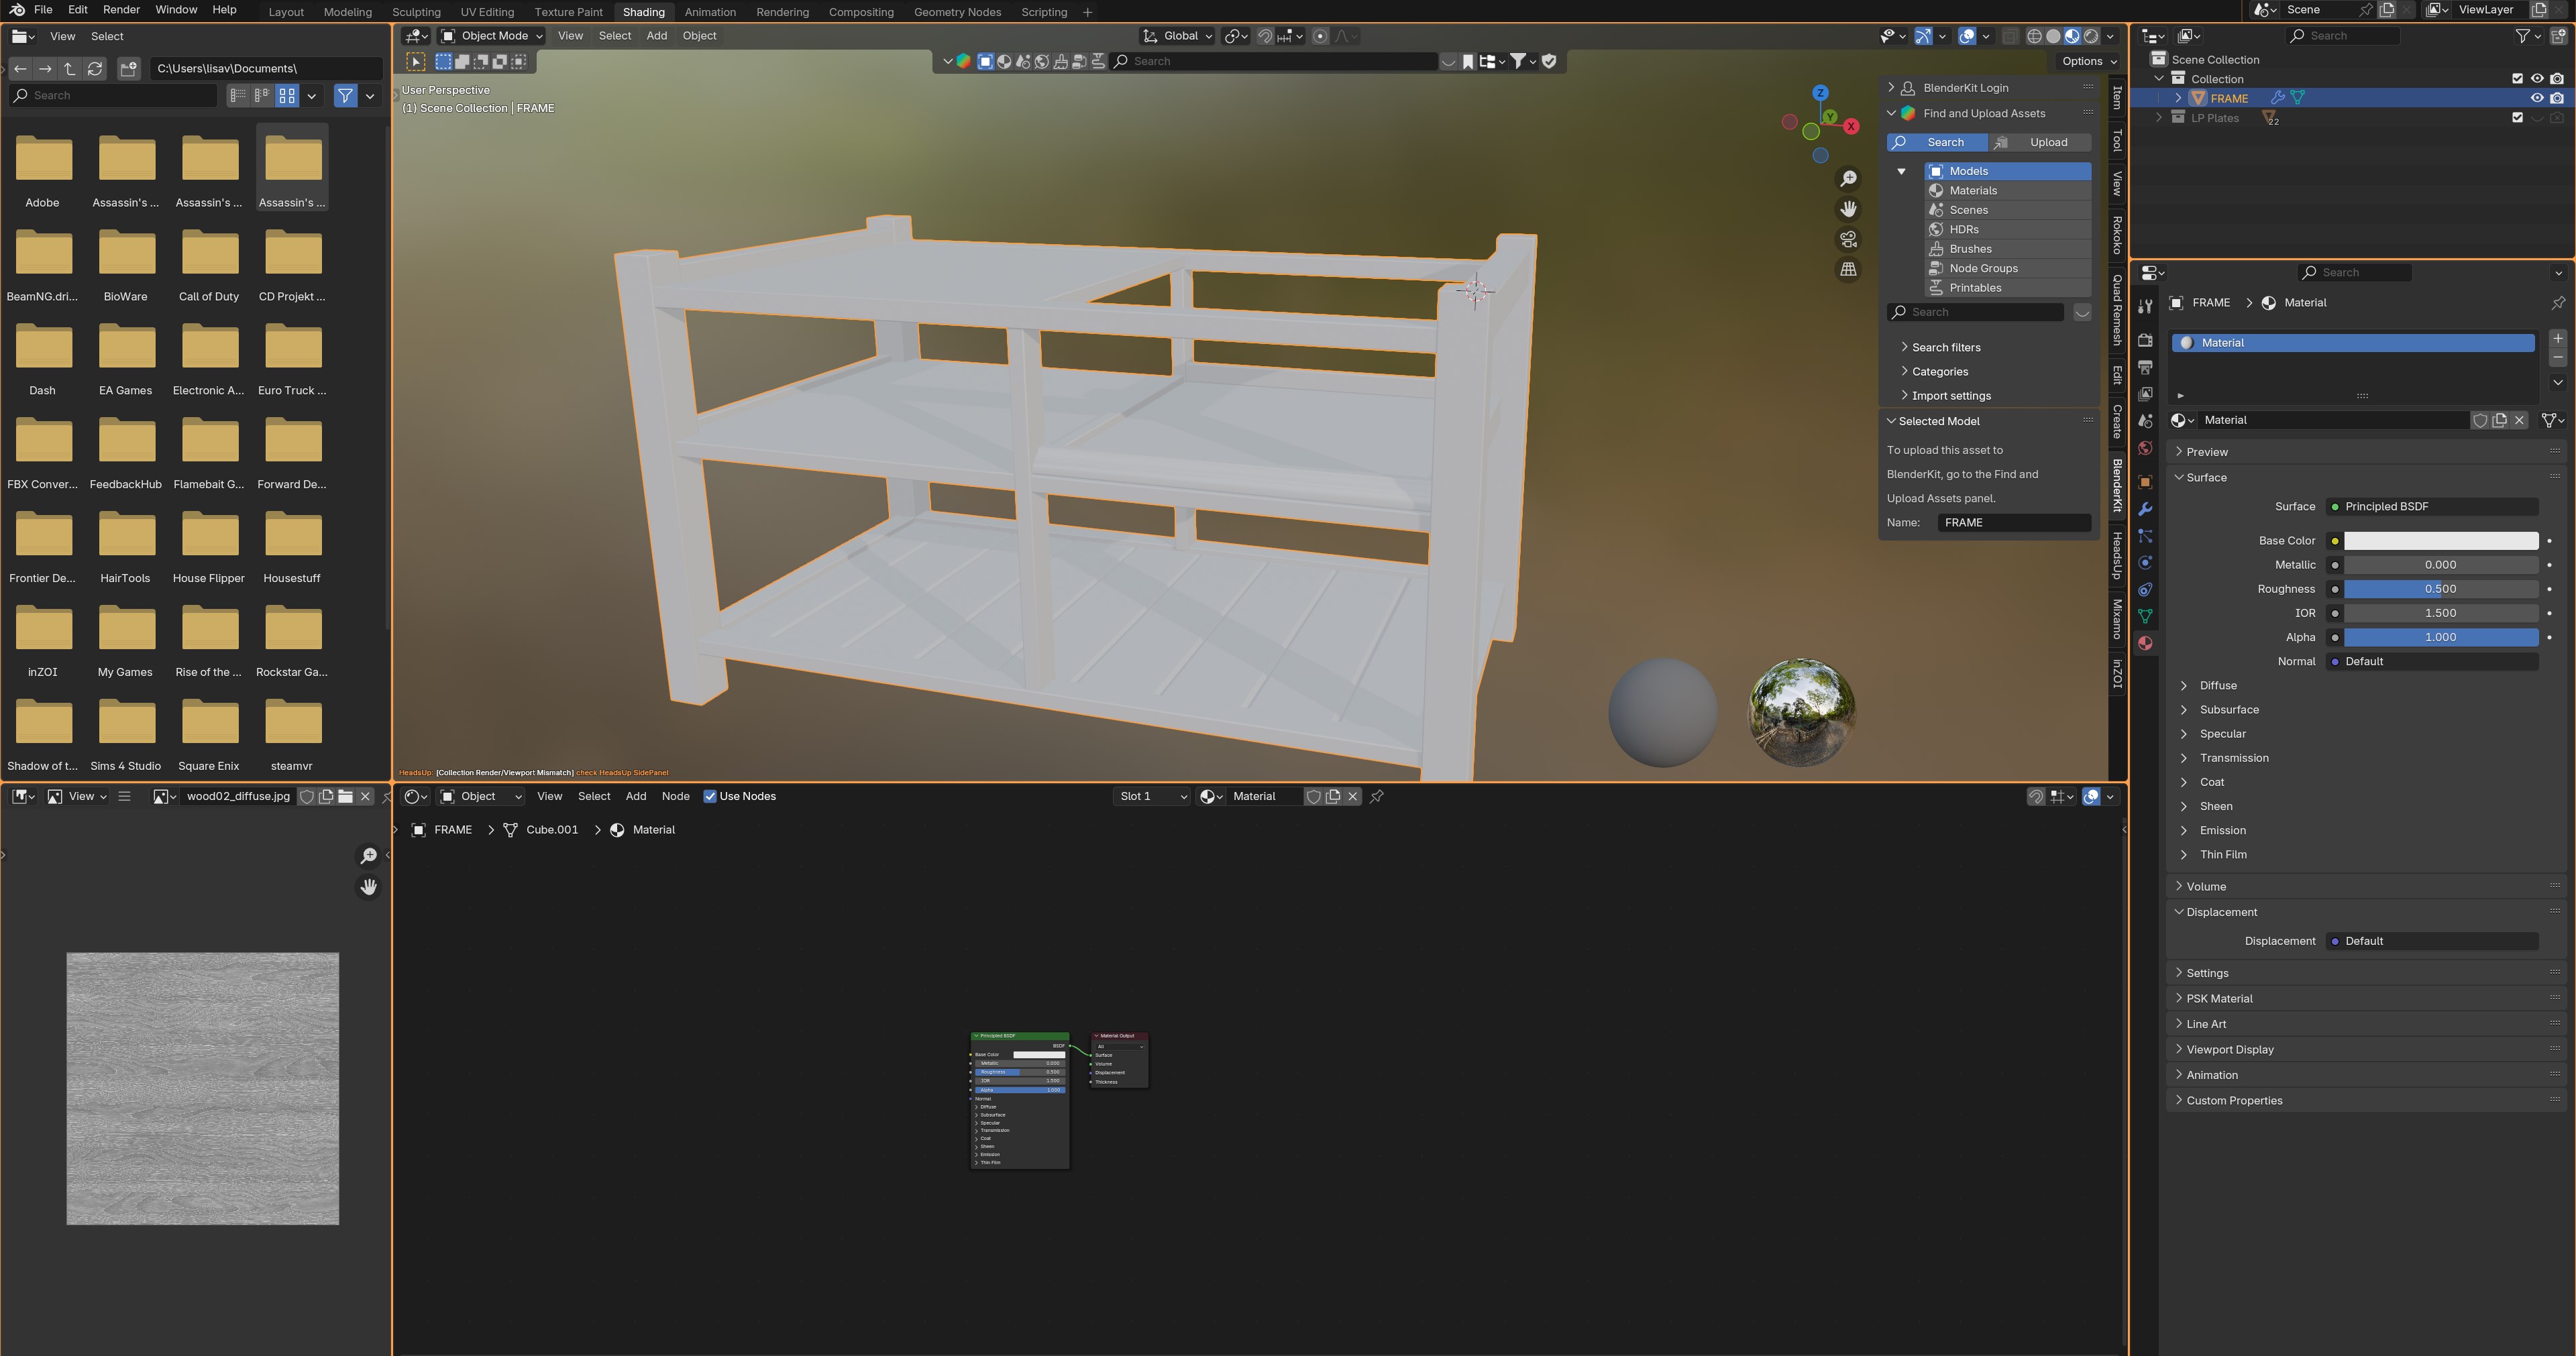
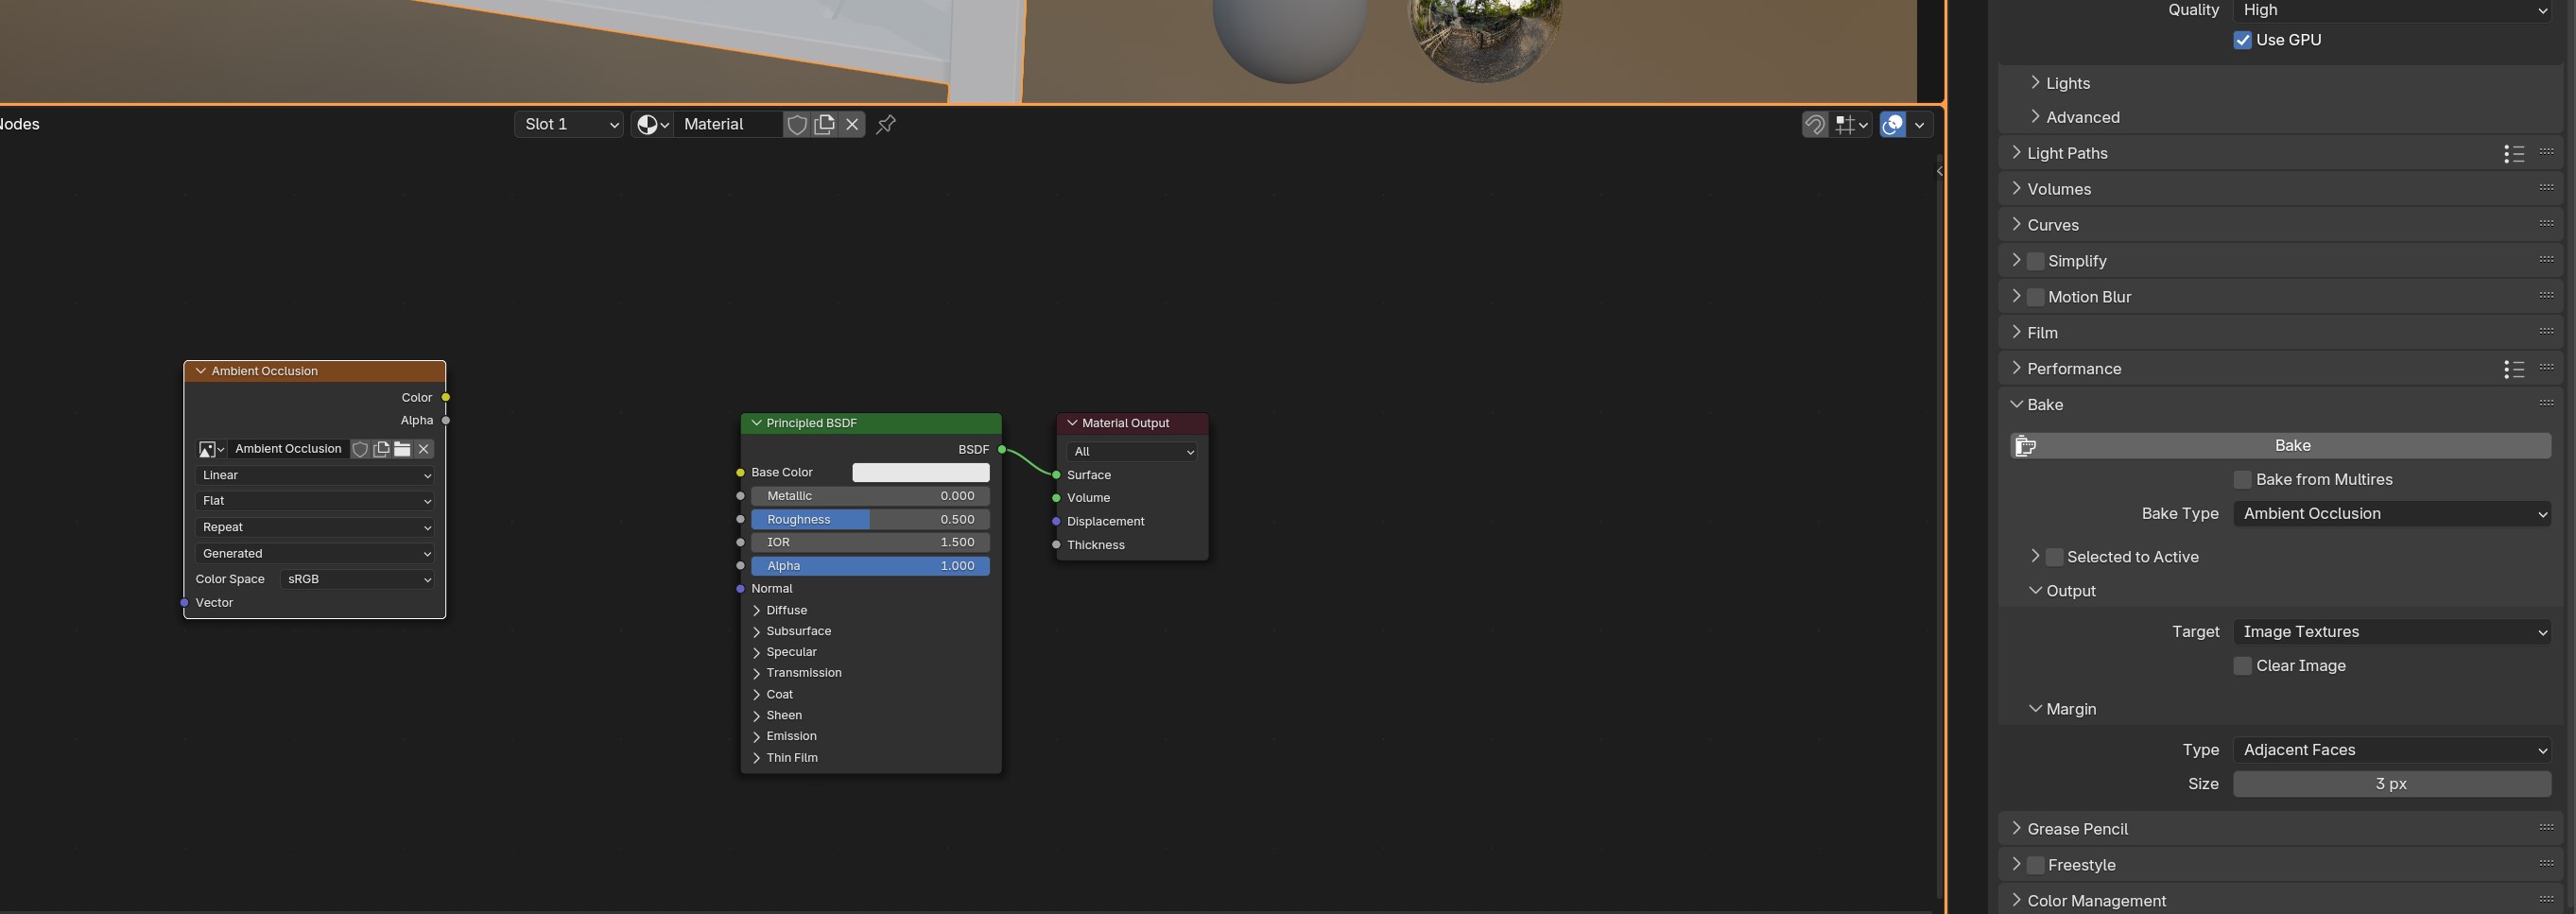
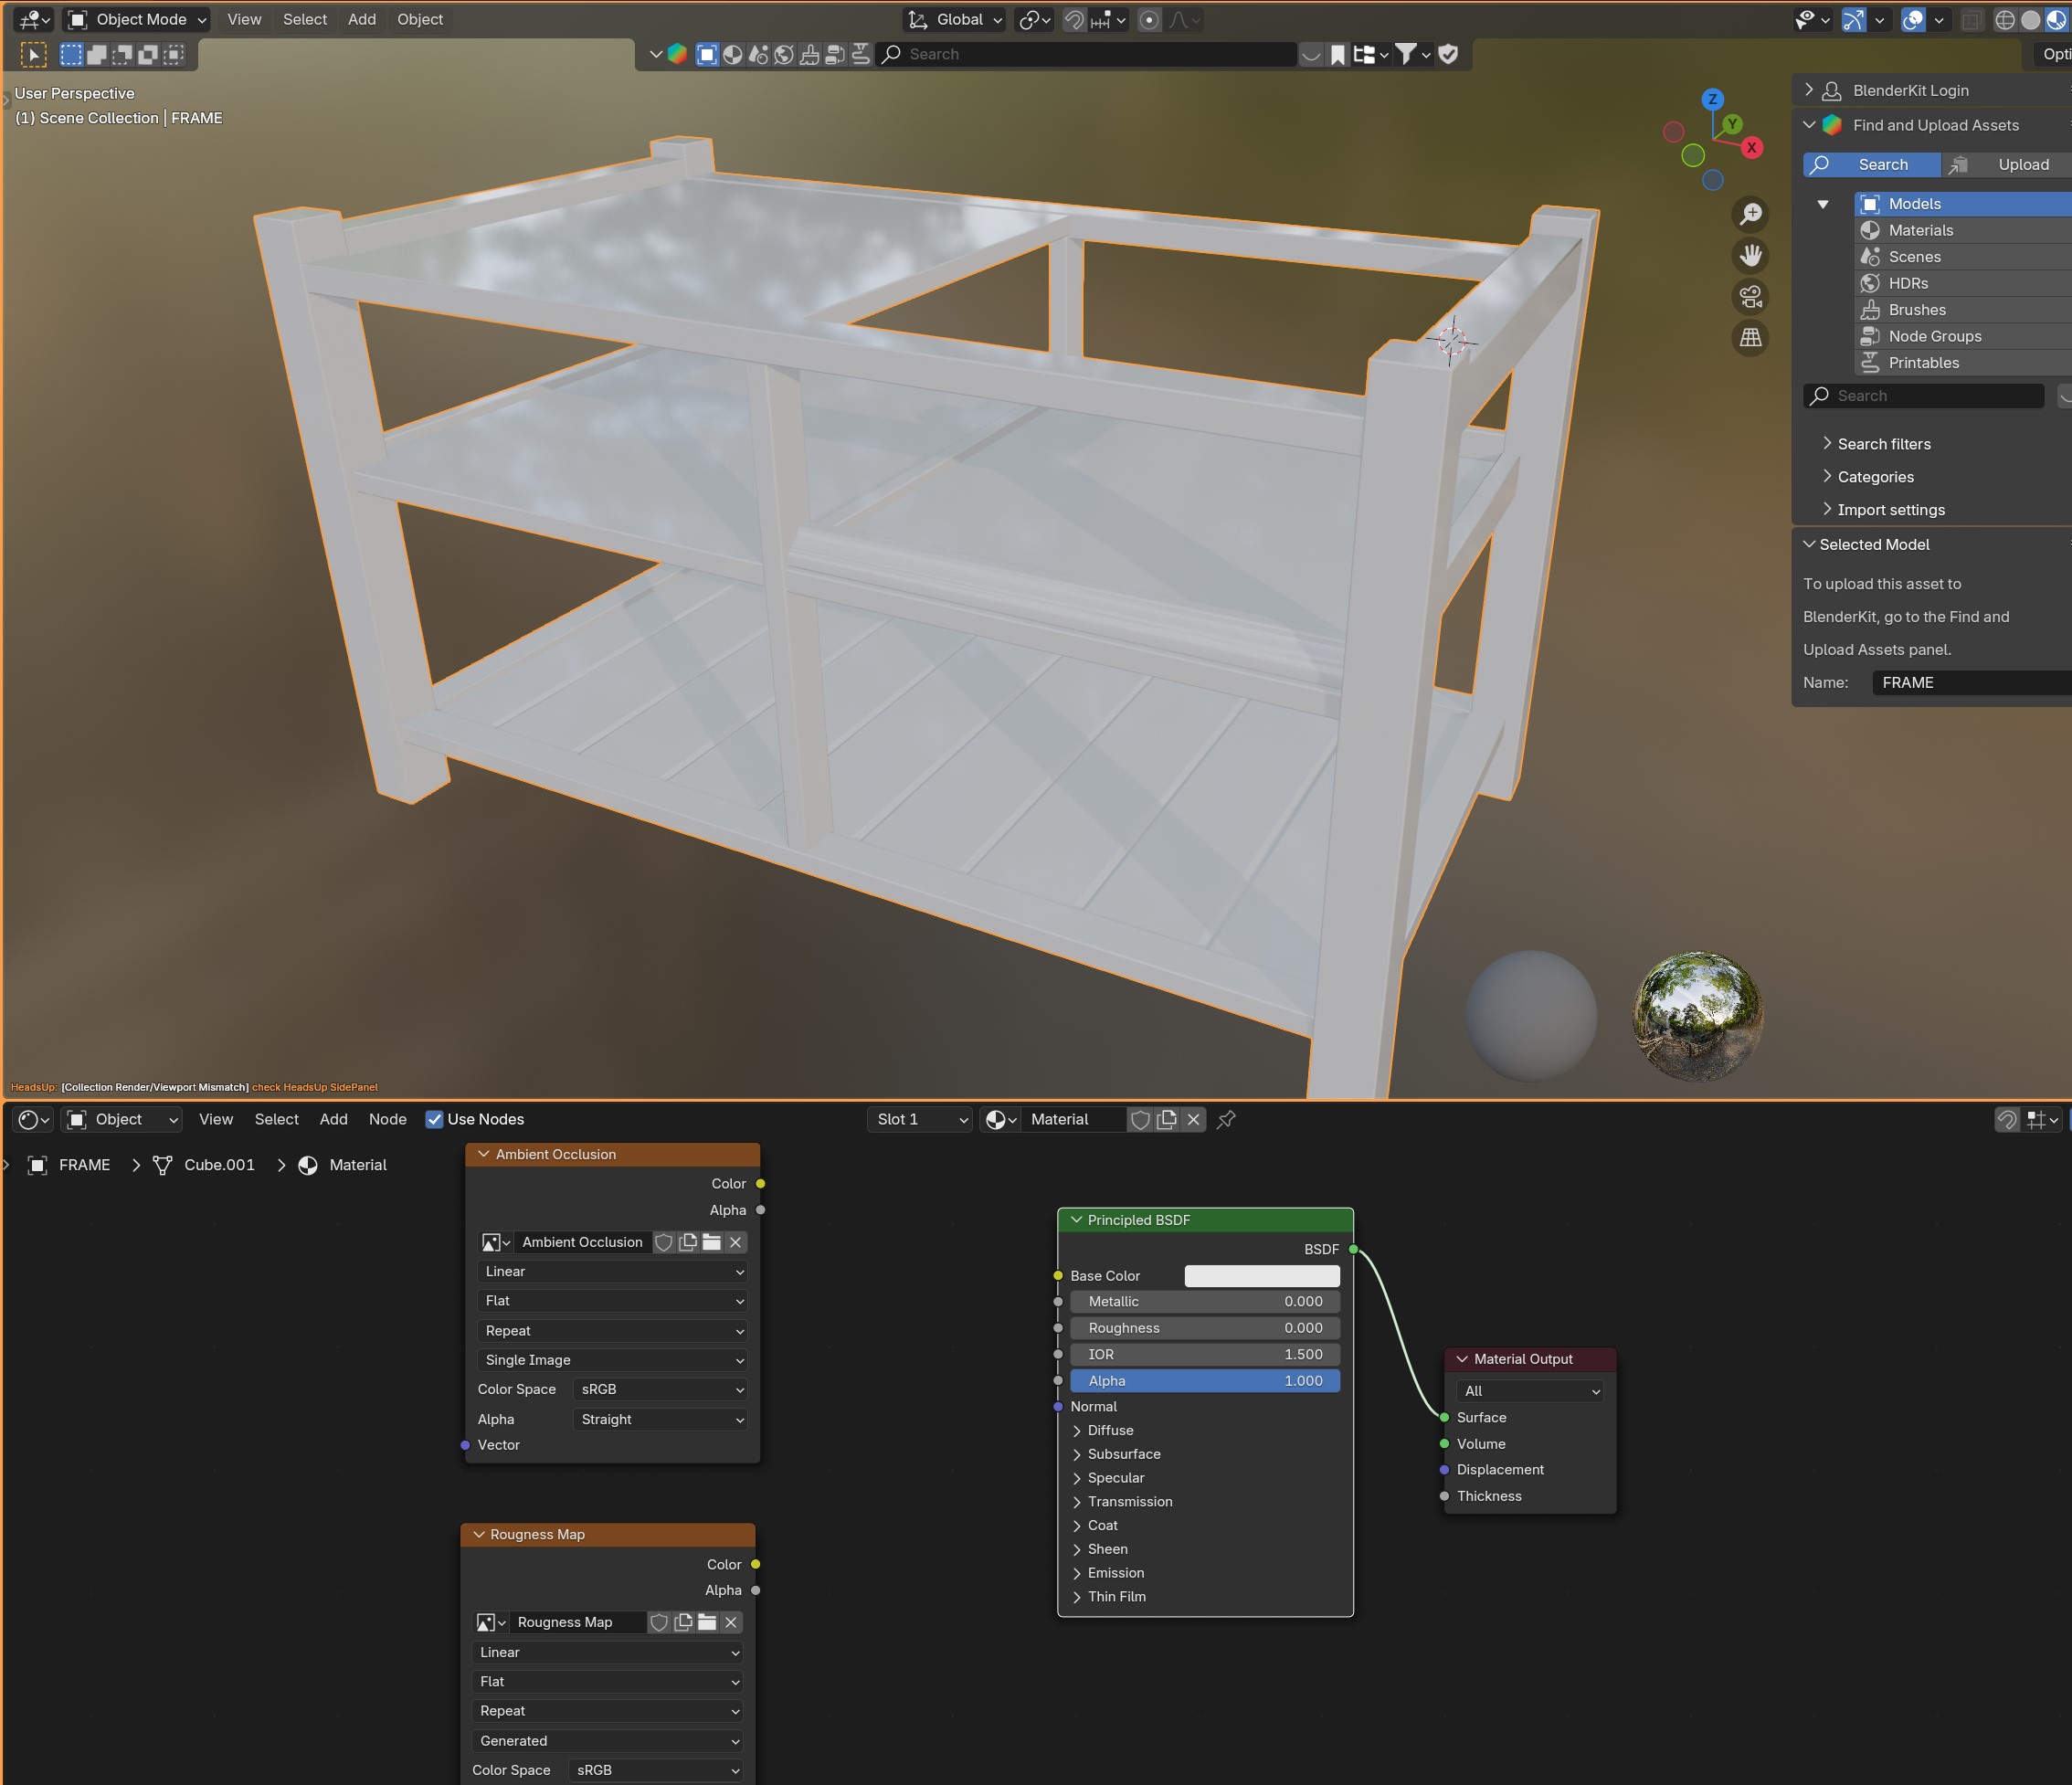
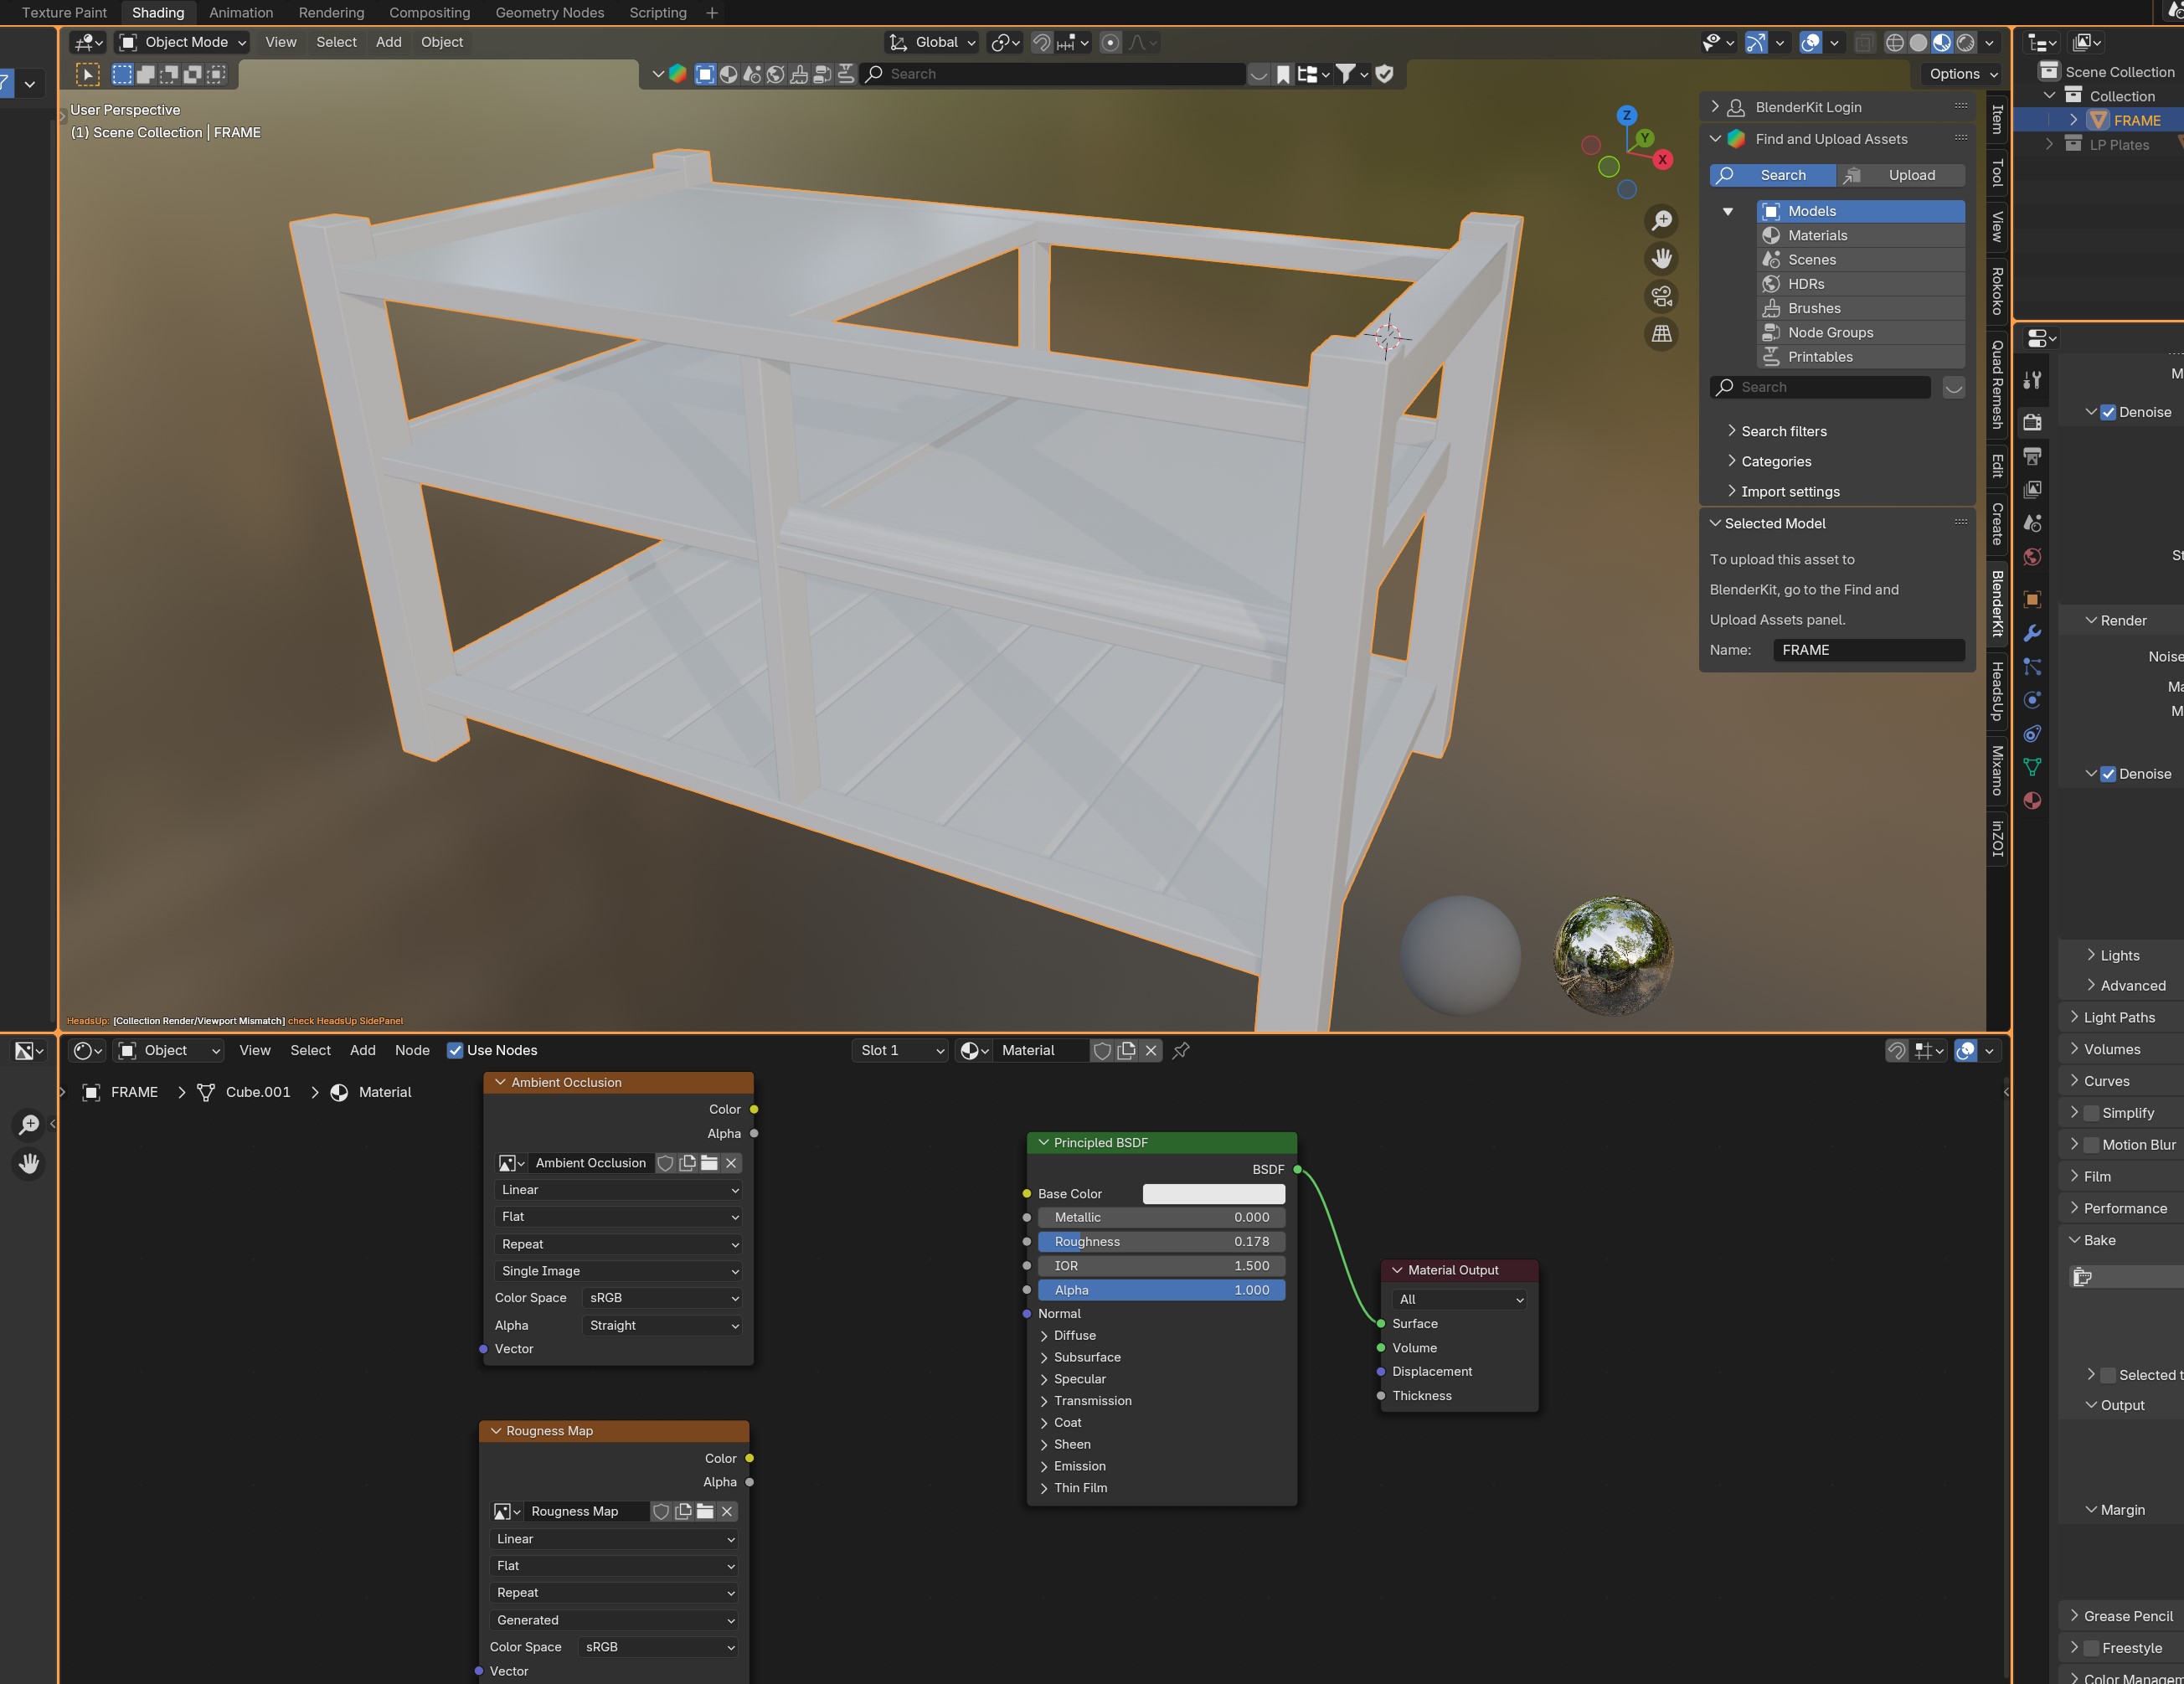
Now on the far top of the entire window, we want to go to the "Shading" tab.
In the bottom screen you should only see two "nodes" (those 2 blocks).
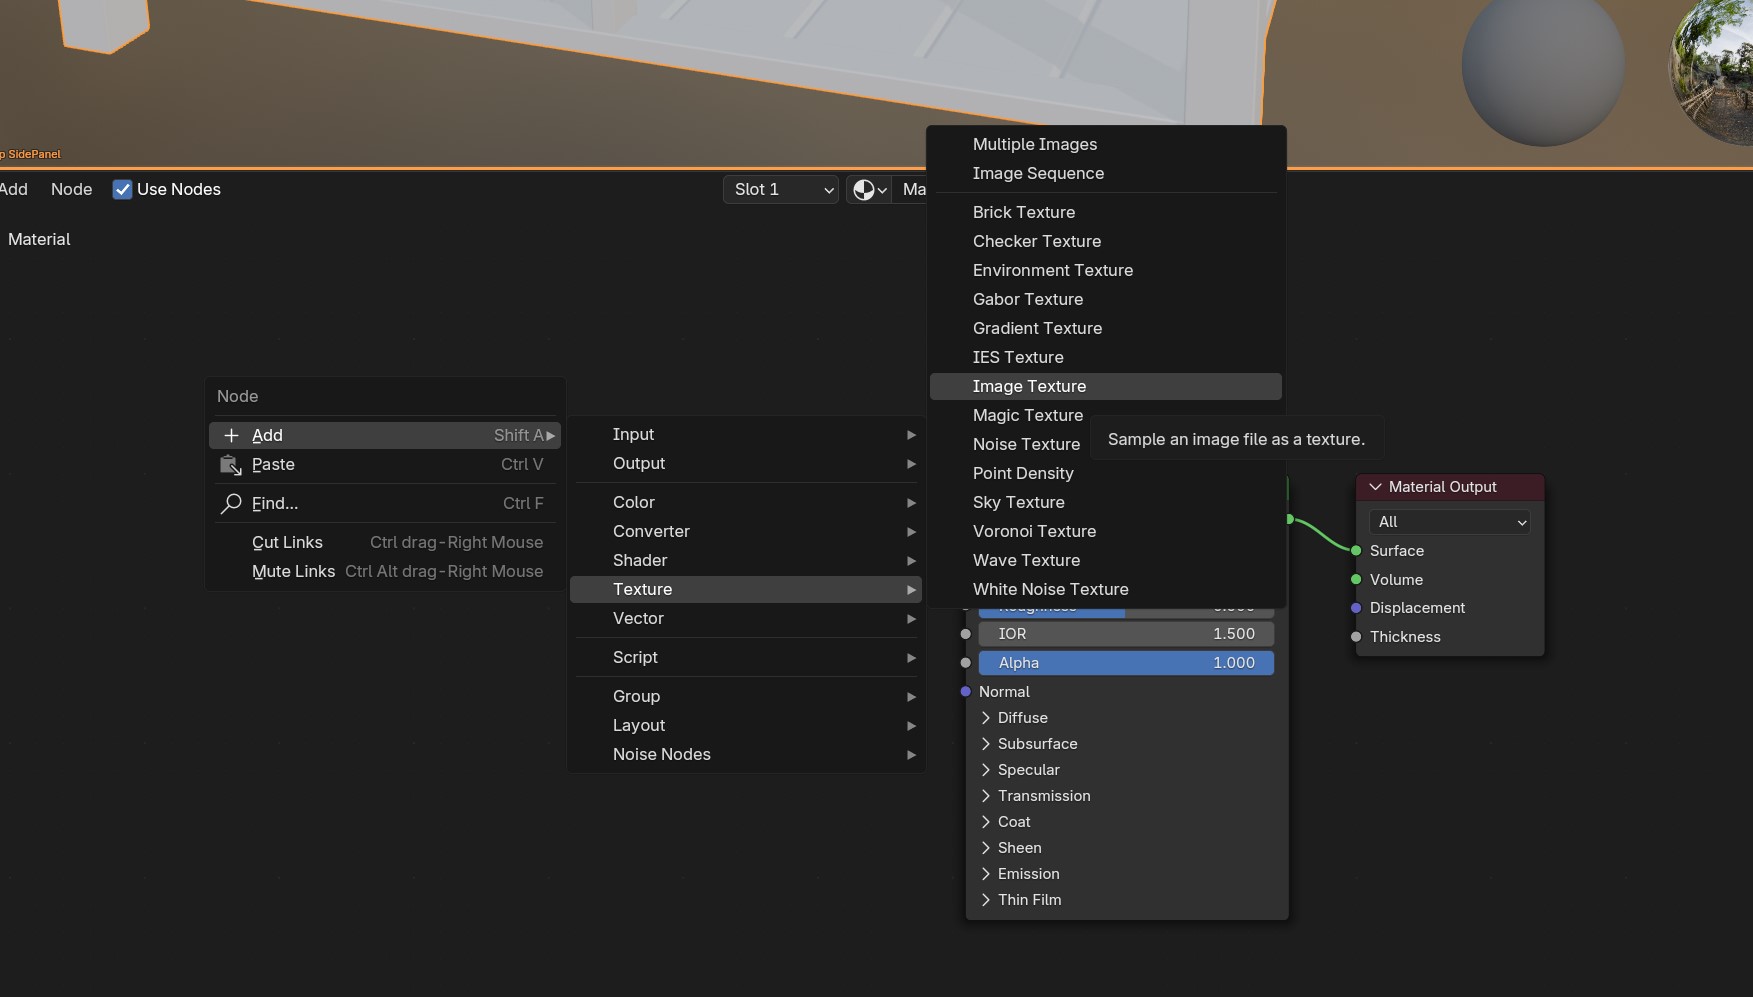
Right+Click on an empty part of the bottom screen, go to "+ Add > Texture > Image Texture".
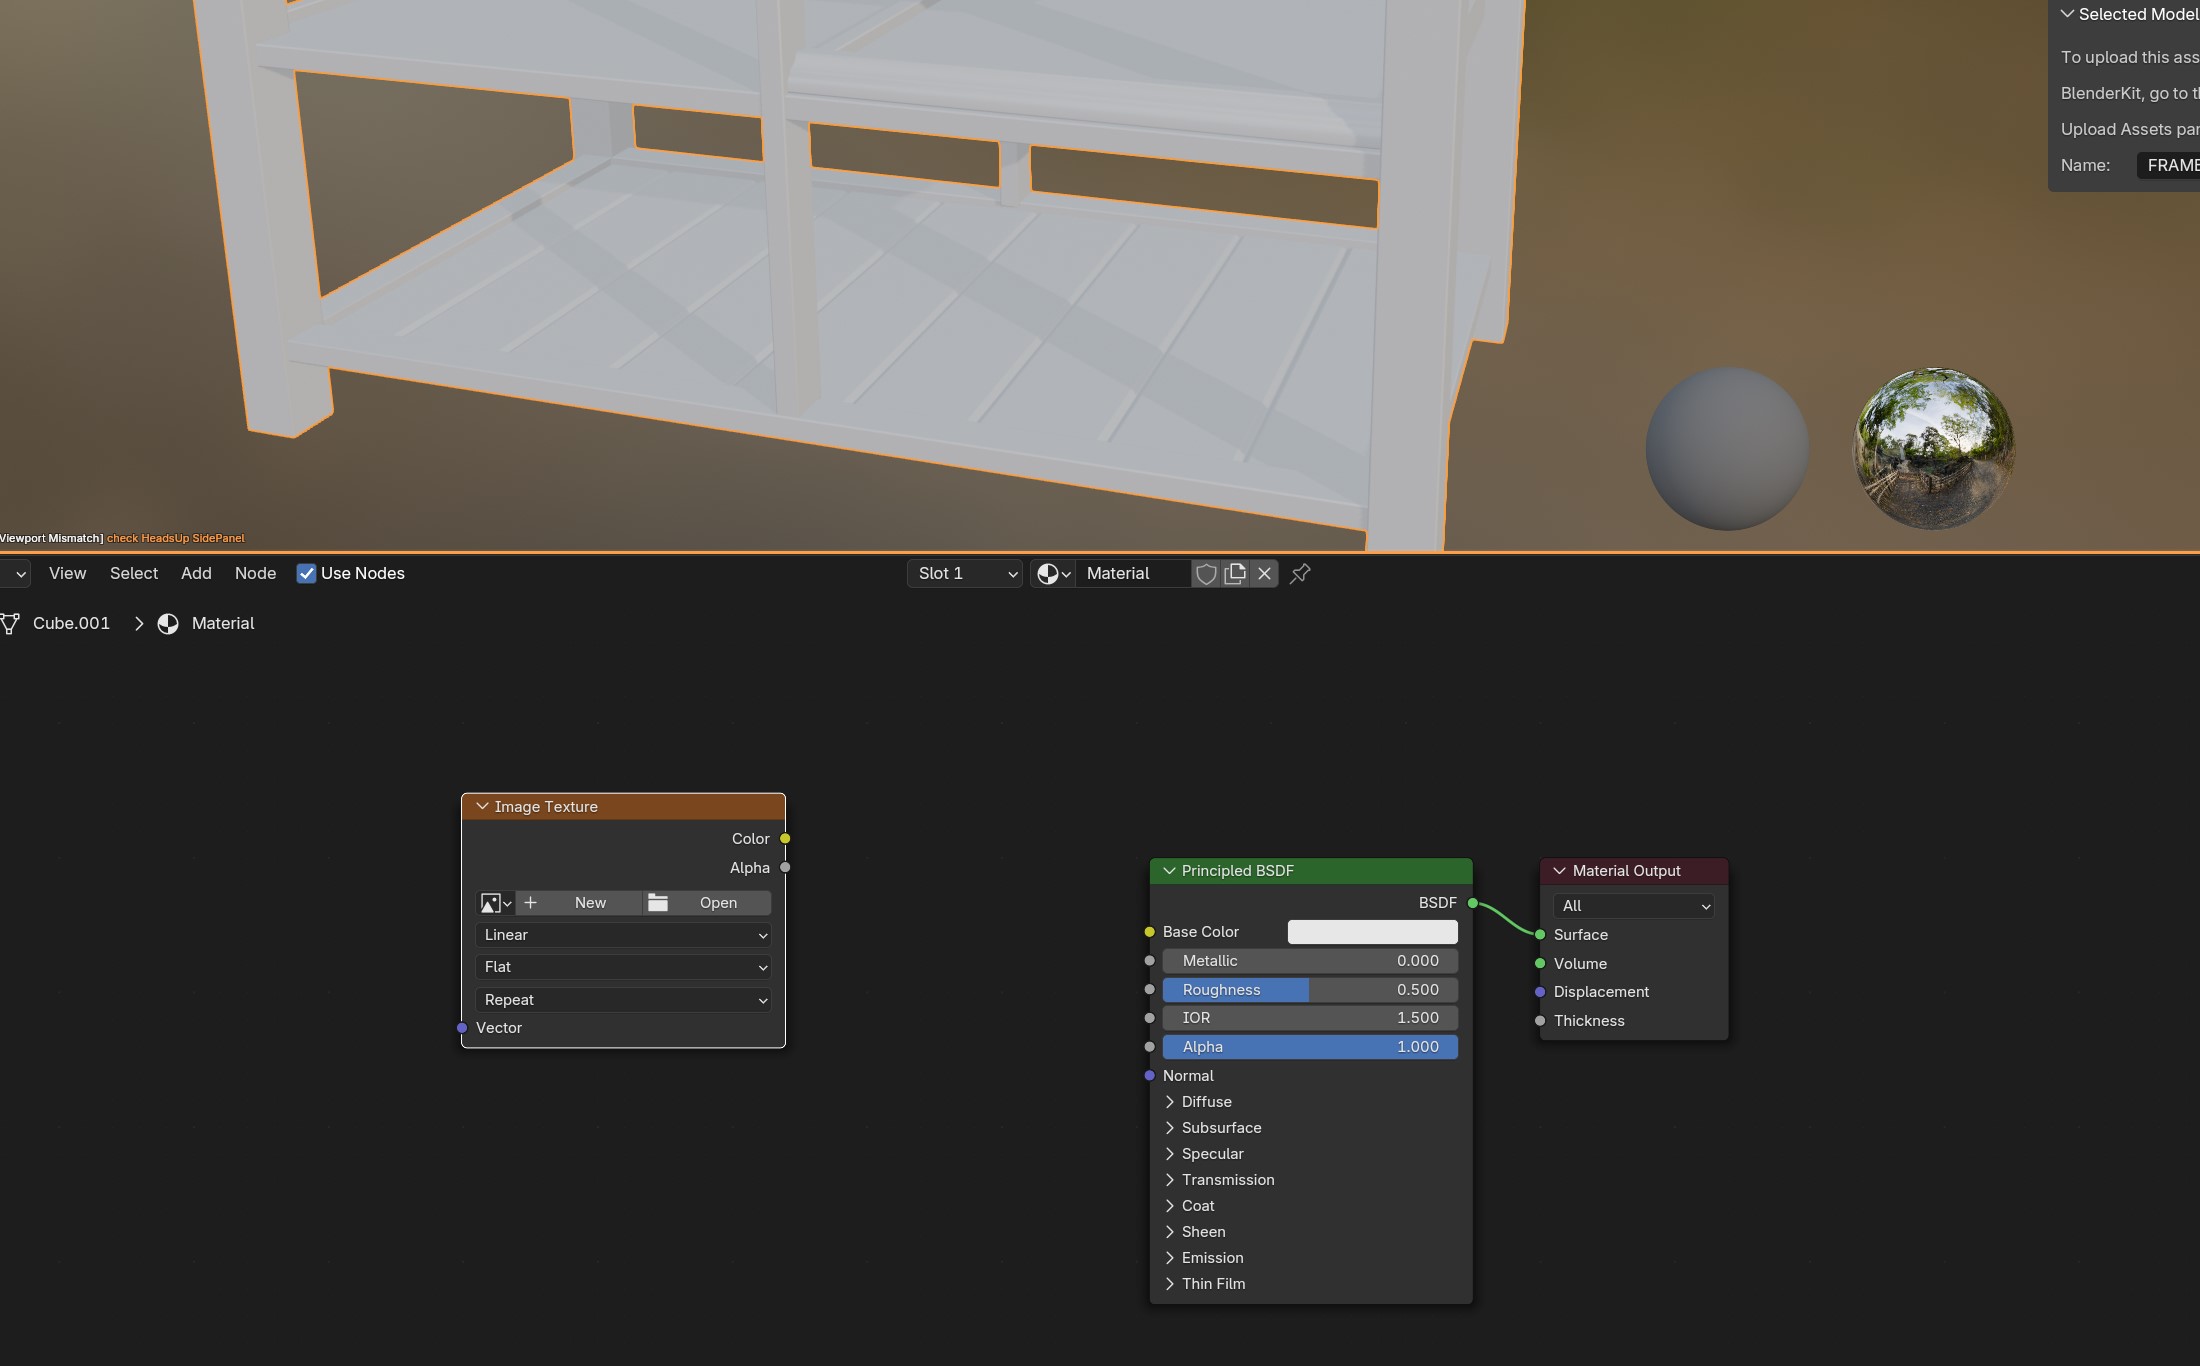
Now things should look like this :)
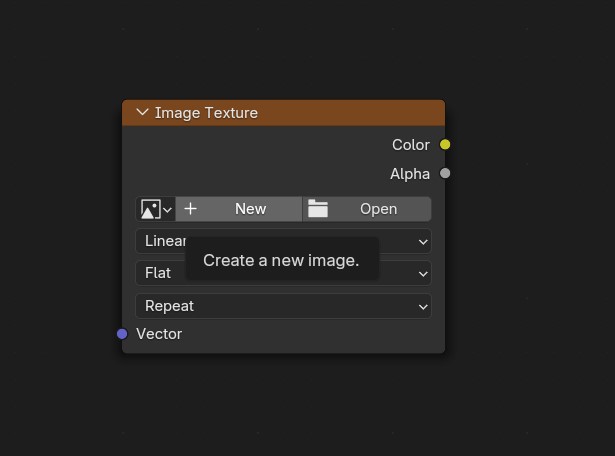
Press "+ New" in our new image texture...
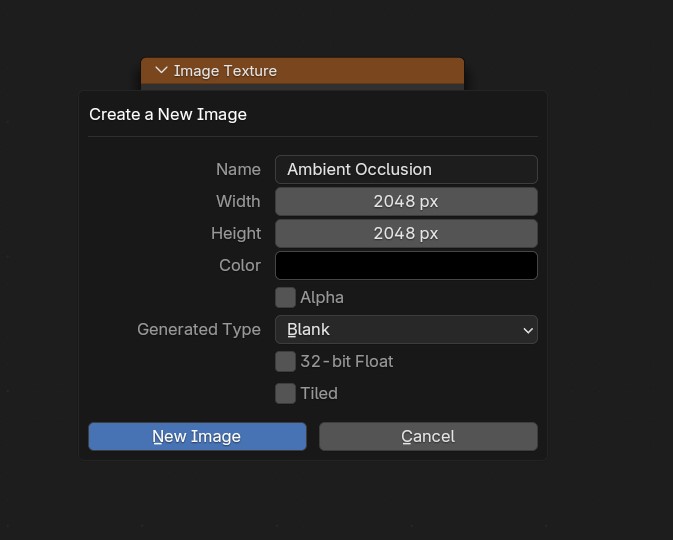
Let's start with the easiest texture first! The Ambient Occlusion.
Now, take over the same settings I have in this picture. I always bake my textures as 2048x2048, as inZOI's developers do often too. However, if your item is rather small, 1024x1024 or even 516x516 is fine too! :)
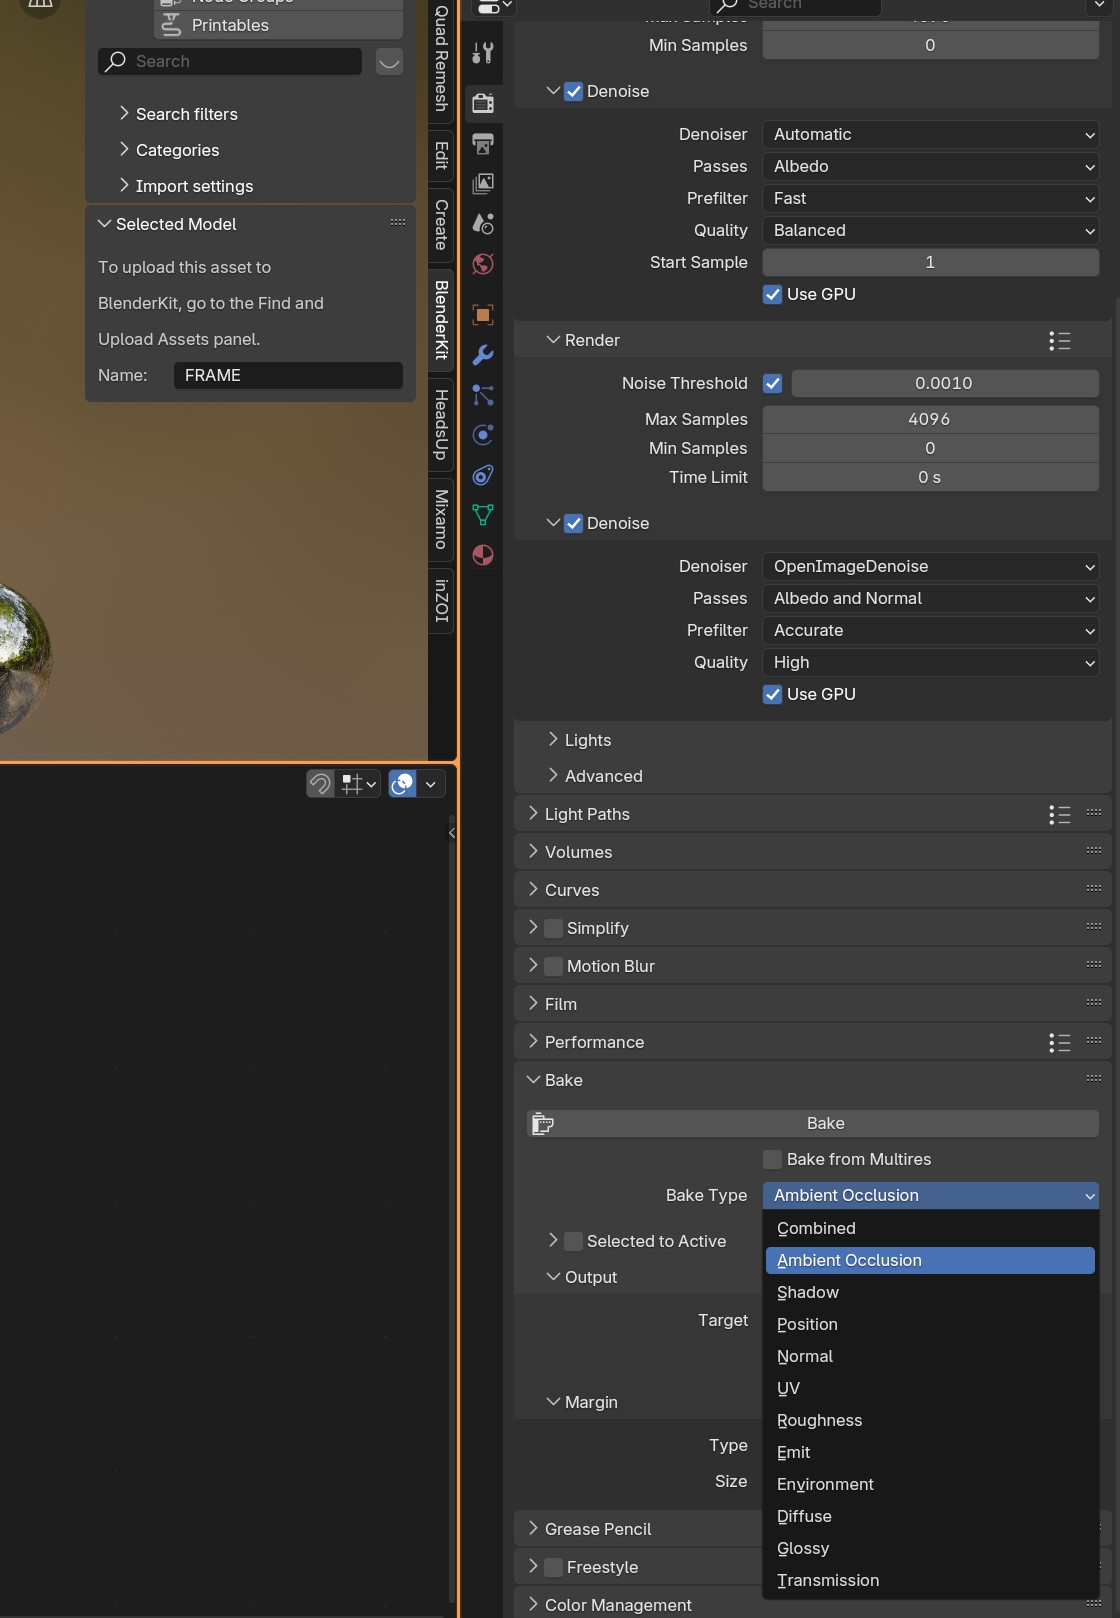
Now we want to go back to our Render tab! (remember, the tab with the screen/camera icon). Scroll all the way till you see the "Bake" tab again.
Change the 'Bake Type' to "Ambient Occlusion.
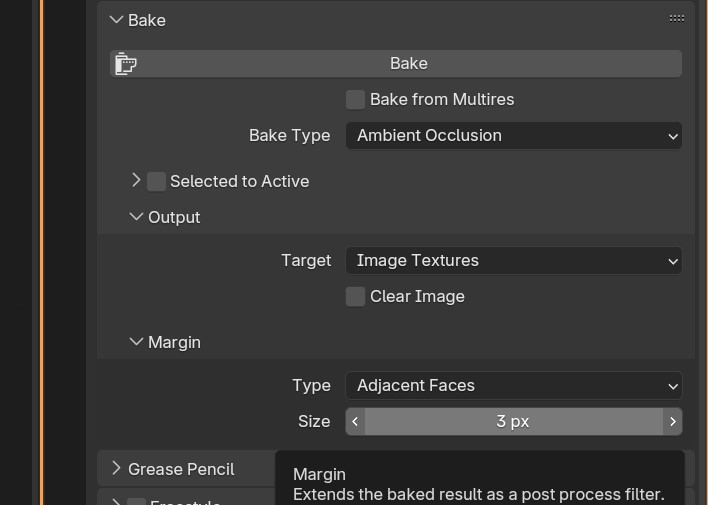
Also make sure that the Margin is set to 3px! By default this is 16 and that has a tendancy to make for some ugly results if kept like that.
Now make sure that you select the Image Texture node where we entered all the settings for the ambient occlusion (it should have a white border around it!).
And press "Bake" on the right!
This can take a bit, just like real baking! :p So make sure to be patient as blender is thinking hard!
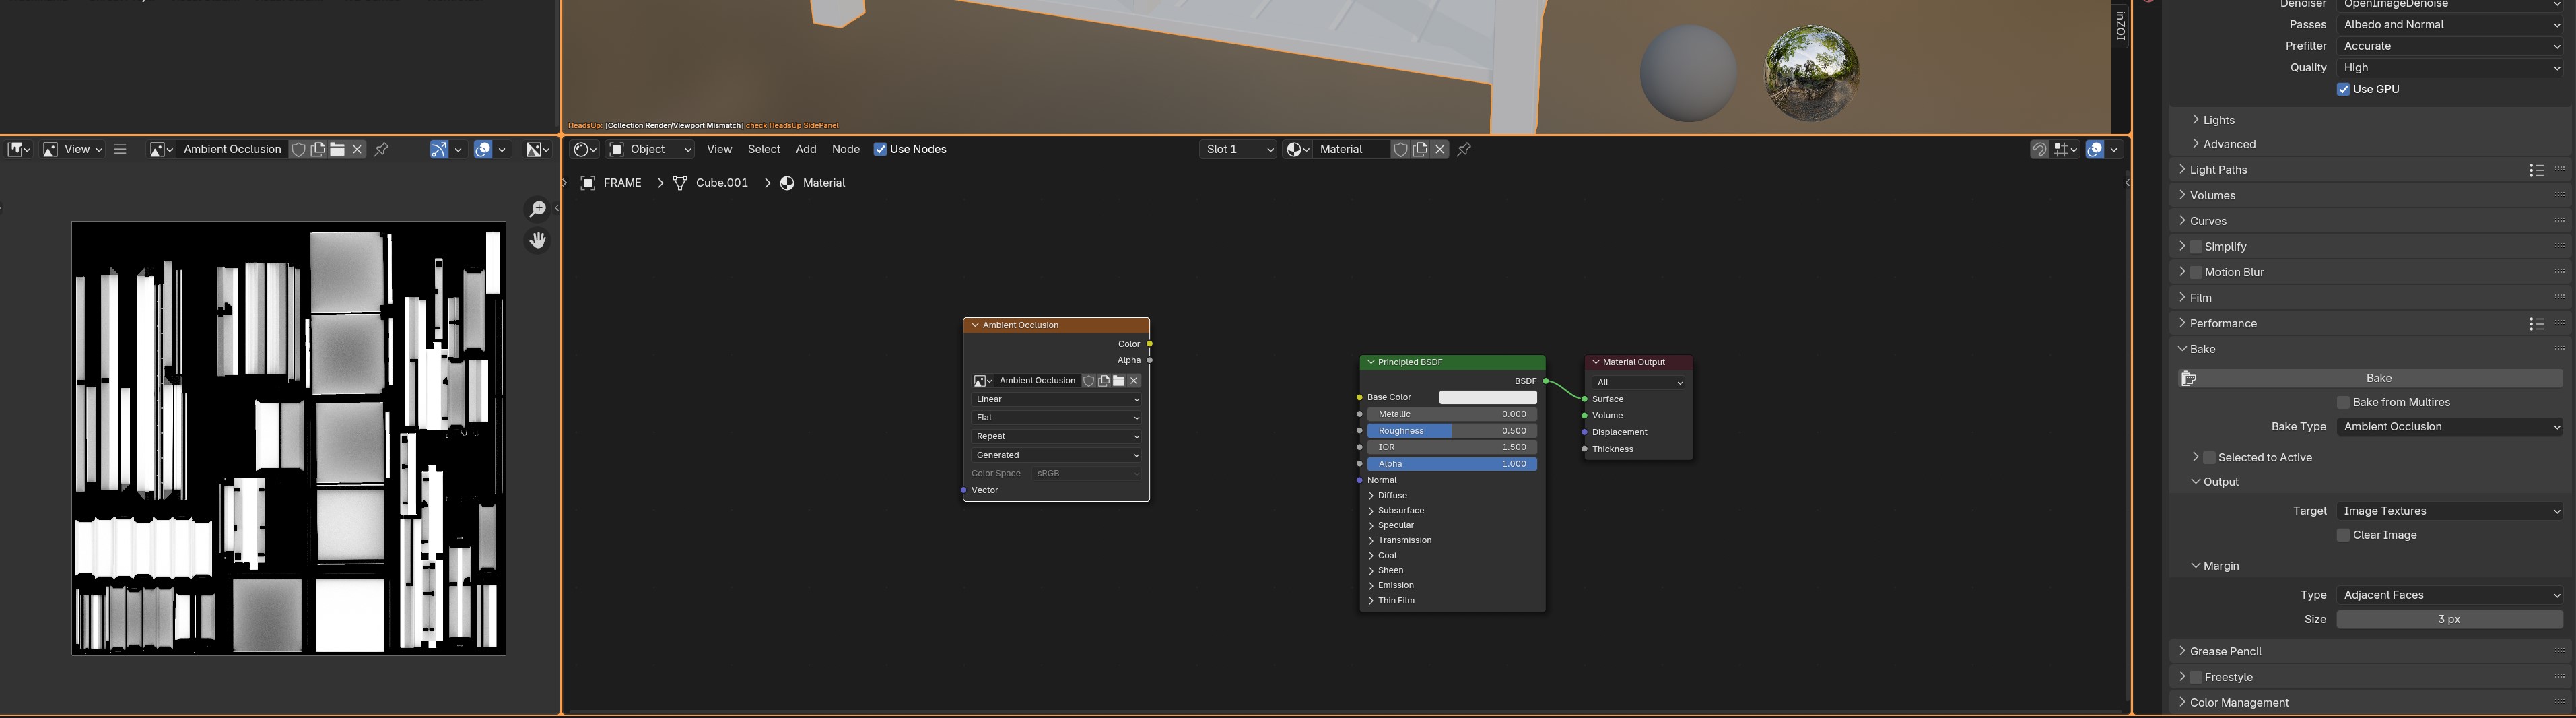
Once completed, it should show up on the left side as a black/white texture! Nice :D
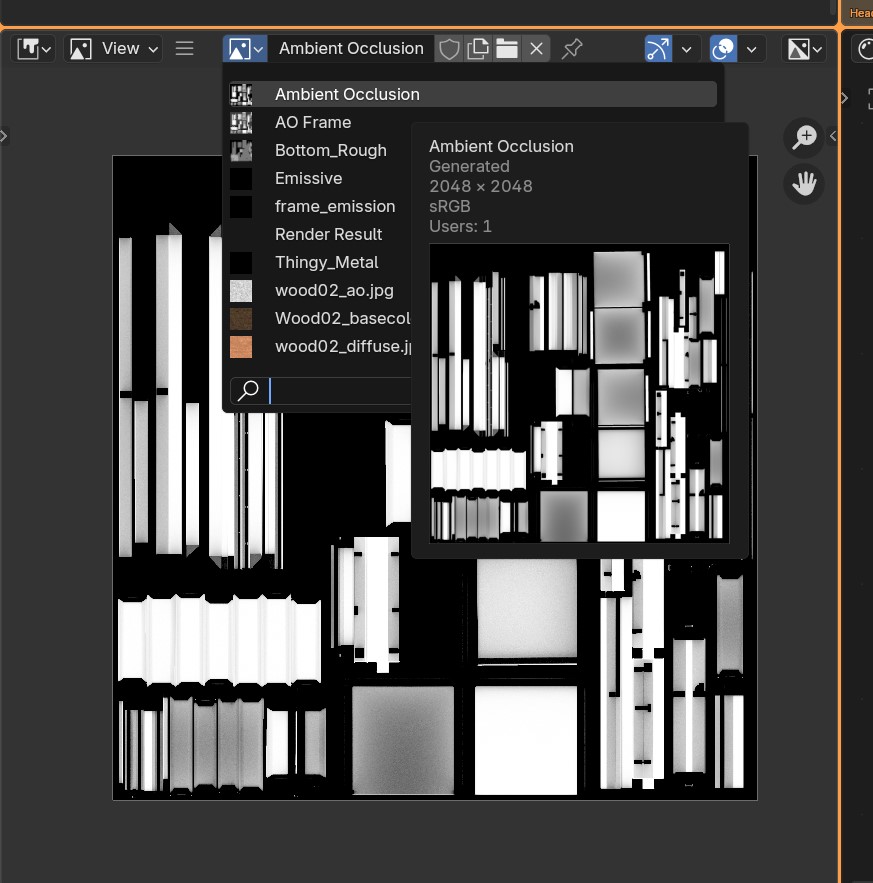
If for whatever reason it doesn't, make sure to click the icon with the image, and select our "Ambient Occlusion" Map.
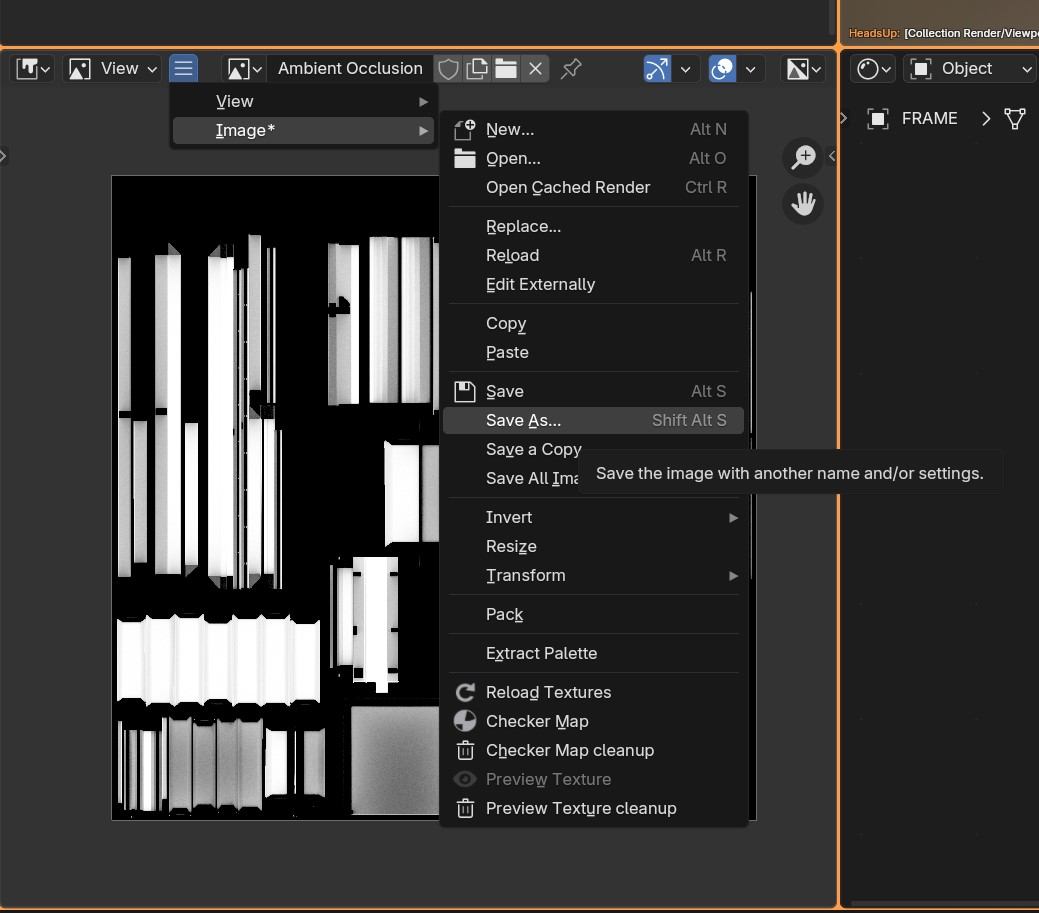
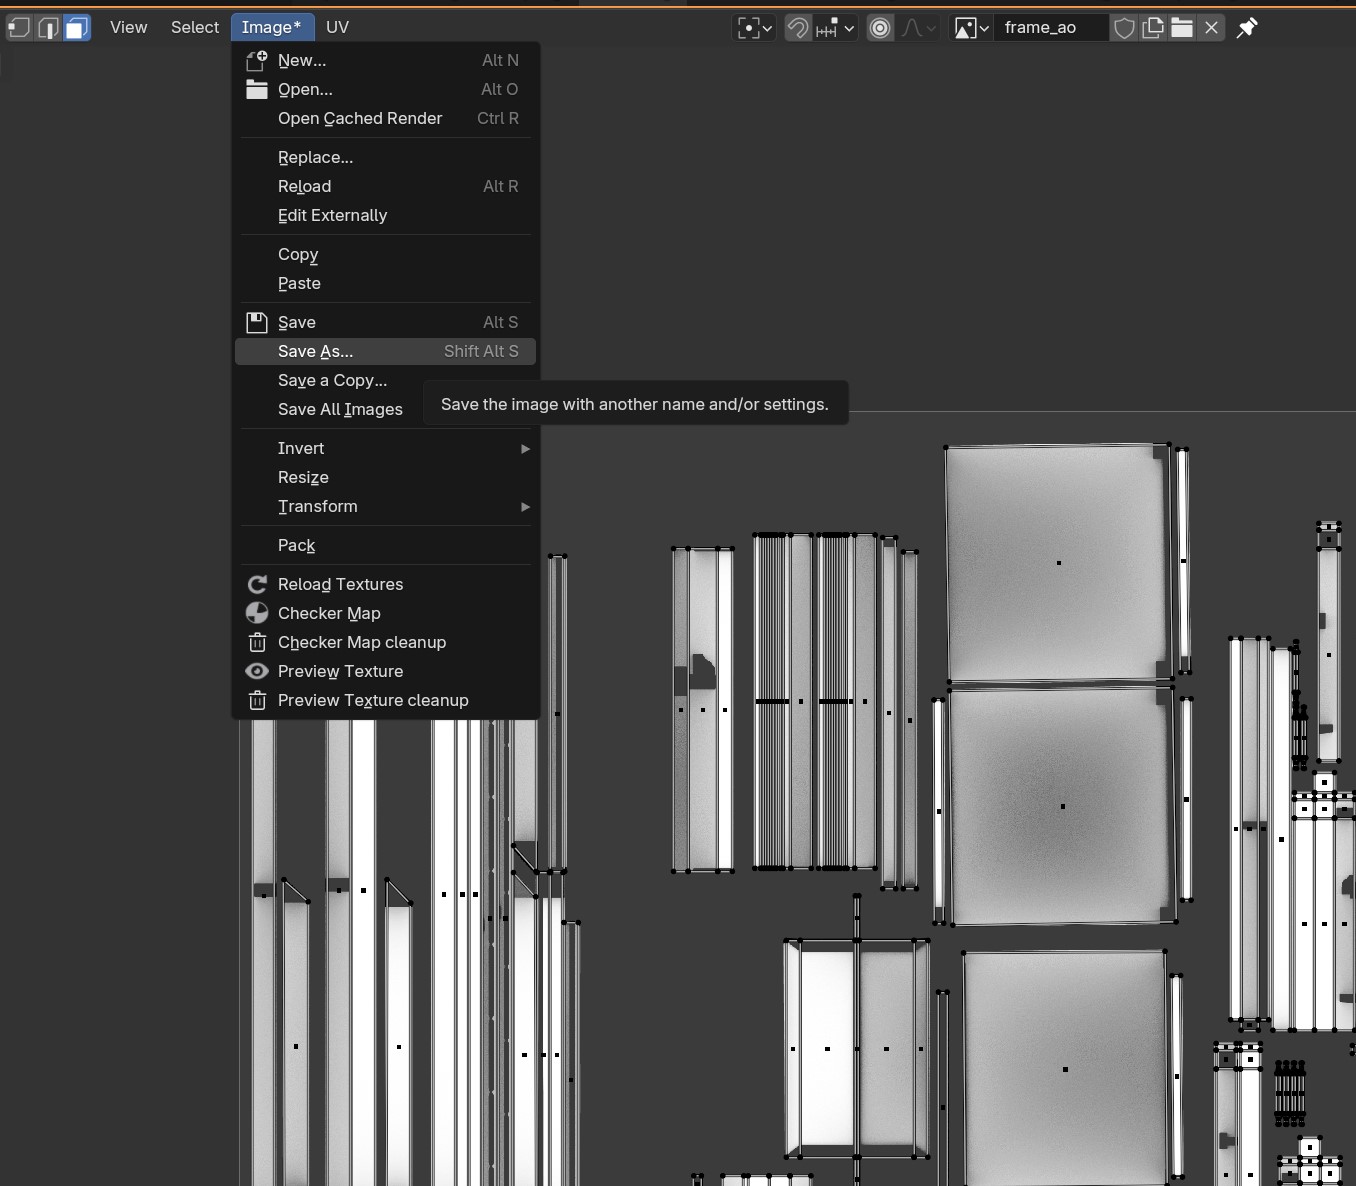
Now to save our Ambient Occlusion map, we want to go to the burger menu (the 3 horizontal dashes icon), Image > Save As...
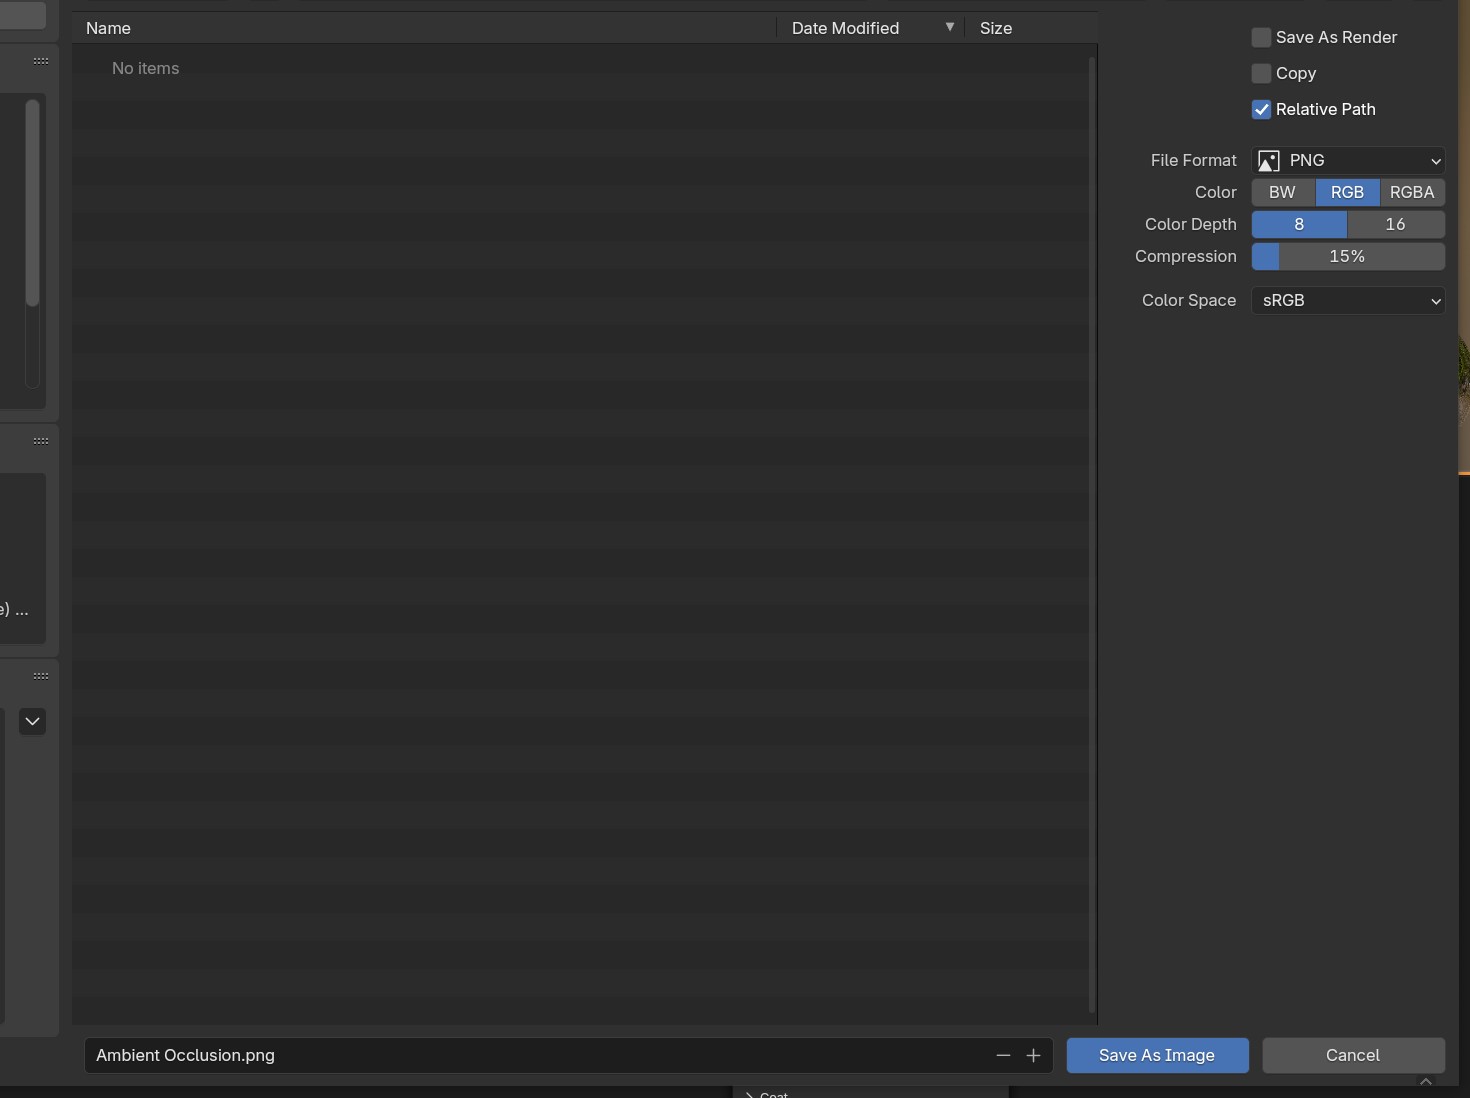
And save wherever! :) As long as you can find it back :p
Baking the Rougness Map
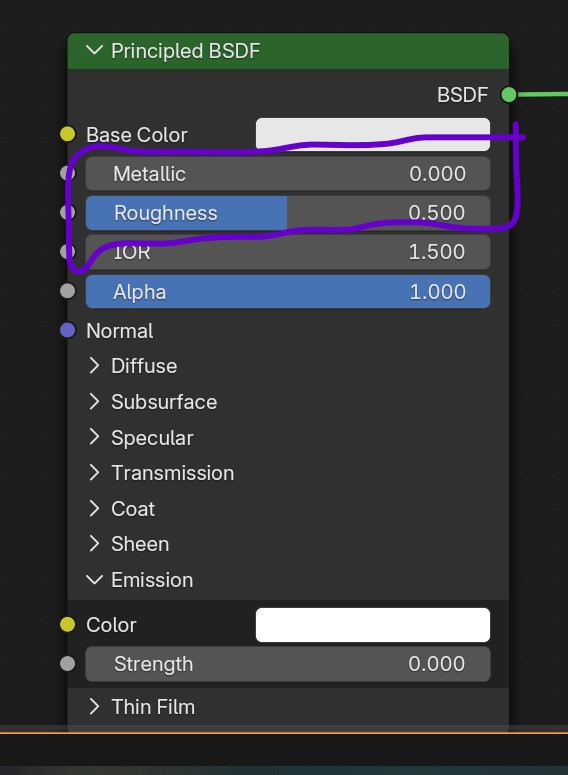
While the same as the Ambient Occlusion map, we do want to play a little with the settings! You see how putting the Rougness setting to "0.0" makes it shiny? And 1.0 will make it not at all shiny.
Make sure to play around with these settings! Although keeping it at 0.5 is fine too!
I felt for a wooden surface this was suffice. 0.33 might be even better :)
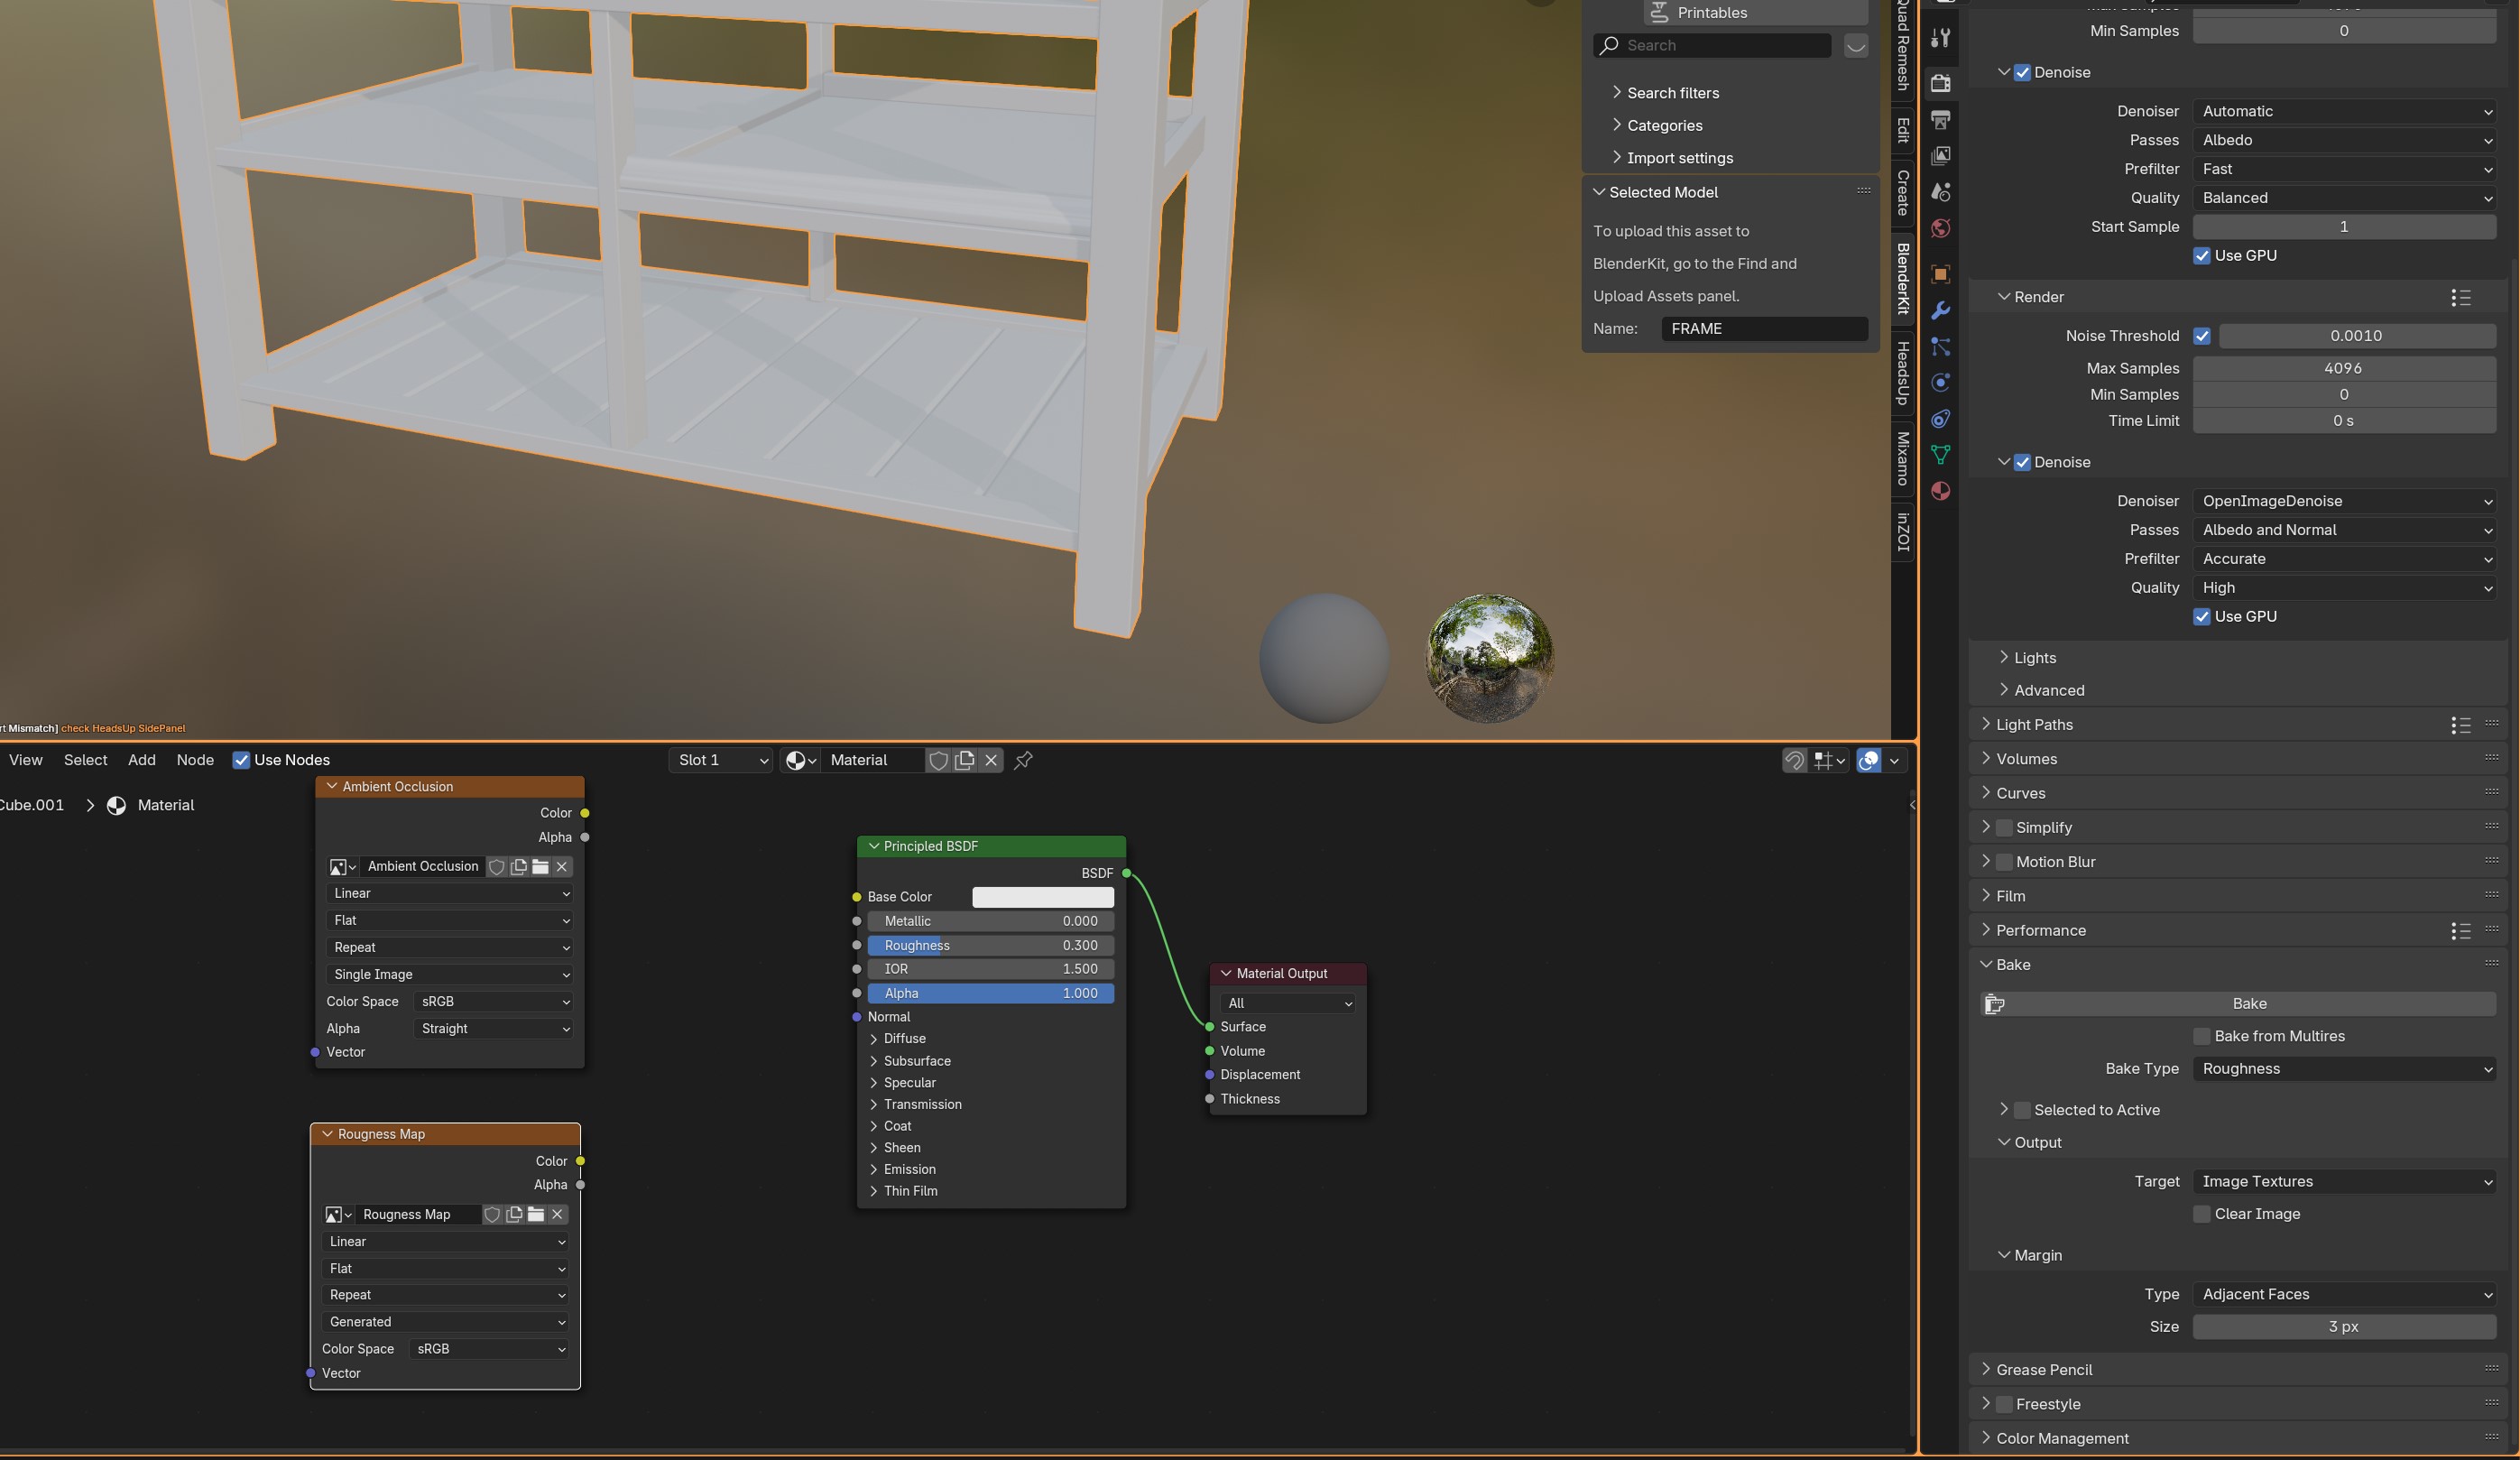
Now we add the Rougness Map just like we did the Ambient occlusion one.
Click on the Rougness Map node, and change the "Bake type" to Roughness.
Press Bake!
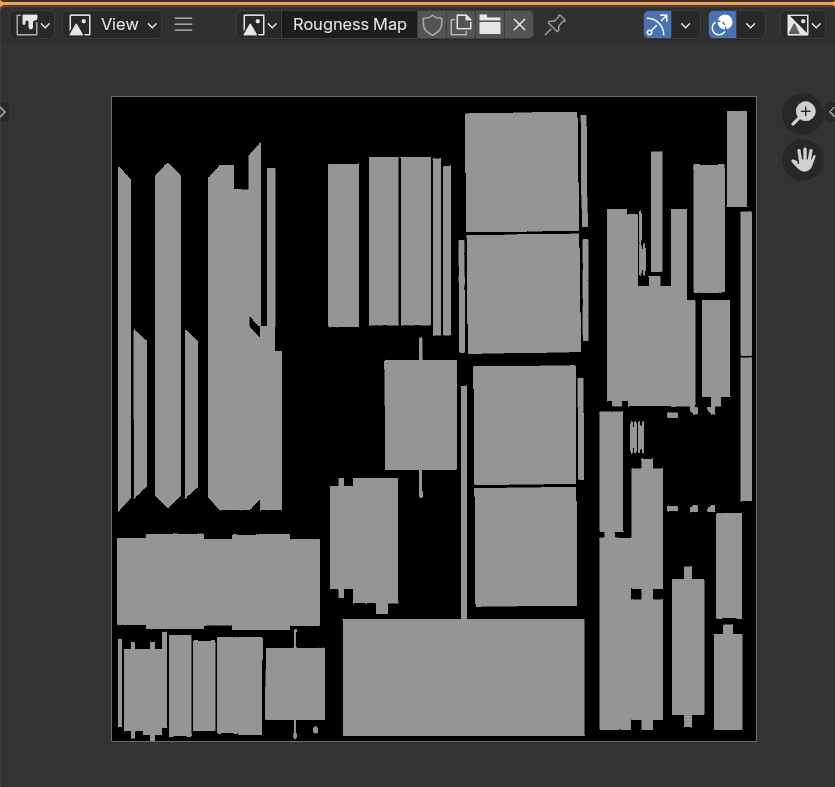
Nice! :D
Baking the Metallic Map.
This is a bit different from the other two, since Blender doesn't come with a baking option for metallic. If you want to use Tex Tools for this, totally go for it! If you rather want to use the hacky method, then use that instead.
So, essentially what we're going to do is to put our metallic value in the emissive value. :)

Change the metallic value first, so we have a visual idea of what it looks like.
- If your table is wooden: Keep it at 0!
- If your table is metallic: set it between 0.5 or 0.8. Unless it needs to be incredibly reflective.
Note: If you want it to be even more metallic-reflective, set the rougness to a much lower number or even 0. If you do this, make sure you rebake the Rougness!
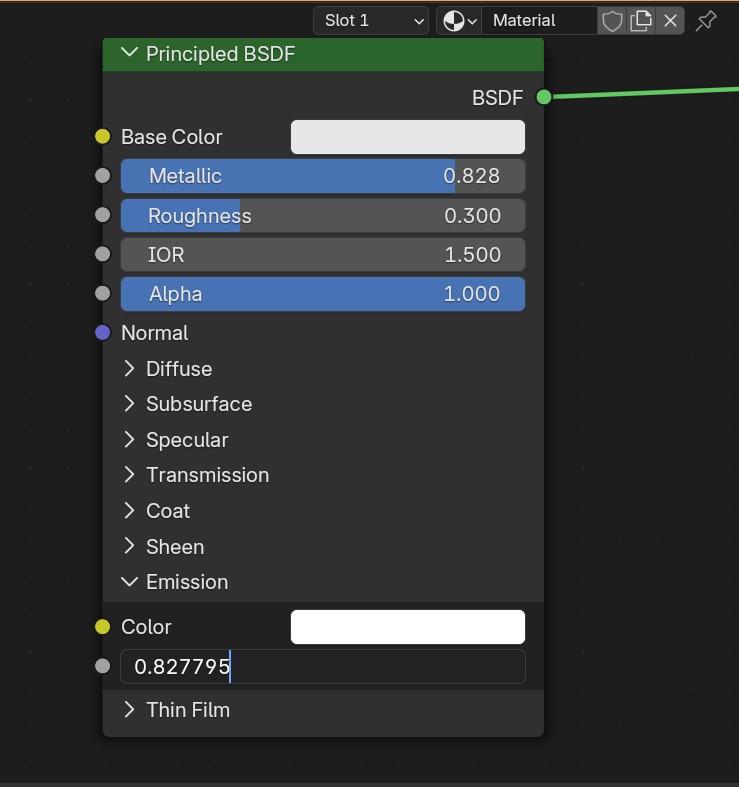
Copy the metallic value you're satisfied with to "Emissive"...
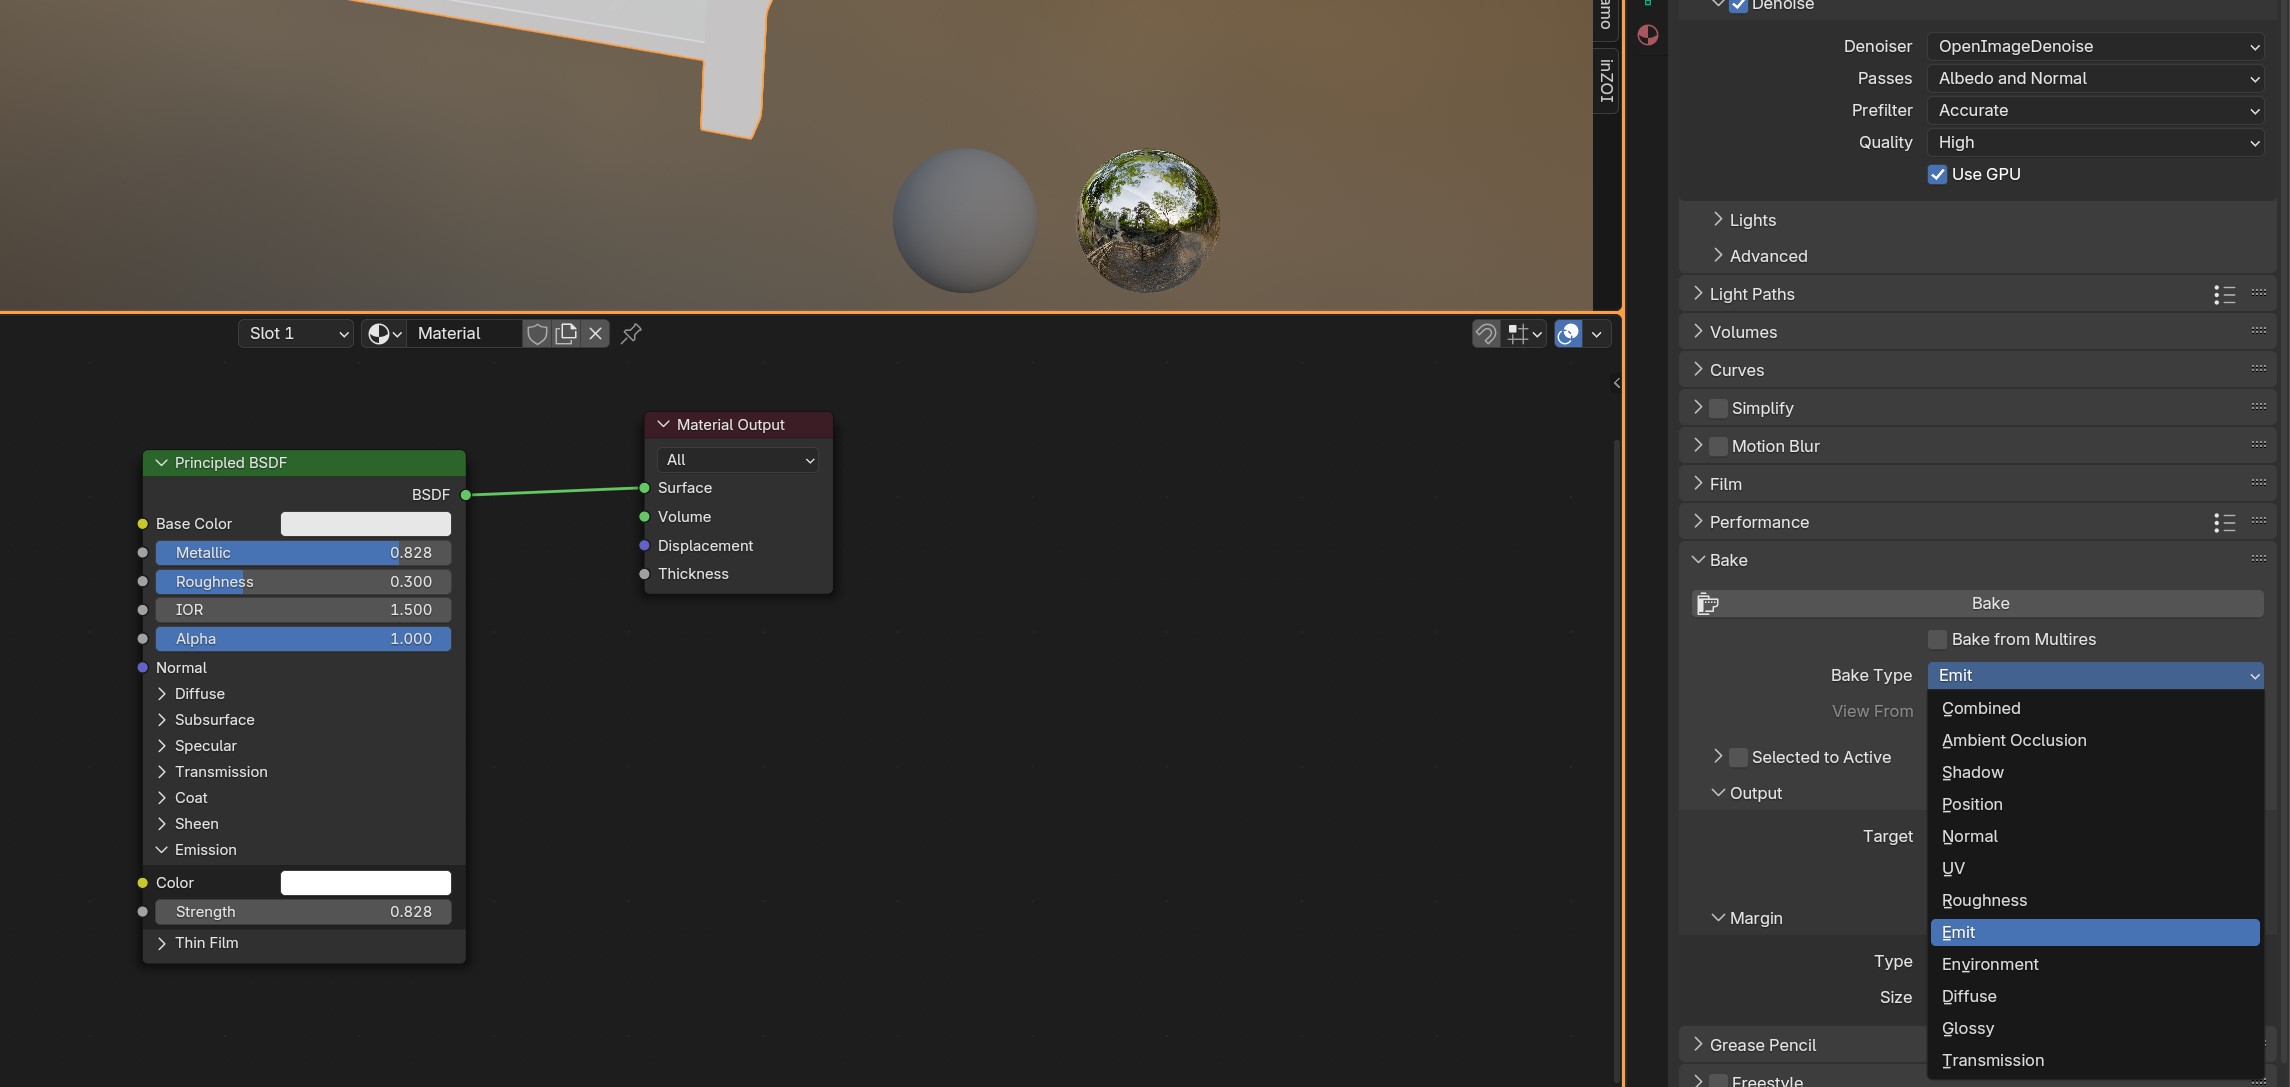
Set the Bake Type to "Emit"...
And Click on your metallic map node, just like you did with the other two :)
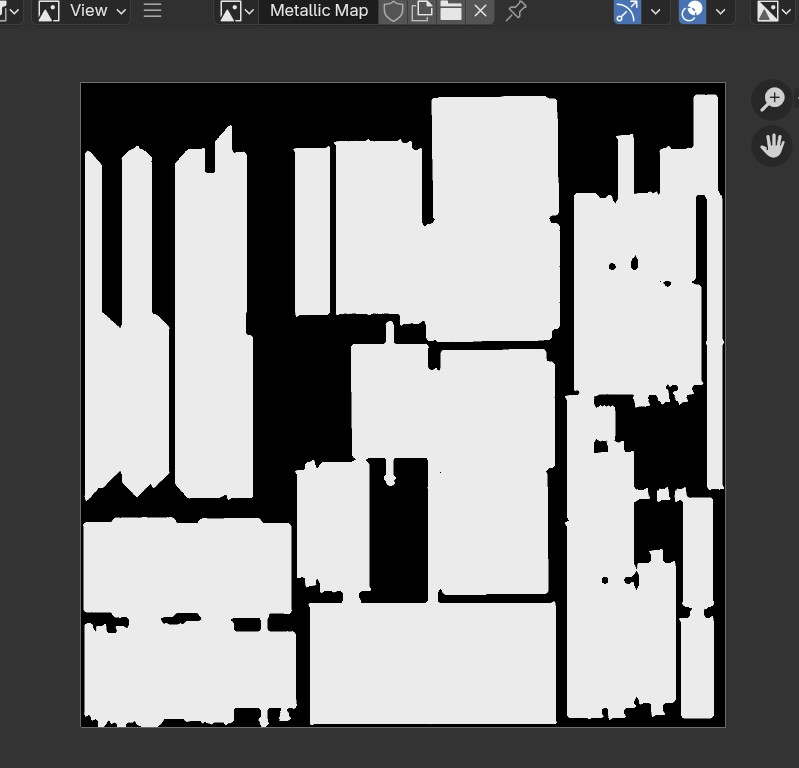
Nice! If your mesh needs to be highly metallic, then this should be rougly the result you're seeing.
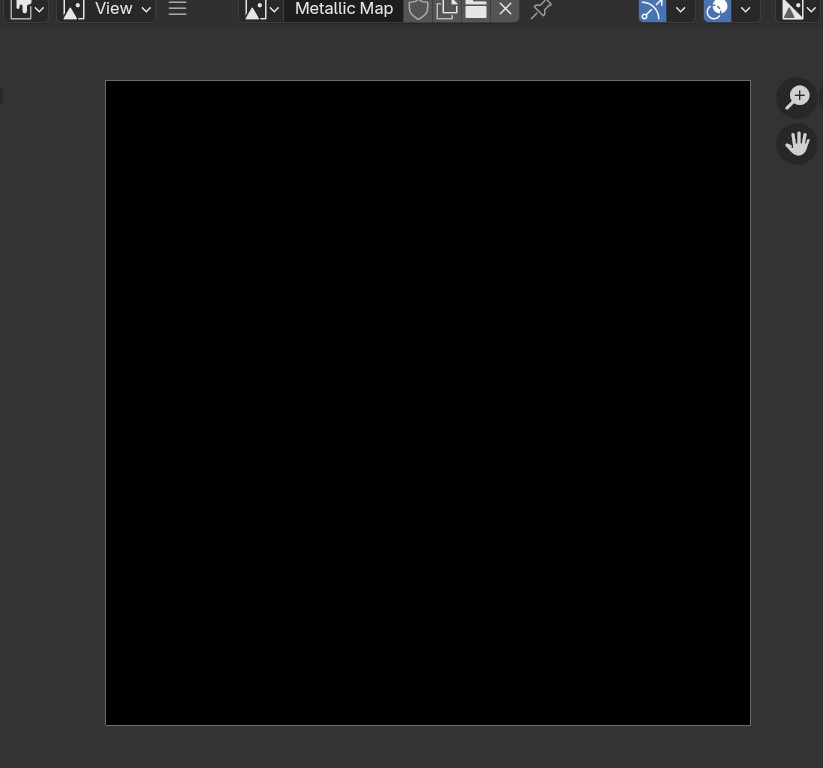
If your mesh is NOT metallic, your texture is going to be black. (And that's okay!)
Save and let's move on!
Method 2: [Beginner Friendlier] Using TexTools
First, we need to set up TexTools in our Blender before we start!
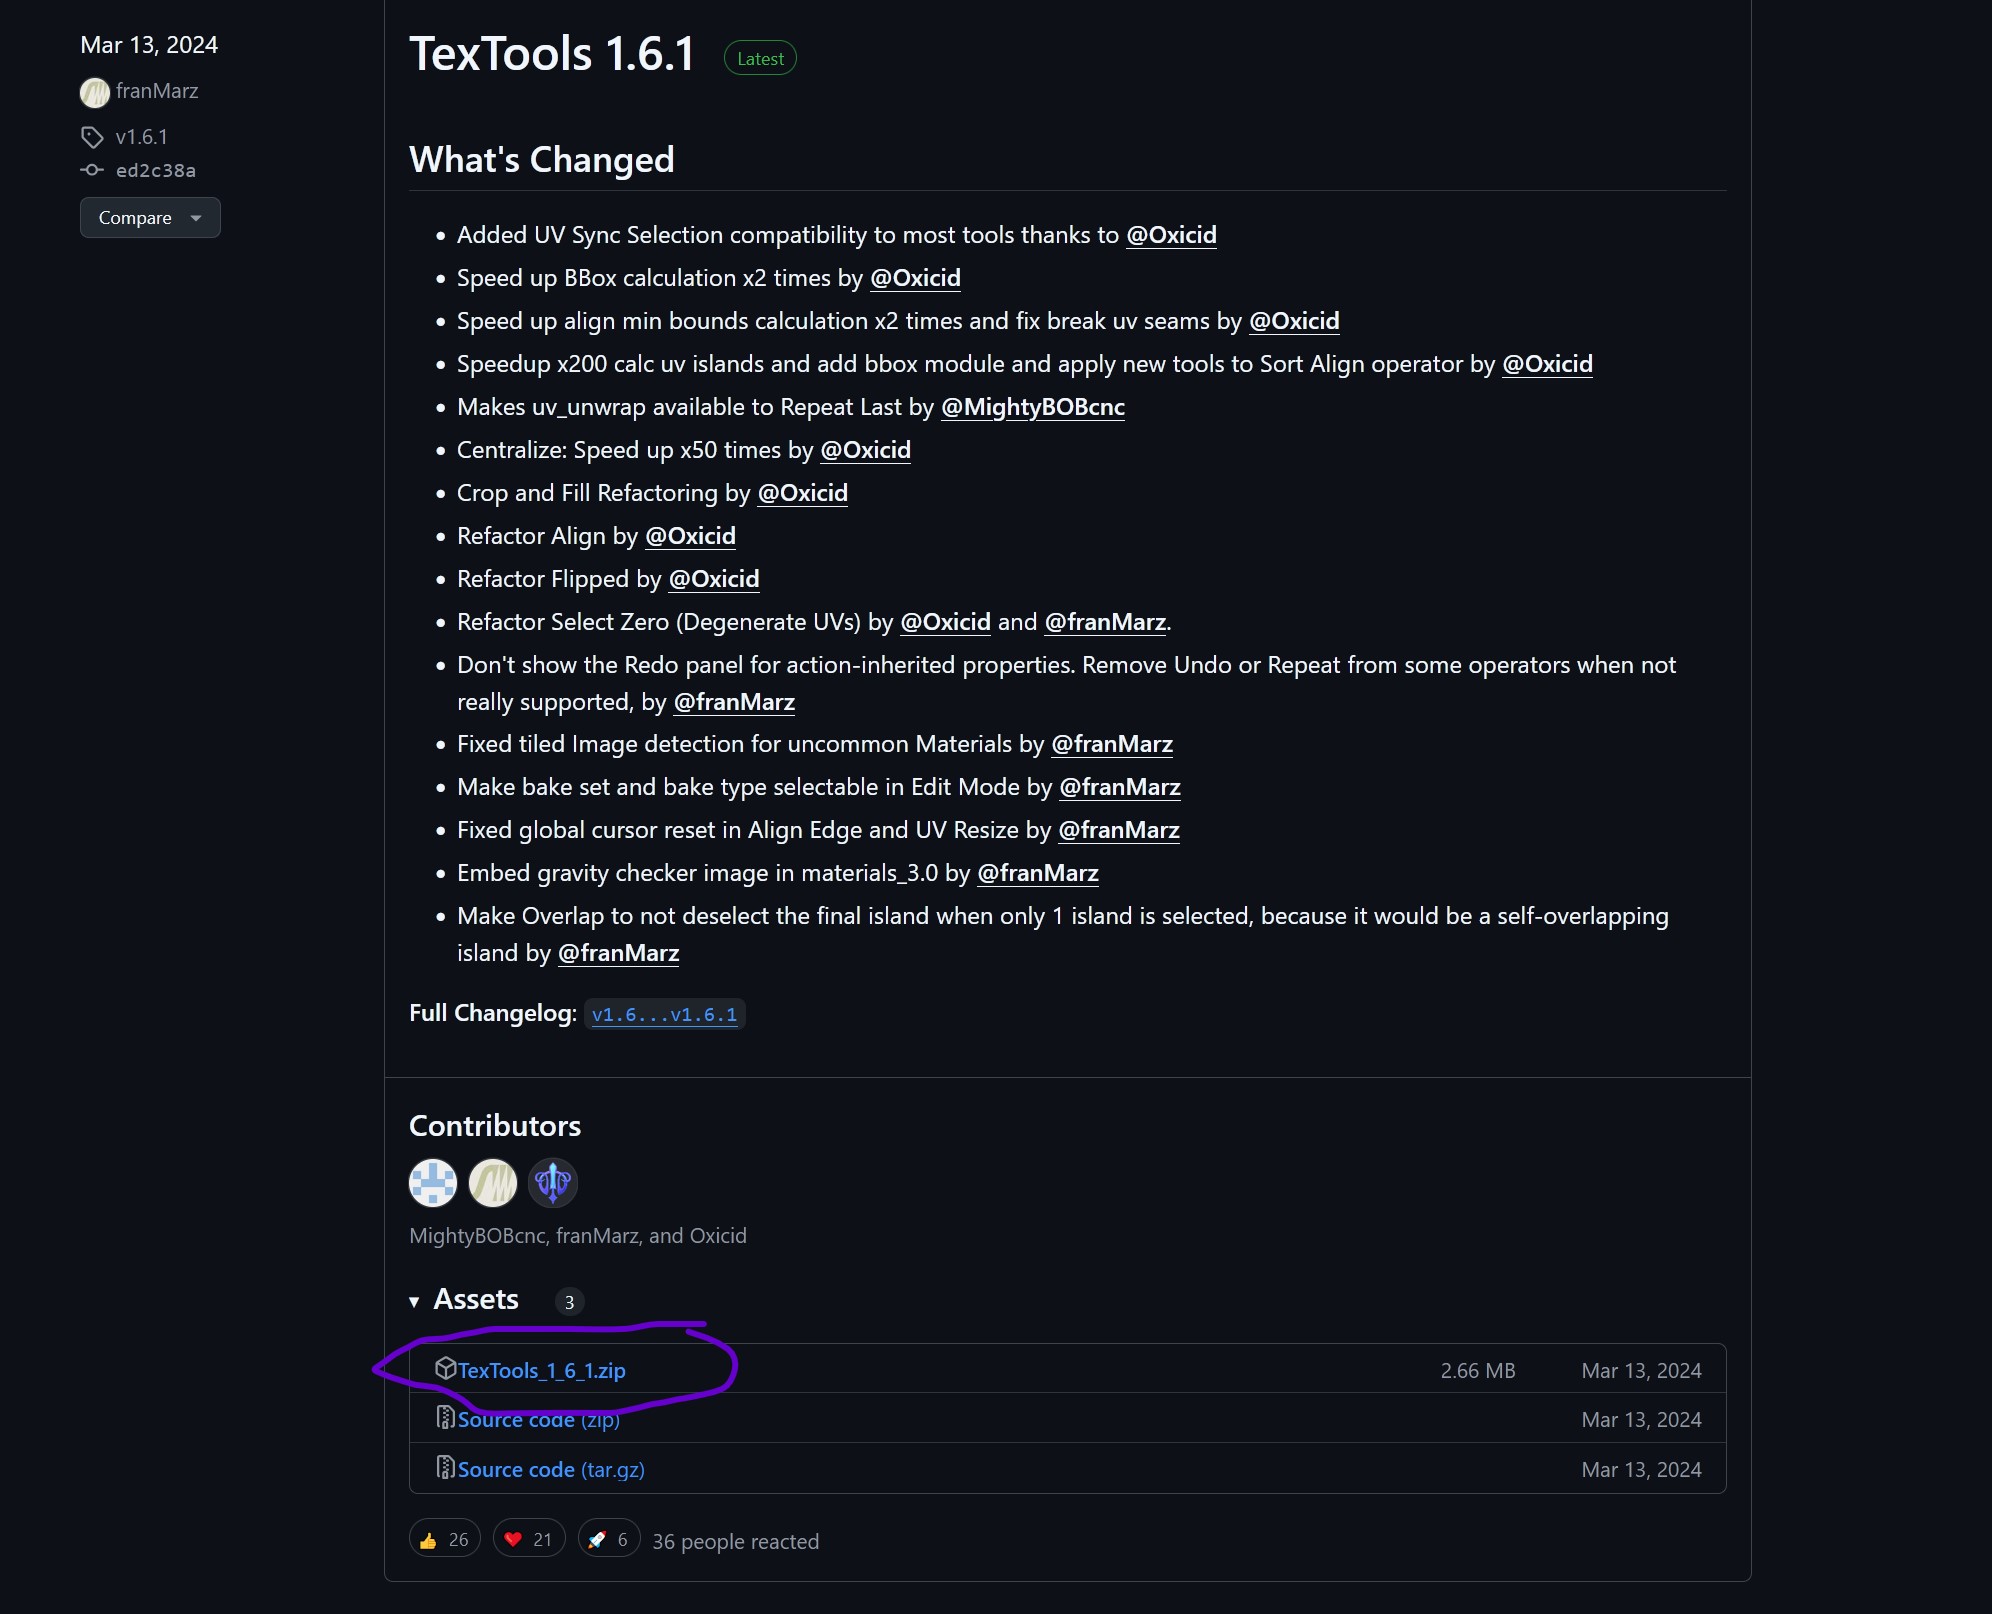
First, we want to download the TexTools_1_6_1.zip file. (NOTE: It's possible that the version is no longer 161 like in this tutorial. Just download the latest version :))
Now, open blender. (Or not! If it's open leave it :p)
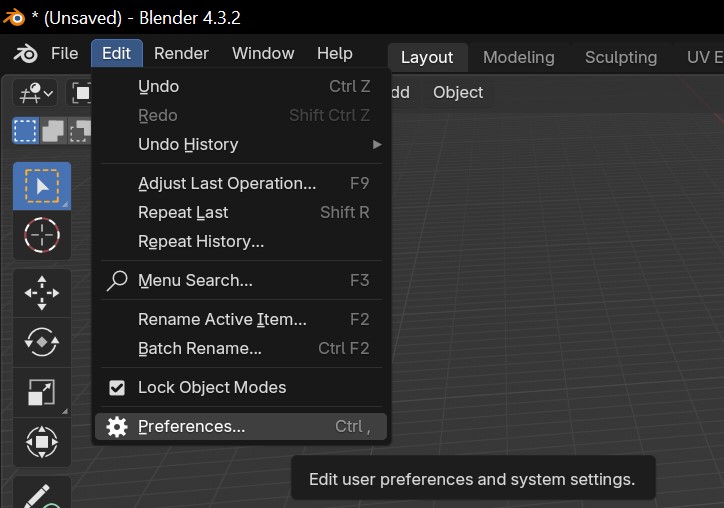
Go to Edit > Preferences
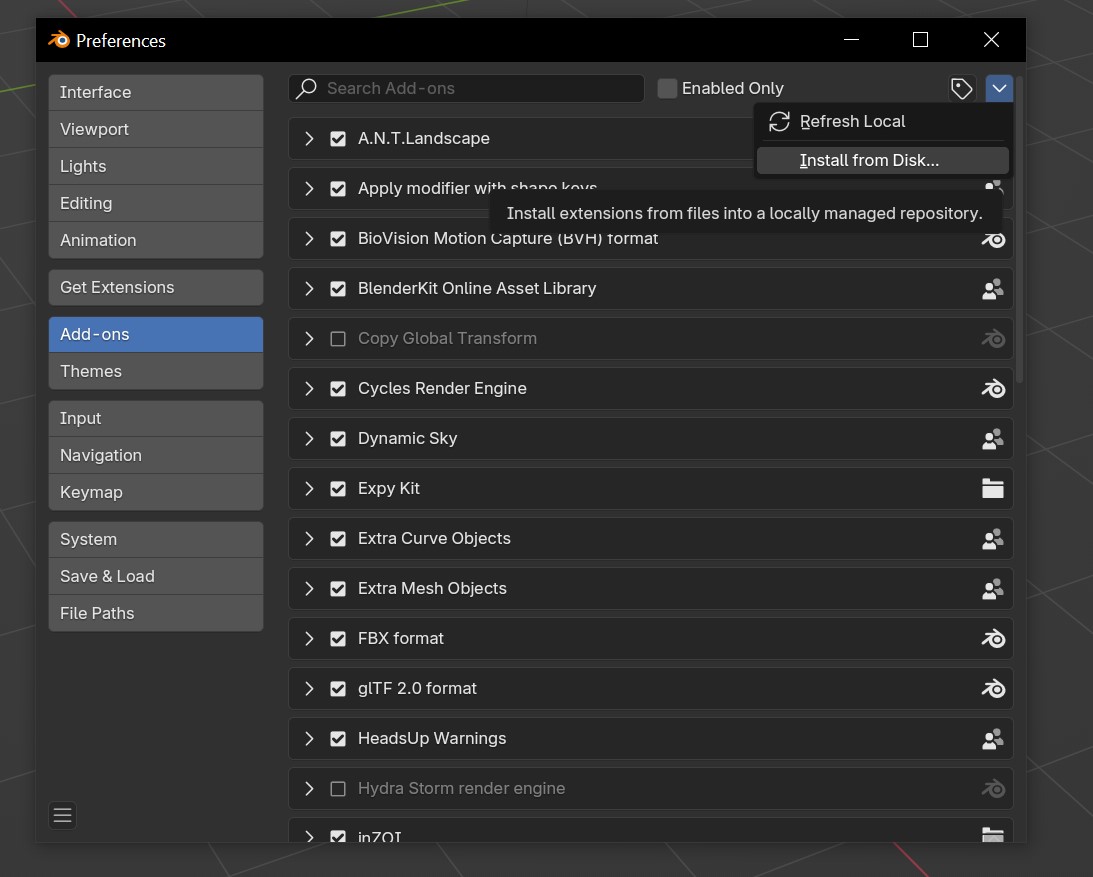
Make sure that on the left, you click "Add-Ons" to see the addons page.
On the top right, click this downwards pointing arrow, and click "Install from Disk"

Click the .zip file you downloaded and click "Install From Disk" at the bottom right.
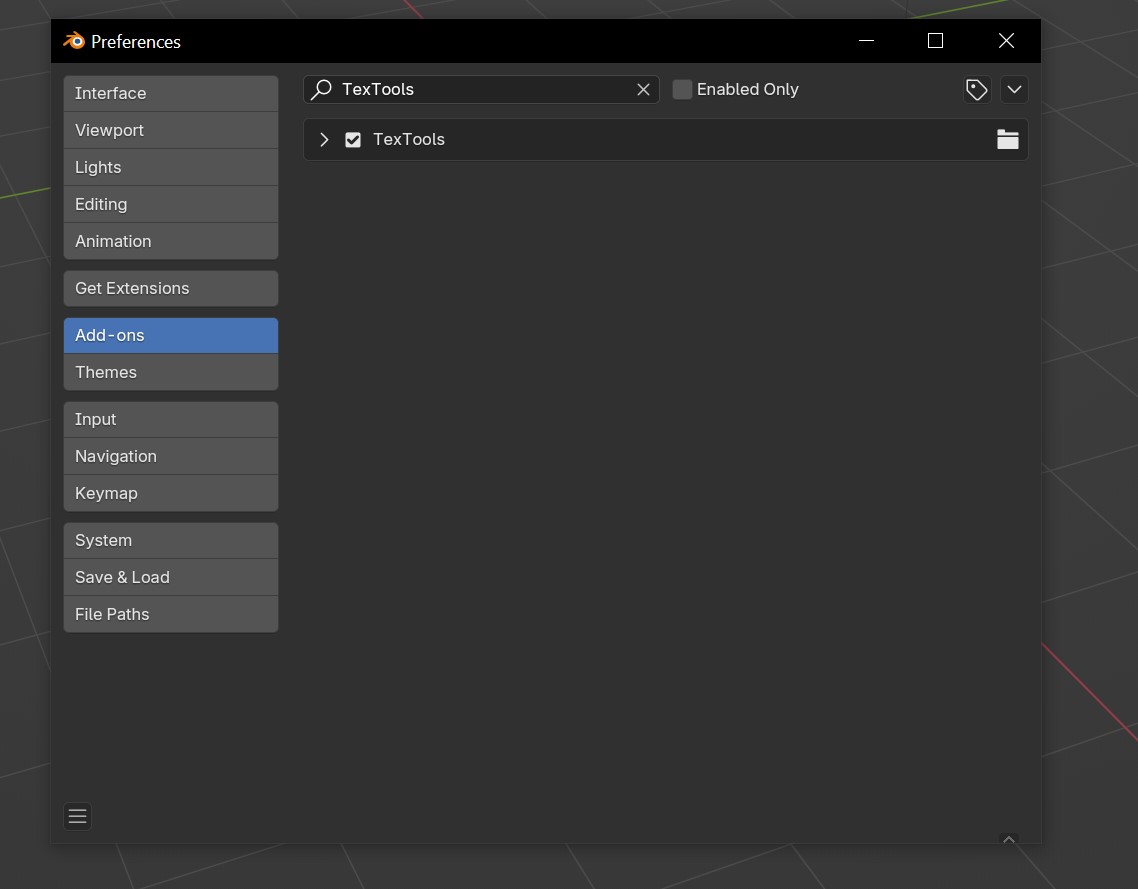
And now it should be auto-enabled! :D If it's not, just tick the checkbox next to it's name :)
Close the window.
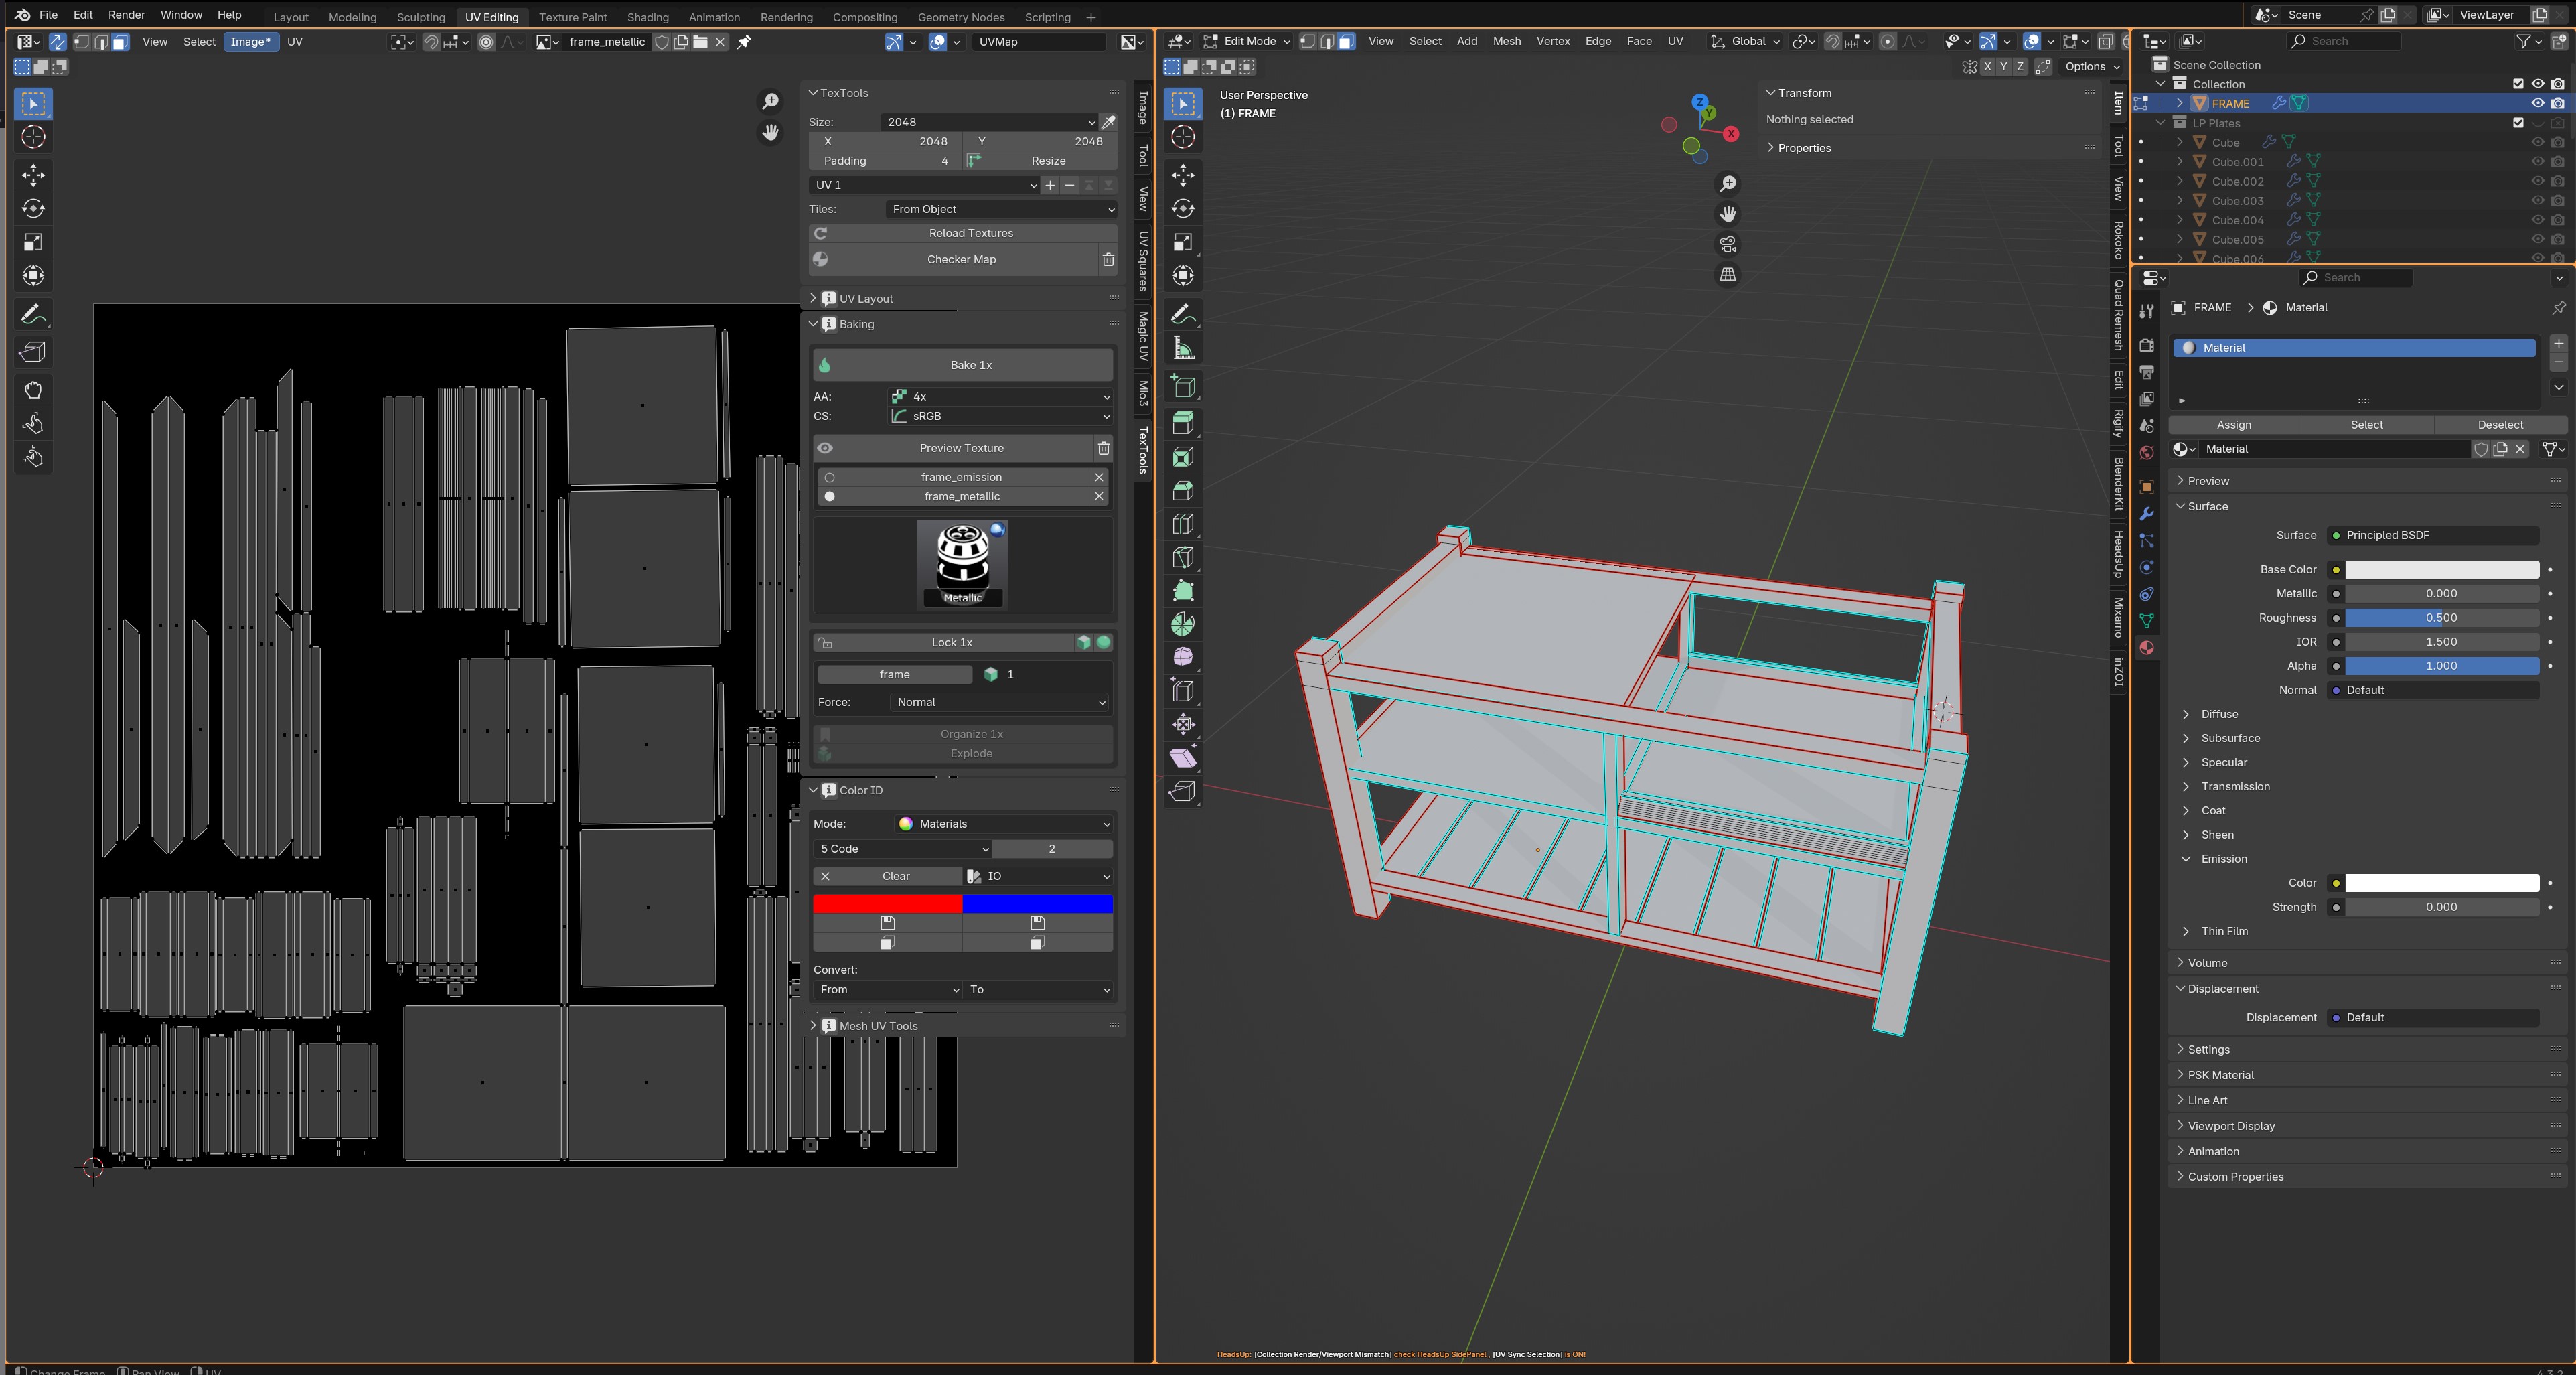
Now, we want to open the UV Editing Tab for this one right at the top :)
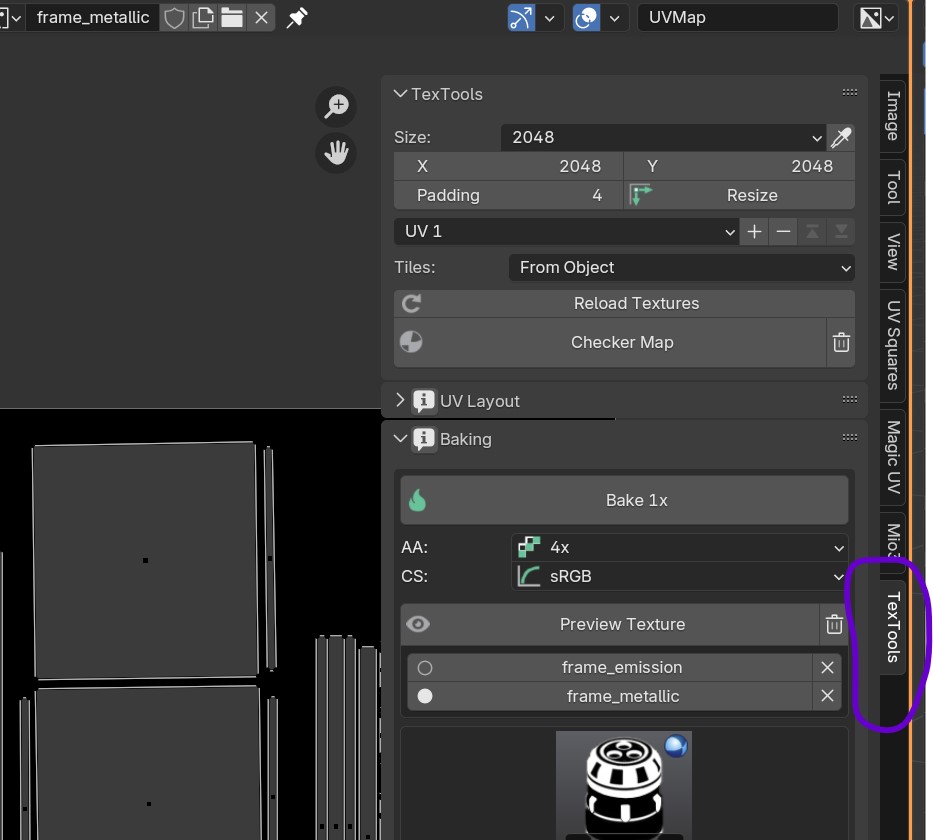
It's possible that TexTools isn't open by default for you when viewing this tab. If you want to see it, click on the "TexTools" tab right at the right hand side tabbing system.
For TexTools, I love to set it to these settings!
- Size: 2028 (But 1024 is fine if your object is much smaller!)
- AA: 2x (4x is okay too, but might be heavy on your machine!)
- CS: sRGB
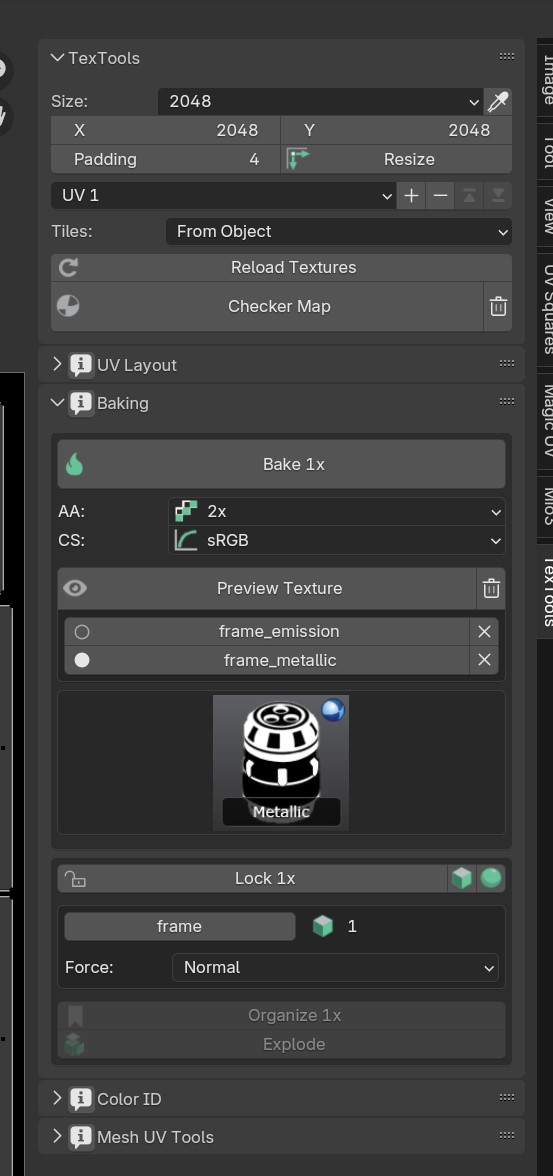
Now we click on this can-shaped item, and change the mode to "AO" (which stands for Ambient Occlusion).
Press Bake 1x :)
Note: If your AO came out grungy, and your computer can handle it, switch the "AA" to 4x!
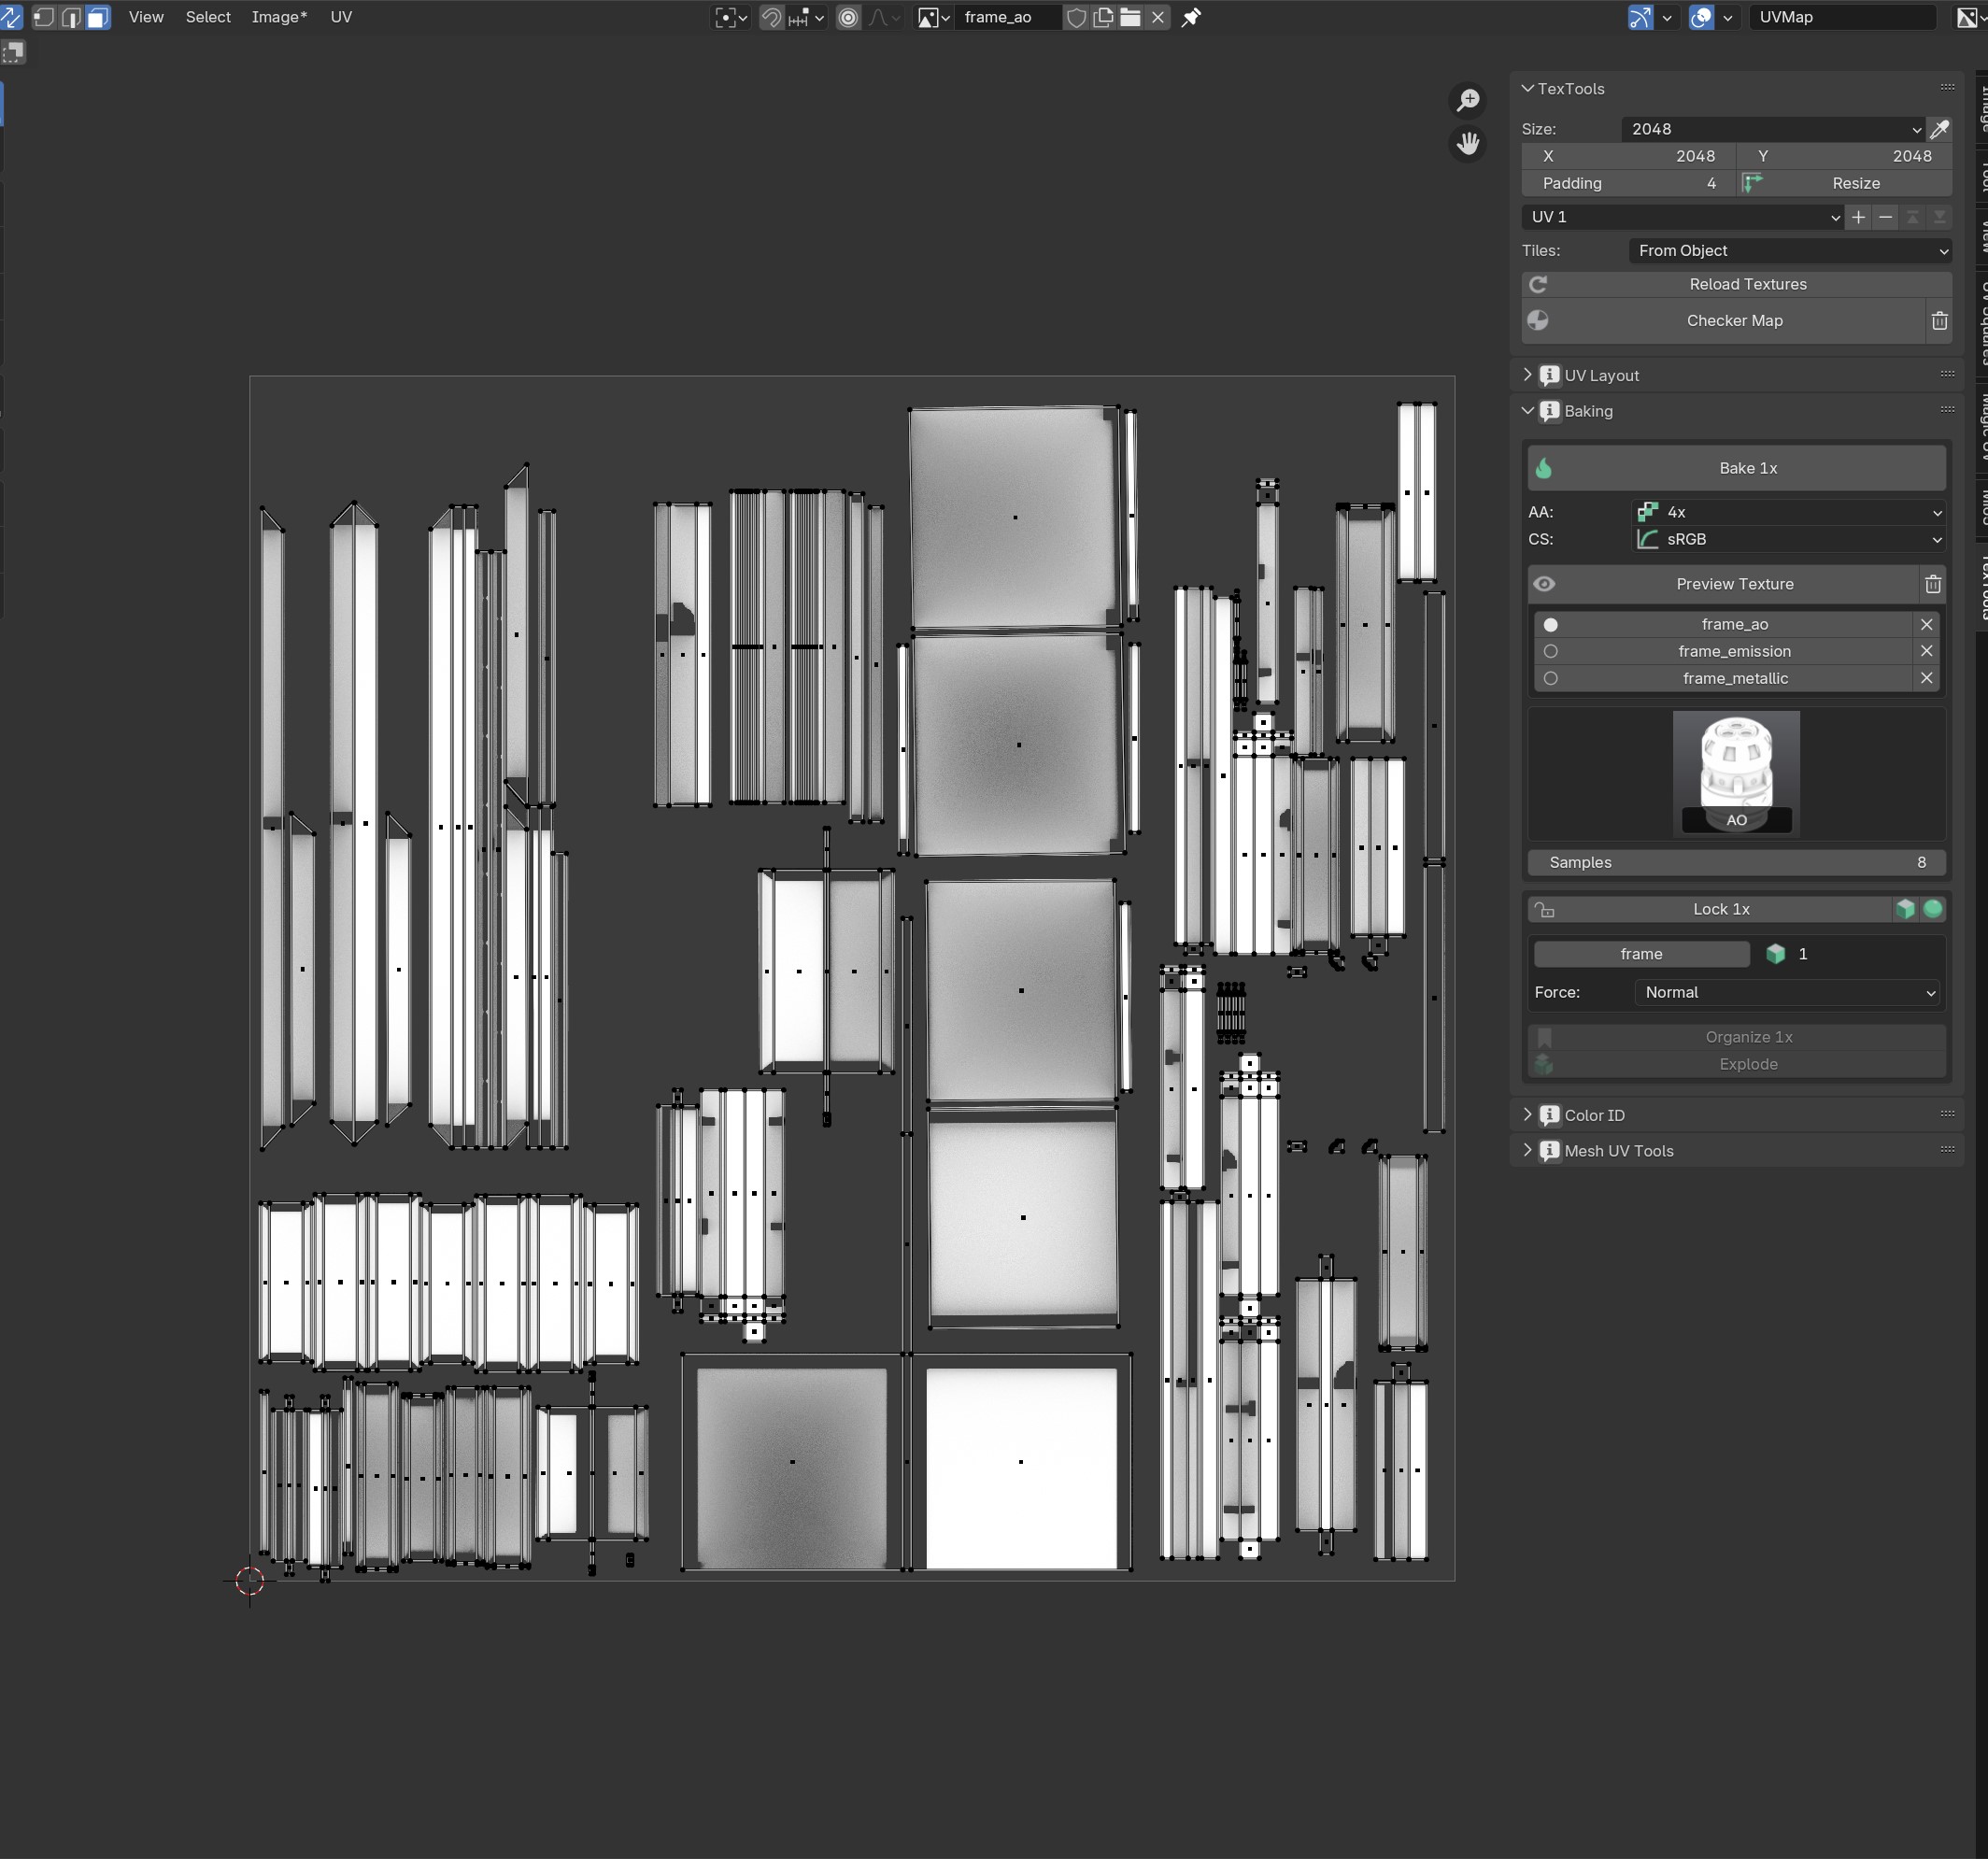
Tada!
Save the image as Image > Save As...
And store it in a folder you can find it back in :)
(Optional) Pre-settting the rougnness and metallic
Skip this part if you're just making a wooden or fabric-y item! Basically anything that doesn't need additional shine or even reflection.
If you're making a shiny/metallic item, we do need to set some values before we can bake what we want in TexTools.
For that, we need to be in the shading tab again. This tab can be found at the far top called "Shading".
From here, we want to play around with the metallic and Rougness values. Set them to whatever works for you! :) The preview screen should change the mesh's shininess as well as you do this.
 (Source: https://manual.reallusion.com/iClone-8/Content/ENU/8.0/40-PBR/PBR.htm)
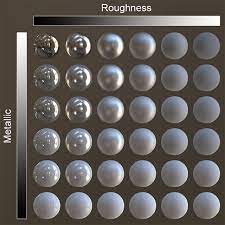
Here's a great guide of what it will look like in-game! Black = 0.0, white = 1.0.
Baking the Metallic & Roughness map
Even if you're making a more matte-y mesh with wood or fabric, this step IS required! So make sure to do this!
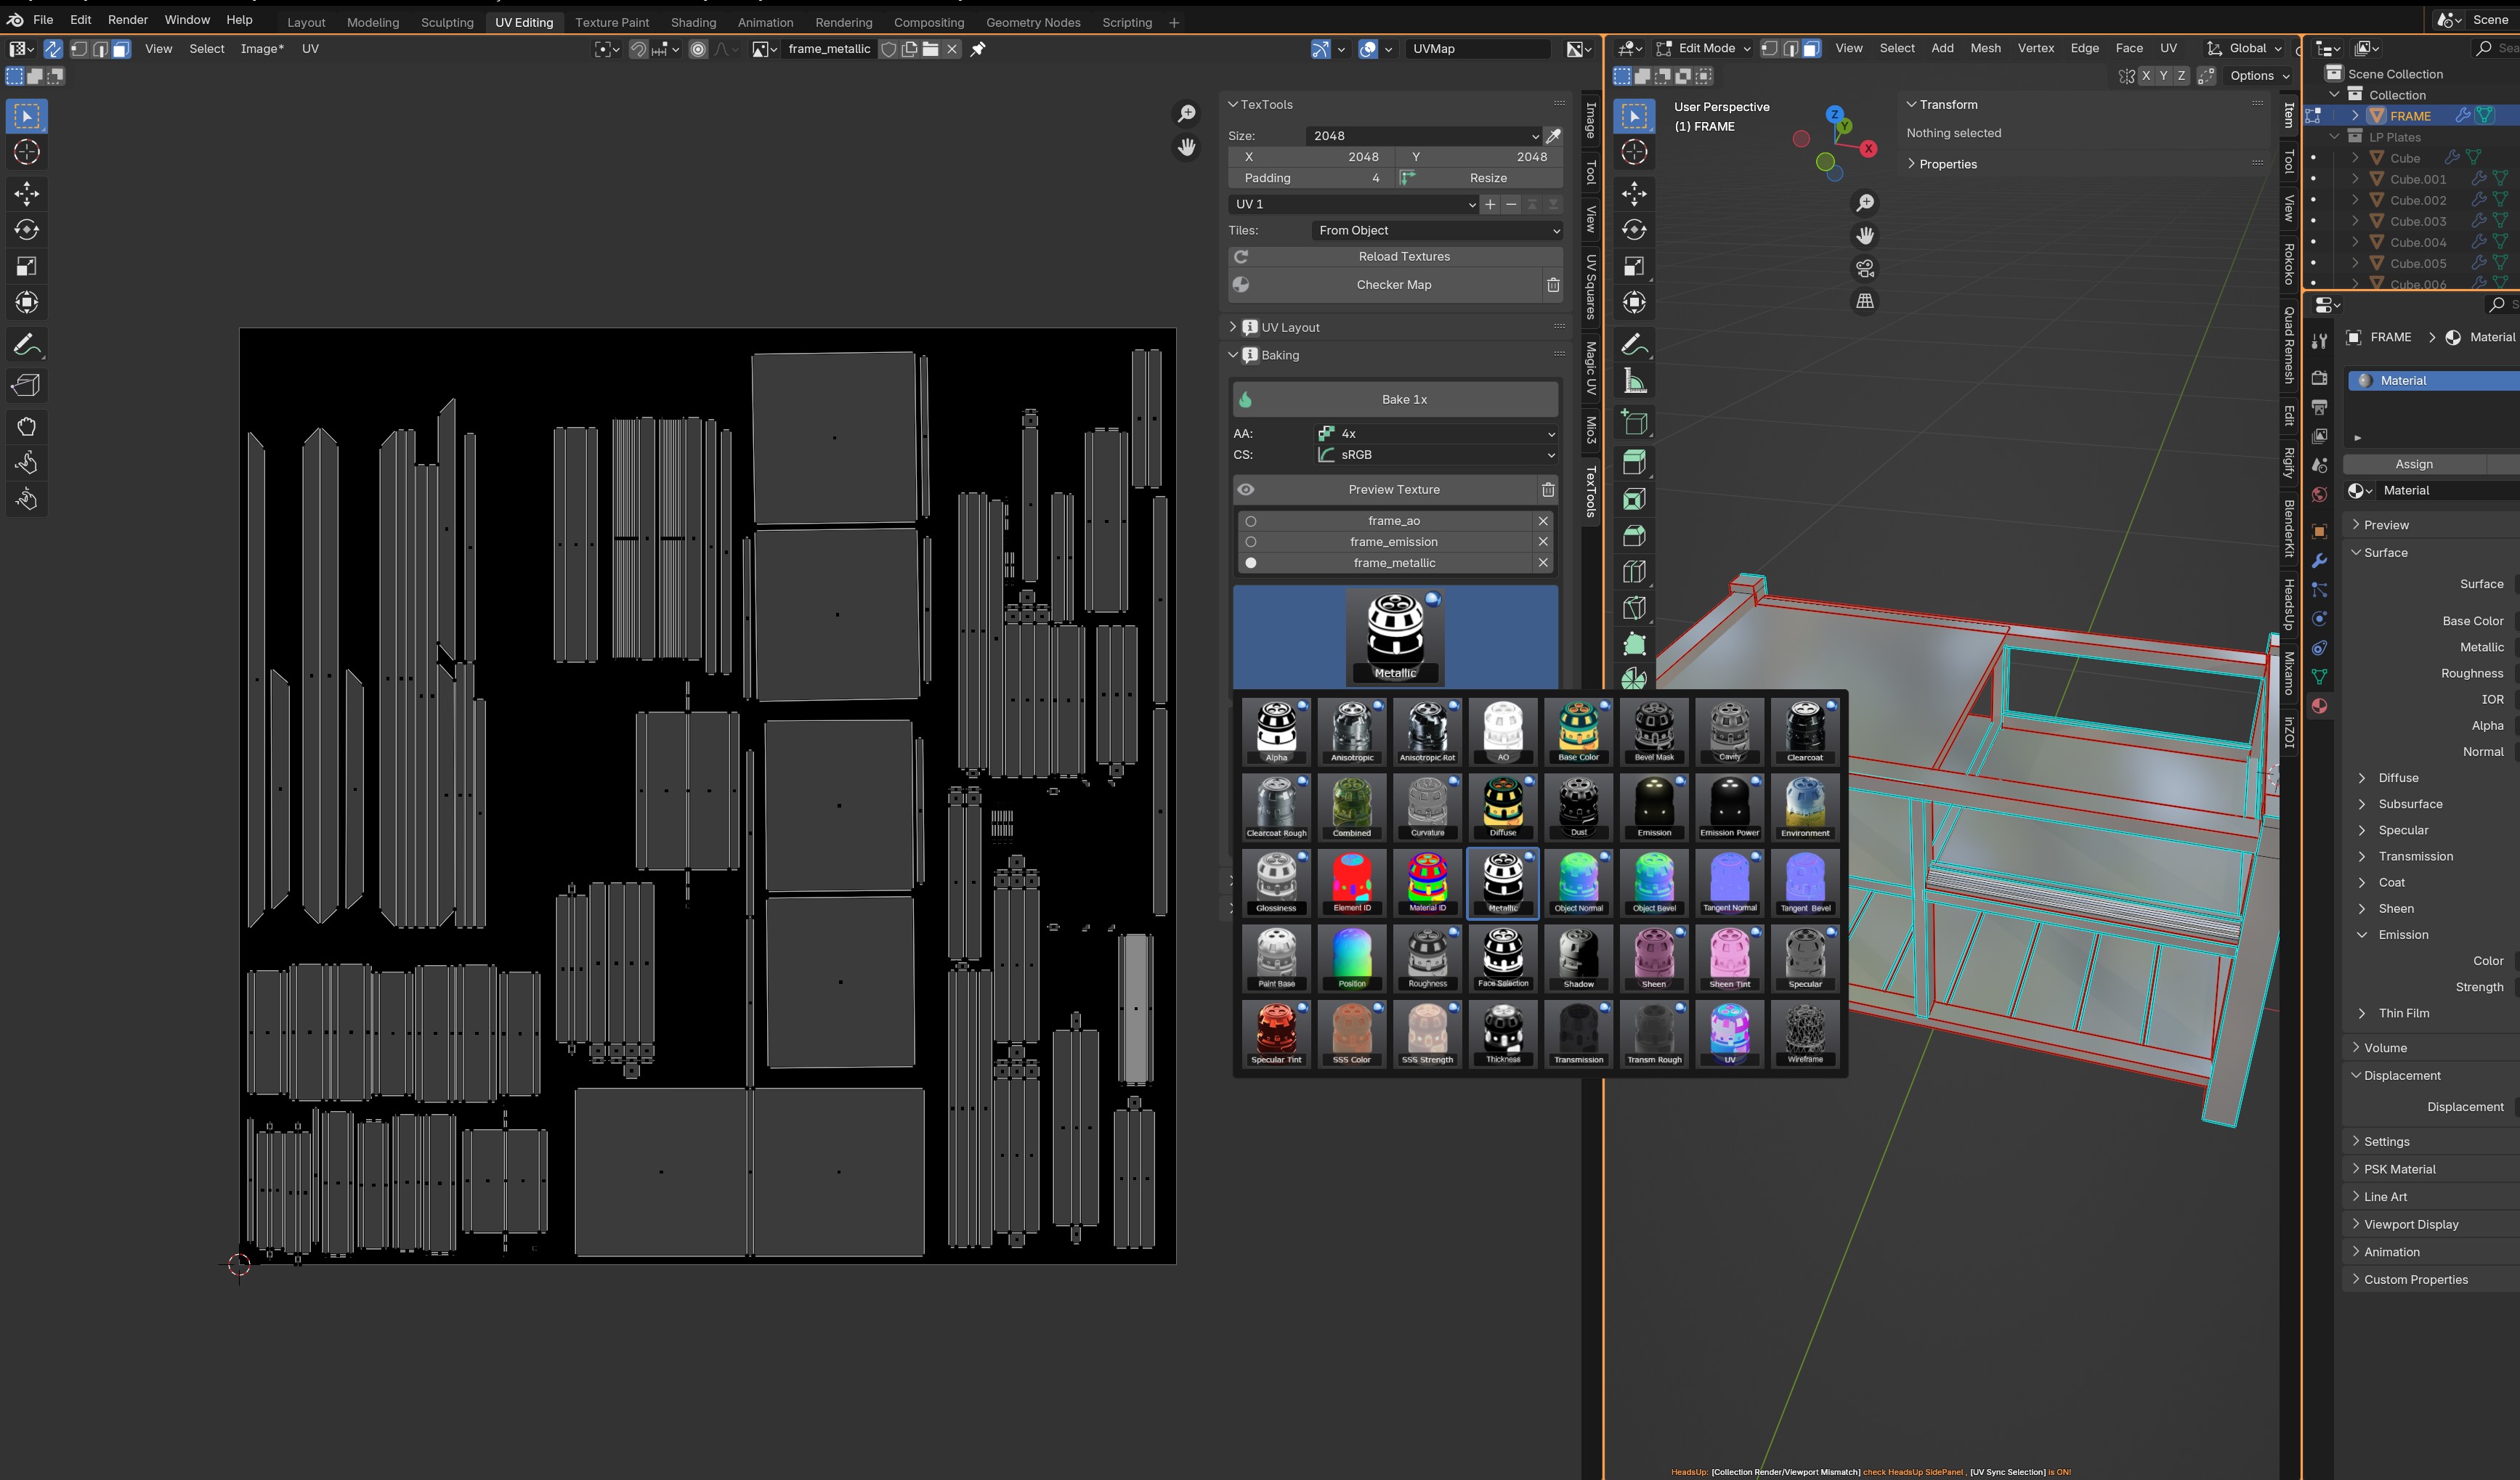
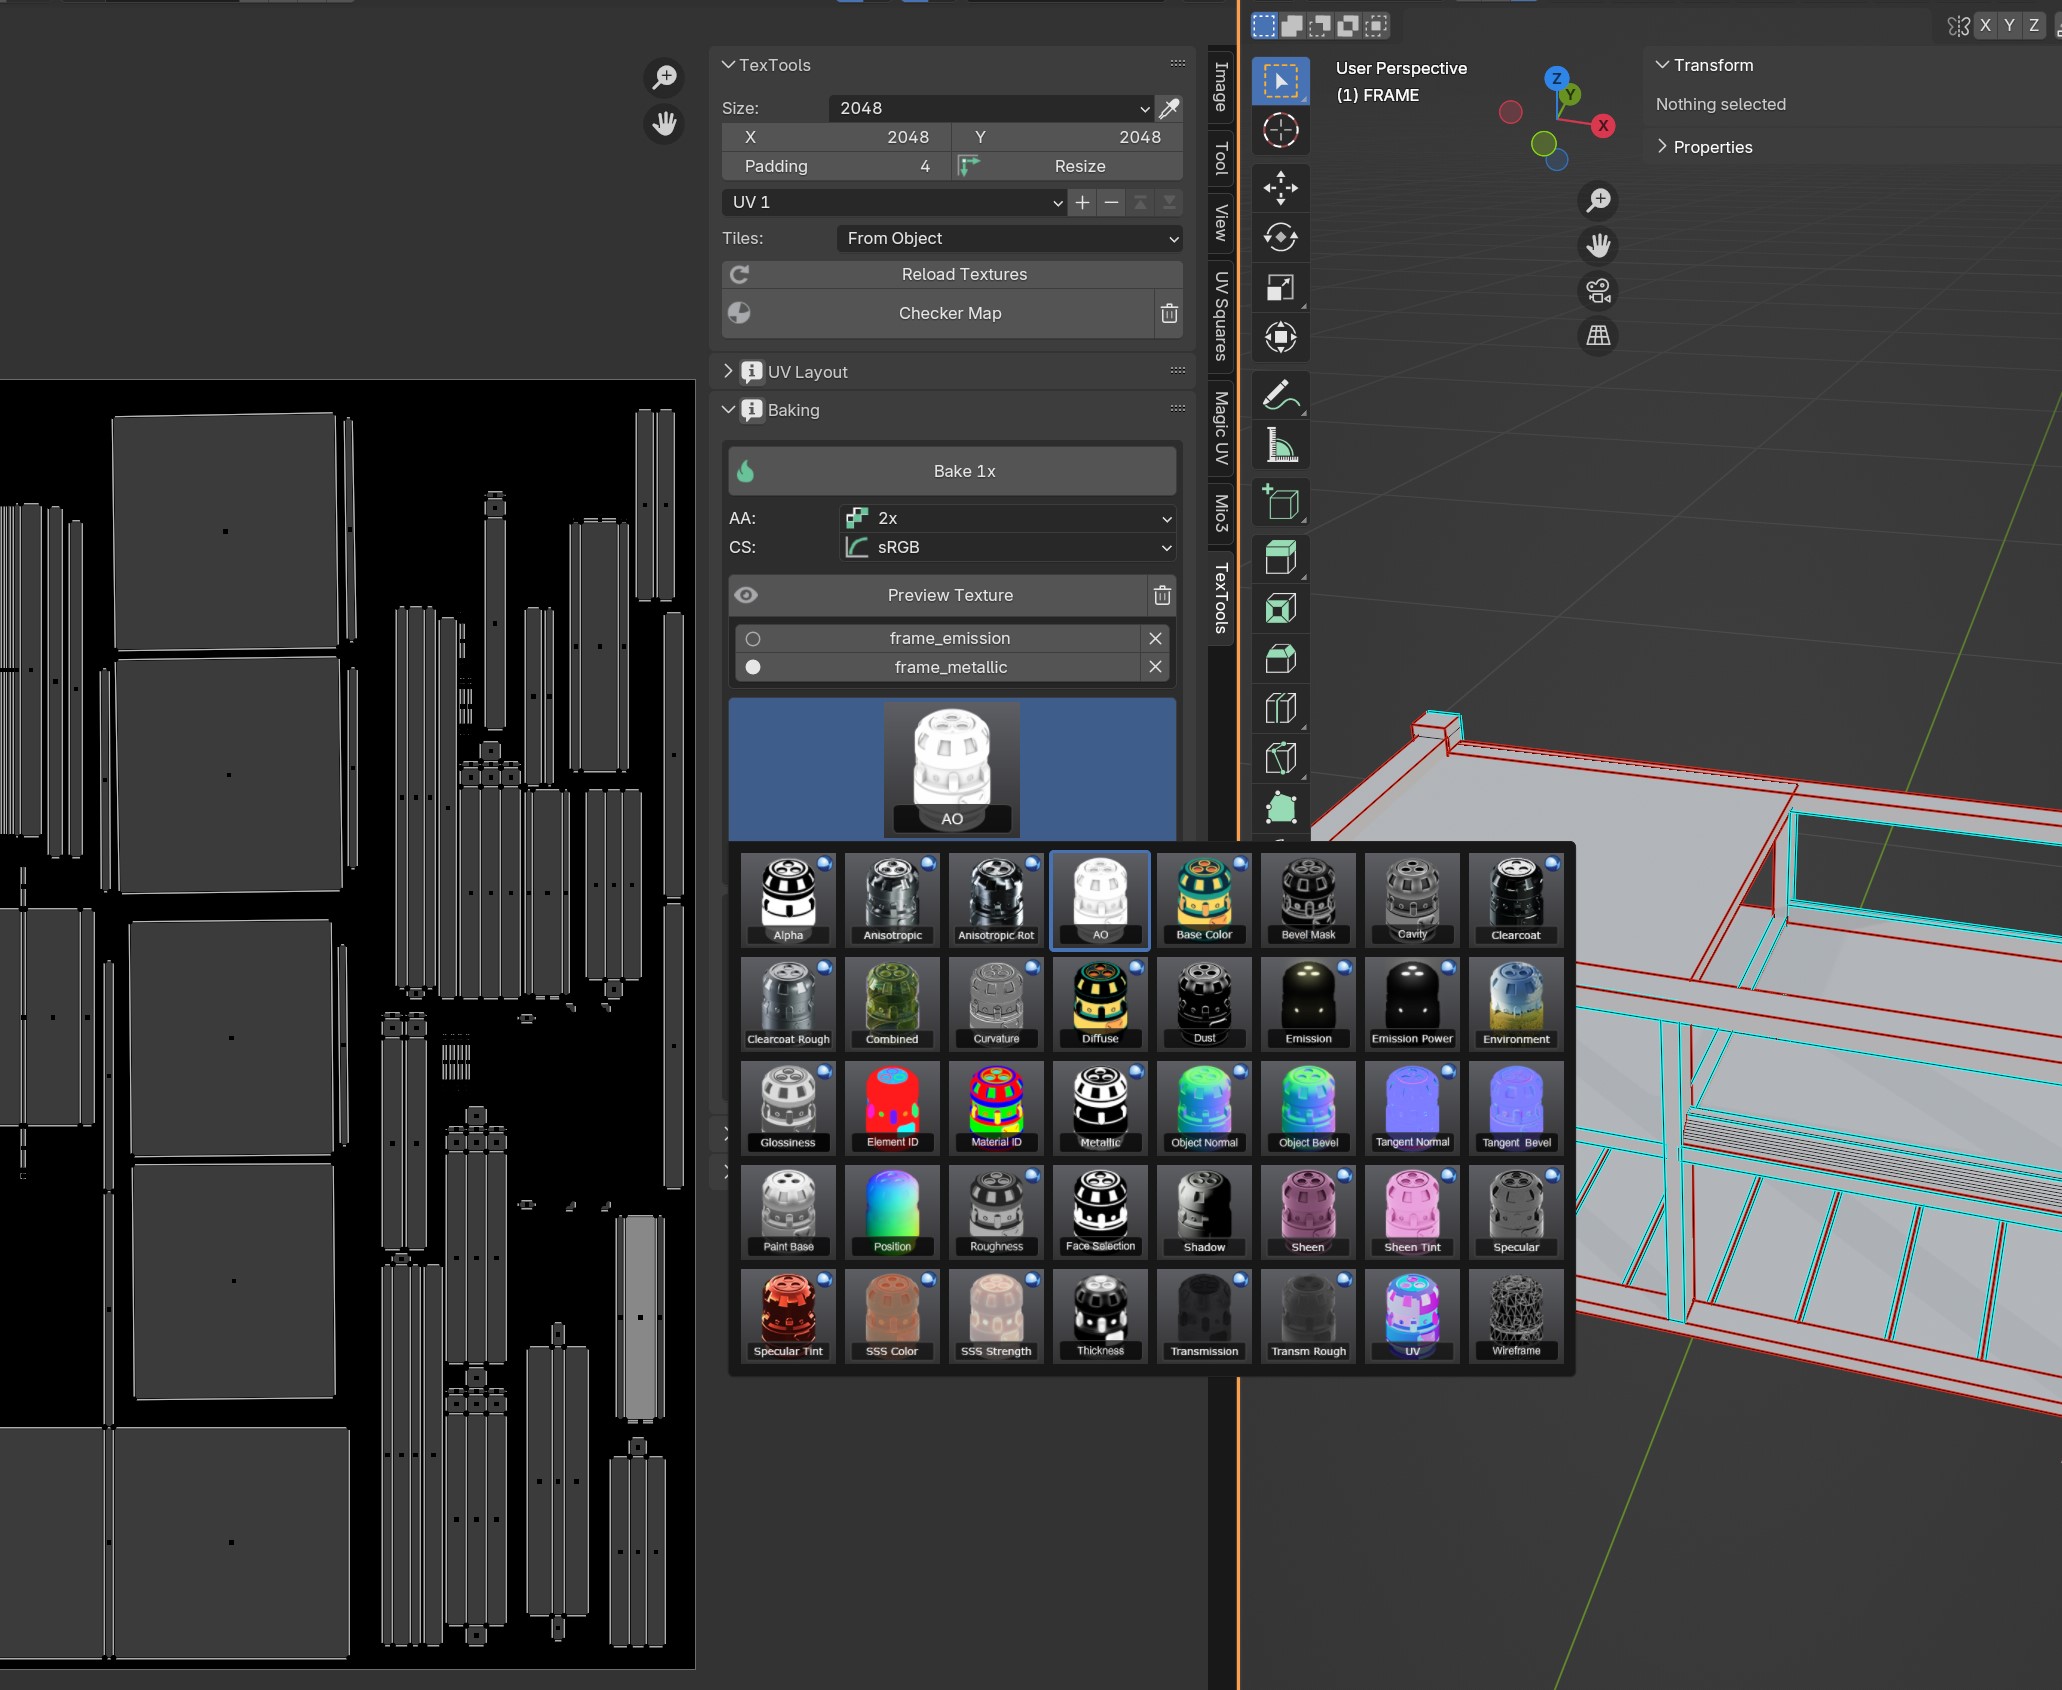
Click on the can icon again, and then "Metallic"
Press "Bake 1x".
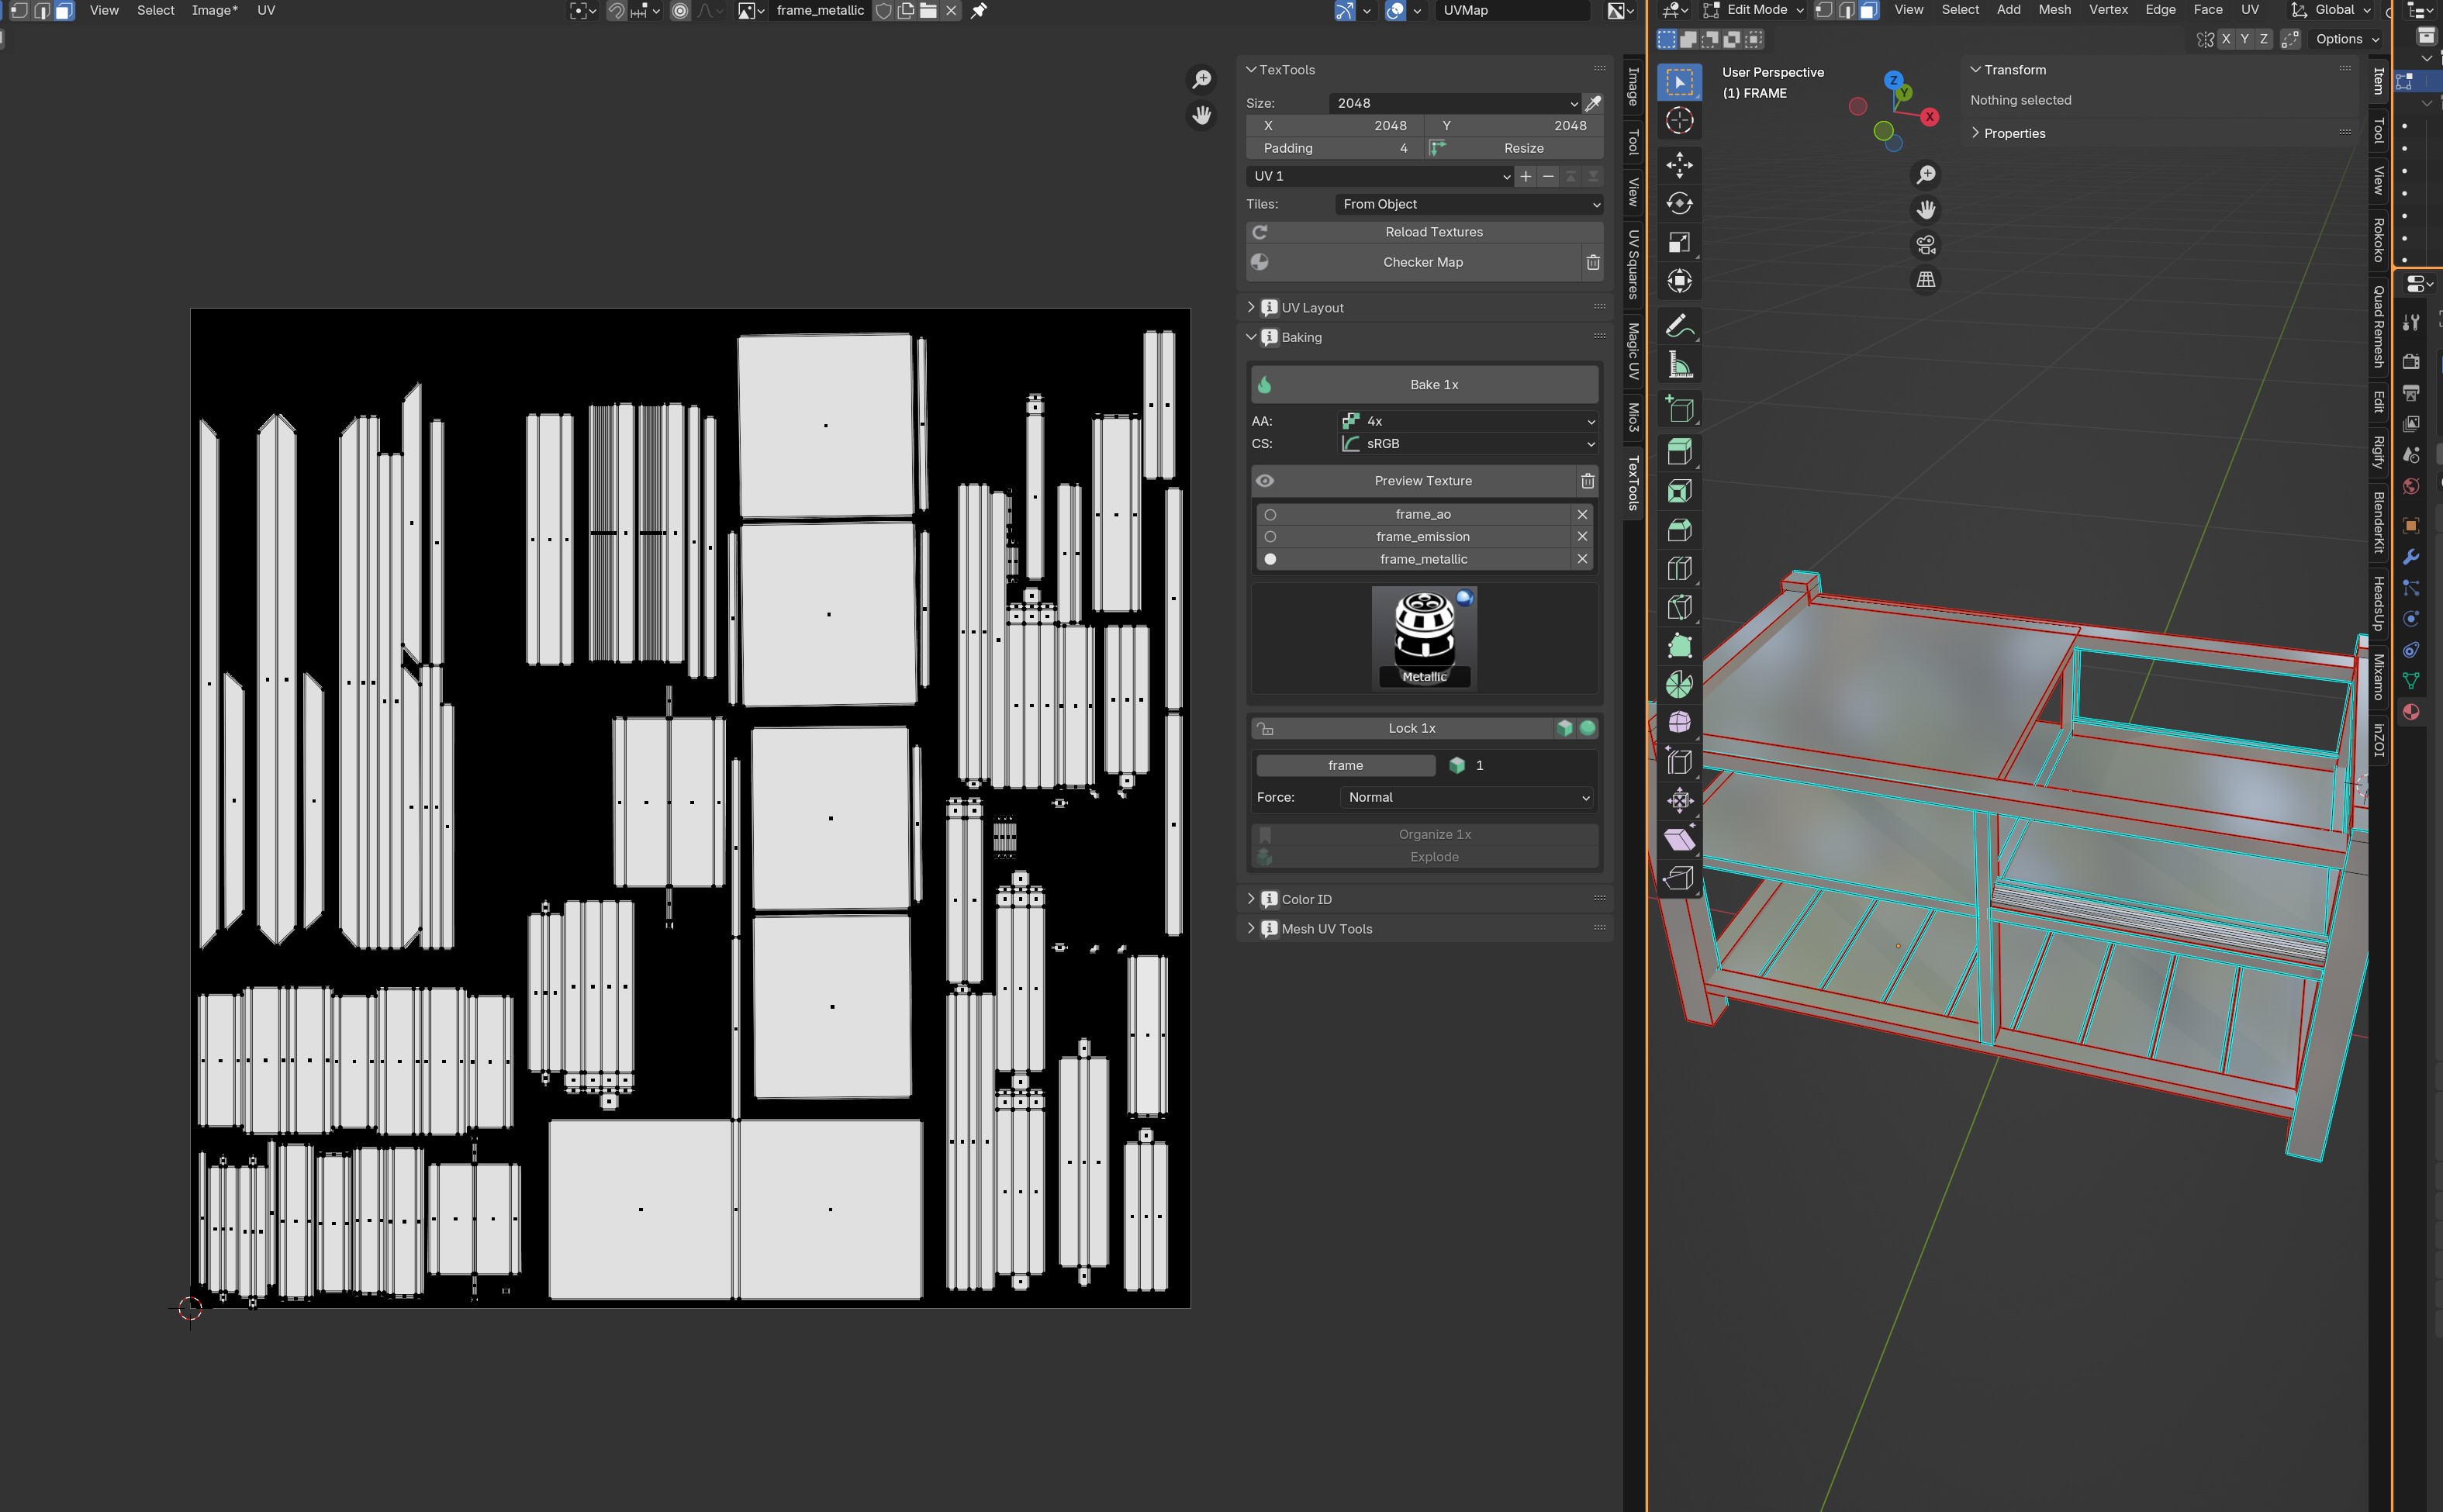
Cool! If you didn't set the metallic value at all, this texture will be black, which is totally fine! Especially if your mesh is supposed to be used with wood or fabrics!
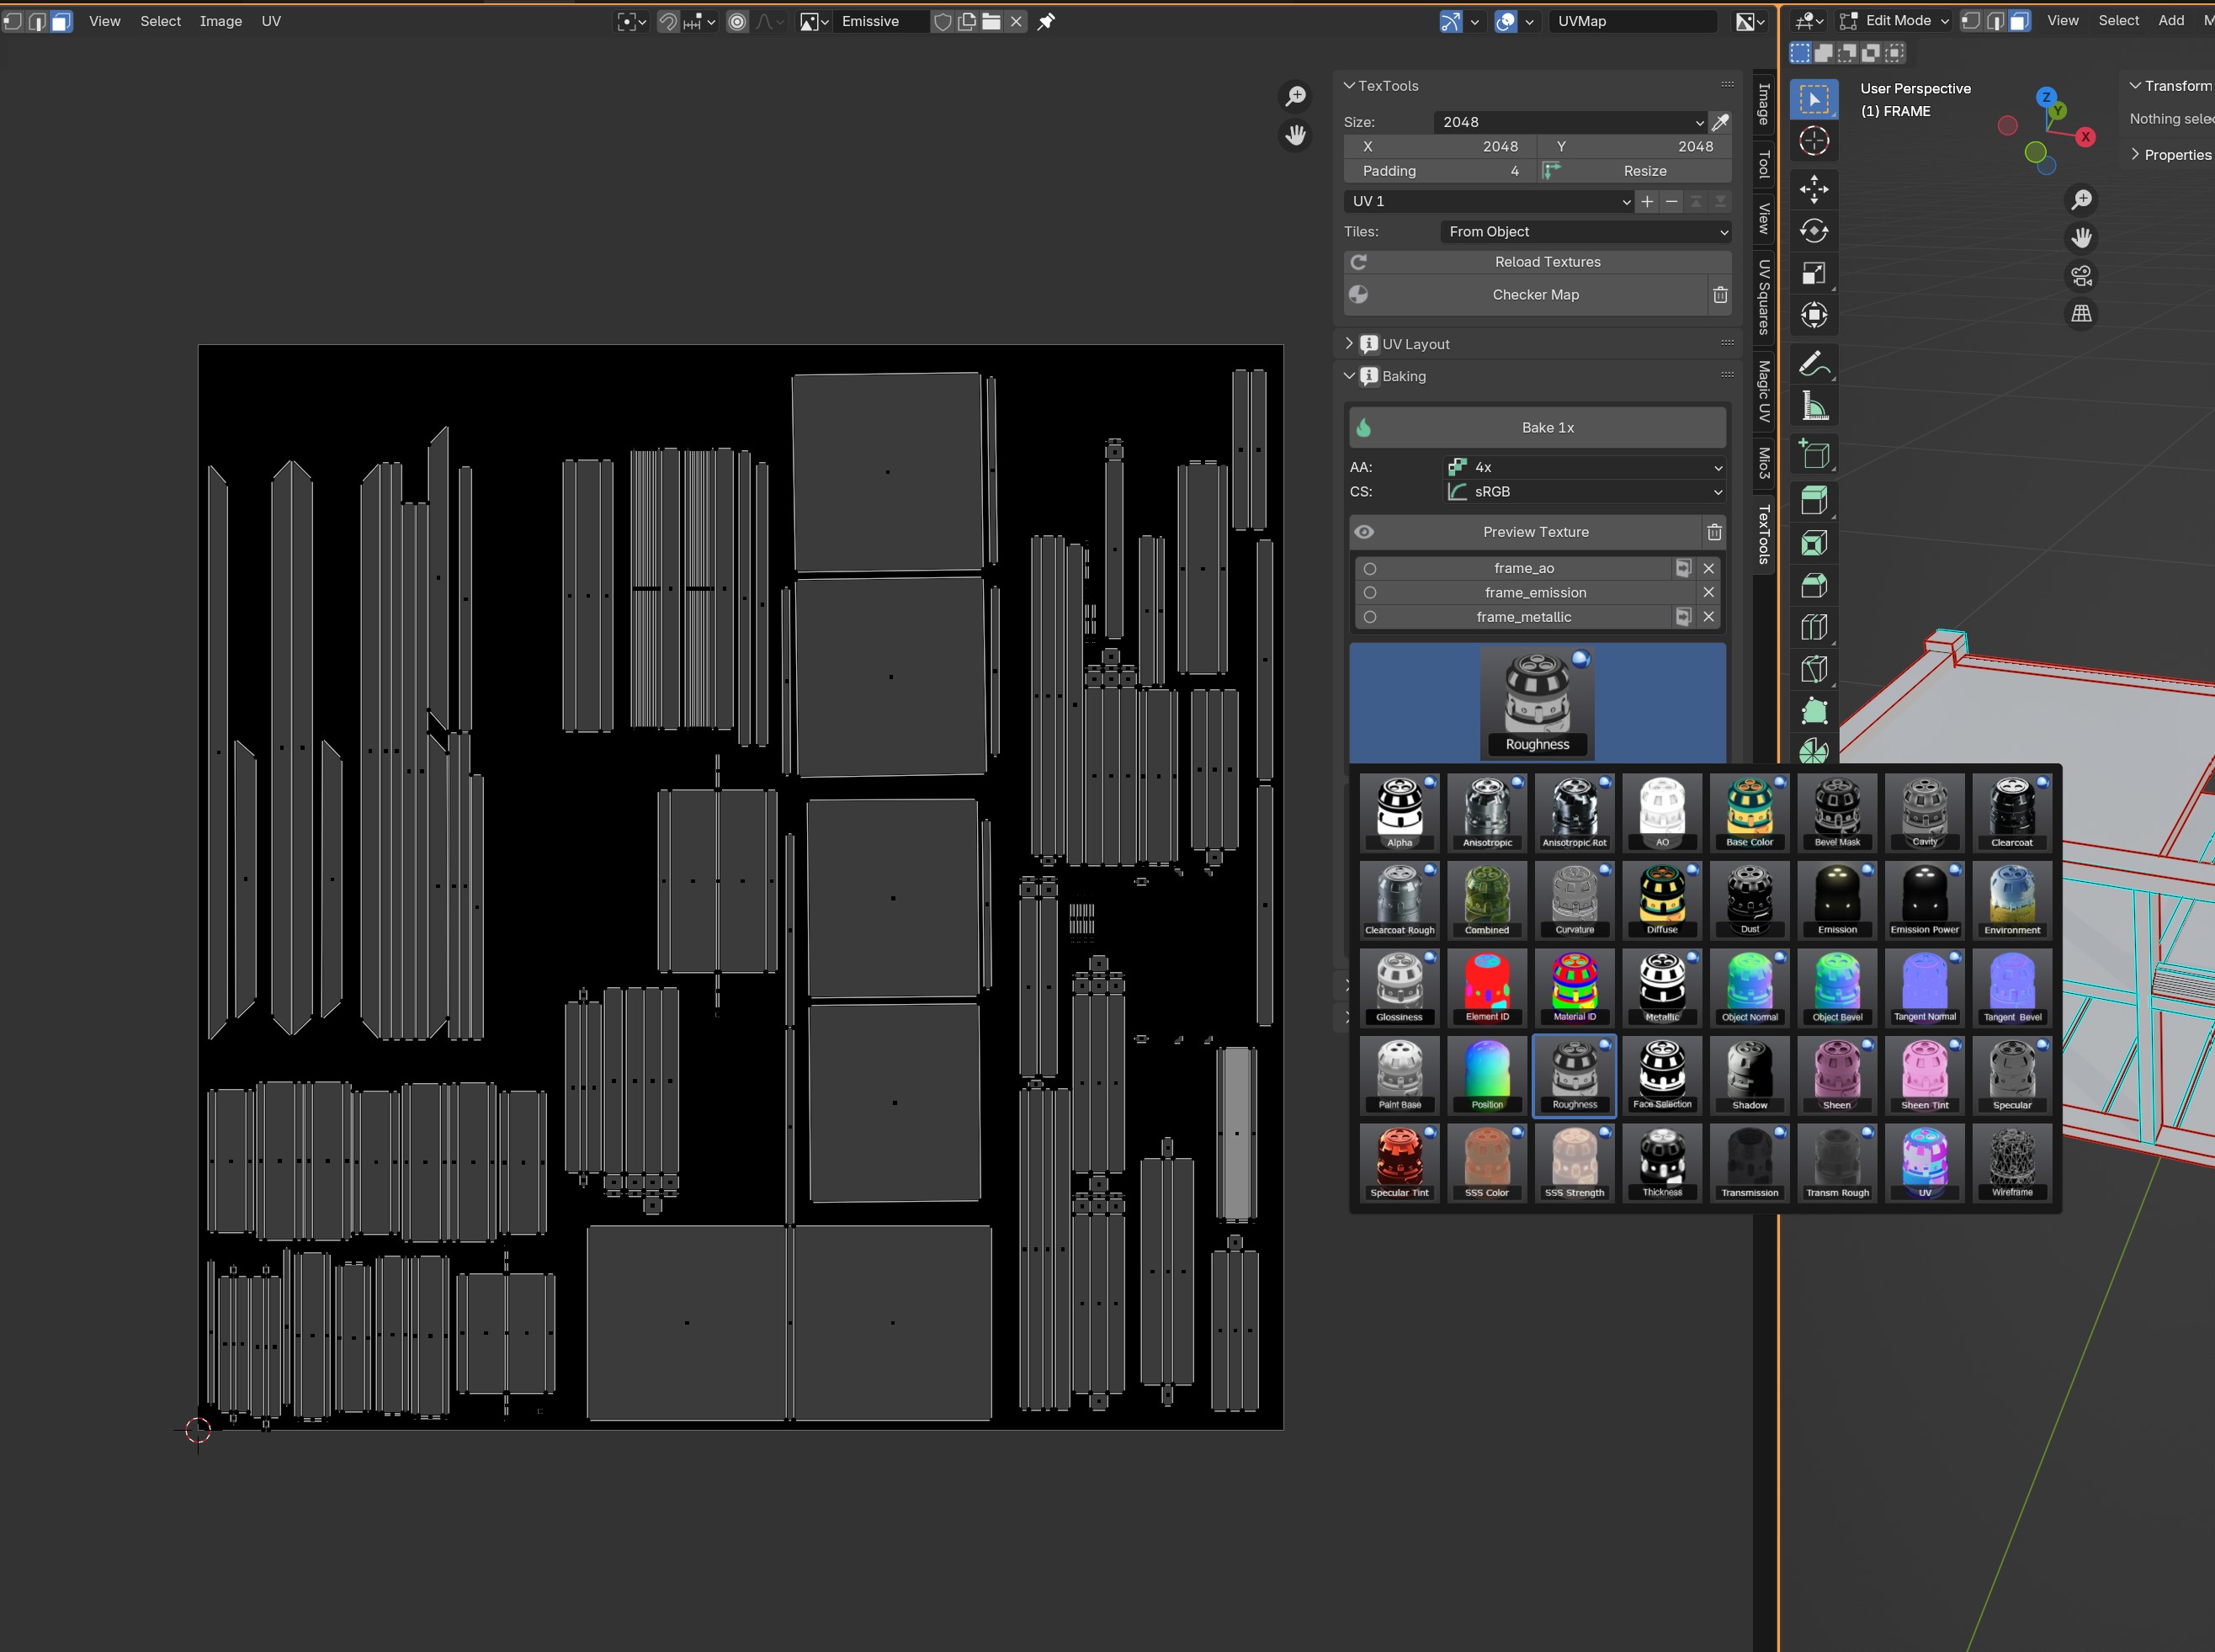
And now the same for our Roughness map!
Note: There are multiple Roughness settings in here. Do NOT use "Clearcoat Roughness" or "Transm Rough". Those are a completely different beast lol. Just go for "Roughness" itself.
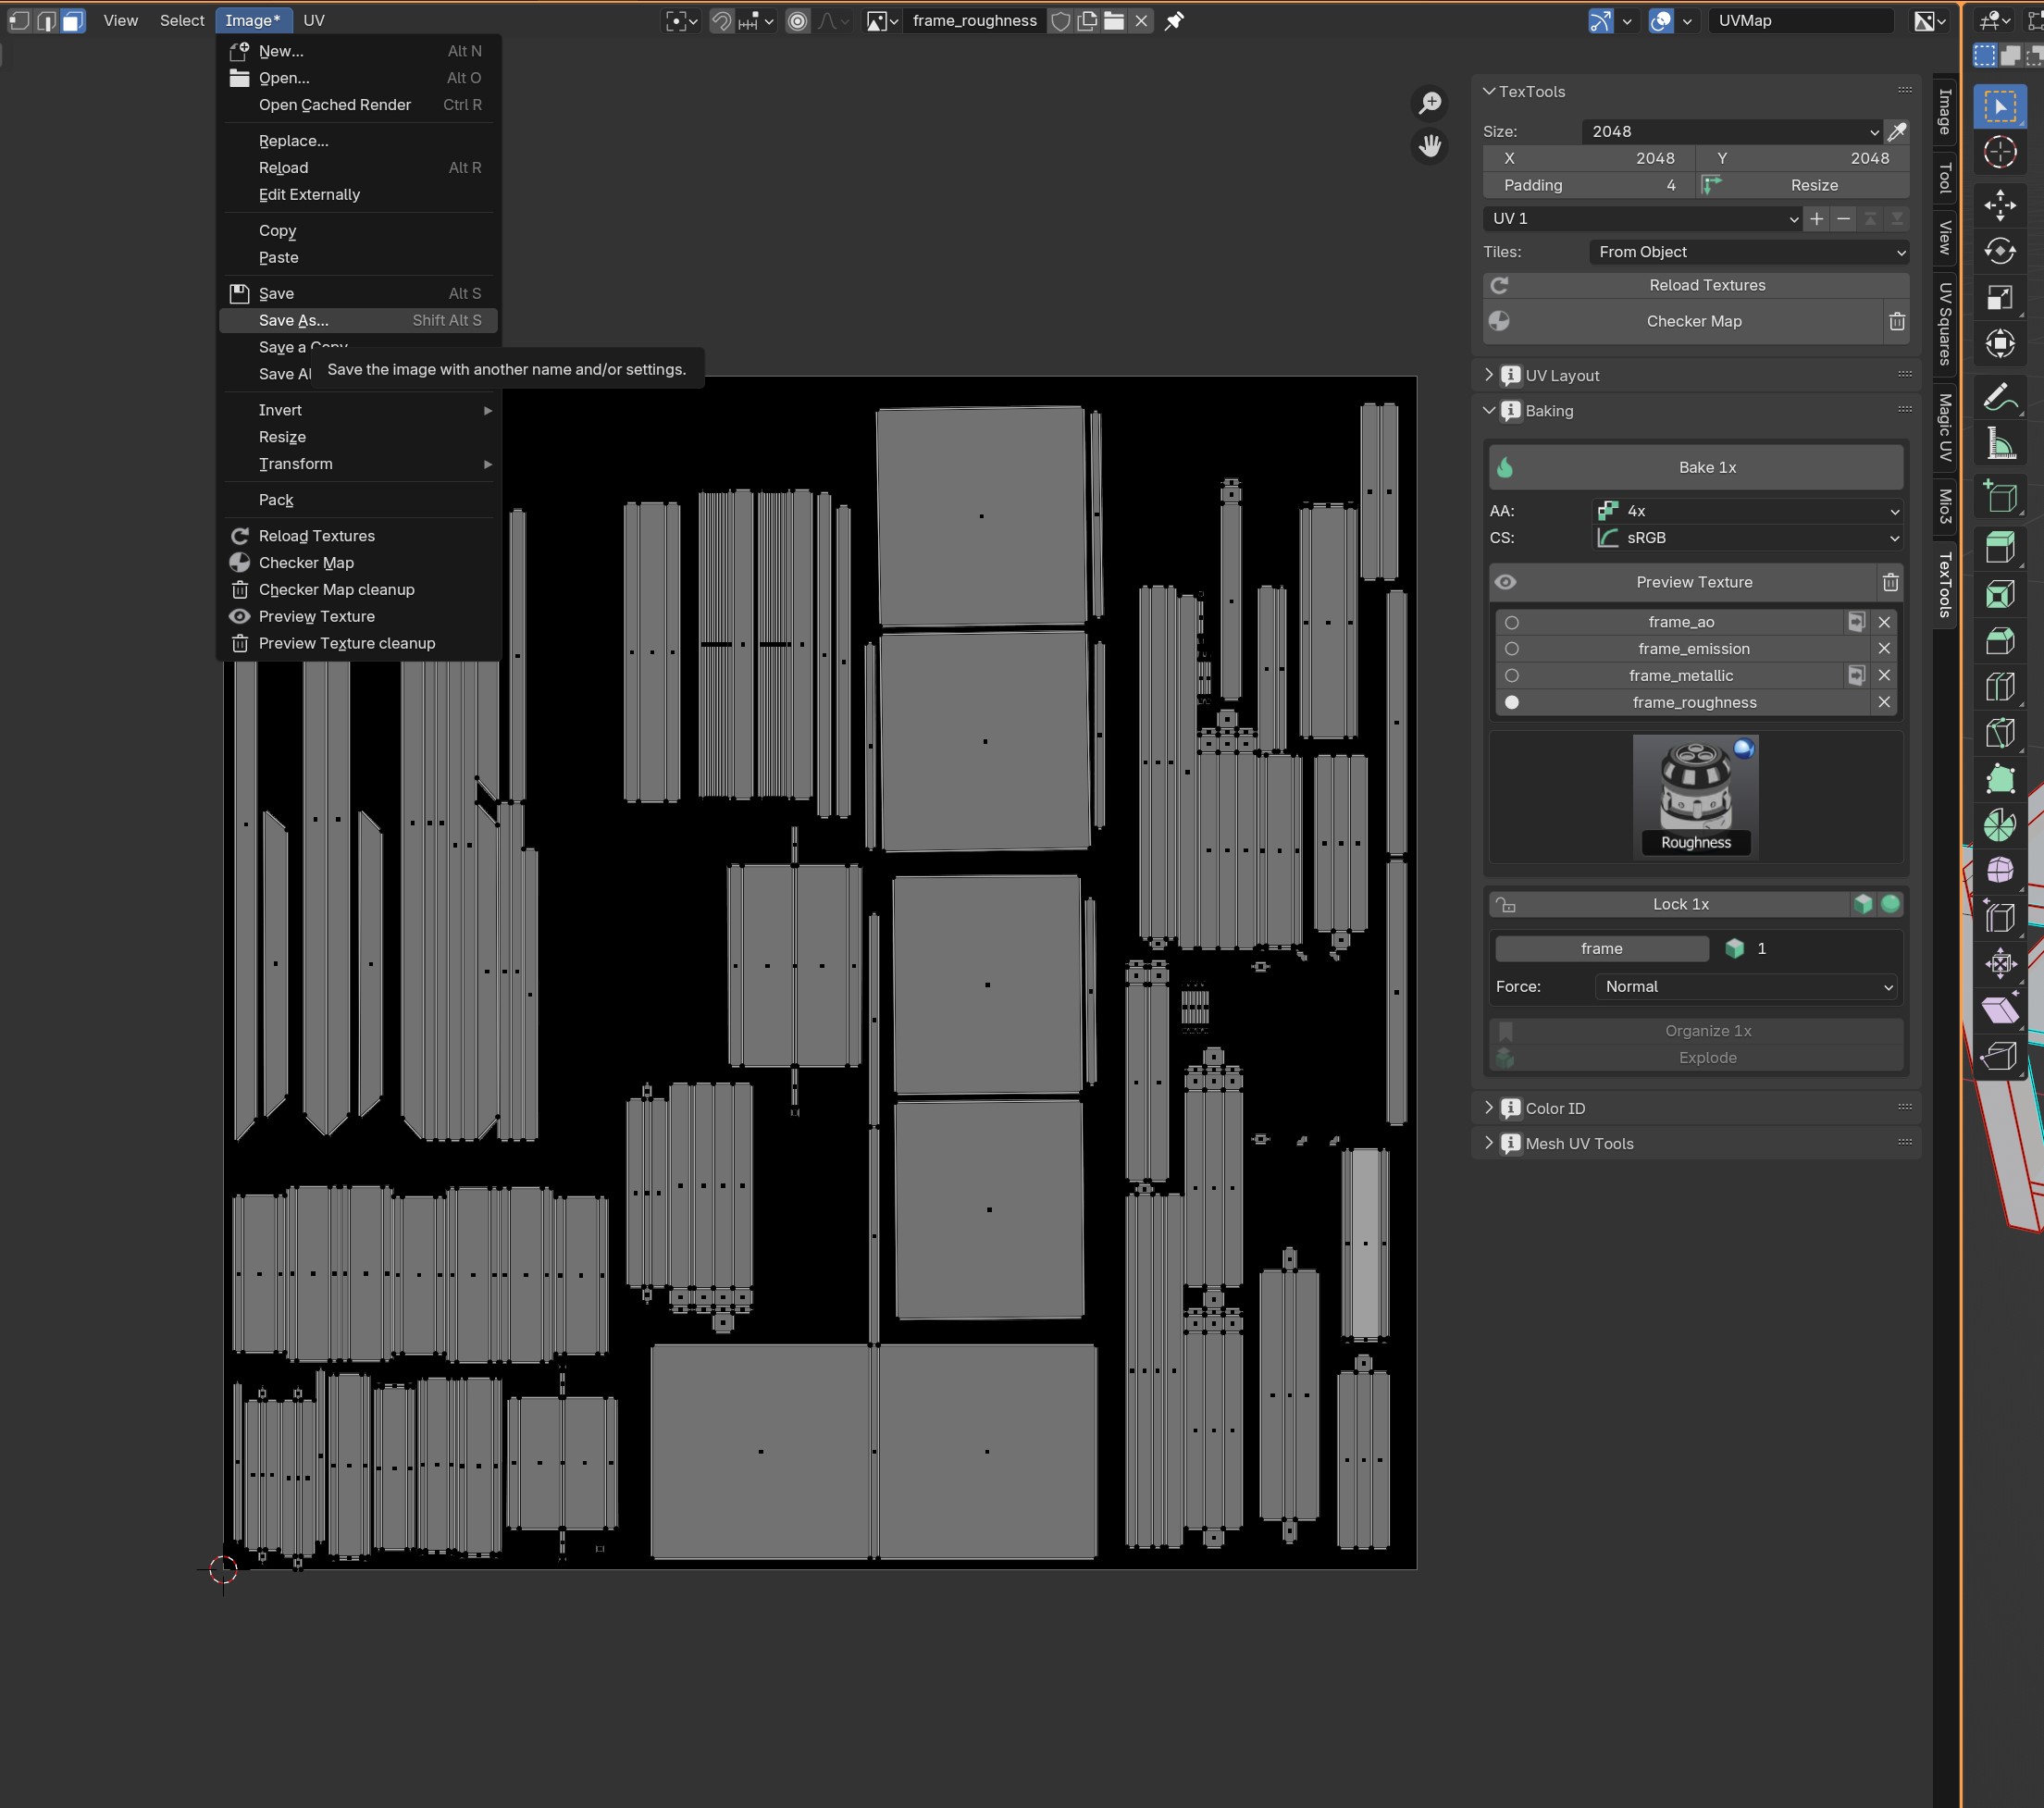
And save that one as well! :)
(Optional) Making the Mask/Color Id
Note: This is ONLY needed if you want your item to be recolourable! Otherwise, skip this part.
Making things recolourable in InZOI is easy, but it does require a few steps to get this going. Before we get into that for the ModKit, we do need to prepare one more texture map and that one is the "Mask" (or also known as the color Id texture), so we can tell the game which regions can be recoloured as a different colour/material.
Before we begin, keep in mind that there are really only 3 main channels you can make recolourable! The rest will be a gradient of each other (yep you can even have them "Flow" into each other ;).
The main colours are:
- Red
- Blue
- Green
Unlike the sims 3, InZOI cannot use alpha channel to read a fourth colour.
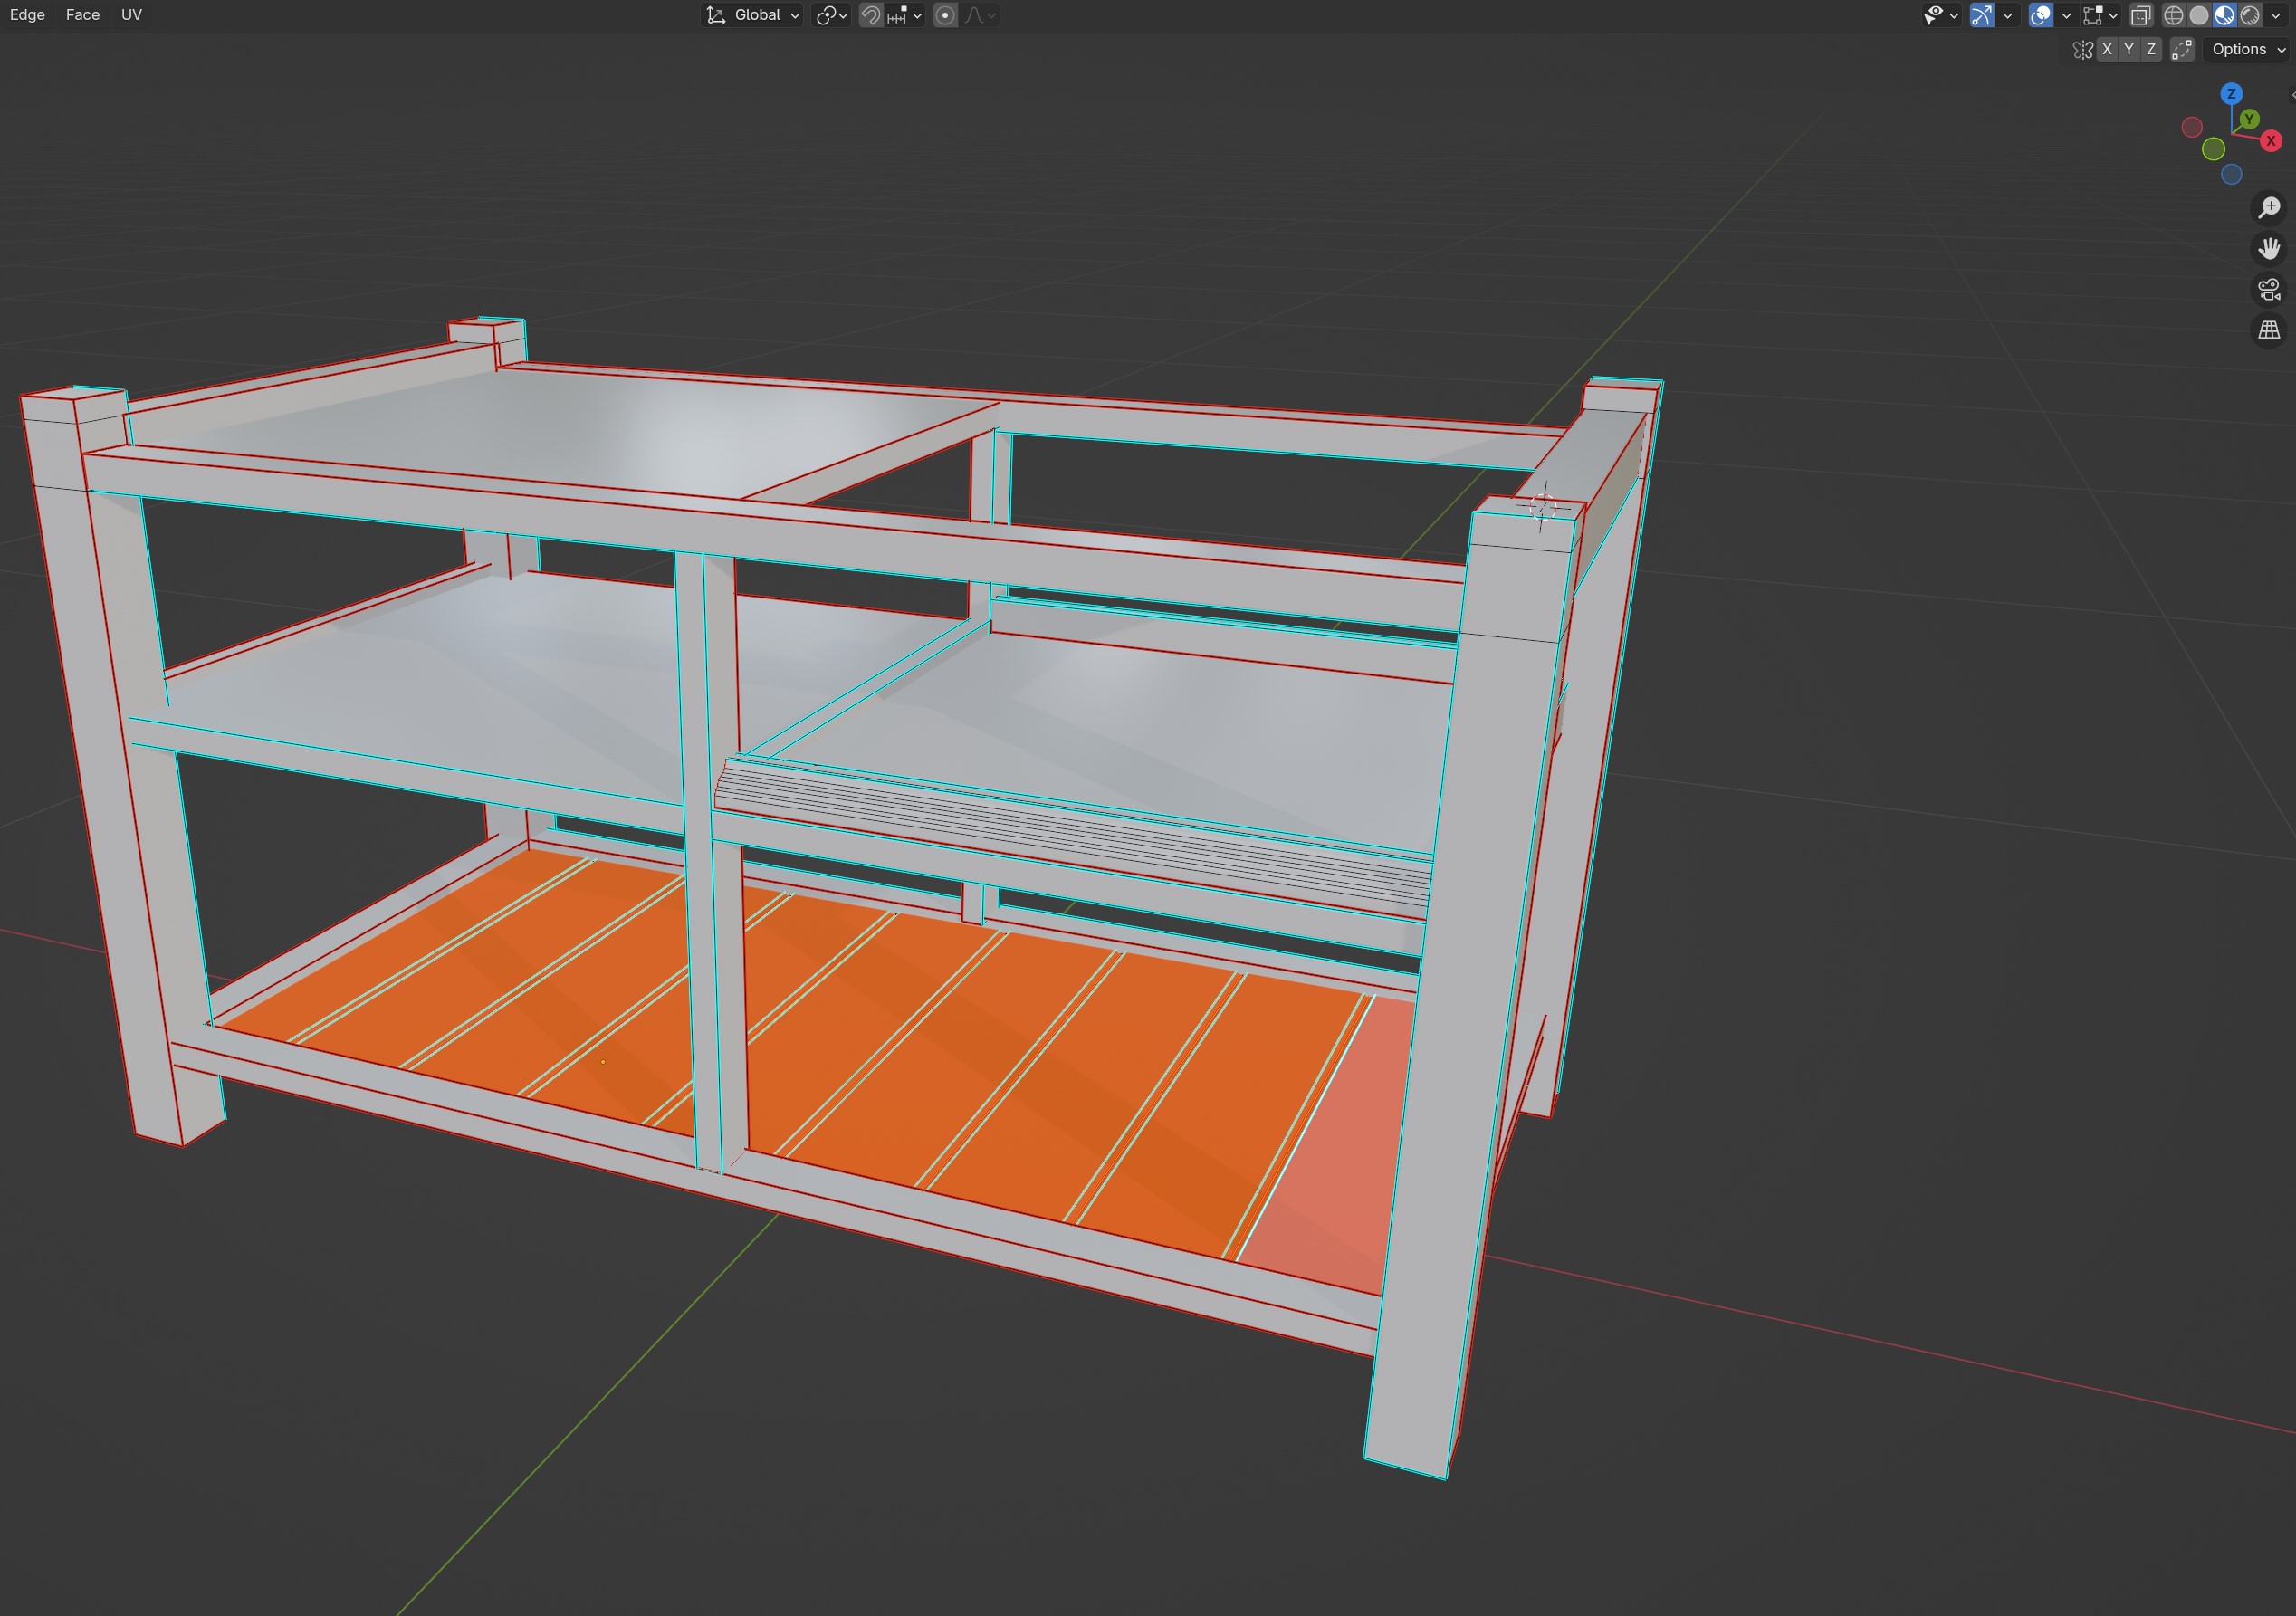
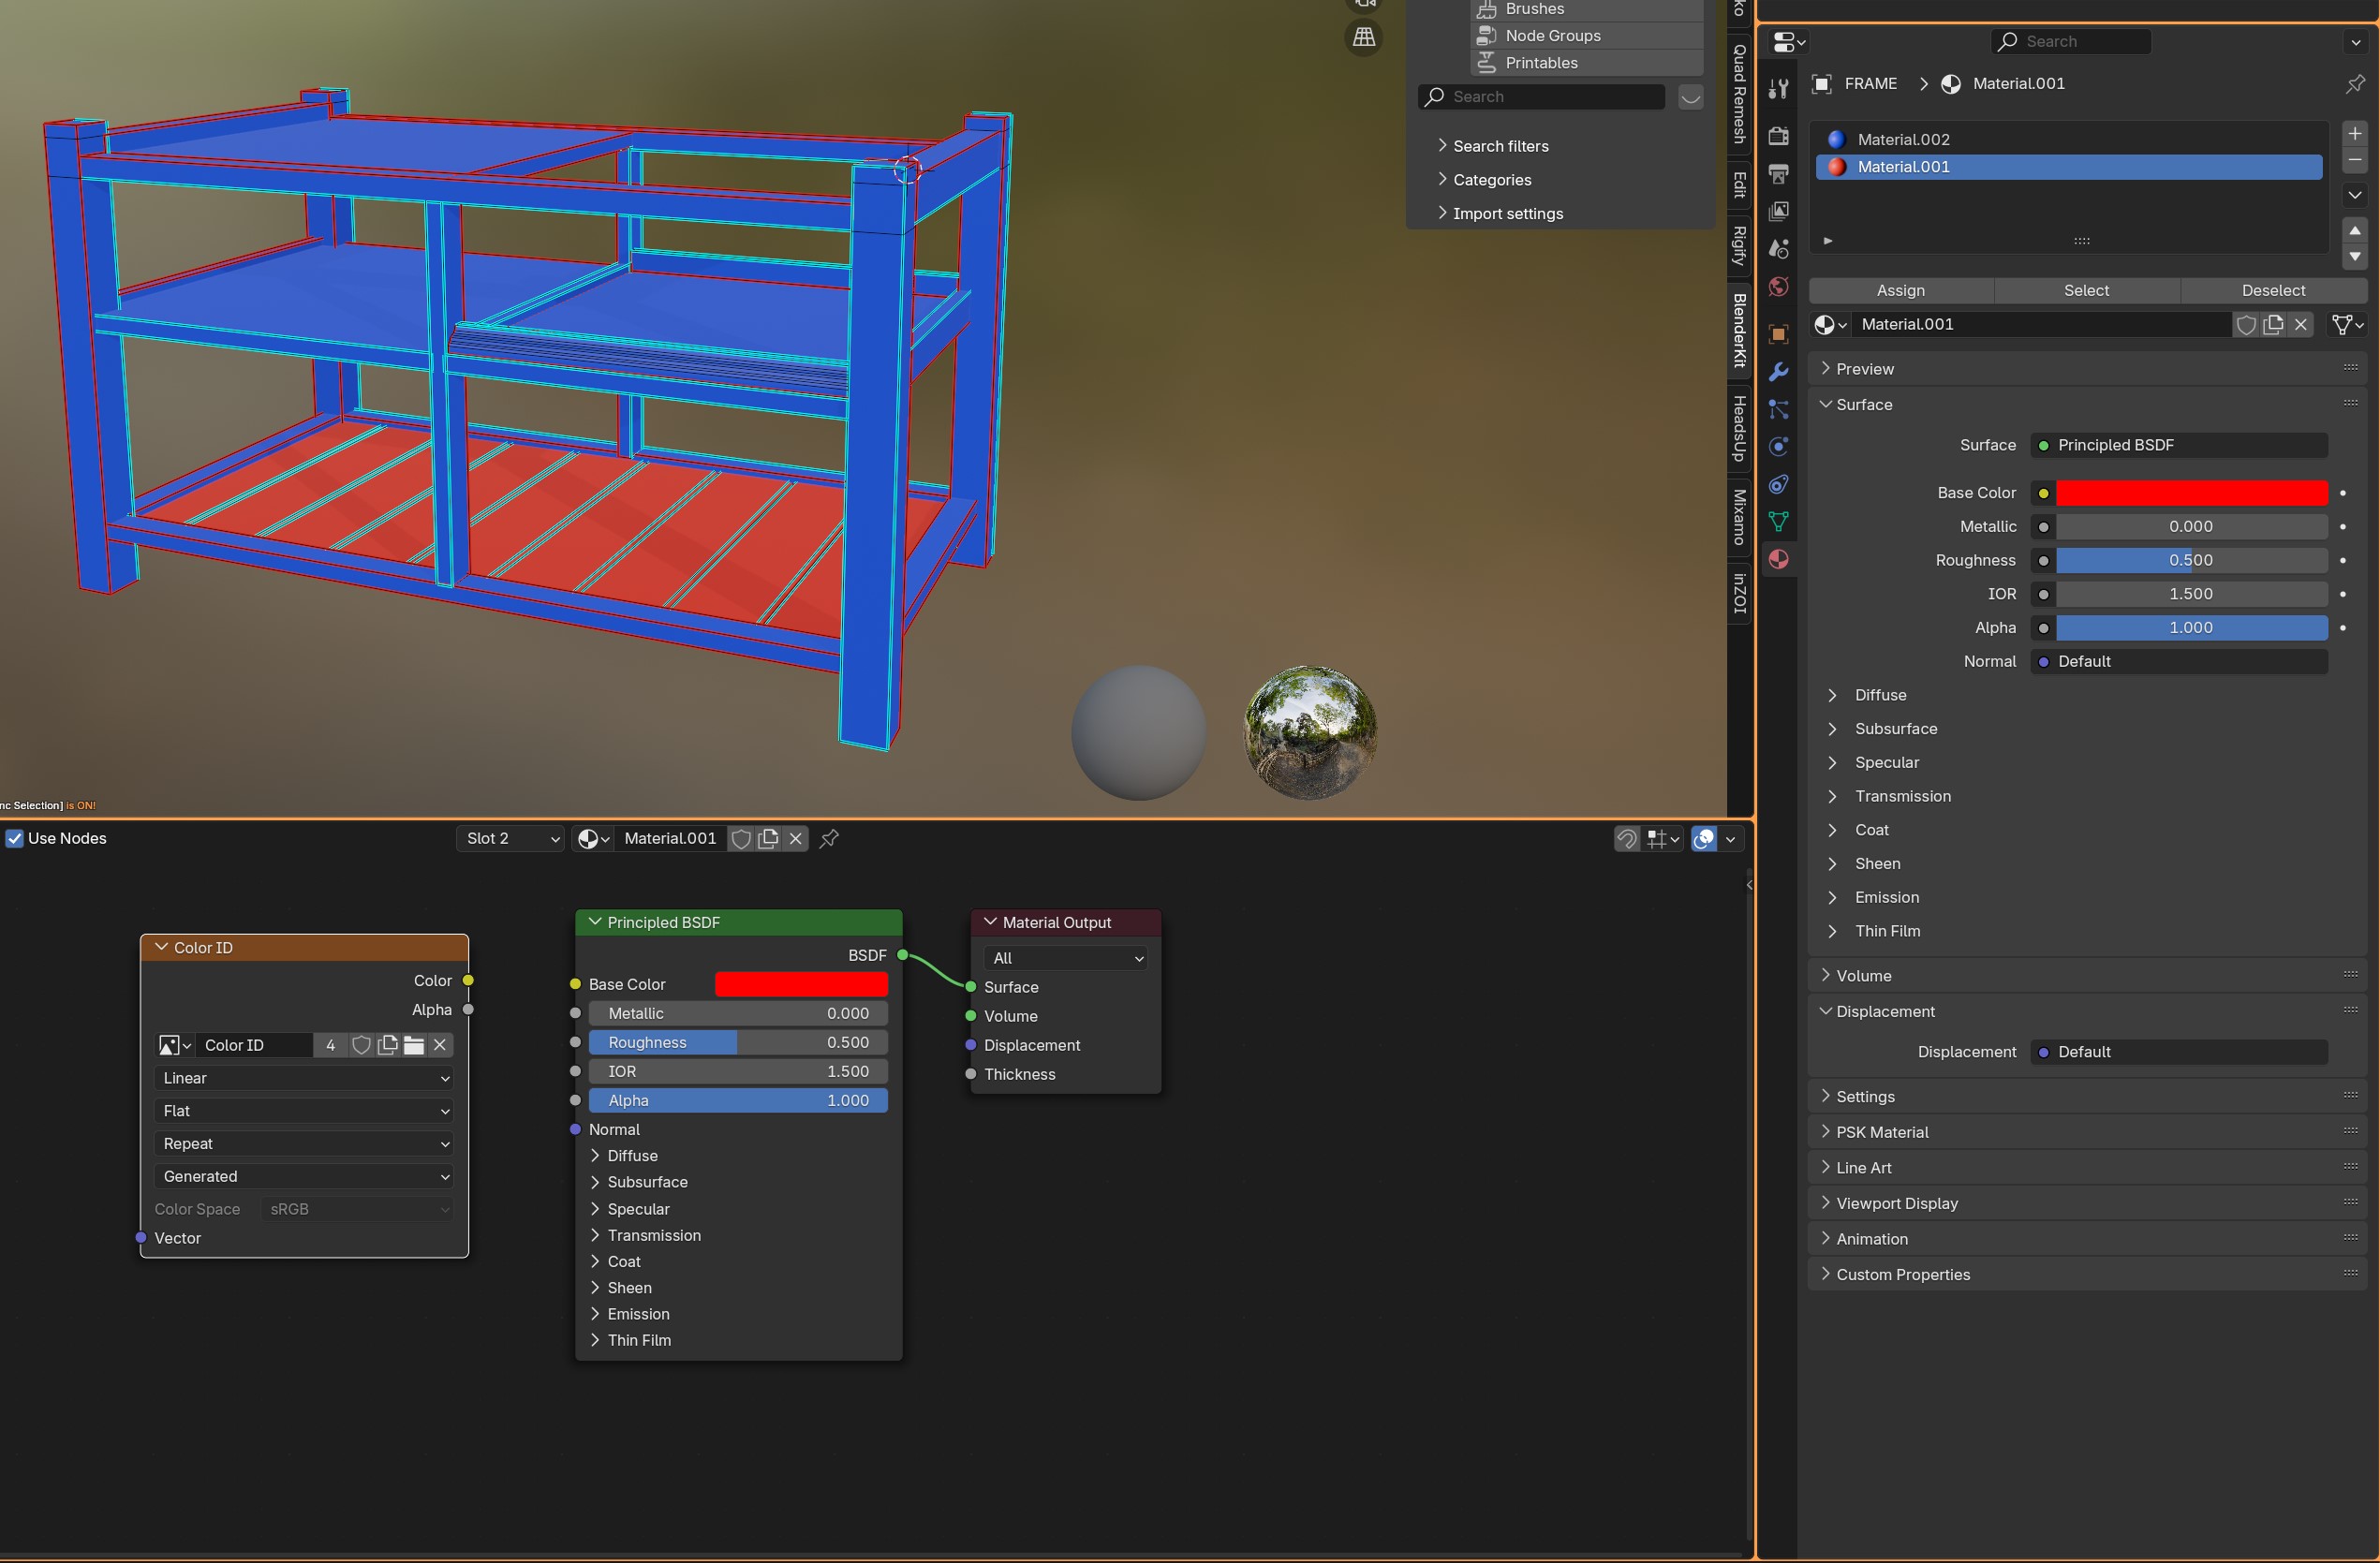
First, select a 'region' of what you'd want to be a different material or whatever the player should be able to recolour. In my case I want 2 different regions! :)
Make sure you're in Object mode for this one!
In the material tab (Red ball icon) we want to press the "+ Button" on the right of our list that currently has "Material" in it.
Click that newly generated material in the list and press "New".
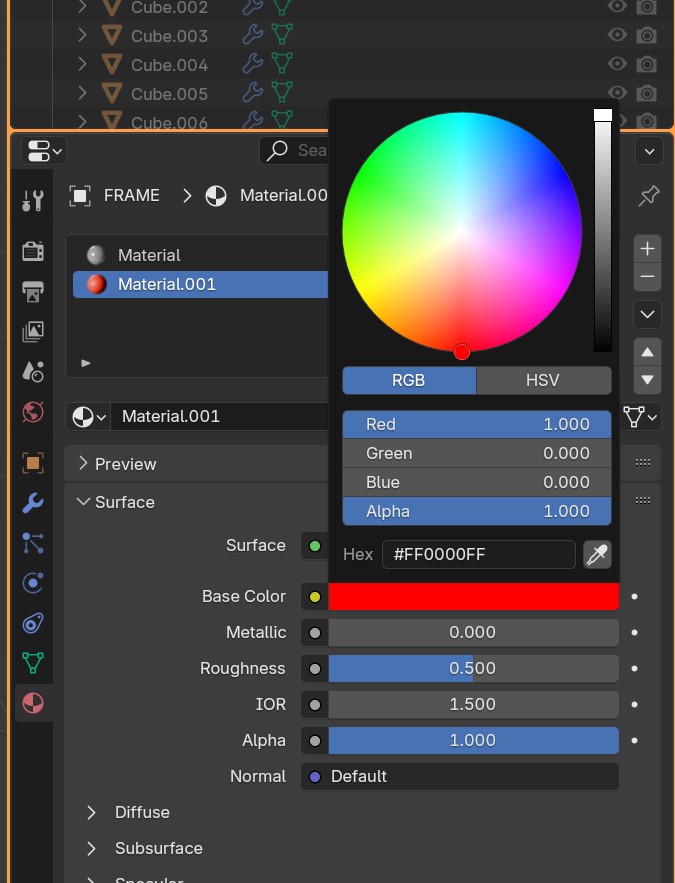
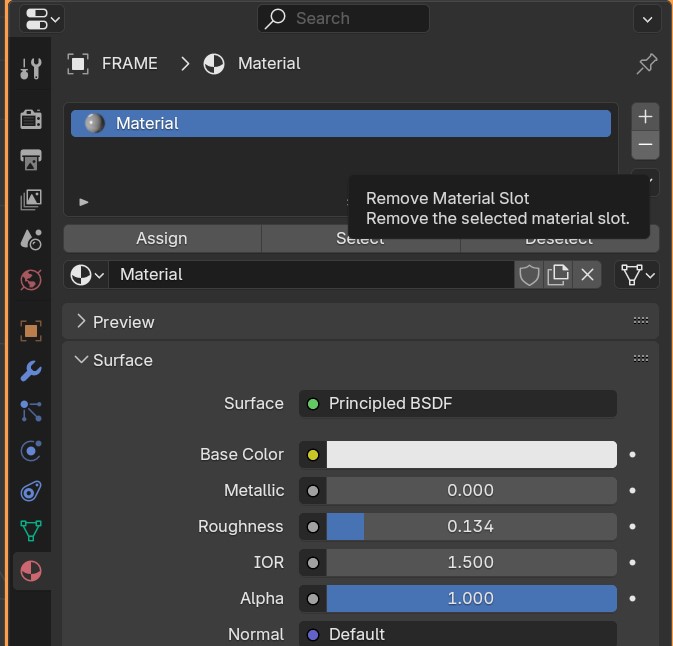
Click the white box of "Base Color" and change this to red.
To know if something is fully red, make sure to switch from HSV to RGB. Set everything to 0 except for Red and Alpha.
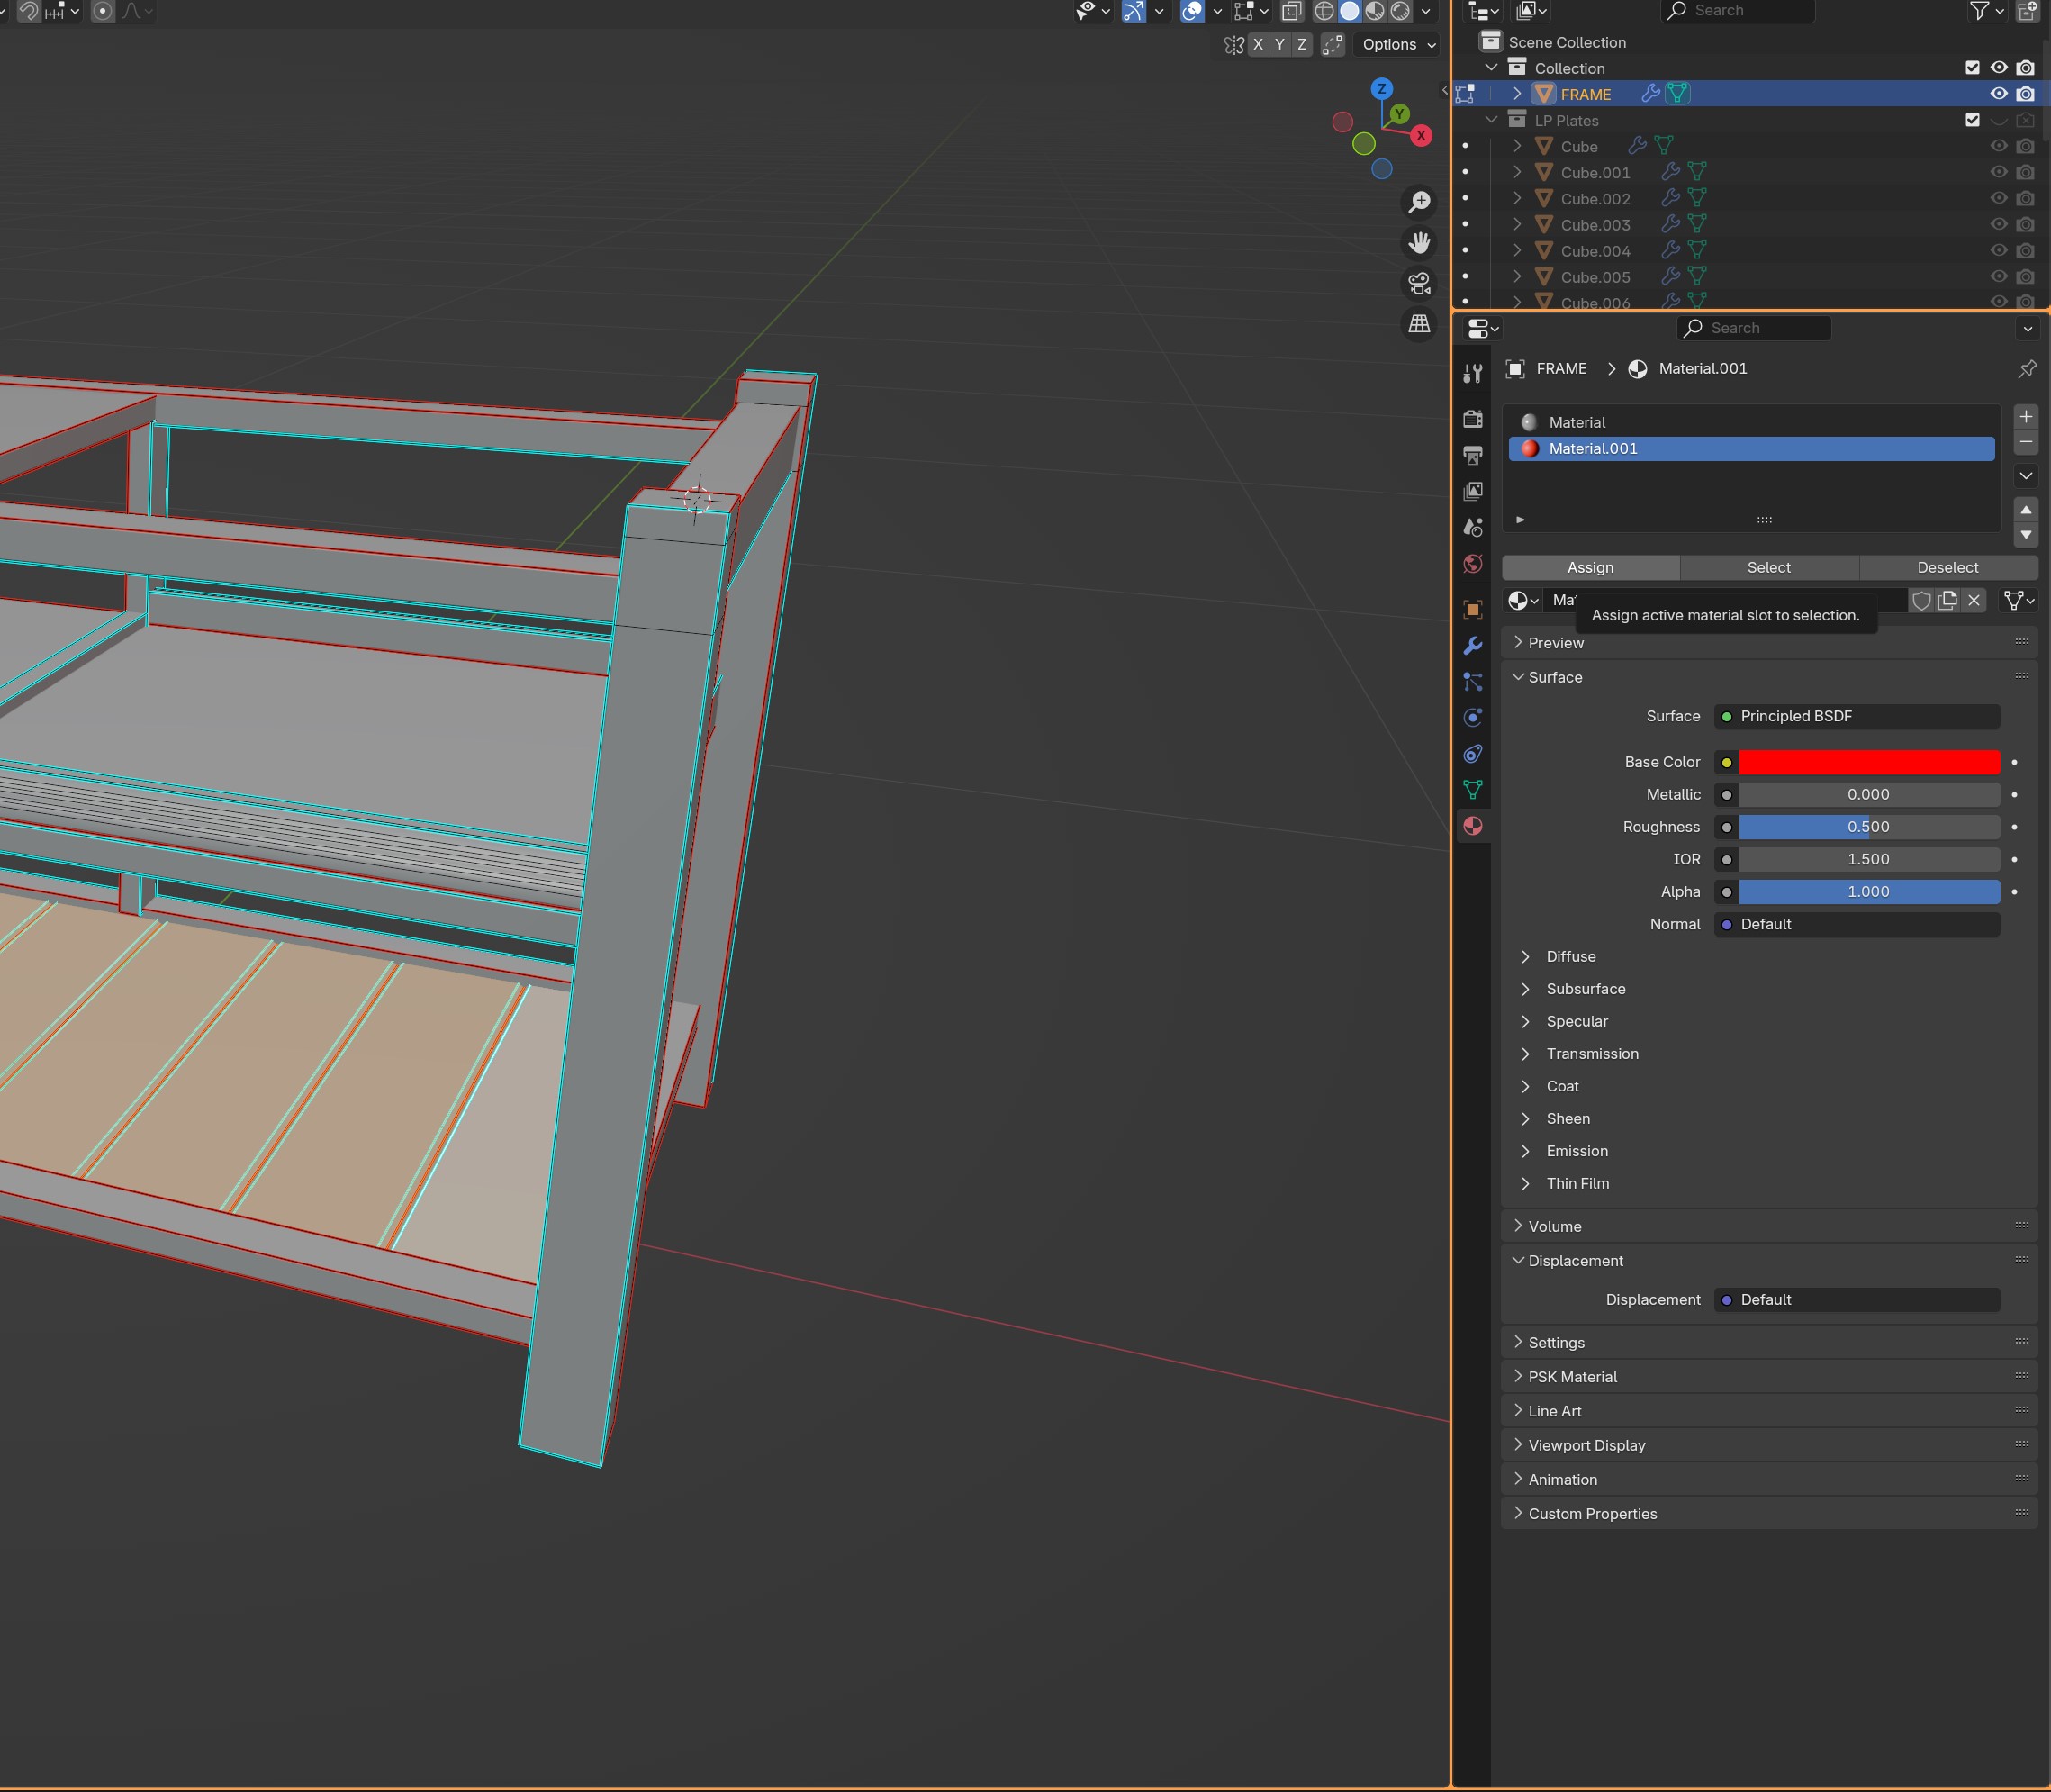
Now go back into edit Mode, make sure you selected your region and press "Assign" where once the "new" button was that you pressed a second ago.
Switching to material preview (See top right, checkered ball icon) will make it much easier to see our new colour! :D
To do so, simply go back into Object Mode and press "z" on your keyboard. Then, click "Material Preview".
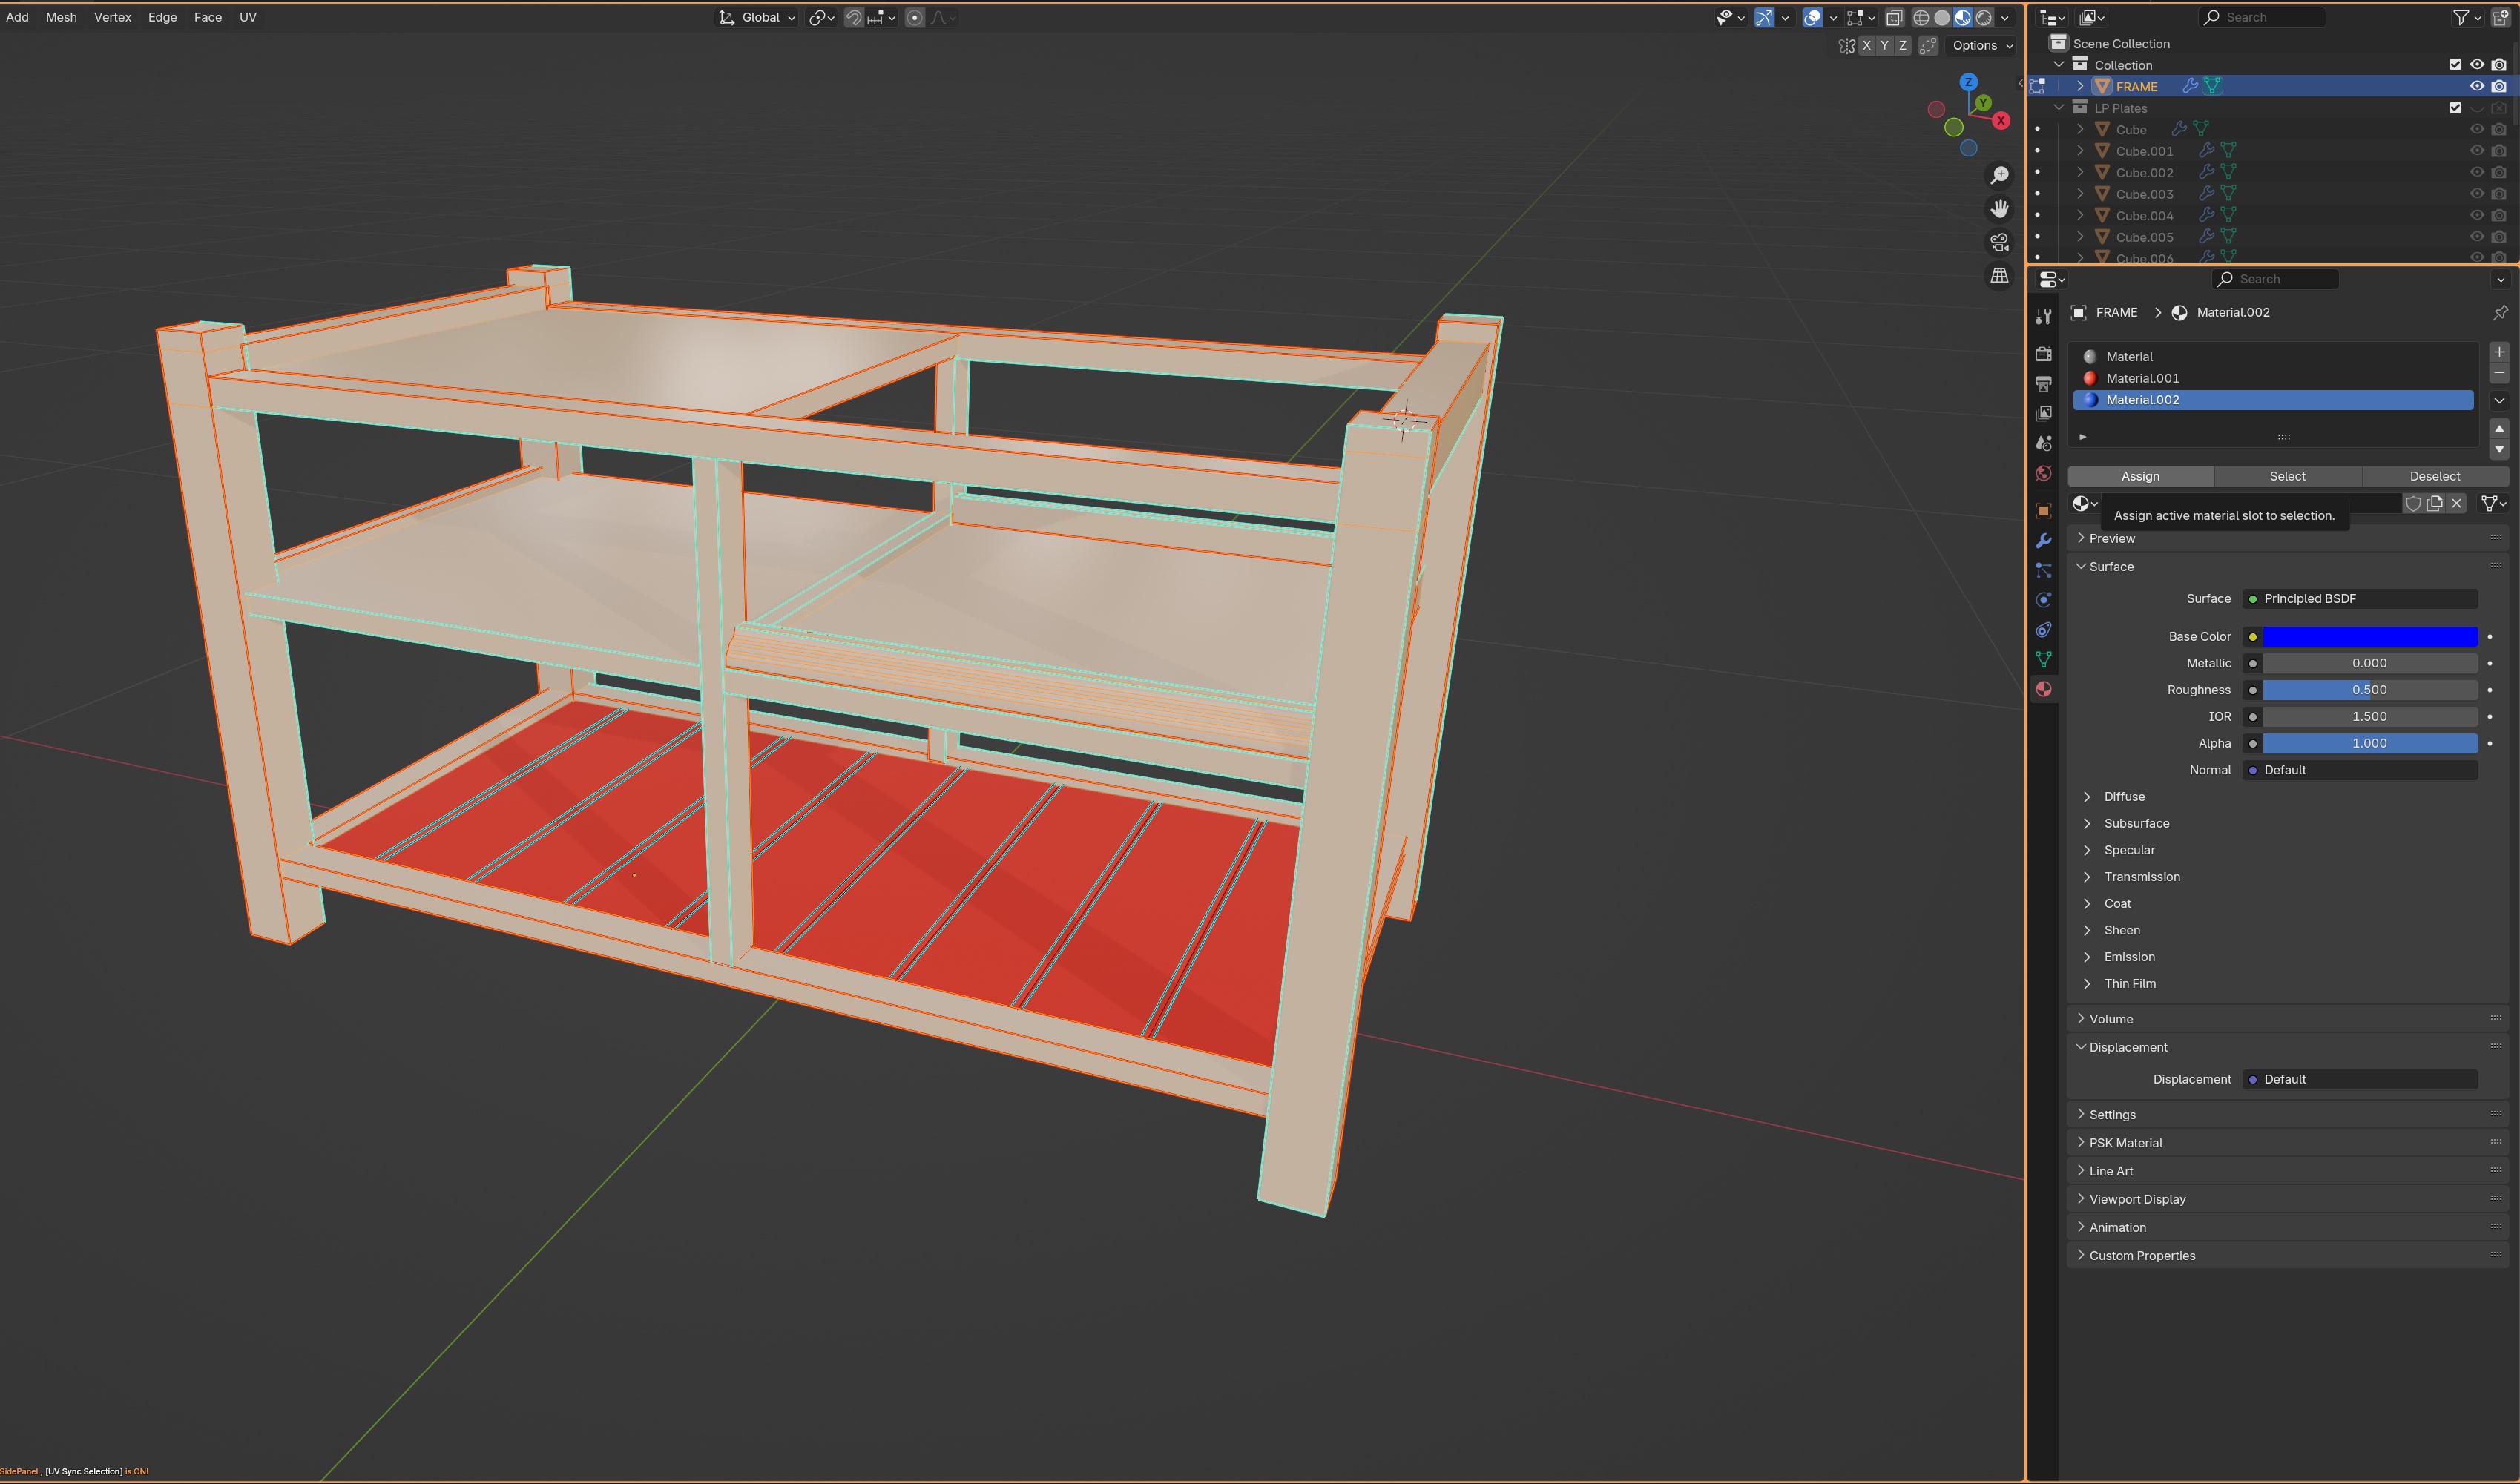
Rinse and repeat it now for the second recolourable region!
Note: if you only have 2 channels like me, simply do "Ctrl+i" in edit mode to select the remaining parts of the mesh 😉
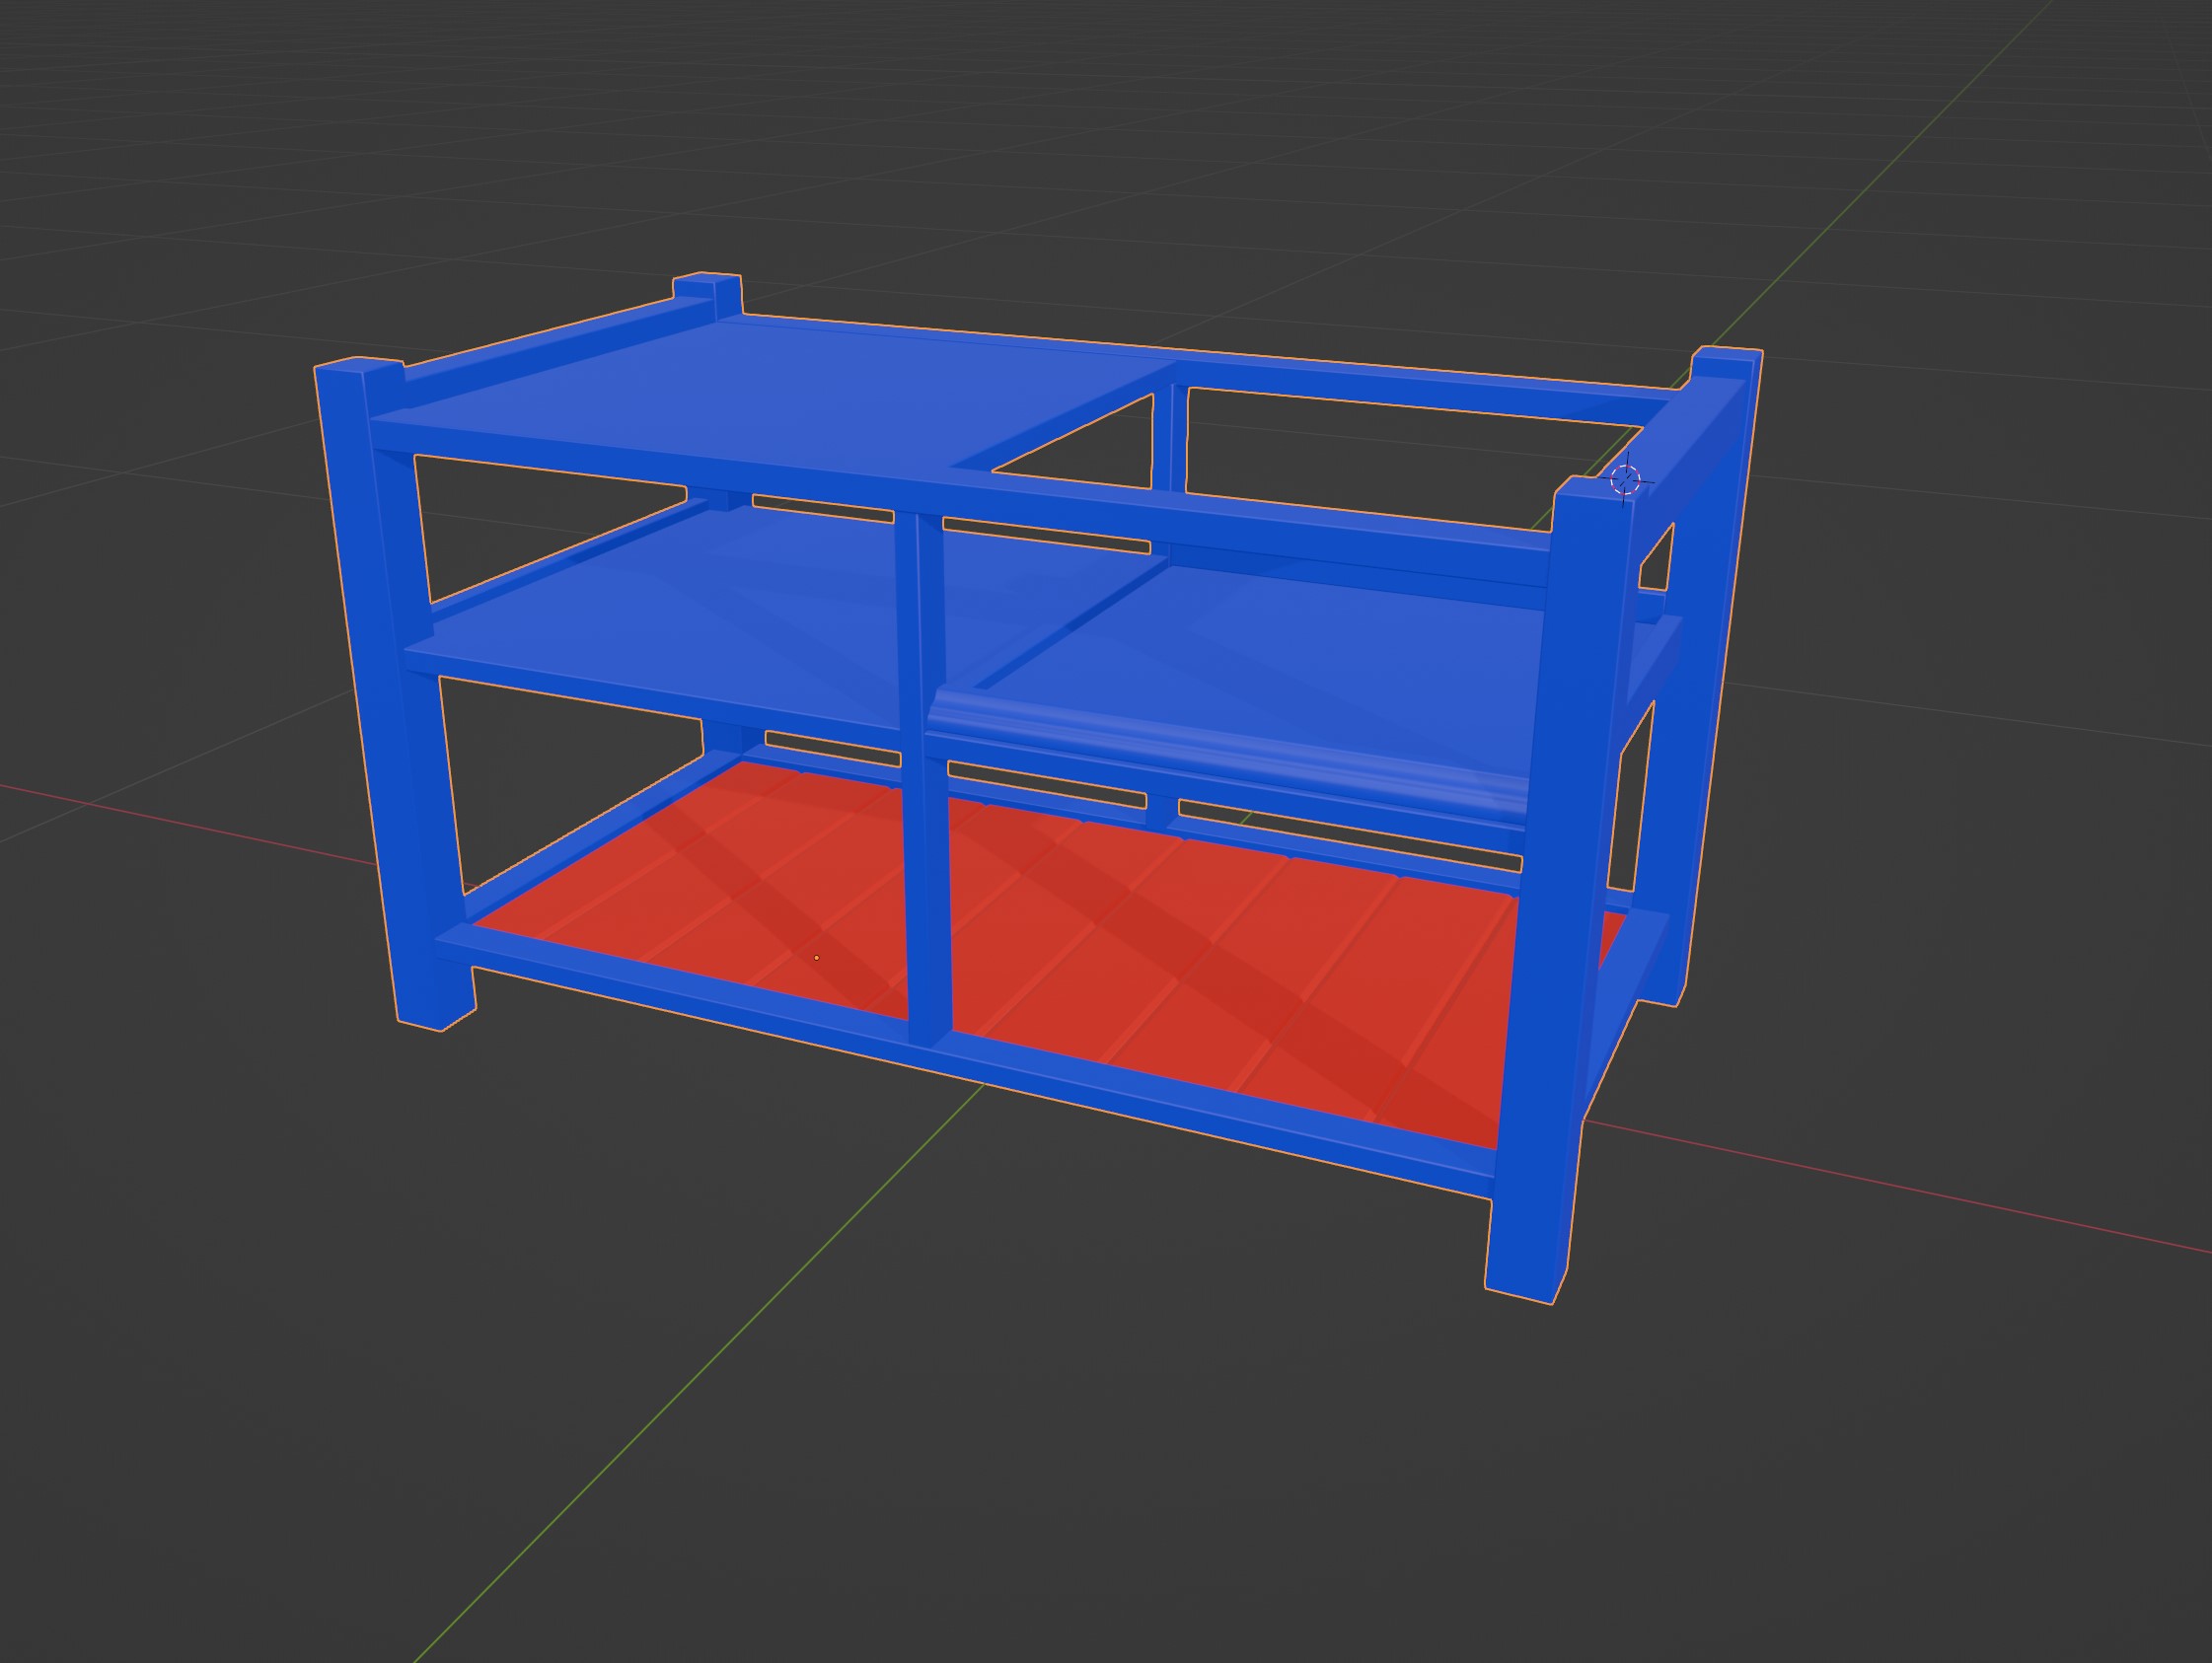
Now this is what it should look like roughly! Again if your mesh is entirely gray, switch it to "Material Preview".

Because baking our color id with TexTools is currently broken, we do need to do this part manually. If you haven't followed that part yet, simply go through the part where we set it up and bake the ambient occlusion map.
DO NOT BAKE ANYTHING YET THOUGH!
First we need to make sure that your other region color has the Color ID texture too! The simplest thing in order to do this is to simply do the following:
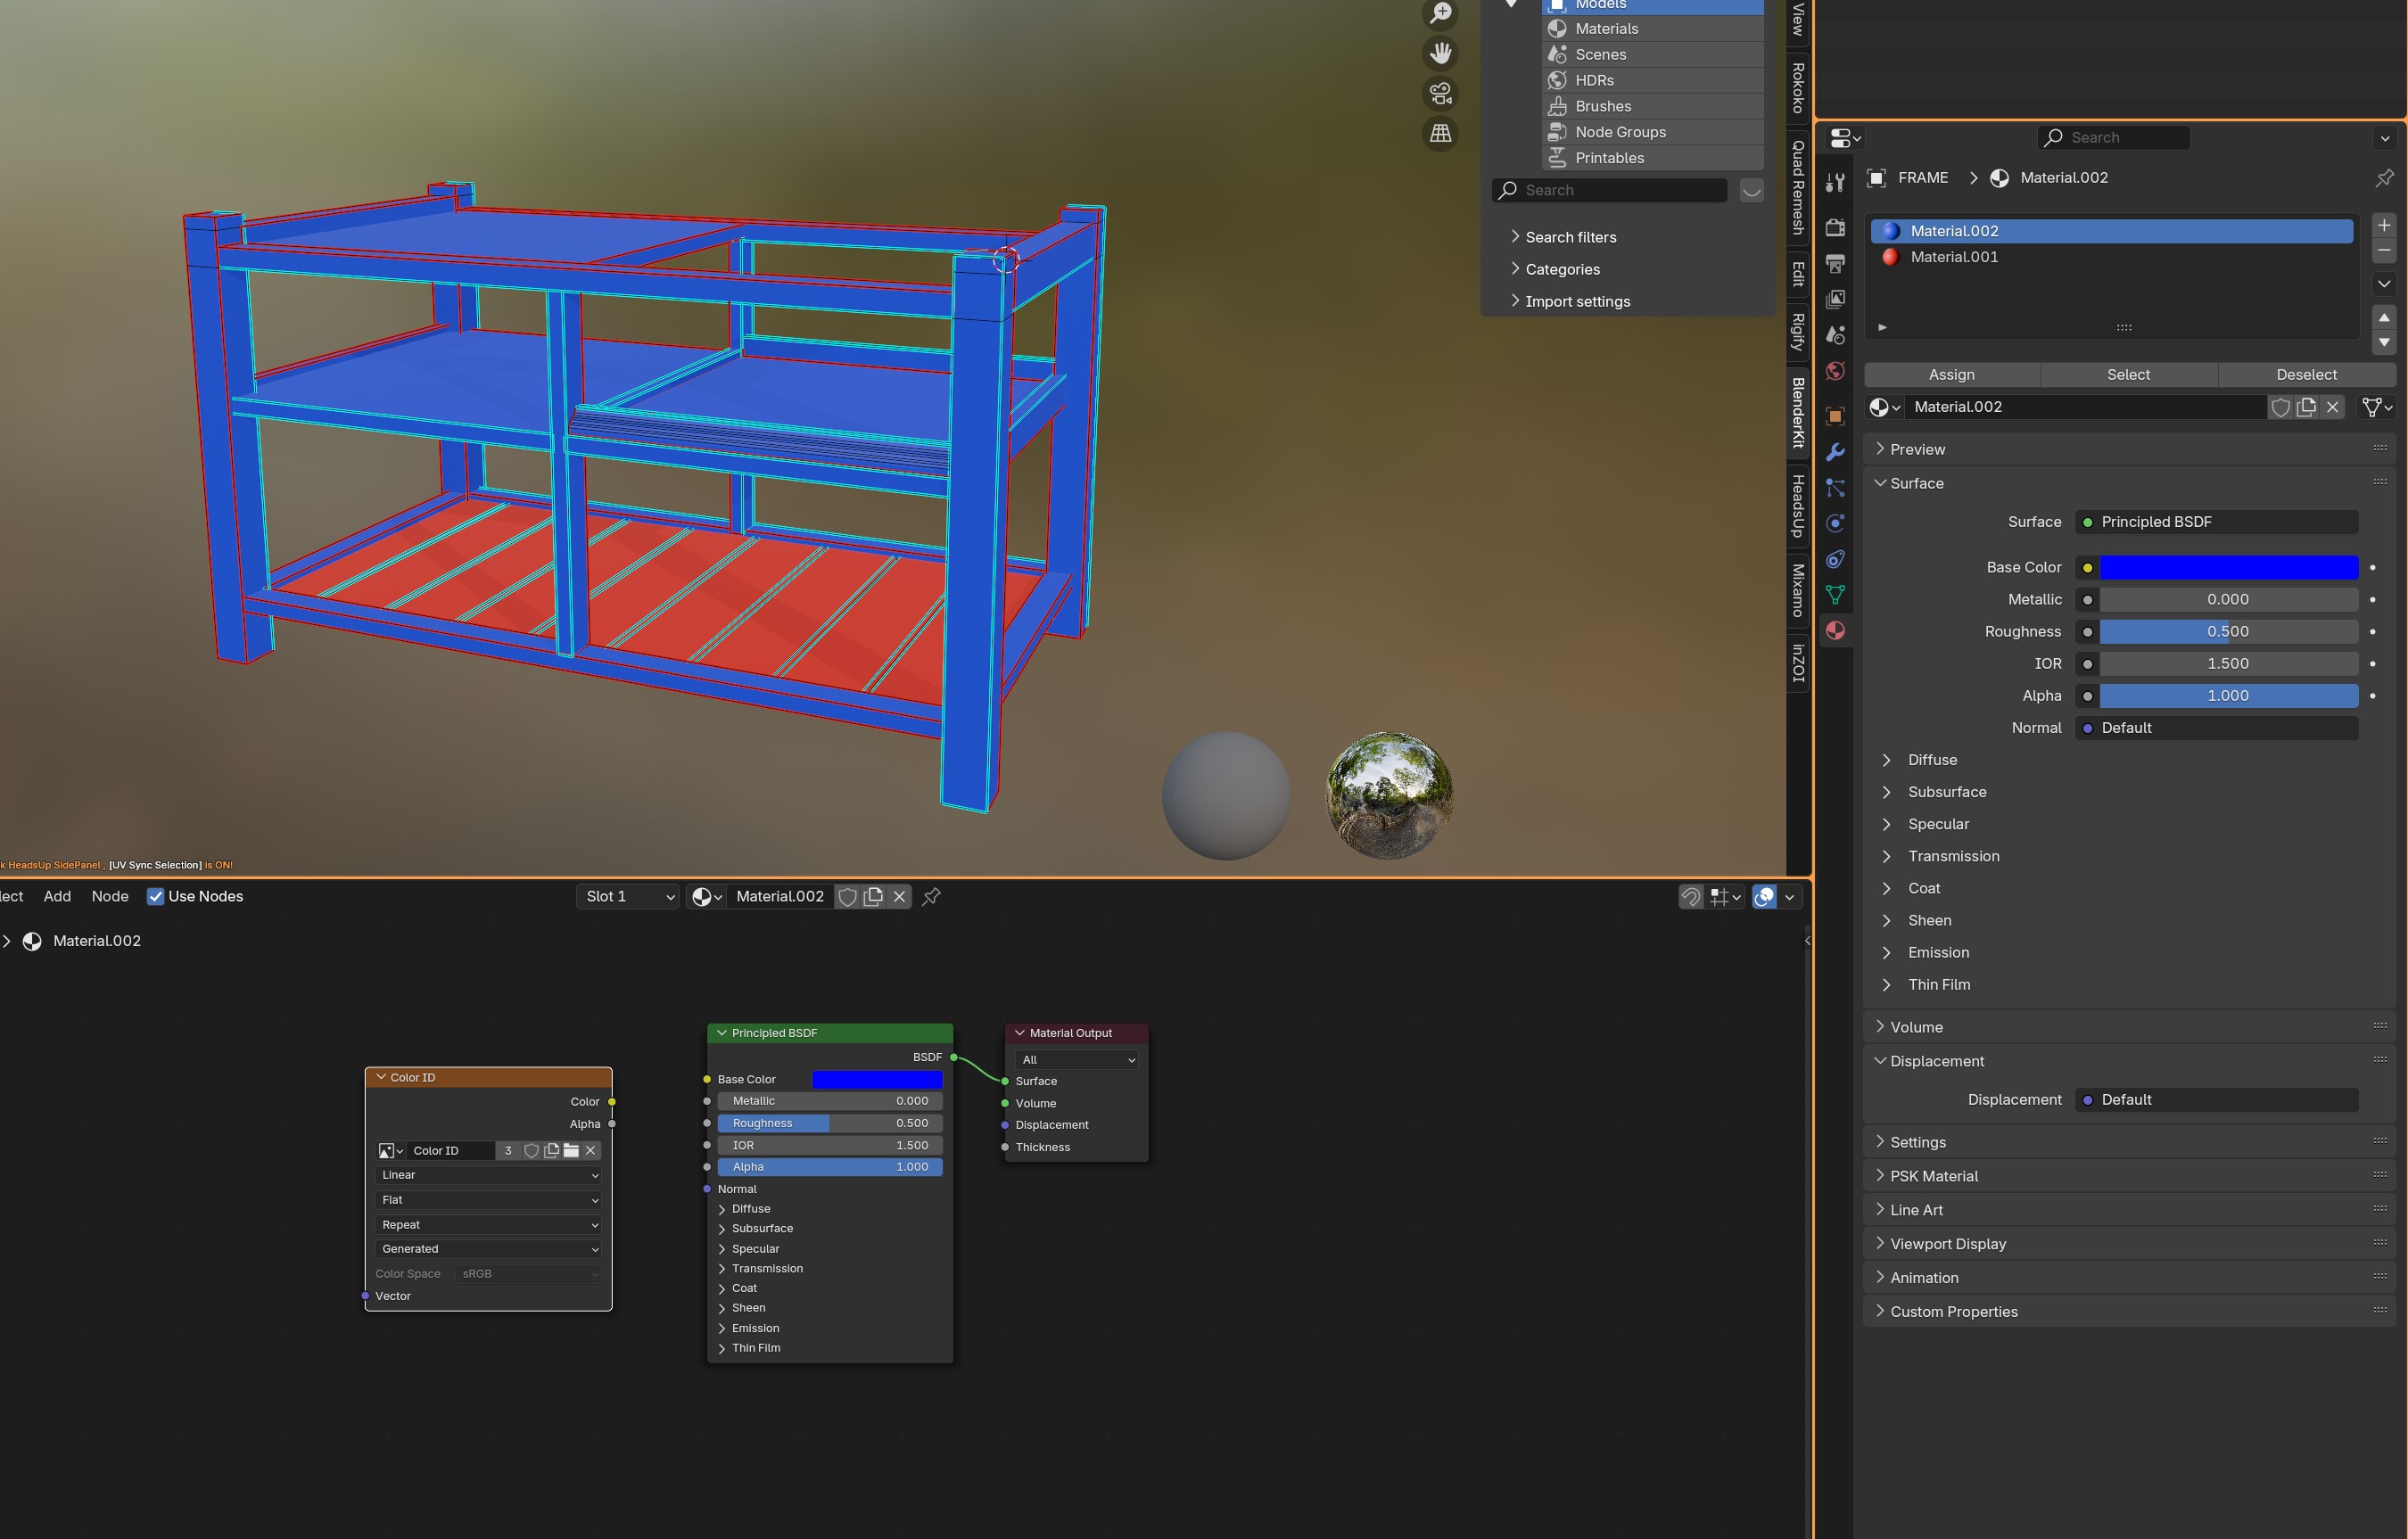
First, we want to make sure that everything looks like this! (if the color is red or green rather than blue, that's okay!).
Click on your Color ID texture Node.
Ctrl+C

Switch to your other color material. In my case that's the red ball! :)
Now CTRL+V and it should now show that Color ID texture node here too! Make sure to click on that.
In fact, in both materials you have to make sure both color Id nodes have a white outline/click on! Otherwise it will only bake one color (or none! D:)
Note: If you want to do it for a third color, make sure to do exactly the same steps as we just did, but for that colour! So, make sure to copy over that Color Id node!
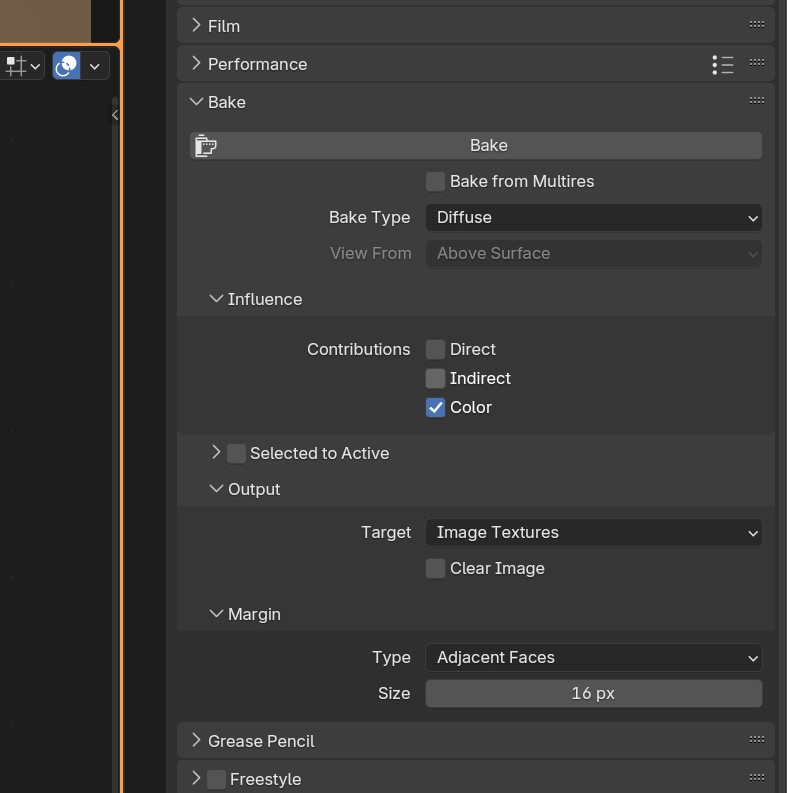
Make sure your baking settings are like so. (Baking type as "Diffuse" and untick "Direct").
And press Bake! :)
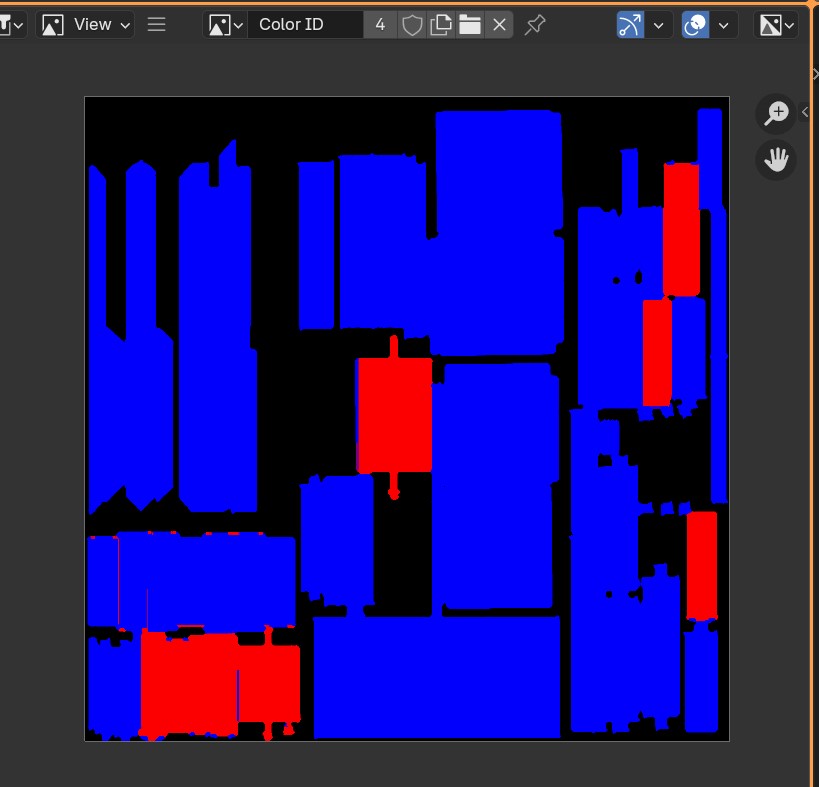
Cool! now we should be seeing something like this! (This can also be entirely red if you only want one recolourable option. Or red, blue and green if you wanted 3! 😉)
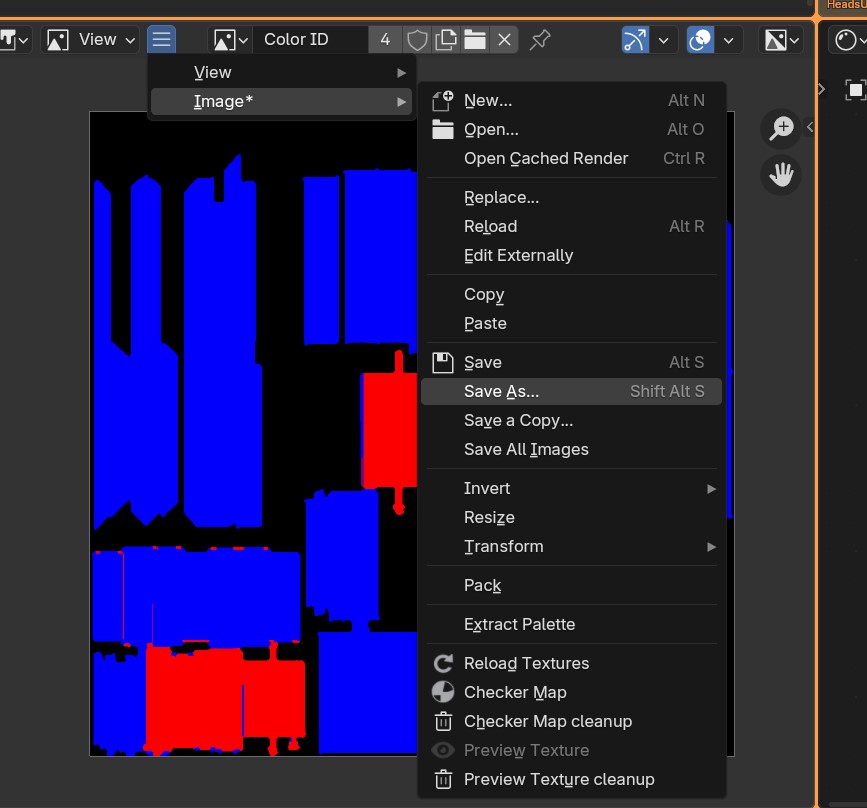
Now go to Image > Save As... and save it to your workfolder with all the other images! :)
Creating the Packed image texture
Now we can officially close Blender as it's done everything for us now! As it's time to make our packed image texture!
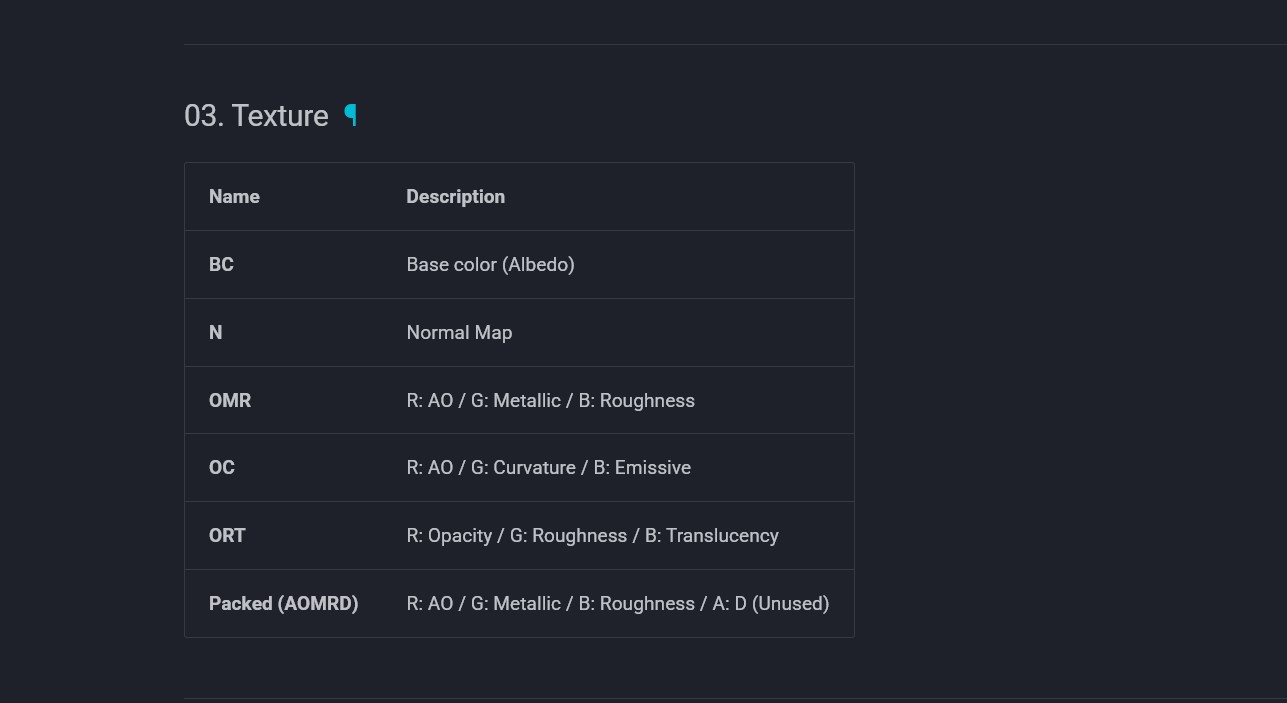
As you might have noticed if you are somewhat familiar with the way PBR materials work, we primarily focused on making the 'OMR' version of the packed texture. This is 99% going to be the one you'd be using, especially since 99% of the furniture you're making is really not going to be difficult. (at least I think so lol).
Here is what the documentation says:
OMR Red: AO / Green: Metallic / Blue: Roughness
Now as an example of where this information is crucial if you know what you're doing and want to use a Curvature texture instead, know that the packed version instead is going to be this:
OC Red: AO / Green: Curvature / Blue: Emissive
Obviously that would have to mean you'll need to let go of your metallic and roughness map (don't ask me why, I have no idea).
But! If you're simply just following this tutorial, totally ignore what I said about Curvature maps :D
Let's create our packed texture!
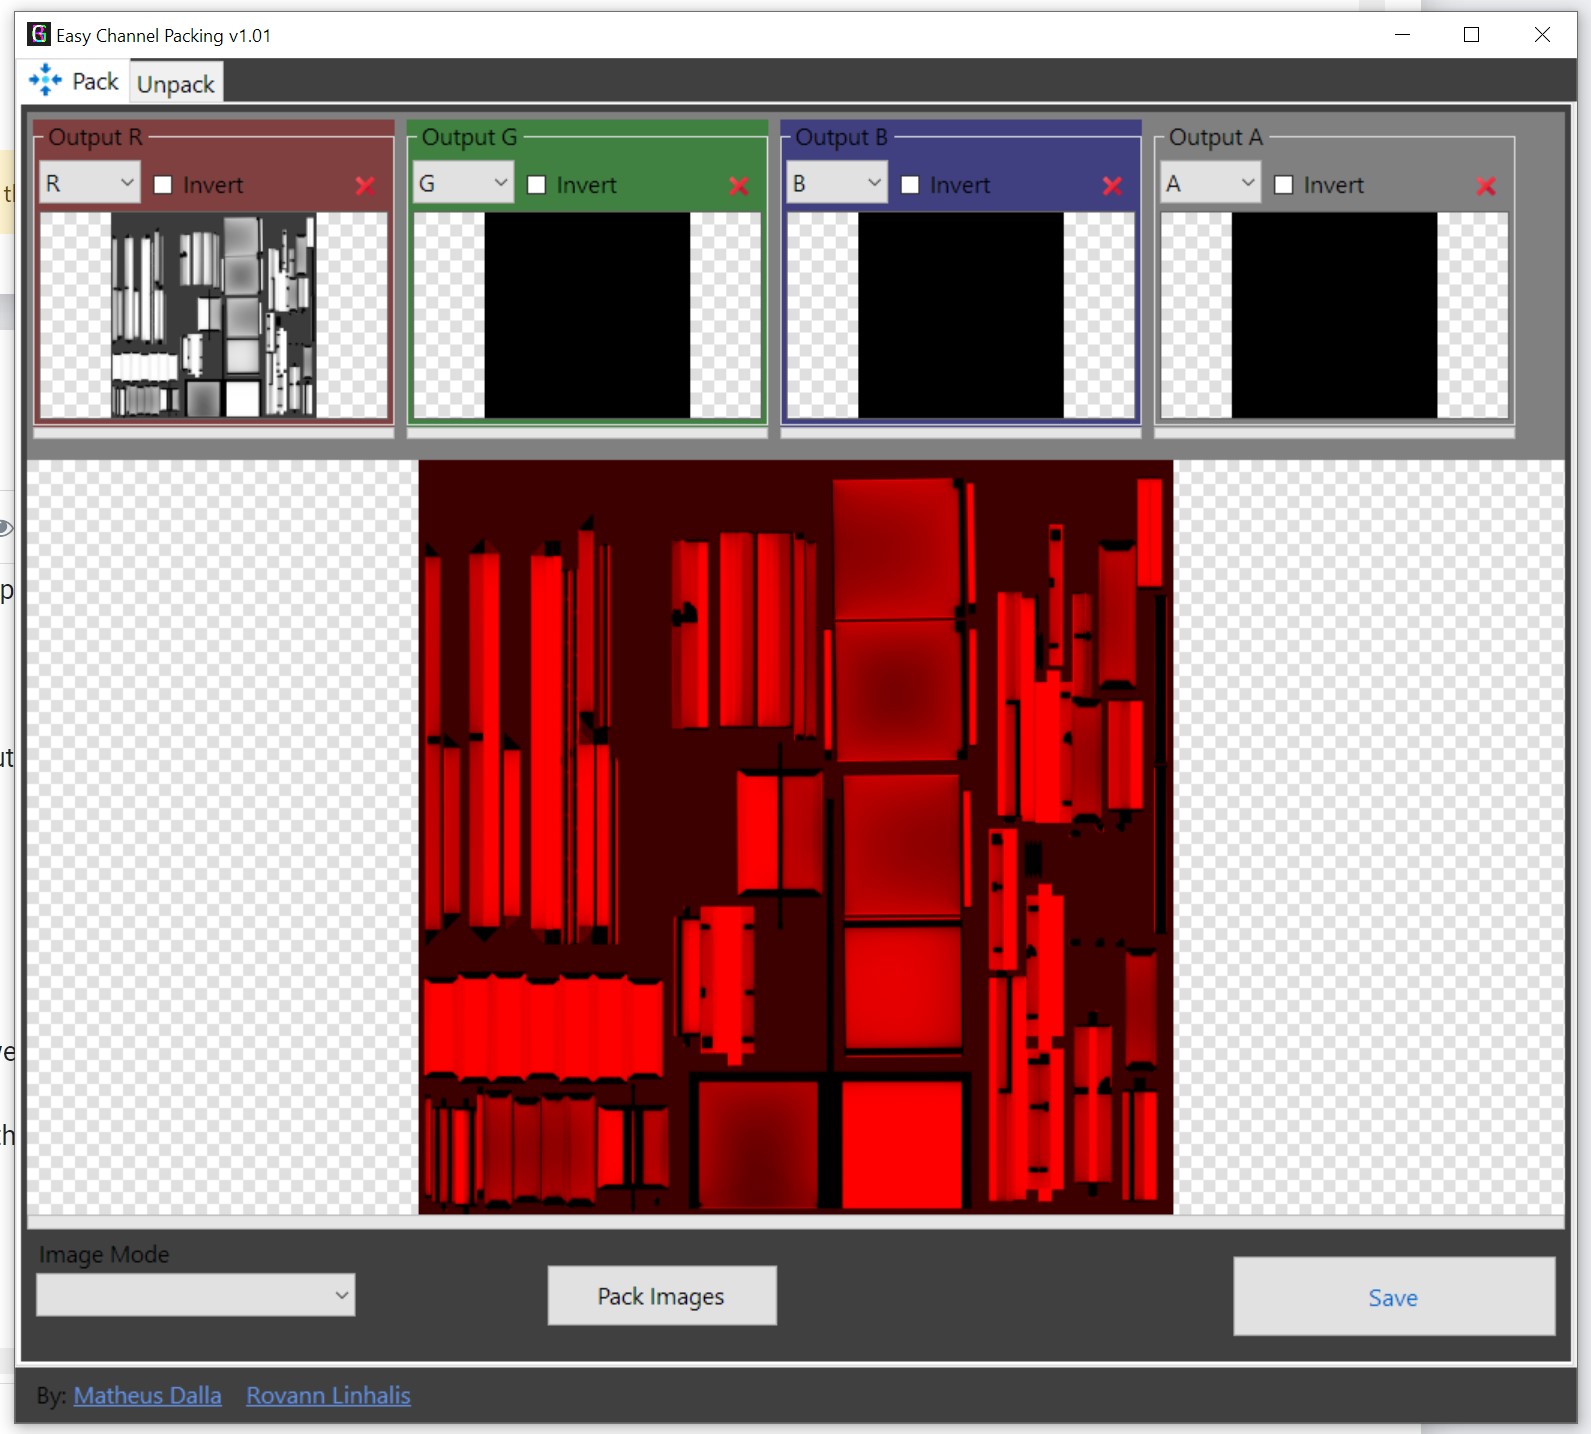
First, open up Easy Channel Packing that I told you to download.
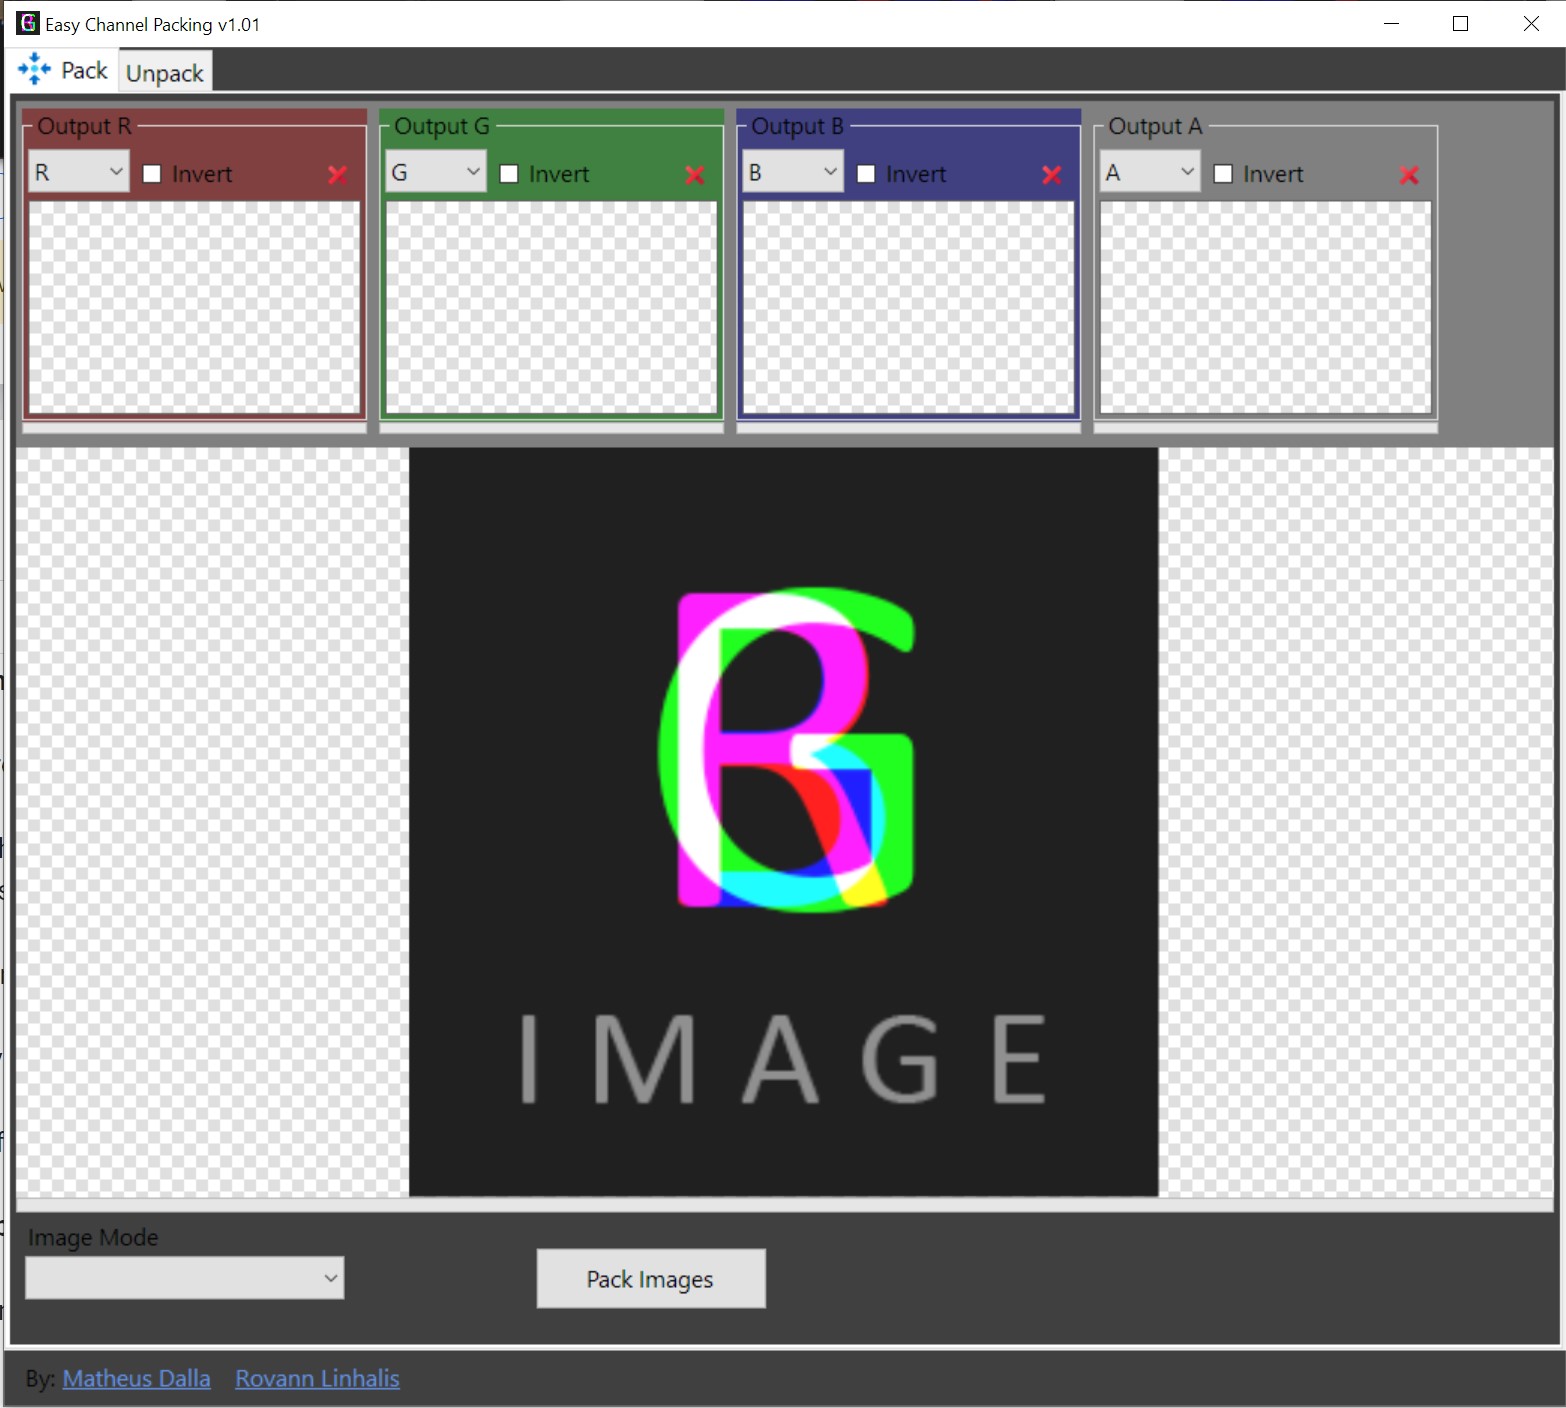
When opening the program, it will look like this.
You've probably seen the 4 boxes at the top! One is Red, the other is Green and Blue. Plus we have a alpha one as well, but we won't be using that one.
Now we want to do the following thing:
- In the RED box, we want to add the Ambient Occlusion texture (if you don't have one, add a
grayscaledbasecolor map in there!) - In the Green box we want to add the Metallic texture
- In the Blue box we want to add our Rougness texture.
(Btw, to add a texture, click the empty checkered space in each colour box)

Now it should look something like this! :)
Press the big "Save" button on the bottom left when ready.😉
[Non-recolourable]: Adding the textures to our mesh
If you want your mesh to be recolourable, skip to "[recolourable]: Adding your textures to our mesh"
Now this tutorial assumes you've already loaded in your mesh and have made a mod project already. If you haven't yet, please follow the first section of this tutorial: Simblr.cc - InZOI Tutorial How to edit existing Furniture
And return here once you've come to the "Exporting the mesh from the Workspace" as we already have a mesh 😉
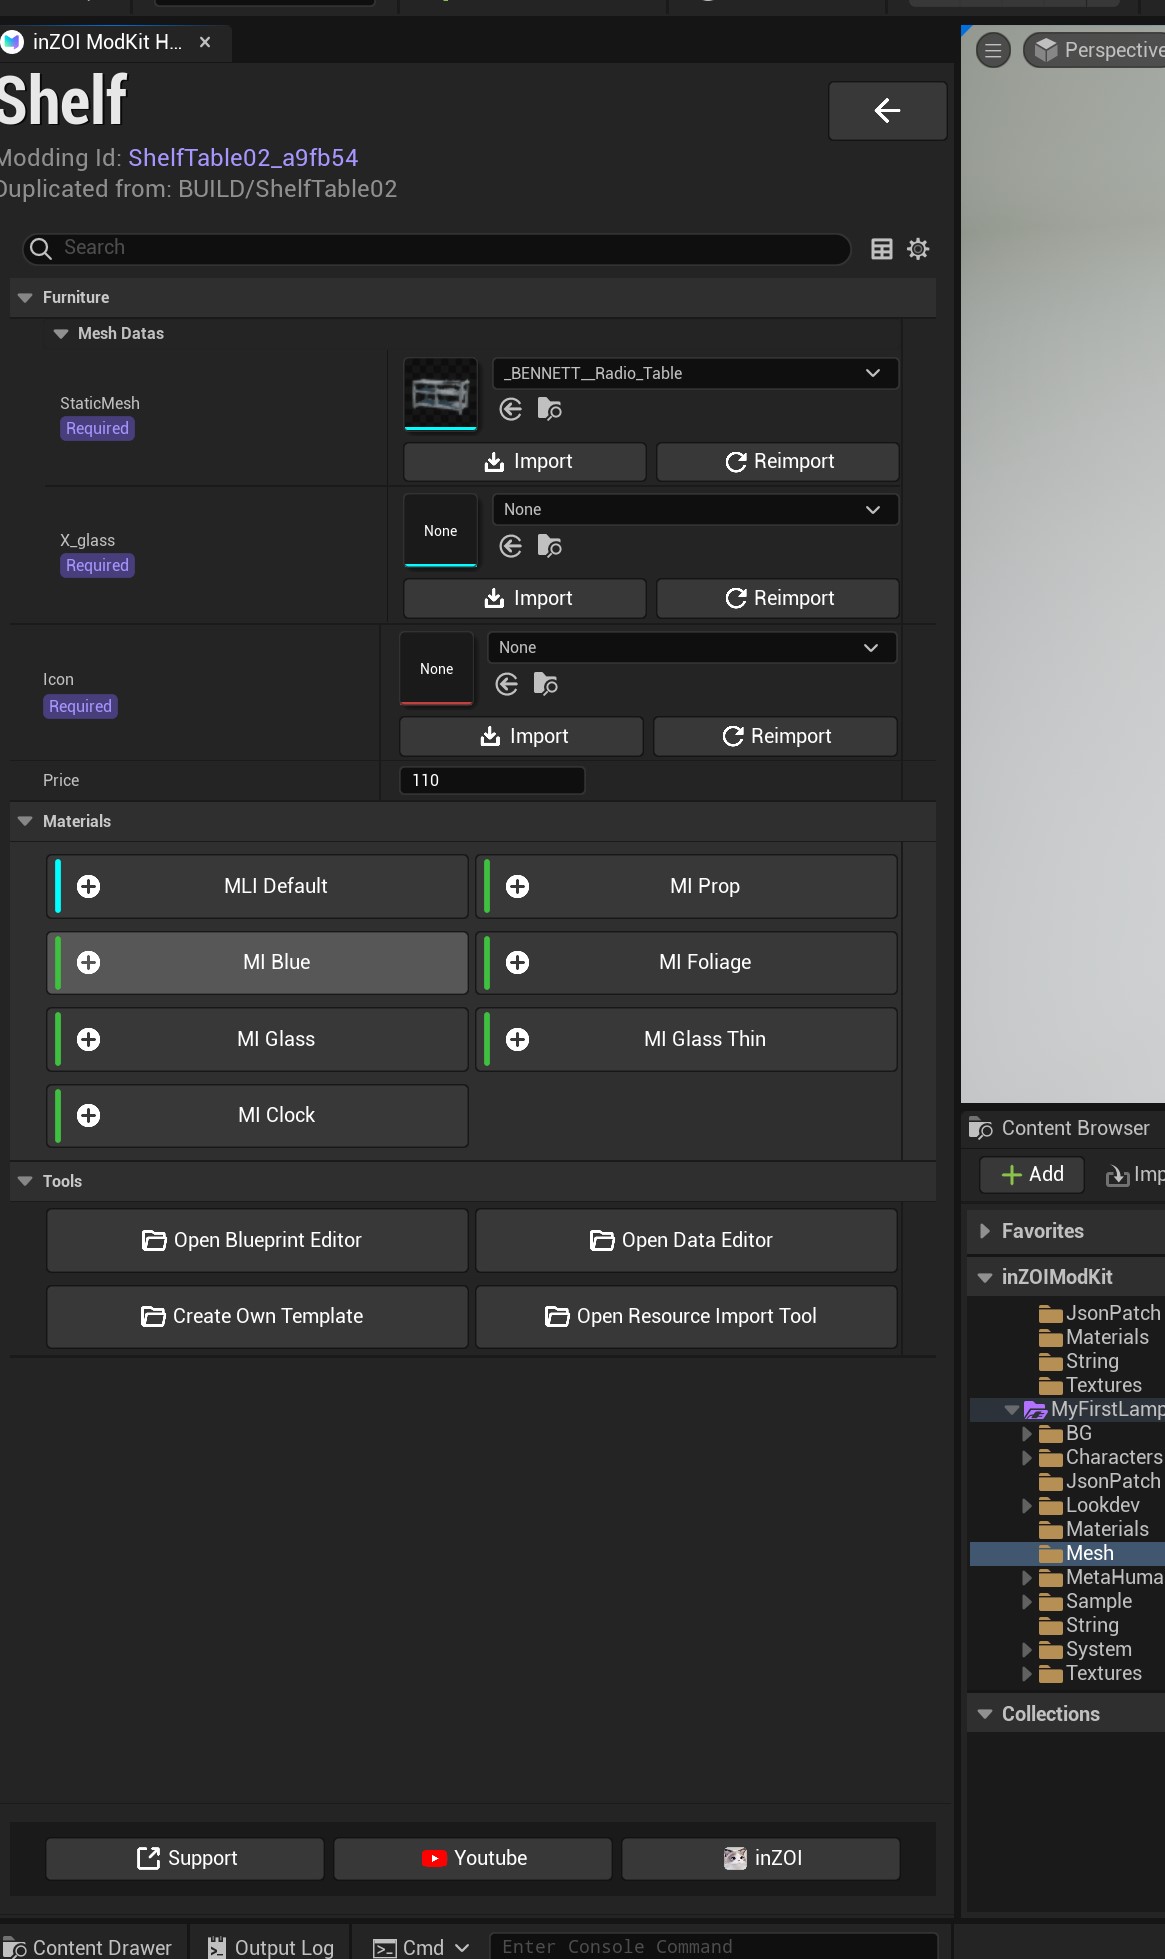
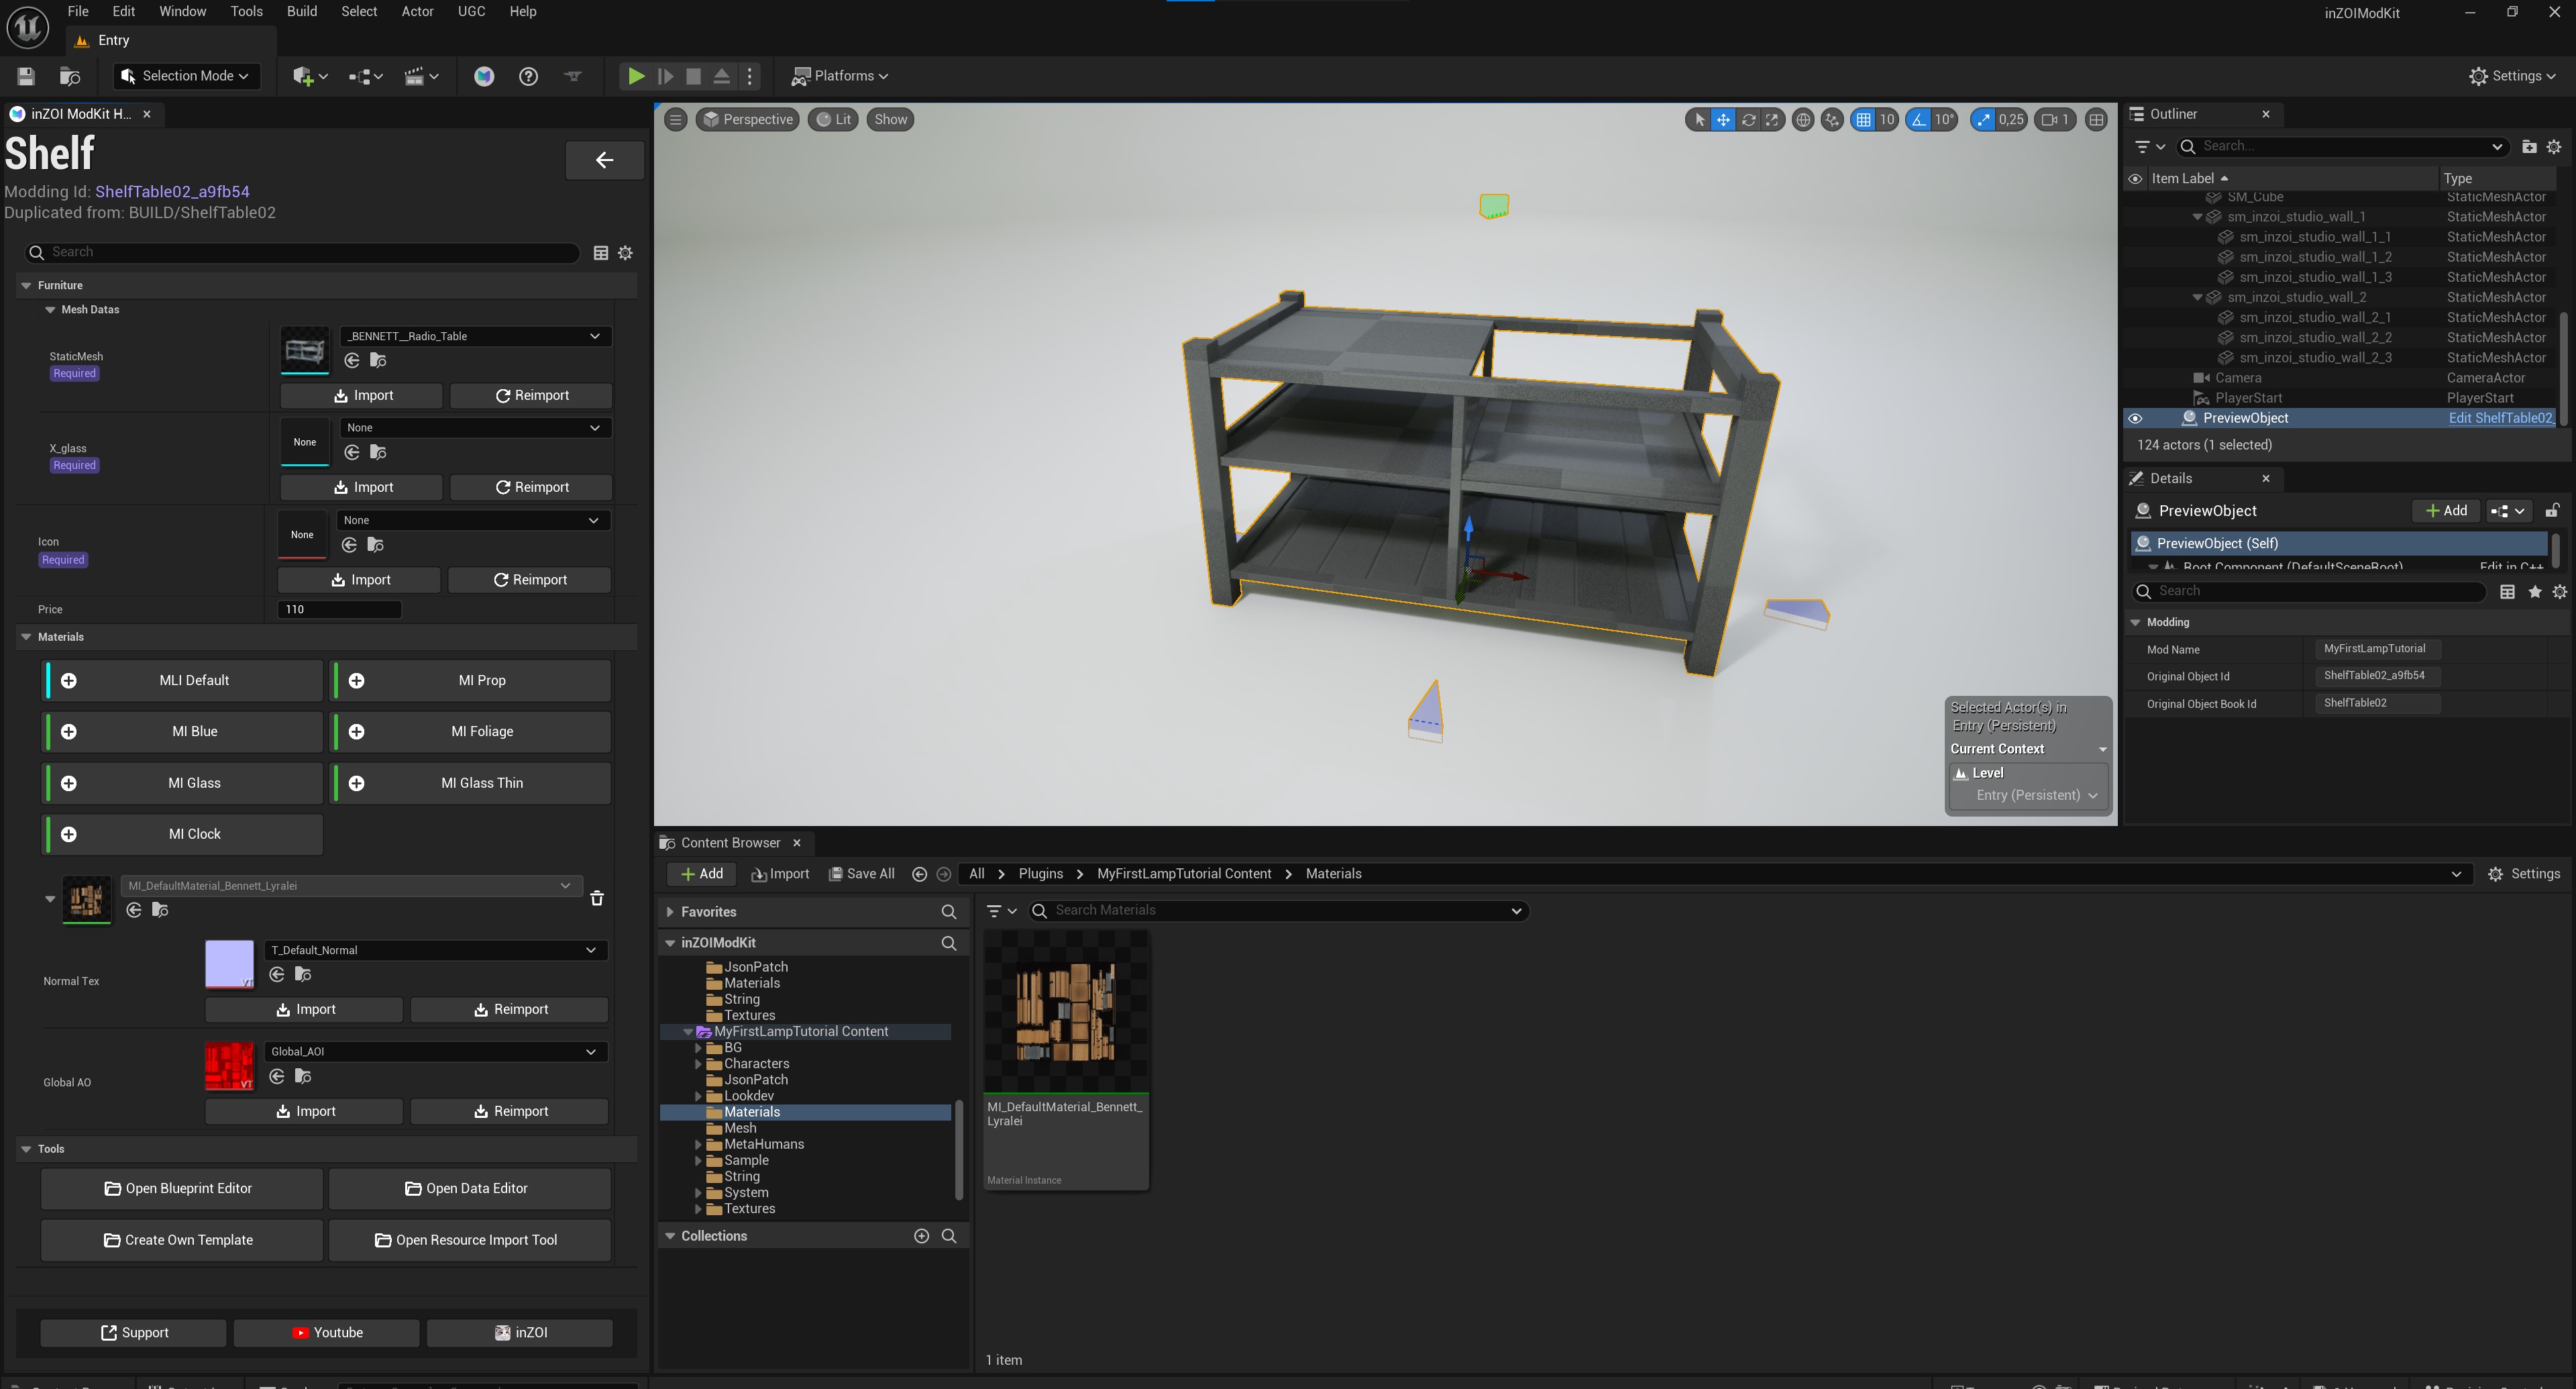
This is probably what your mesh currently looks like... boring and gray! D:
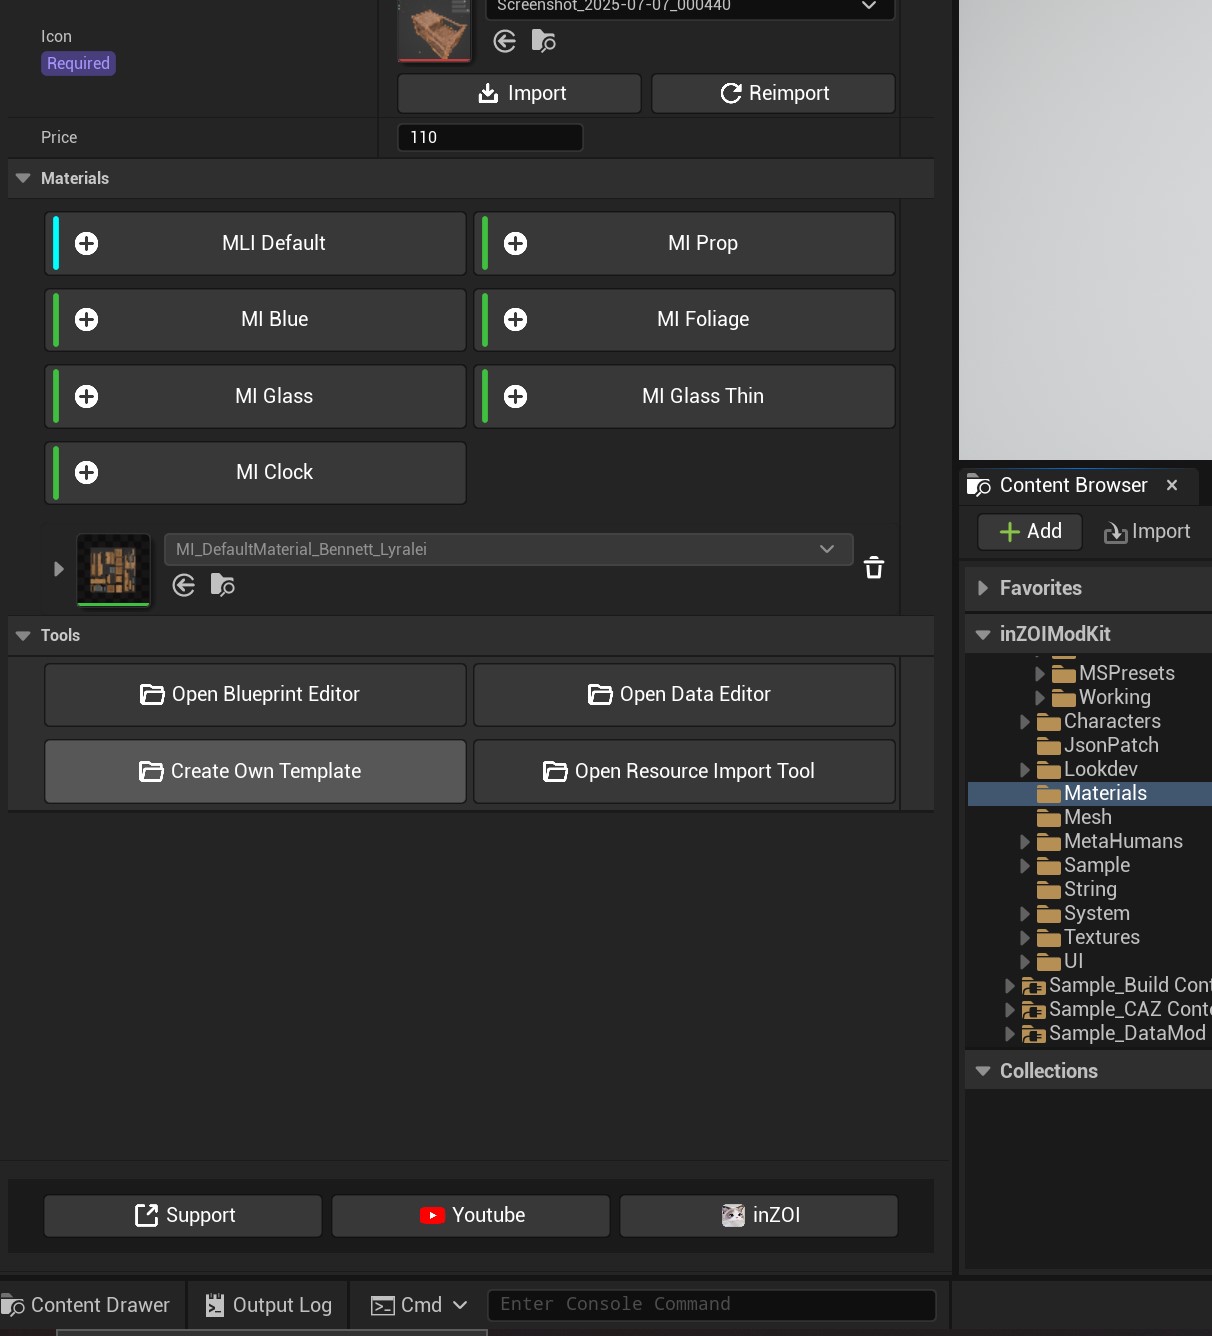
To solve part of that, press "MI Prop".
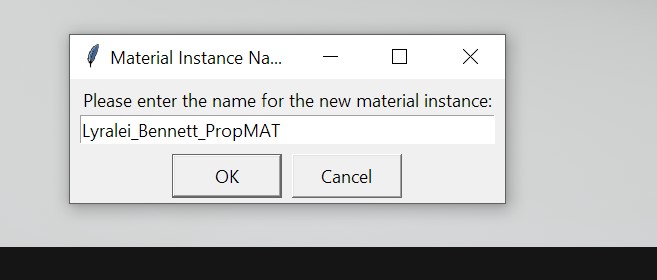
Give it a cool name! Otherwise some other mod may conflict if the asset has the same name! So always make sure it's unique!
ALso make sure that you don't give it spaces, or special characters. Underscores are okay.
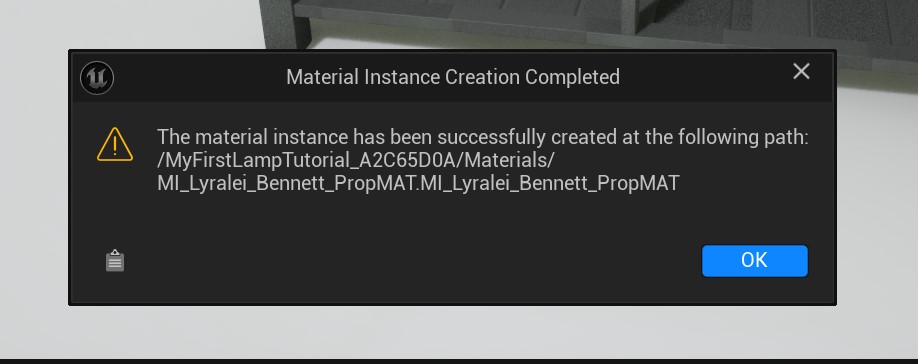
Nice! If this screen pops up it's made it! :D Otherwise, make sure your name doens't have special characters or spaces!
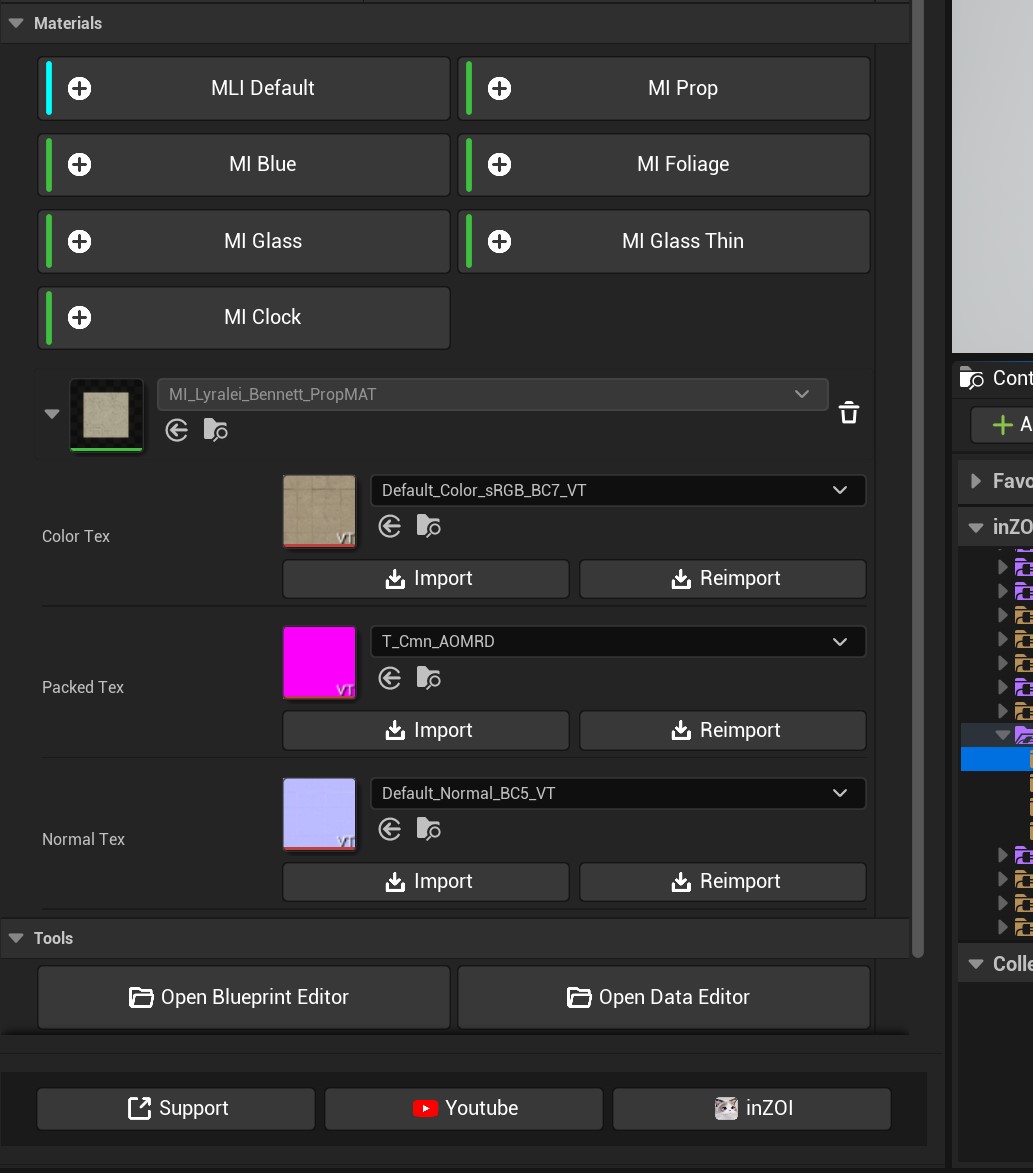
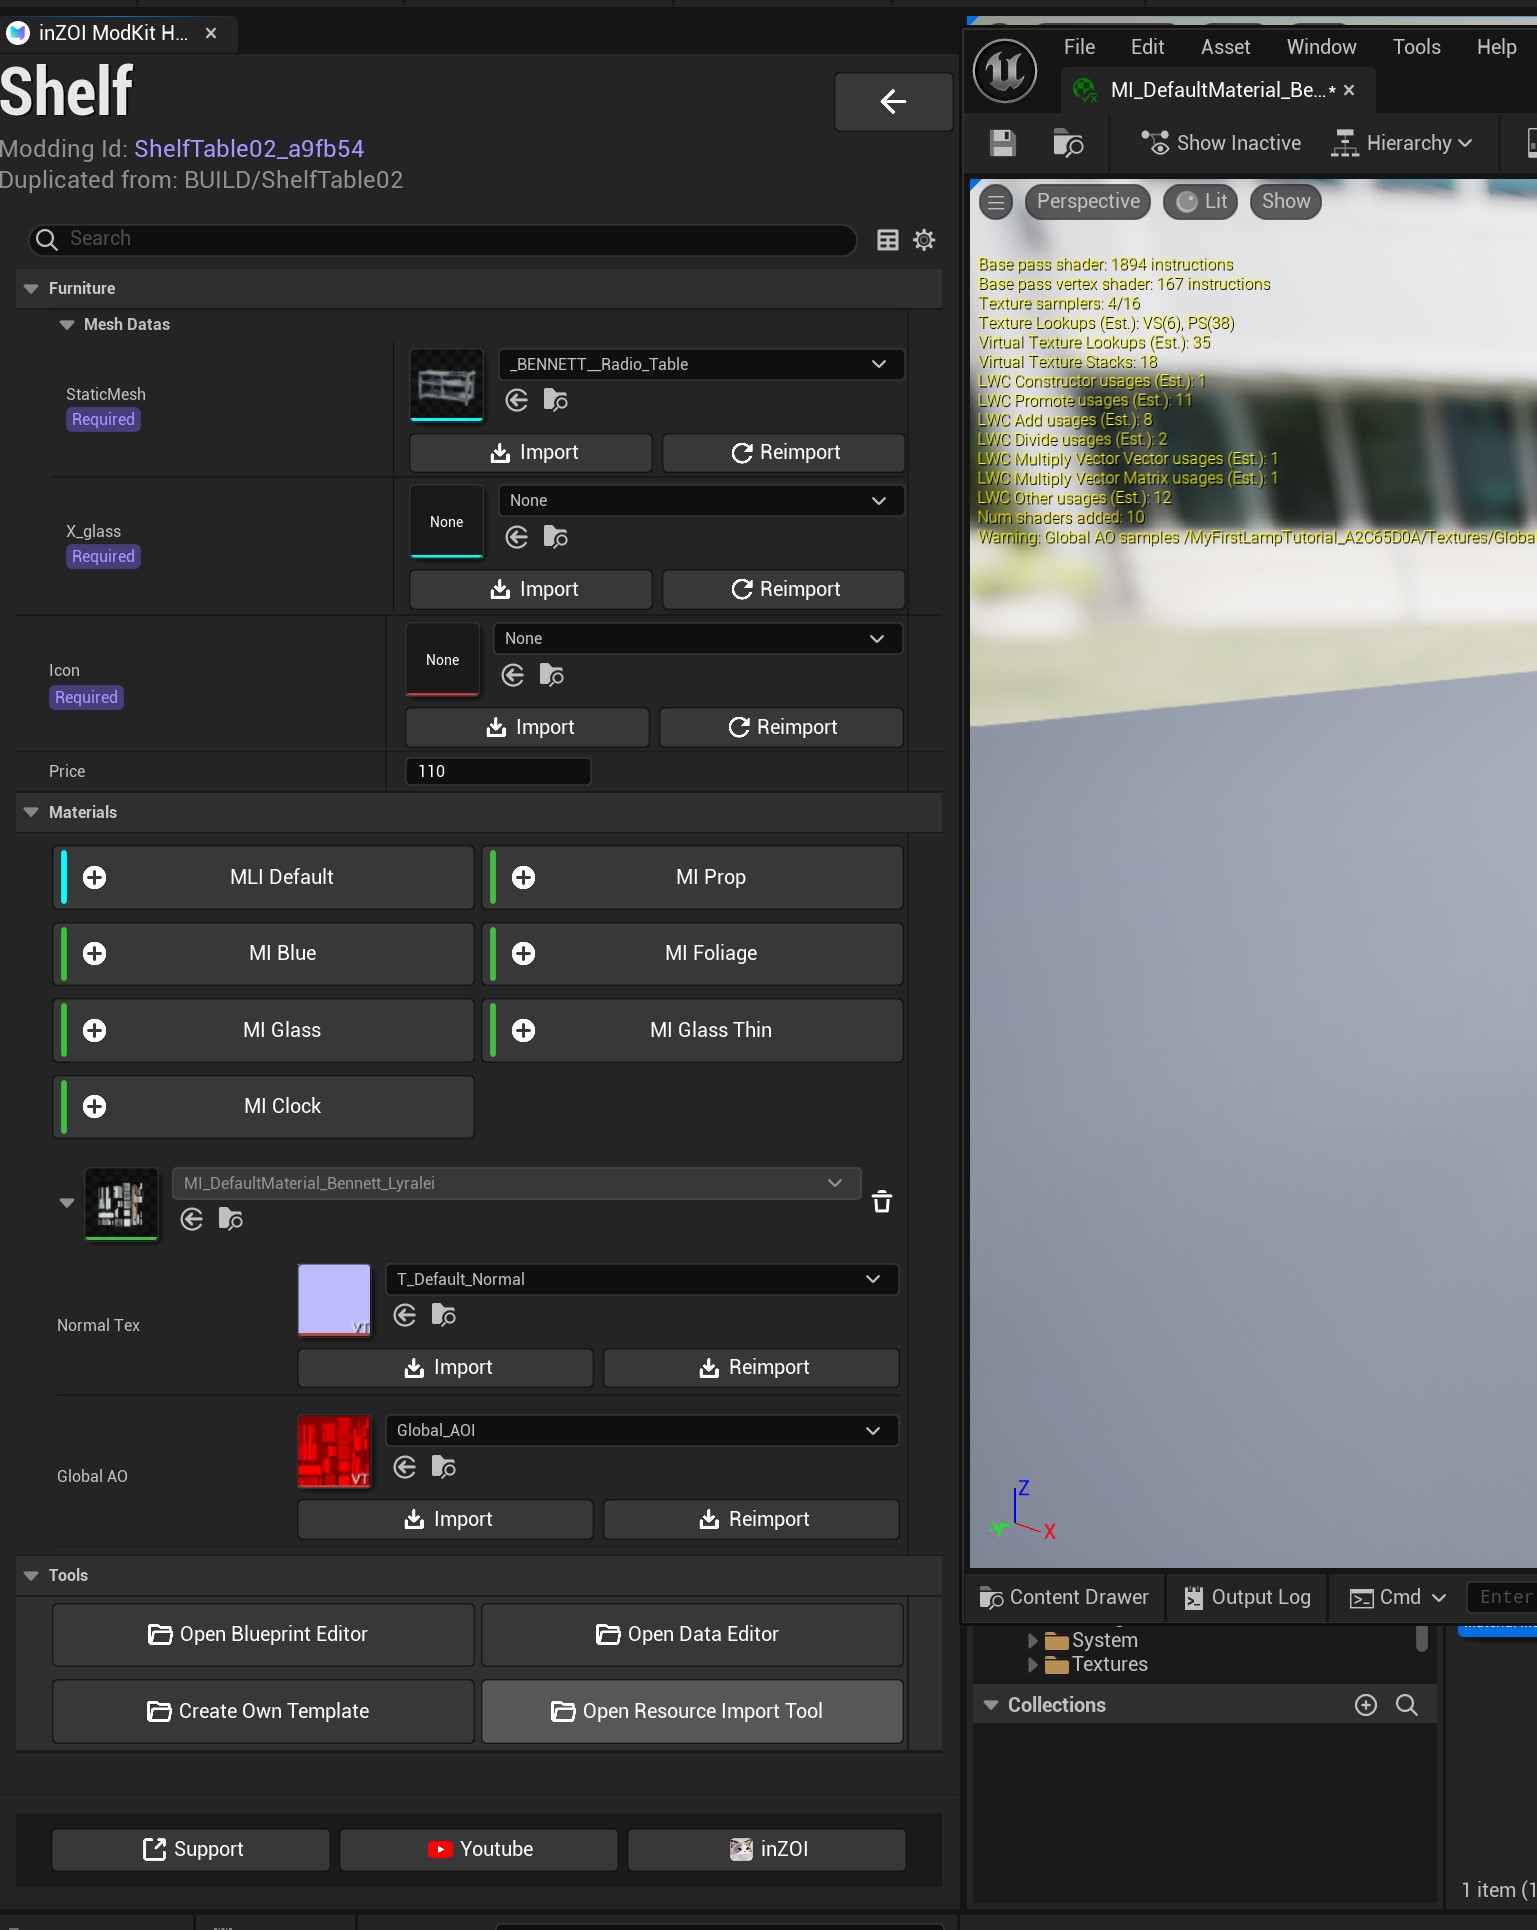
Now, uncollapse the material that's gotten added to the material list here. (Click on the arrow next to it's icon).
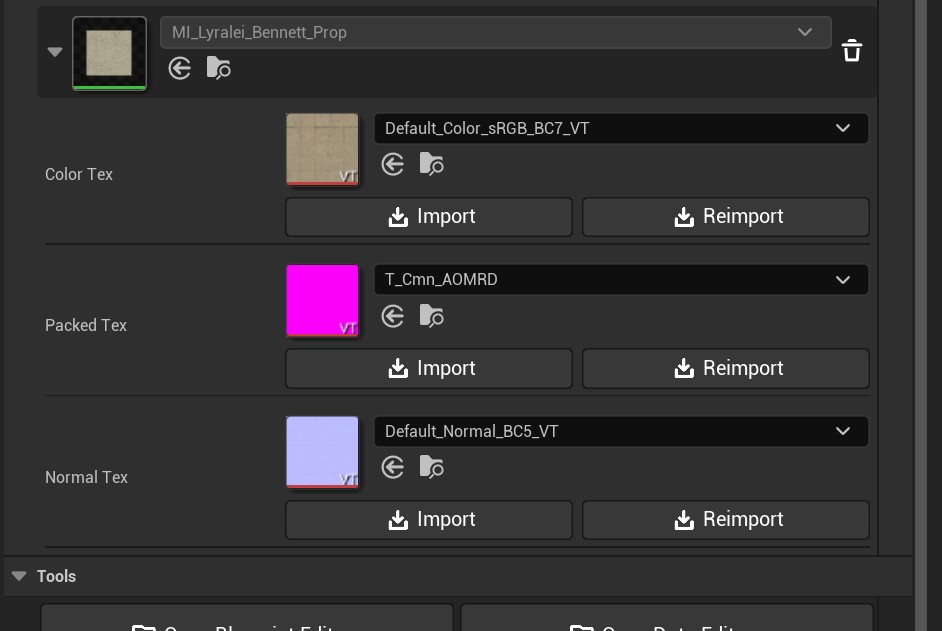
Here you'll see 3 textures. We want to import the following:
- Color Tex - Add your AO texture to this. (alternatively if you made yourself a diffuse map/base color map/albedo, use this instead)
- Packed Tex - Add the packed texture we've made.
- Normal Tex - If you have none, change it to "T_Cmn_N", unless you made one yourself! :)
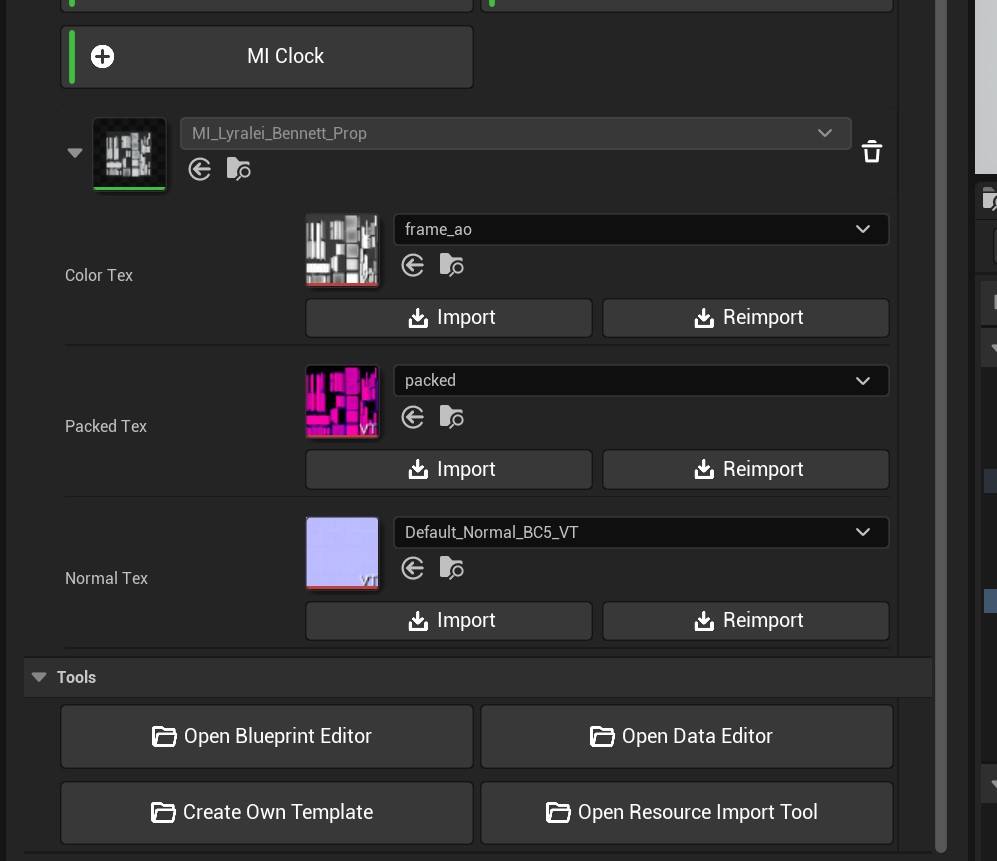
Right now you should have something like this! :)
By the way, the mesh will still be grayscaled and checkered! If you don't want to predefine a colour and like it grayscaled, or maybe you imported a diffuse map, move to "Assigning material to mesh" part.
I don't have all the textures it wants me to use!
No worries! InZOI comes with quite a few default textures you can use! For example, I often tend to use "T_Cmn_N" if I don't have a normal map.

If you press the dropdown it shows a a way to browse all the textures we can use! If you simply search for "cmn" it will show all the defaults you can assign! But be wary, you need to assign the correct one!
If you want a default for your....
- Normal Map, use "T_Cmn_N"
- Packed tex, use "T_Cmn_AORMD"
- Opacity tex, use "T_Cmn_OP"
- Albedo/base color/color map, use "T_Cmn_BC"
(Optional) Predefine a colour
Because we added our AO map to the Color tex, we do want to give it a colour. Otherwise it will turn out to be white in game D: (No judgement here though if that's what you want!)
To fix this, we need to open our material in blueprint mode.
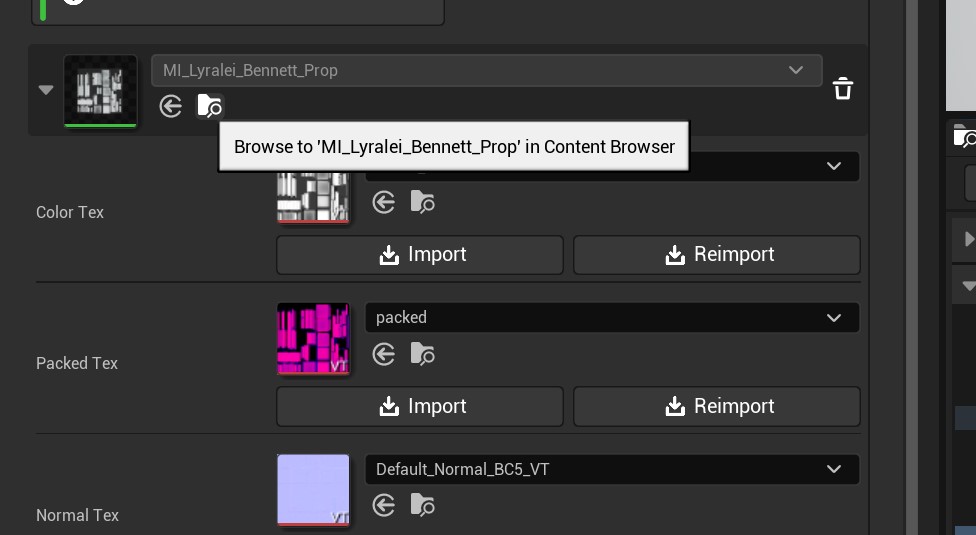
Click the Folder with the magnifying glass right under where our material name is. (Not any of the textures!)
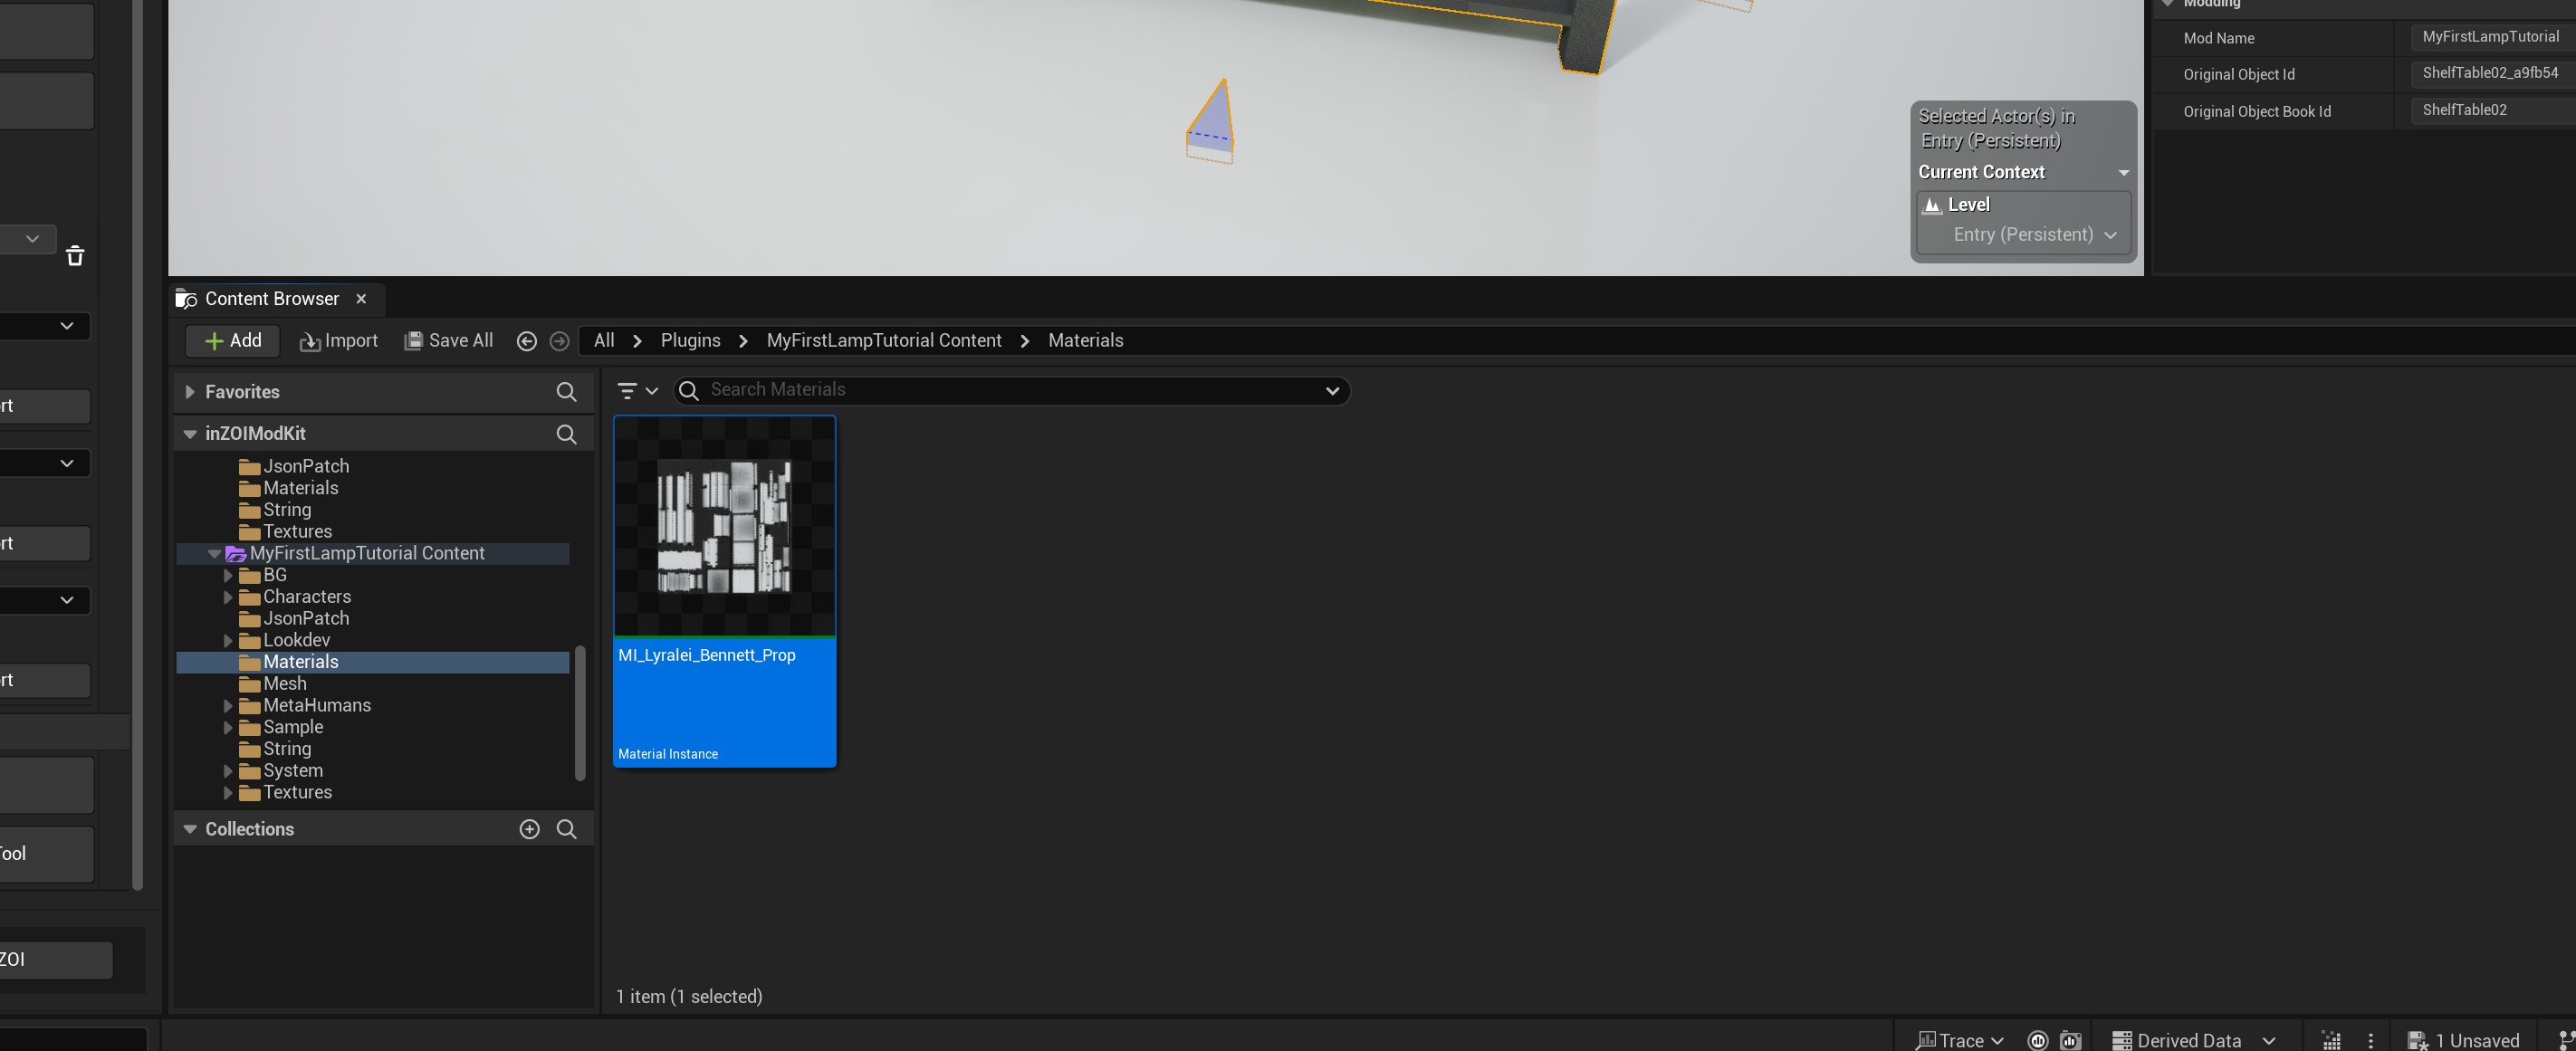
There it is! Double click it.
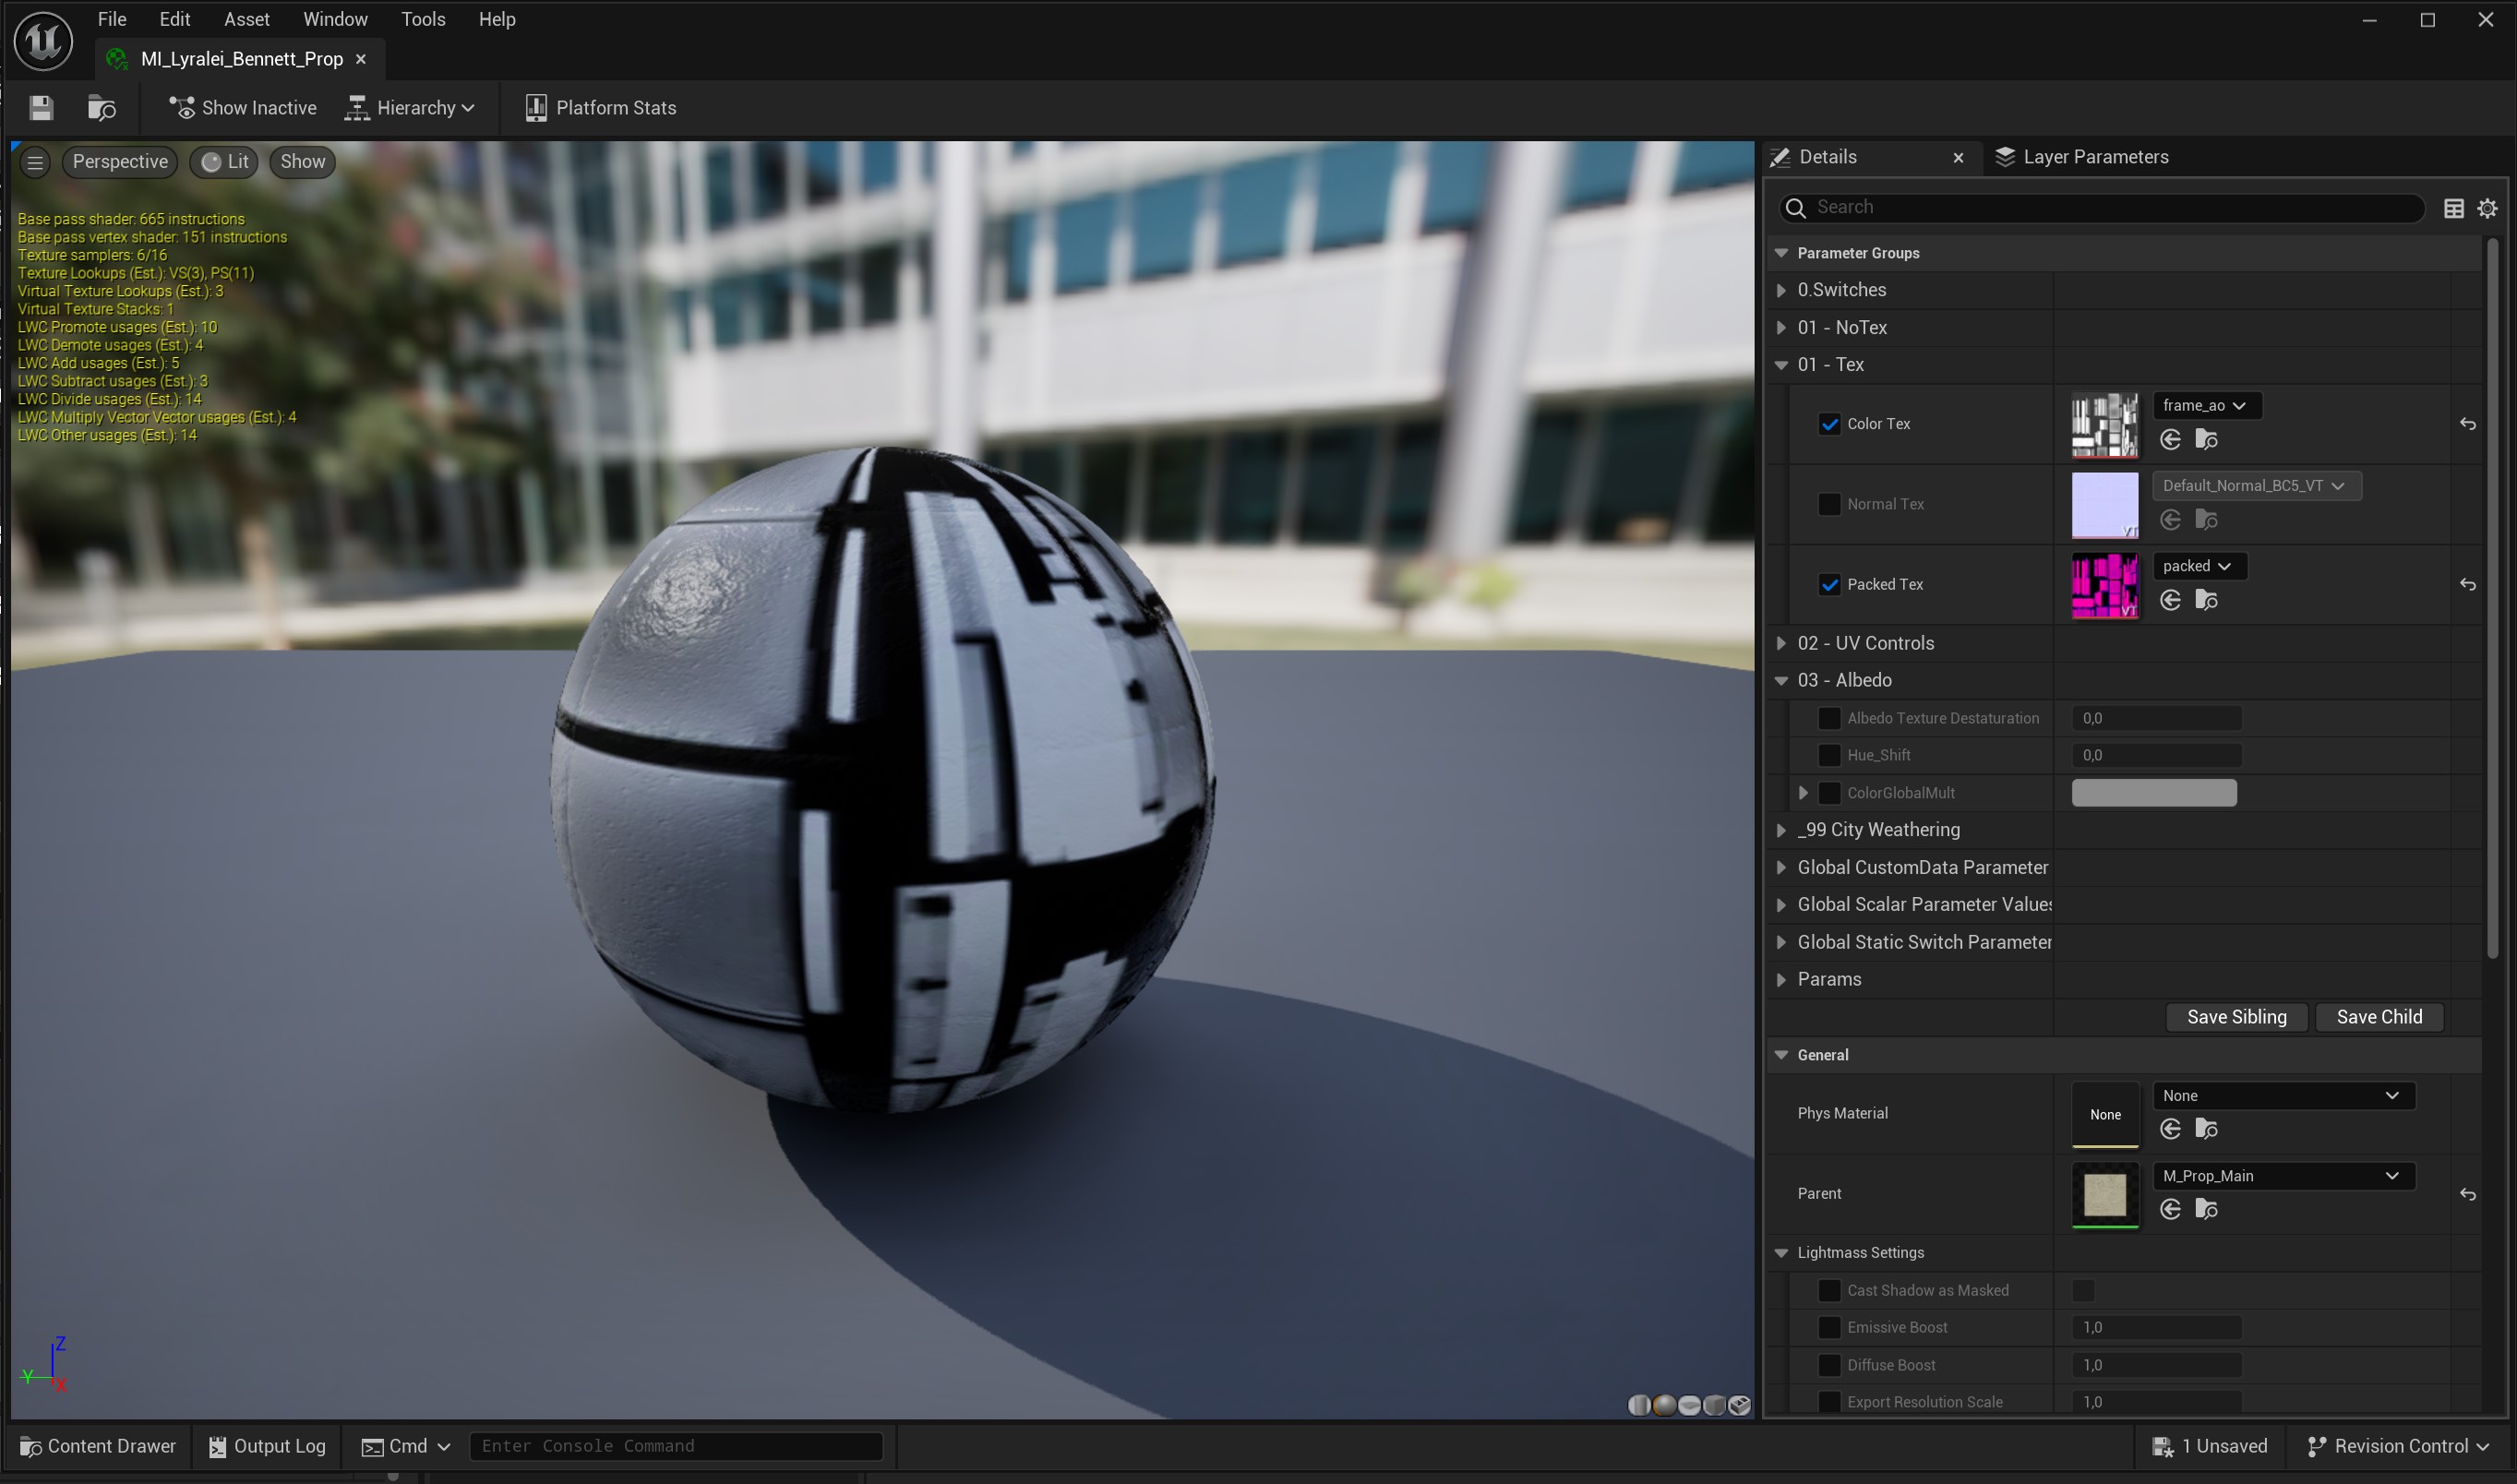
You should now be seeing a huge ball with our textures :)
First, uncollapse "Albedo" so that it reveals more options.
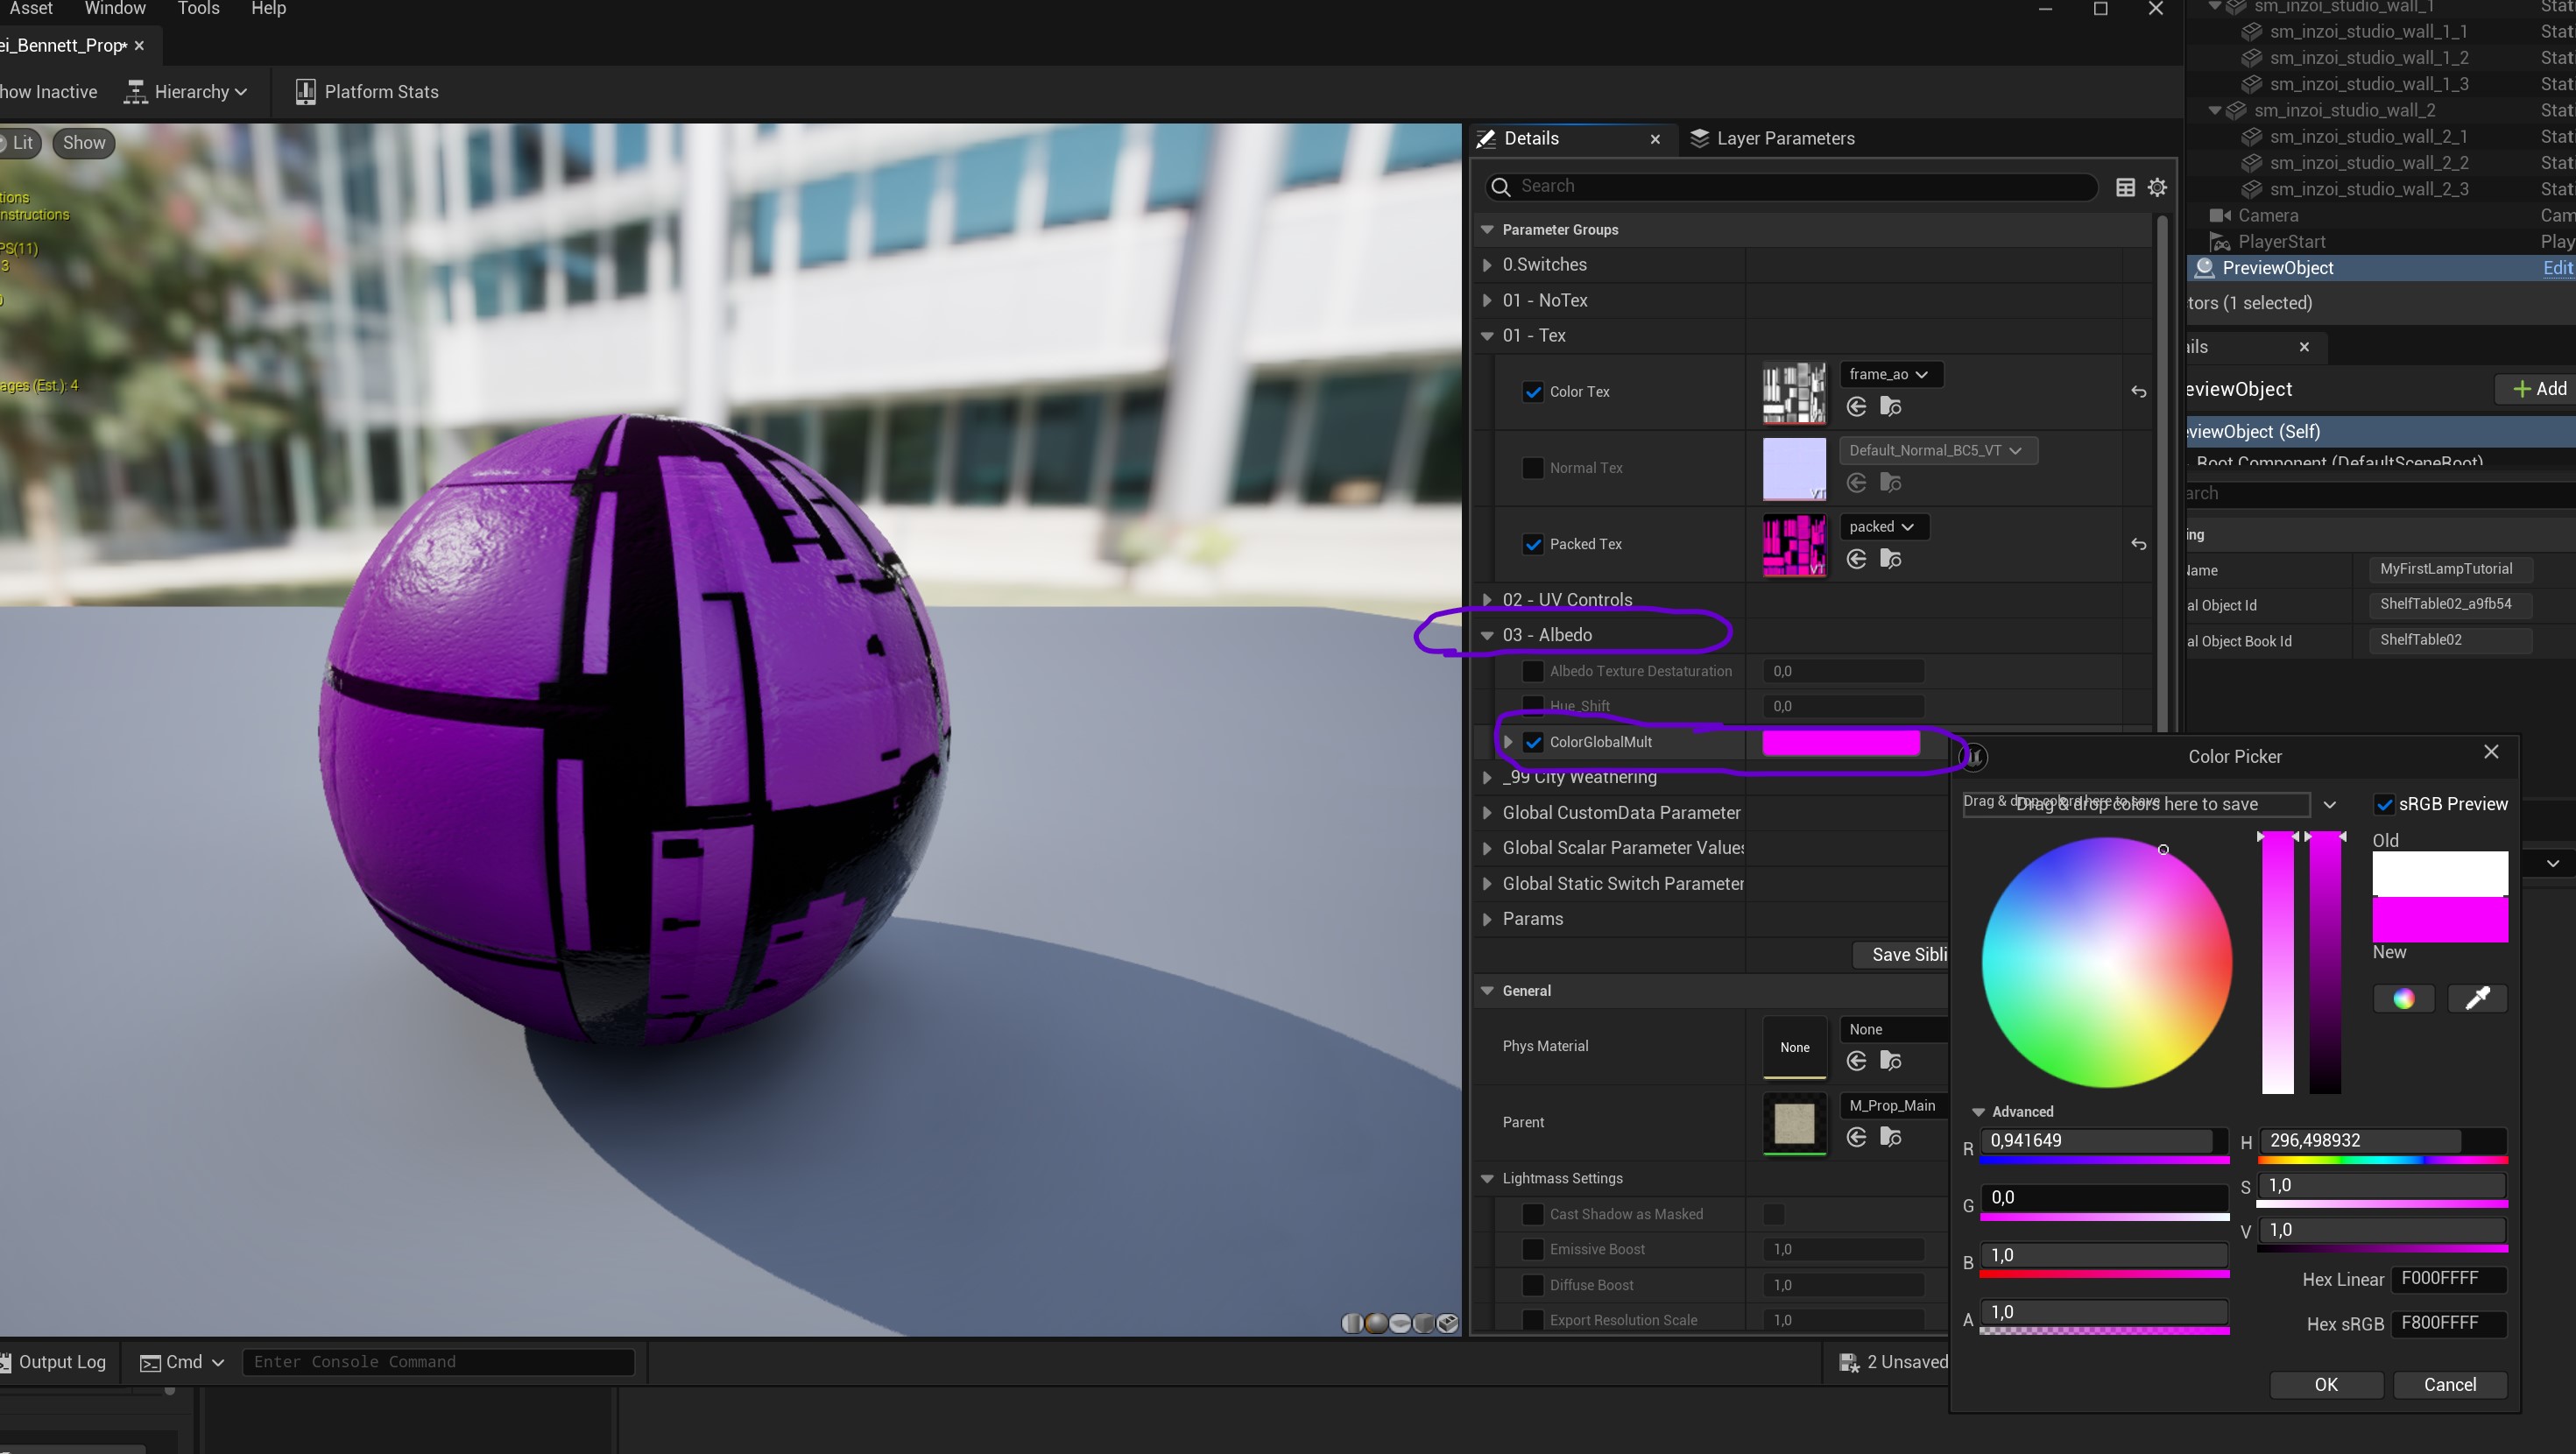
Then, check the checkbox for "ColorGlobalMult" and click on the white box next to it to change the color!
Change said color in the colour wheel and press "OK".
Now if done correctly, it should be in the colour you want it to be! :)
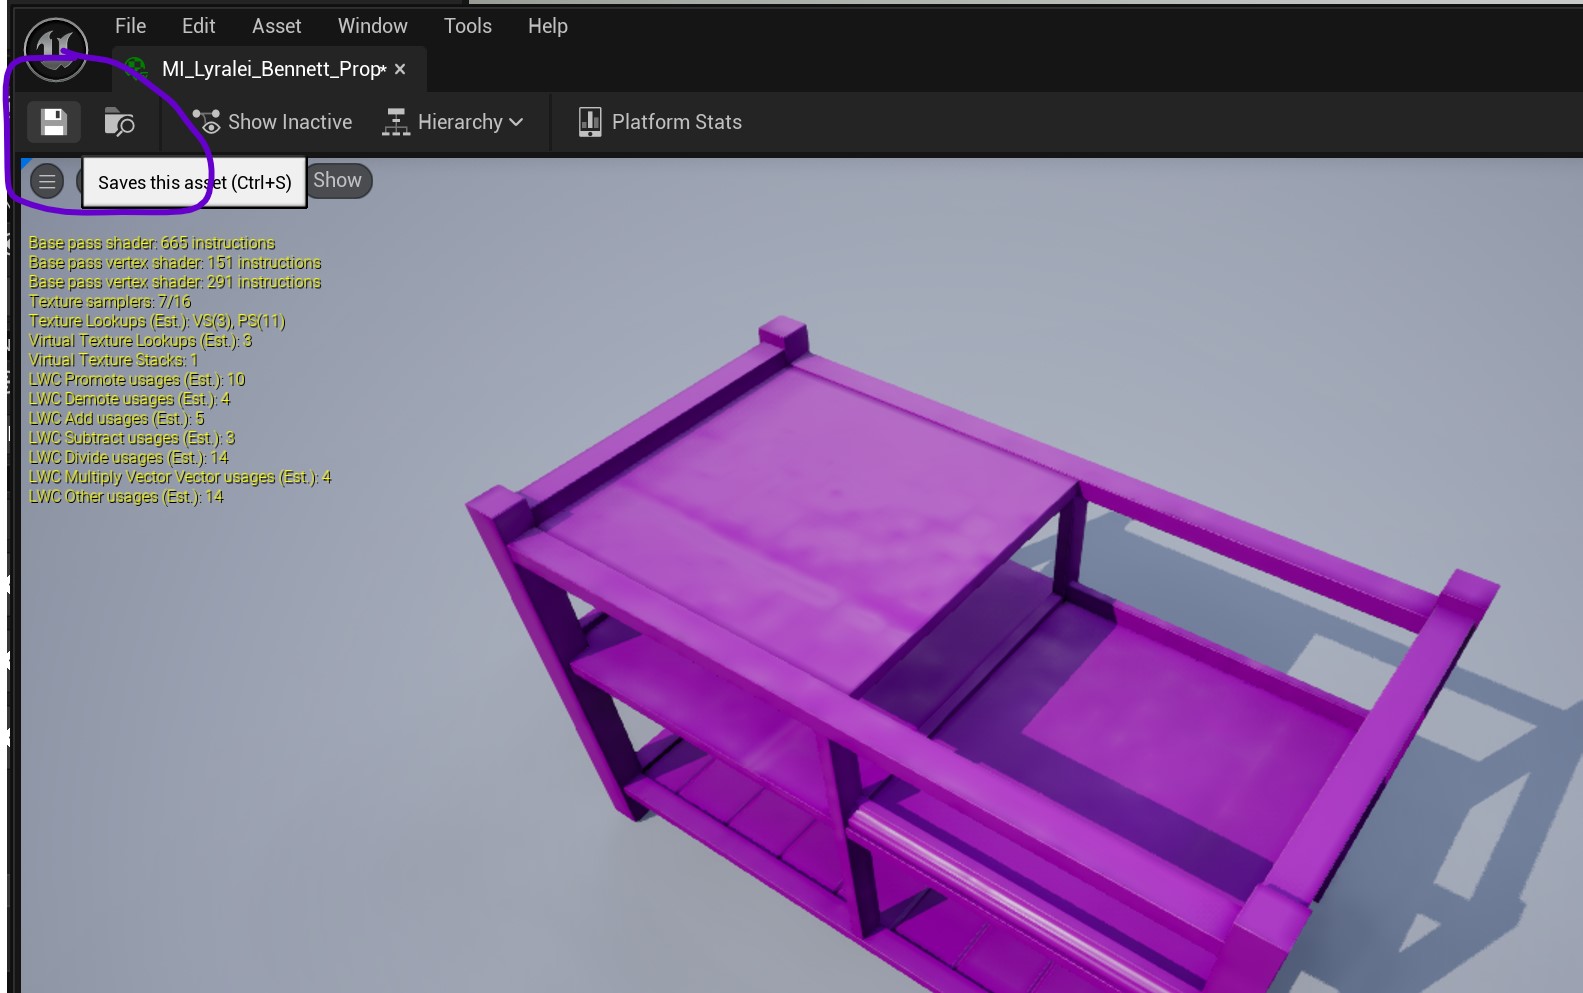
Now we save!
[Recolourable]: Adding the textures to our mesh
If you want your mesh to be non-recolourable, skip to "[non-recolourable]: Adding your textures to our mesh", or continue on to the next section! :)
Now this tutorial assumes you've already loaded in your mesh and have made a mod project already. If you haven't yet, please follow the first section of this tutorial: Simblr.cc - InZOI Tutorial How to edit existing Furniture
And return here once you've come to the "Exporting the mesh from the Workspace" as we already have a mesh 😉
This is probably what your mesh currently looks like... boring and gray! D:
To fix this, we press "MI Blue"
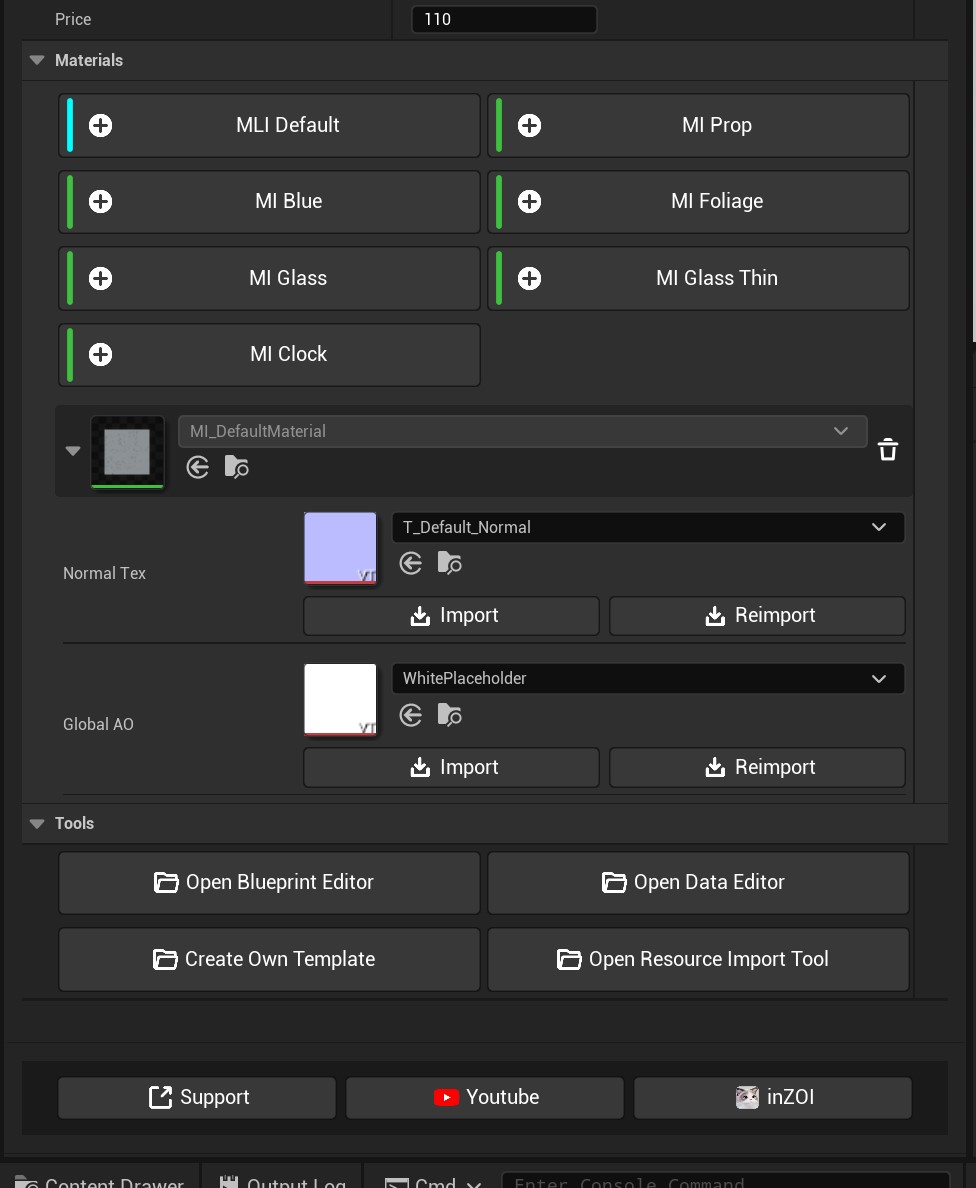
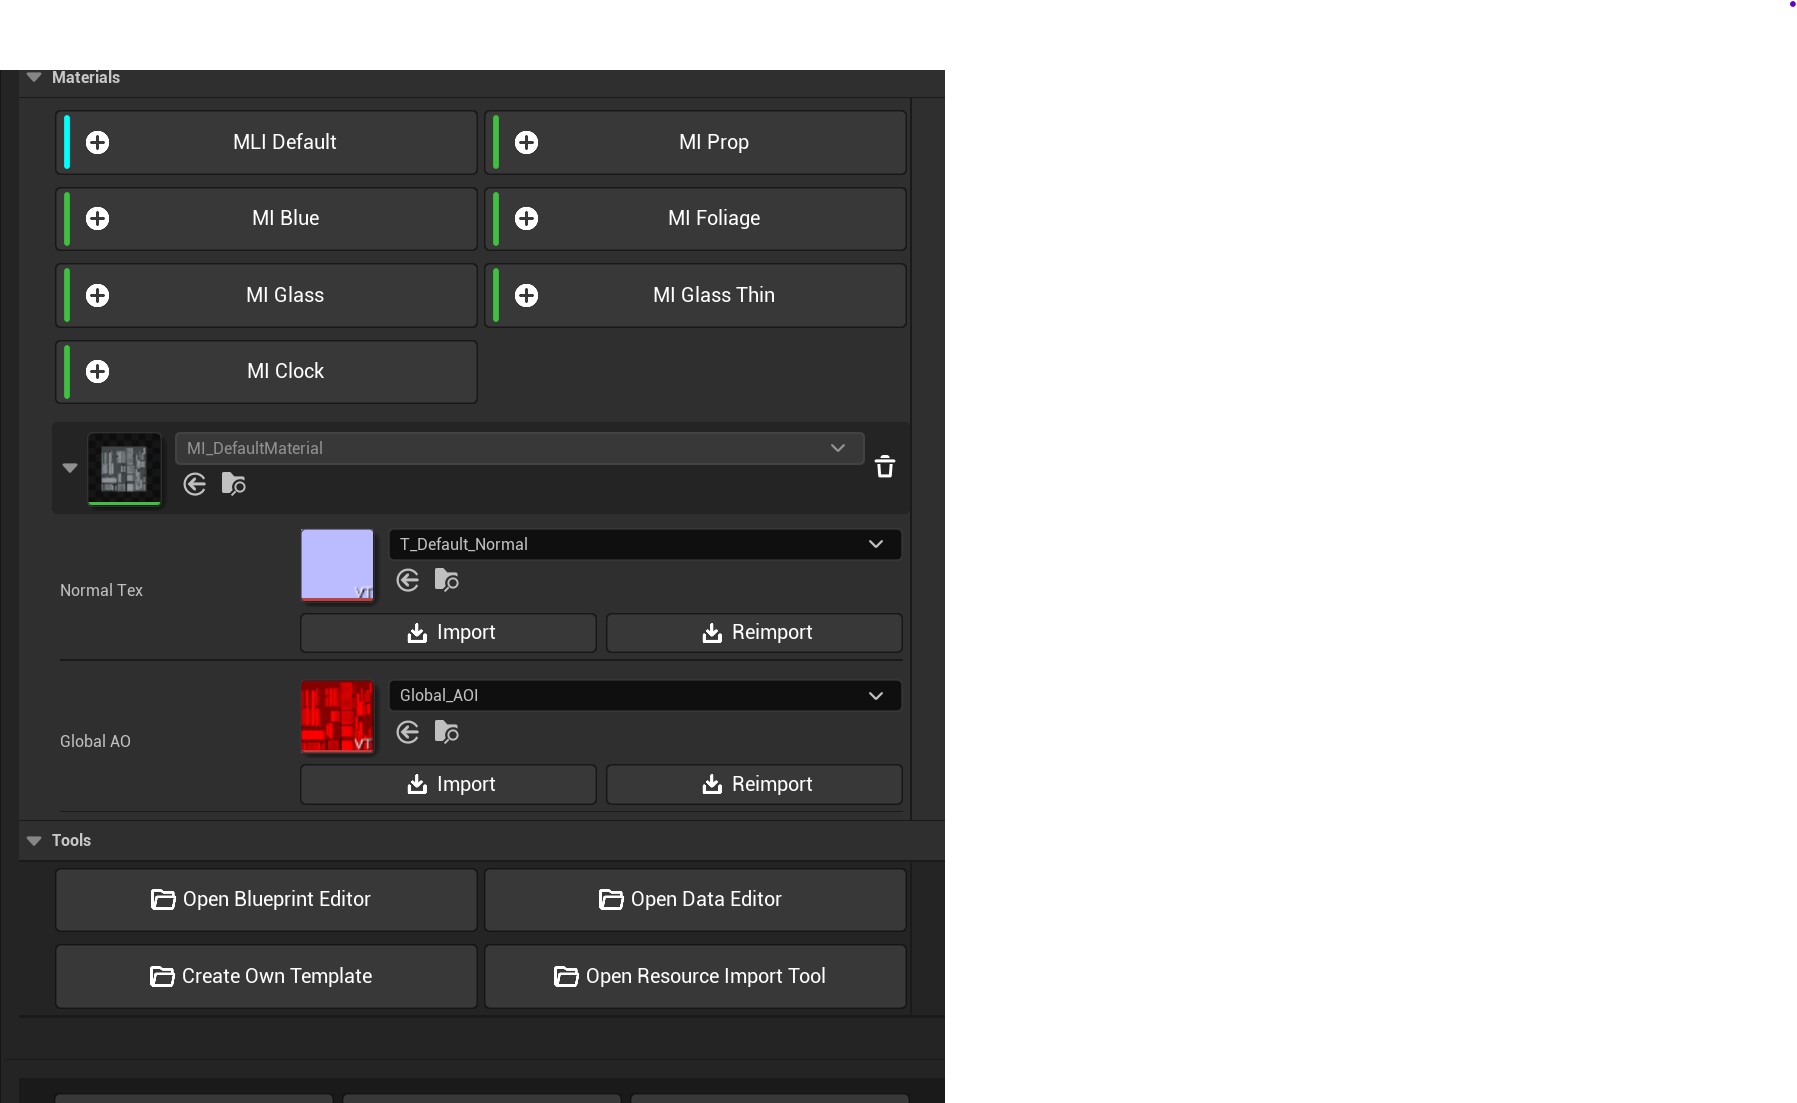
Now, uncollapse the material that's gotten added to the material list here. (Click on the arrow next to it's icon).
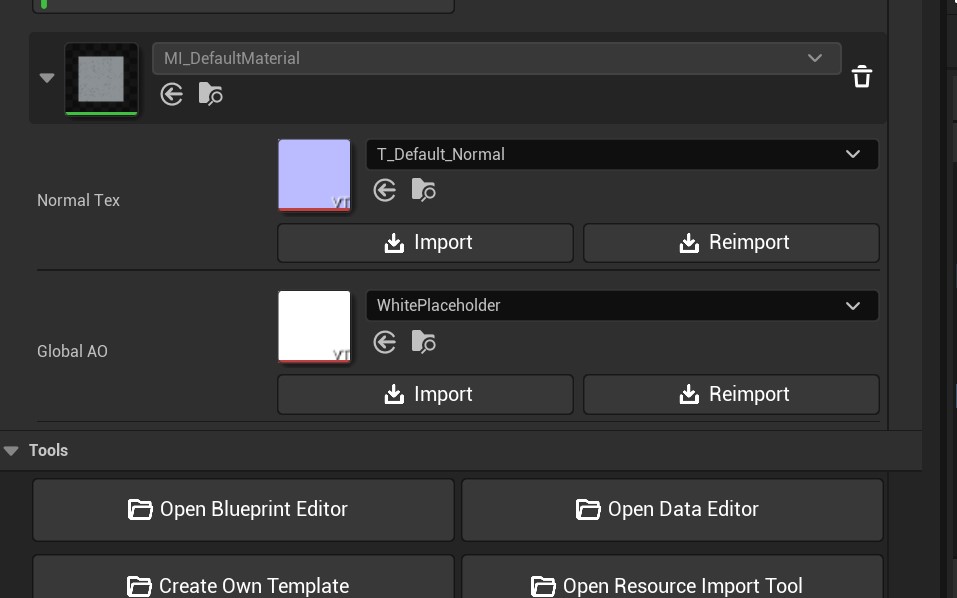
Here you'll see 2 textures.
Now, you probably noticed how our "Global AO" is not purple, nor is it called "Packed"! We will fix that in a second.
Creating the Global AO texture:
The global AO texture uses a couple of different maps, but it's actually just like a packed texture! It just has different requirements:
- The Red Channel needs the AO
- The Green Channel needs the Curvature
- The Blue Channel needs the Emissive
- The Alpha Channel needs the Emissive mask.
Lots of new maps we're hearing here. But luckily for us, we don't need any of them :D
Though, we still need to make the global AO texture. For this, we want to go back to good old Easy Channel Packing!
With our already made textures this is super easy to do!
- Red needs your AO
- Green needs to be a pure black texture
- Blue also needs to be pure black
- Alpha also needs to be pure black
You may need to make a quick pure black texture in Photoshop or Gimp though, as that's what we're adding in the Green, Blue and Alpha box :)
Press "Save" at the bottom right, and store it in your workfolder
Press the "import" button for Global AO to add it! It should appear red now :)
Adding our mask/color id.
I'm not sure why Krafton made this so difficult, but for this we need to open the material up in the blueprint view. To do so, we first need to find it!
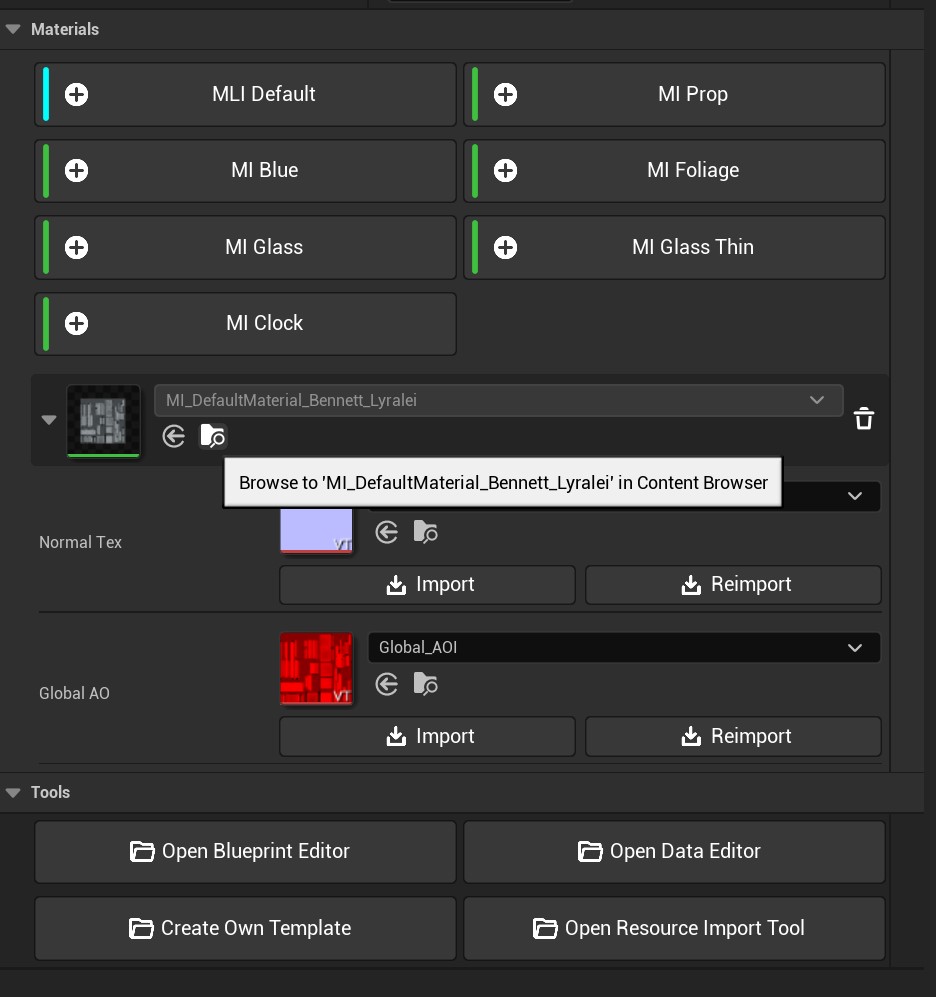
Press that folder icon with the magnifying glass, so it tells us where our material is...
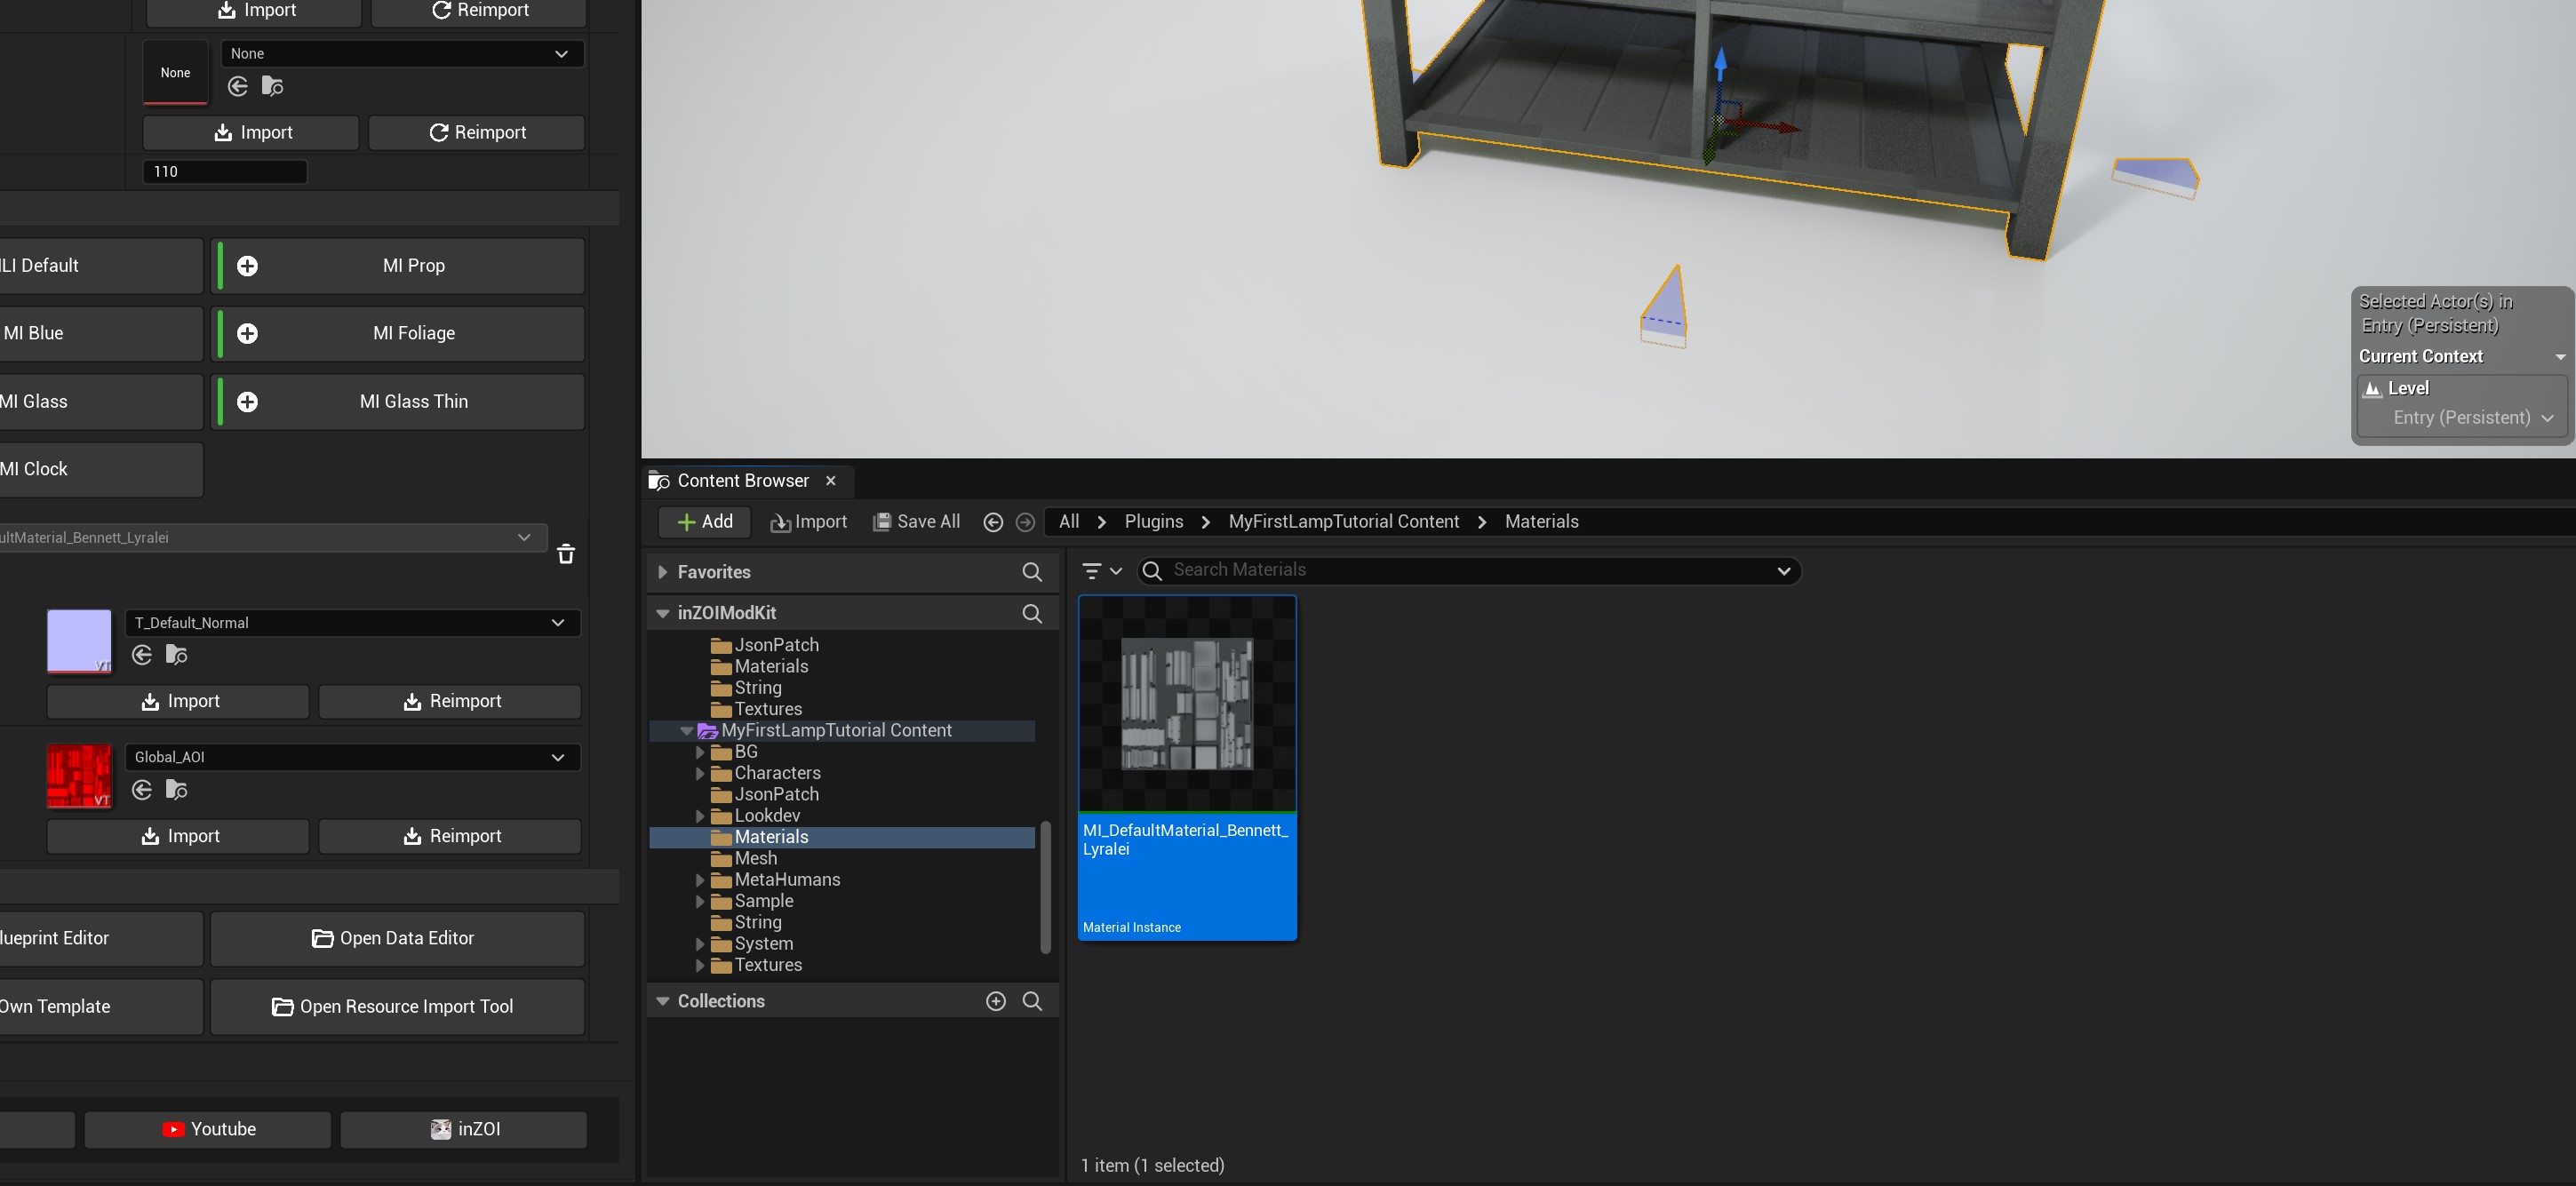
There she is! :D Double click on it.
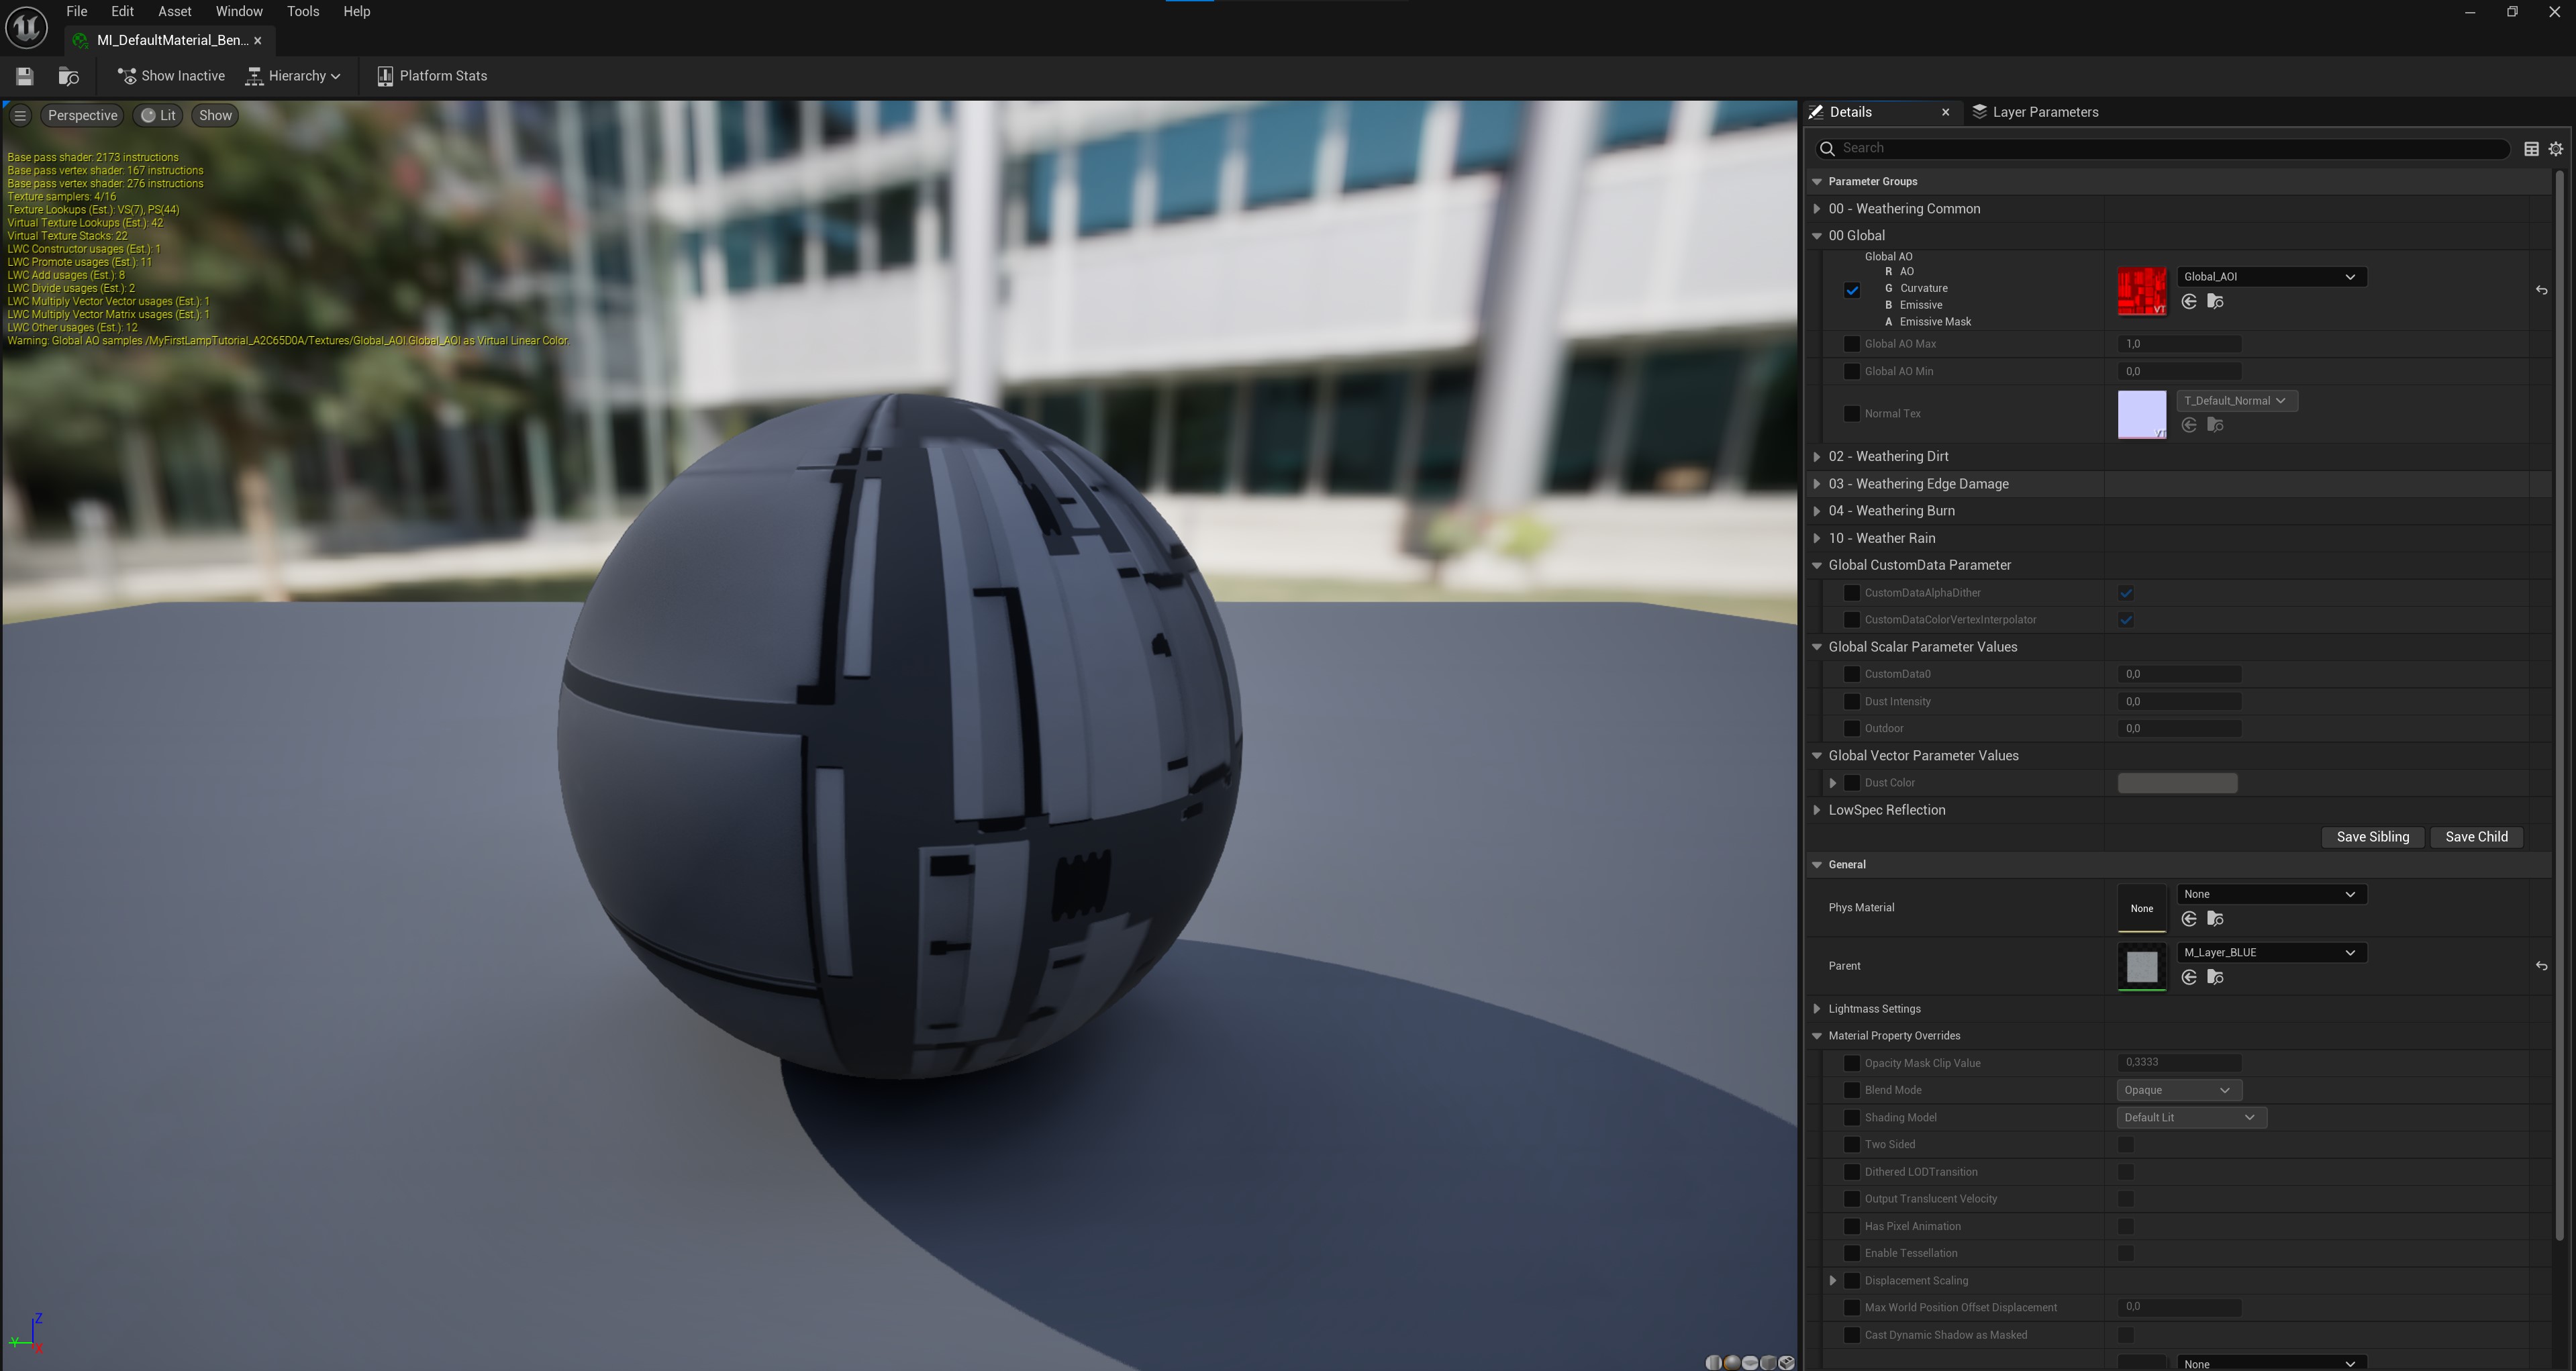
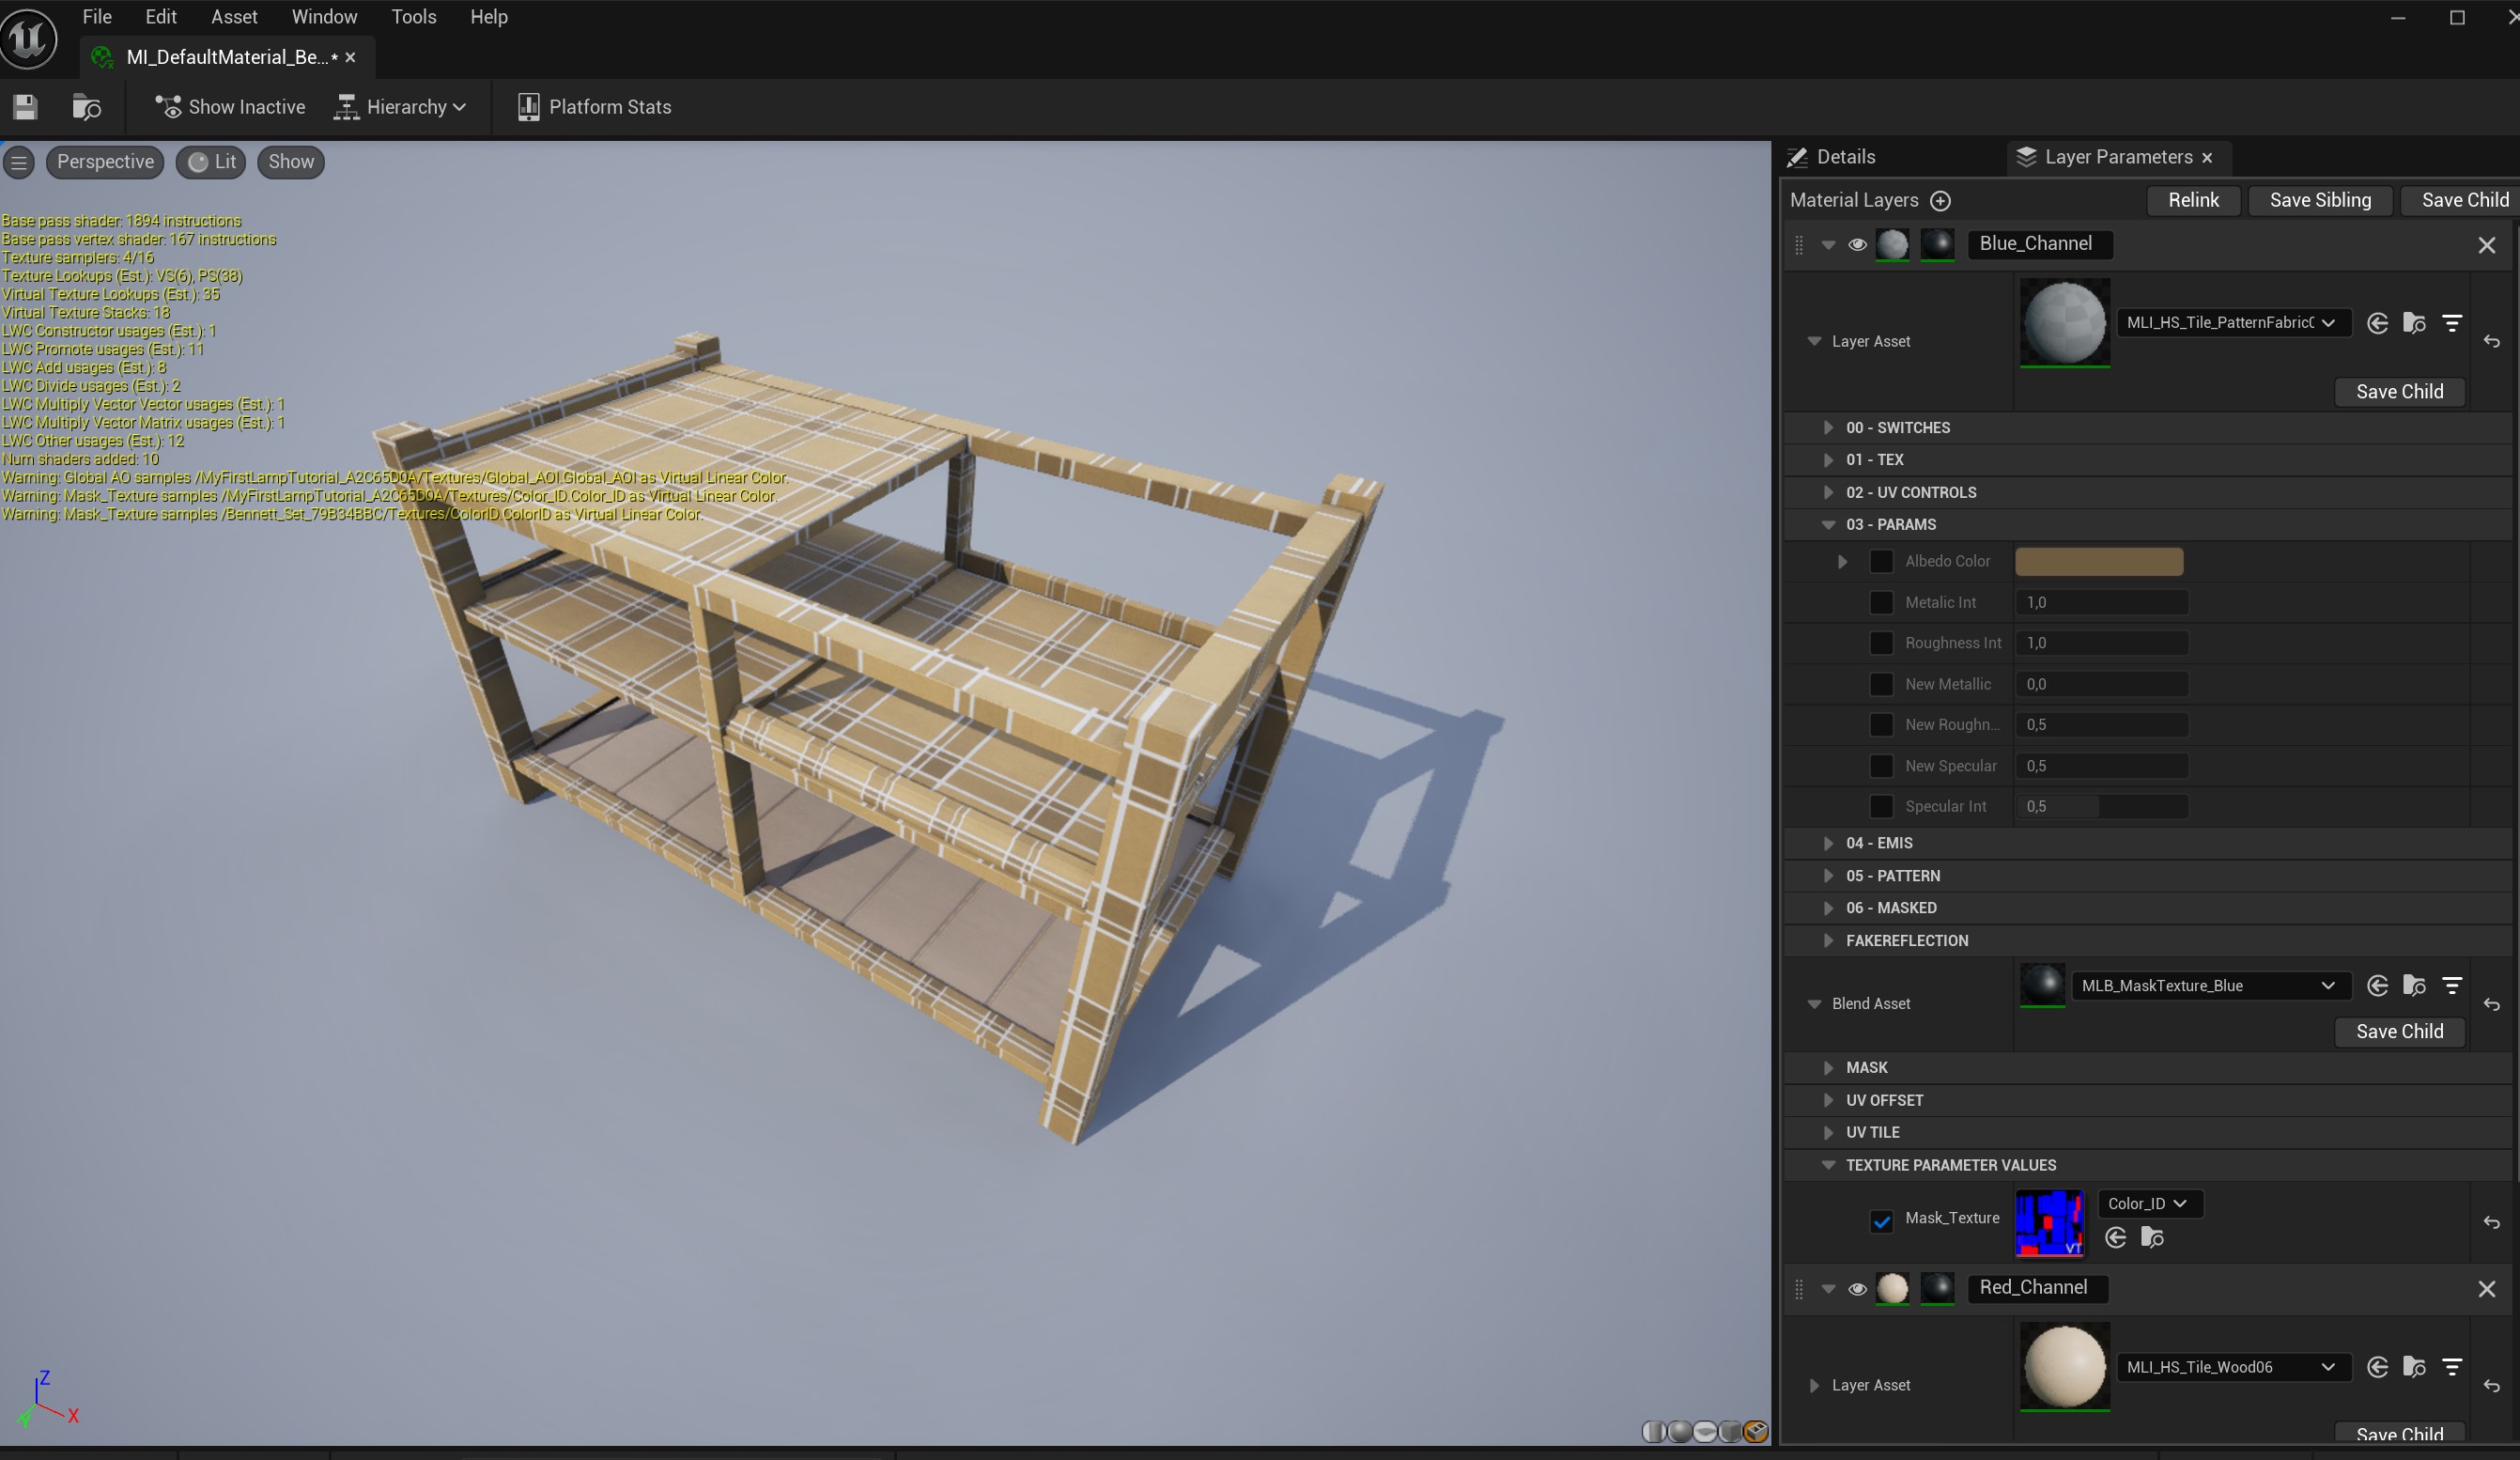
Now this screen pops up! :)
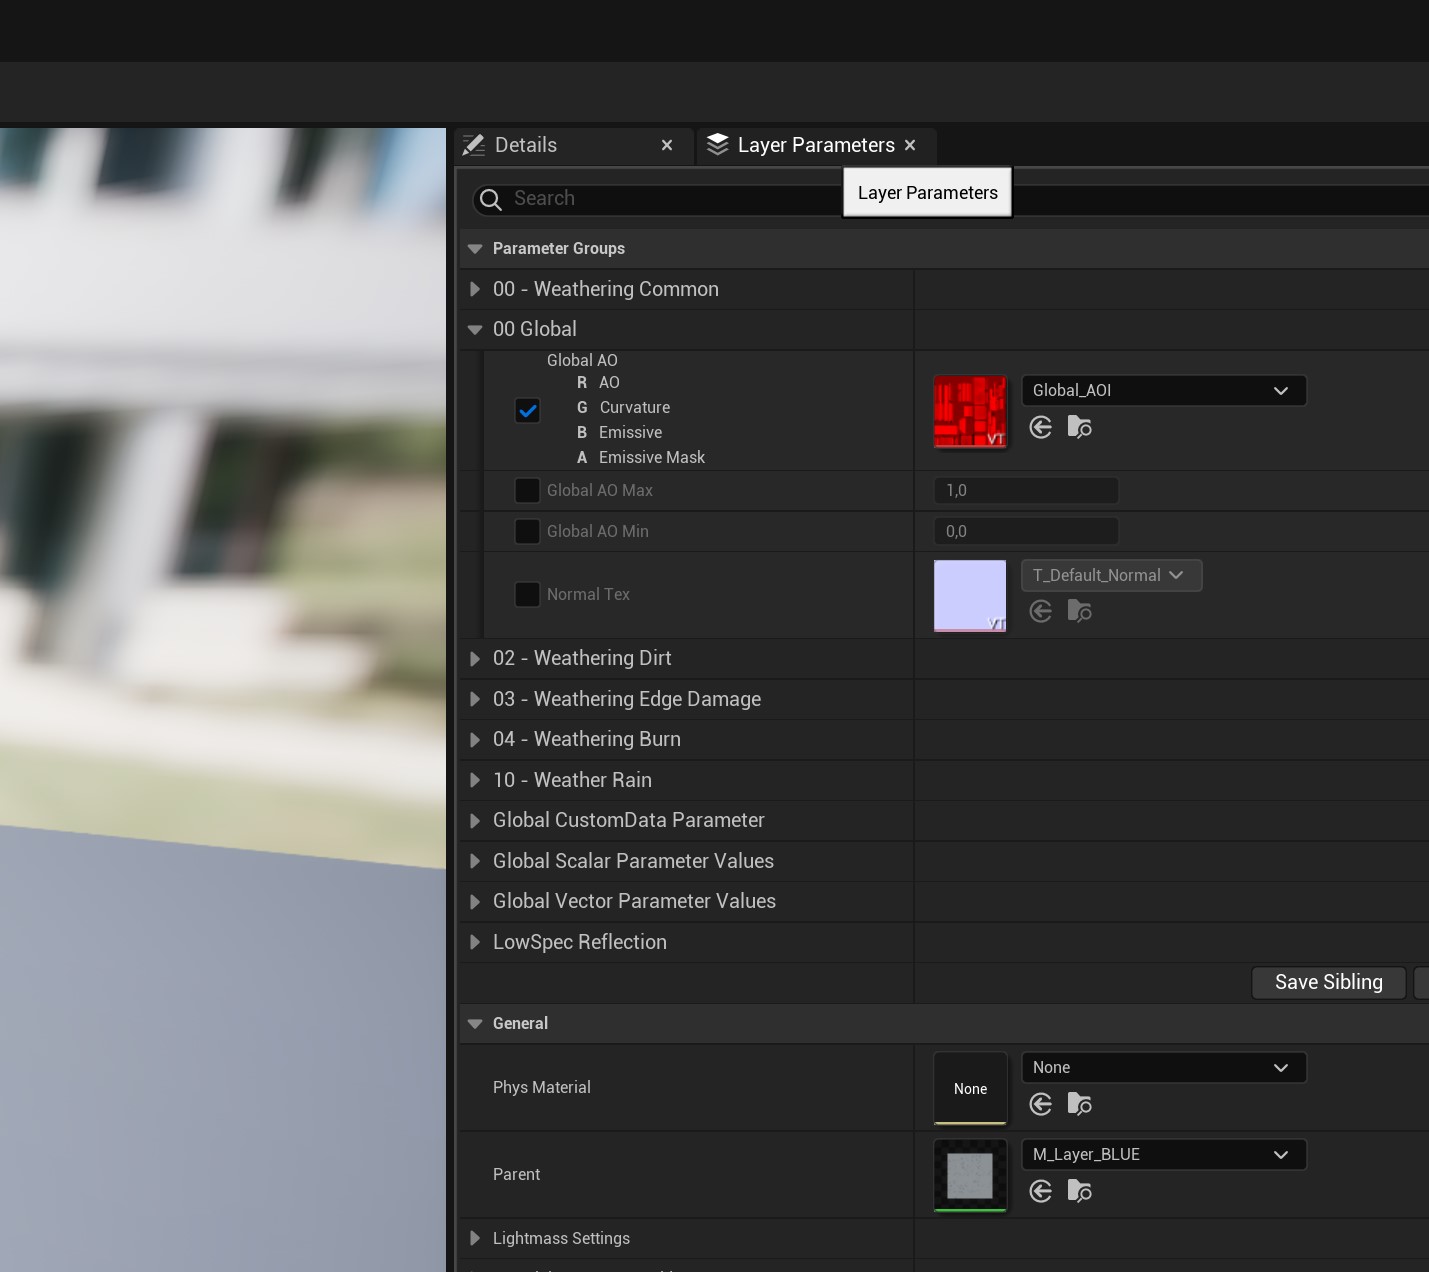
On the top, we're going to the "Layer Parameters" tab!
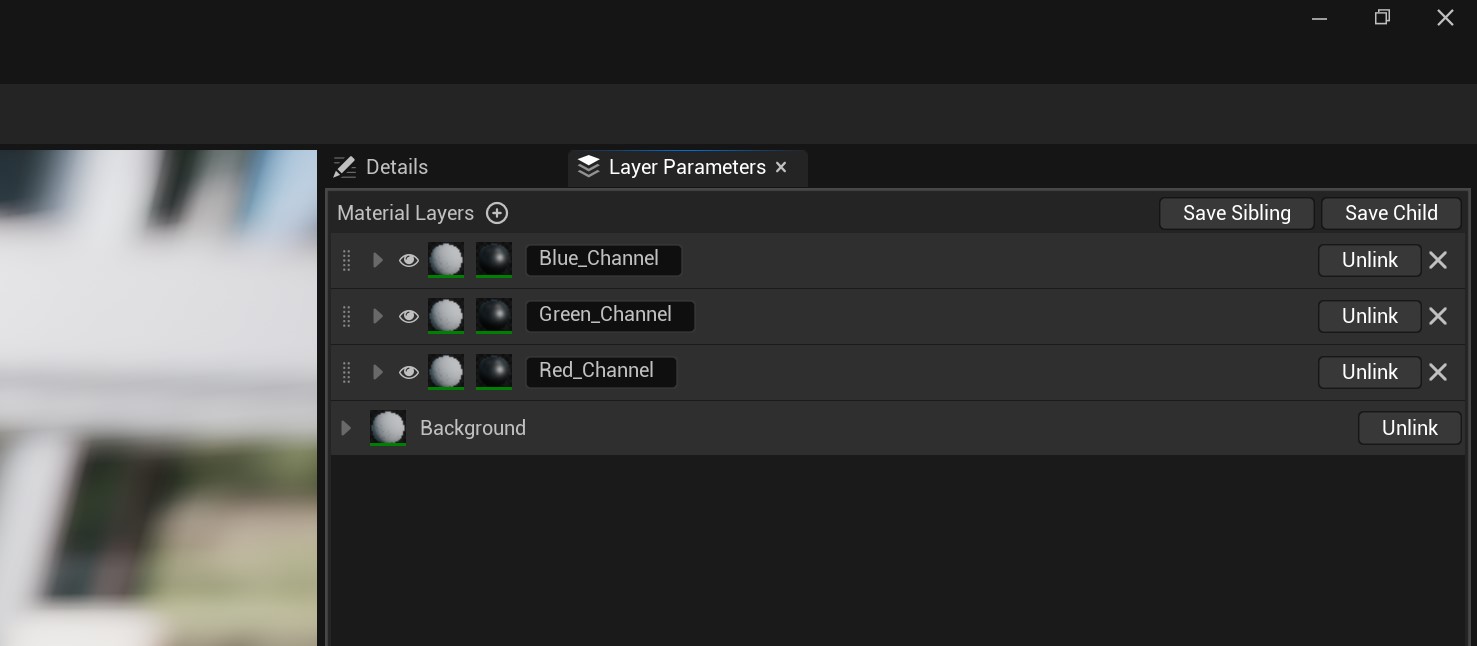
This is what you should be seeing. As you can see, we have a:
- Blue channel
- Green Channel
- Red Channel
Keep in mind that these colours will look at the colour your color id map/mask has! So for example, the red channel looks at the red colour of the mask and will apply that preset colour for it.
Cool! Now with that out of the way, let's get to the cool part :D
First things first, if you have to, DELETE the colour(s) your mask DOES NOT have. In my case that's green. (the x icon next to it is what you want to press).
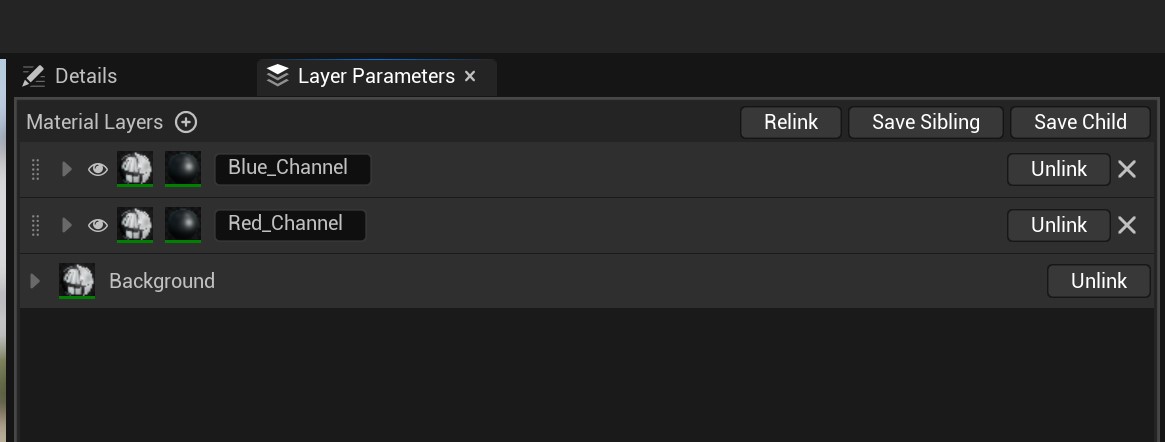
So, basically this! :)
Cool, okay let's open up our Blue channel tab so that it shows more values...
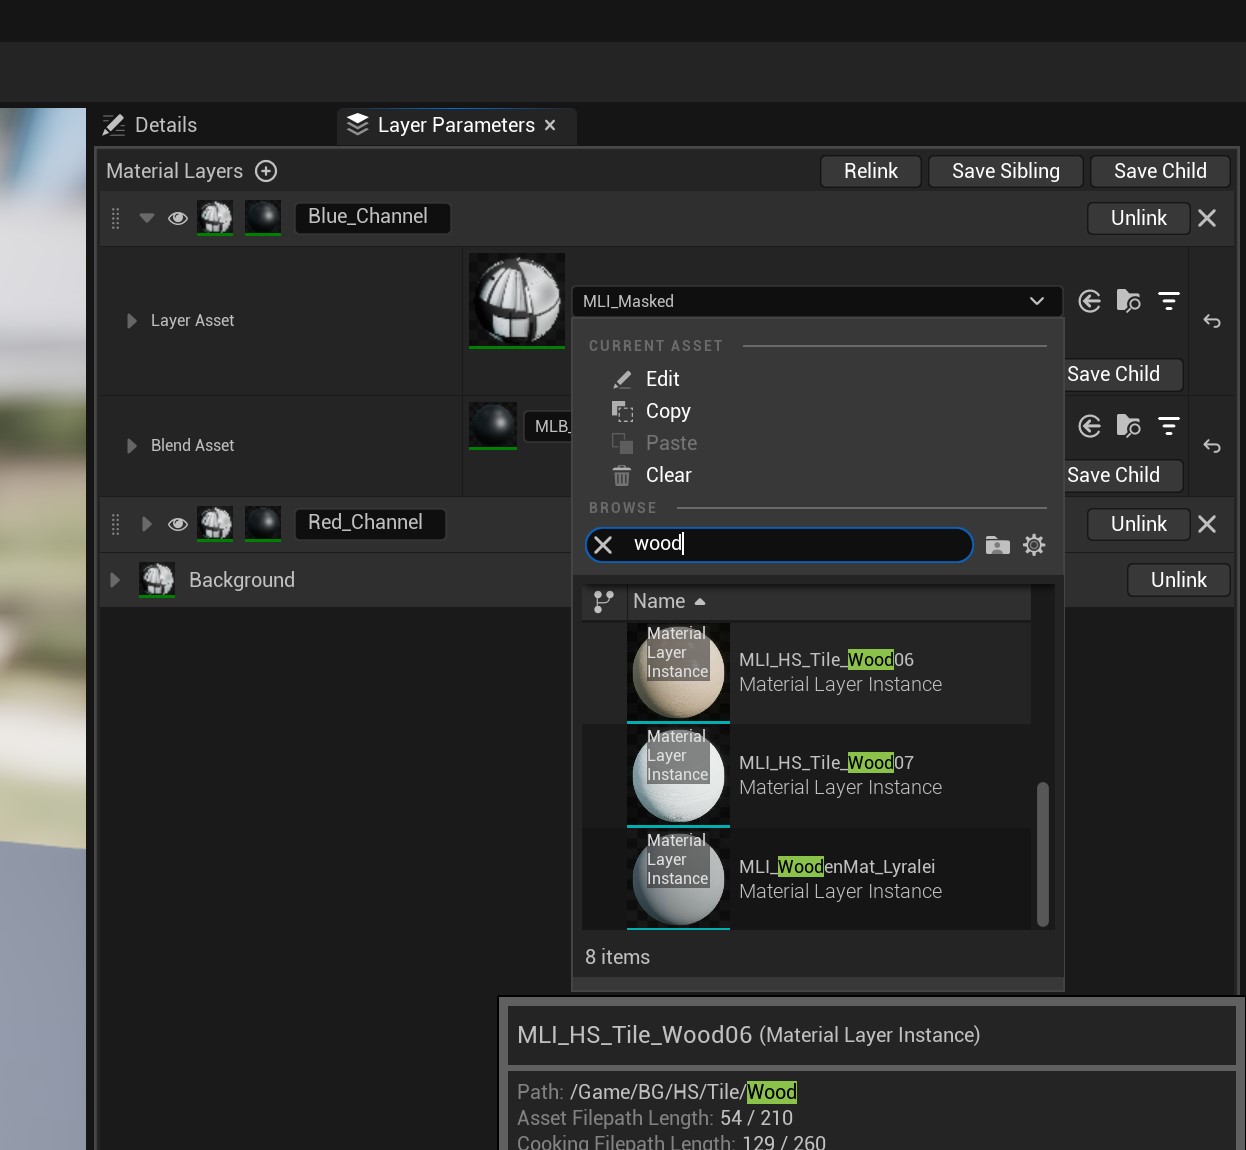
You know how in the game, you can assign materials to it? Like wood, or fabrics, etc? That's what this is! :)
So, In my case, I want to use wood06. The best way of finding these are just to type in "Wood" or "Metal". Here is a list of all materials:
- Fabric
- Wood
- Plastic
- Metal
- Ceramic
- Marble
- PaintedMetal
- Picture
- Rubber
- Screen
- Soil
- Vinyl
- WallTile
Here you can't go wrong! If you want to play around, finding a suitable material, totally go for it :D
Now to adding the actual mask to see our changes!
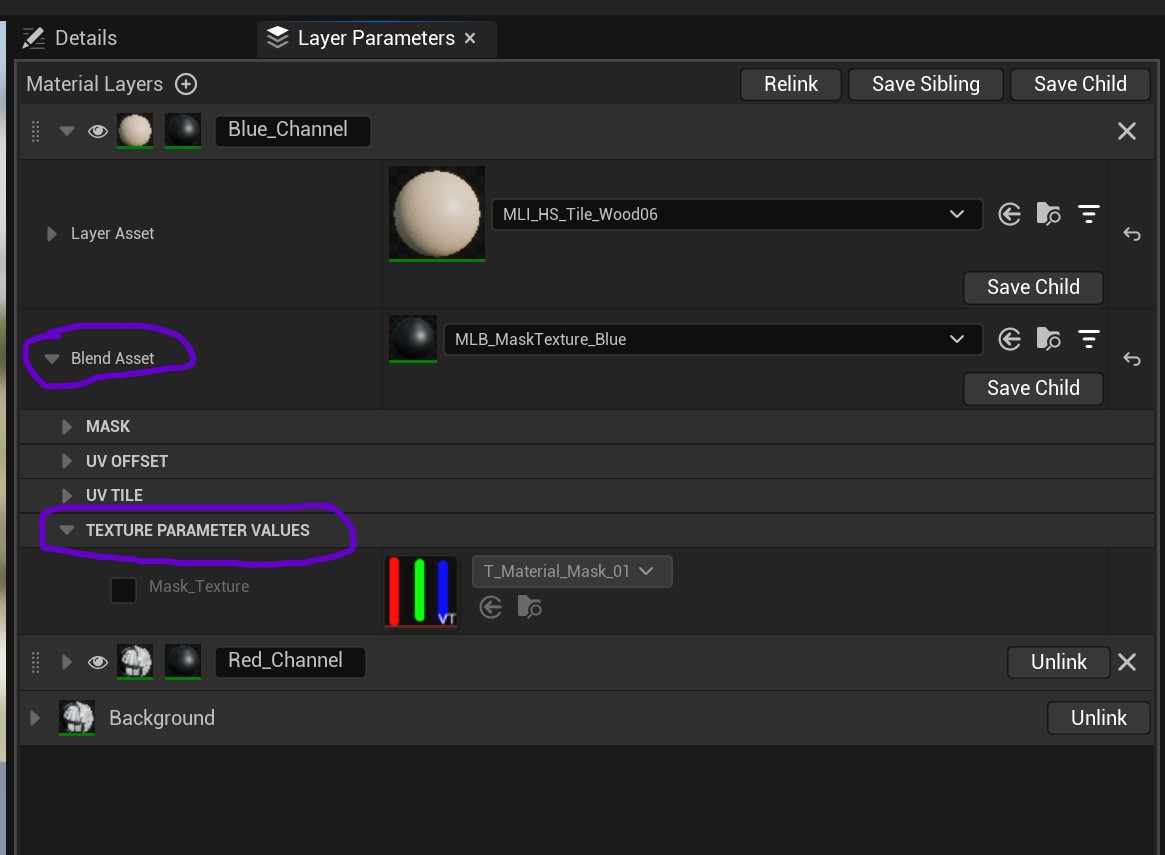
First, uncollapse the "Blend asset" tab, so that we see more settings...
Then, uncollapse "Texture Parameter Value".
That looks already close to our mask! :)
Before we can assign it, we do need to import it! The quickest way of doing this, is by going back to that main screen, and press "Open Resource Import Tool". This is where we can add any additional textures, meshes and other goodies that we may need.
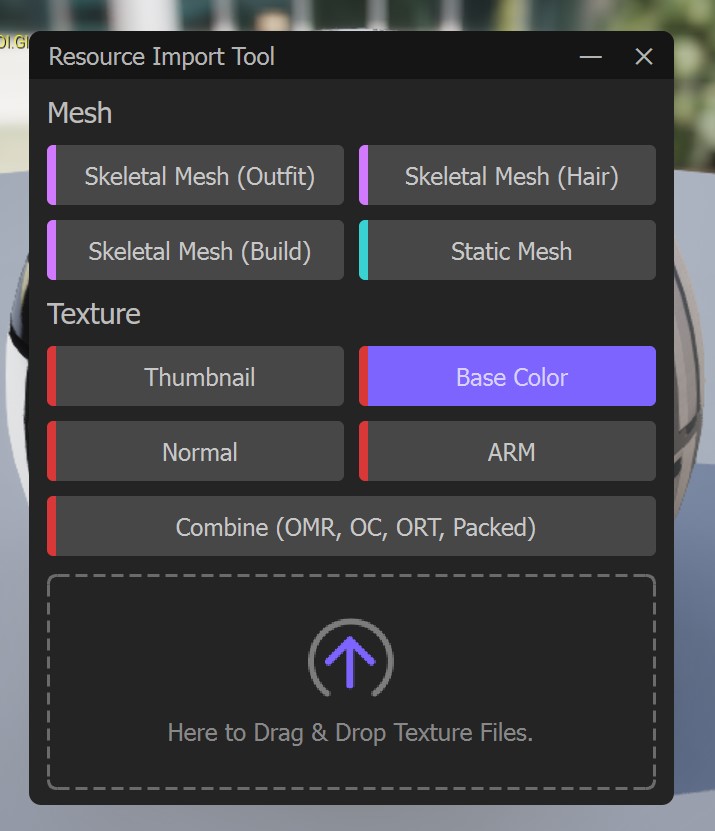
Click on "Base Color", and drag/drop the Color ID texture into the box that says, well, exactly that! :p
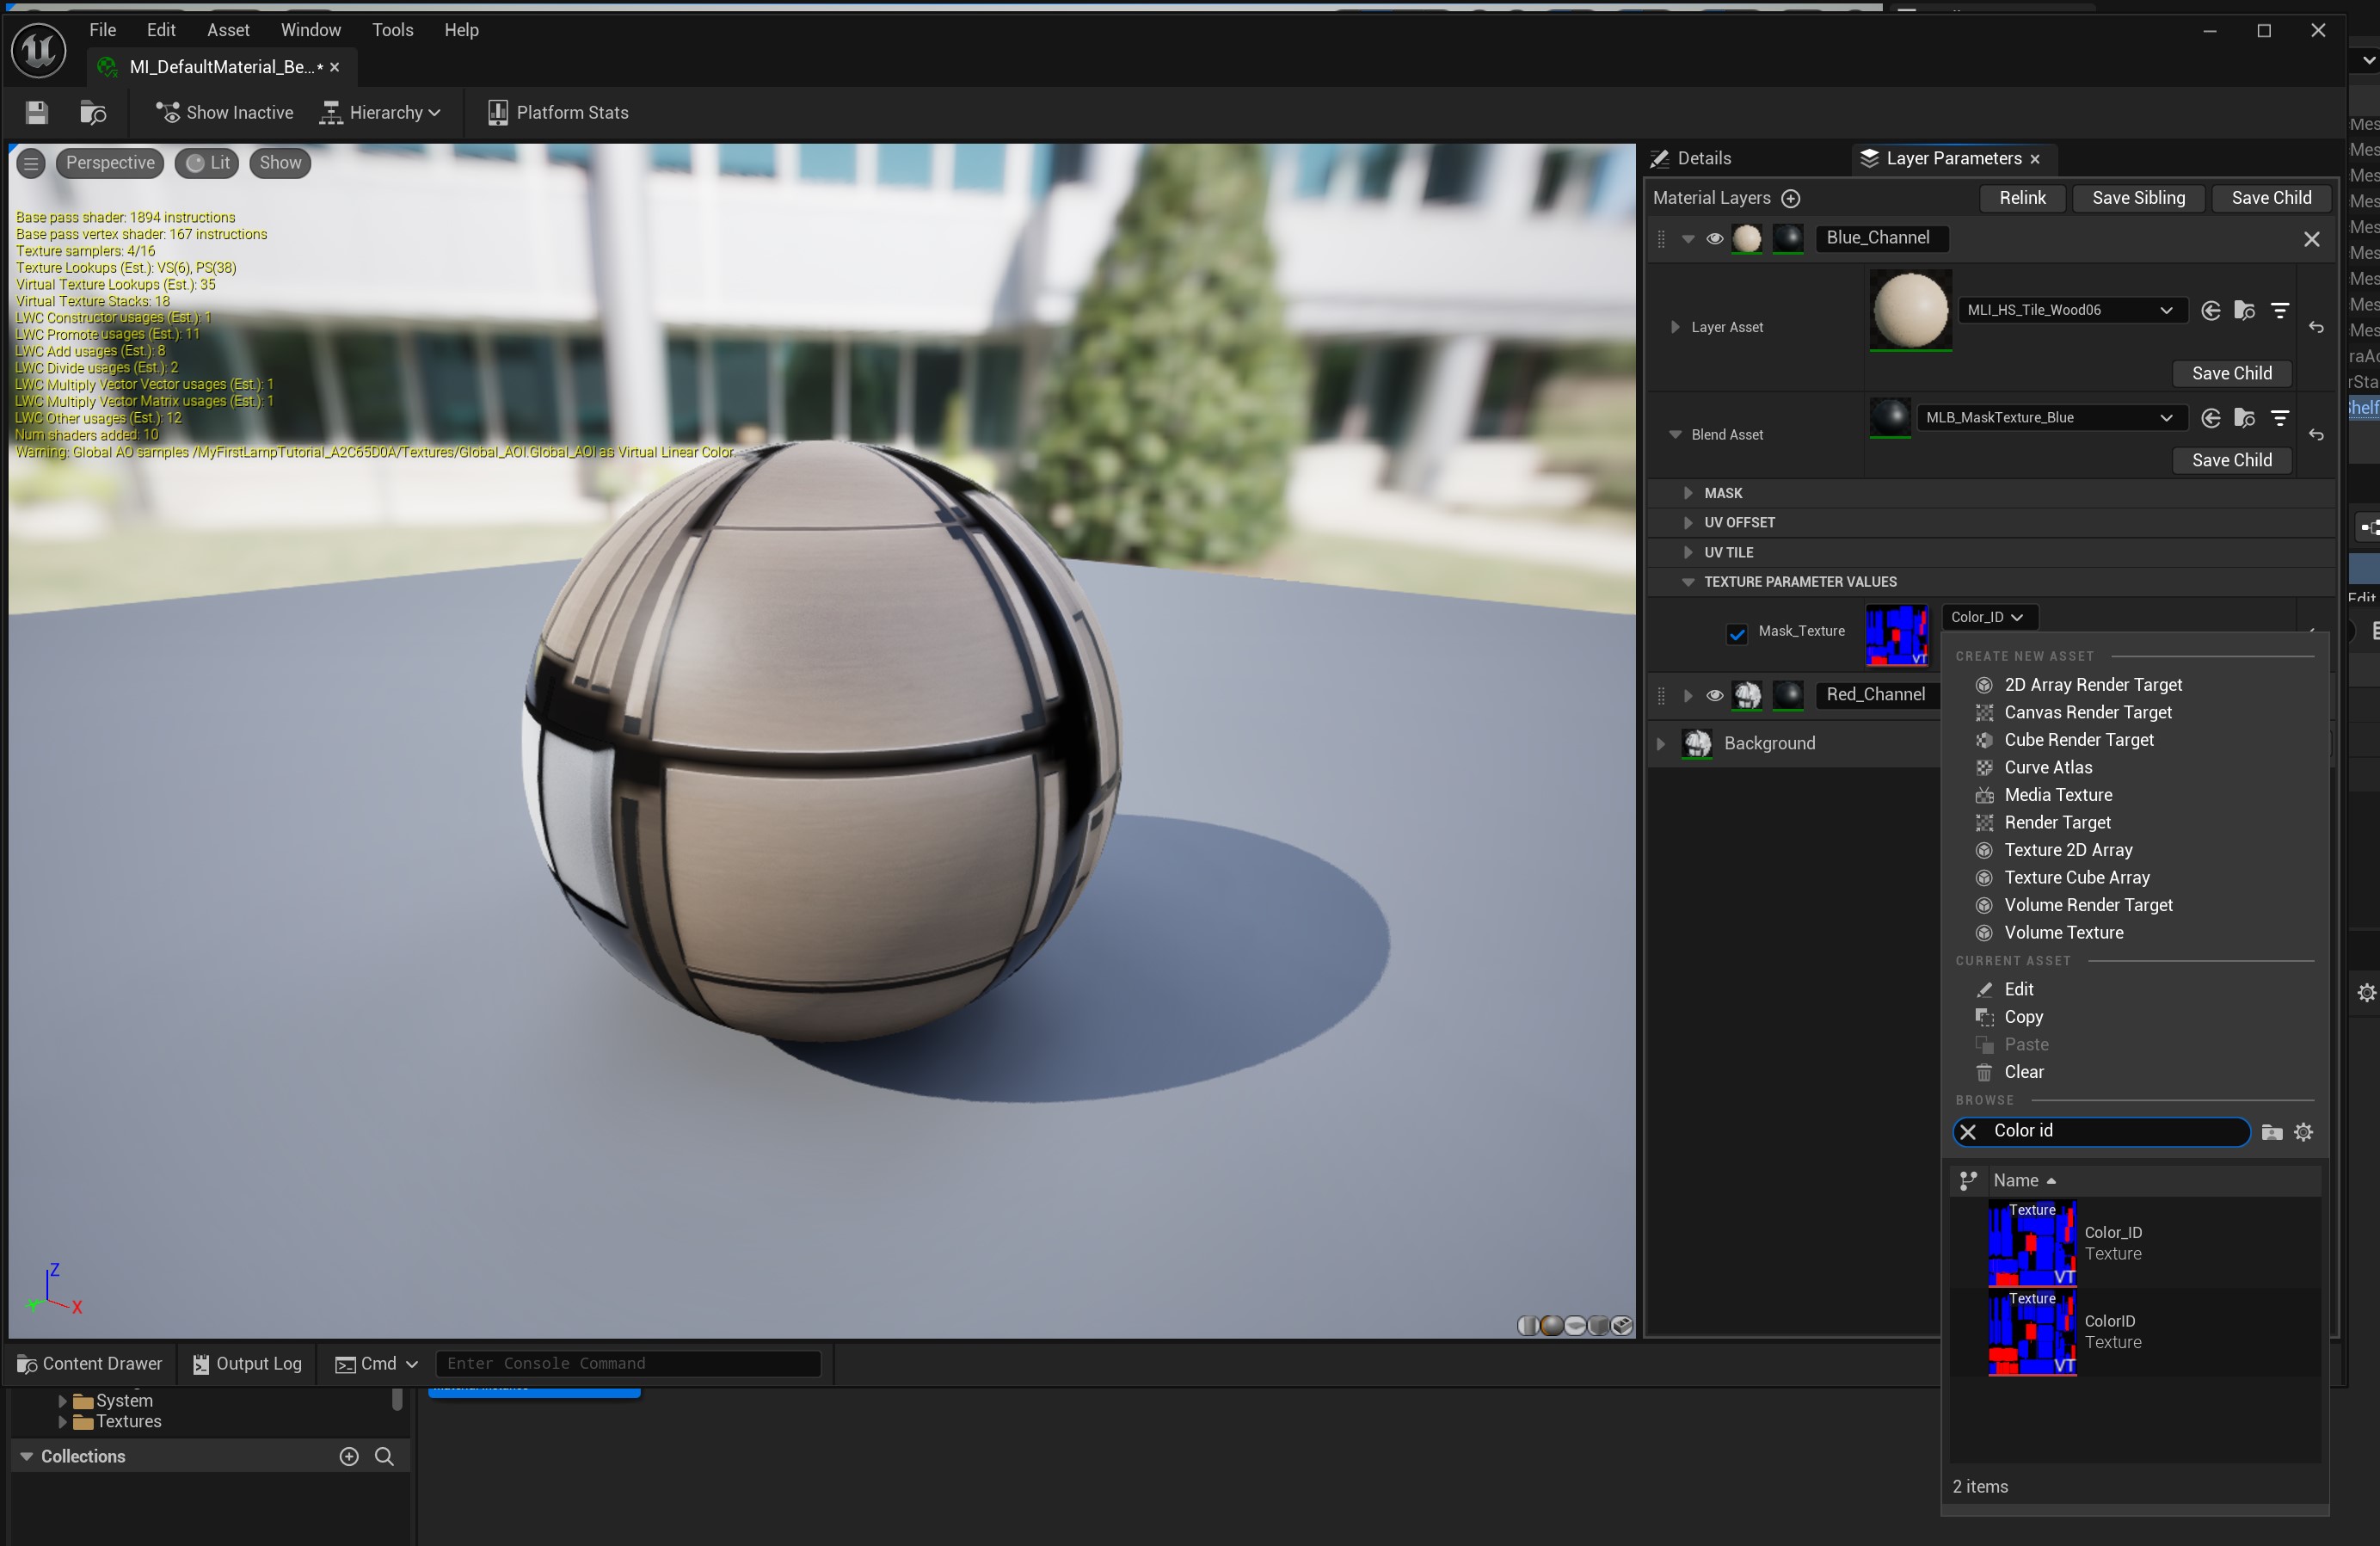
Back in this window, we now want to press the checkbox next to "Mask_texture" and click the dropdown.
To find your texture, simply write it's name in the search bar. In my case it was called "Color ID" because I called it that :)

Now if we wanted to change the colour of the wood, we can do that too!
First, we want to look at the "Params" section, and uncollapse this.
Then, Check the "Albedo Color" checkbox to enable it.
And then change the color by clicking on that color next to the albedo color!
But what if the material feels too big?! Maybe you want a more finer wood, or maybe much more prominent, how do we fix that? Maybe it's even going the wrong direction!
Well, the fix is easy! :D

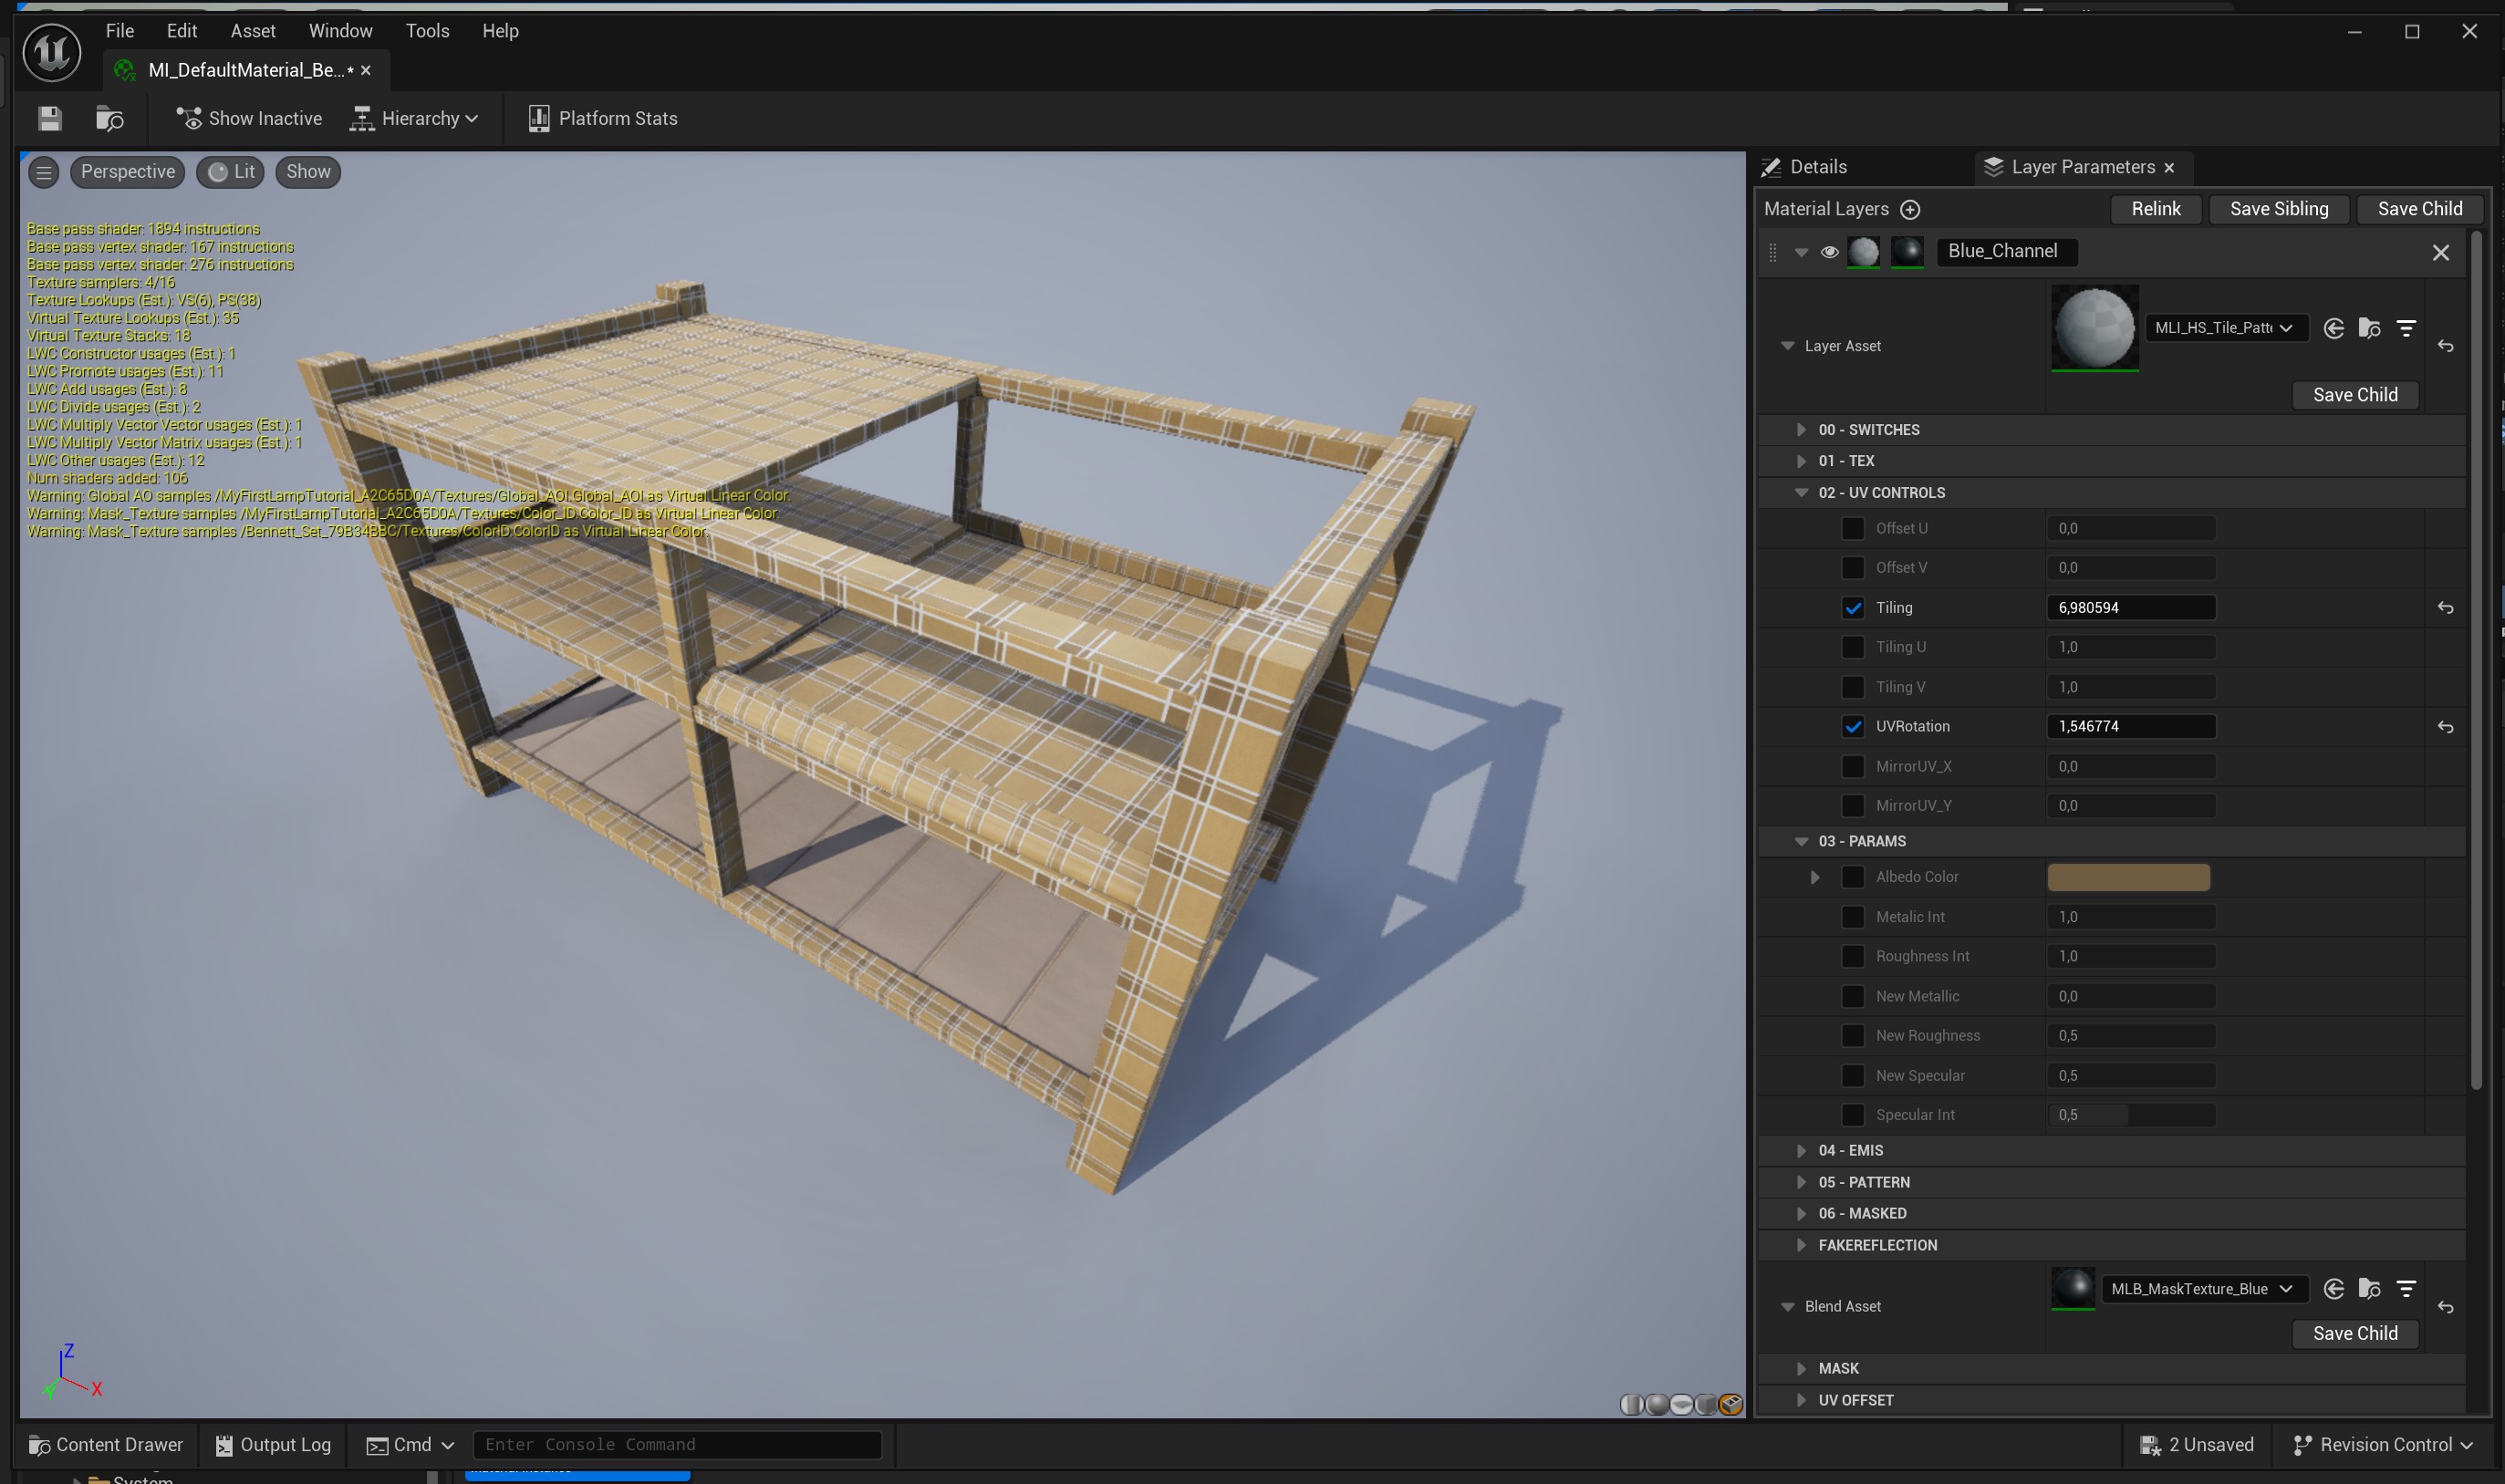
(Remember to enable these options by enabling their checkboxes!)
First, if the material is really big/small, we want to adjust the "Tiling". A higher number will scale down the material, and a lower number will increase it.
If the material is rotated wrongly, change the values in the "UVRotation". This one doesn't work like degrees, so make sure to play around with it a bit! For 90 degrees turns, set it to 1,5.
Done! :)
Rinse repeat all this for the other channels!
If you want to see the mesh while tweaking these things, please see: Simblr.cc - Furniture Troubleshooting, specially question "Q: How do I see my mesh when editing my material(s)?"
Help! One of my channel(s) is still gray!
Please check out this question for the solution: Simblr.cc - Furniture Troubleshooting, specially question "Q: My mesh only shows part of my texture!"
Adding the rest of our textures to our recolourable material
Now that we set up our recolourable areas and gave them a nice elemental material (like wood, fabric, etc), we now want to add the remaining textures to give it that extra "oompfh"!
First, import your "packed" texture, the way we did the color ID map.
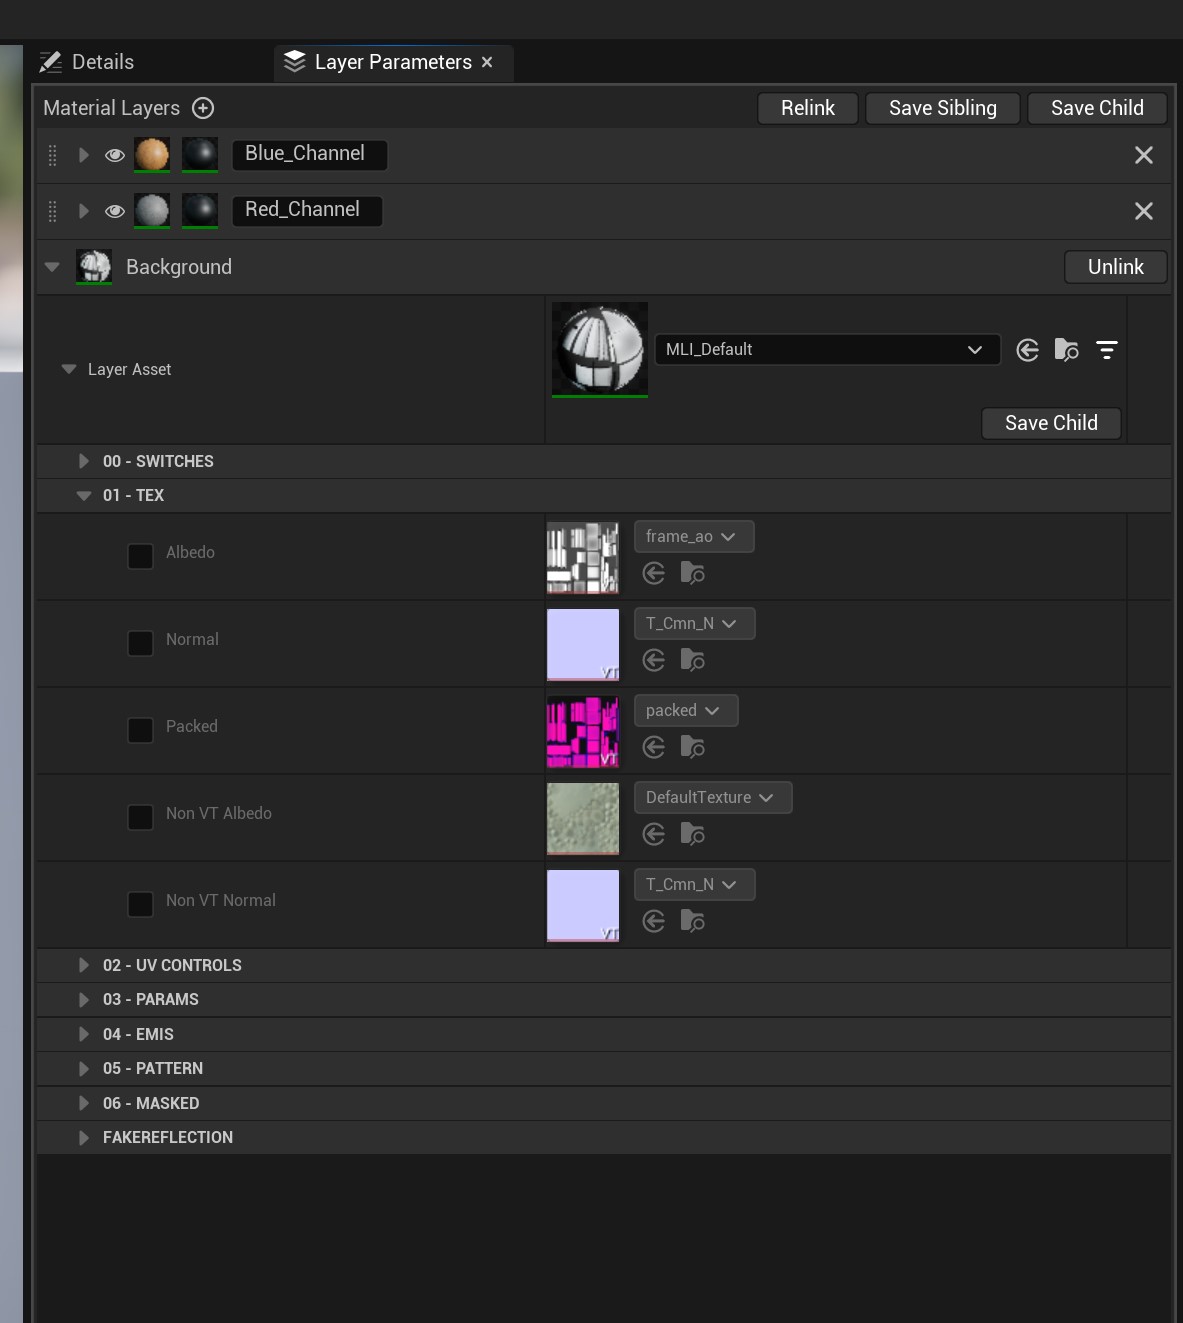
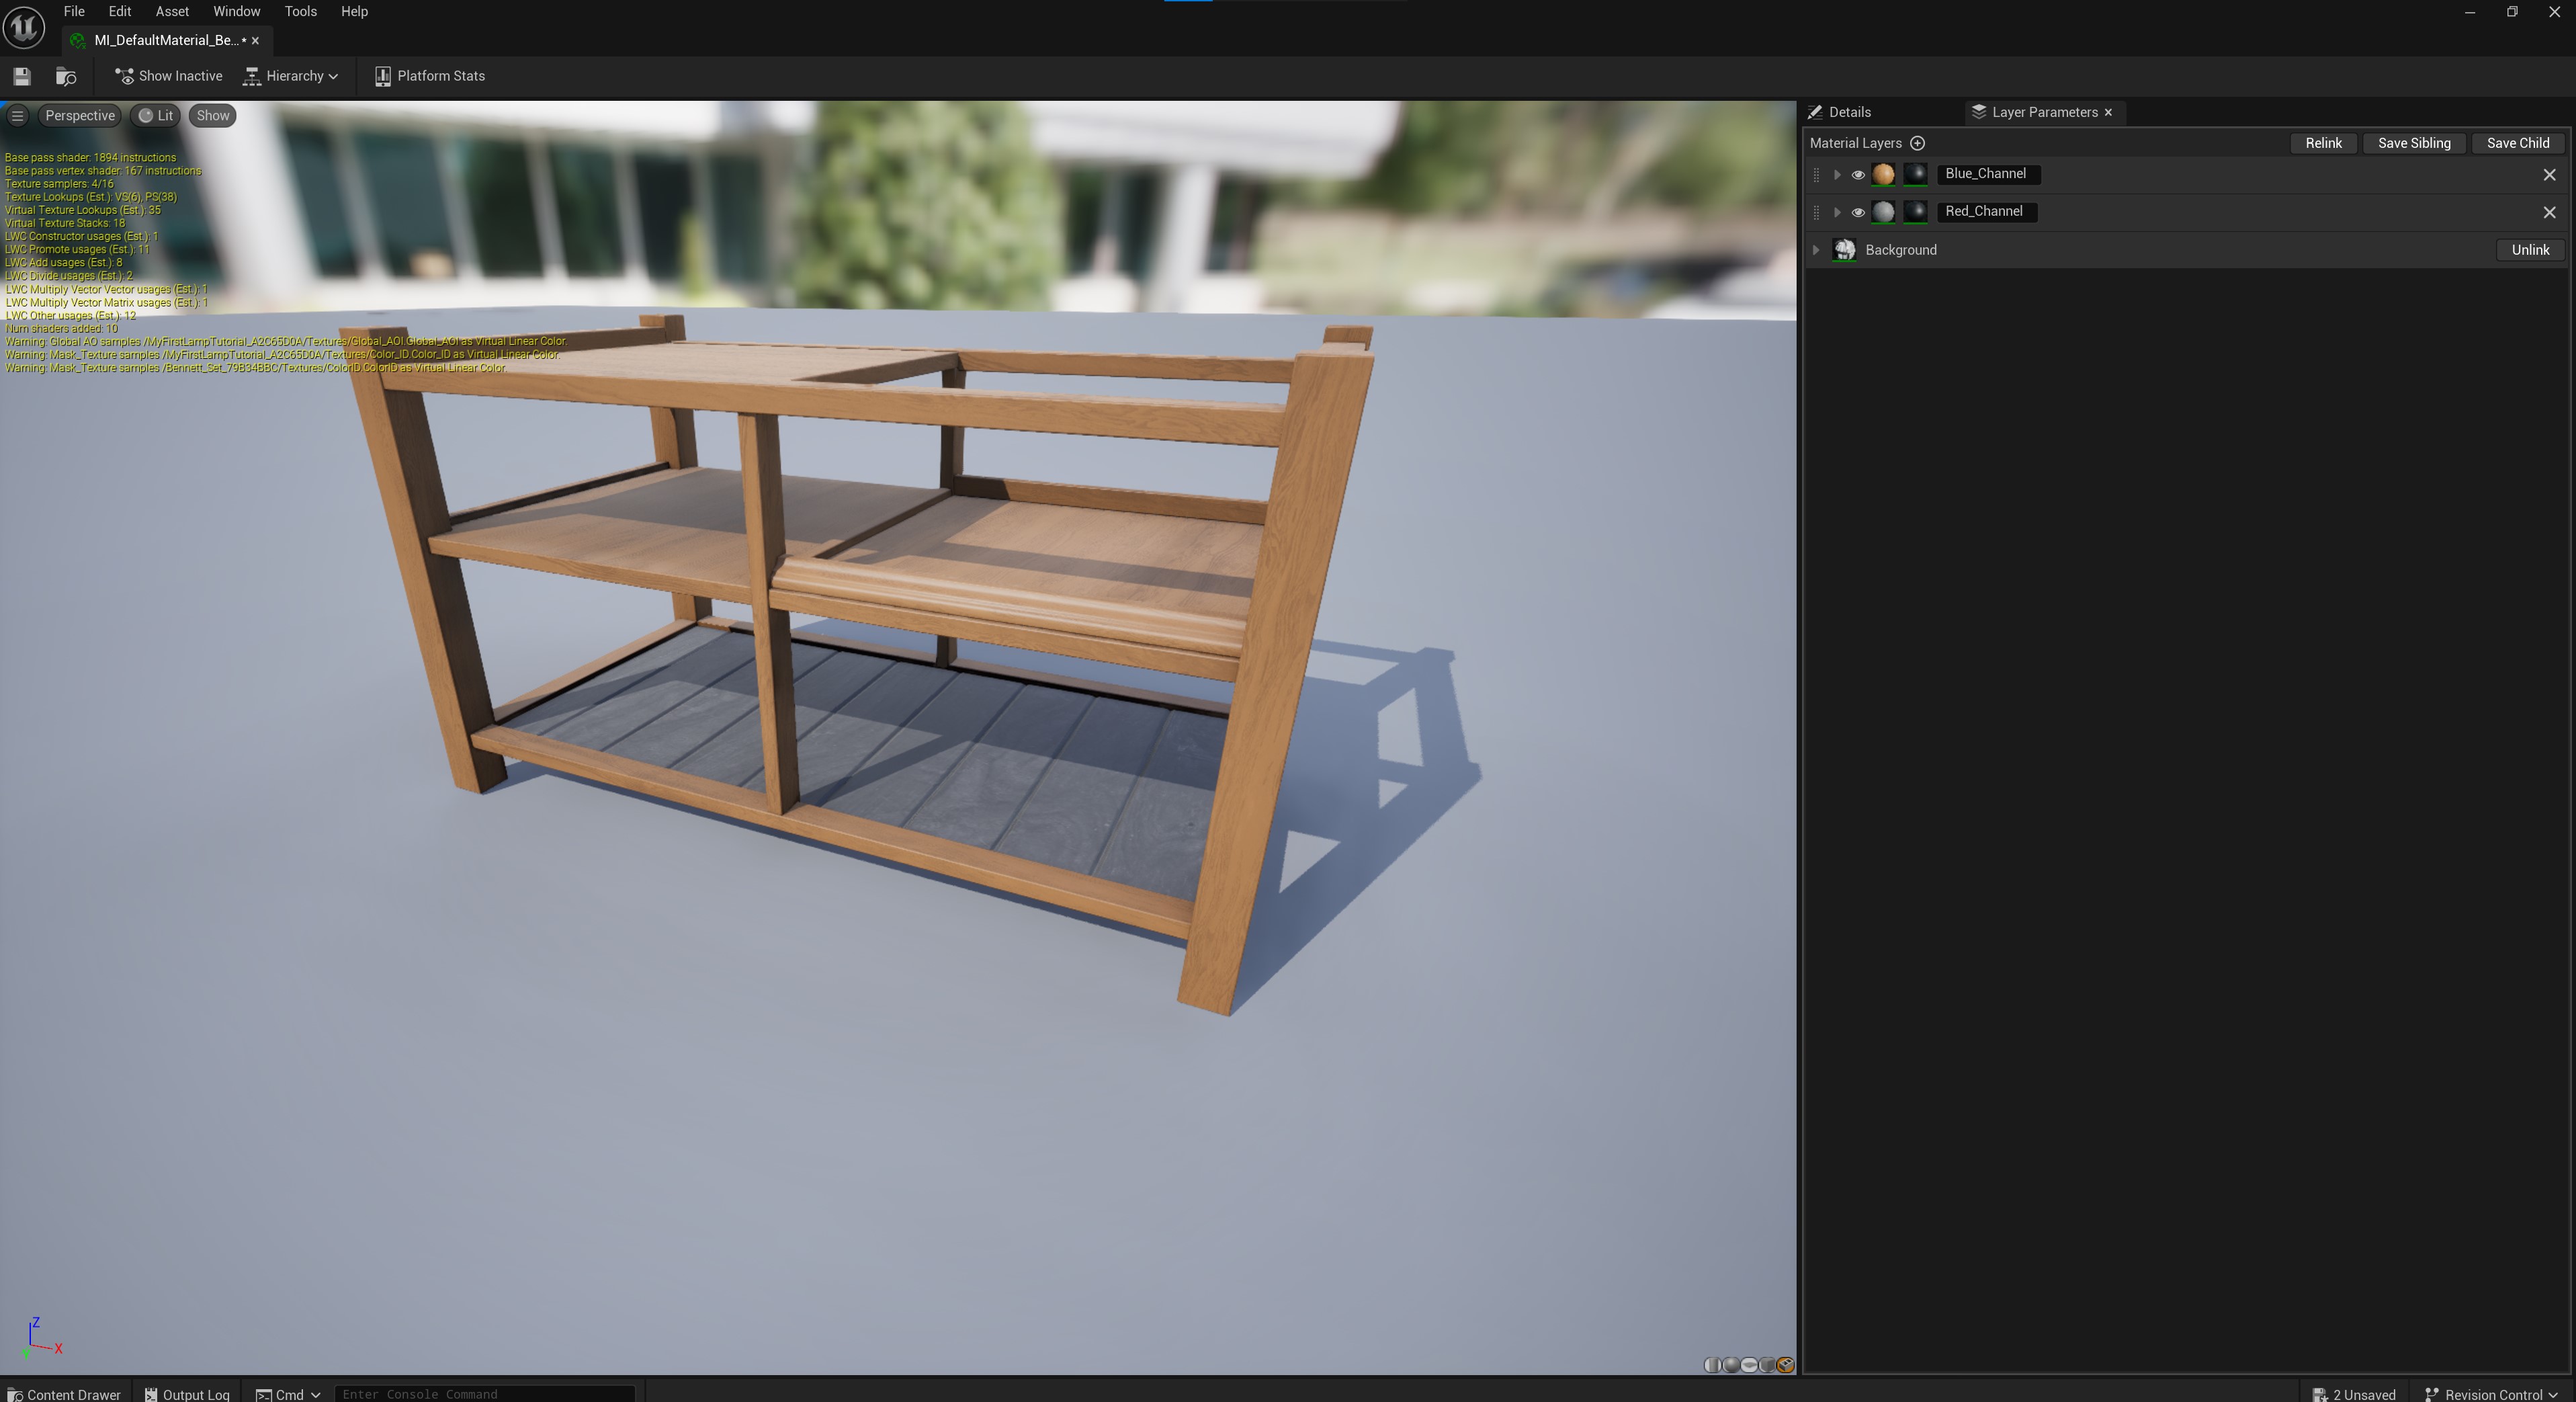
What I did here, was collapsing the channels, and uncollapsed "Background".
Then, you simply uncollapse "TEX".
After that, we check "packed".
Then, click the dropdown where you see a name (in my case i already imported my packed texture, hence the name :p) and search for your own texture, just like grabbing your Color ID/mask!
Do the same if you have a Albedo and/or normal map! If not, leave these as is.
Now we press save!
And close this window altogether :)
Assigning your material to the mesh
This section is meant for both non-recoloured and recoloured items!
Unfortunately, we're still seeing our grayscaled object! D: But there is luckily a way to fix that! I'm not entirely sure why it doesn't automatically assign it, since their tutorial showed that it did, but I will figure that out at some point lol.
For now, let's fix that!

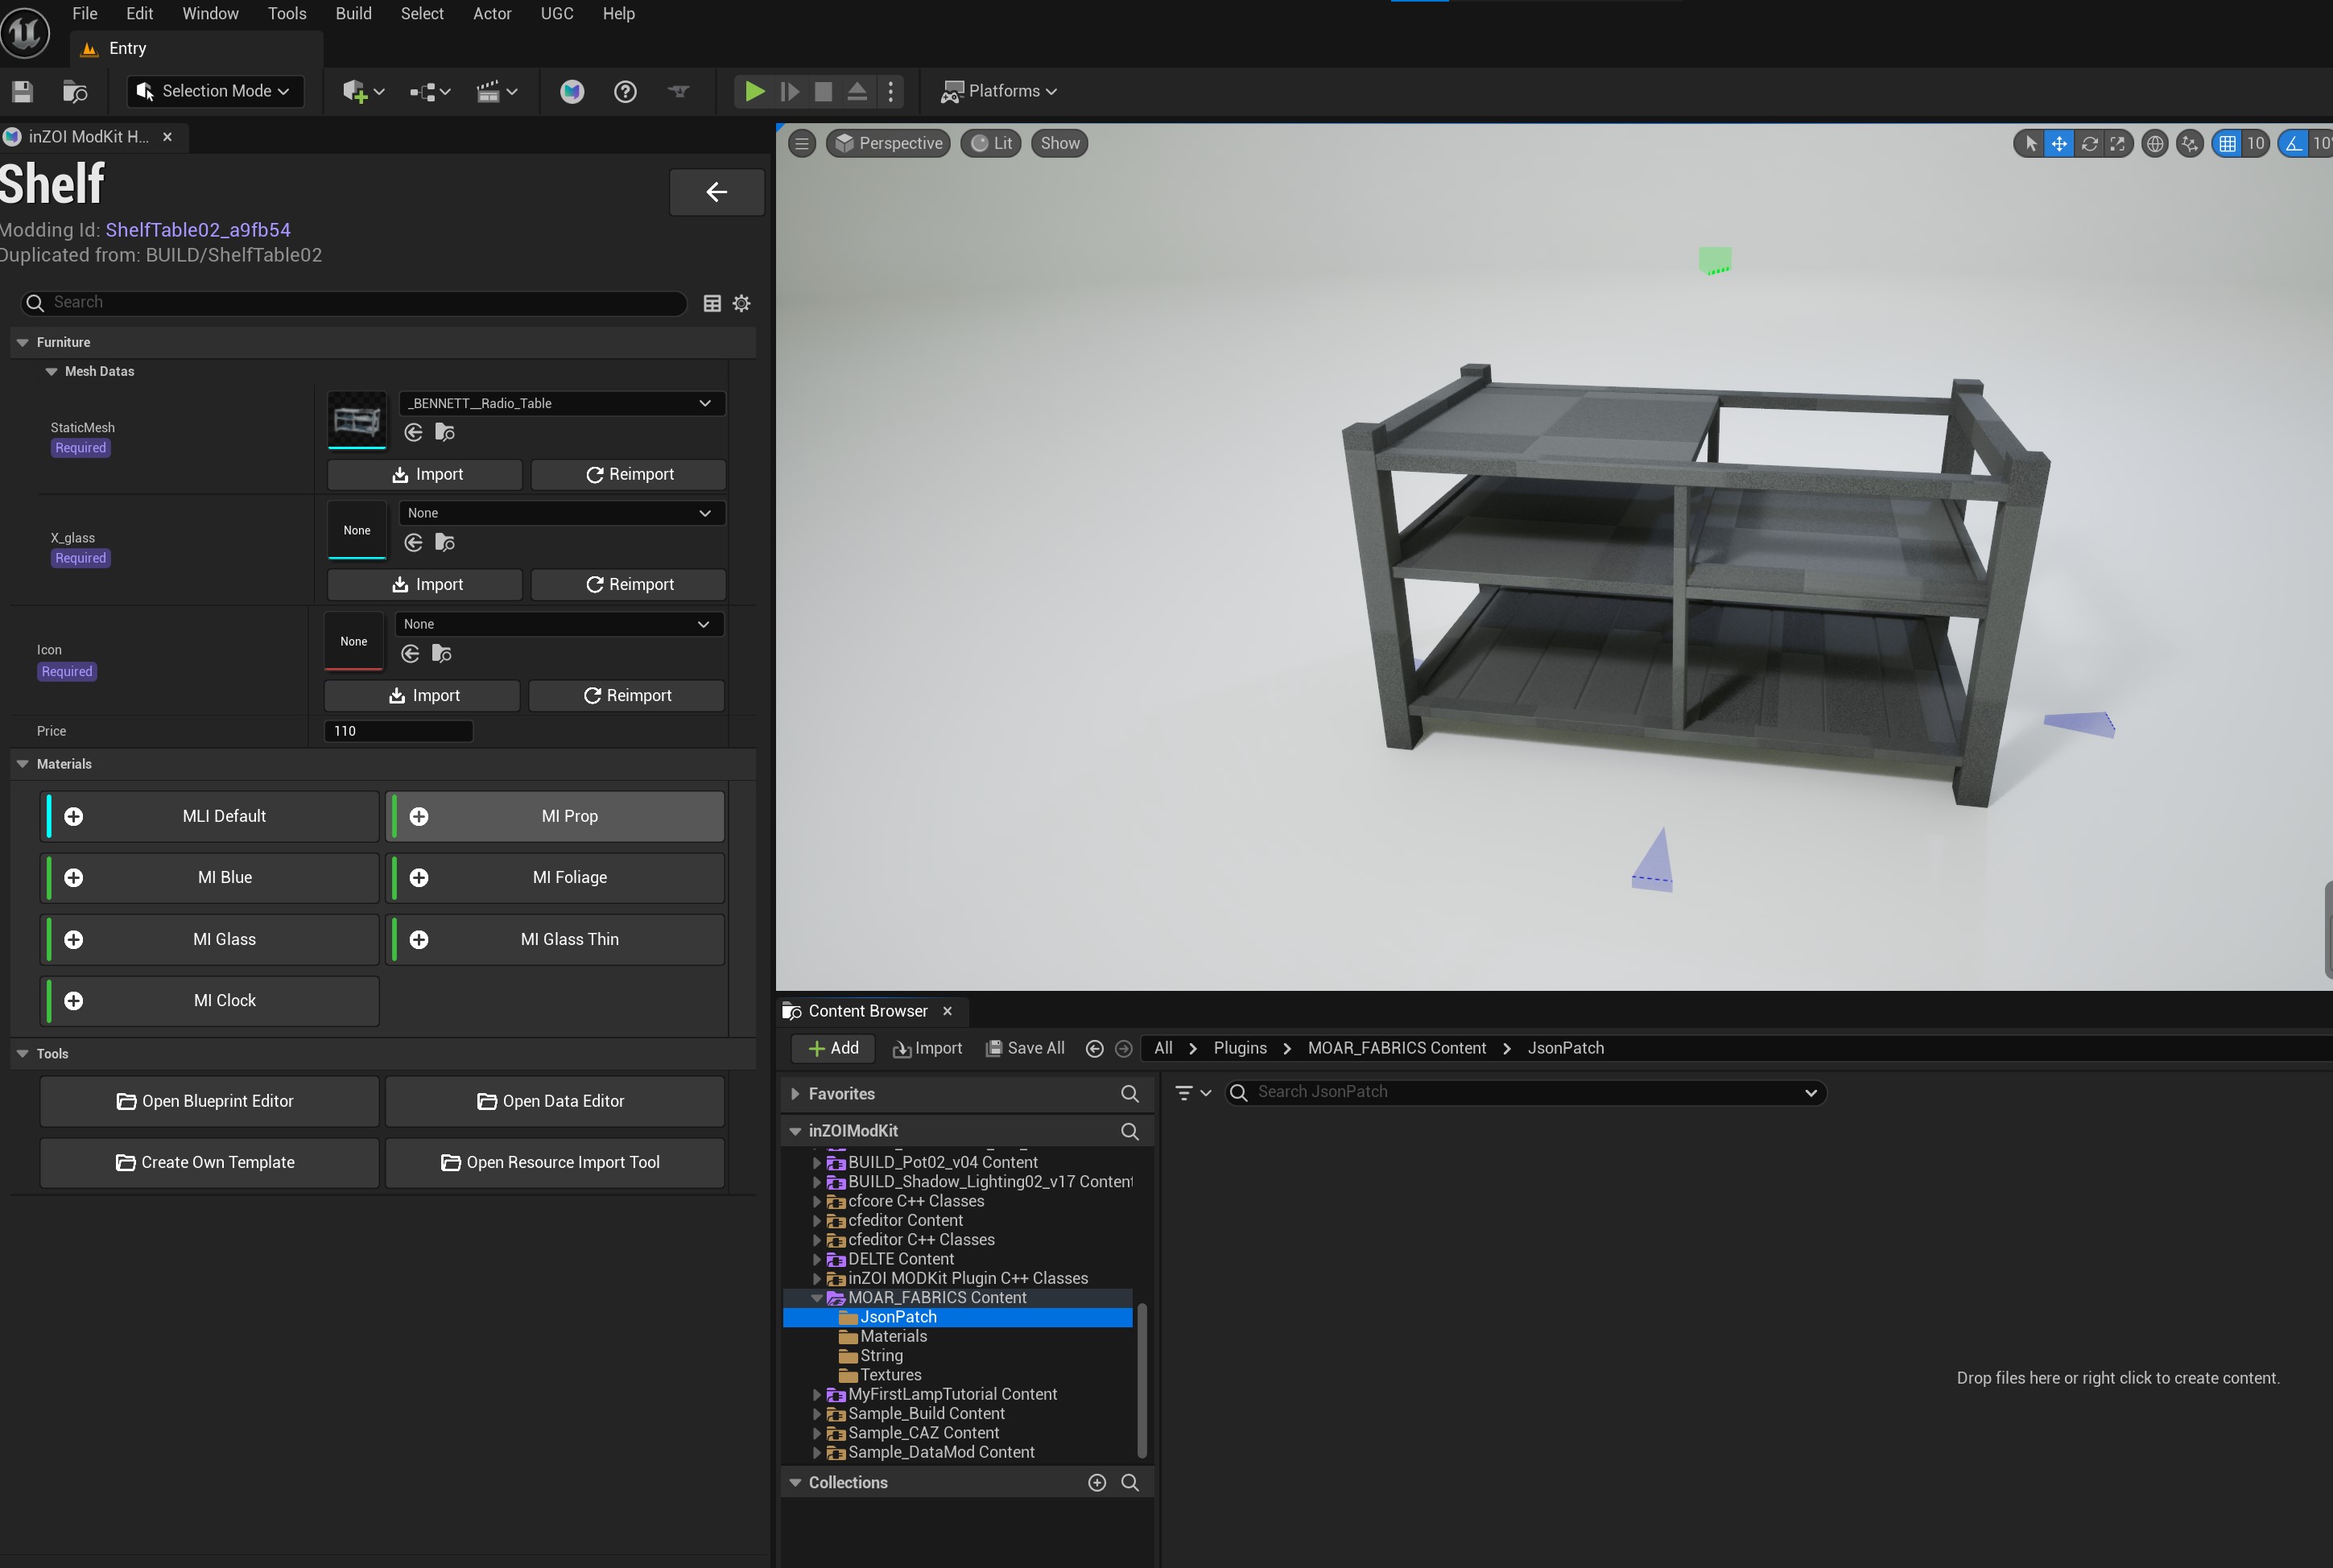
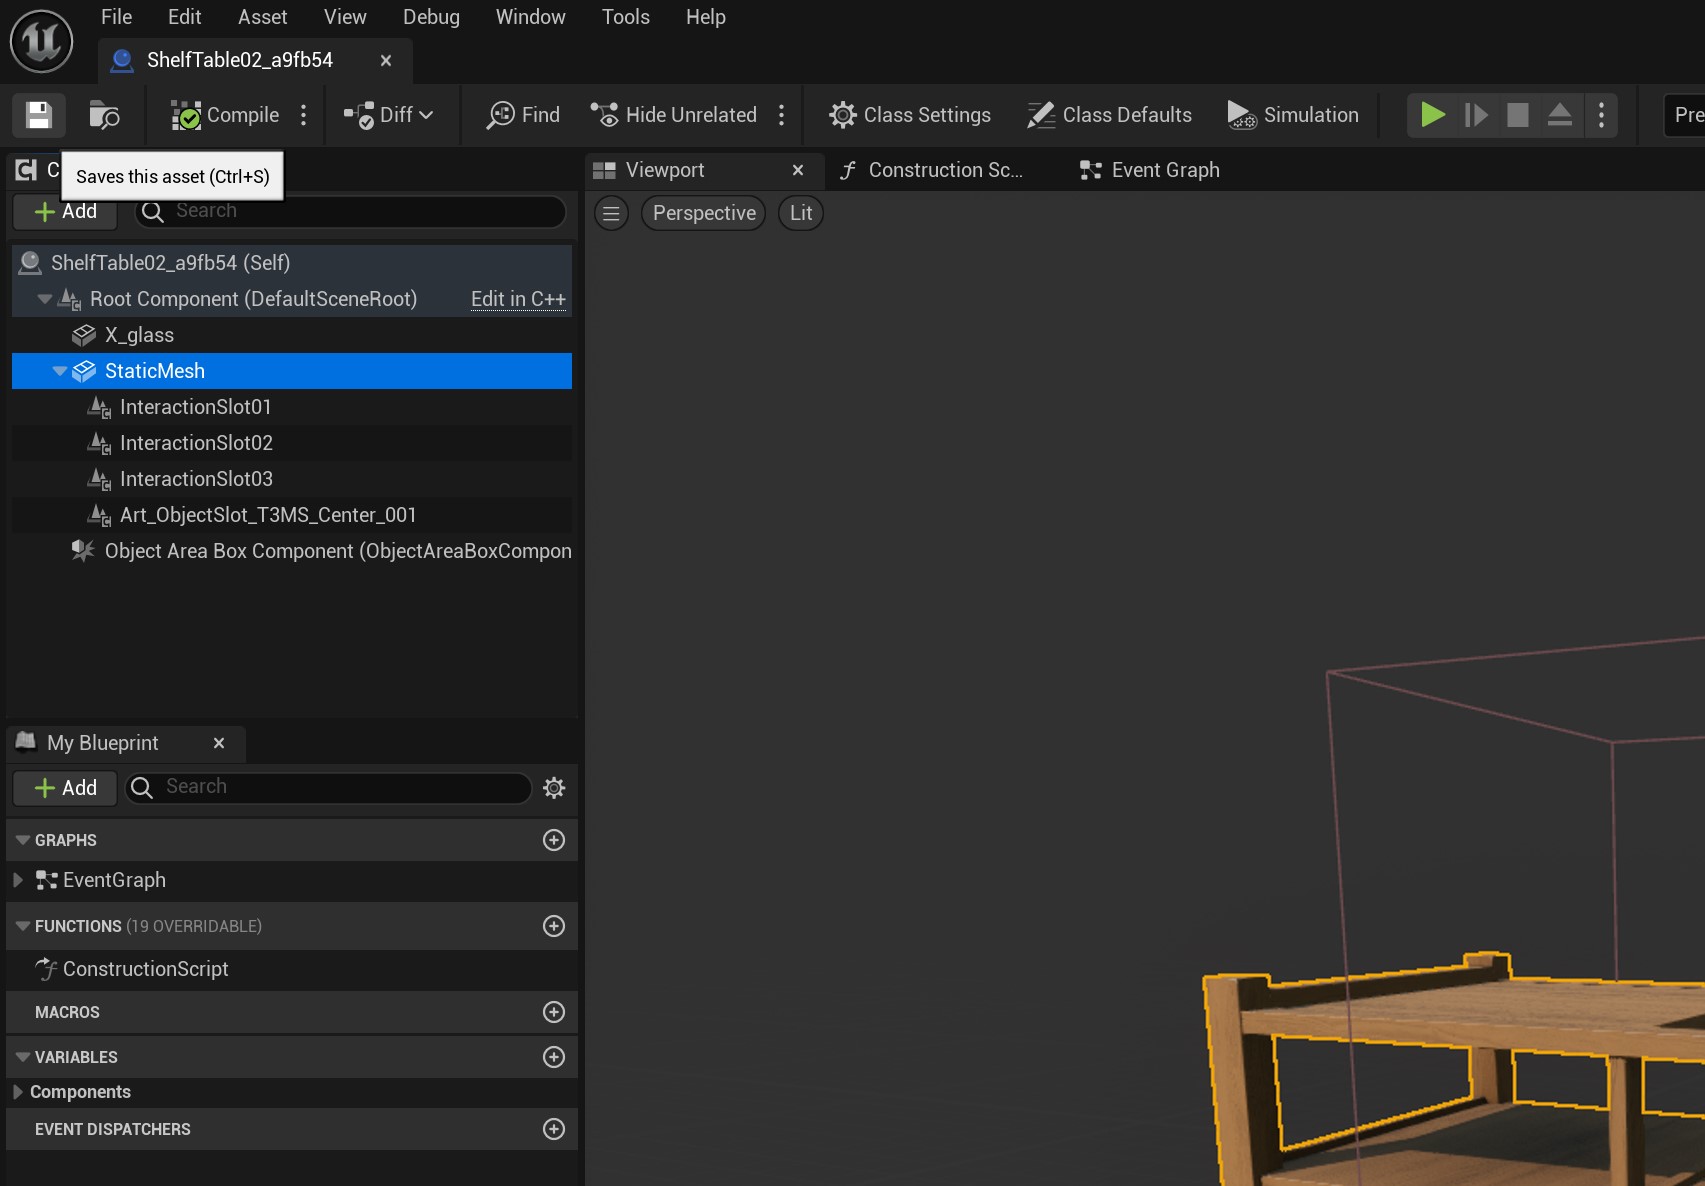
First, we press "Edit MESHNAME" (In my case it says "Edit ShelfTable02", but this is probably different for you).
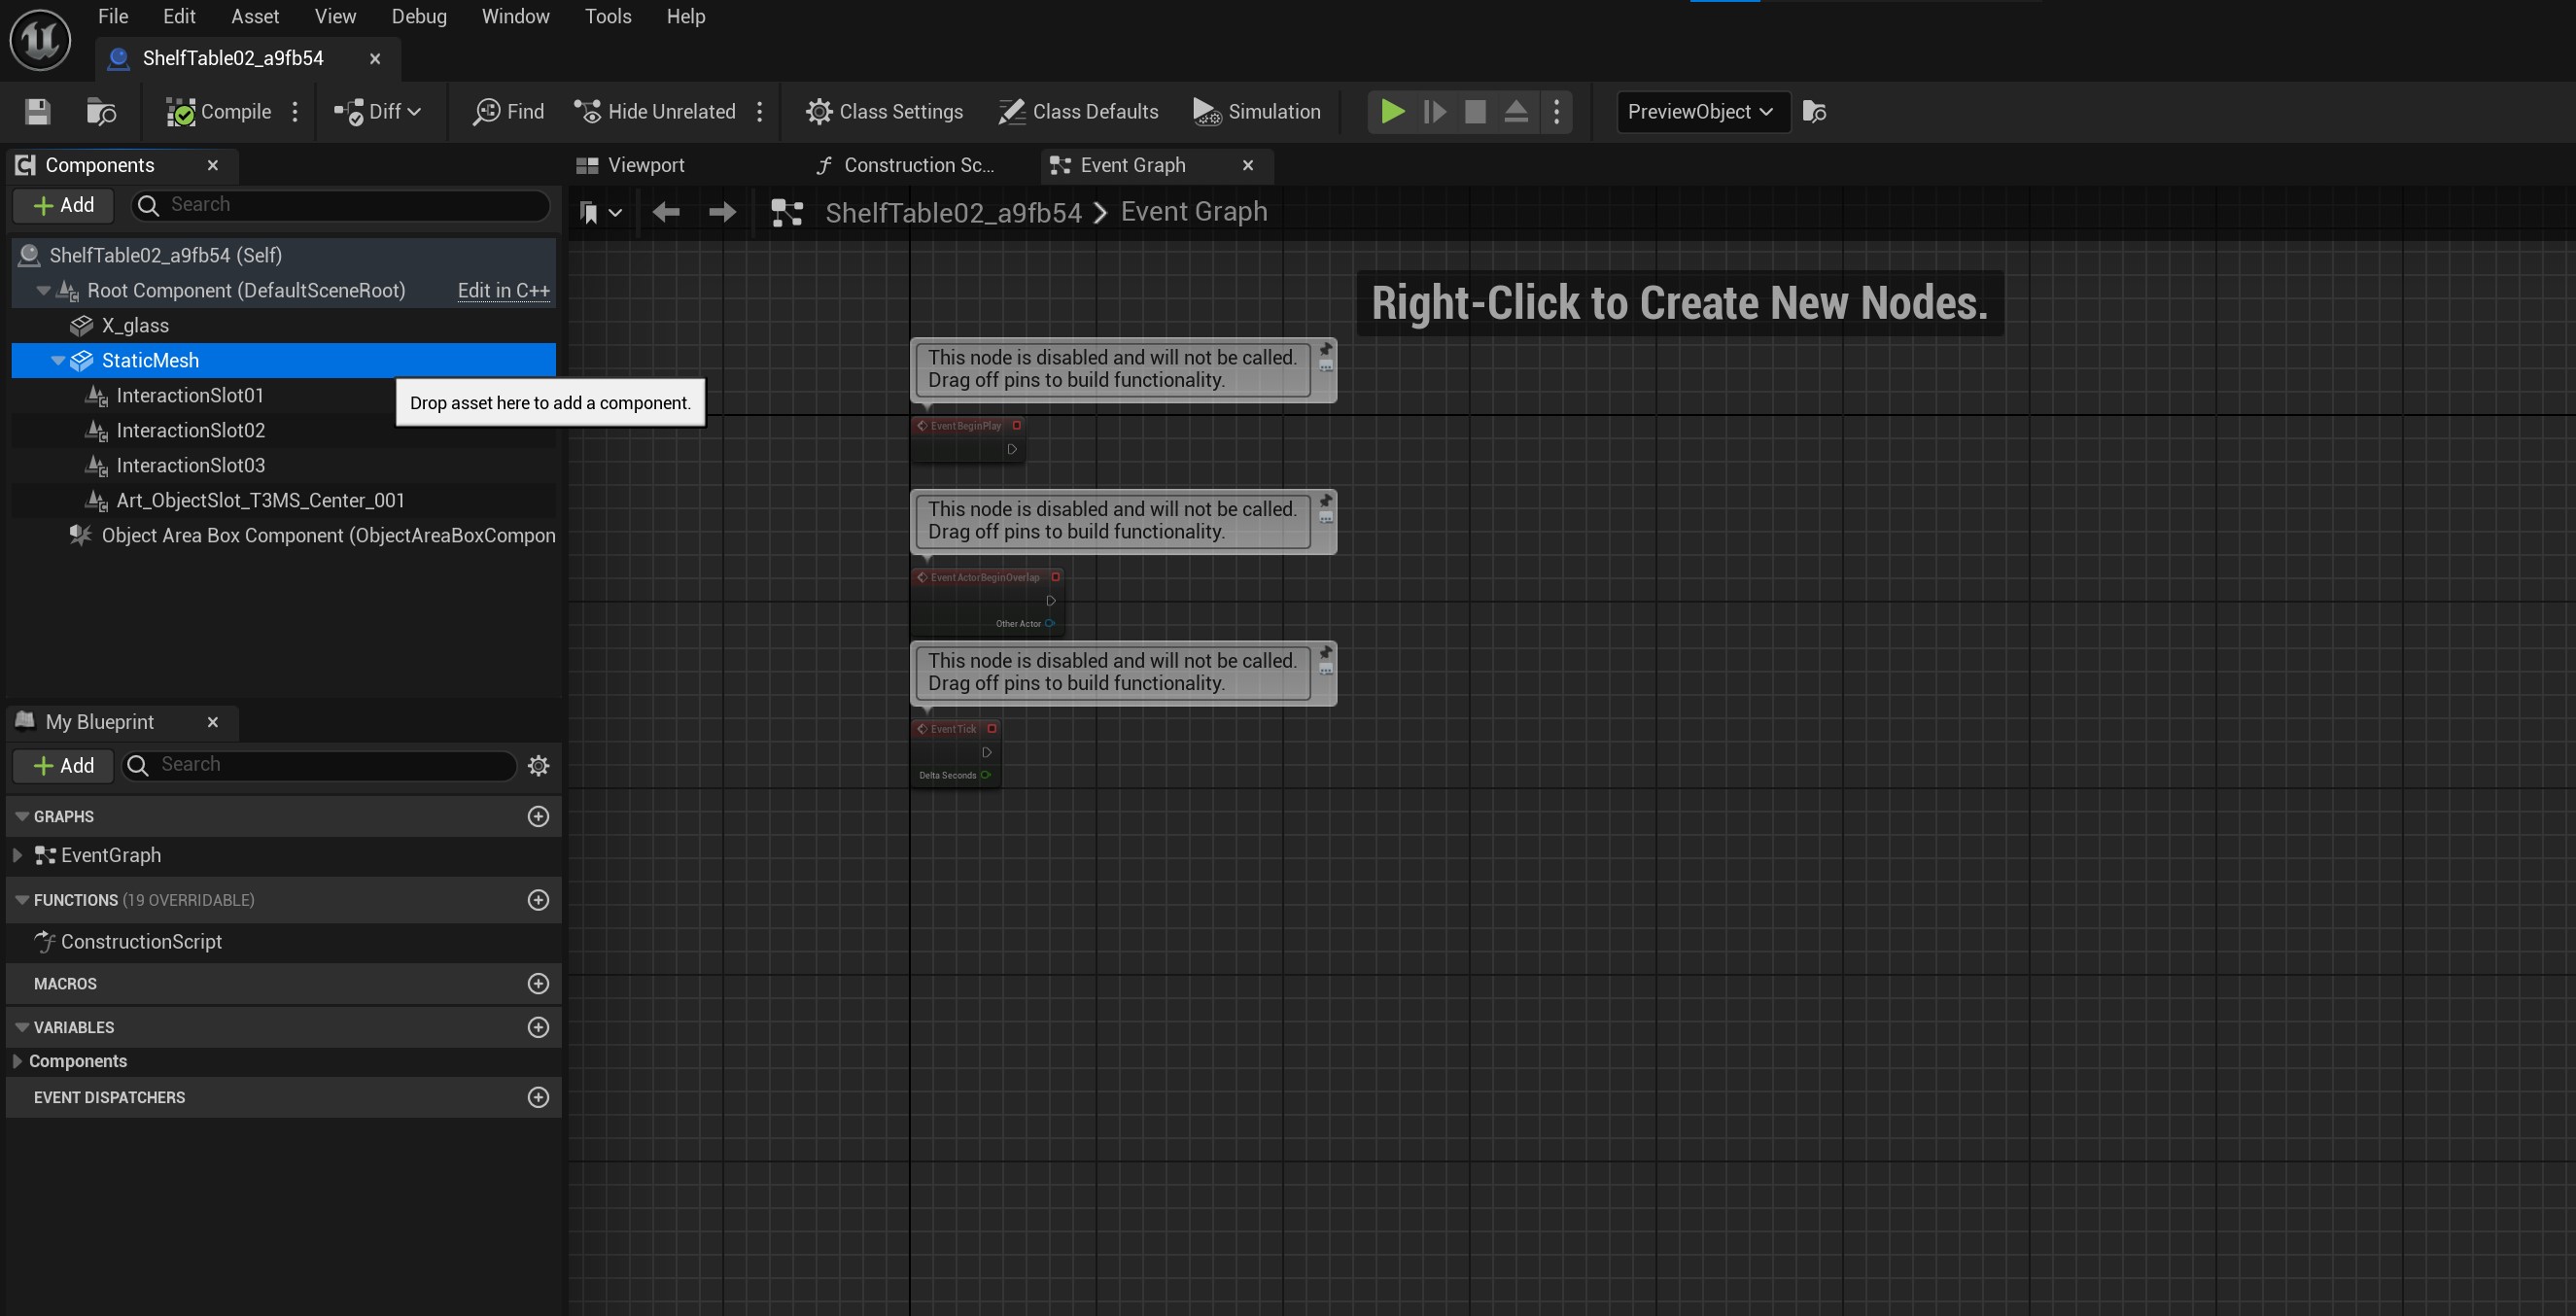
Double Click on "StaticMesh"...
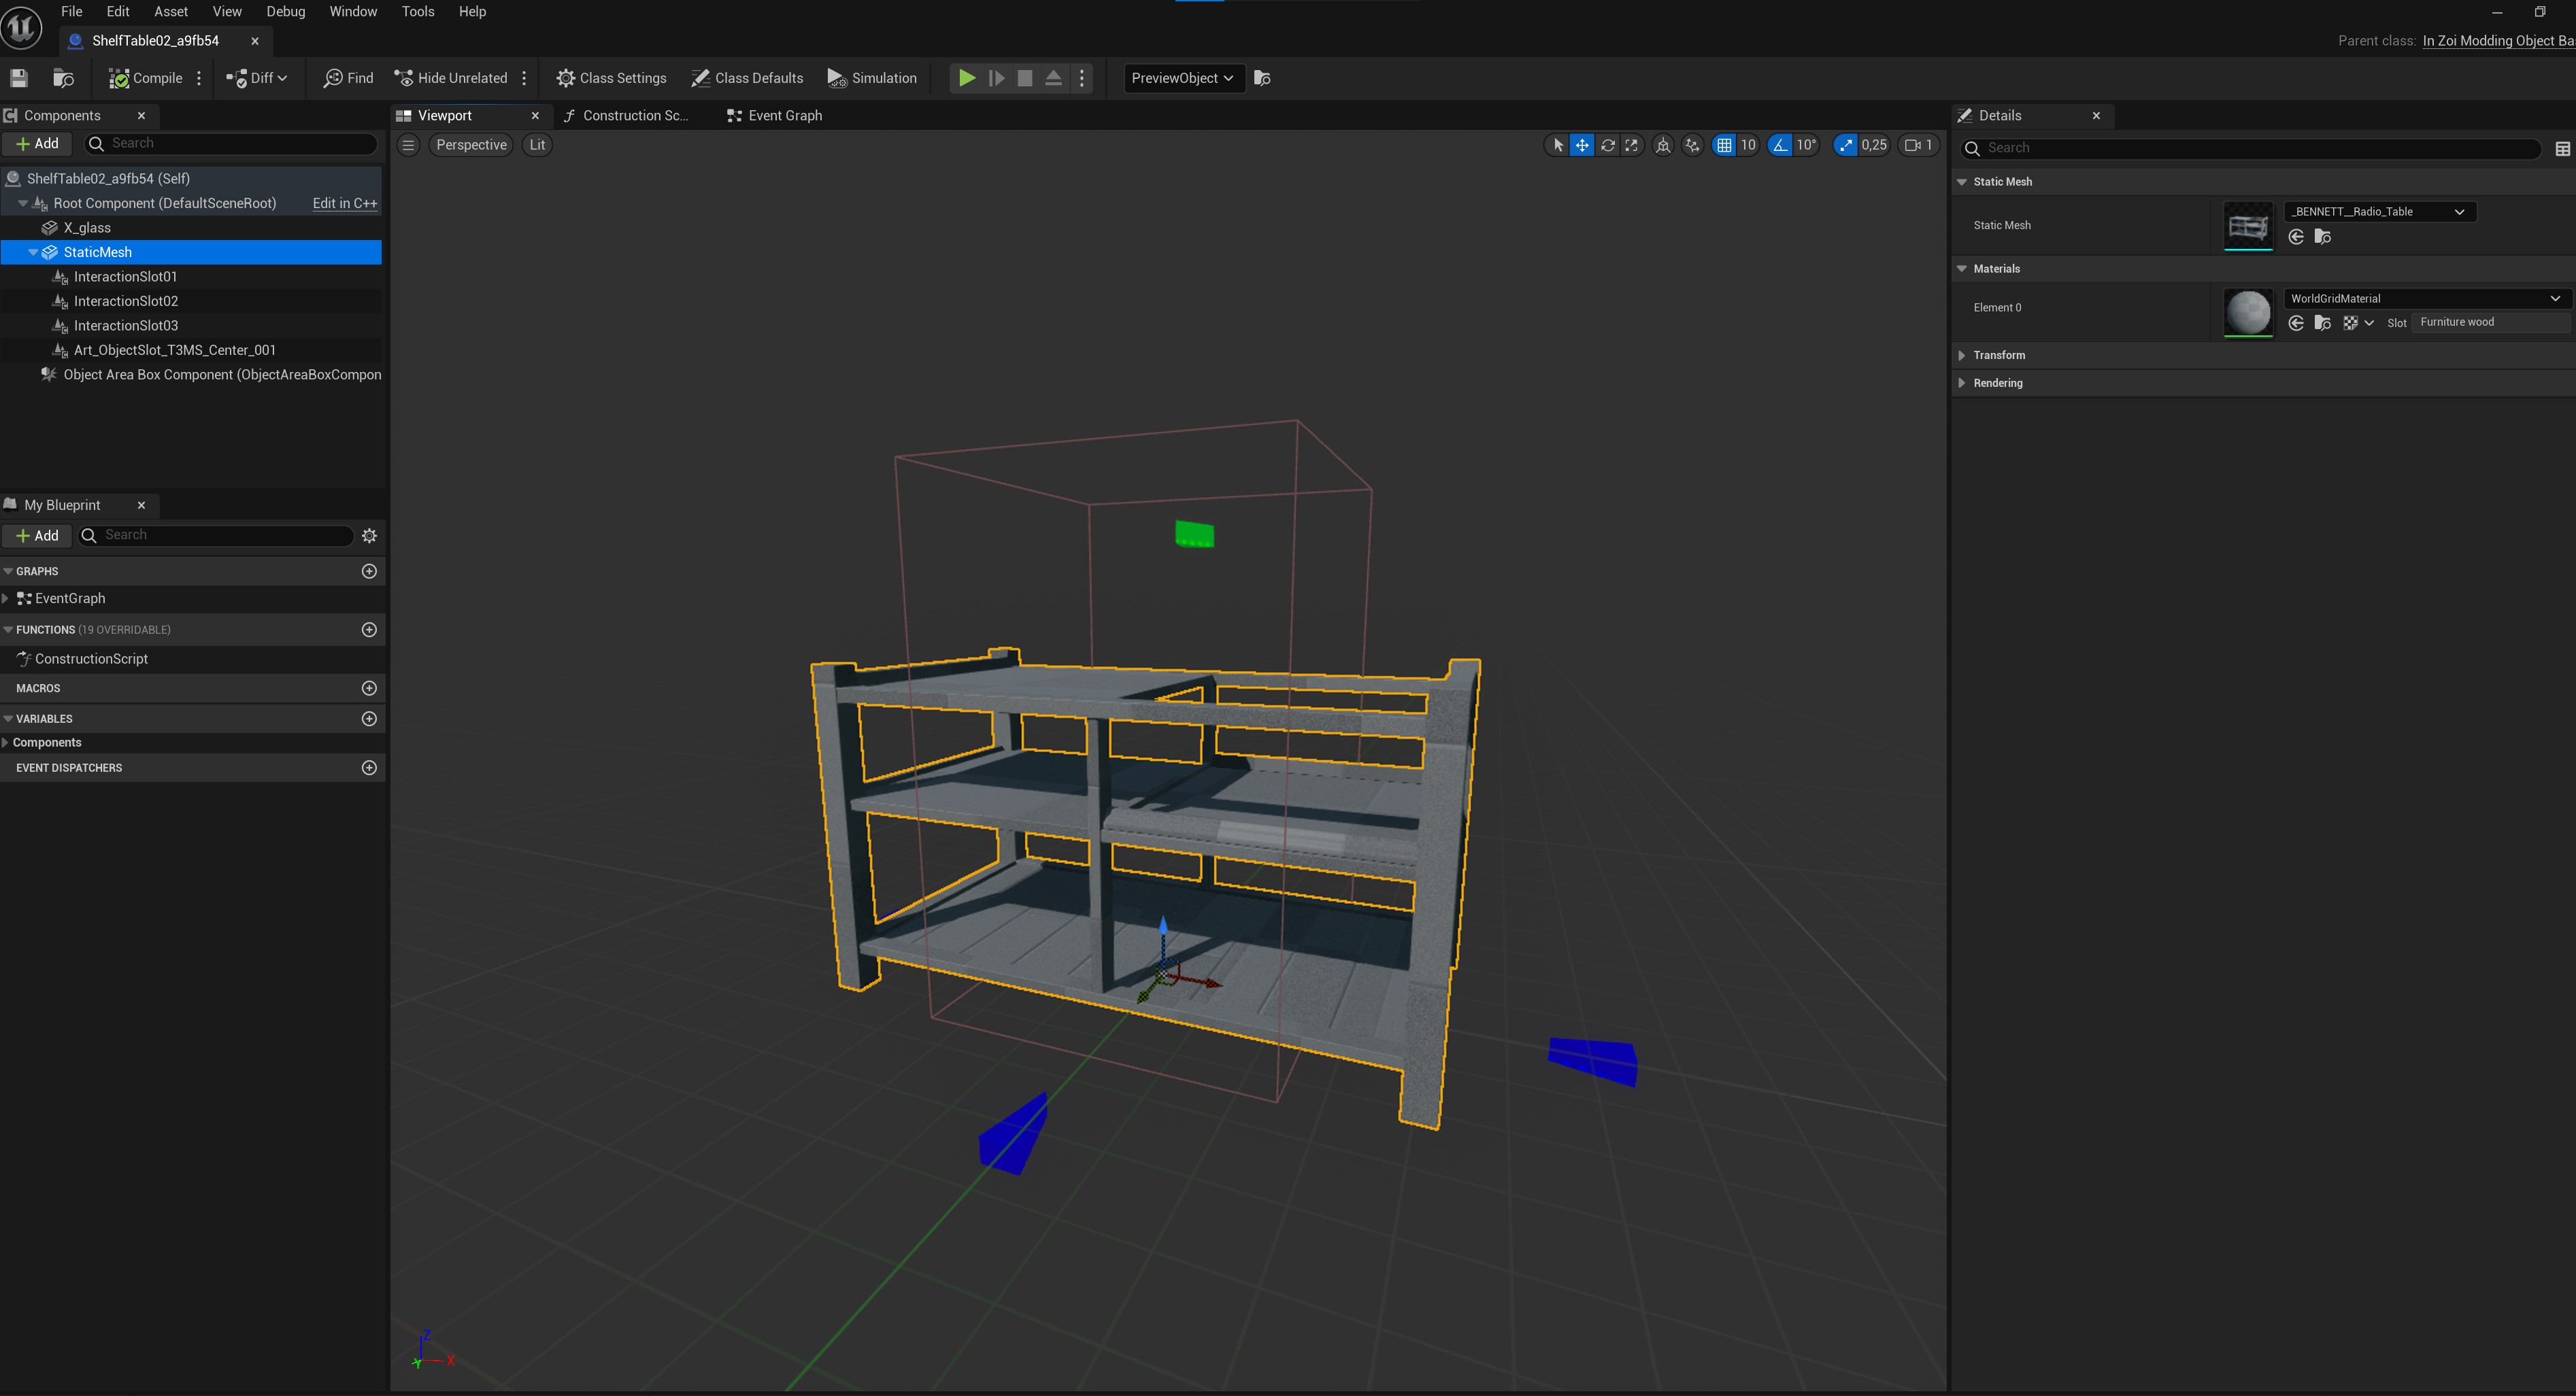
There! That fixed the view :)
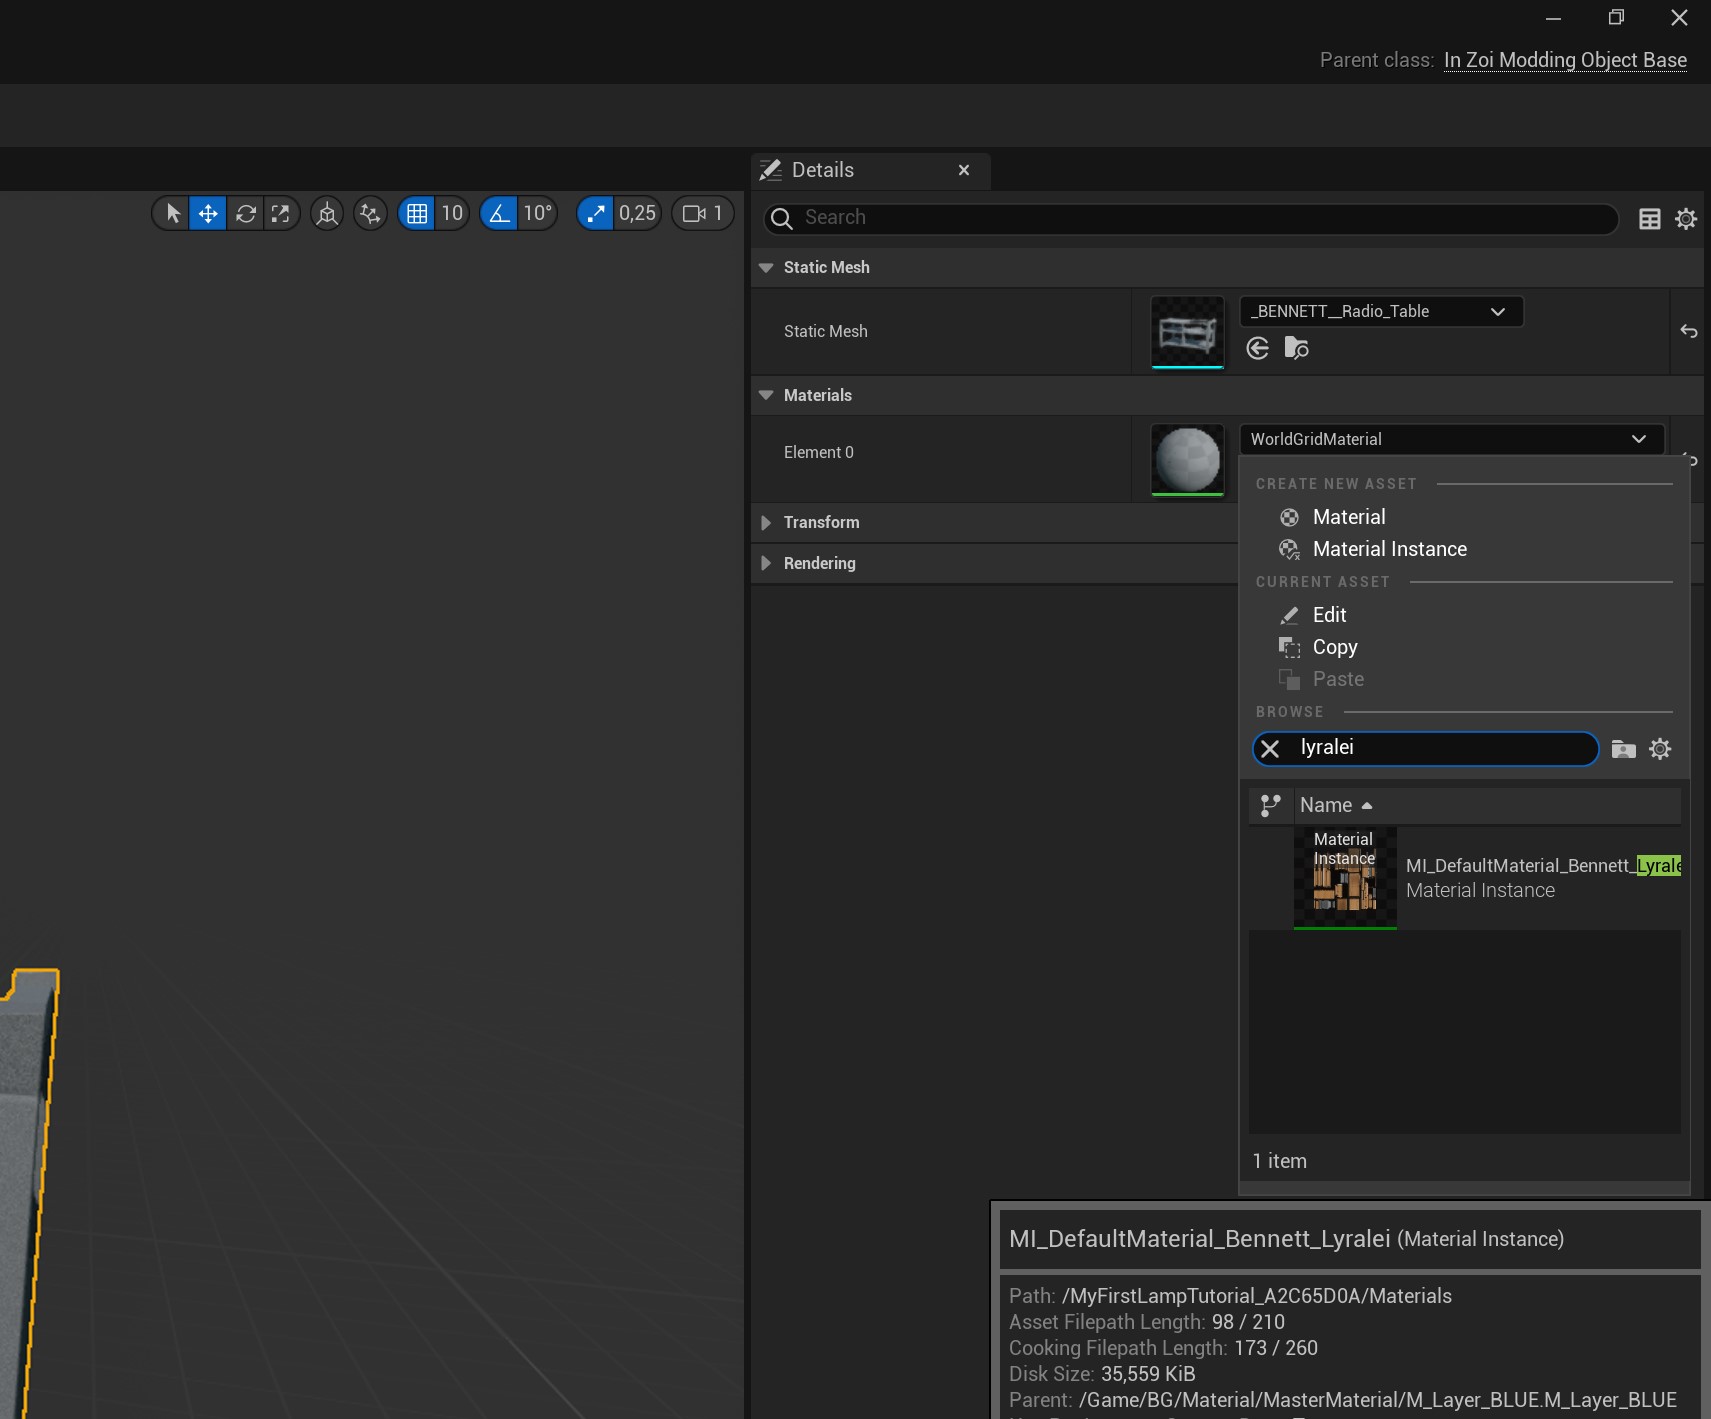
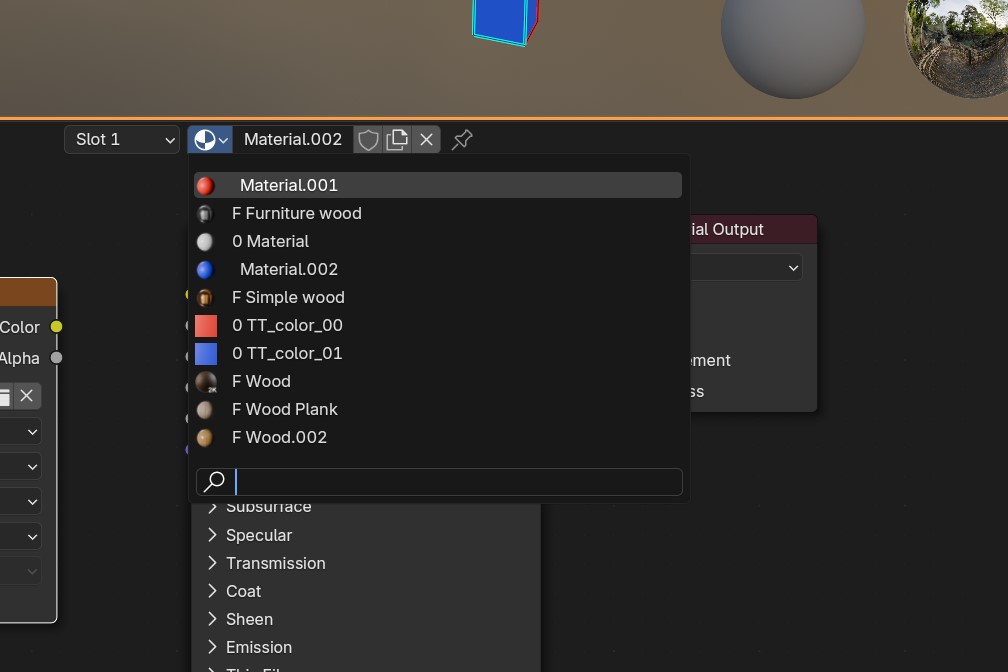
On the right hand side, we see something called "Materials". Depending on your mesh you can have multiple, but either way they all are probably saying "WorldGridMaterial".
Click on the dropdown, and search for your own material's name. (the one we had to type in a bit ago).

Yay! :D
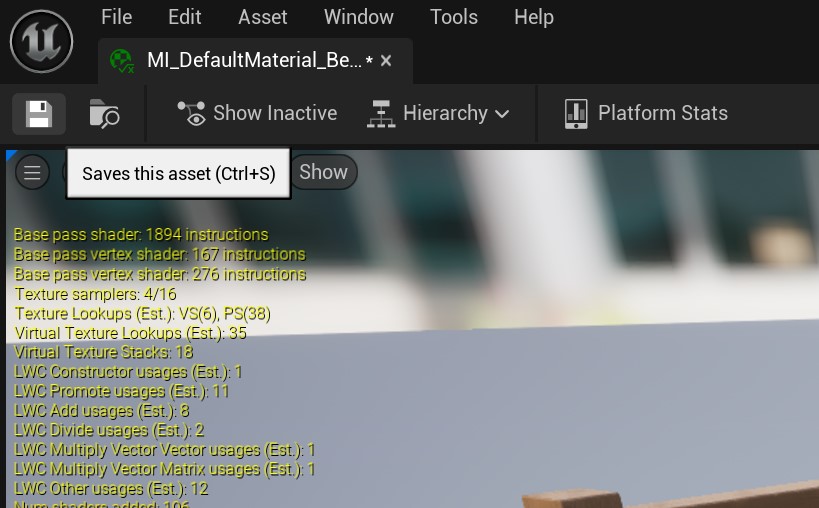
Save the asset by clicking on the floppy disk...
And close the window ;)
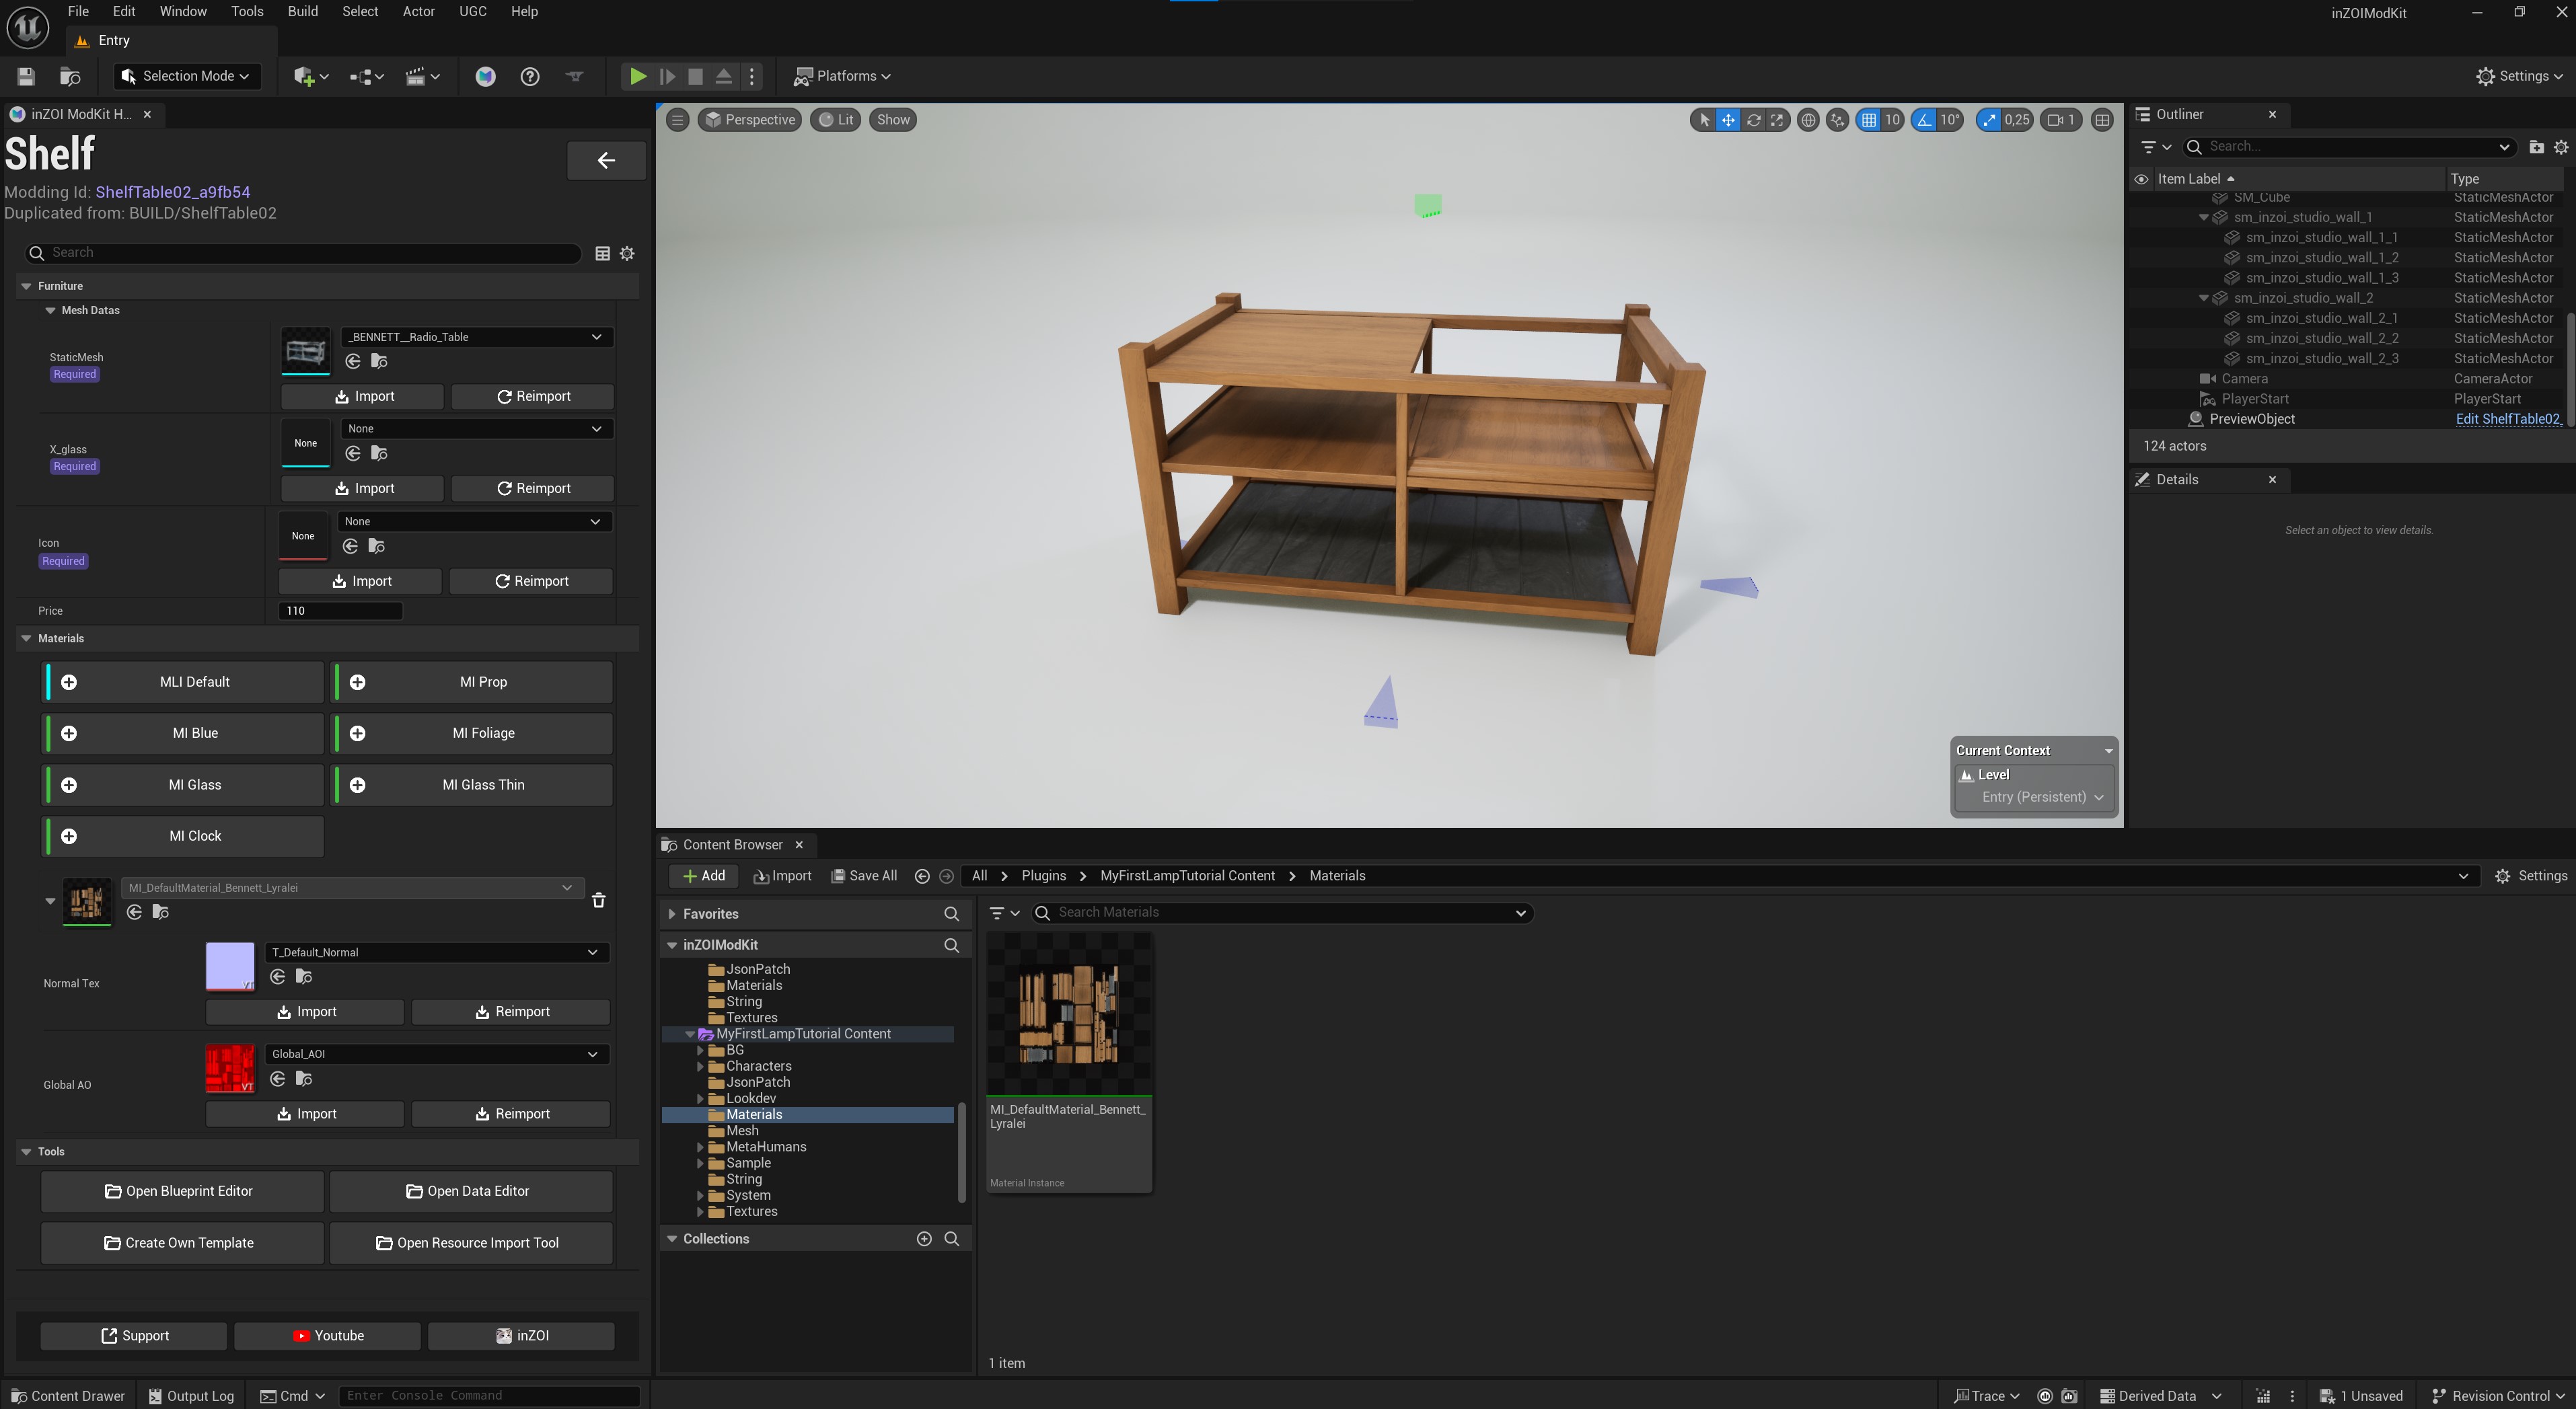
And now our mesh has textures! Look at it! :D It's so nice!!
Telling the game to make it recolourable-compatible.
Note: If you're making a non-recolourable prop, skip this step!
First things first, I want to add credits where due, since I wouldn't have been able to figure this out without the InZOI Discord modding channel (specifically ming!) for sharing a working demo on how to make the game be capable to know our object is recolourable (and therefore the brush icon isn't grayed out 😉)
For this, we will have to make our own data asset in the data editor. This sound super overwhelming probably, but I will try my best to make it as hand-holdy as possible!
If you happened to have modded for the sims 4 or sims 3, you might find this very similar to Tuning modding the game! That's ironically what this is actually, but just layered a bit better rather than an XML file 😉
First, we want to press "Create Own Template". This will mean we're making a fresh tuning template to tell the game we want to make it recolourable!
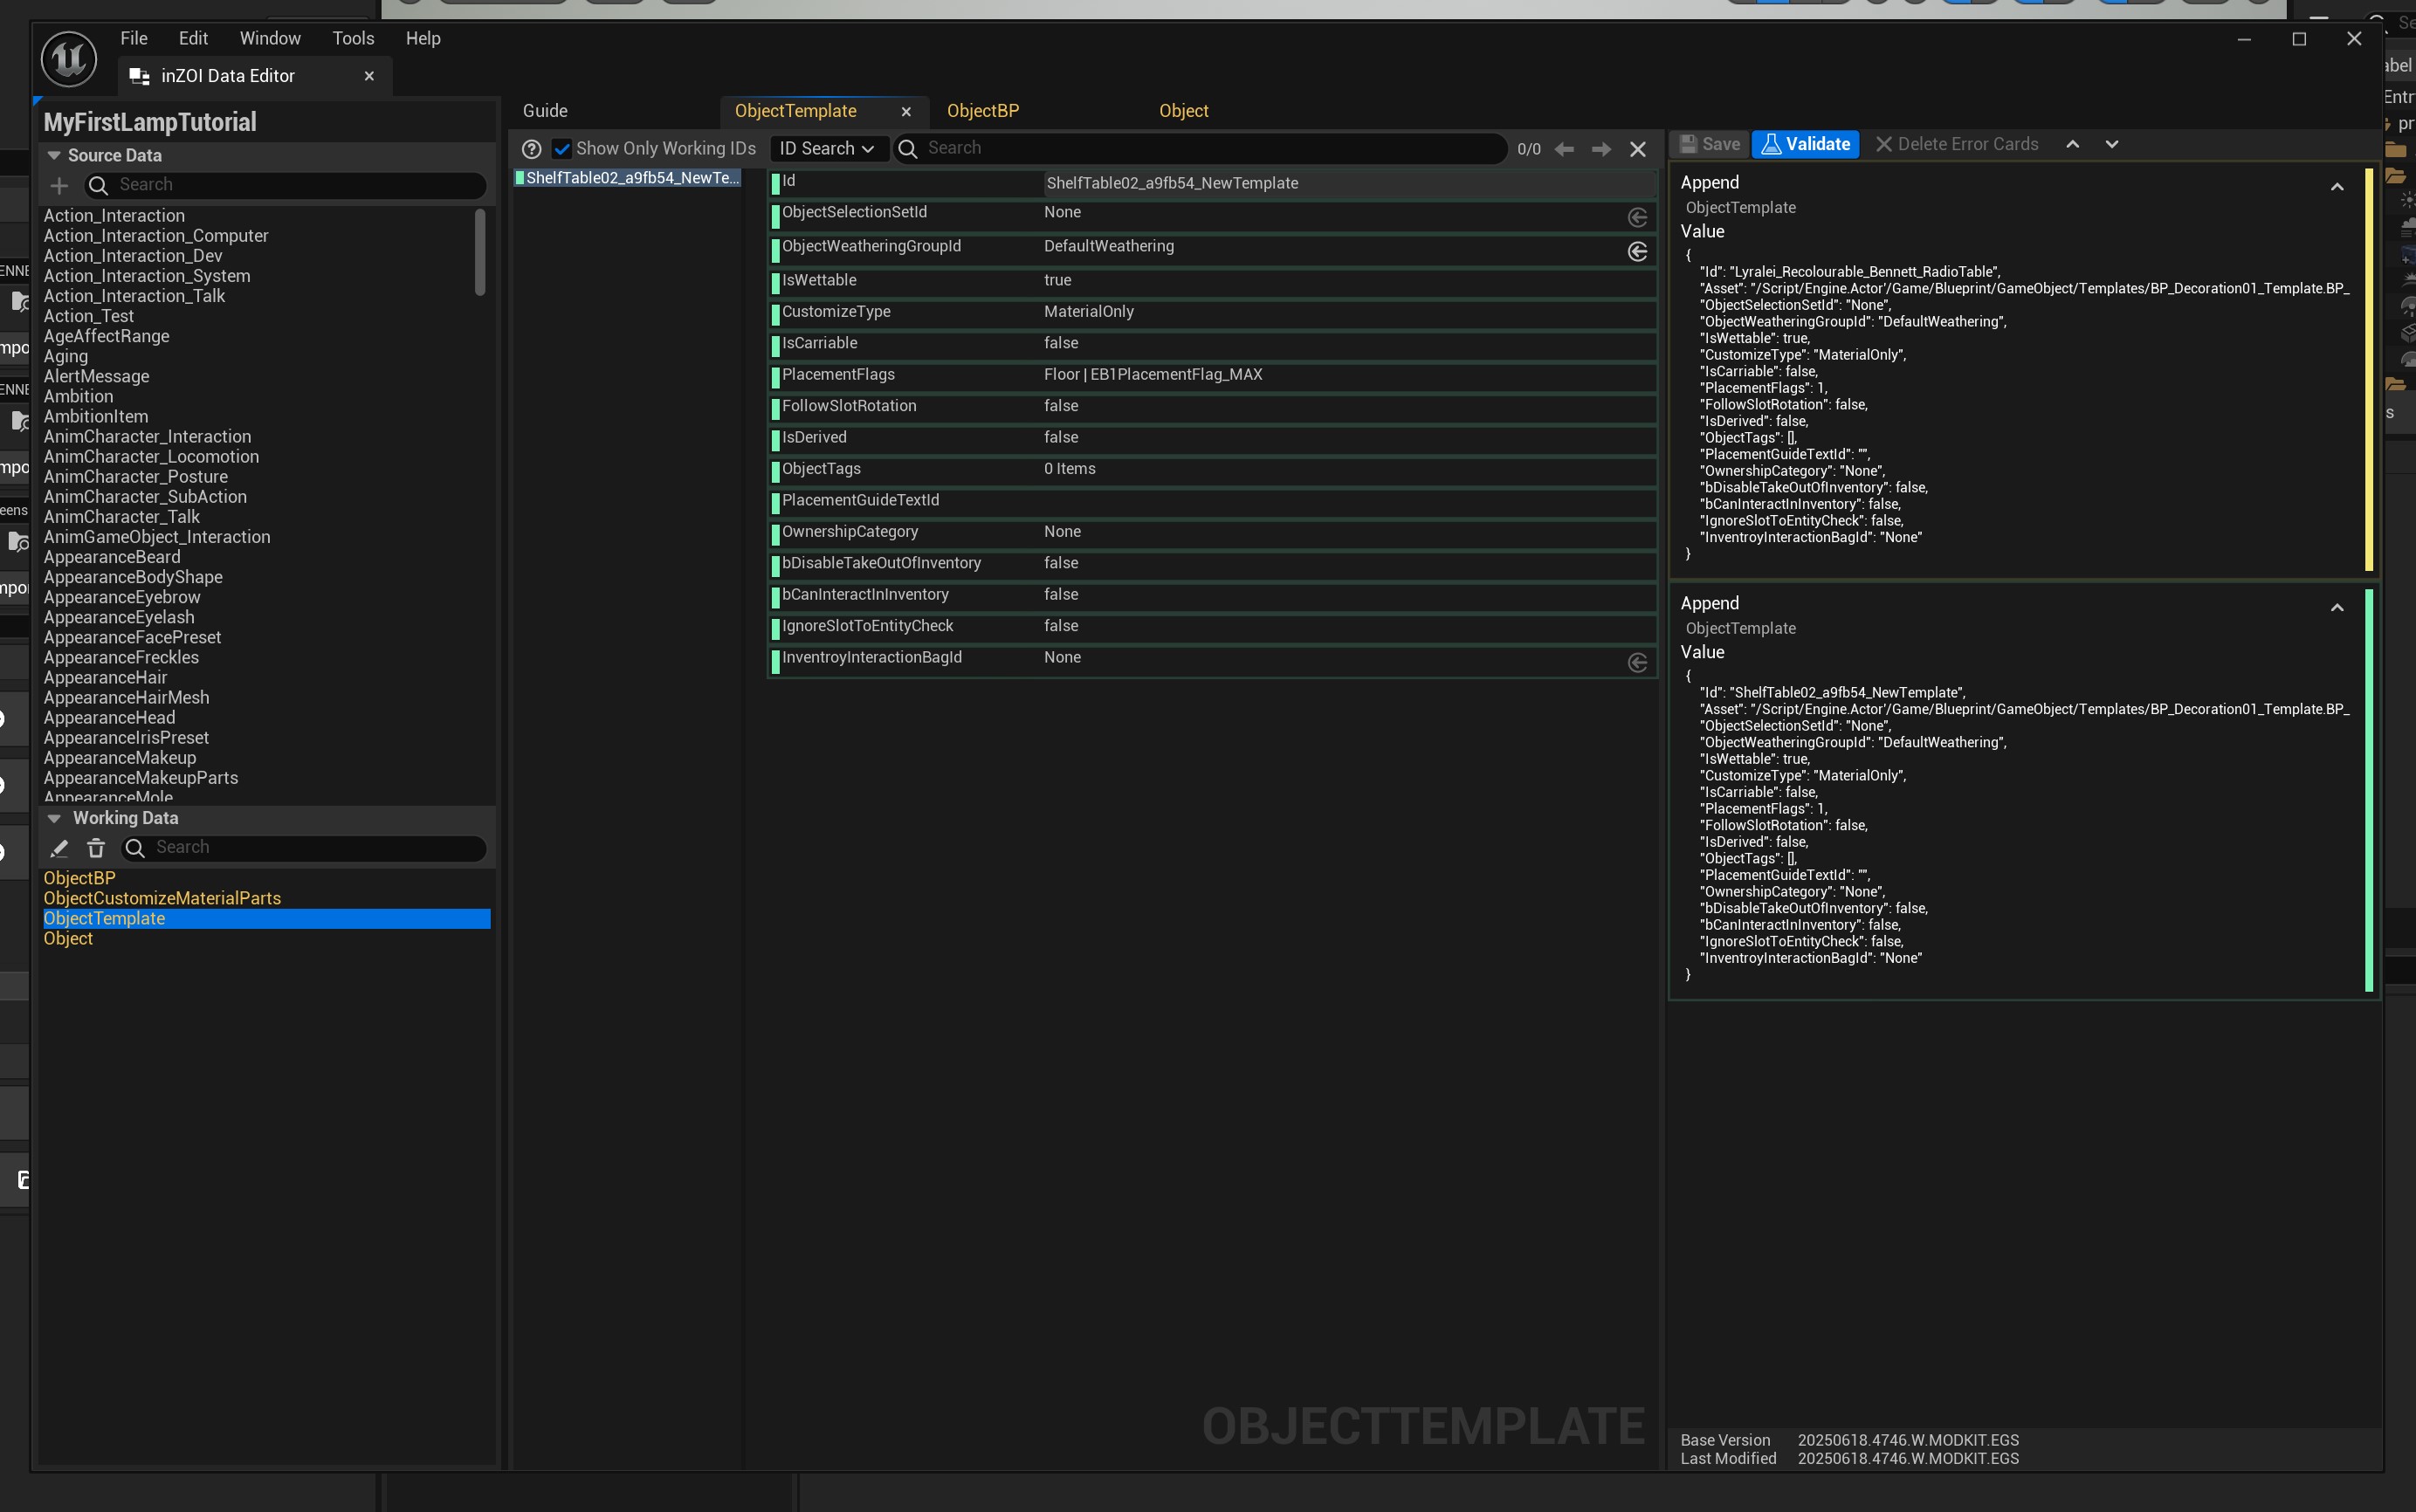
Now you should see a screen similar to this one :)
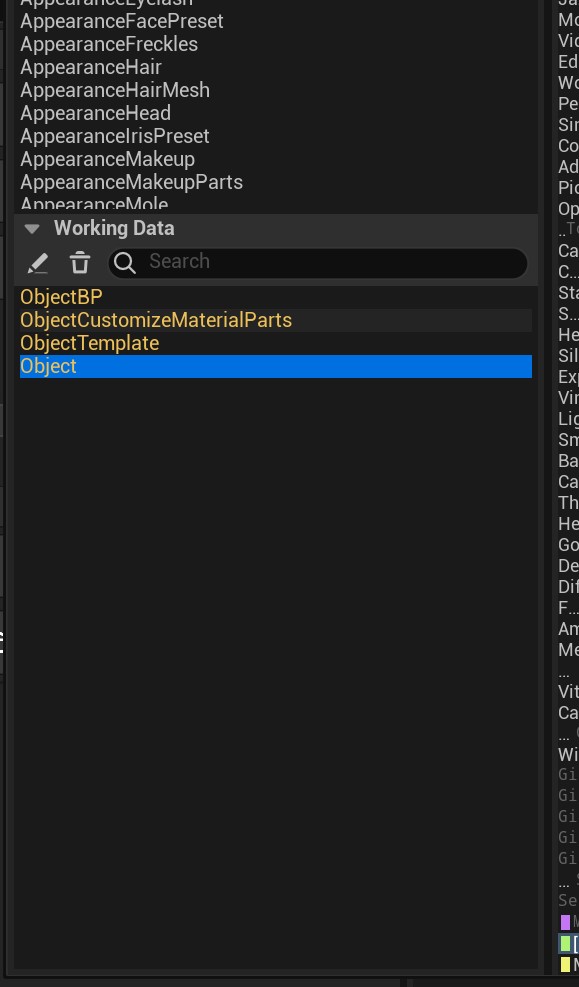
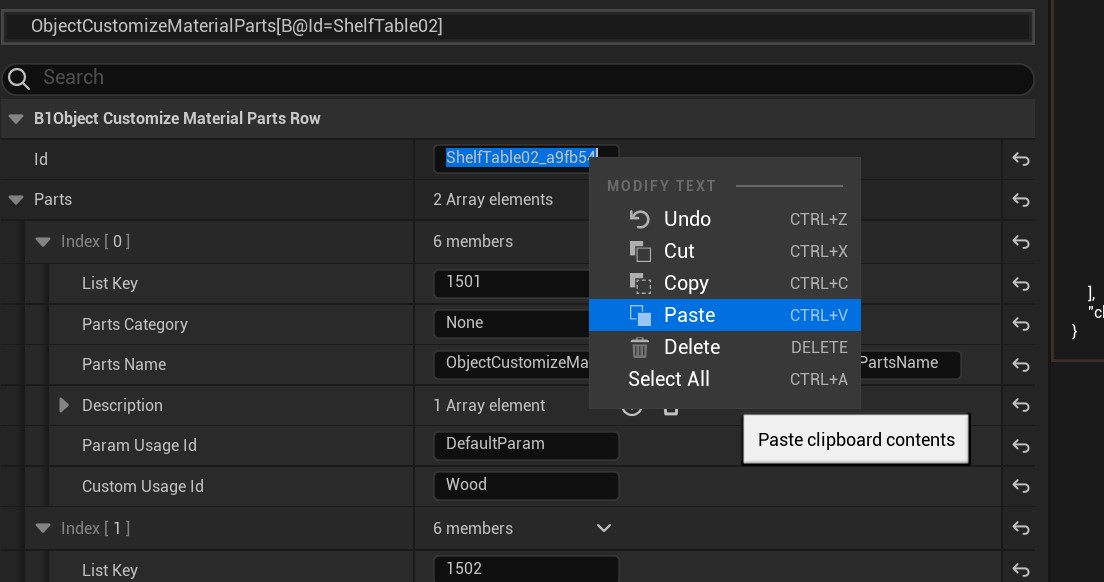
First, we want to double click on the "Object" yellow text right at the bottom right...
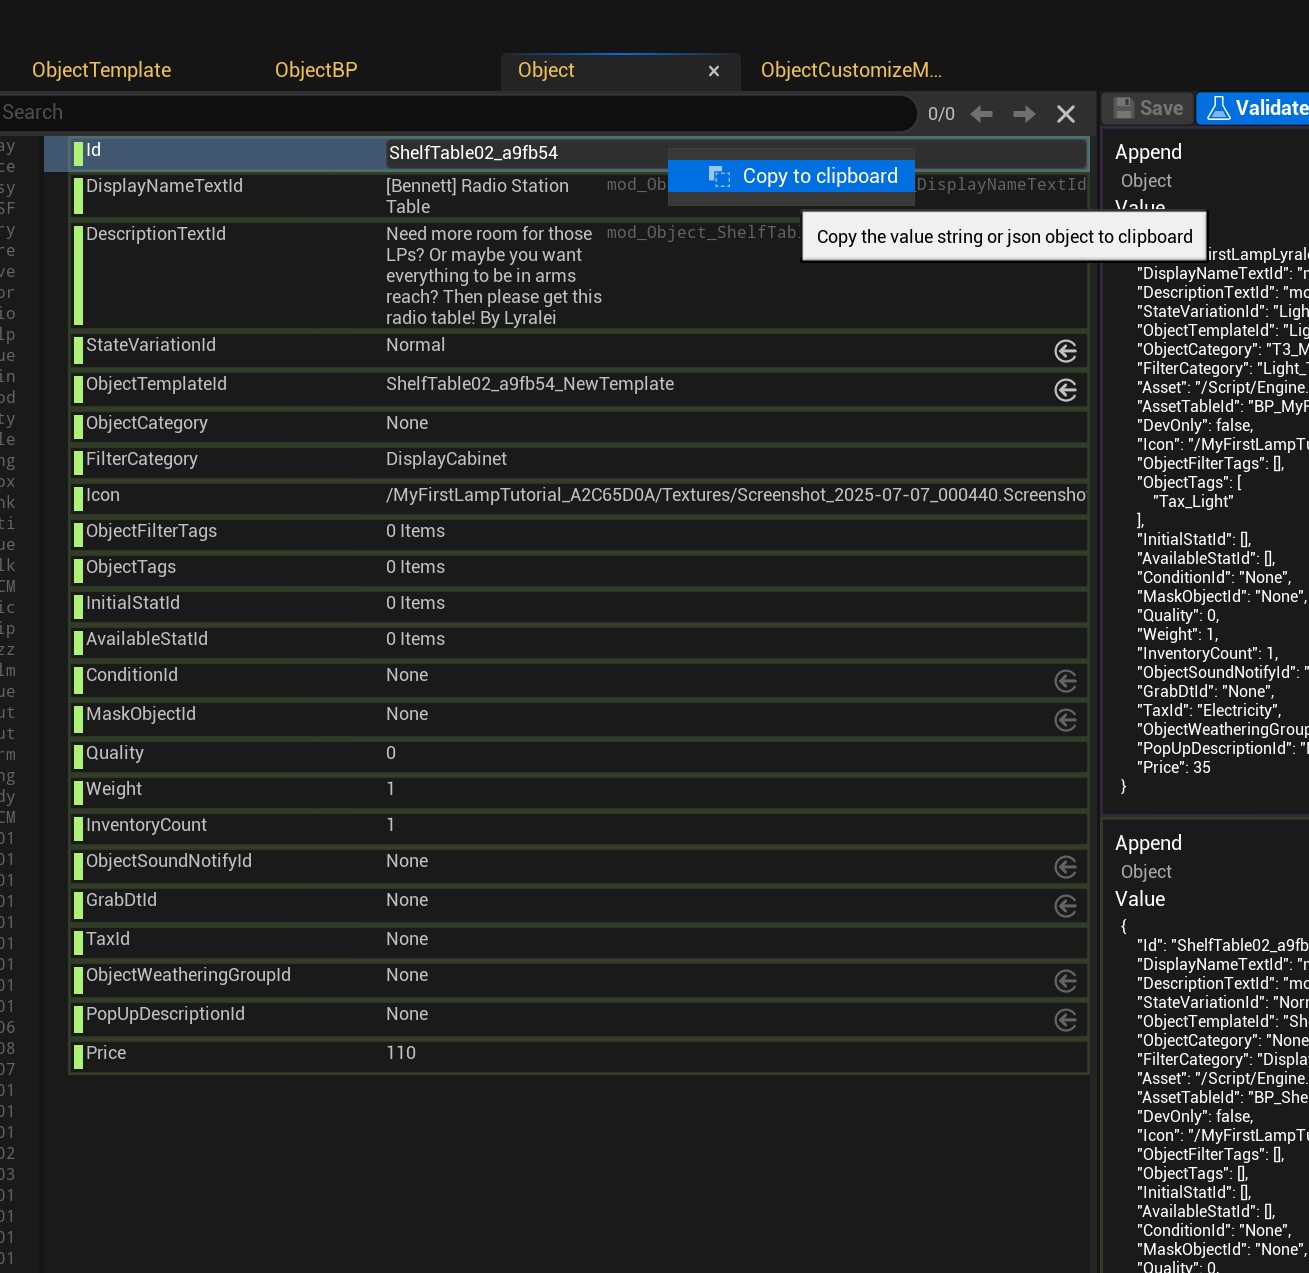
Now, right click on the "ID" row, and click "Copy to clipboard".
Store it now somewhere on a notepad or whatever text editor. We'll need this later!
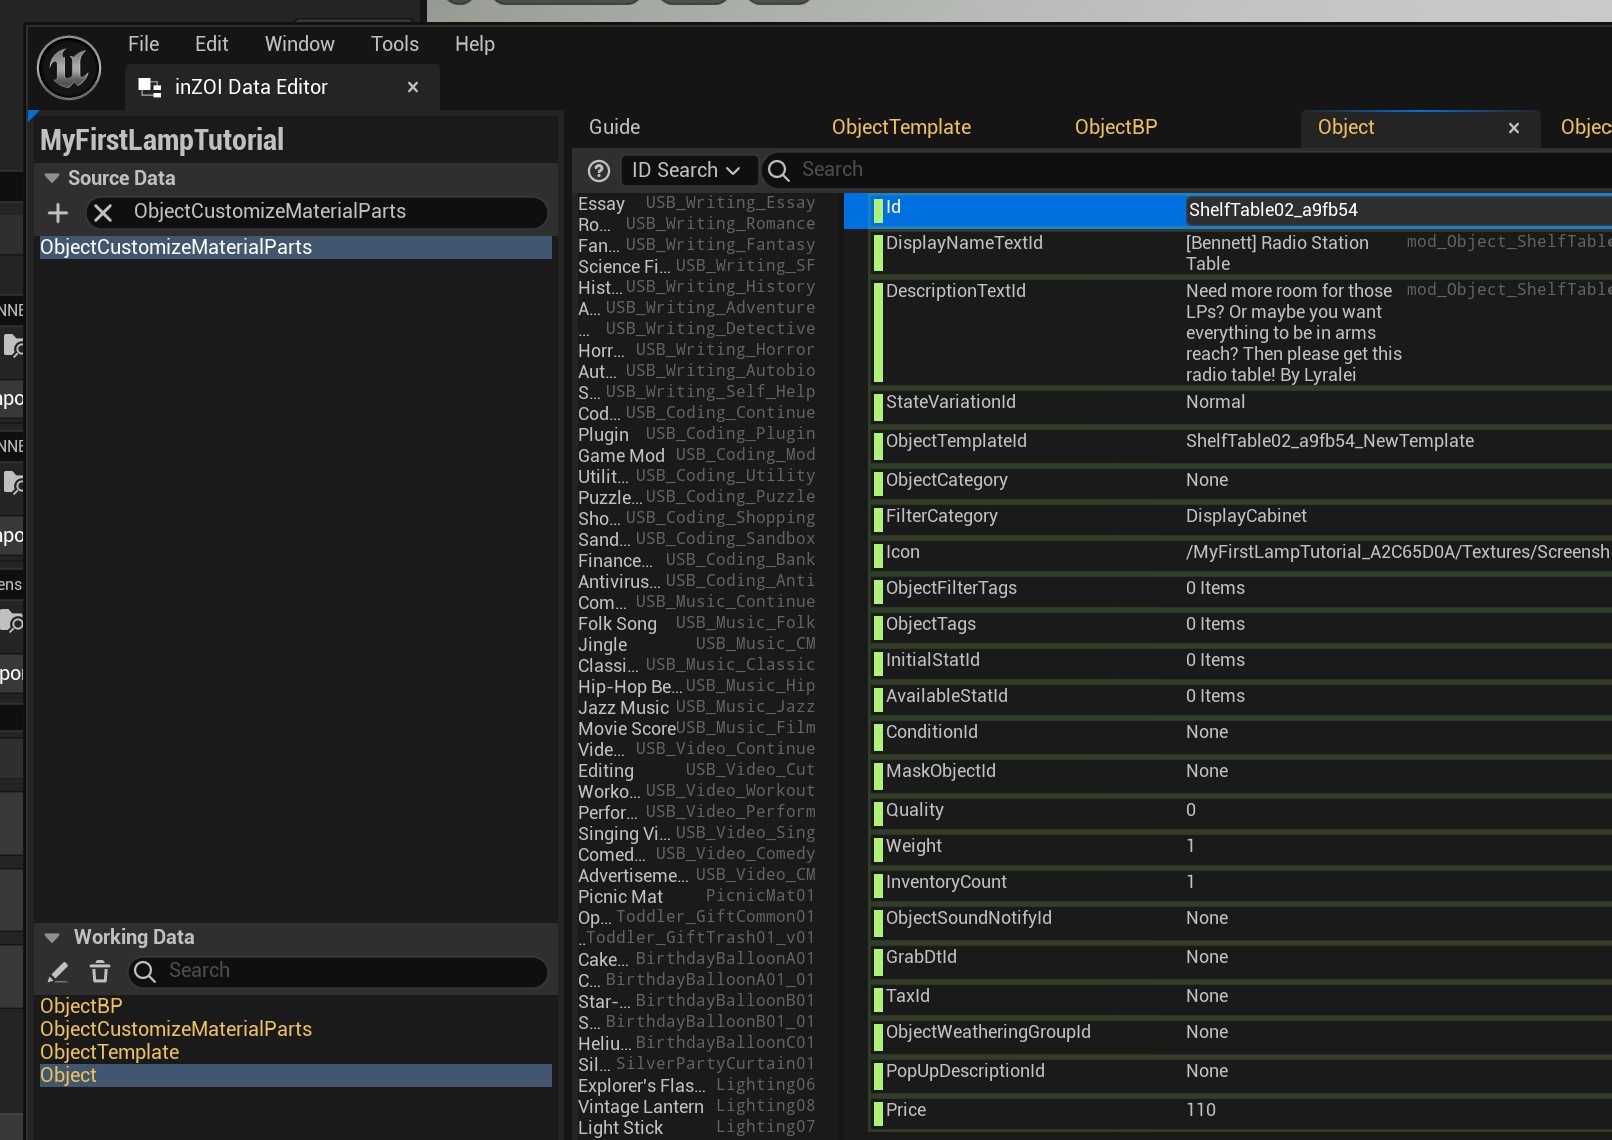
Next, in the search box at the top right (The text above should say "Source Data"!!), we type in "ObjectCustomizeMaterialParts".
Double+click this to open it.
Now we need to clone an already existing entry from this list of furniture! You probably might've noticed that you're seeing names like "bed" or "fridge".
What i like to do here is using the cloned name of the object I cloned before, which is "ShelfTable02" in my case.
However, just keep in mind that you can't make mistakes here! All these items are recolourable. So if this is all overwhelming for you, simply go for ShelfTable02 too for now 😉
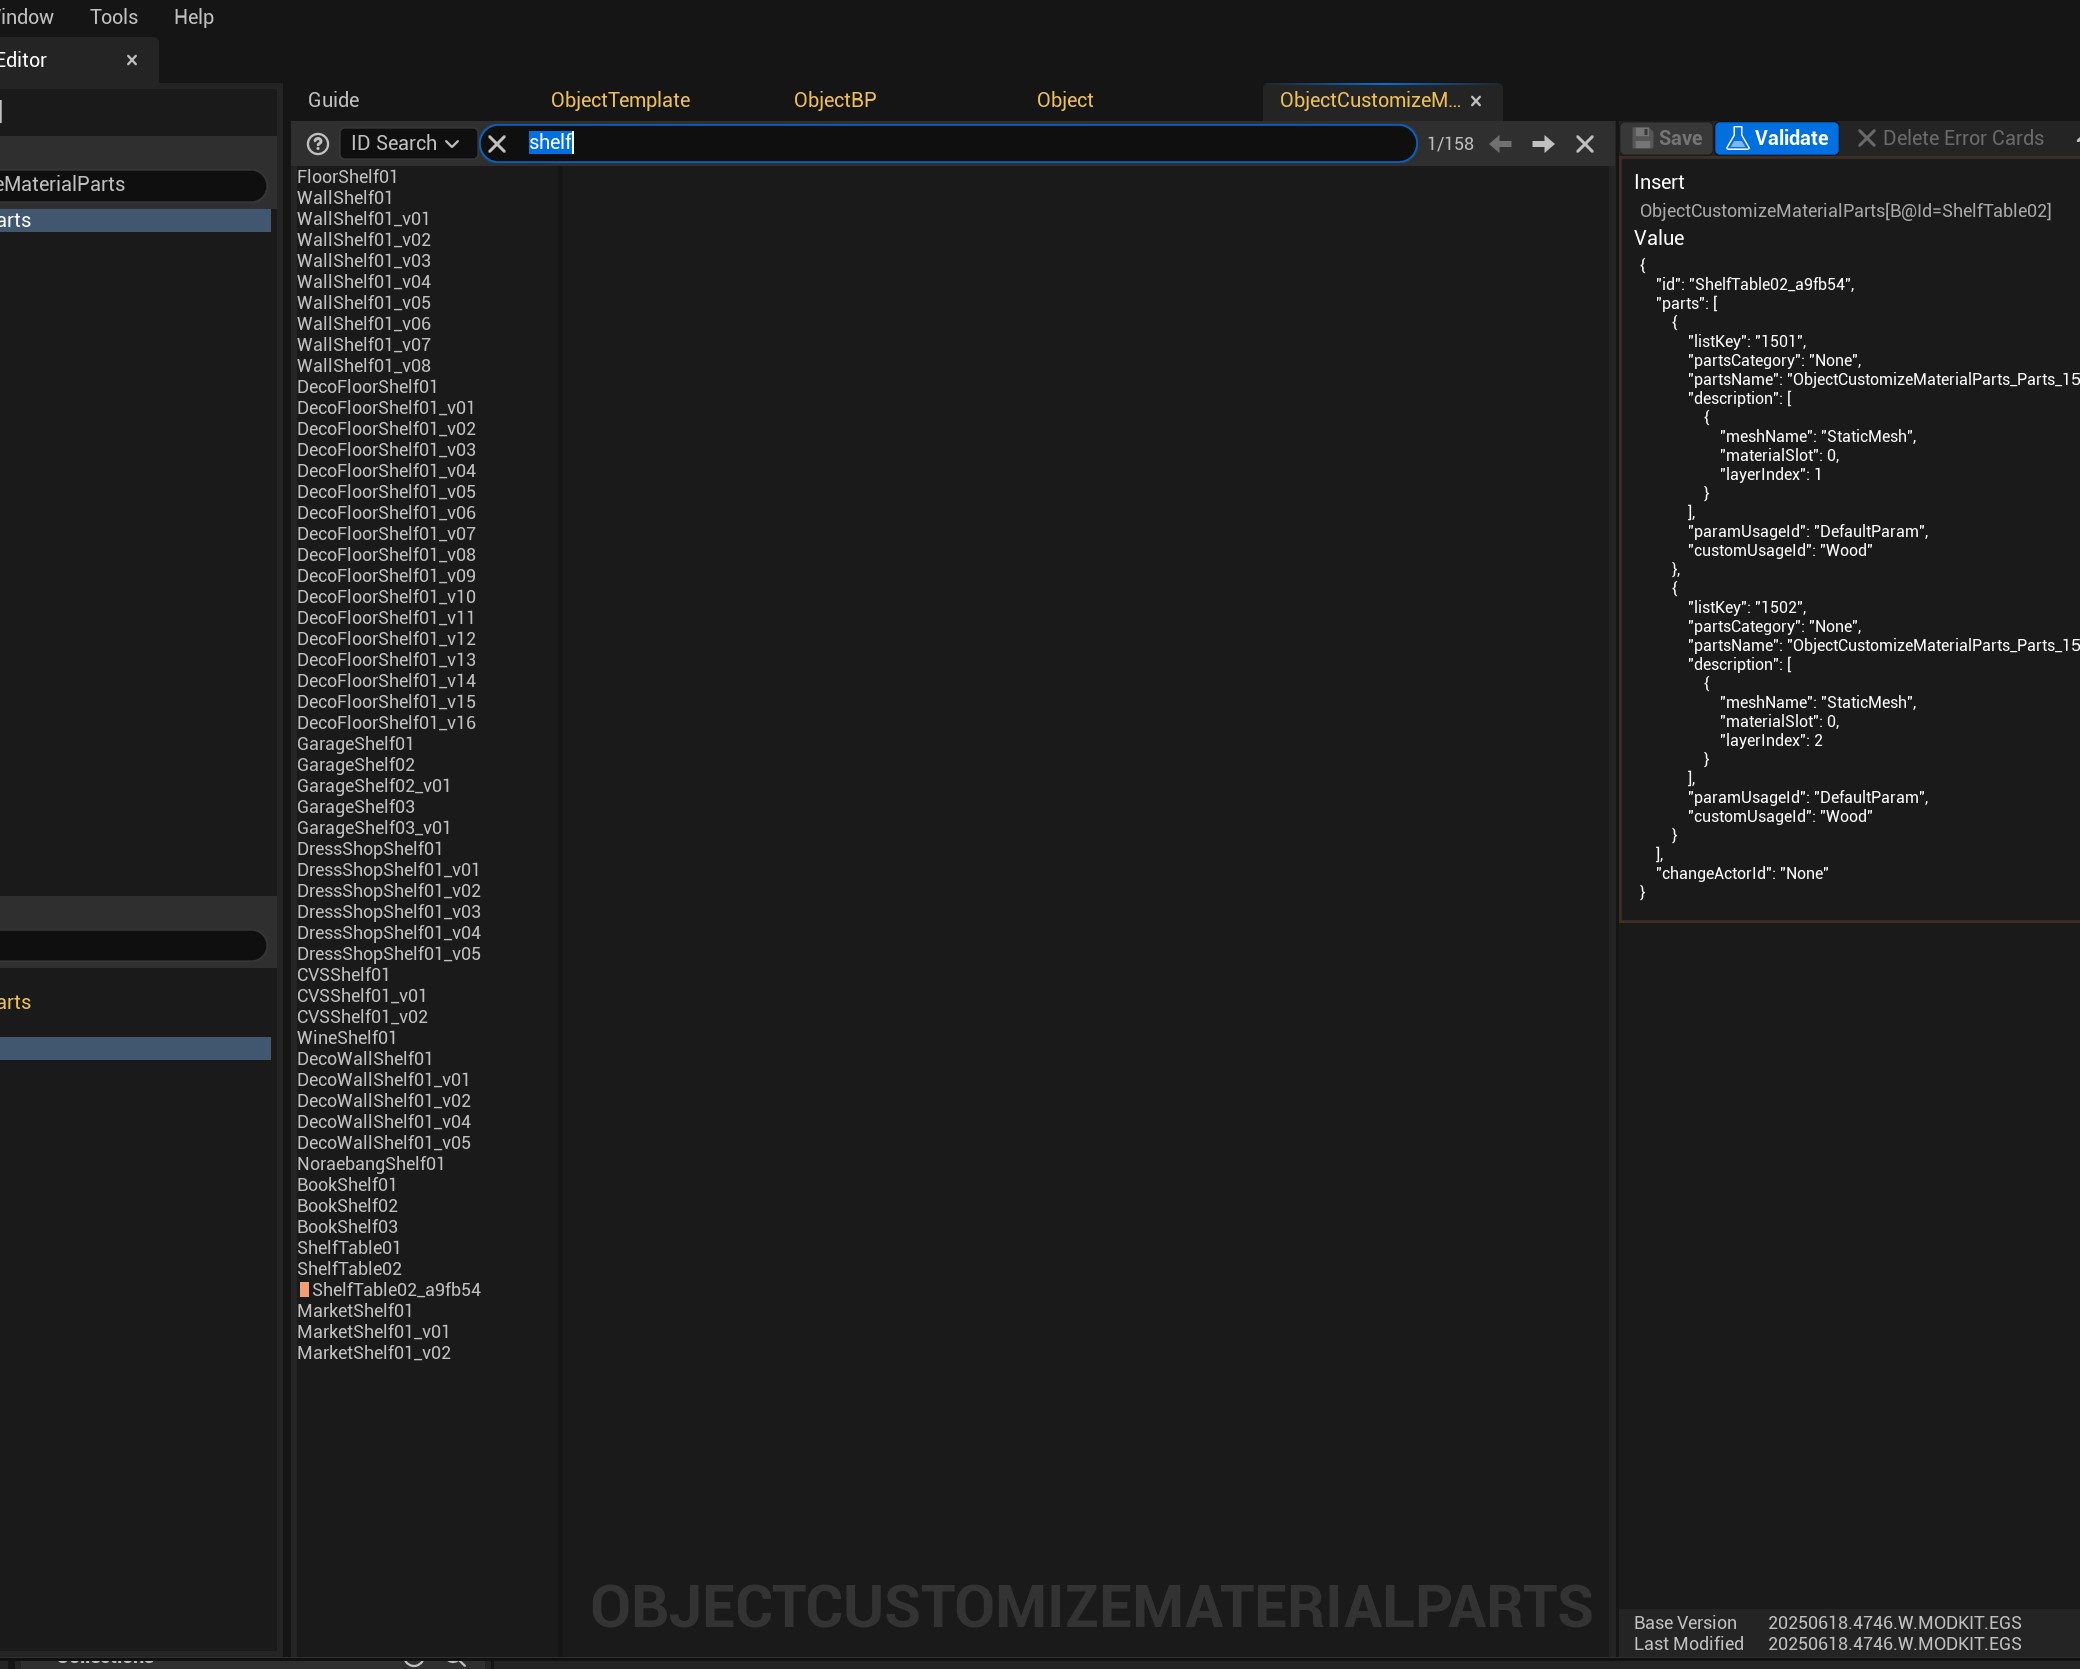
In this case, I type in "Shelf" in the search box, till my list is a bit smaller.
Find the entry called "ShelfTable02"....
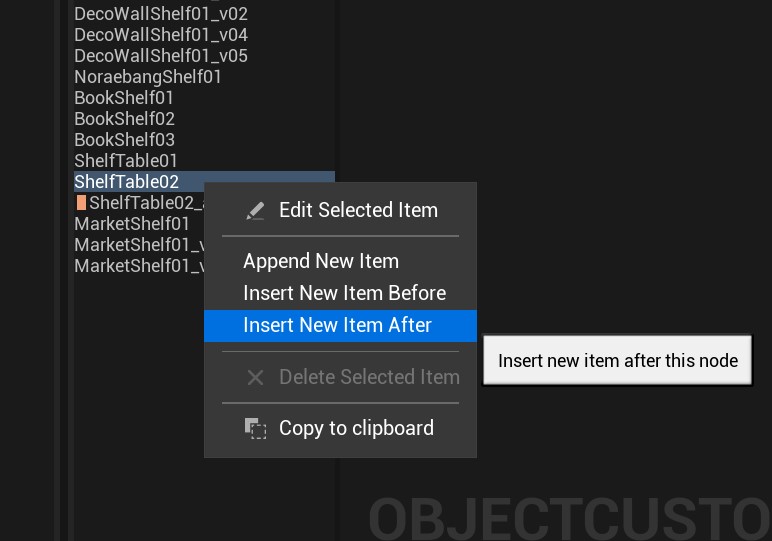
Right+Click on it, and click "Insert New Item After".
Hooray! You've now successfully cloned the tuning file! :D
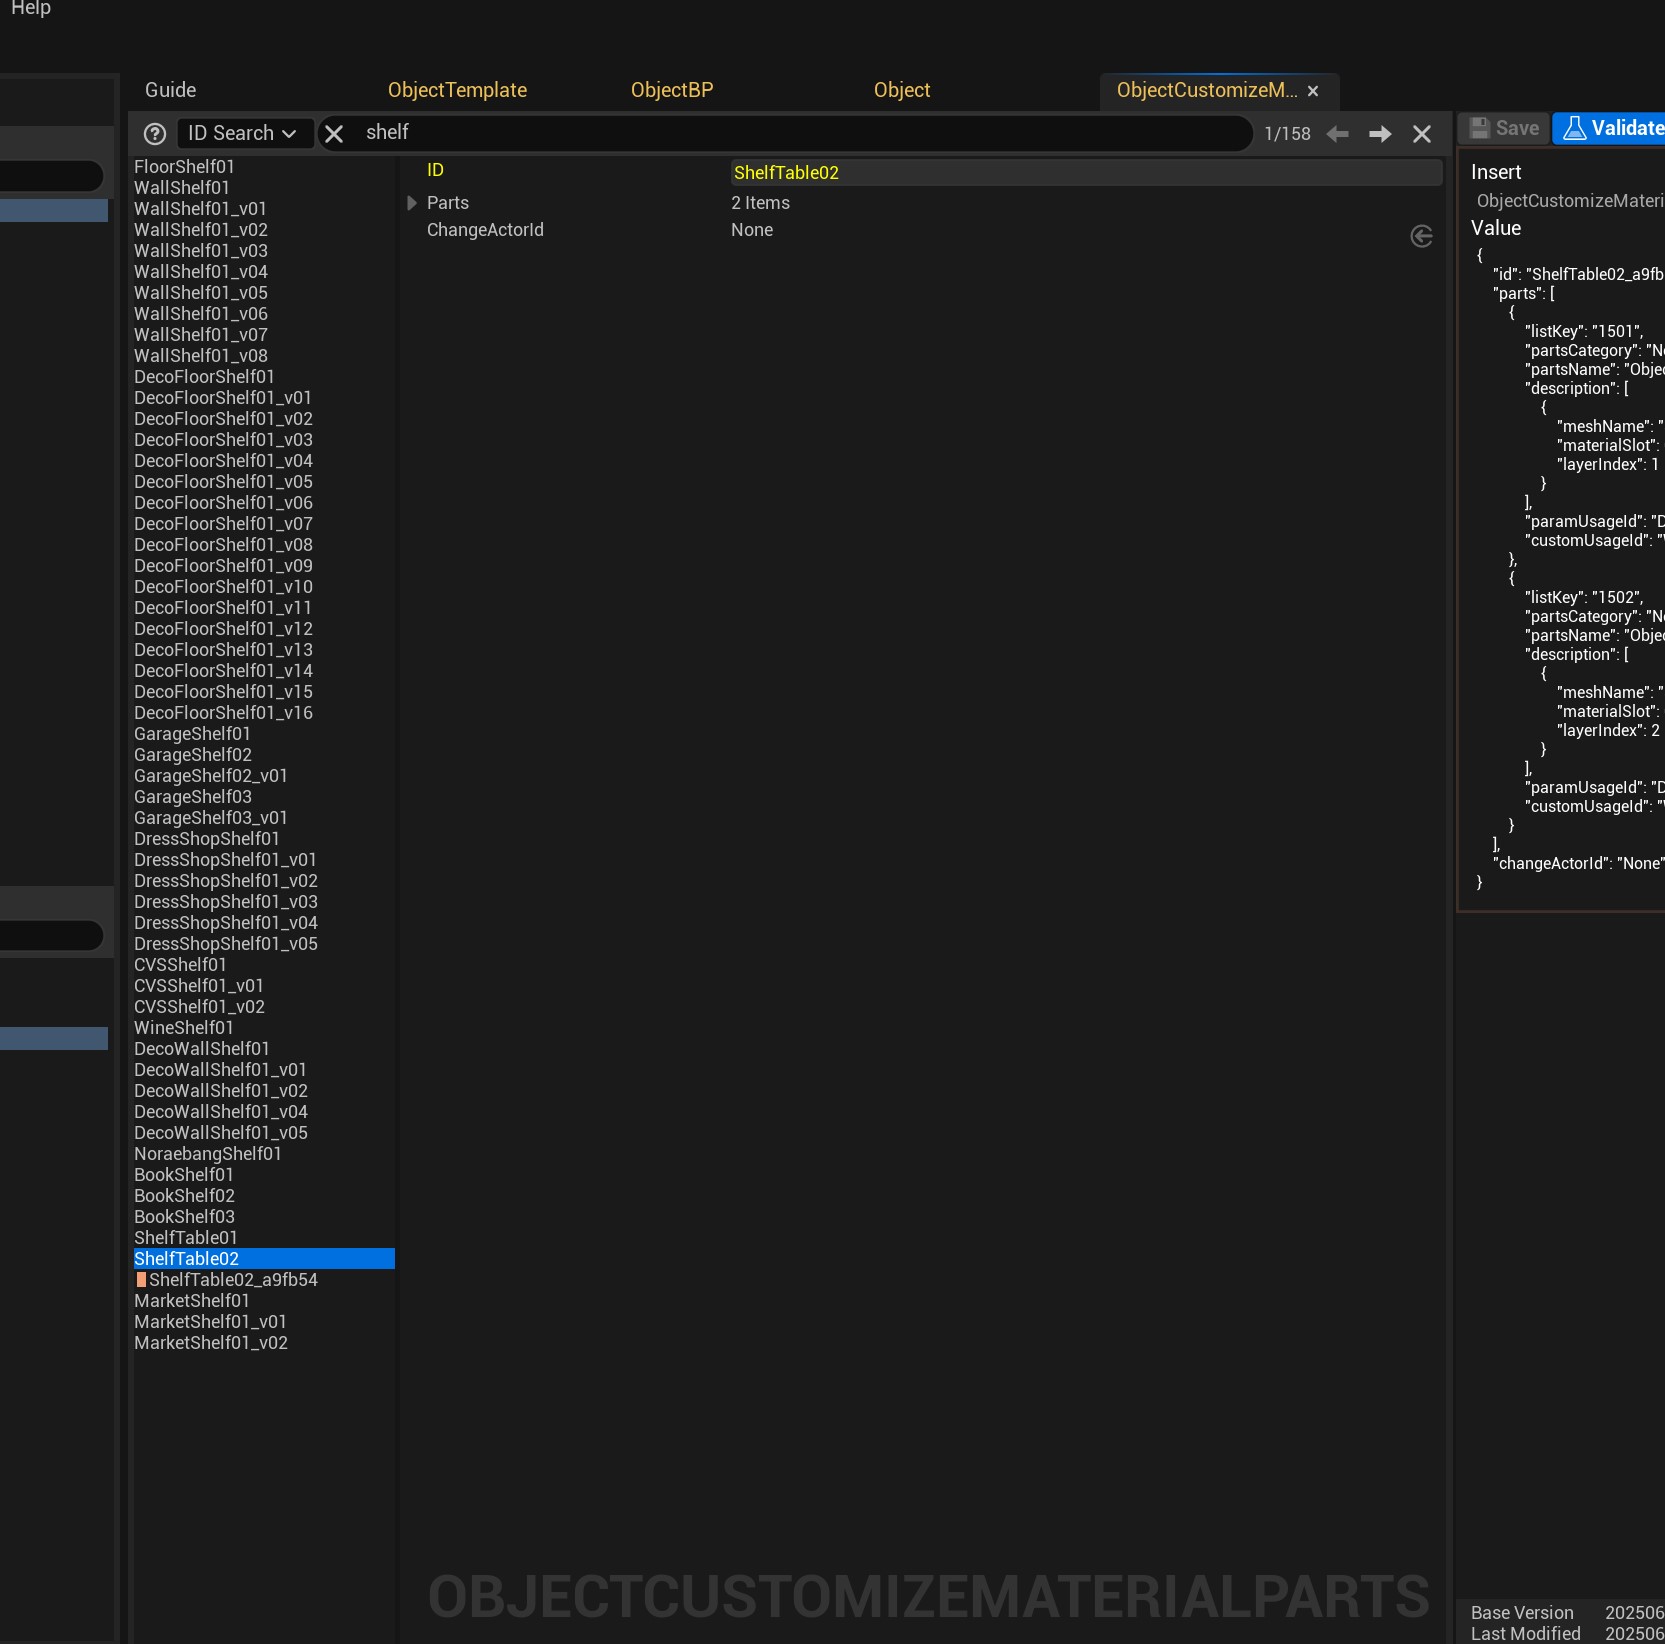
Now to editing it! So, after we clicked "Insert New Item After" it opened a window. This is where we're going to be adding our information :)
First, we start with pasting our ID that I told you to copy and store in a notepad or text editor. (In my case this is ShelfTable02_a9fb54. DON'T COPY MY ID THOUGH!)
Double click "Id" and paste our ID into the field. Your Id should now have something like an underscore with a bunch of numbers and letters at the end :)
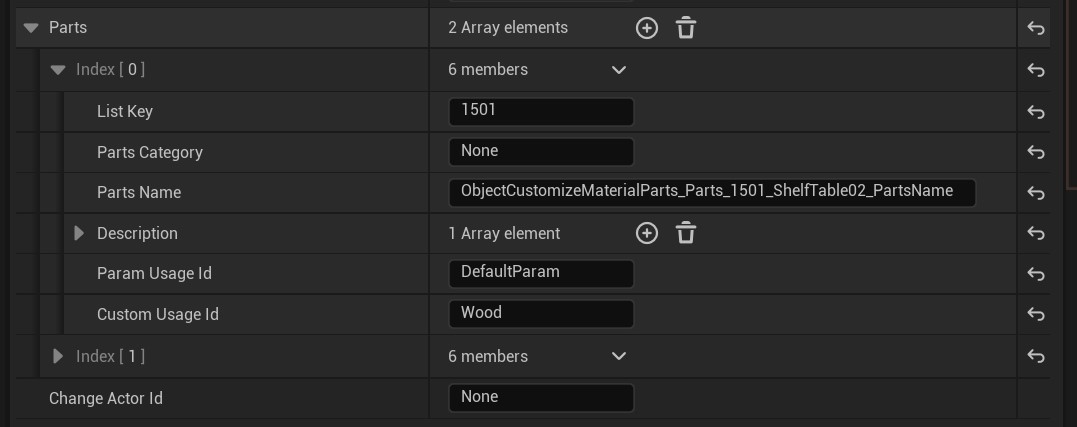
Now to the "Parts" tab. If it's collapsed, uncollapse this! As well as the "0". tab.
This is where we're going to tell the game what kind of material our mesh can use. (Wood, fabric, plastic, etc).
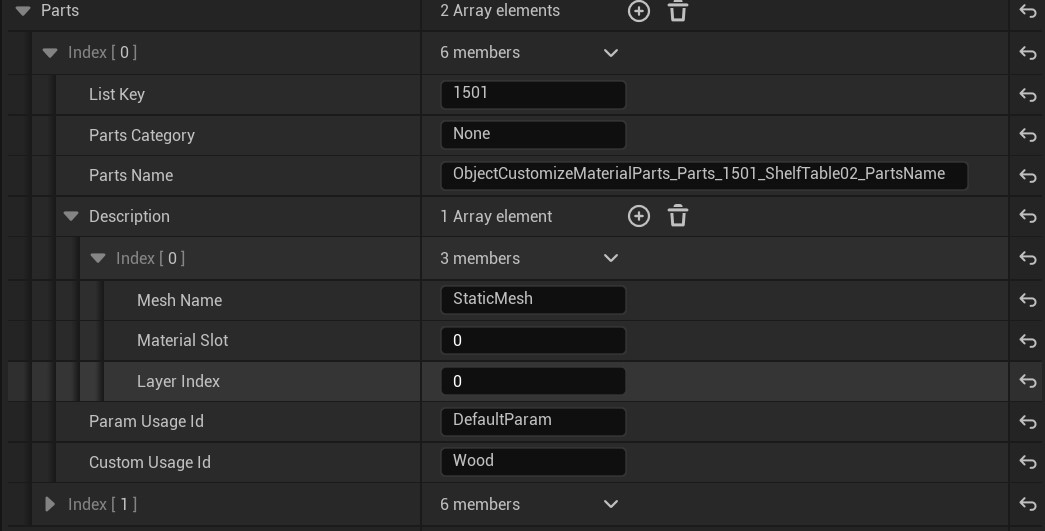
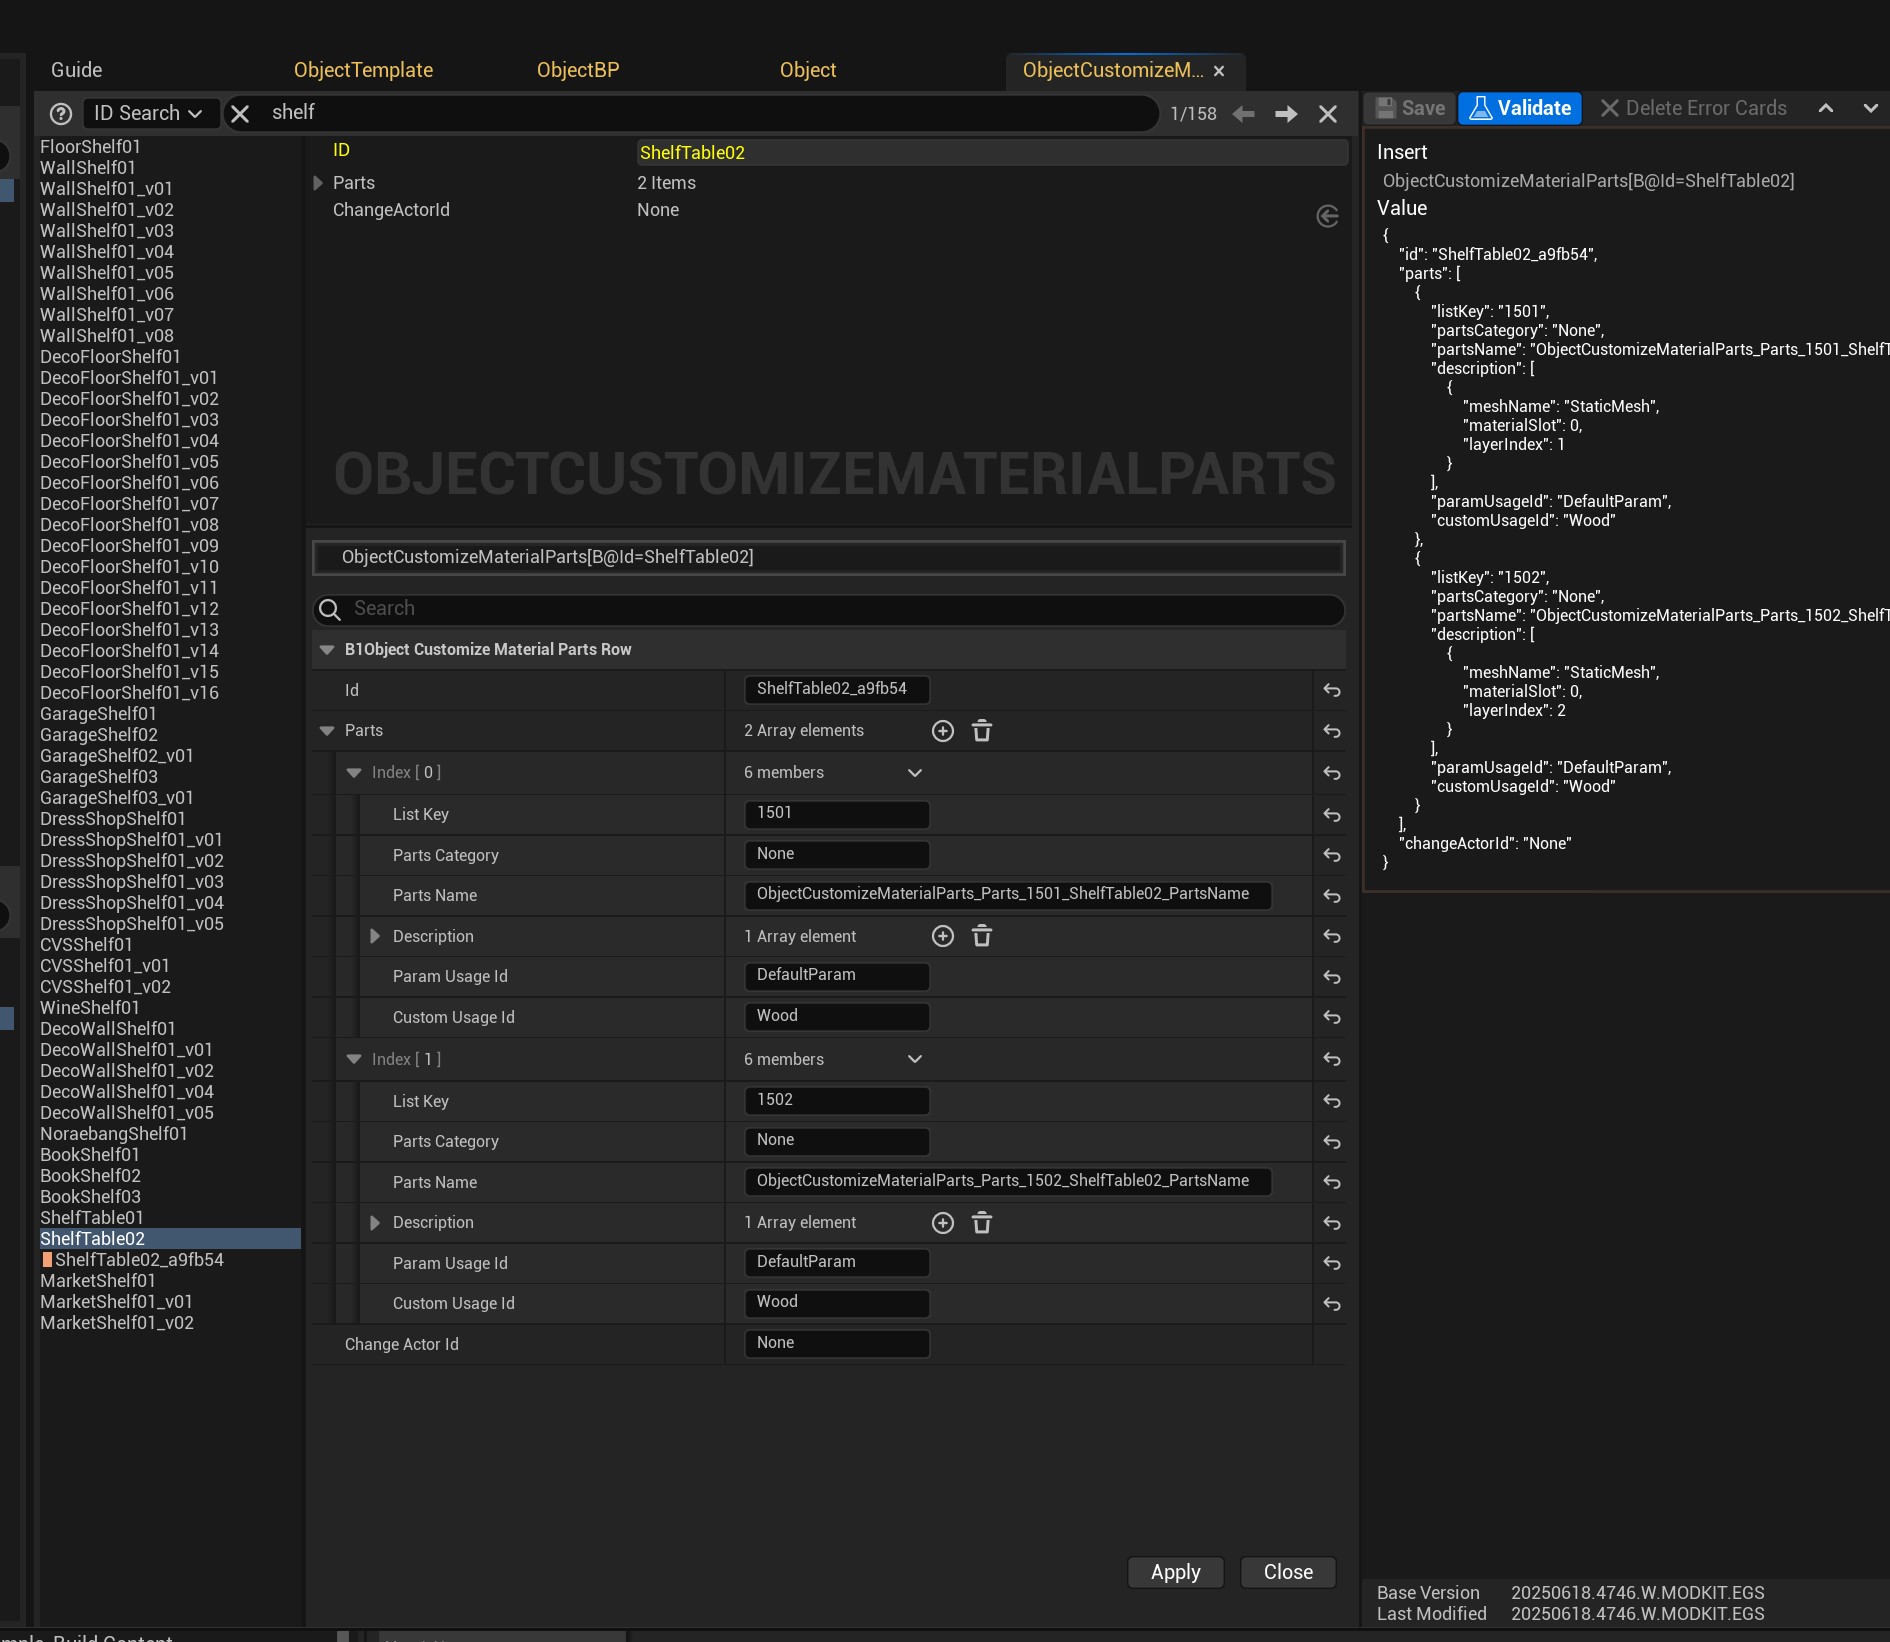
Now, we uncollapse "Description", "Index 0" and update our "Layer Index" to 1.

To set what type of material it should be accepting, we want to change the "Custom Usage ID". For this item the default was Wood.
Note: This is really spelling and capitalization sensitive! So make sure you either copy/paste from this list, or double check the capitalization of it.
Here's the full list of what you could use to add to Custom Usage Id:
- Ceramic
- Concrete
- Fabric
- Leather
- Marble
- Metal
- PaintedMetal
- Picture (so you can add a picture to your picture frame!)
- Plastic
- Rubber
- Wood
(There are a couple more but those won't work on furniture pieces 😉)
How do I allow multiple materials?!
Let's say, your item can be a wooden item, but you also want it to allow metal, well then we want to make sure we type WoodMetal in the "Custom Usage ID".
And if you want to go really crazy, you could even go for: WoodMetalFabricPlasticRubber :D
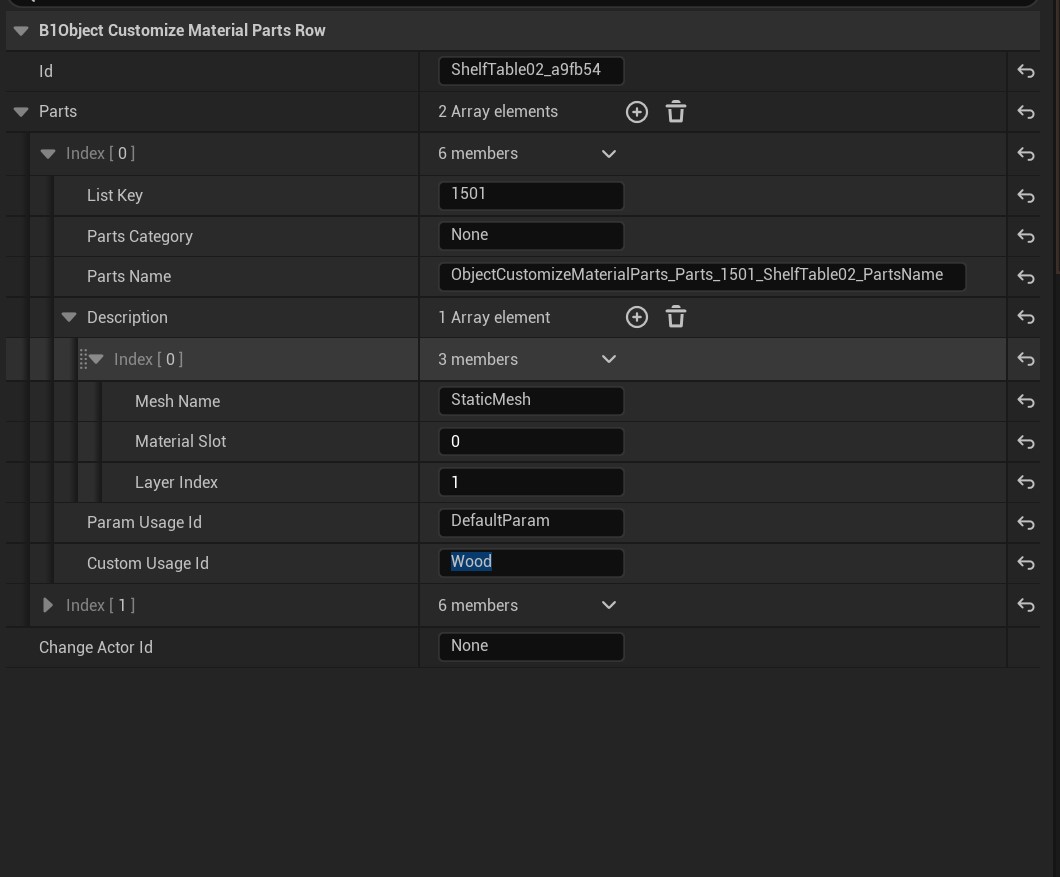
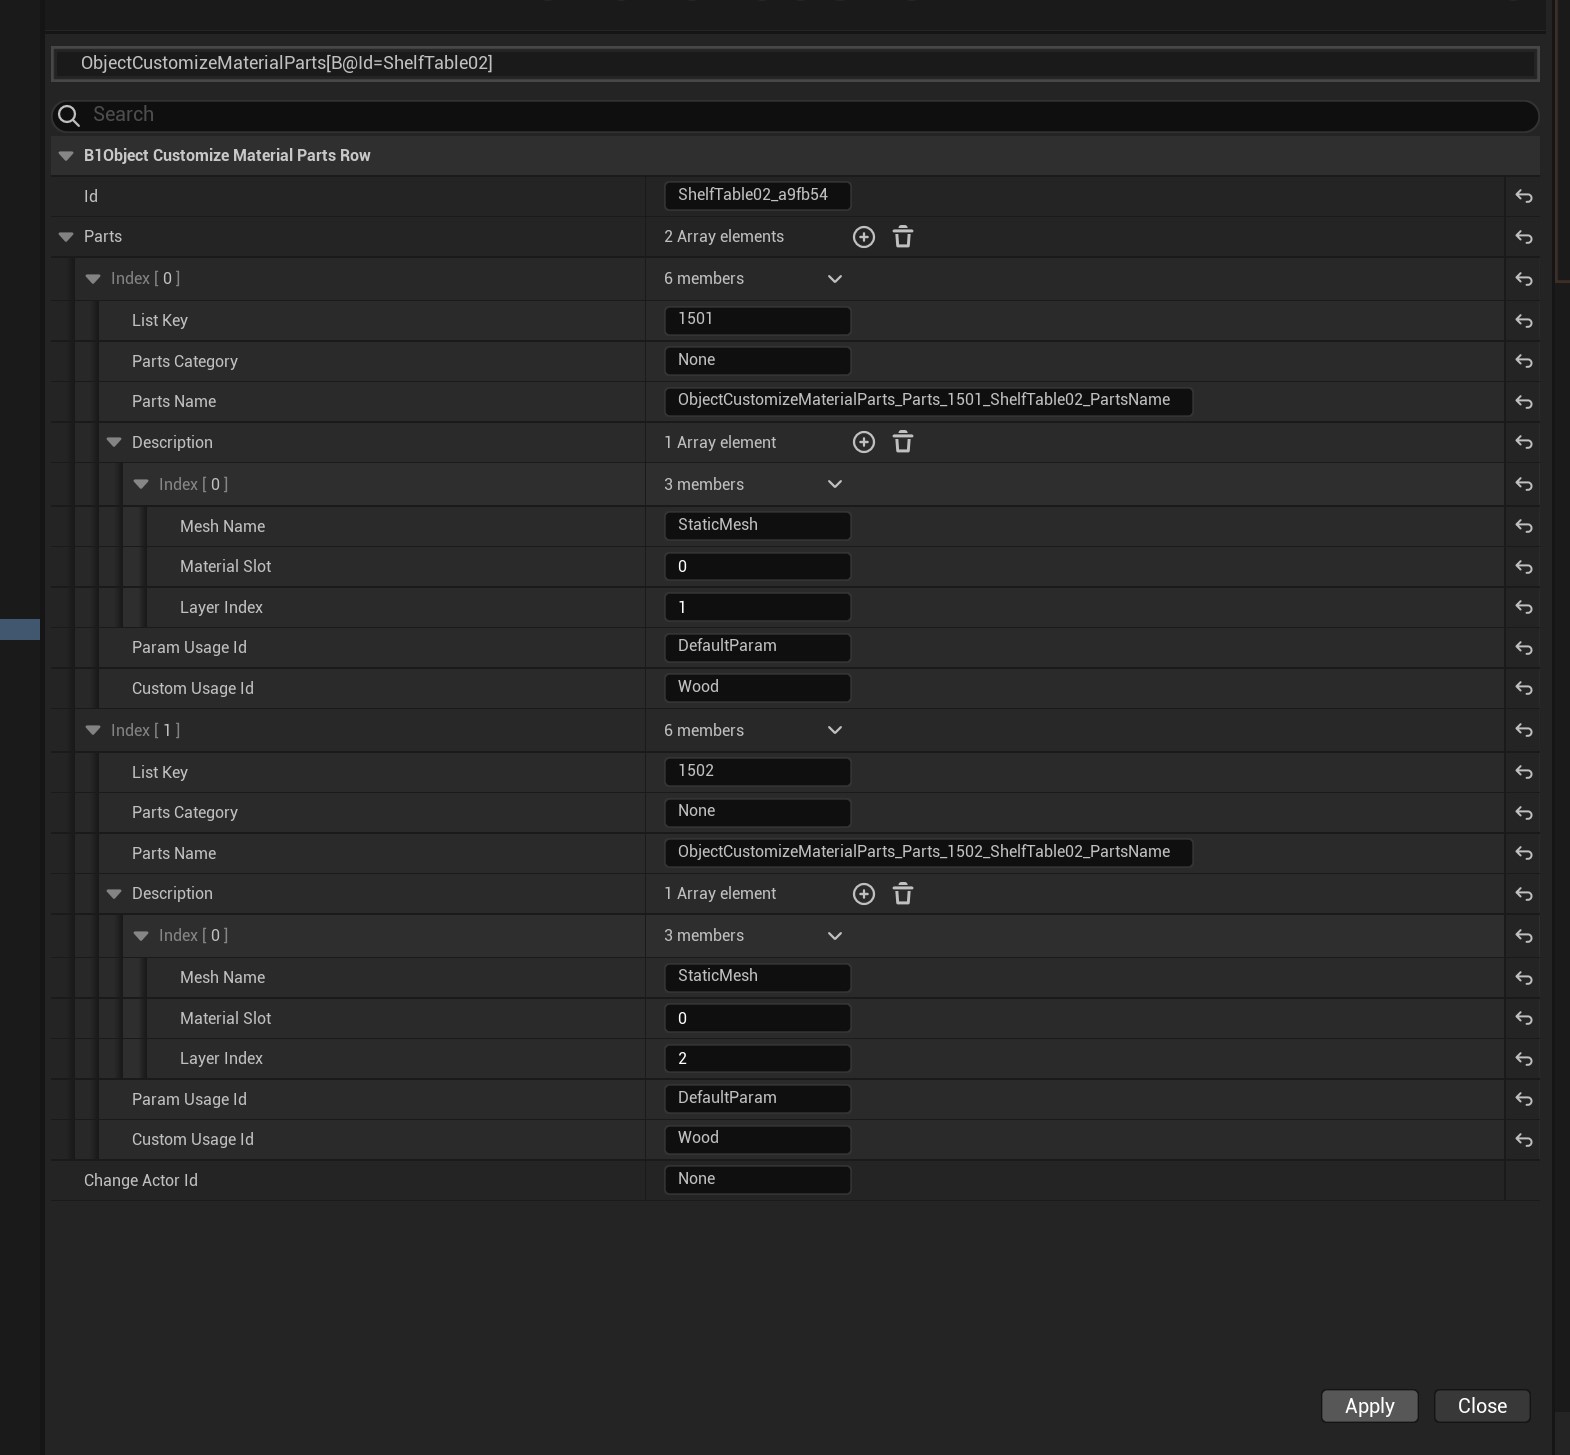
Now you should have something like my here! Don't worry about the ListKey or Parts Category. Those things are really advanced right now and we don't really need to check out 😉
Adding other recolourable areas:
Note: If you only have one recolourable area, you actually want to delete the second part! To do so, you click on the downwards facing arrow next to "Index 1" (it also says something about members right next to it) and press "Delete". I will cover this in a sec! But just so you are aware how to do it if you'd like to try yourself.
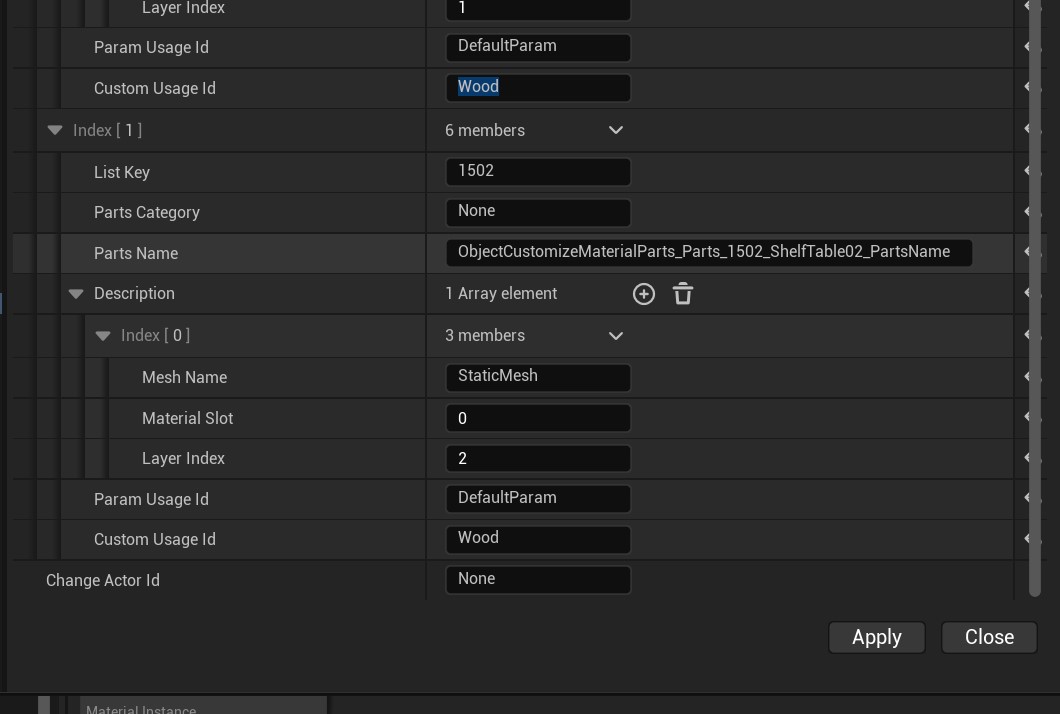
Now we want to uncollapse Index 1 in the parts. It will look EXACTLY like the first one we filled out. However, under "Description" > "Index 0" > "Layer Index" We now want to set it to "2" since this is our second recolourable region! :)
Edit the Custom usage Id if you need to (or keep it as wood!) and now it's done!
But I don't have a second "Parts"?! What do I do?!?!
It's possible that the item you cloned only has 1 recolourable part. The best to fix this is to add one, which is really easy to do!

First, find "Parts" (I collapsed a lot of the things, so it's easier to see it). Then, next to "Array Elements" there is a plus button. Press that.
And voila! We have another part :D
Note: You can only have a total of 3 recolourable parts! Anything higher will be ignored by the game!
What about deleting any extra parts?
Maybe as you're following this tutorial, you only have one recolourable area. And therefore you don't need that second 'part' in this case. (Or maybe your cloned item had 3 recolourable areas, but you only need 2 or 1!).
To delete those parts, we want to instead do this:

Next to the part you want to delete (Let's say, Index 1) and primarily next to the "members" text of said part, there is a arrow dropdown you want to click. Press Delete and this will remove said recolourable area :)
Note: Make sure you have at least one part!
Removing them all because you want your item to be non-recolourable is pointless and you probably shouldn't have followed this part then!
Moving on
Now we want to save our changes!
Here's a quick pic of what mine looks like. now remember, not all the values have to be the same! Maybe your doesn't need wood, but metal instead of example. Or maybe you have 3 recolourable areas instead of two :D
Now press "Apply" at the bottom.
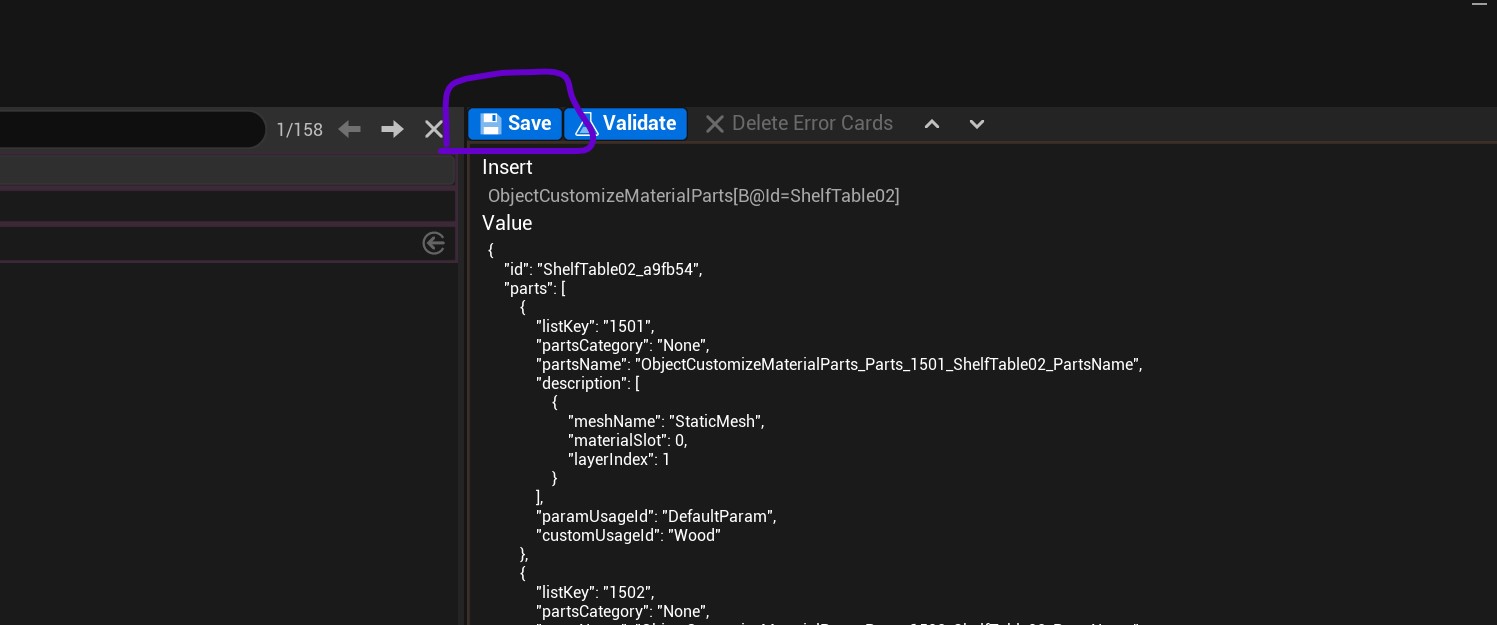
Now it should show on the right hand side this code-looking piece (we call this JSON if you're curious!) and press the "Save" button that's currently blue right at the top.
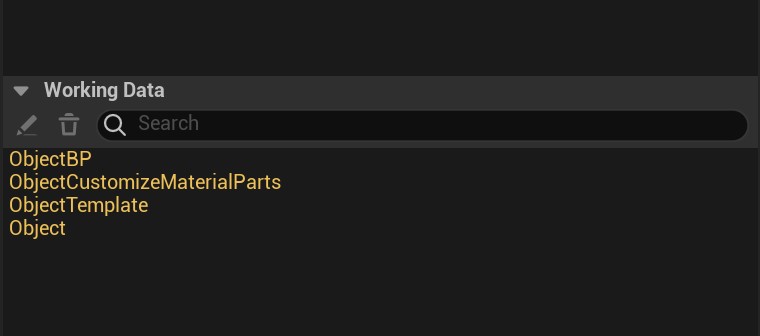
If you've done everything correctly, you should now be seeing all these yellow names (data) at the bottom right light (Working data list).
Close the window.
Result:
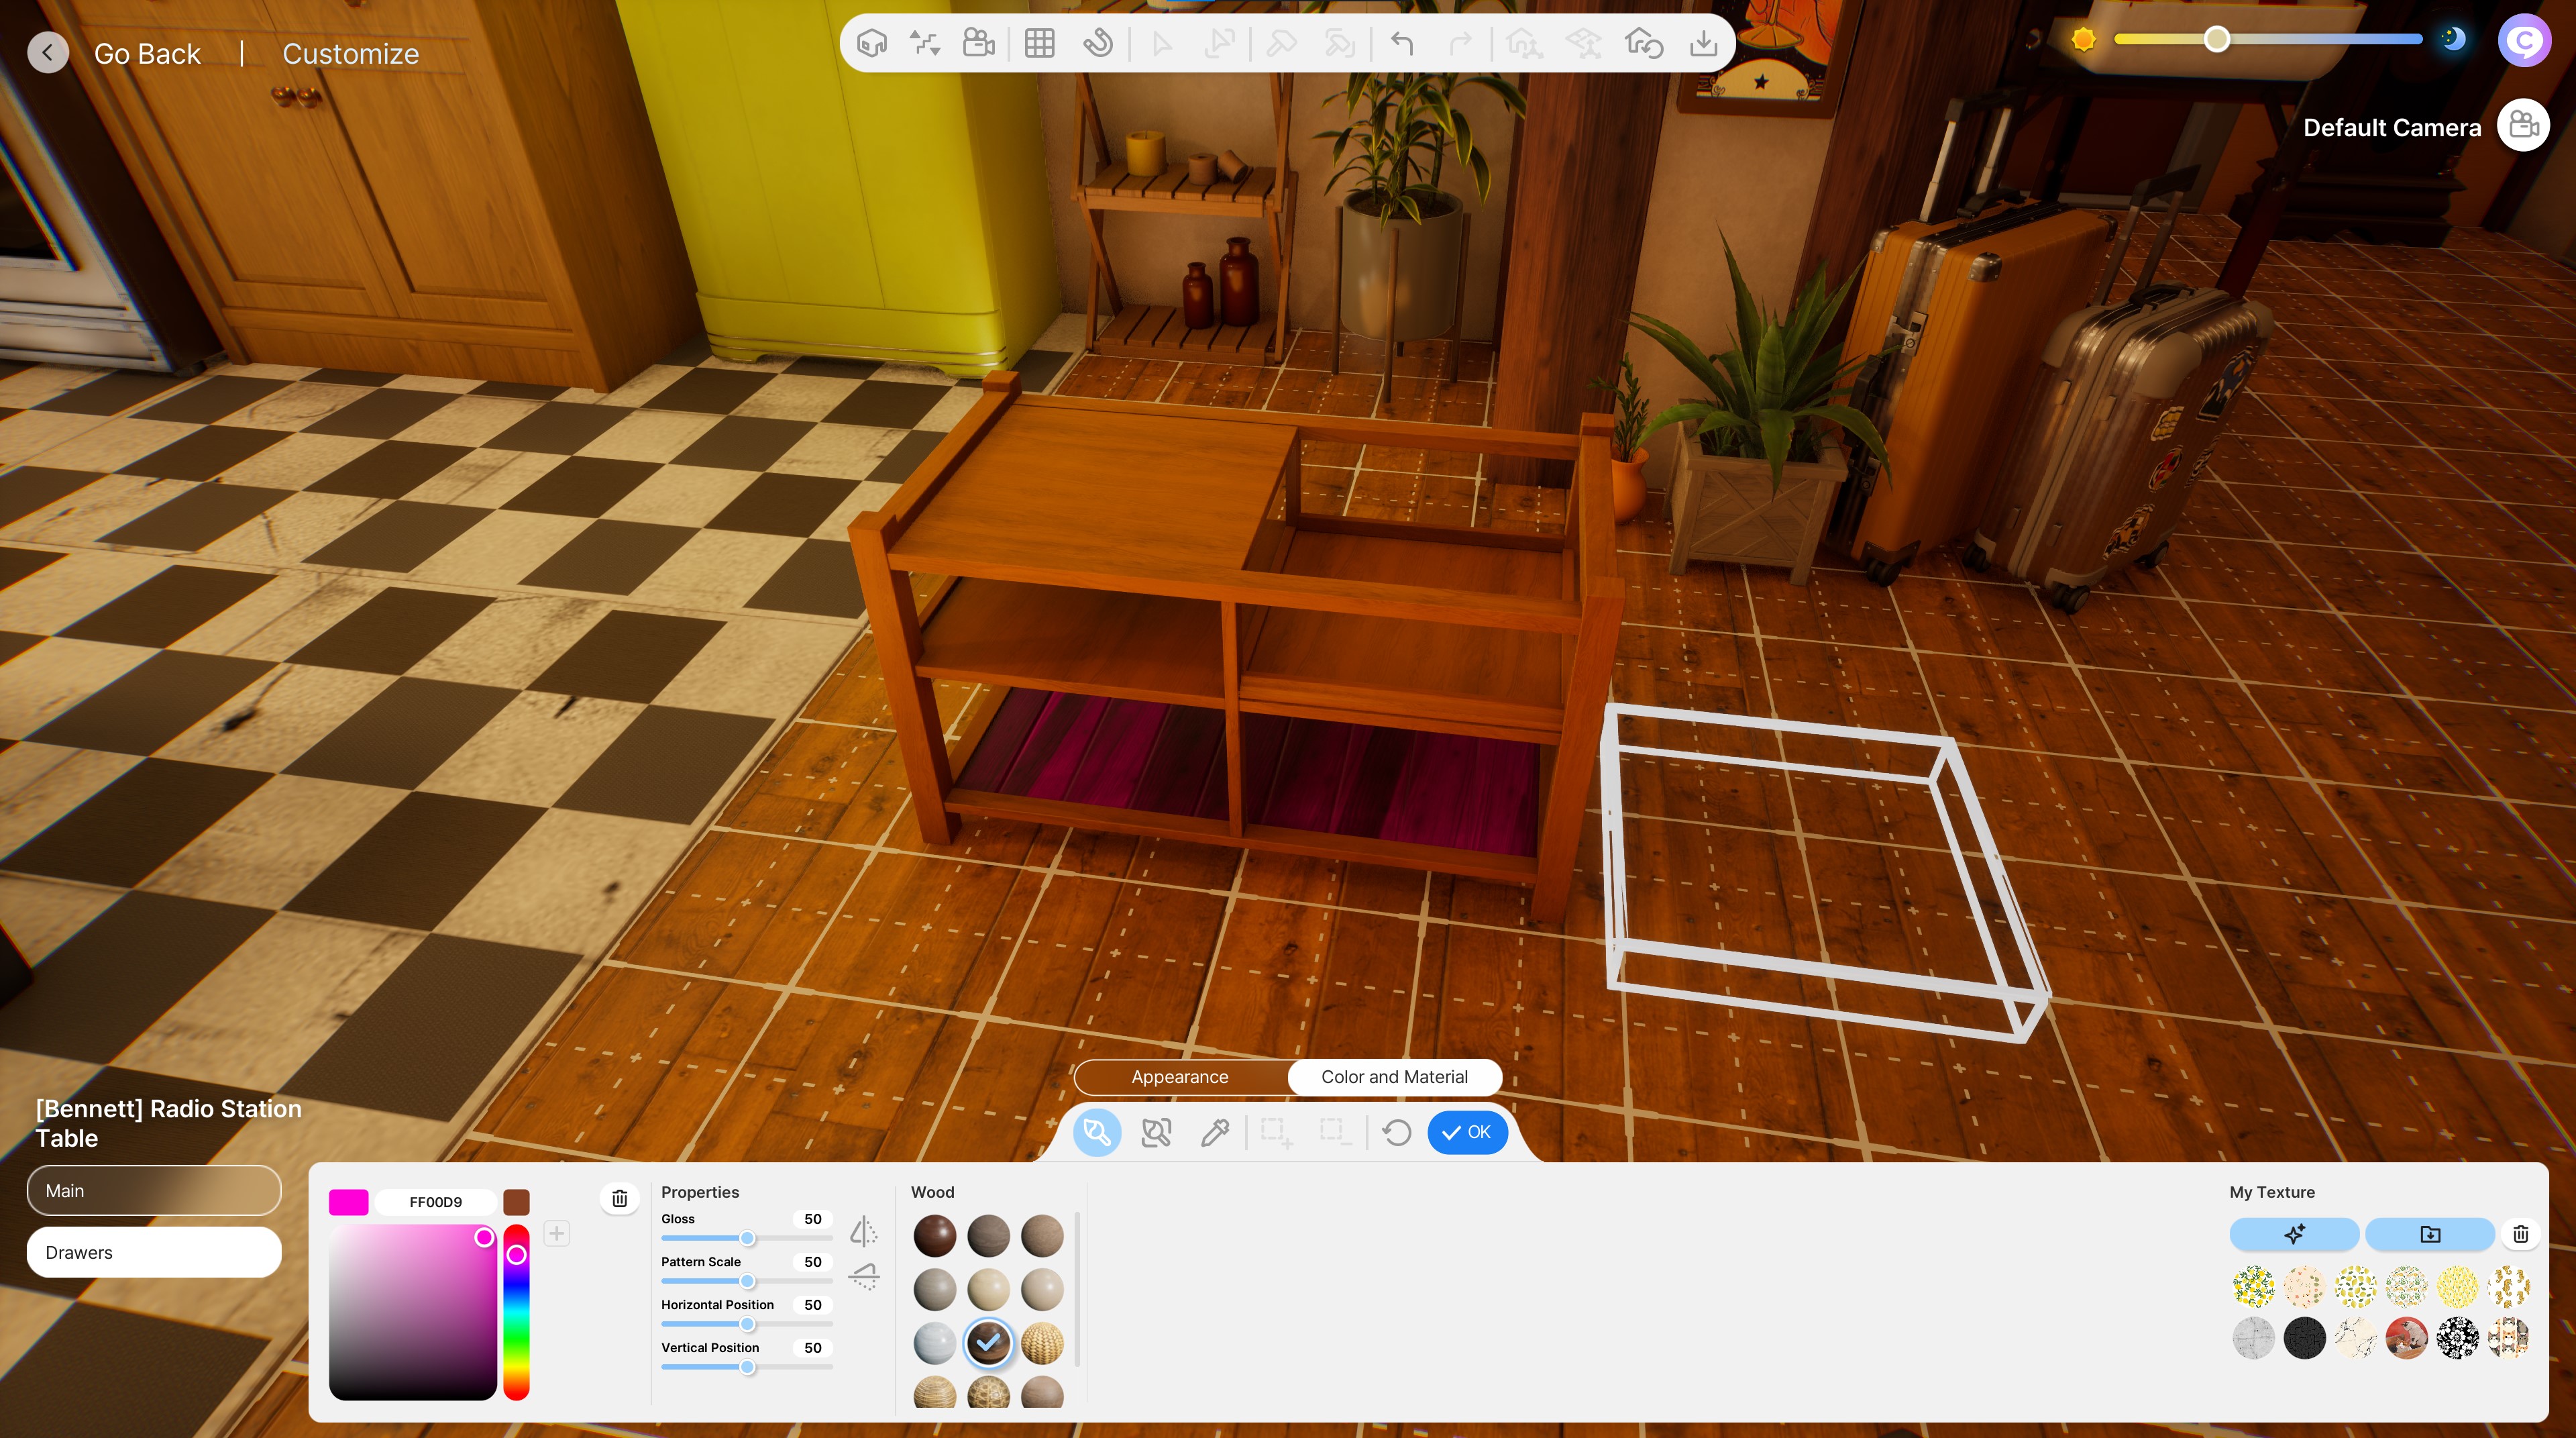
This is how it looks for me in game! I have 2 recolourable items and it's all functioning too! Obviously it comes with our default set colours initially, but hey! It's at least recolouable! :)
Obviously if yours isn't supoosed to be recolourable, then you should have a similar result where your textures are showing up on your mesh!
Nice work! :D
Credits:
- The InZOI Discord
- Modkit
- Easy Channel Packing for making packing textures MUCH easier.
- Blender for being such a cool open source tool :D