InZOI Tutorial: [Beginner-friendly] How to Edit existing Furniture
Project: InZOI Tutorials
by Lyralei
Uploaded July 4, 2025, 7:24 p.m.
Updated July 6, 2025, 10:50 a.m.
Hey, you made it!
You were probably just as excited to create content for InZOI like me, but the docs are overwhelming and the youtube tutorial is just as vague? Well, I'm hoping to make it a bit more beginner-friendly!
Who is this tutorial for?
Anyone who is a beginner in modding (for inZOI) as well as meshing. Editing existing assets is often easier than making them from scratch. Or to learn the ropes this can be a good start too if you're more advanced in modding! 😉 (salutations simmers ;D)
What you'll need:
- Blender (make sure to donate if you can to keep this program free!) - I'm using 4.3 in this tutorial.
- InZOI Modkit from the Epic Games Store (it's free).
- The game itself ;)
- Have done at least the Blender donut basic modeling tutorial so you have somewhat of an idea what's going on!
Note: If your mesh isn't available in the "Include assets only" tab, know that I also have written a tutorial on how to extract it from the game files! Simblr.cc - Finding Meshes That Are Not Available In Modkit And Edit Them
Preparing our mesh:
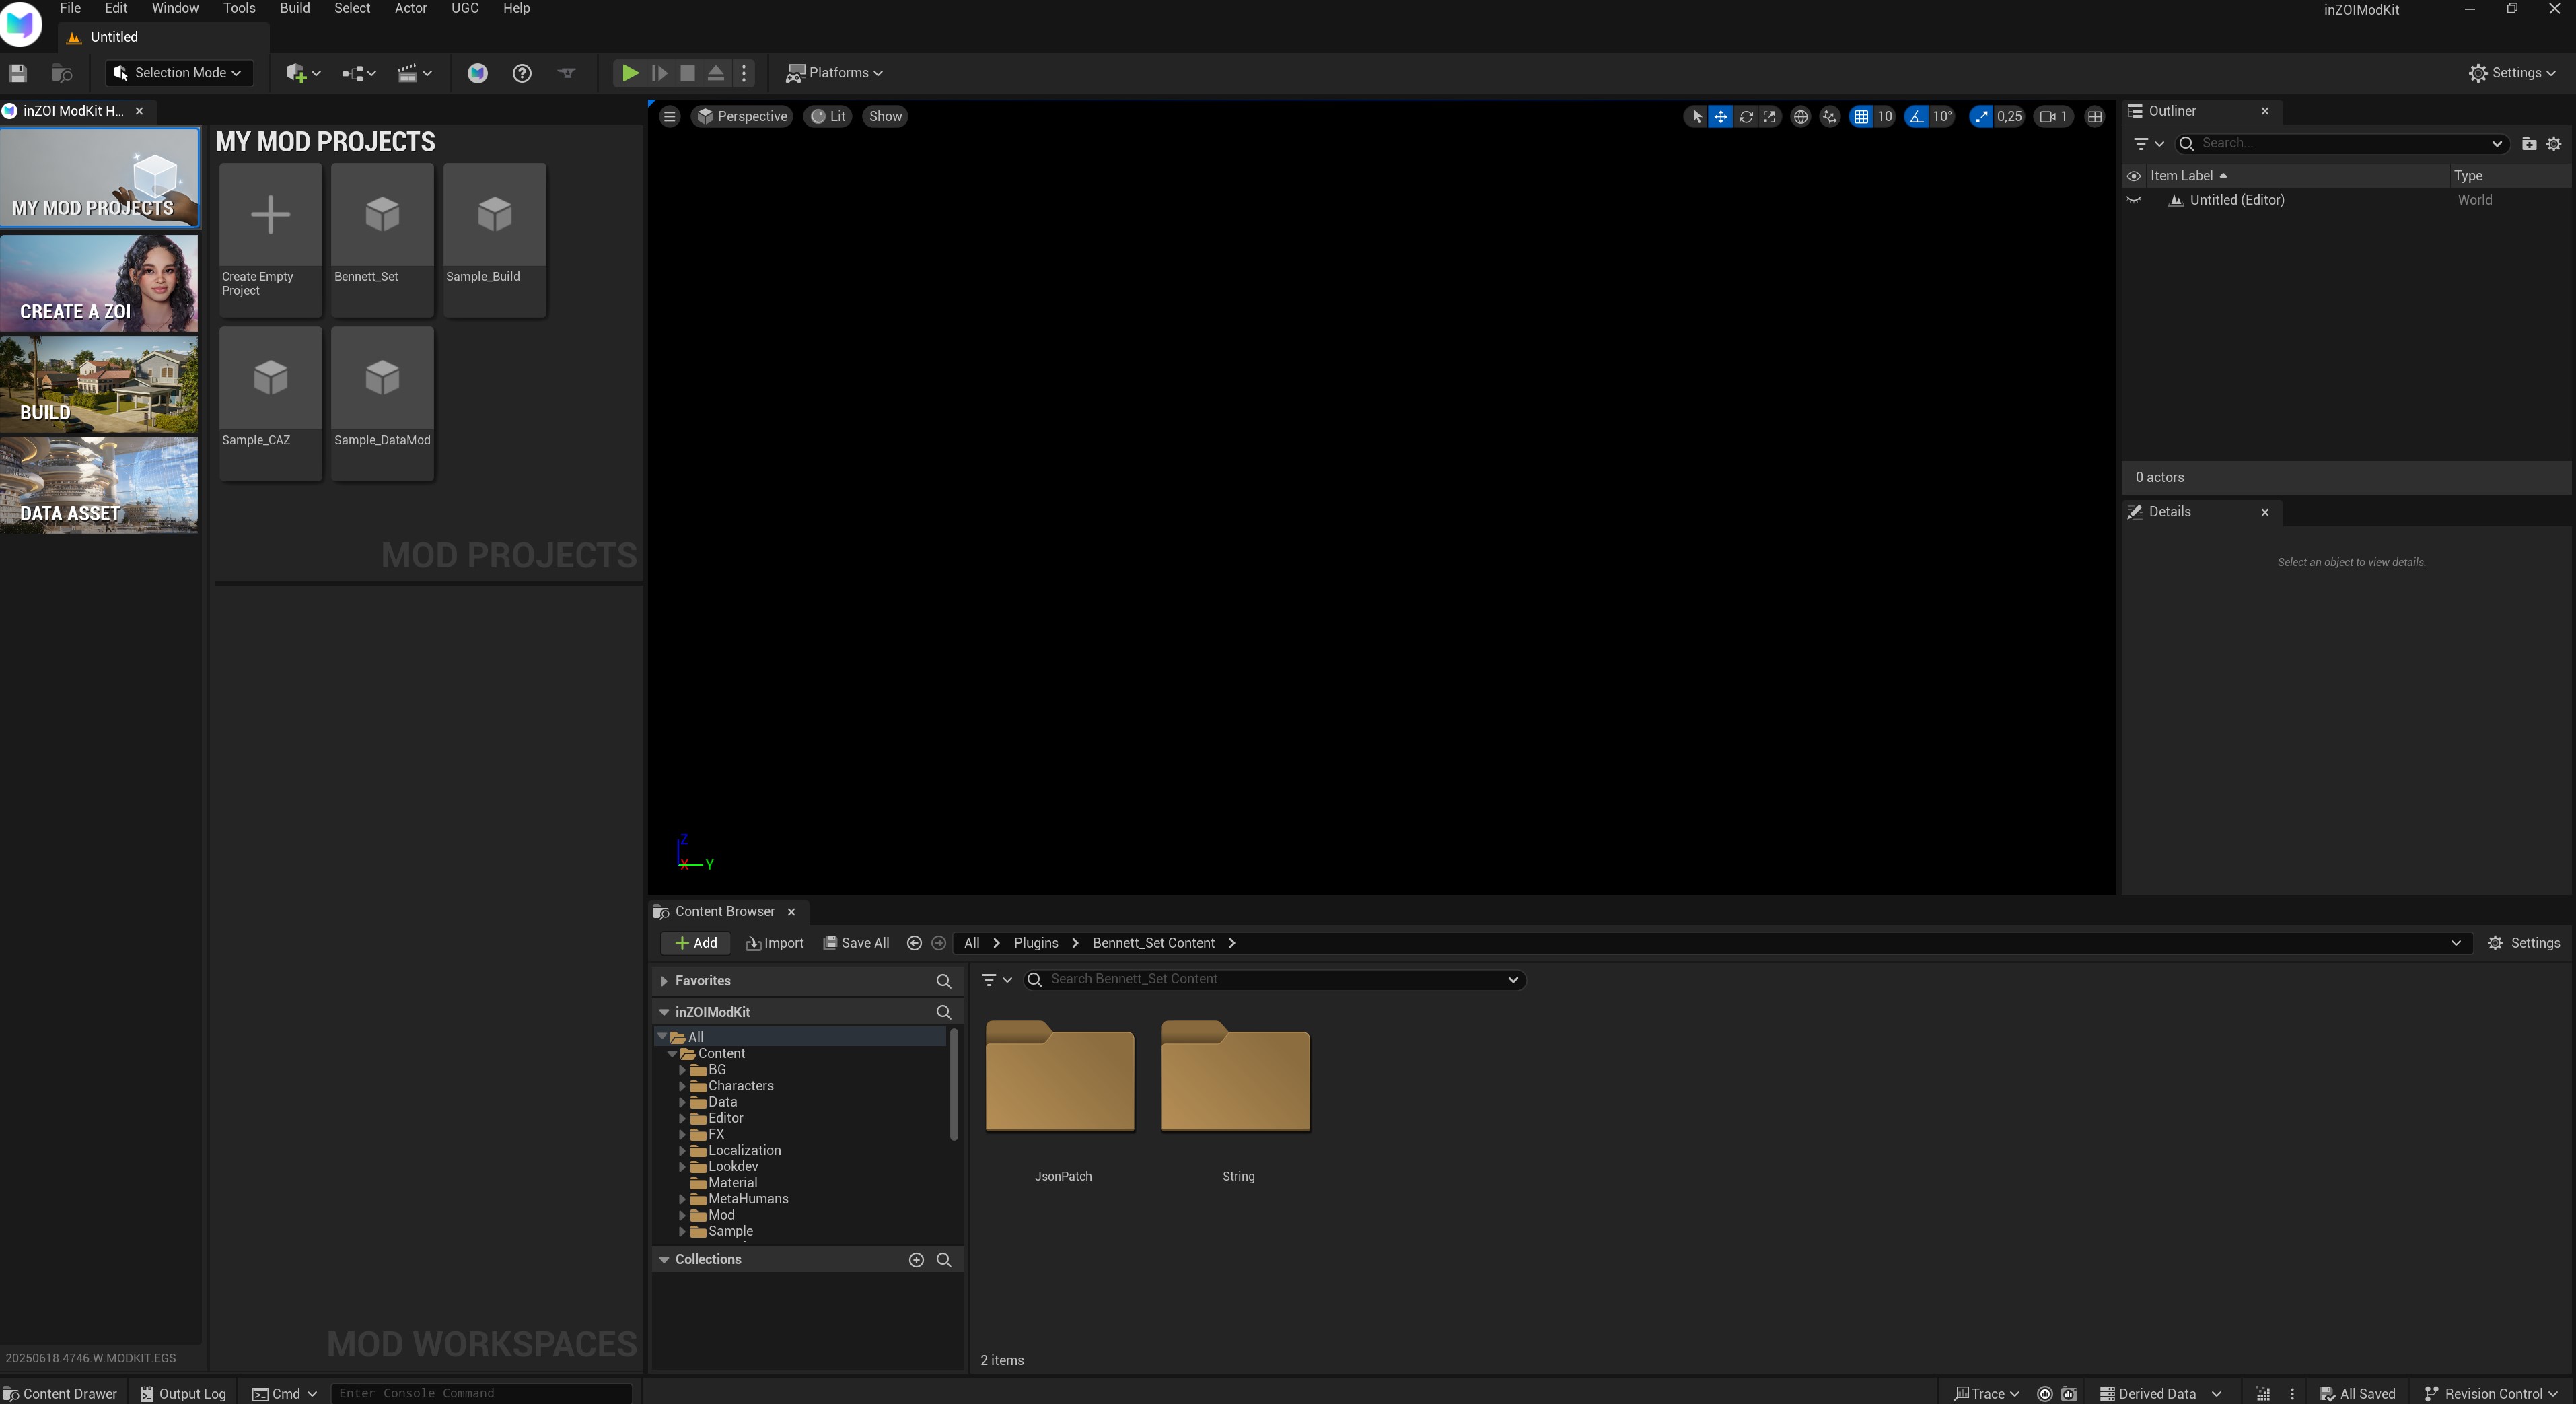
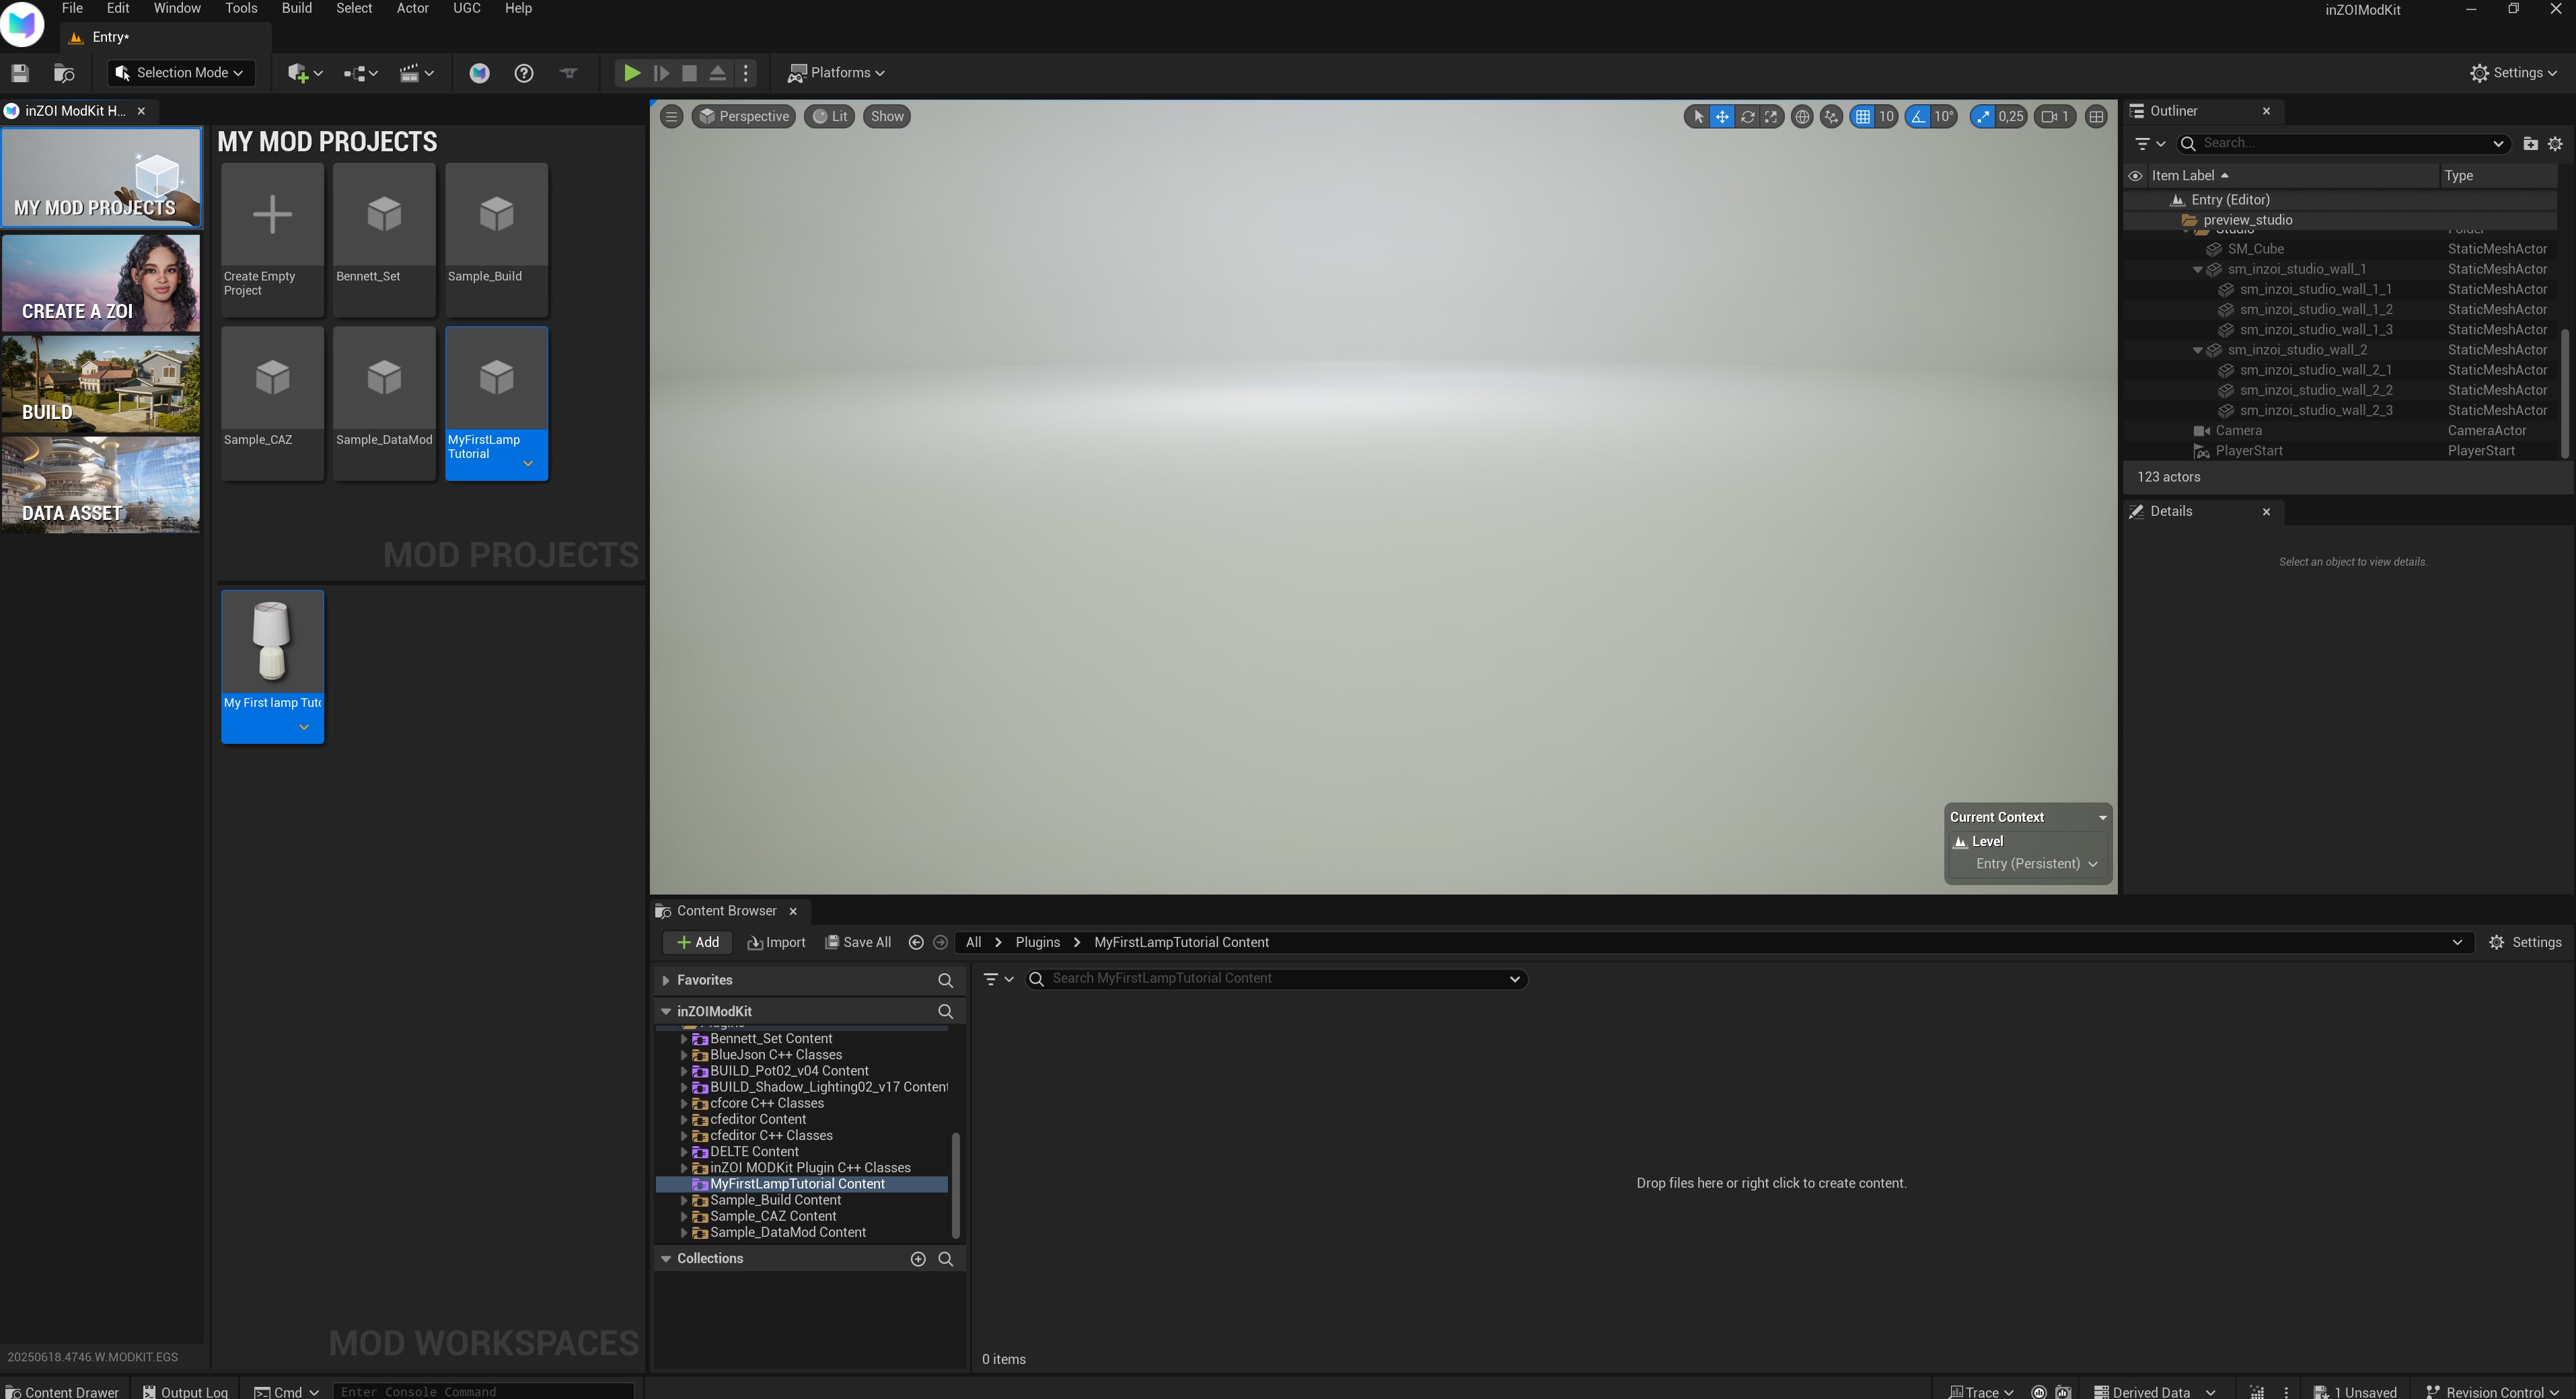
Obviously we want to start with opening the ModKit! It should look something like this:
On the left, we see a tab called "Build". Click that. While it's lacking Build items as of right now, we can actually find our buy items with the current release!
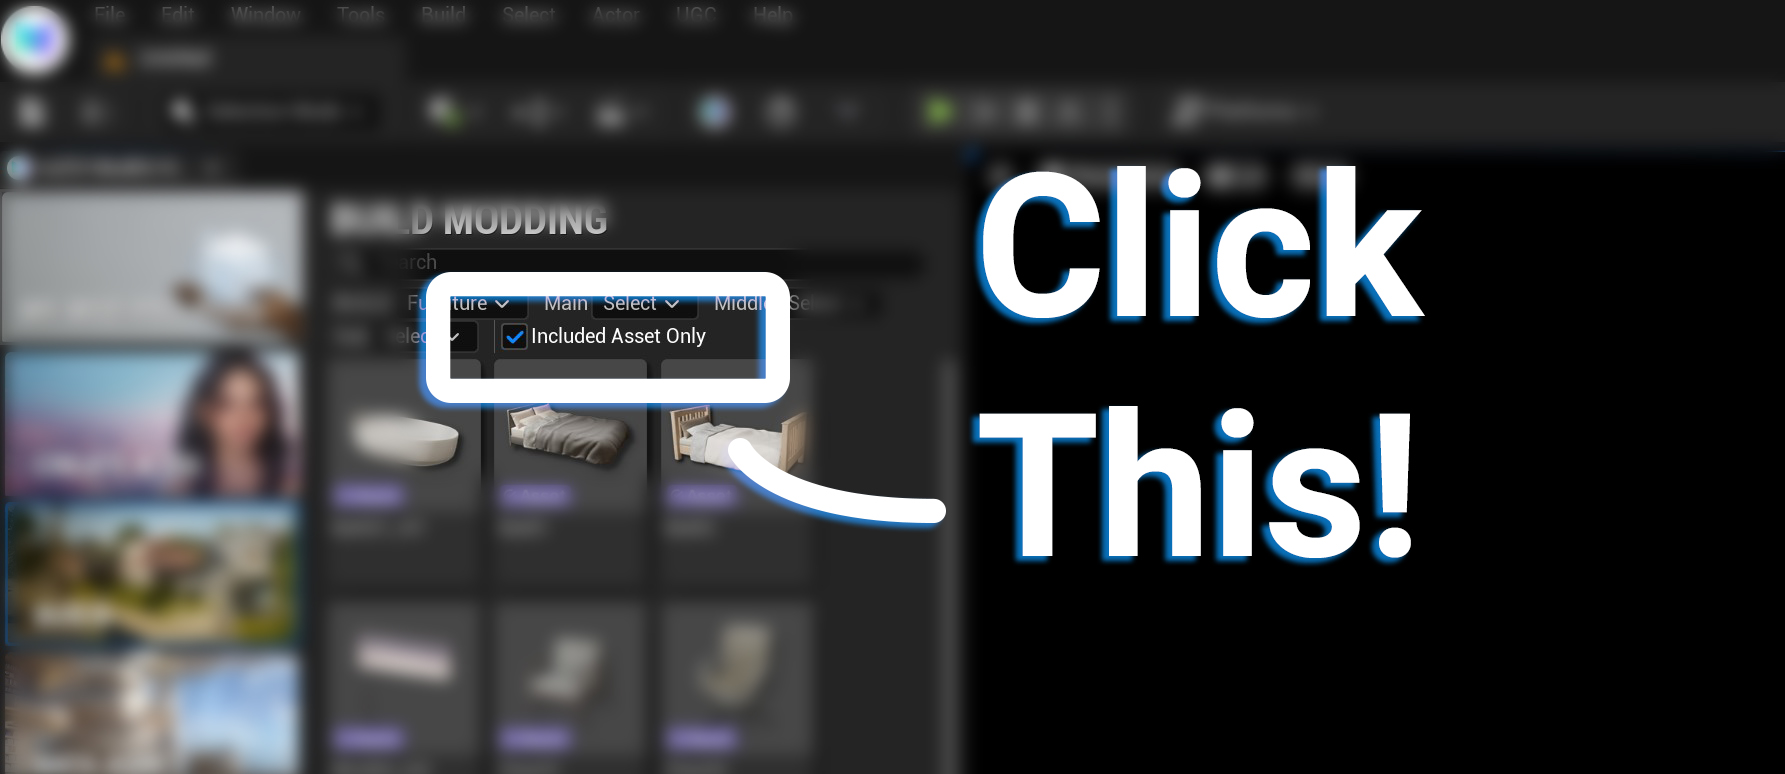
Now this step is important! A lot of the asset you were seeing in the build section DO NOT have meshes! A lot of these assets seem to be more of a reference, but that doesn't mean we can't use it to make what we want 😉
Make sure you have "include Asset Only" to make sure you're cloning something with a mesh!
Note: It's possible that in future updates we'll be able to edit any item in the game, but right now it's quite limited. I will update this tutorial once that's the case!
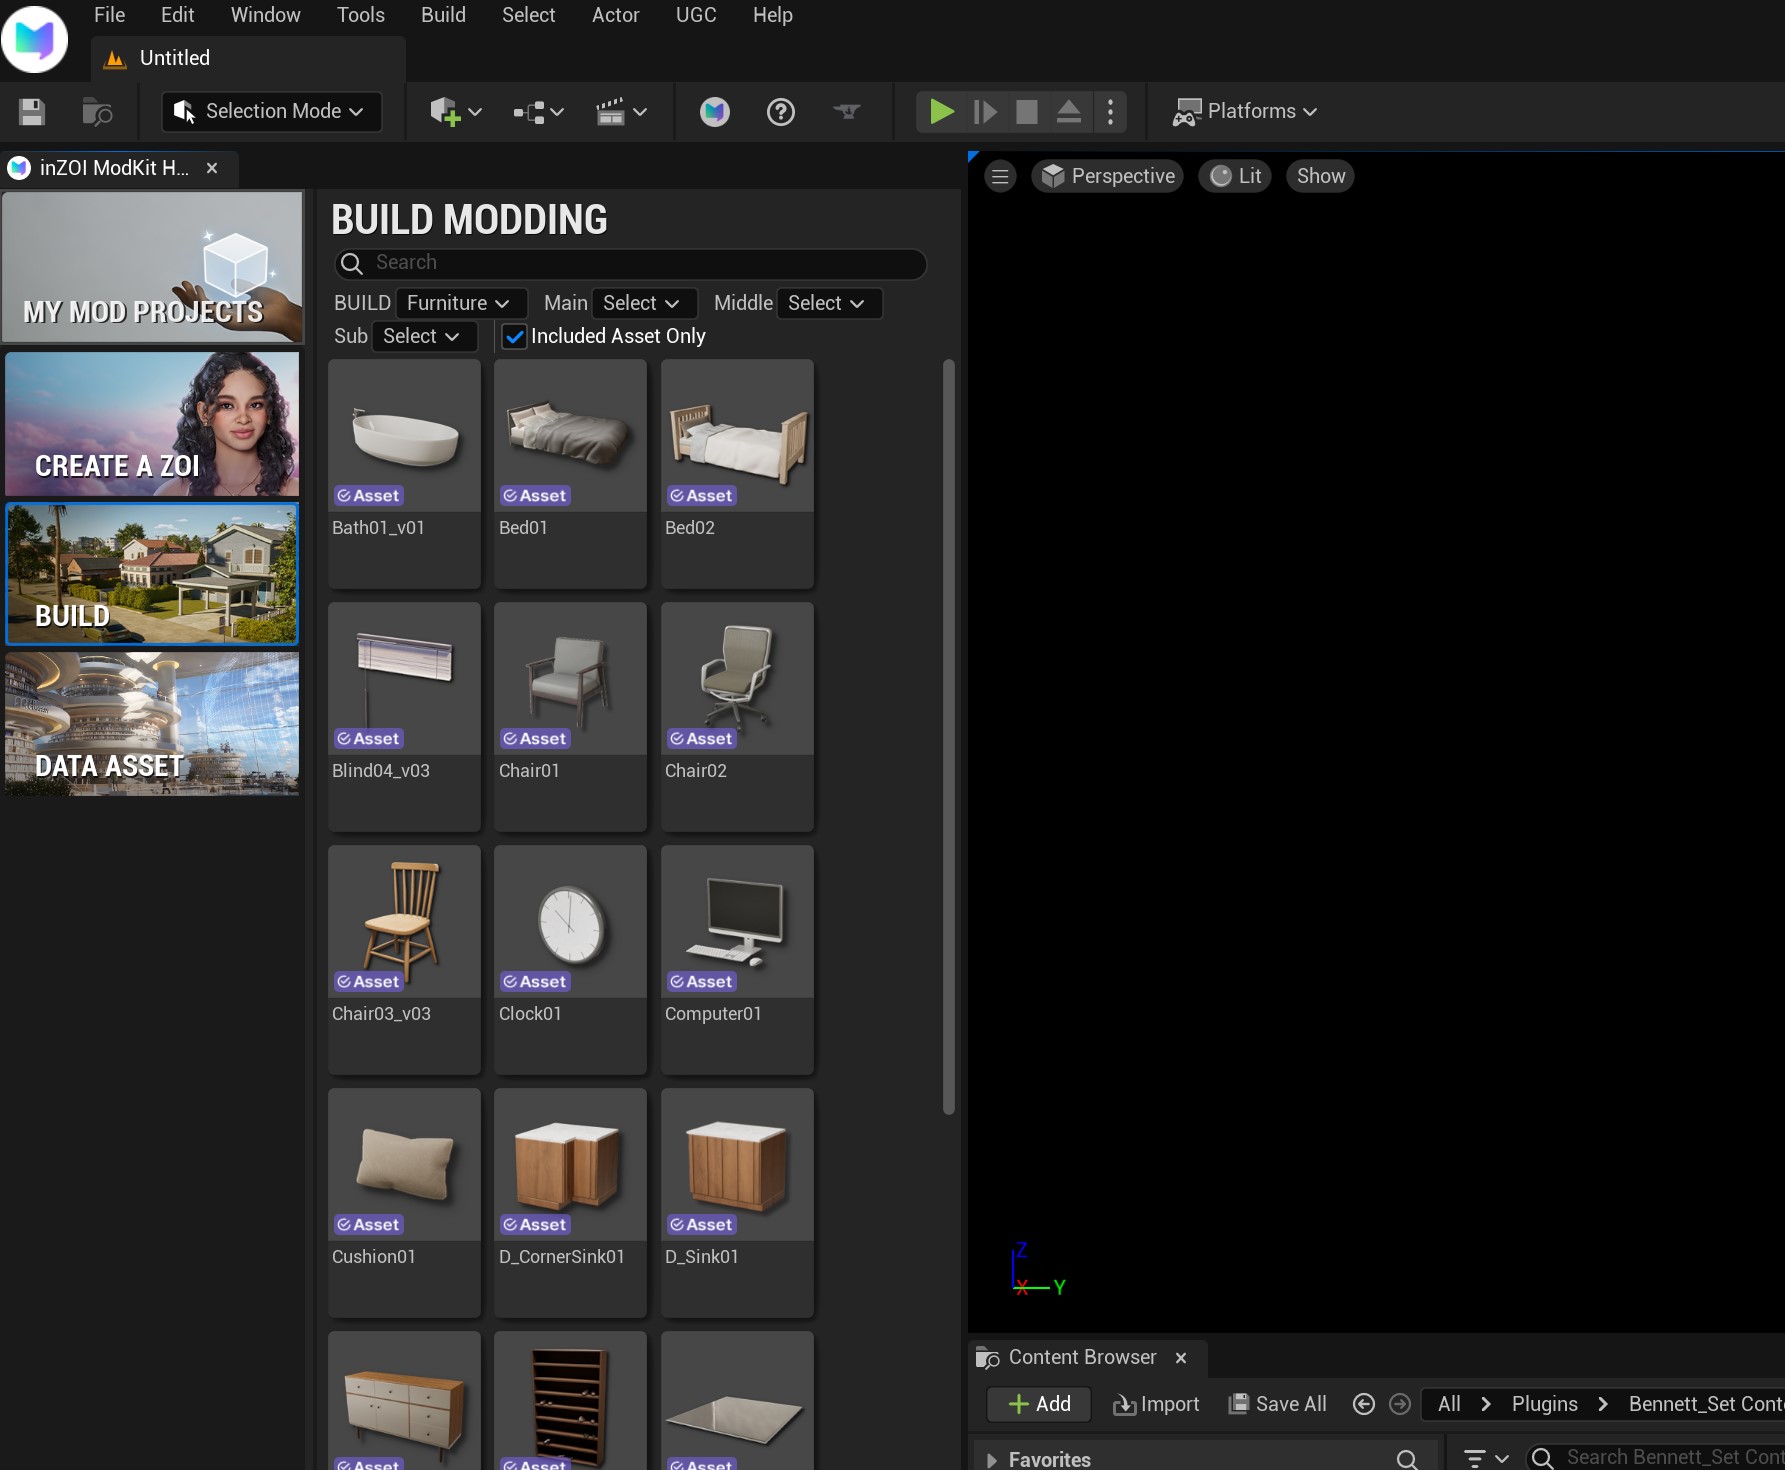
Now your library should look something like this!
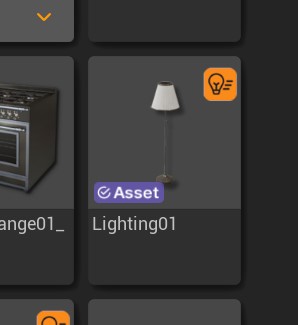
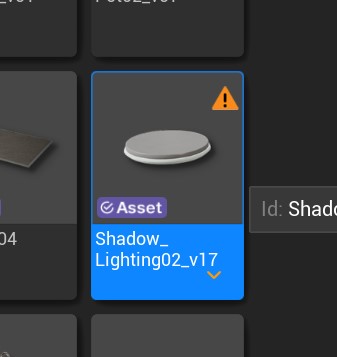
Some items come with icons next to them. The first one means that light is compatible with the more realistic lights update! The second one seems to be outdated. So make sure not to use anything with a warning sign for now!
I'm thinking of editing the lamp's base, to be a bit rounder. Obviously you can choose whatever you like, or tag along with me!
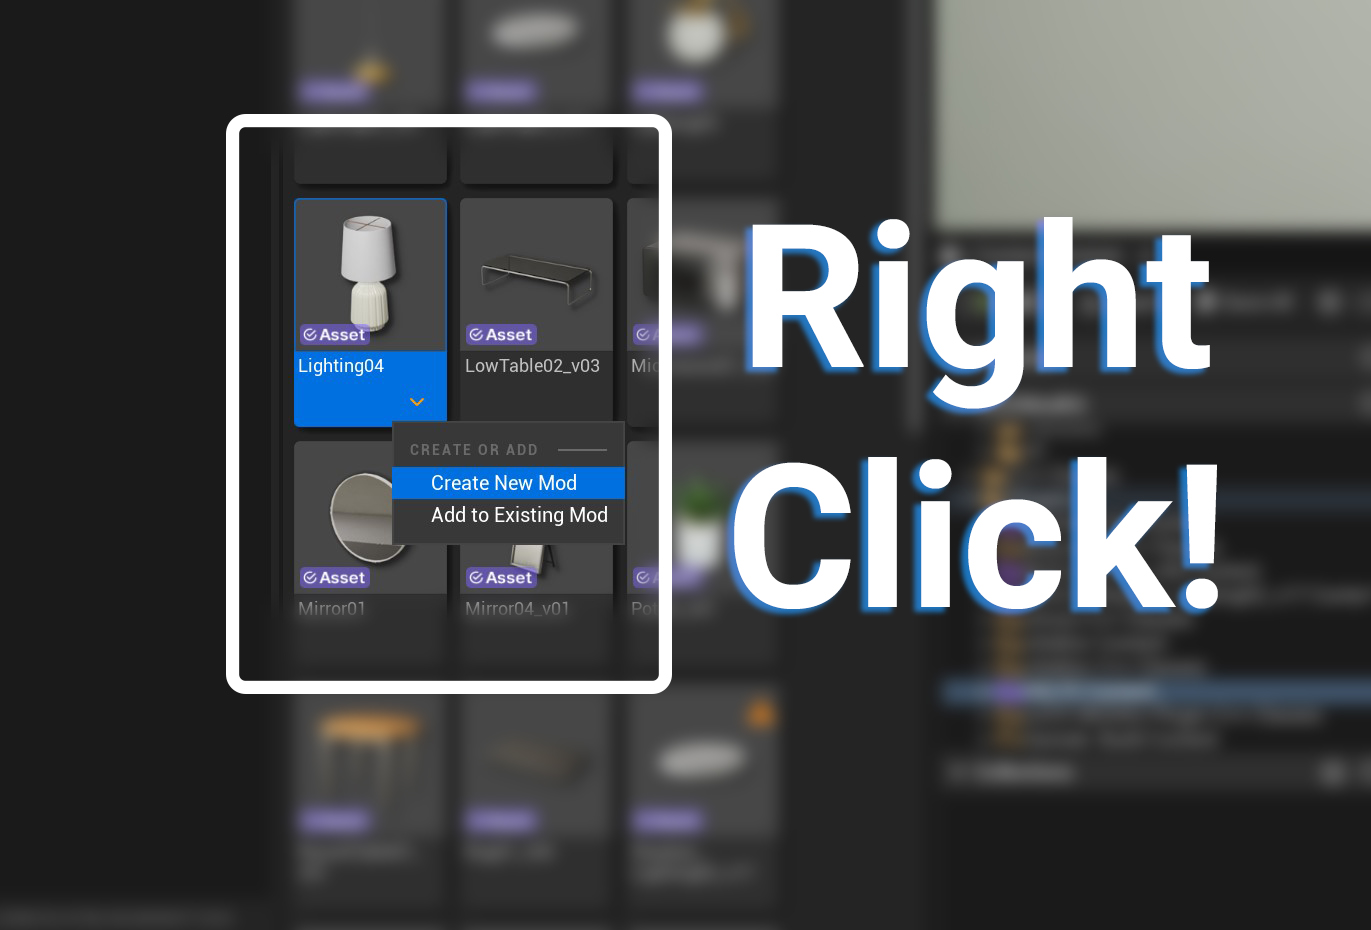
Right click on your item of choice and press the "Create New Mod" option.
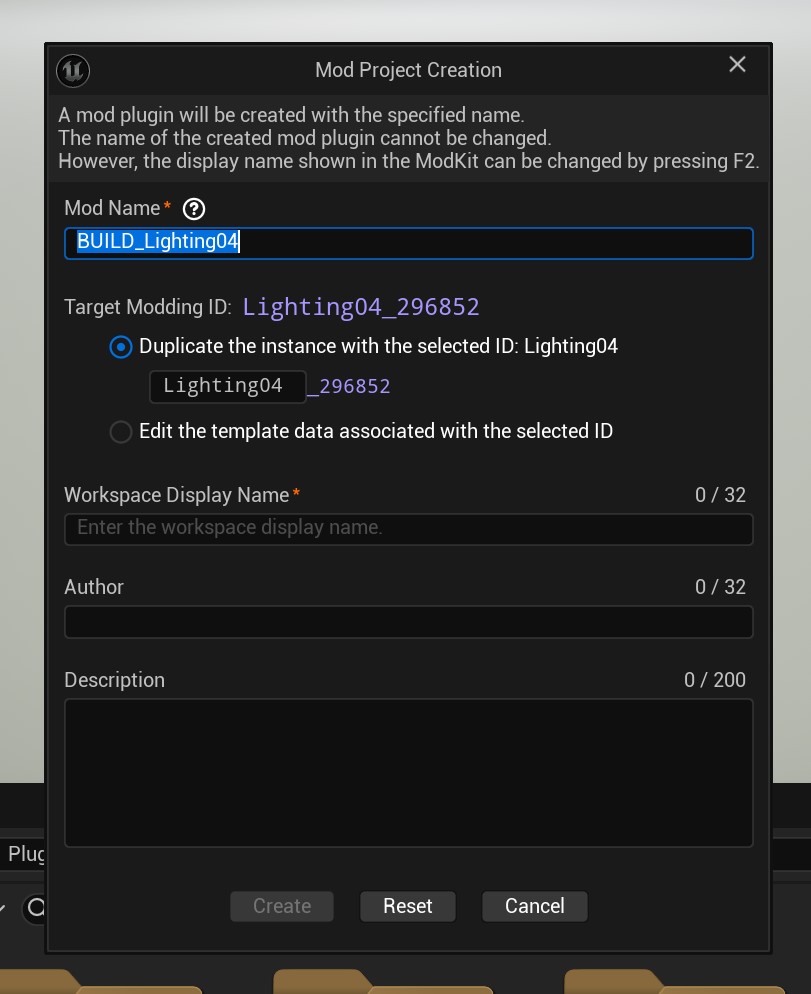
Now you should see this screen! (if not, exit out of it and right click again on the item of choice. Then, click "Create New Mod" instead ;). Unless you're making a set, there's really no need to add it to an existing mod! We'll cover that in another tutorial).
- Mod Name: The name of your mod!
- Duplicate the selected instance with ID: This means basically that it WILL NOT override the existing in-game item! It, instead, will become a new item in the game :)
-
- (Also make sure to give your item a unique ID! The part you can write in, that should be changed to something self explanatory but also not too simply that others might accidentally override your item!)
- Edit the Template Data associated with the selected ID: Make override changes. Can be as simple as changing the price, to changing the texture or even mesh. This WILL override the existing item
- Work Display Name: The name it will appear as under the "My Mod Projects" tab.
- Author: Feel free to put your name or Username here! It might be smart to use the name you'll be using to share your content. Or similar to it.
- Description A quick description of what you're making. Can be left blank!
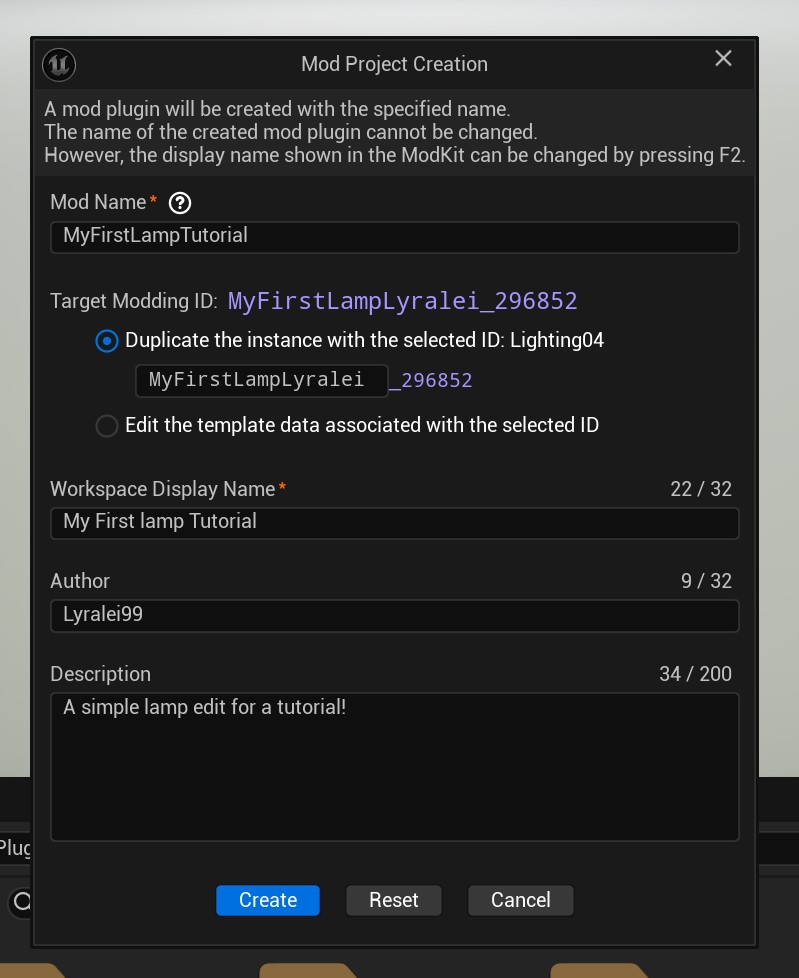
Here's an example of how I ended up changing mine 😉
Though, before you click anything else! Make sure you save the original "unique id" text. In my case that's Lighting04. We need this for later 😉
Click "Create" and let's move to the actual fun!
The Workspace (aka your mod!)
We're almost to the fun part (I might've lied lol) but it's still important, as right now we're gong to be looking into exporting our item!
Double click on your mesh here. In my case that's the lamp.
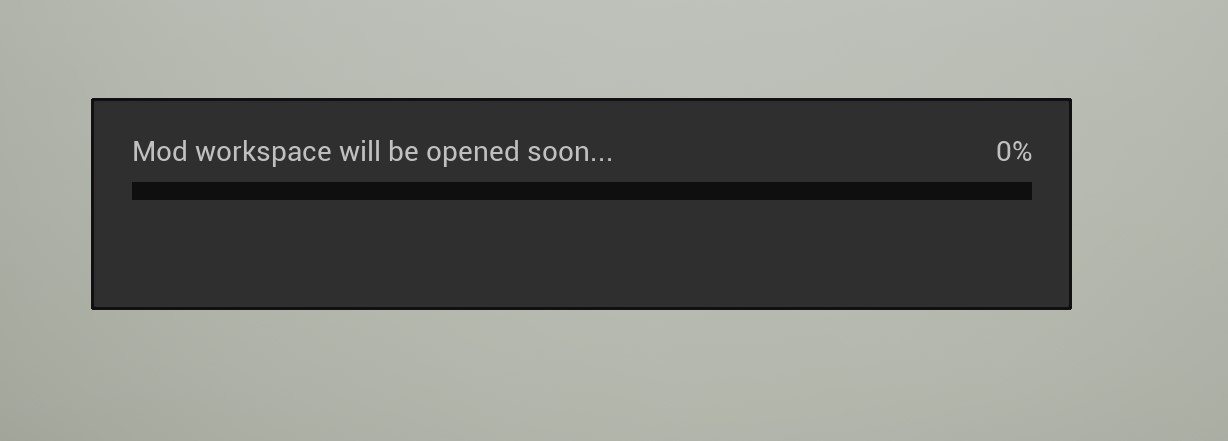
Now you'll see this progres bar. It might be here for a second till we see...
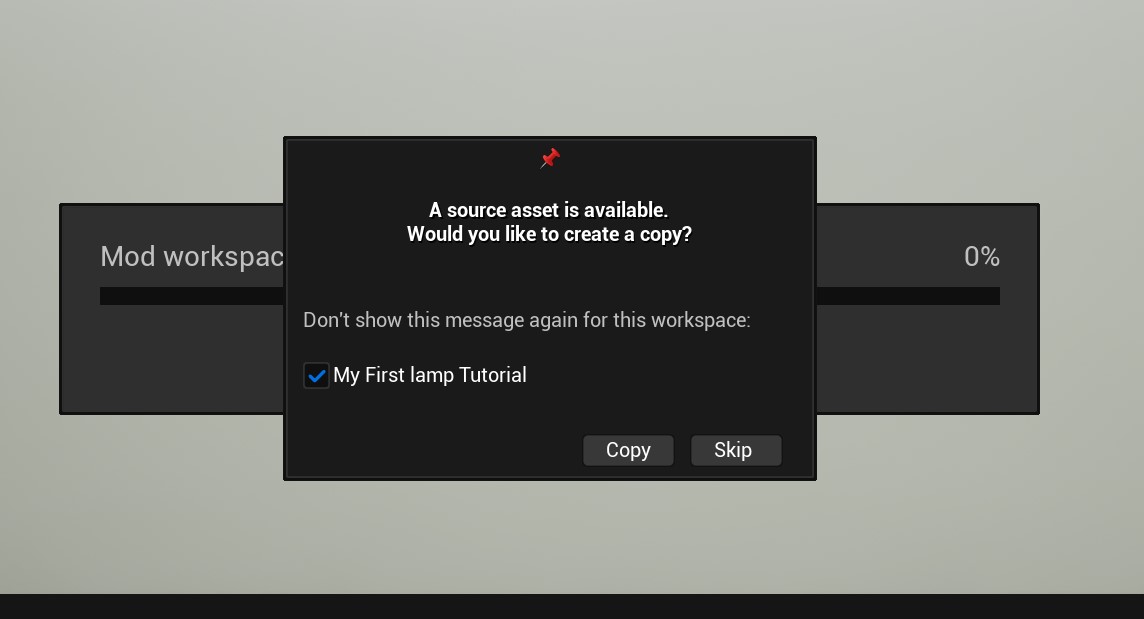
This! Now click "Copy"!. If you accidentally clicked "Skip" instead, see the "Troubleshooting" part of the tutorial 😉
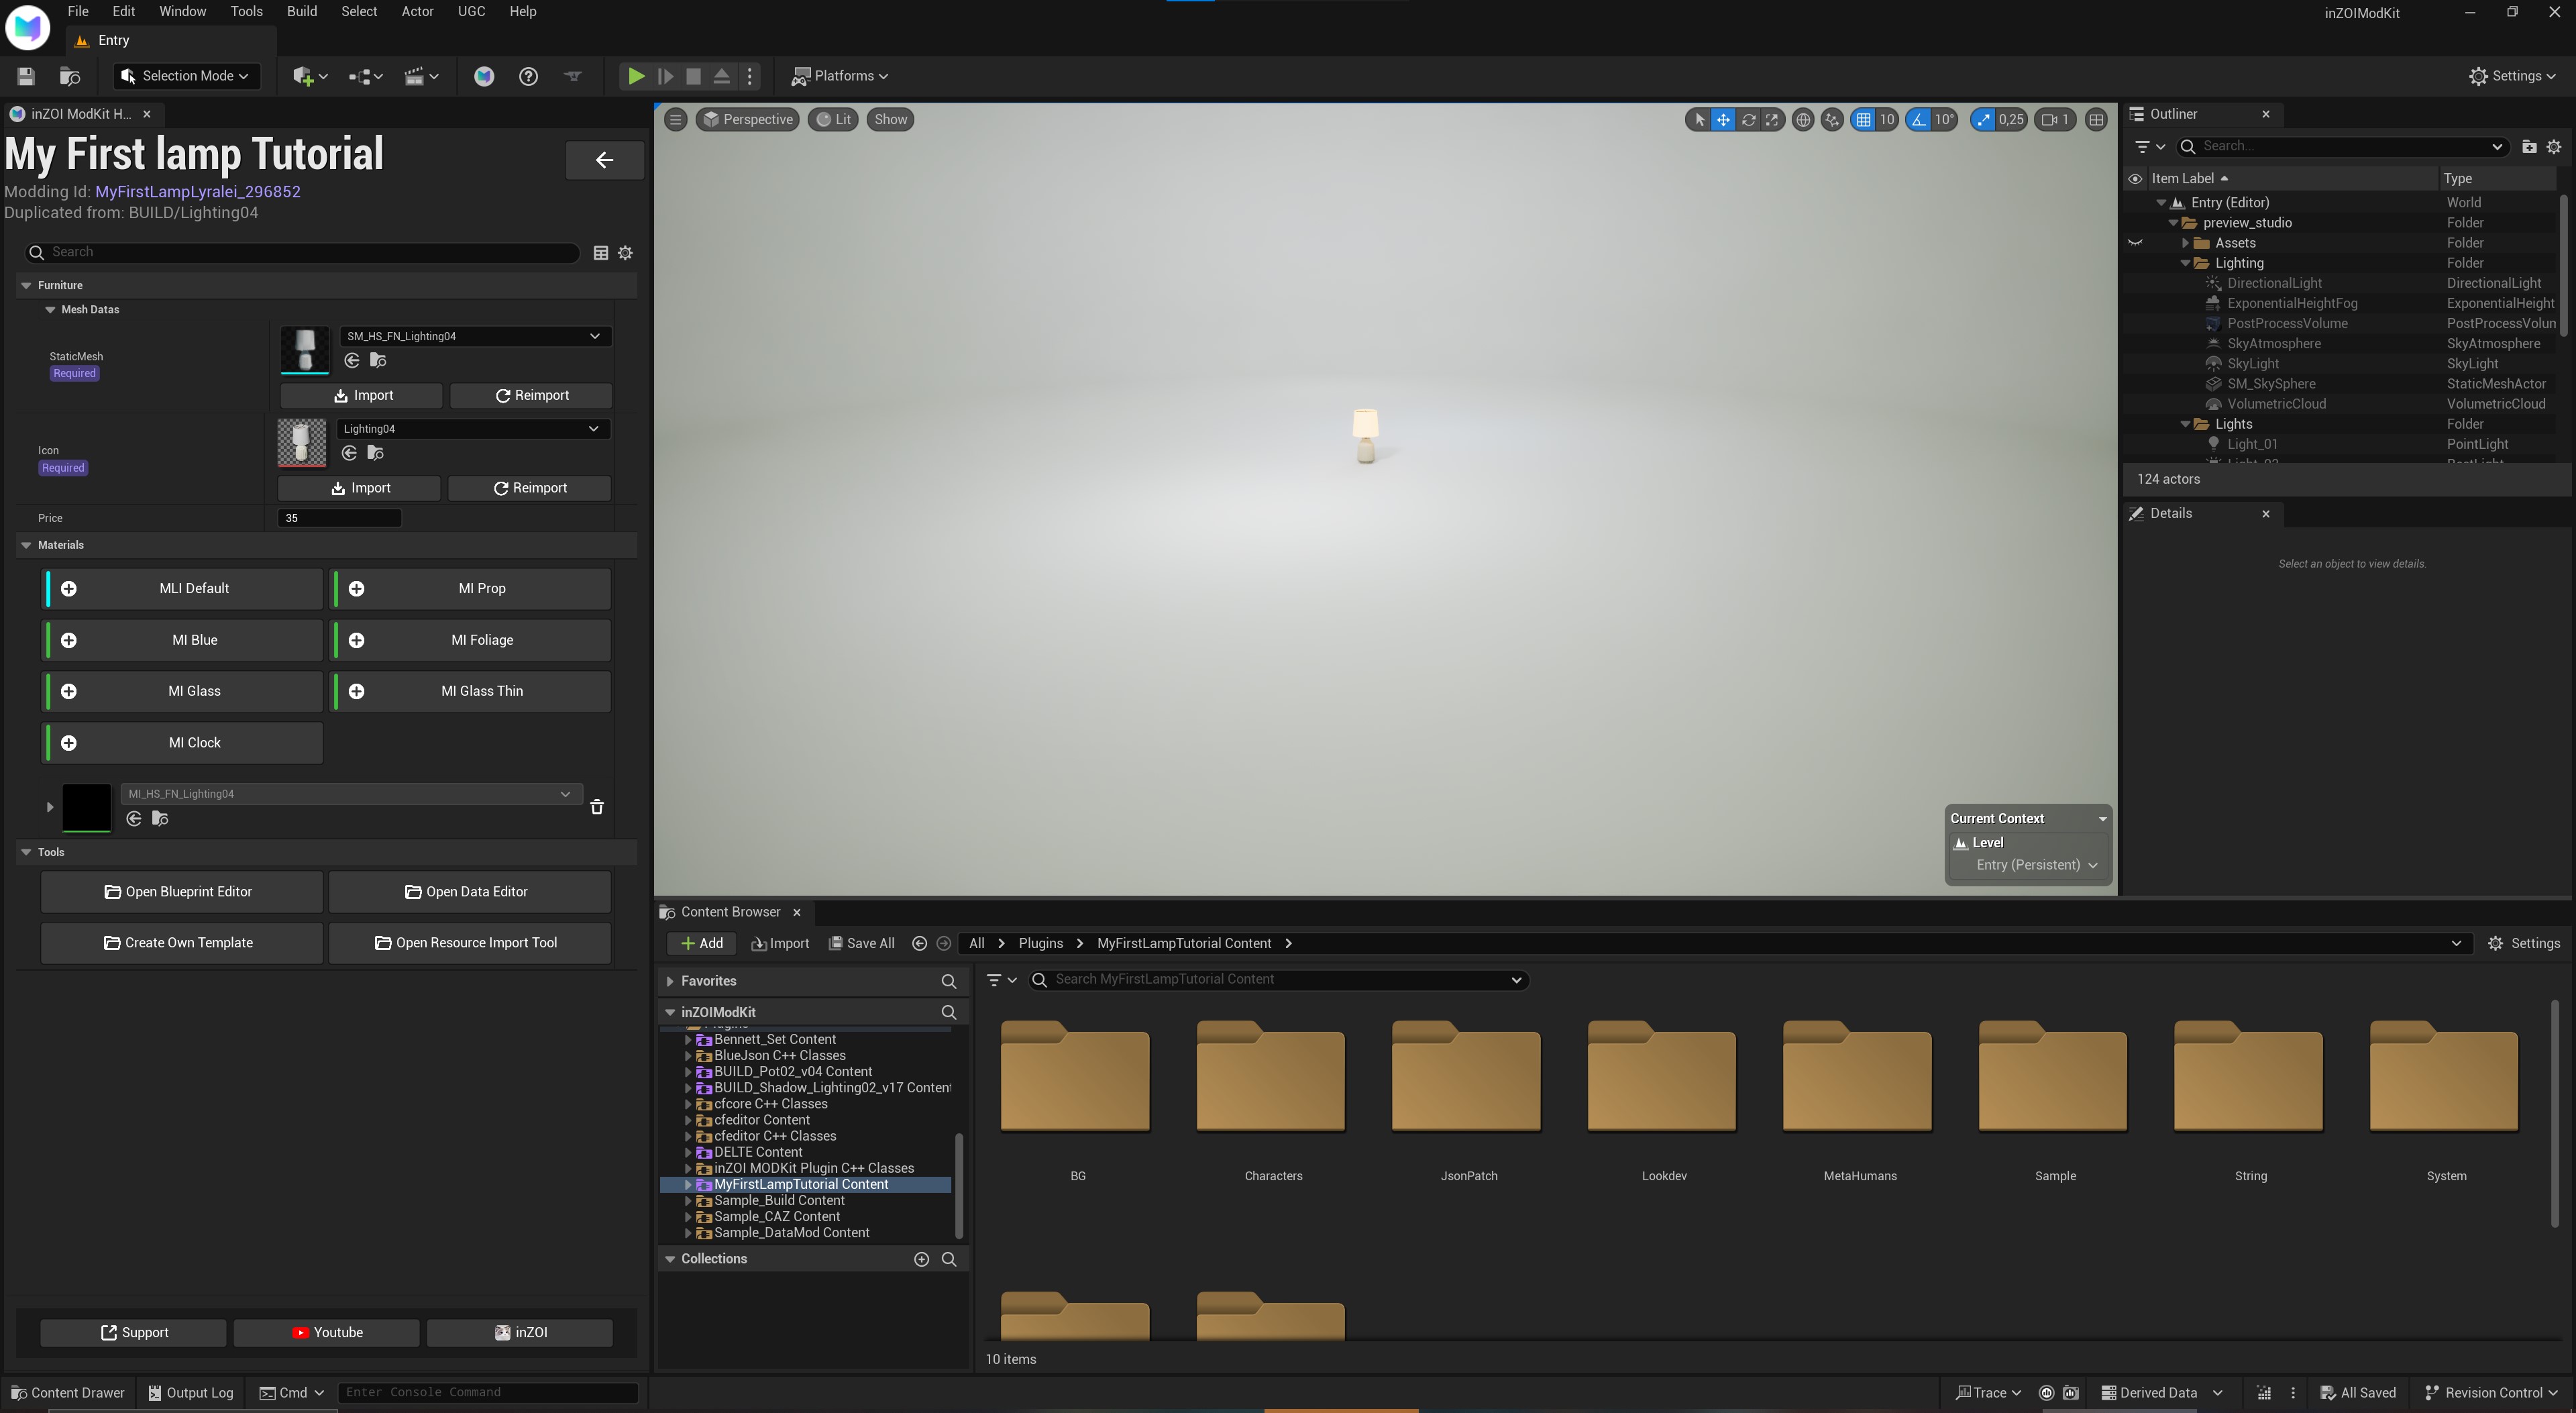
Look! A lamp! If all things are fine, it means you did well! If not, check the Troubleshooting section in this tutorial.
Exporting the mesh from the Workspace
Now that we have a lamp, we now want to export our mesh properly! Now, because this uses a dumbed down version of unreal engine, if you know your way around it this might not be as tough...
But because MOST people probably have never touched UE in their lives, that's what I'm here for :D
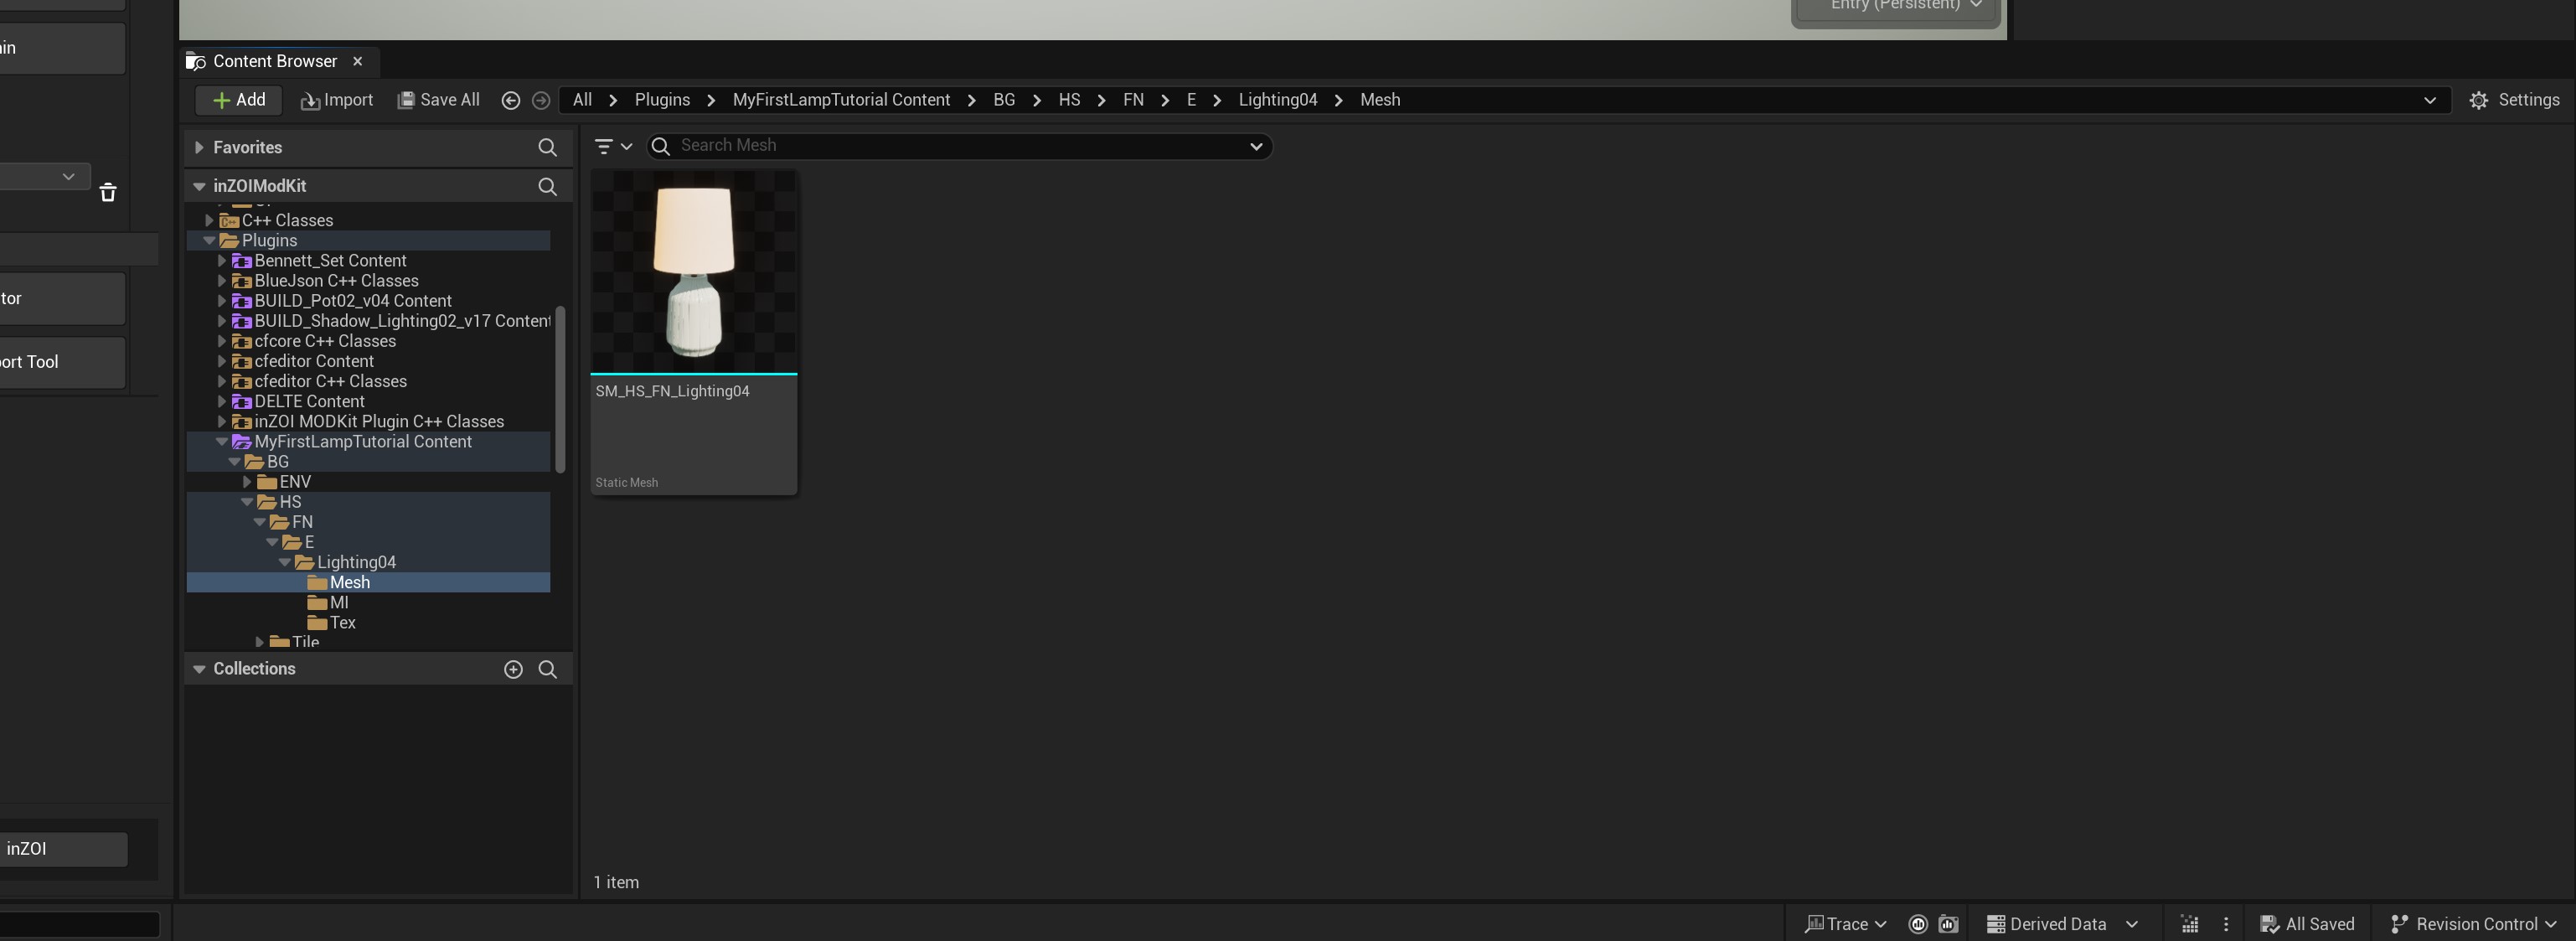
The sceen underneath that white background with your mesh, you'll see another tab called the "Content Browser". Now you'll see A LOT of folders here, but think of it like browsing your own computer in a way!
Now where you want to be is: plugins/NAME OF YOUR WORKFOLDER content/BG/HS/FN/E/NameOfYourOriginalMesh/Mesh/
So In my case that's plugins/MyFirstLampTutorial Content/BG/HS/FN/E/Lighting04. You should also now see the item in question in that folder like I do! :)
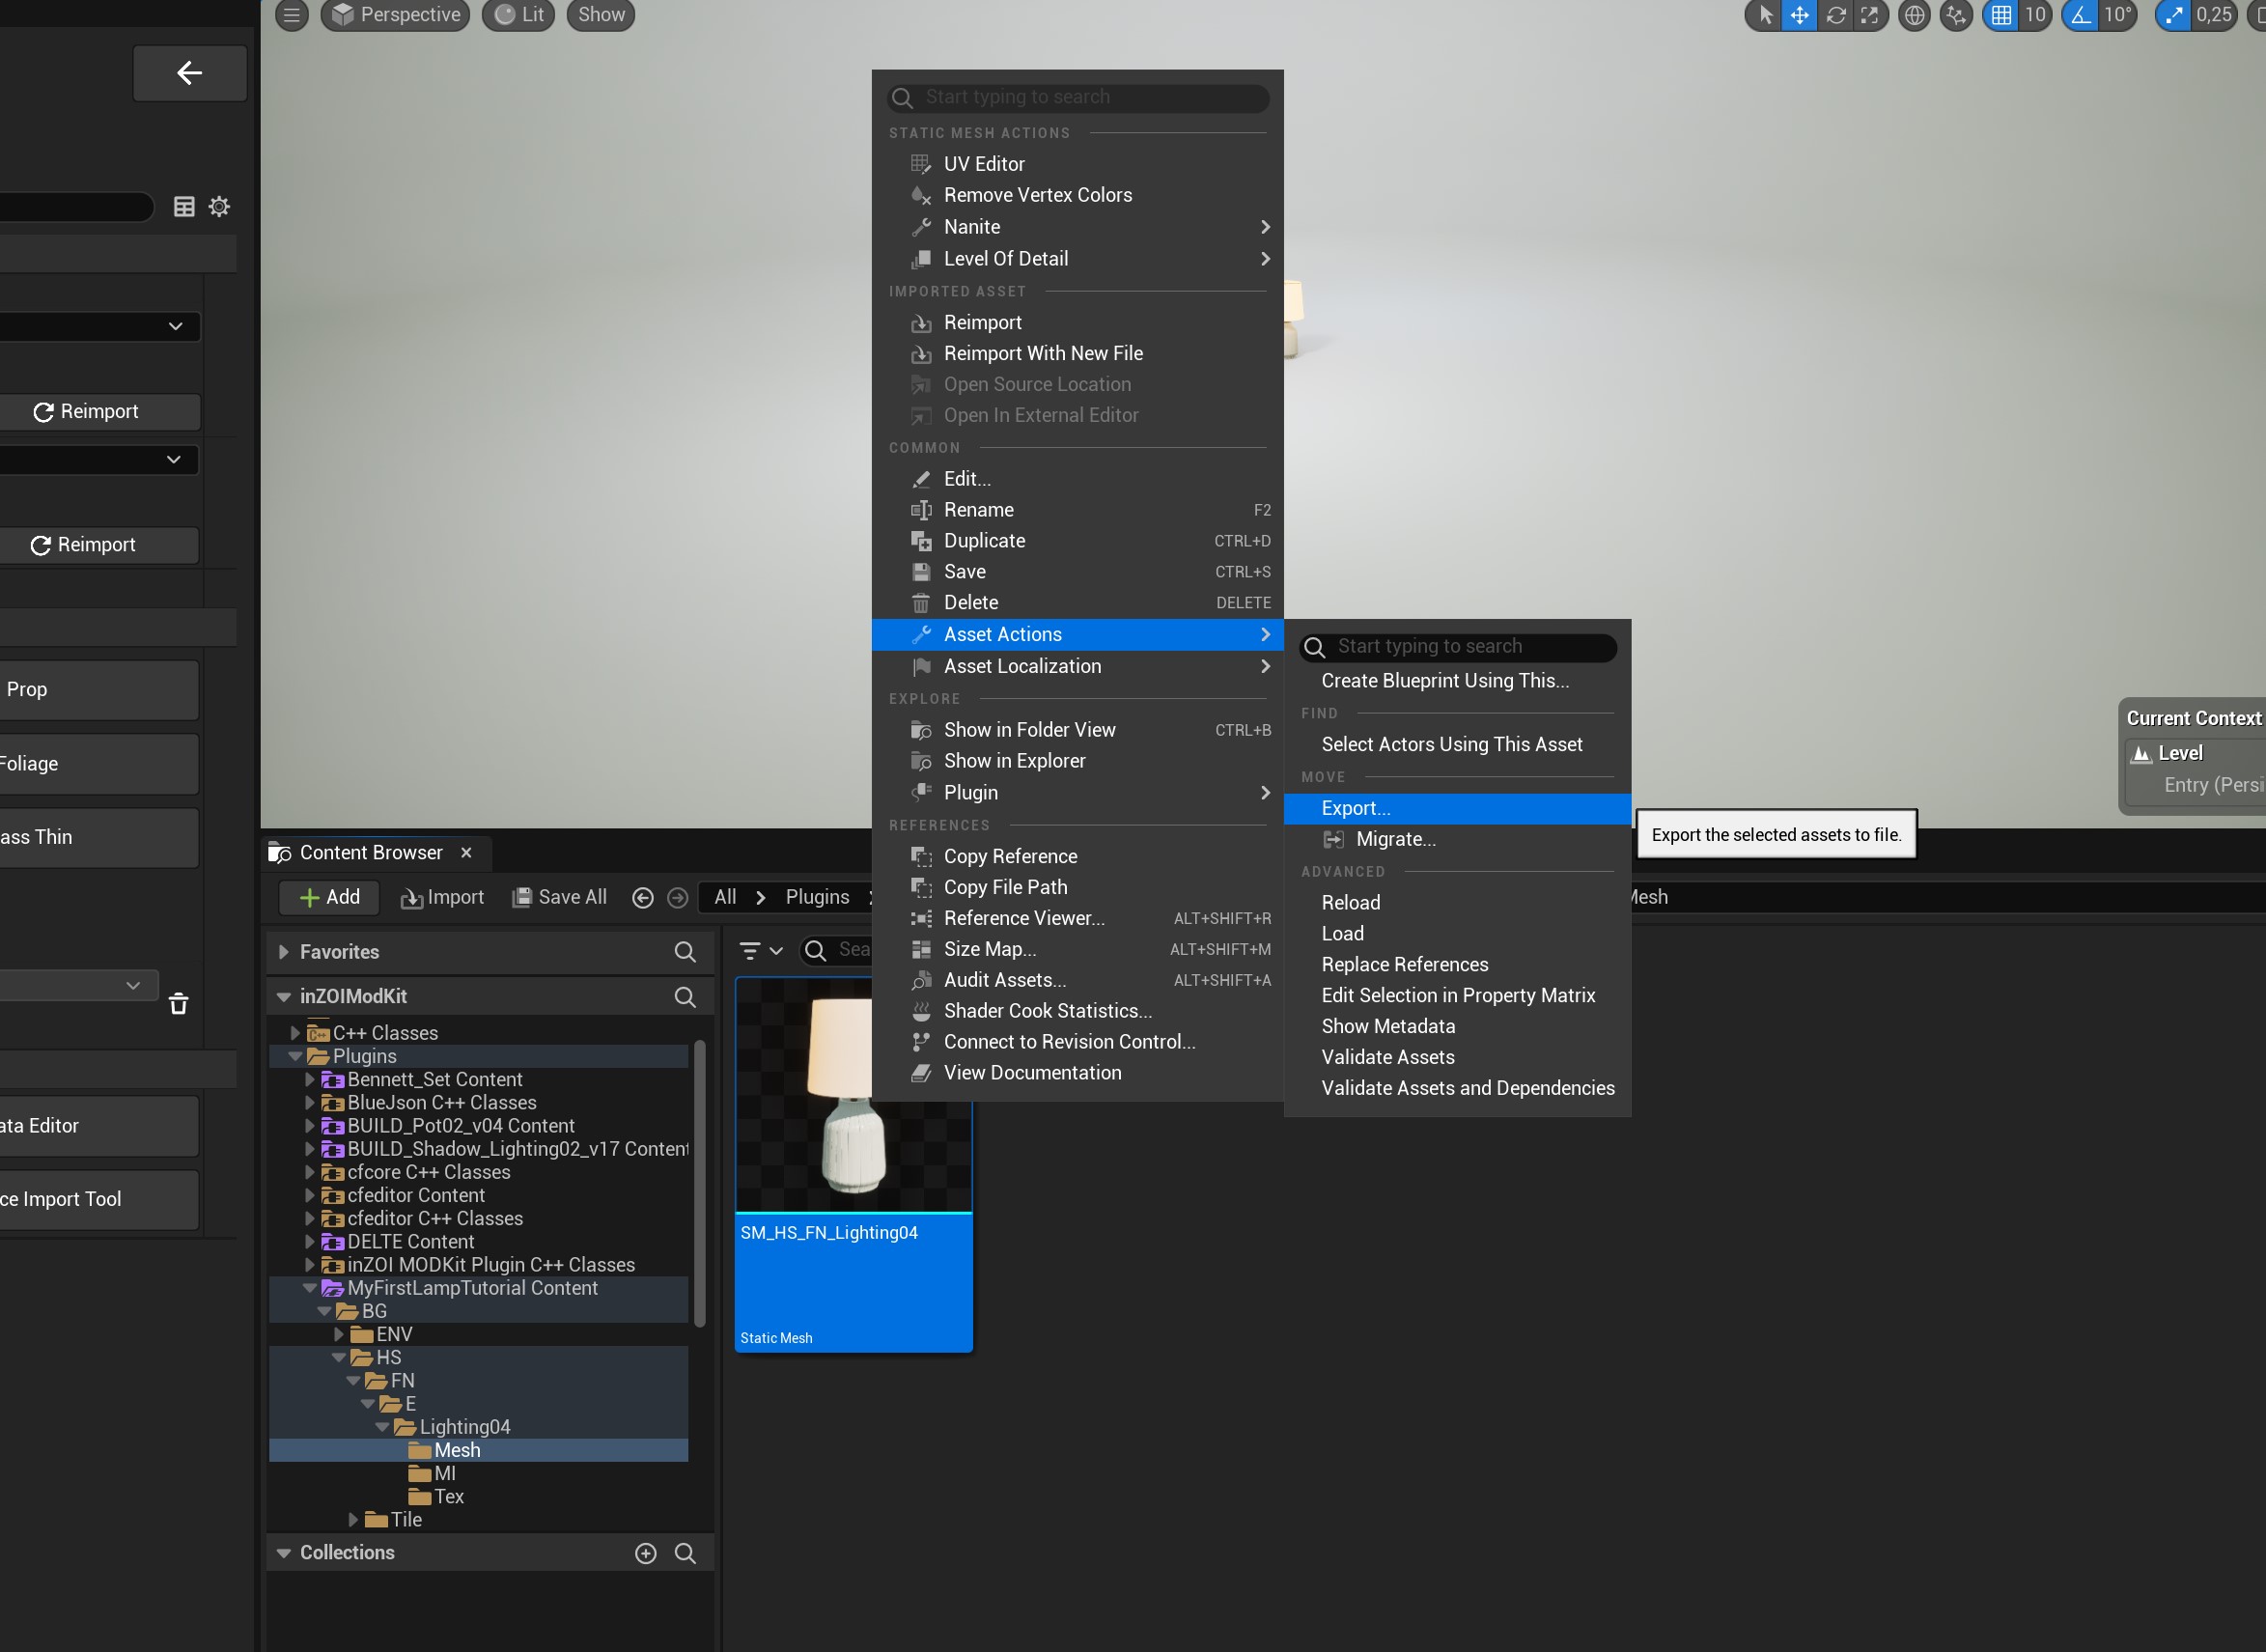
To export your InZOI mesh, we need to:
- Right+Click on the mesh icon (this can take a minute when you do this).
- Asset Actions > Export...
- Export to your workfolder. Give it whatever name you like! Or keep the original name, that's fine too!
Now the extention at the end should be .GLTF too! Not .uasset! If it is, please reread this section of the tutorial again 😉
'Why not export it as an .FBX?'
... I hear the 3D artists in the back say.
While it's my preferred workfile as well, the problem with Unreal's FBX exporter is that your mesh won't actually return with the materials/textures once we import it into Blender, unlike most FBX exporters. That's why we need to use GLTF, as it will do that :)
Exporting it as a .GLTF file:
This is probably the most pleasable way to importing, since it also imports the mesh with all it's textures and materials (So, it's colours, simply put!) :) So our mesh will look almost exactly like the modkit!

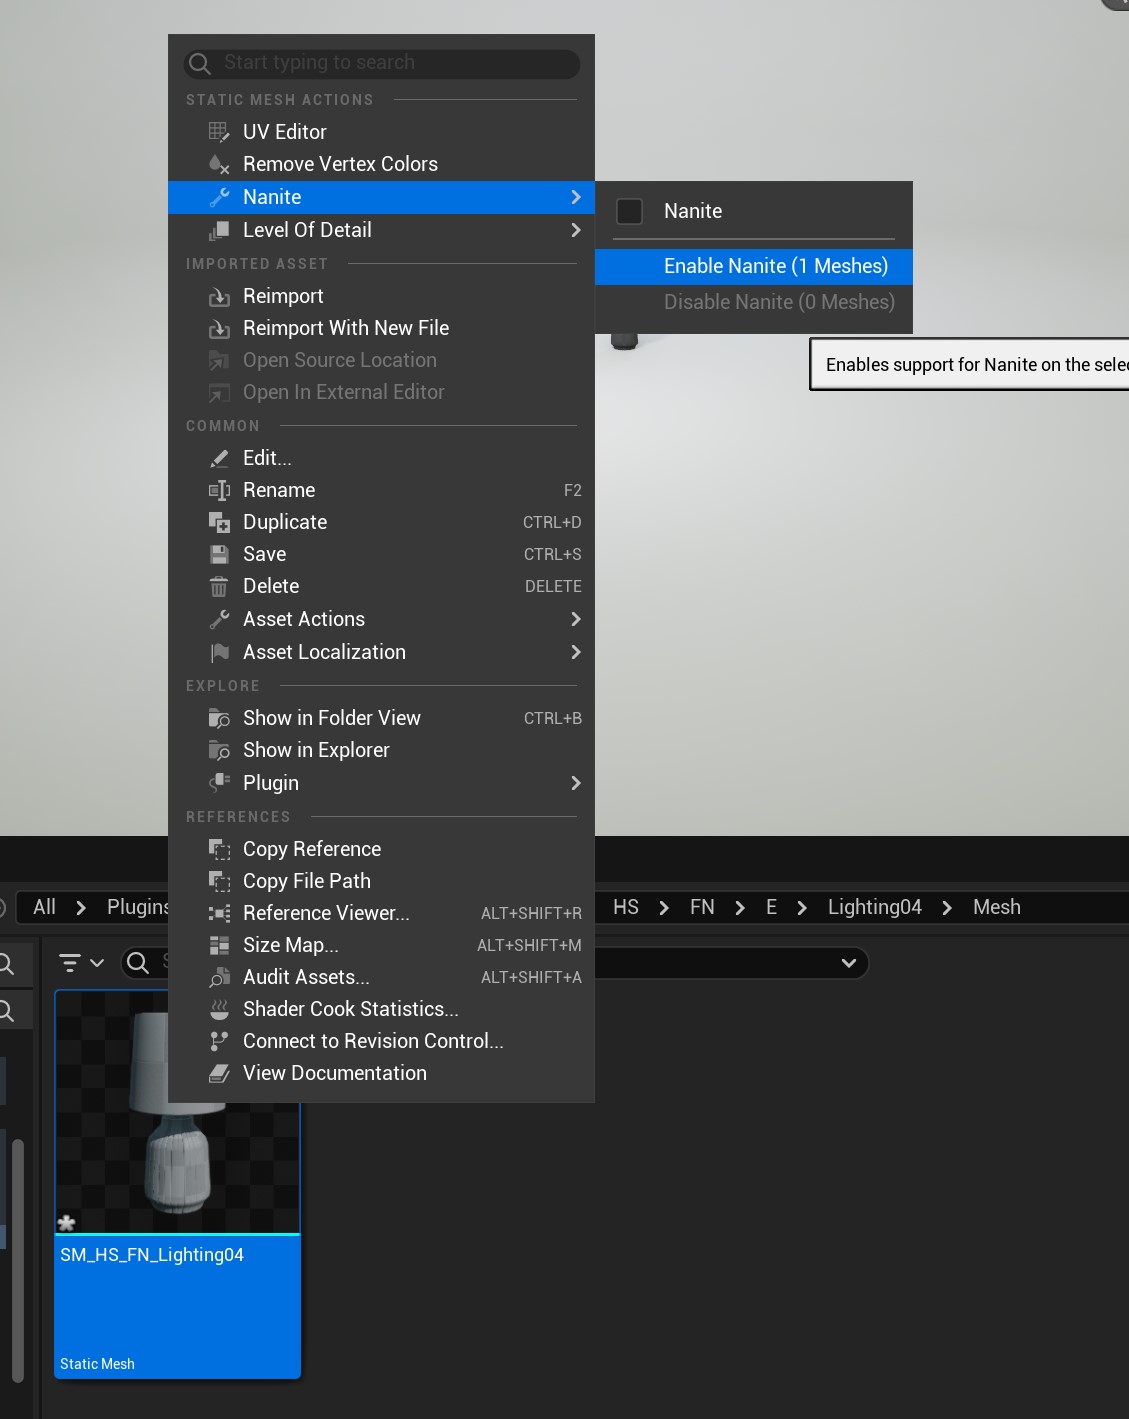
When exporting your GLTF, you will need to do an additional step and that's TURNING OFF NANITES
When we Right+click on our mesh in the content browser, you want to go to Nanites > Disable Nanites on (1) mesh
Once the nanites are deleted, we want to finally export our mesh!
- Right+Click on the mesh (again)
- Go to: Asset Actions > Export
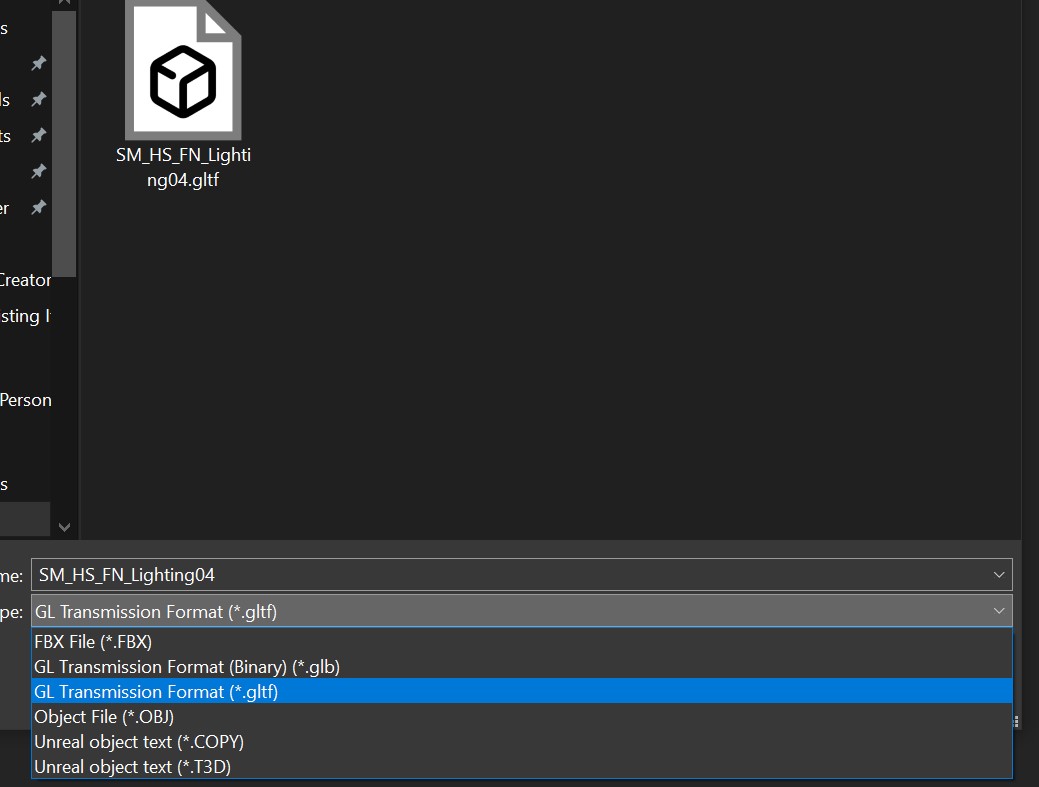
- Now, in our file explorer, we use the drop down to export it as a .gltf
- Save with whatever name you want to give it!
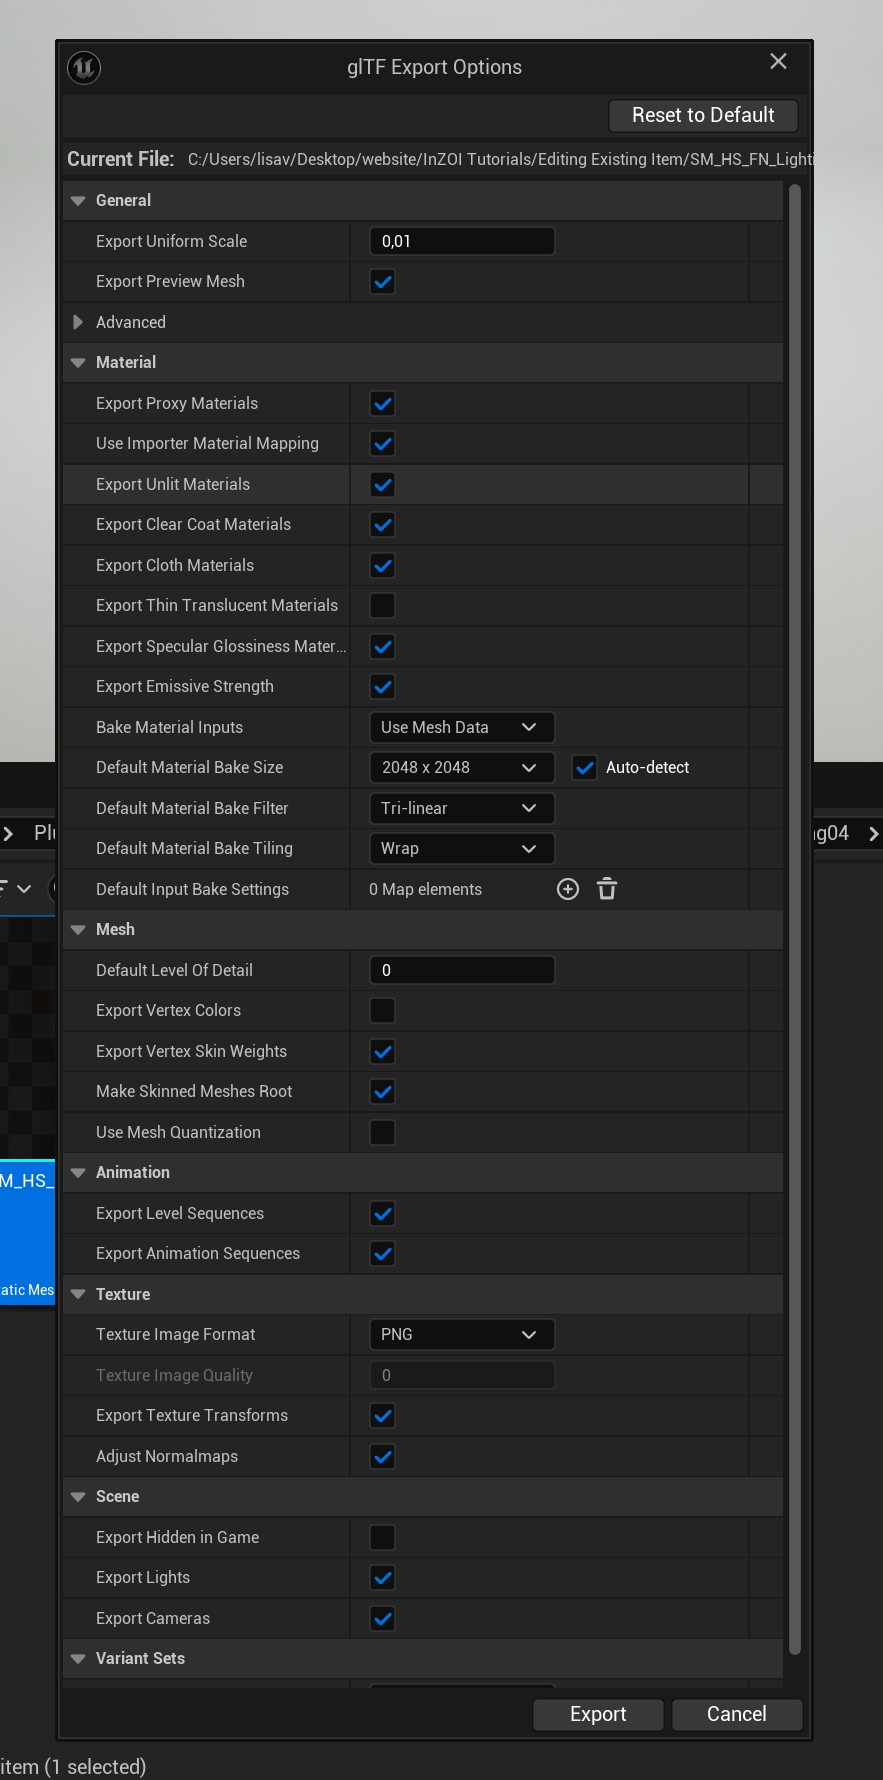
Keep everything the same (unless you know what you're doing!) and save. (Though, setting "default material bake size" to 2046x2046 is optional but recommended!)
After that, reset the nanites back! :)
Yay! Now we finally have our mesh exported! Let's get to Blenderizing it...
Import, export and edit our InZOI mesh in Blender
Now to the moment we've all been waiting for, editing our mesh in blender!
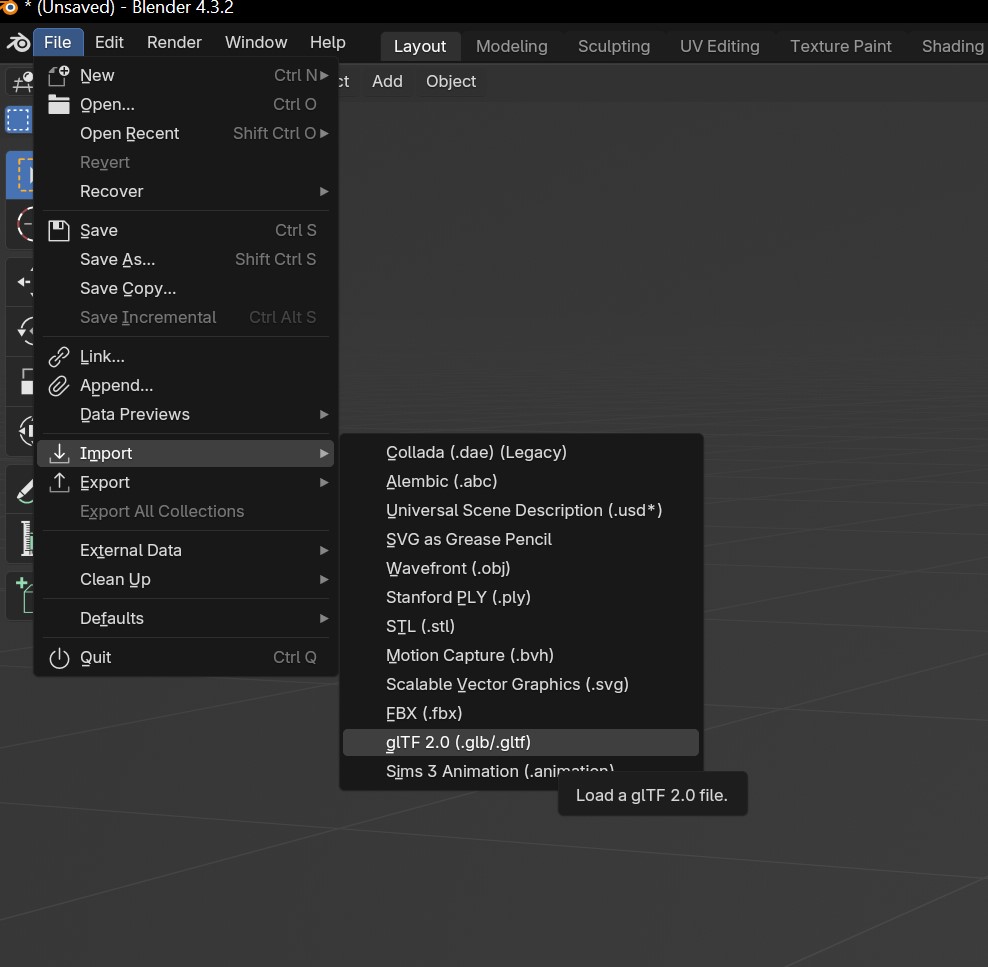
Go to File > Import > gLTF 2.0 (.glb/.gltf)
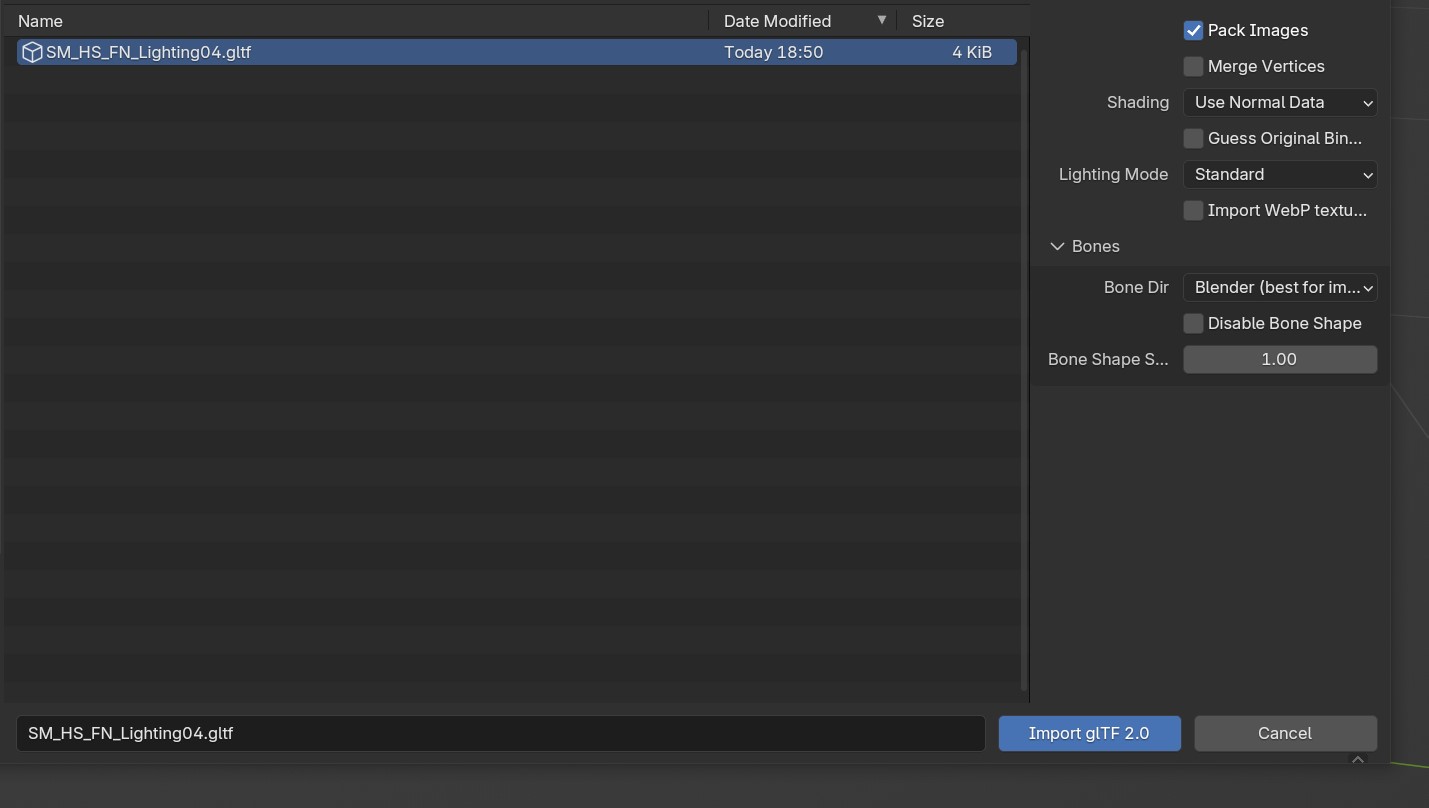
Import our mesh... the default settings should be enough.
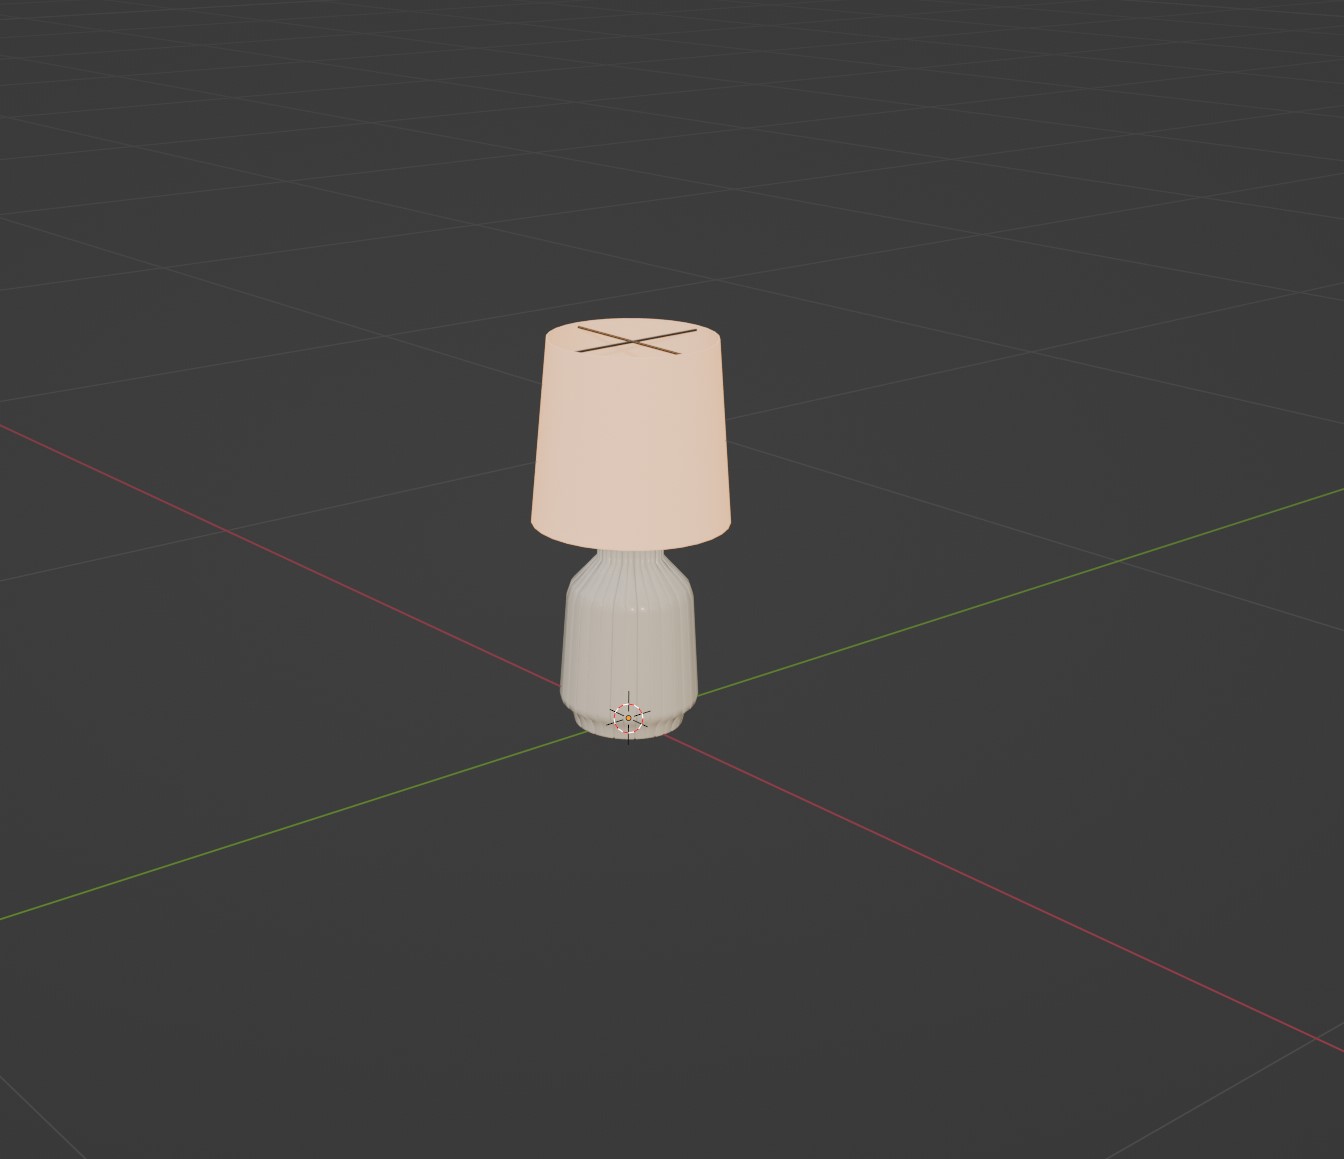
(Psst if your mesh is still gray, make sure you're changing it from "solid" most to "textured", by pressing "z" in object mode. Like here:)
Tada! :D
Cleaning up our mesh to make shiny things!
The entire mesh is all trangelized/I cant use "loop cuts" and other useful thingies! ... Might be the next thing you say.
So, game developers like to triangulate their meshes before they're imported into the game for optimization purposes. However, when modeling the mesh, we often use "quads" as it's simply easier to work with ;)
Now, with that in mind, you might've gone ahead and tried editing your mesh, but it's really hard to get anything done, such as using loop cuts, right?
What we want to do to enable this again is:
1. Go to Edit mode.
2. Make sure you have "select faces" selected.
3. CTRL+A to select all the faces.
4. Right+Click
5. Now we click "Tris to Quads" (or alt+J).
Done!
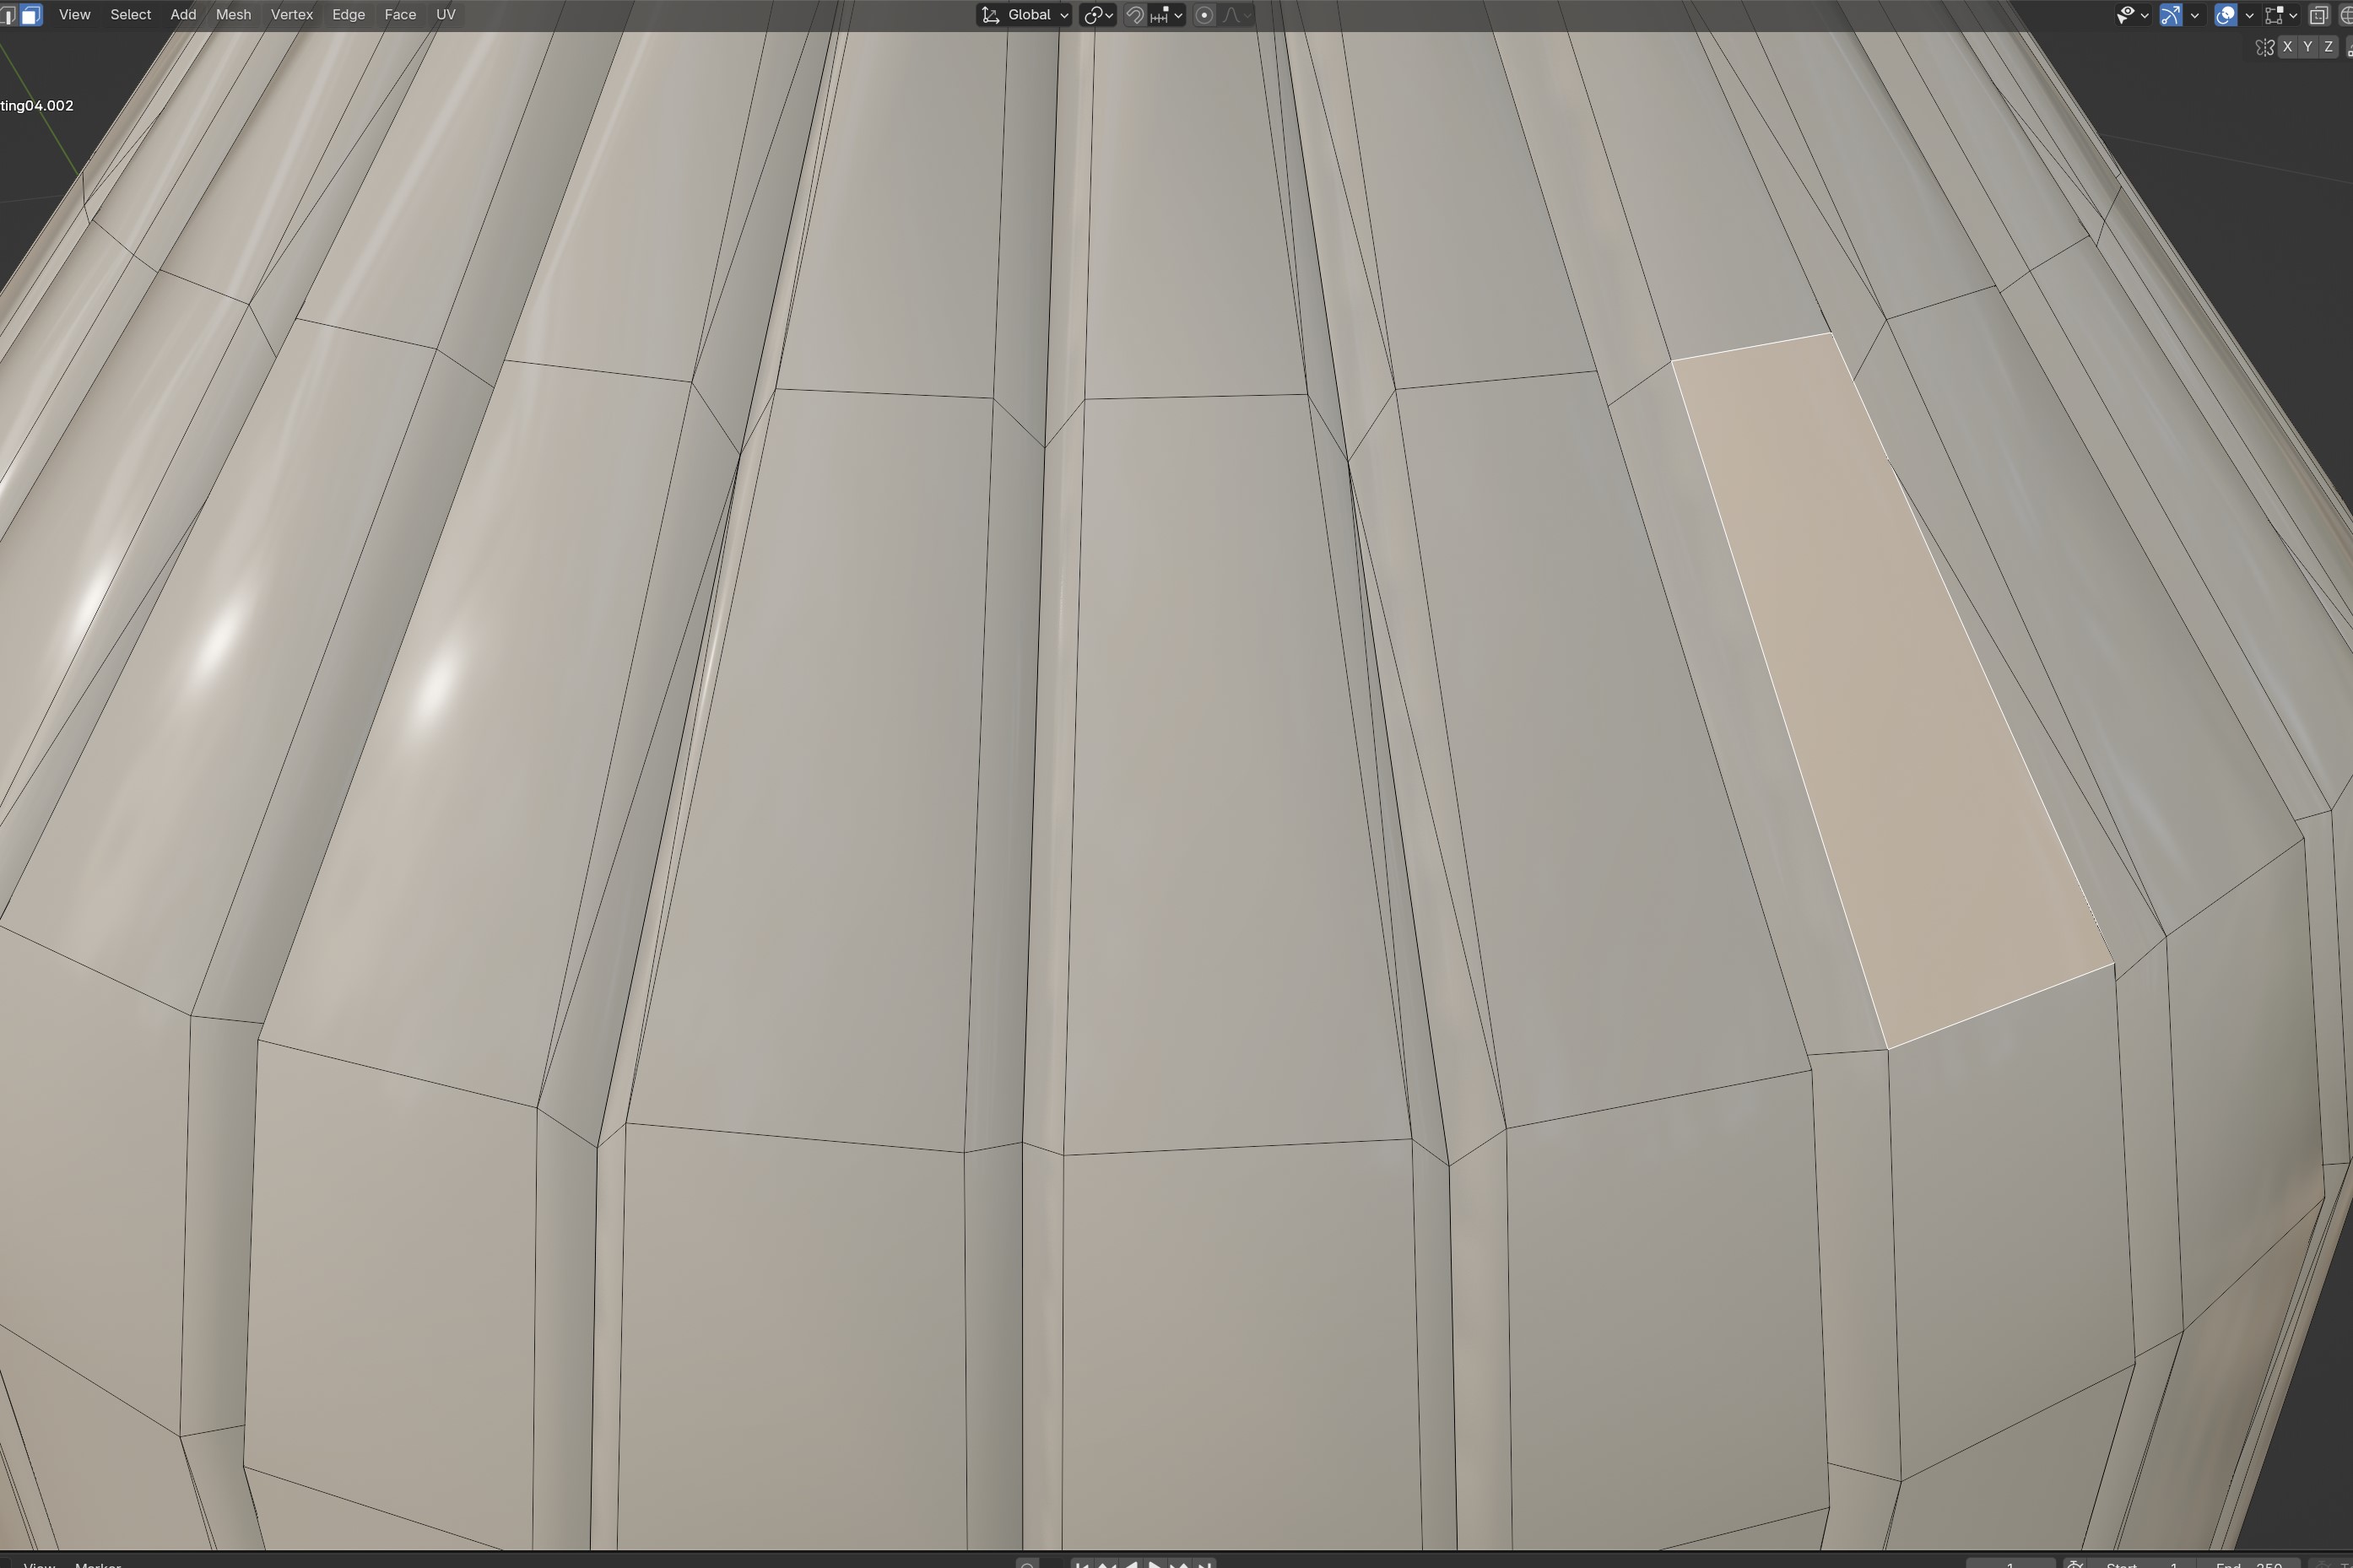
In my case I still can't quite use loop cuts, because some parts of the mesh is still triangulated. So, how we fix that, is to select the faces that have this issue and do the same method as we did with the whole mesh!
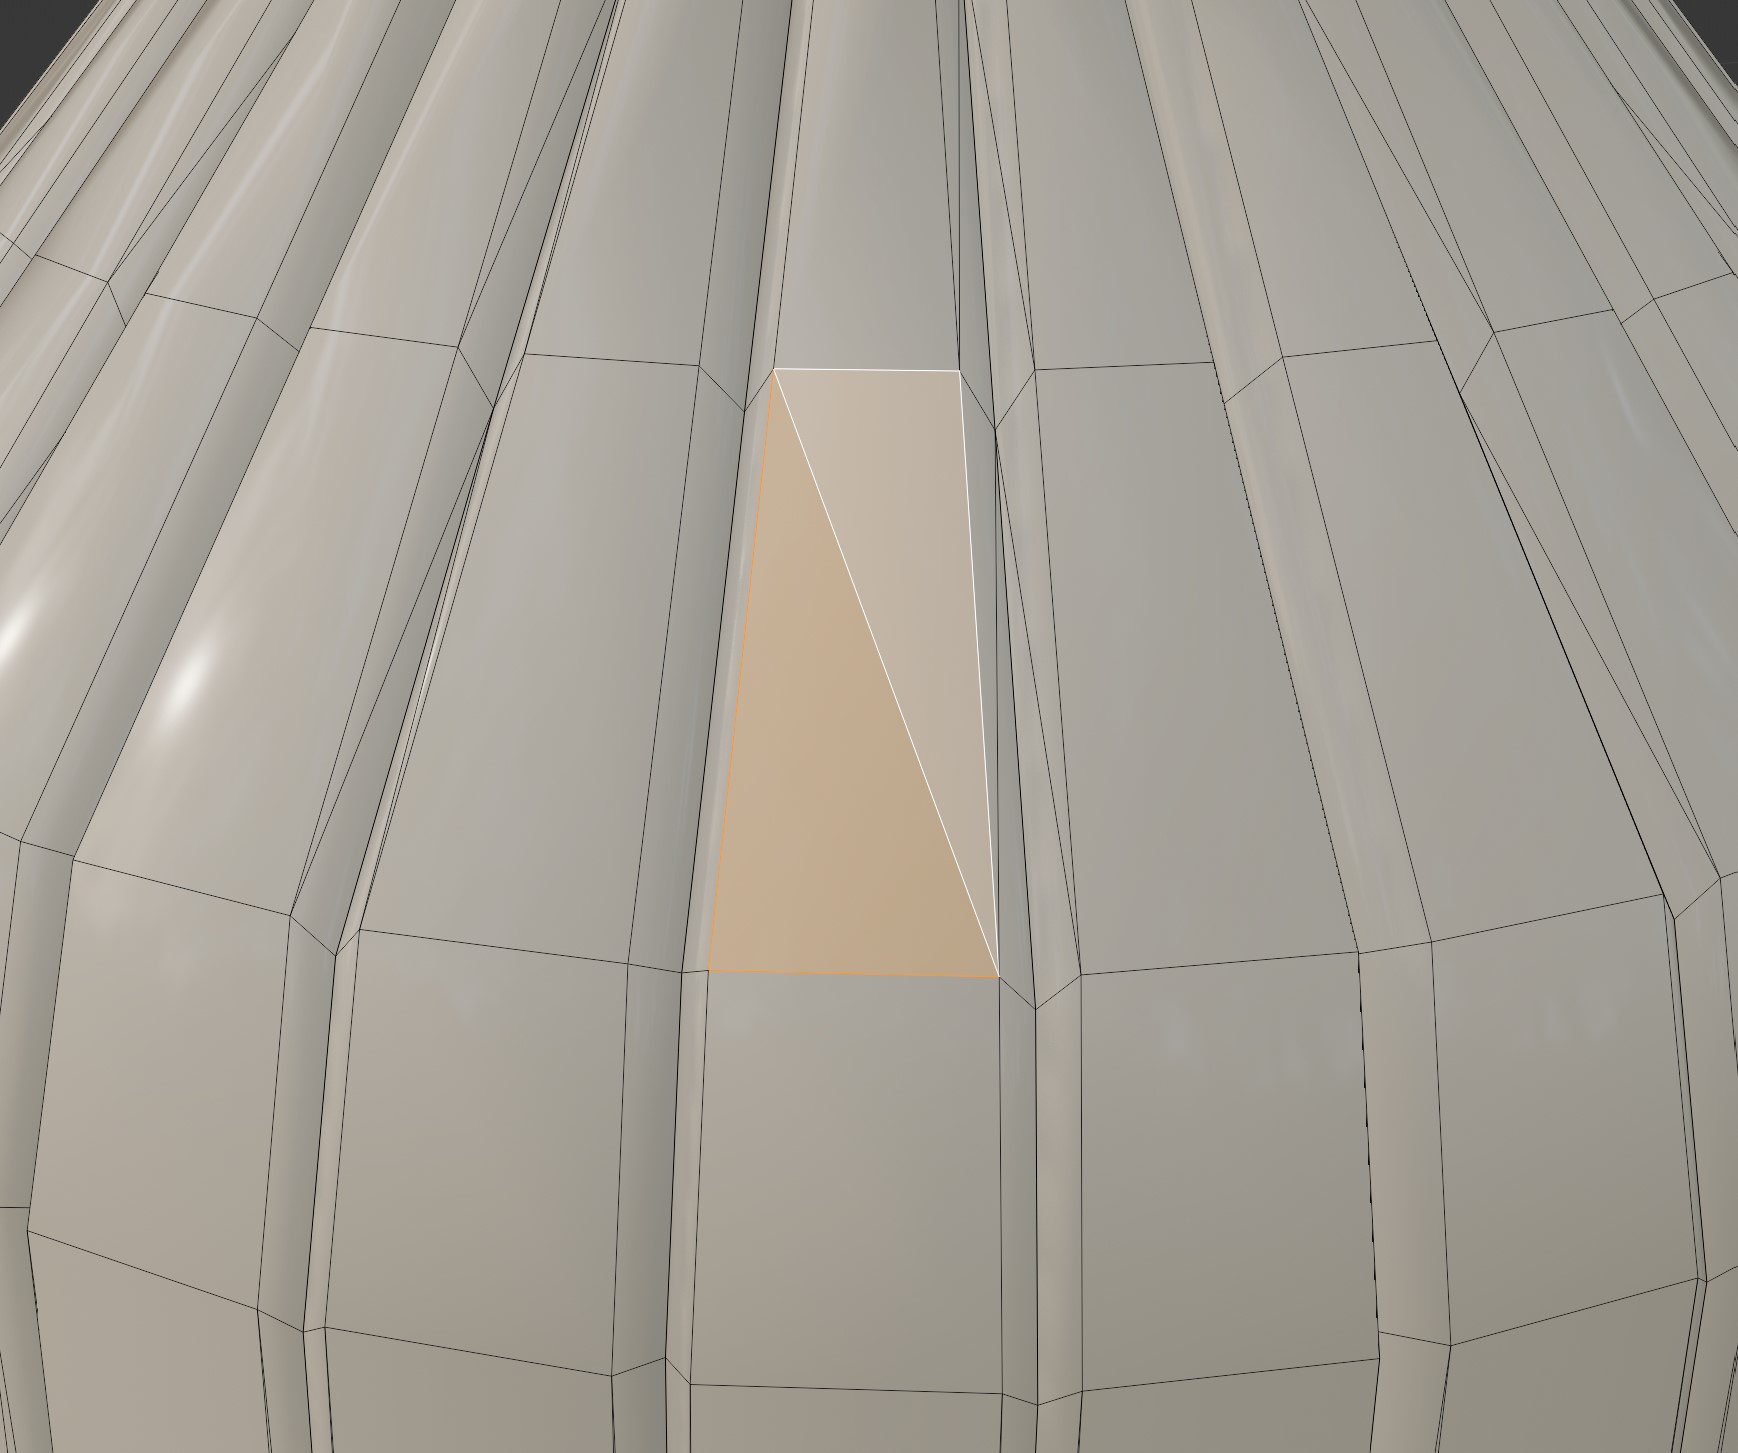
Just like so. I take, what can be a 4 vertex (so 4 cornered) face, and select that. Then Right+Click > "Tris to Quads" (or alt+J) :). Rinse and repeat this process in other places!
Sometimes the mesh might not be as well topologized that this might take a little more time. Or, if you don't want to do the whole mesh, simply do it for the area you want to edit! 😉
I still can't use Loop cuts and such! Only bits of the mesh... While not every mesh will have this, a lot of meshes with sharp "edges" often won't have, what we call "normal data" (Which is essentially the "shadow" of your mesh) of what's sharp or not. Often it can also get lost in translation as we import/export things.
So, a nifty thing that developers do to fix this, is to split the edges!...
Except that now we have split edges where we were expecting sharp non-split edges. How do we fix that?
Well, really easily actually!
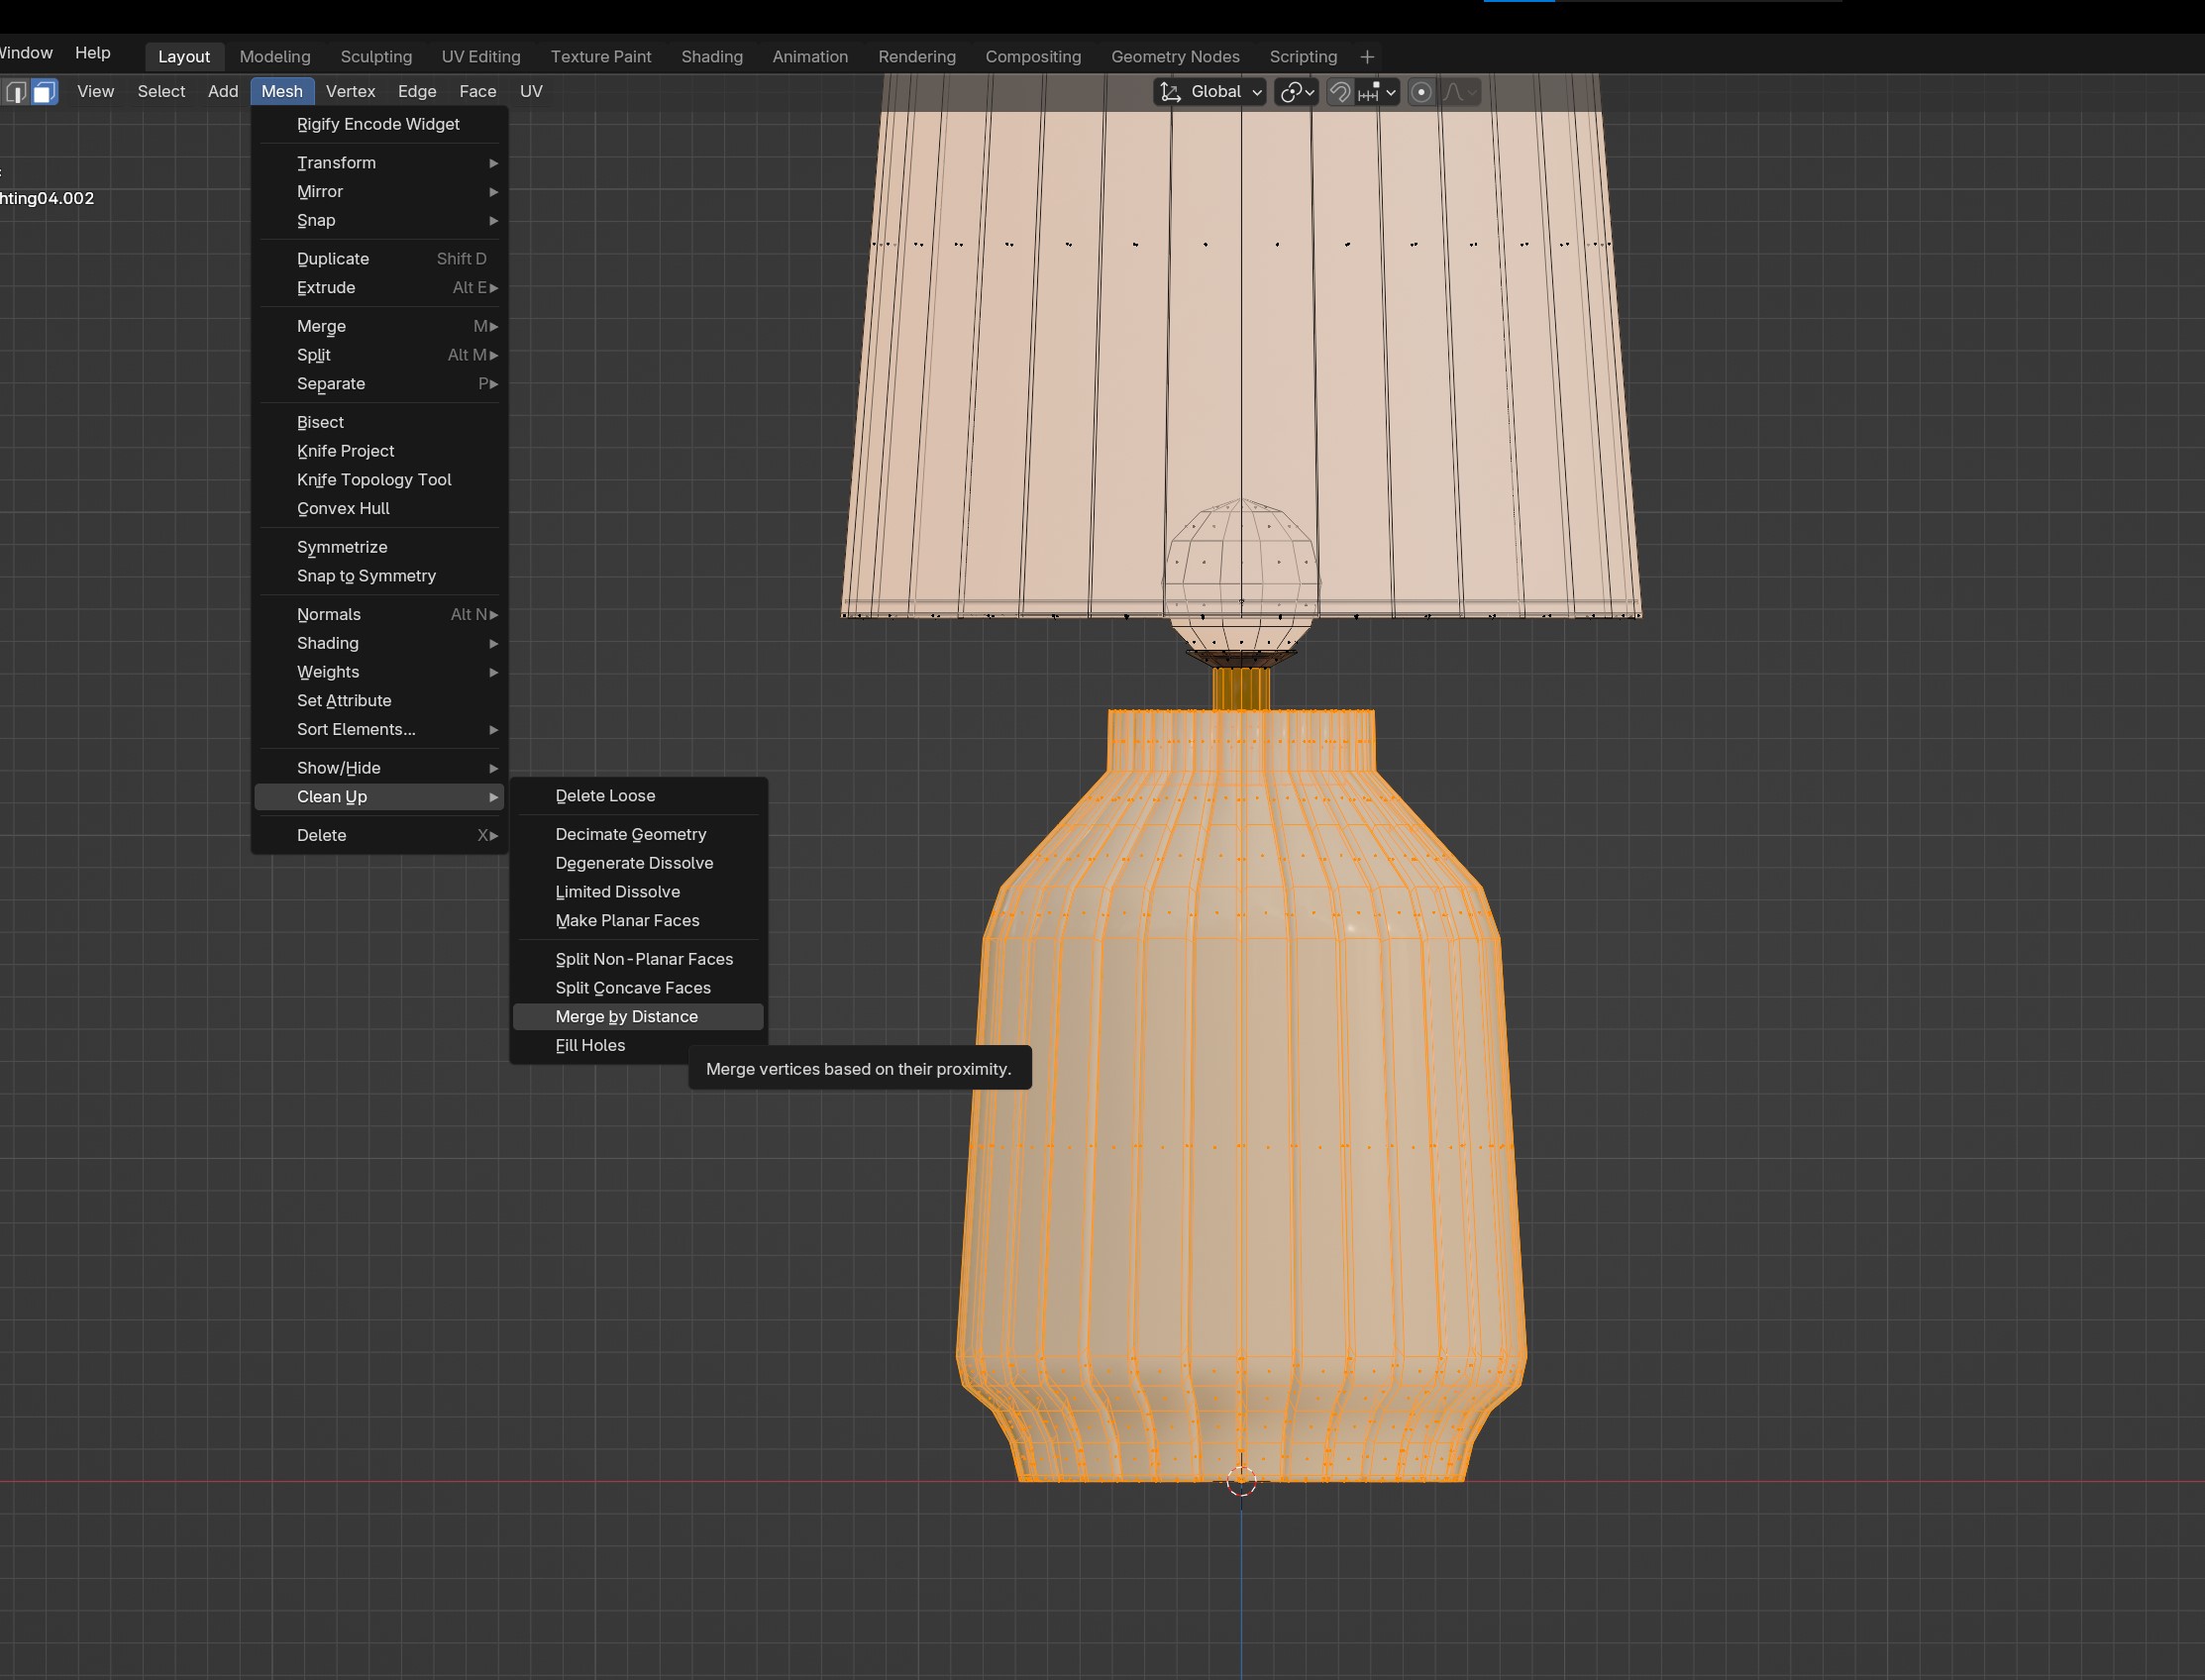
We go to Mesh > Clean Up > Merge By Distance
... Except your after thought was probably 😬 when we merged the vertices! Since now our sharpness is gone D:
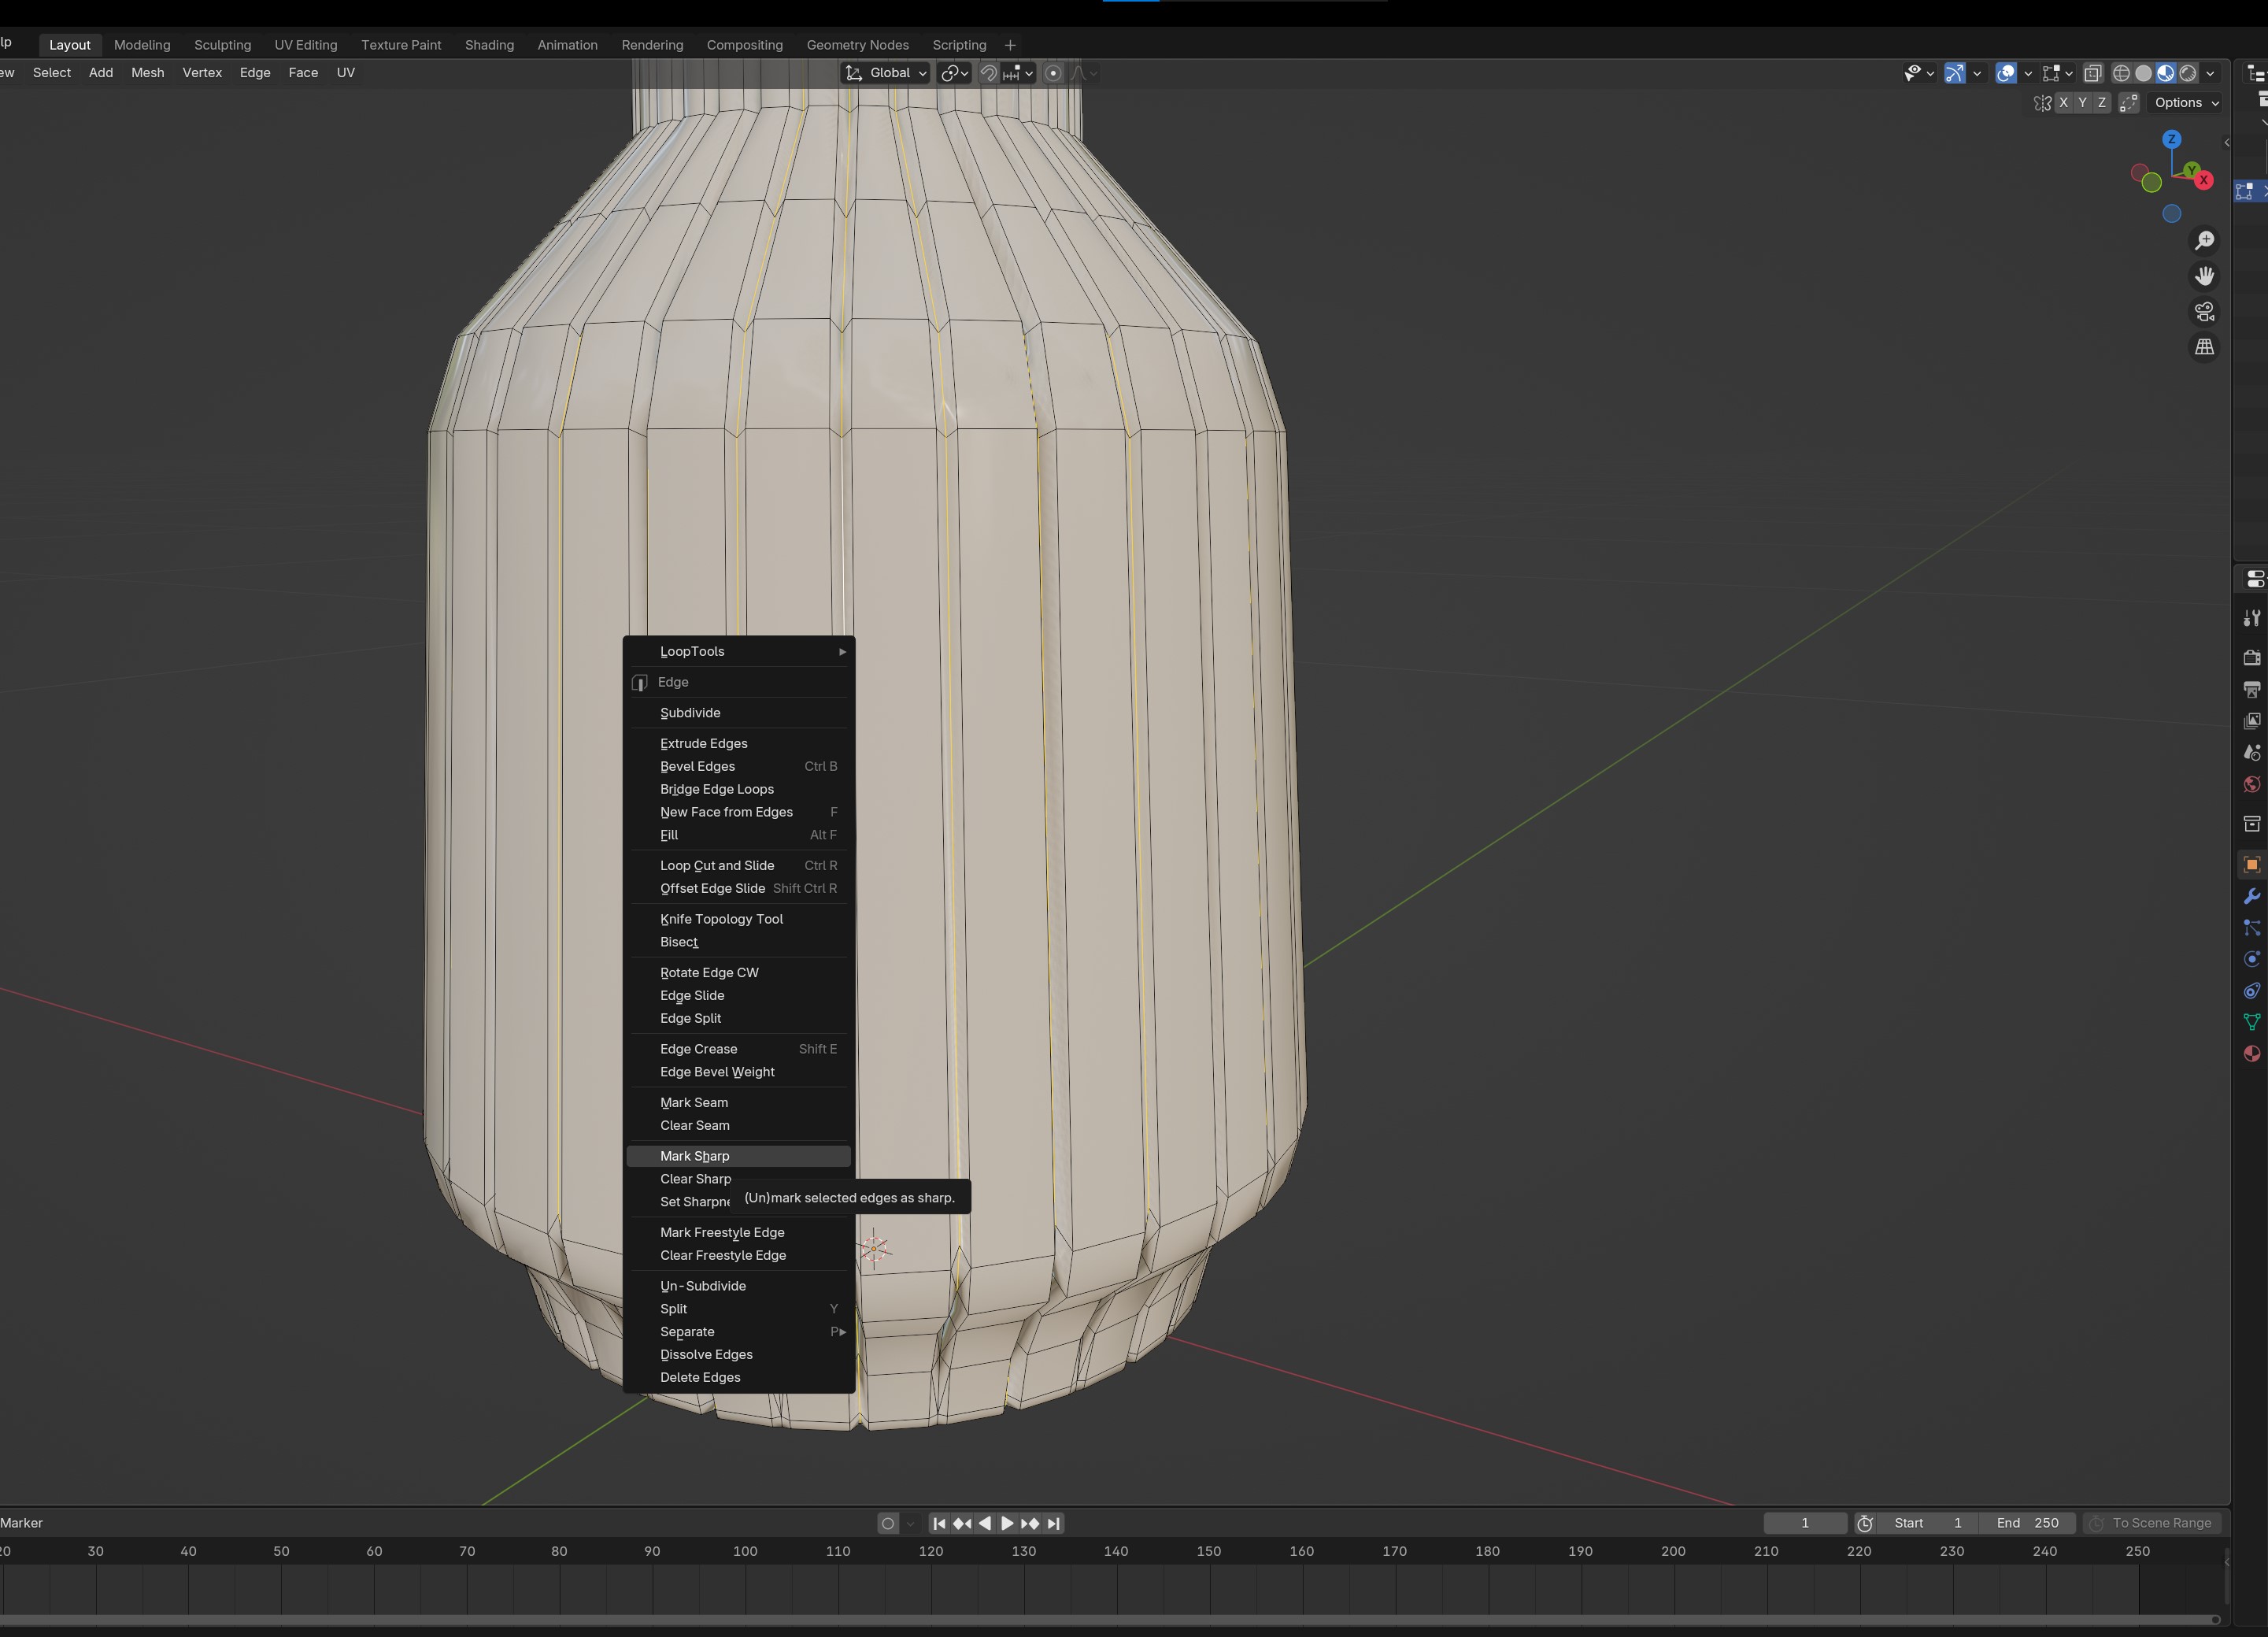
However, to fix that, we select the edges that were once split...
Right+click > Mark Sharp.
... Except that didn't fix it yet... But! It is still important that we do this, because now we're going to tell blender what to do 😄
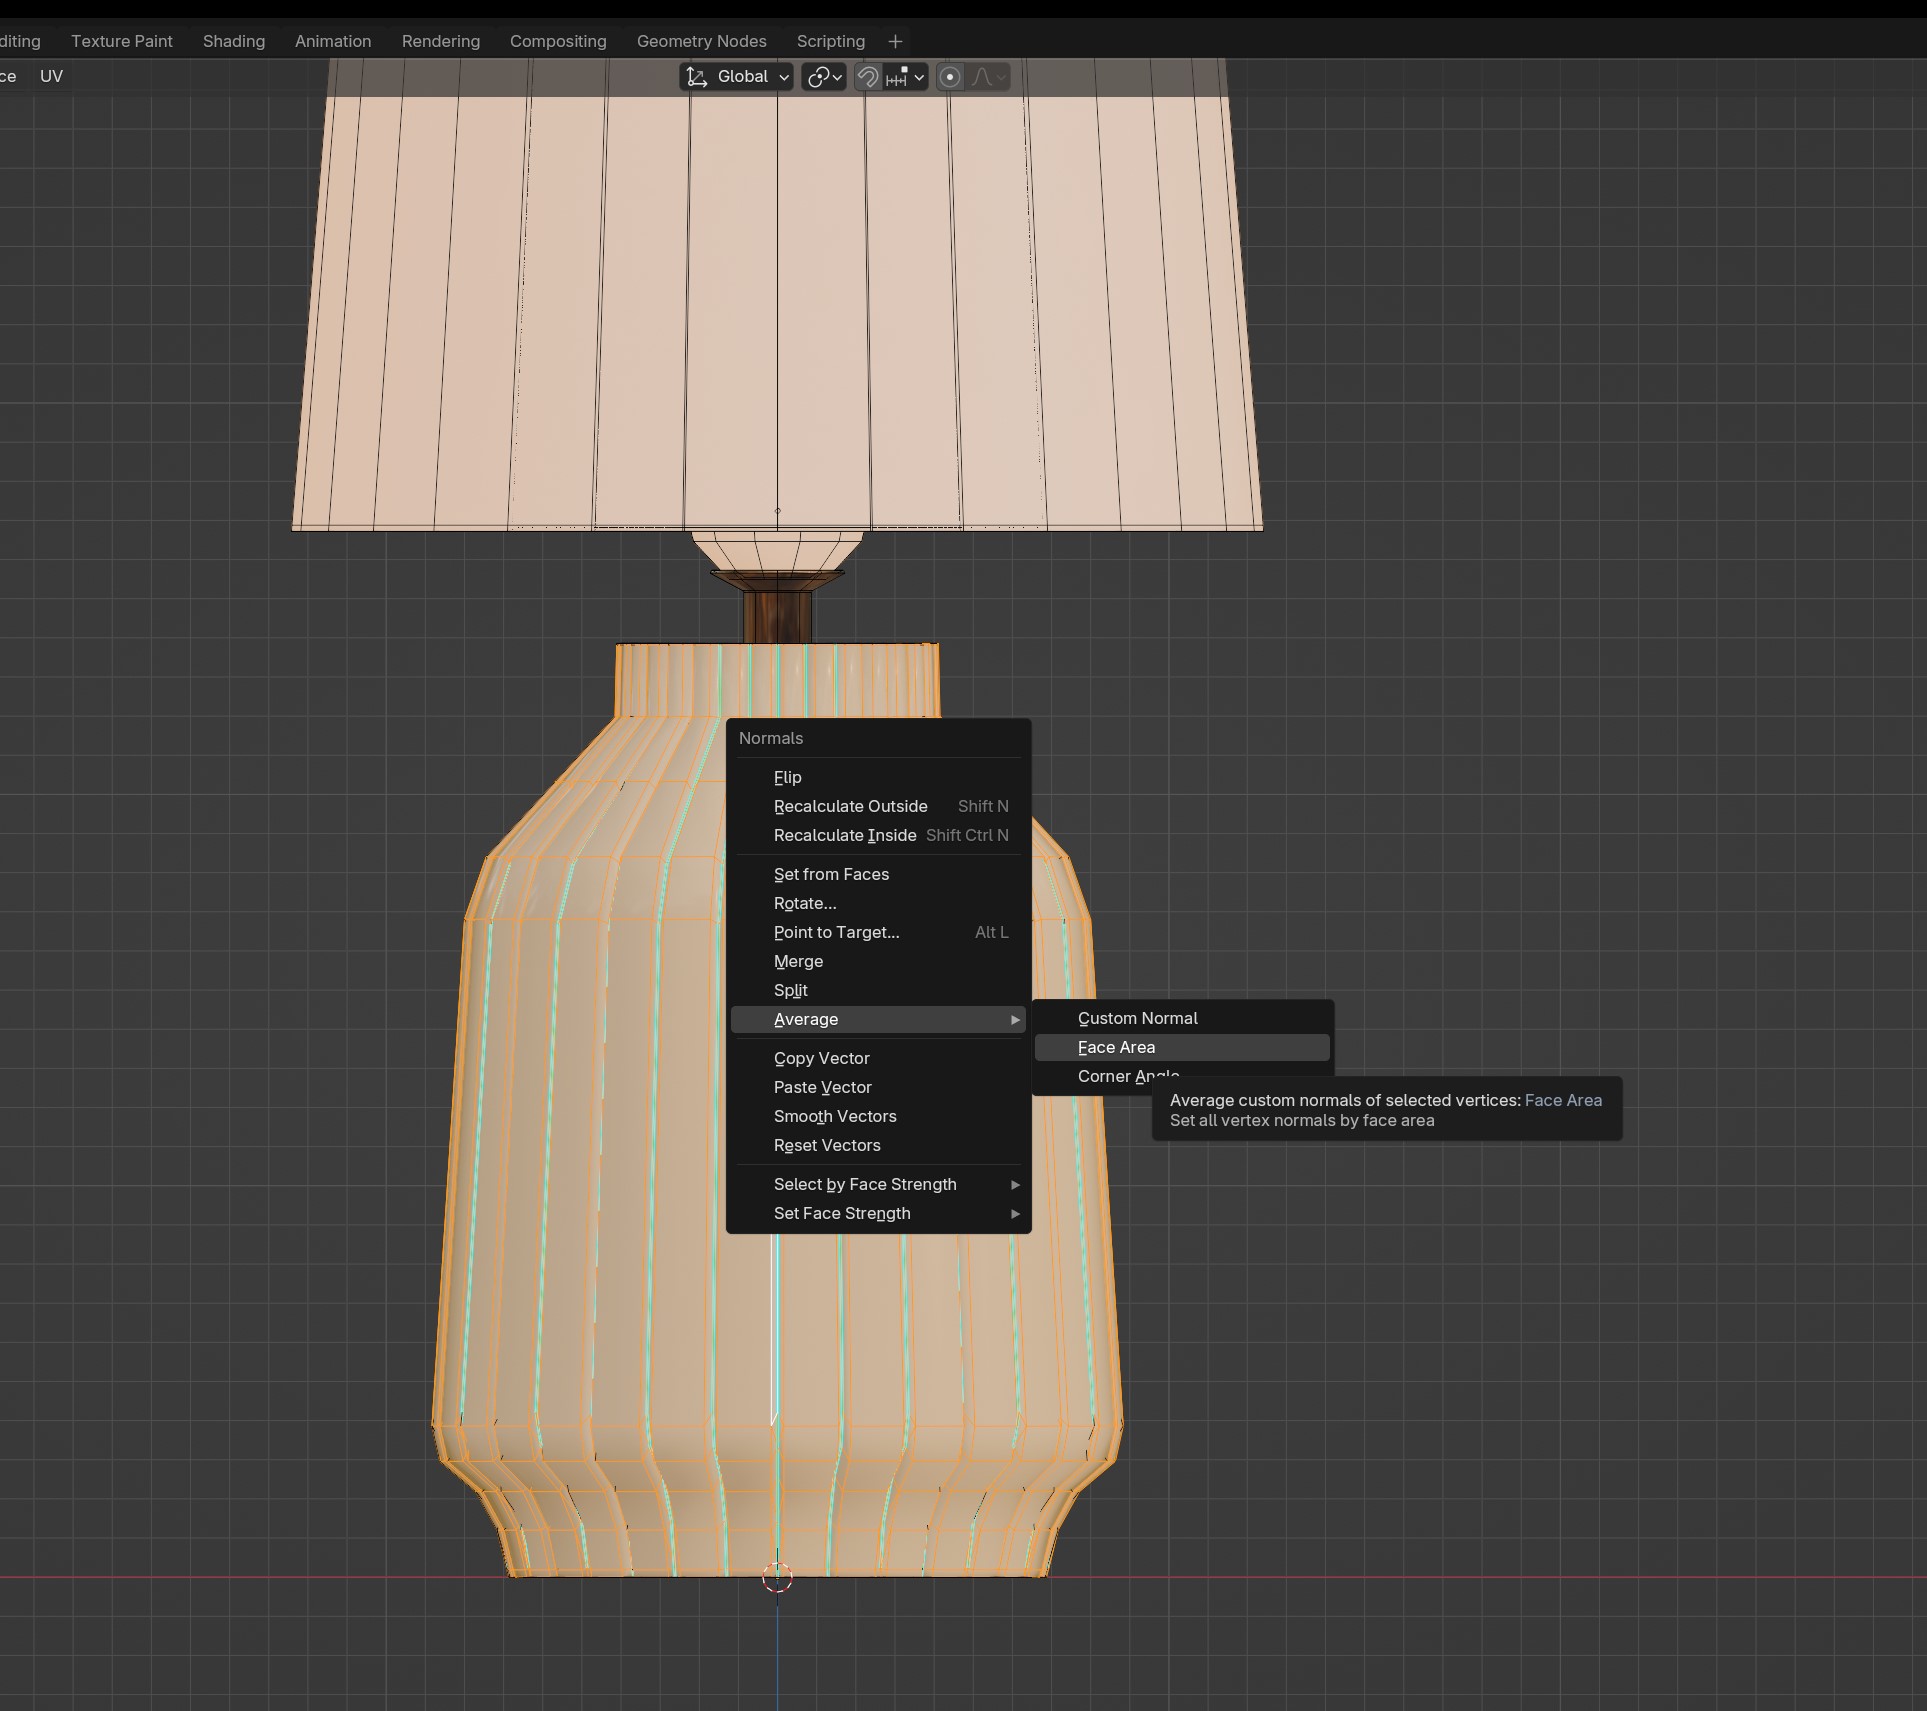
To actually properly fix it, we need to do one step:
- Select the parts (or the whole mesh)
- Alt+N (or Mesh > Normals)
- Click "Average > Face area"
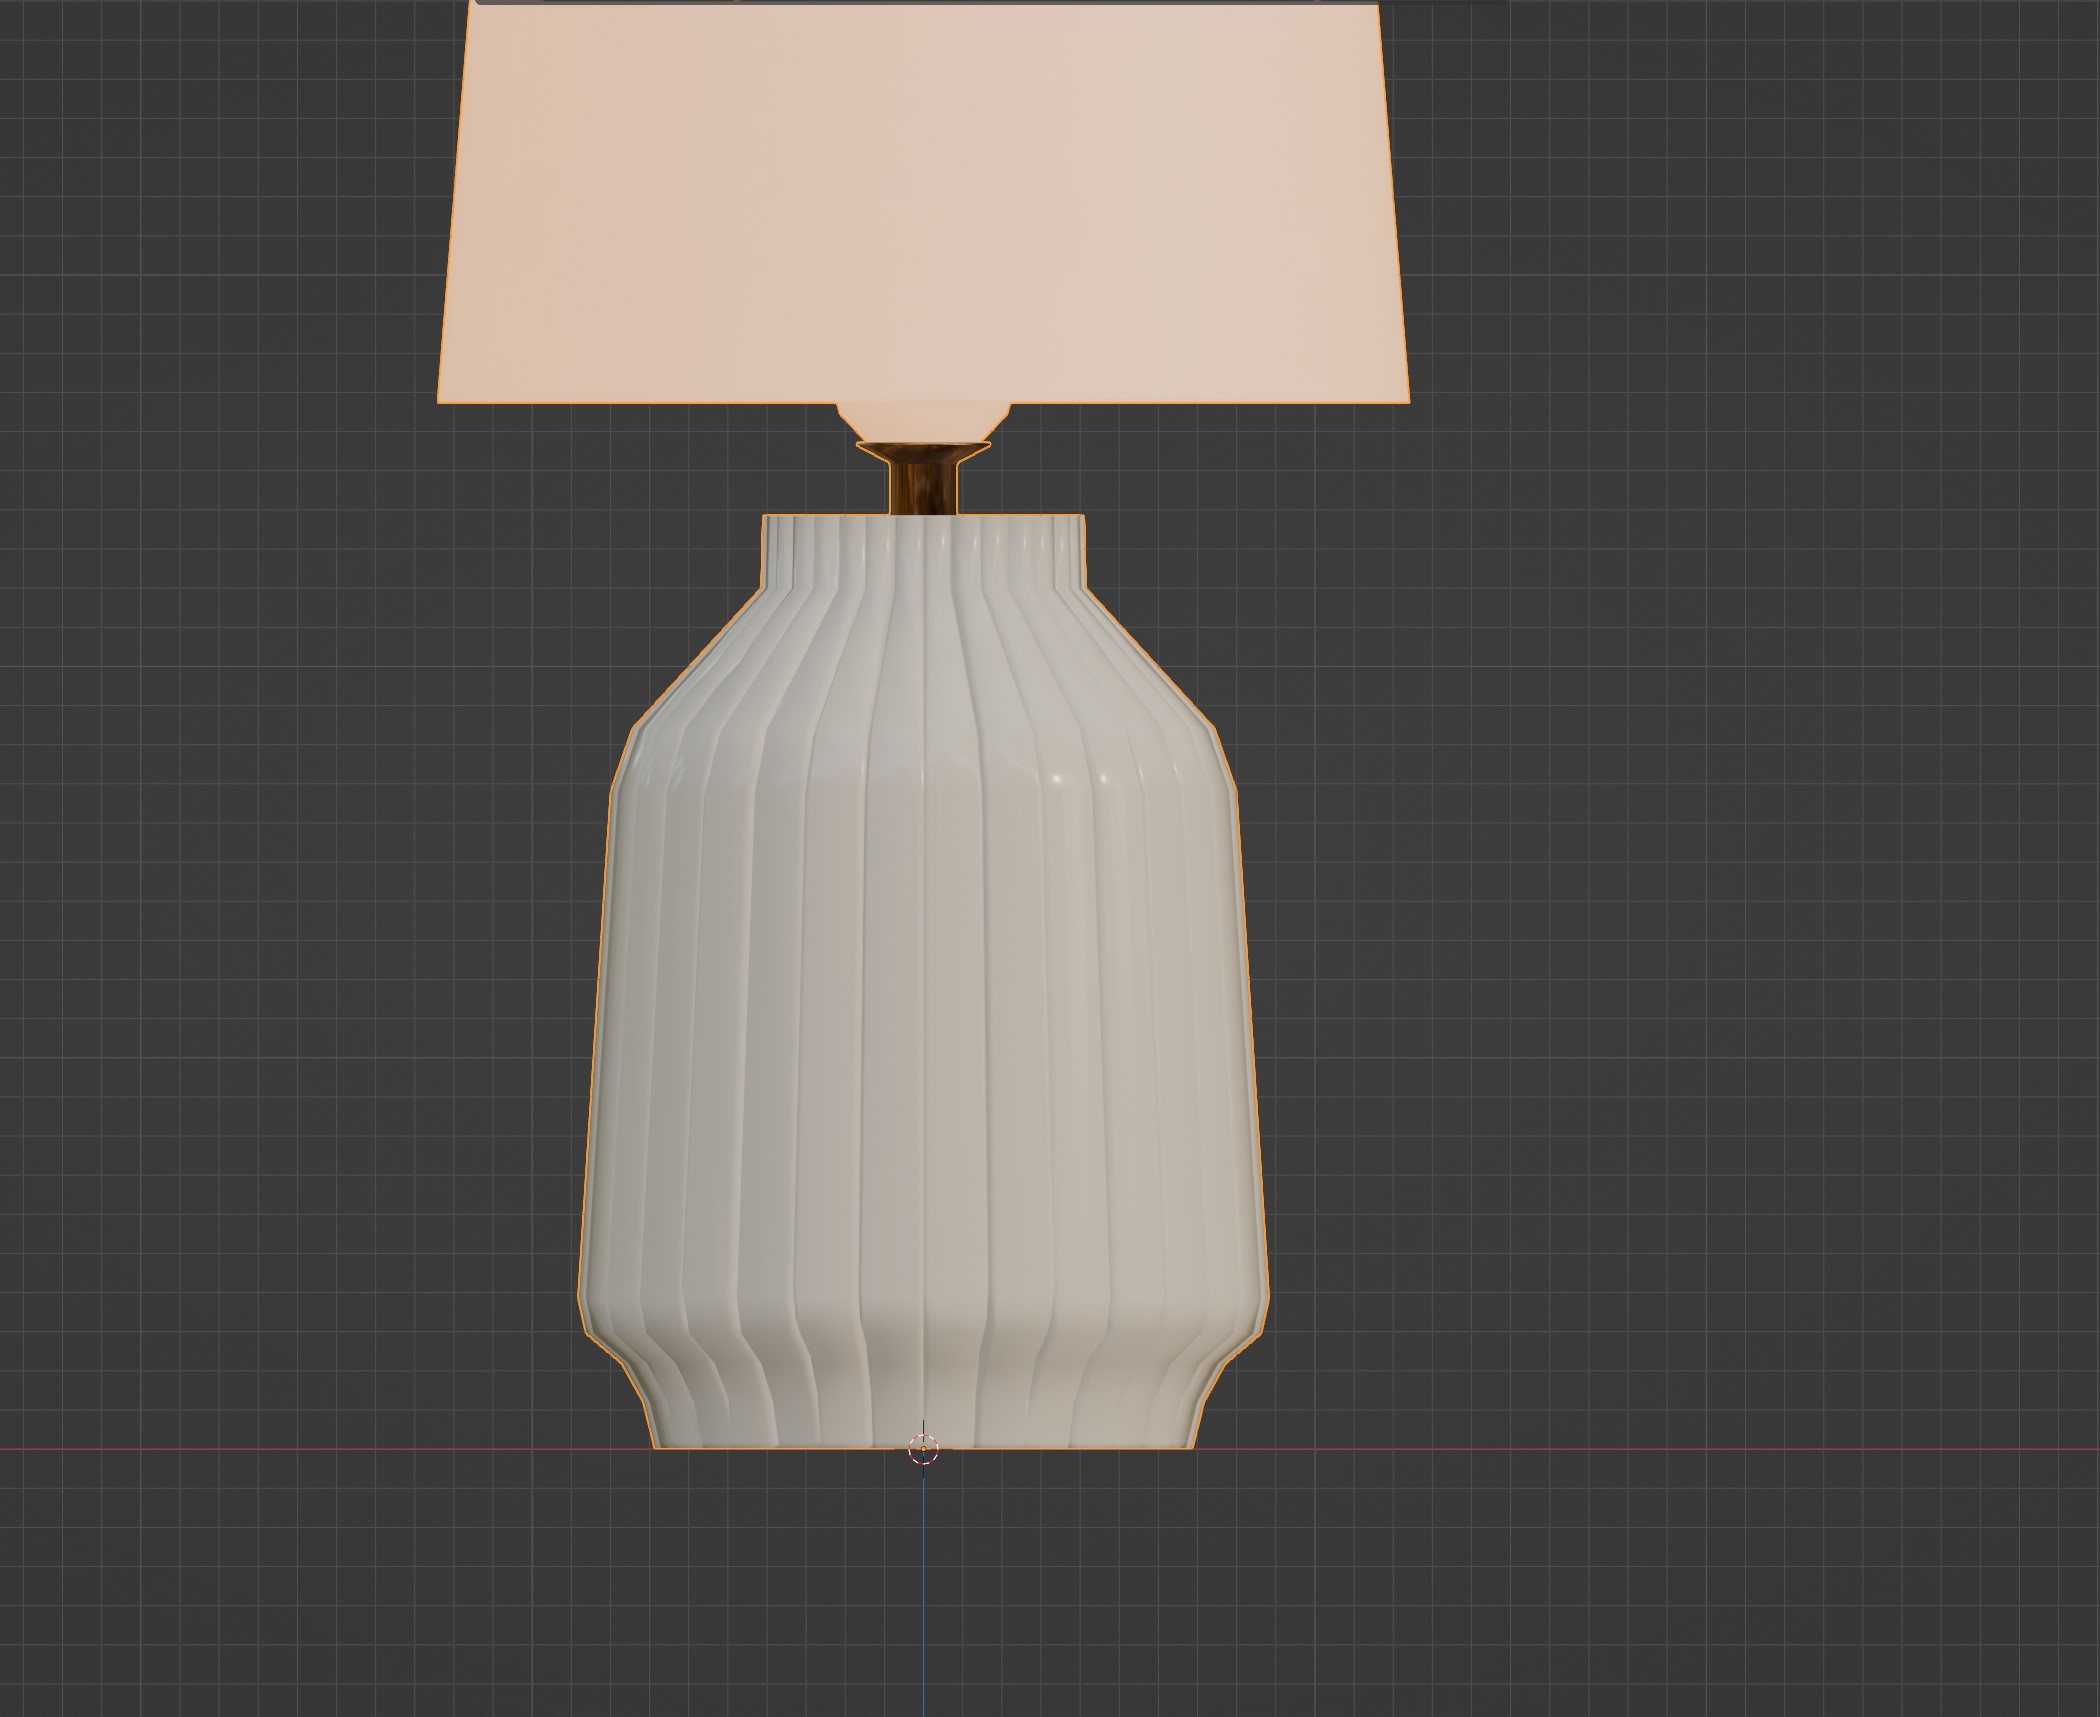
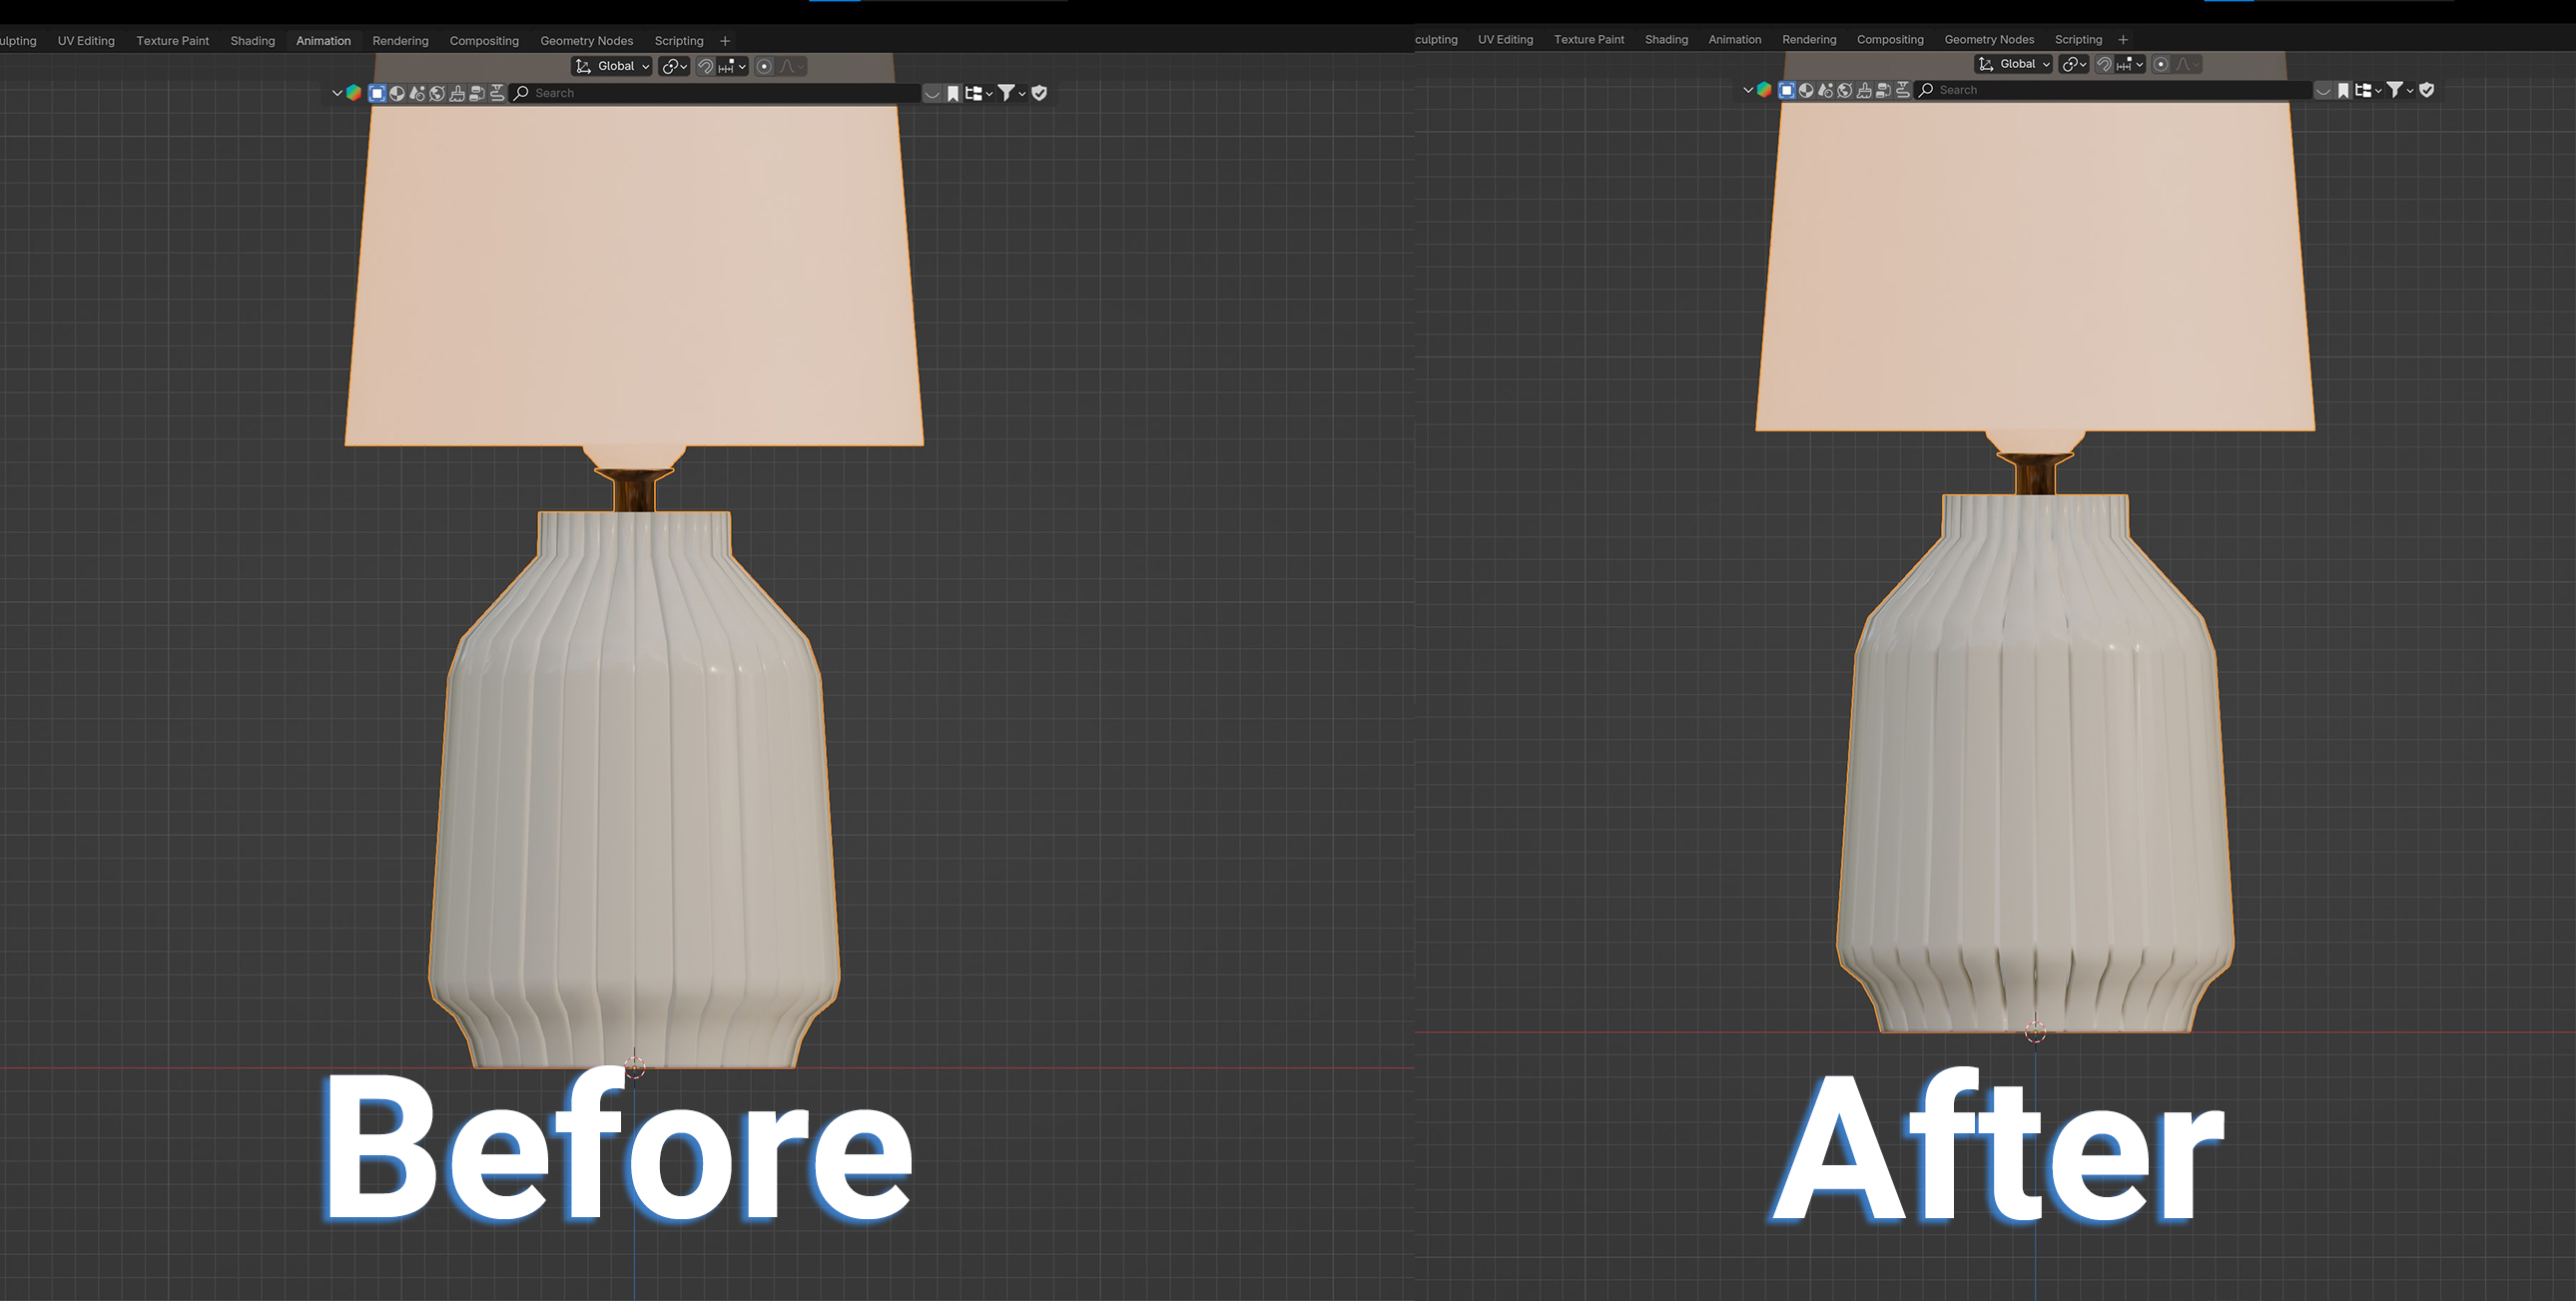
Tada! Now we got it back to the way the developers probably initially had it before they exported it. And now you can make your changes much easier!
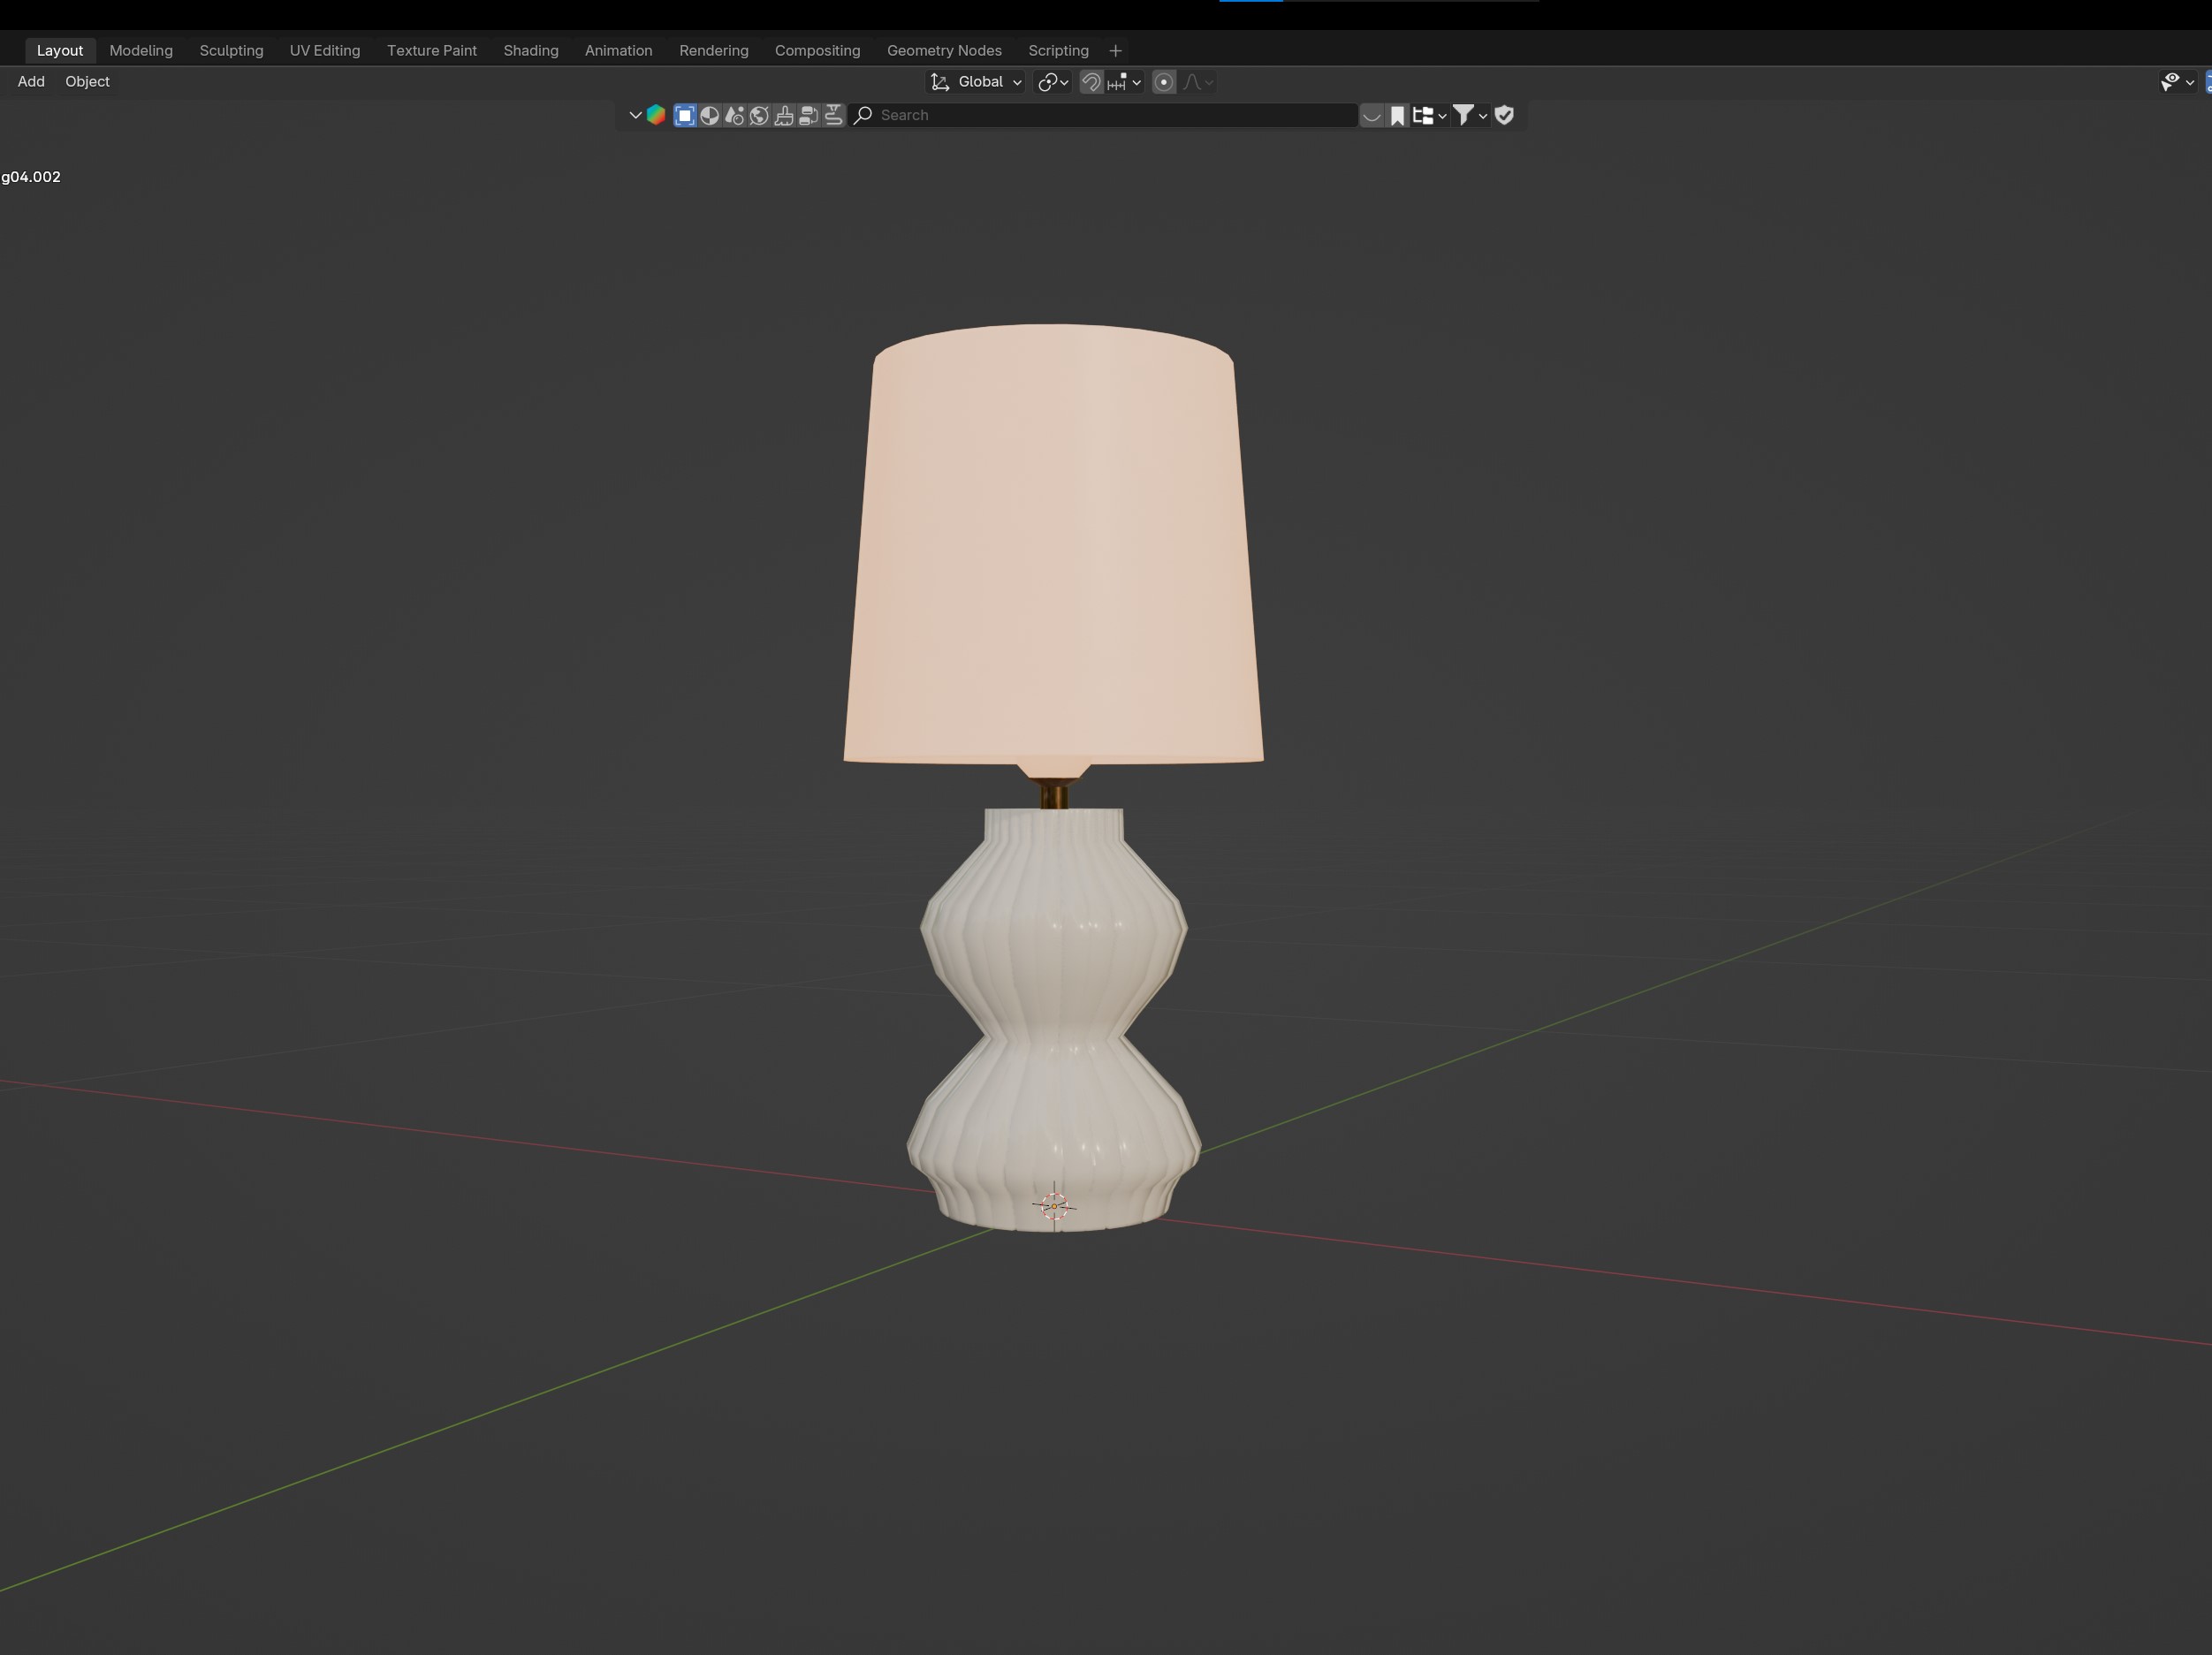
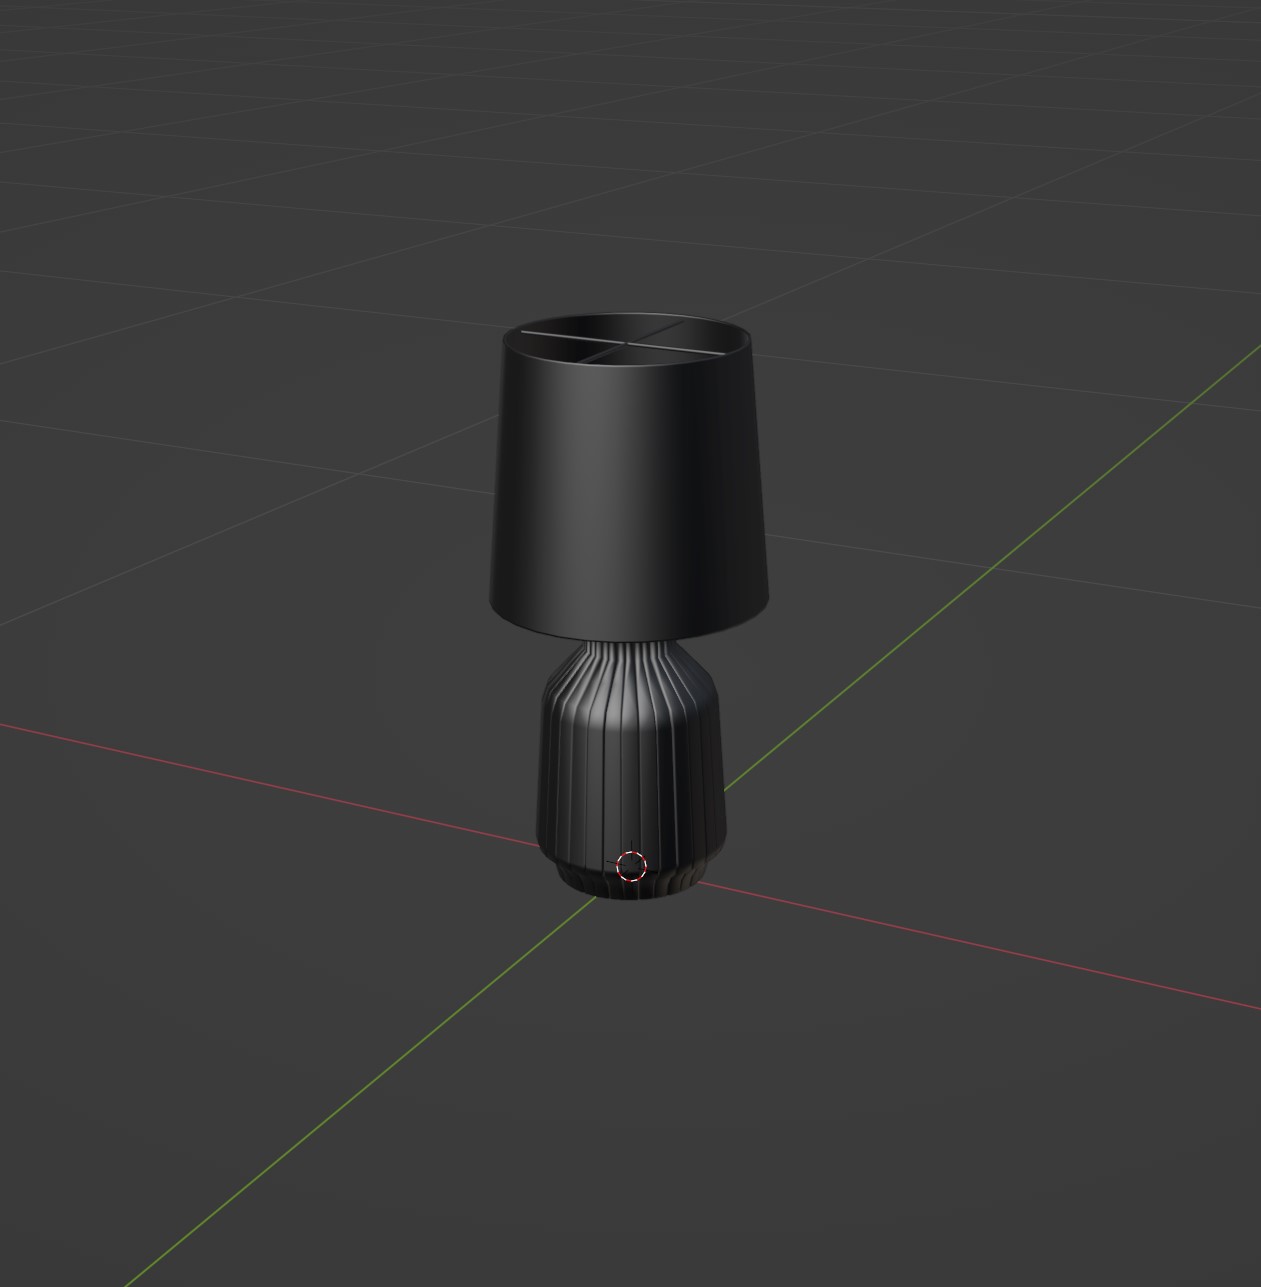
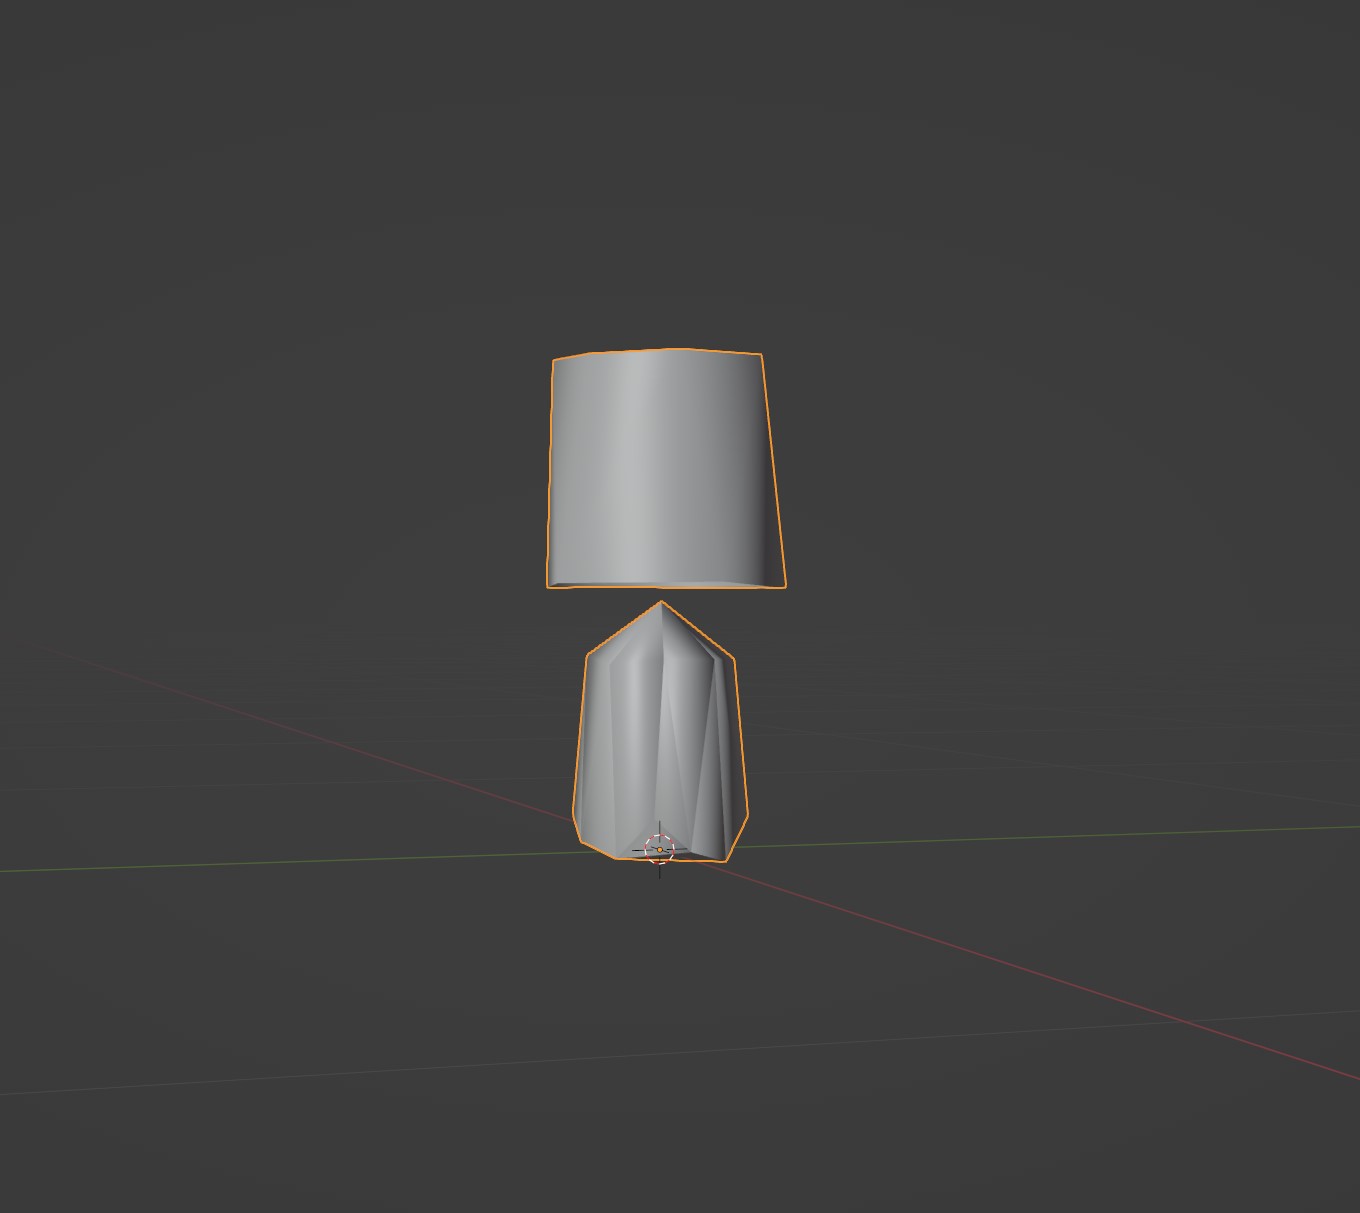
And here is my mesh edit! :)
Exporting our mesh
Okay, this is the point where you probably want to save a blender backup, in case you ever need to edit your CC as we're making our item game-ready again! That means triangulating and splitting edges again (it was fun while it lasted :( ).
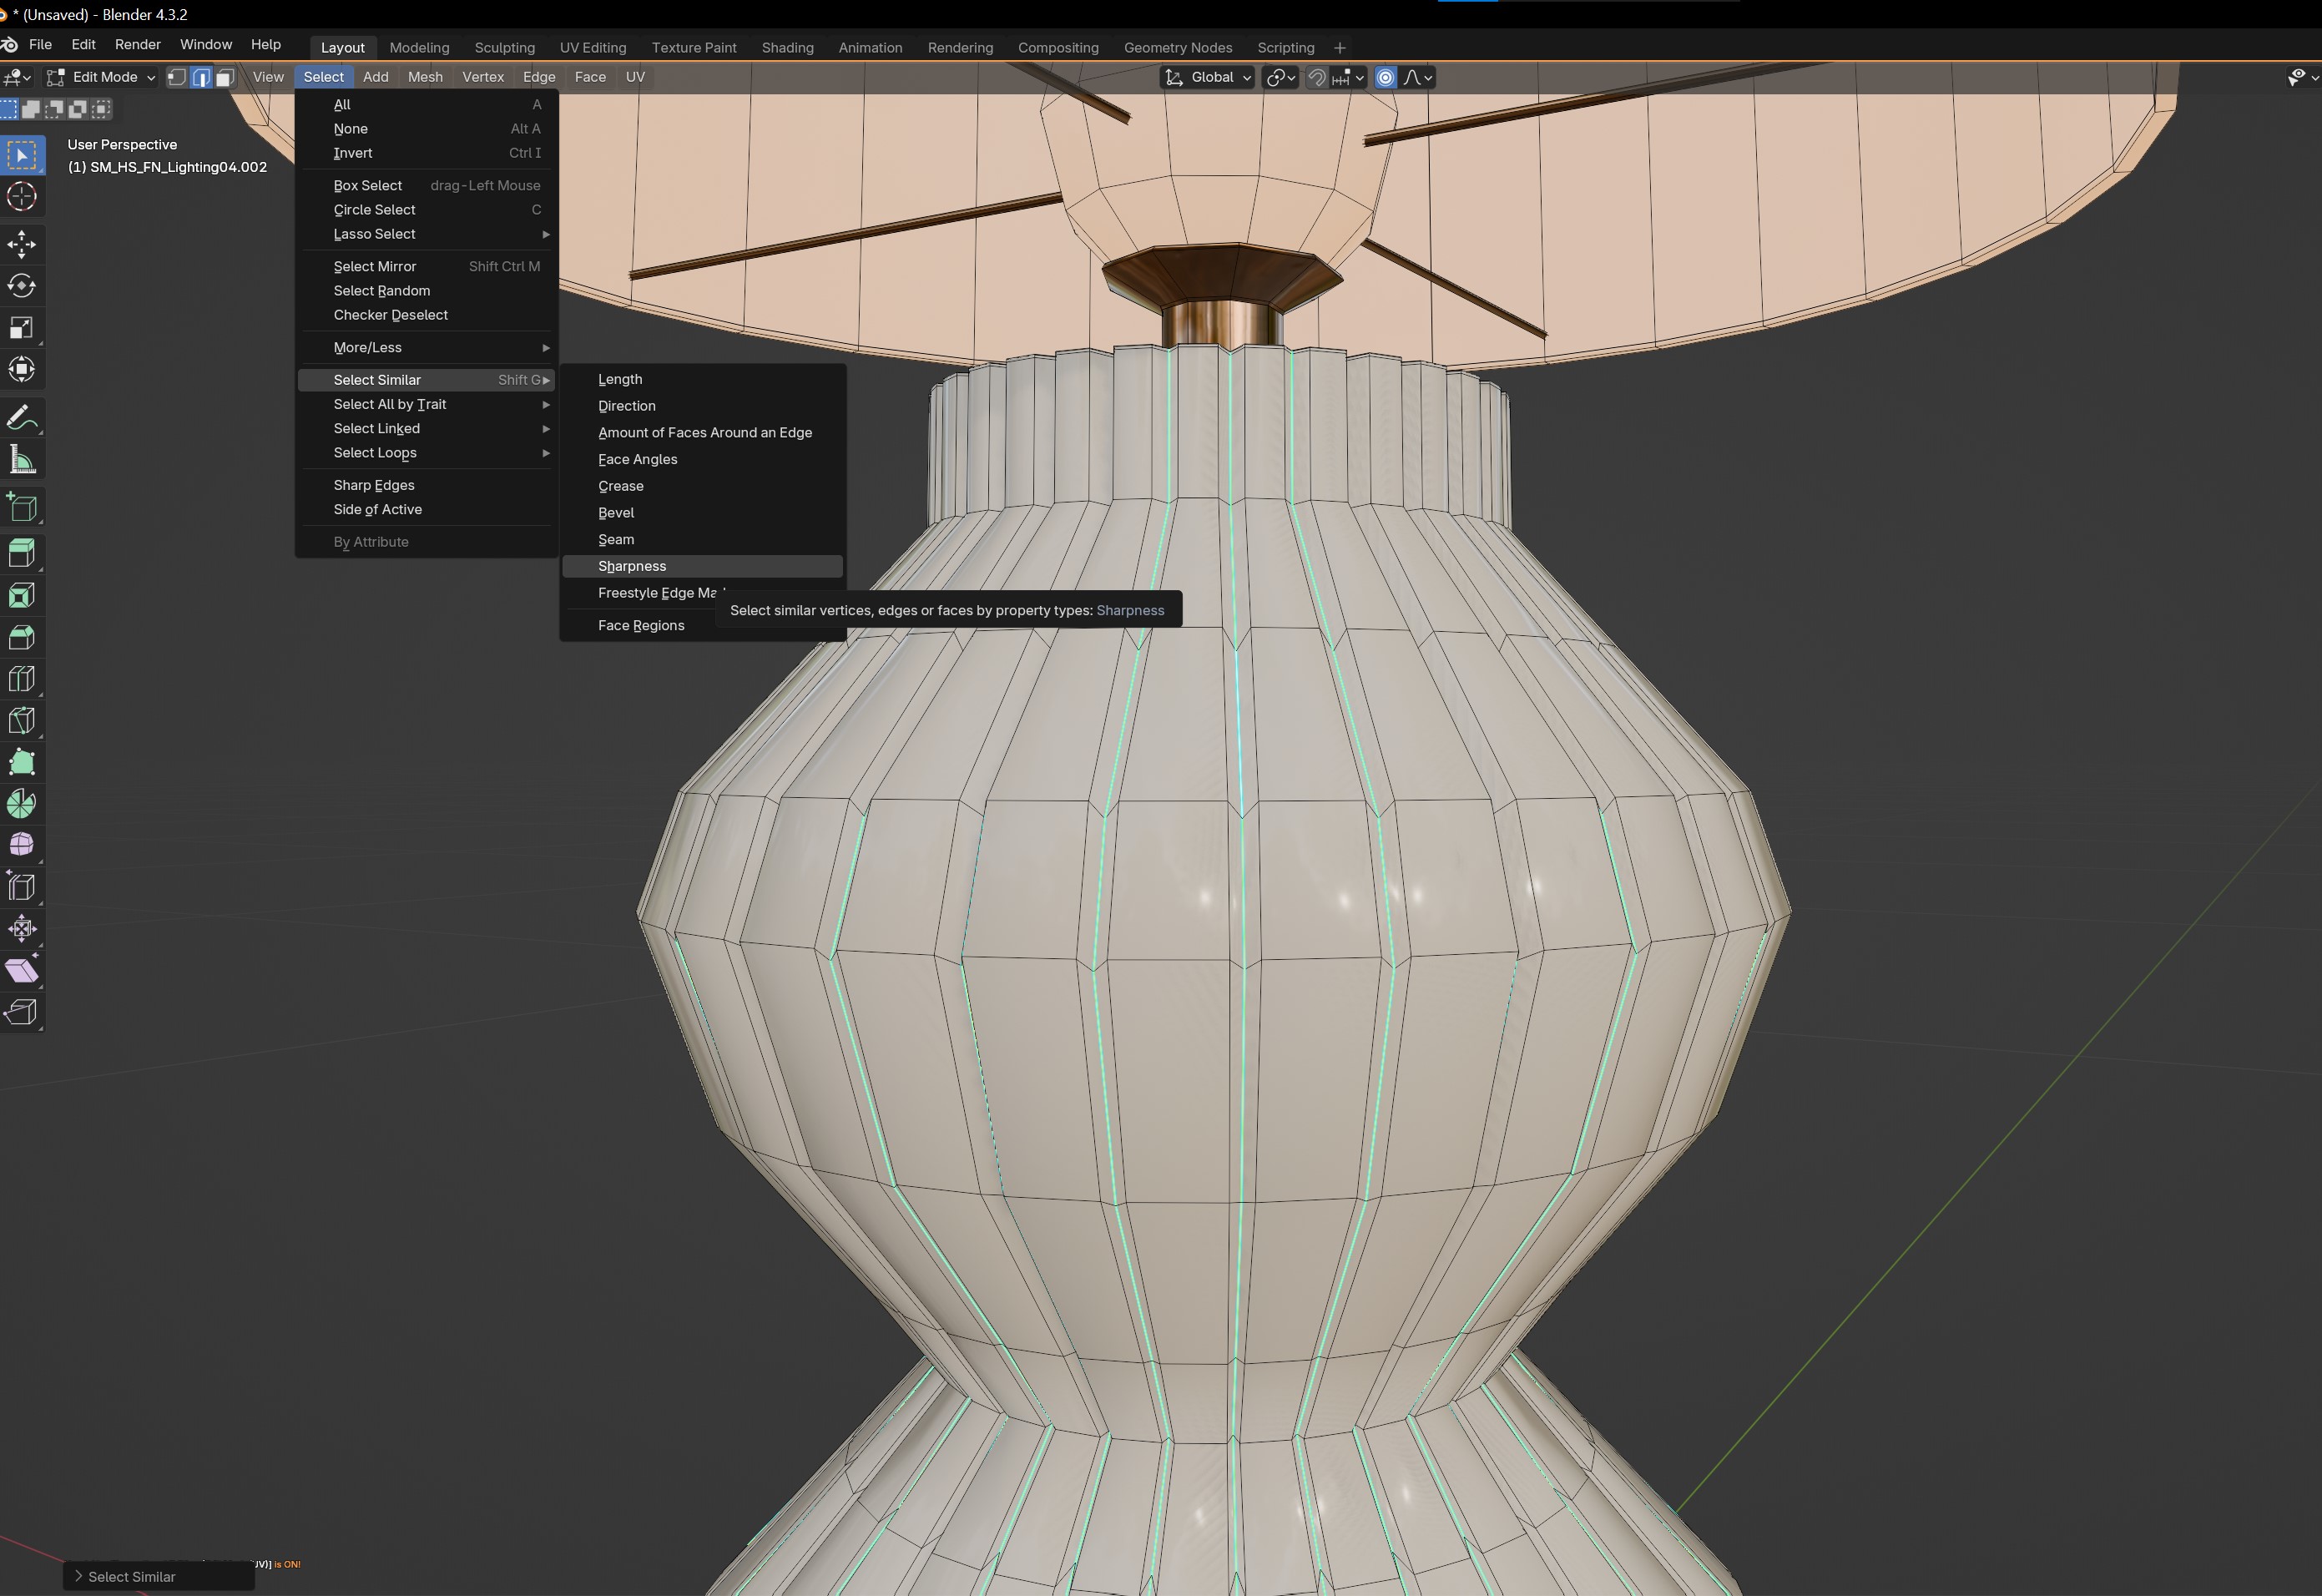
Select one of the Blue lines.
Go to "Select > Select Similar > Sharpness"
Right+Click on the mesh (make sure you've selected the edges!) and click " Edge Split"
And done :) Triangulation we can fix once we export it!
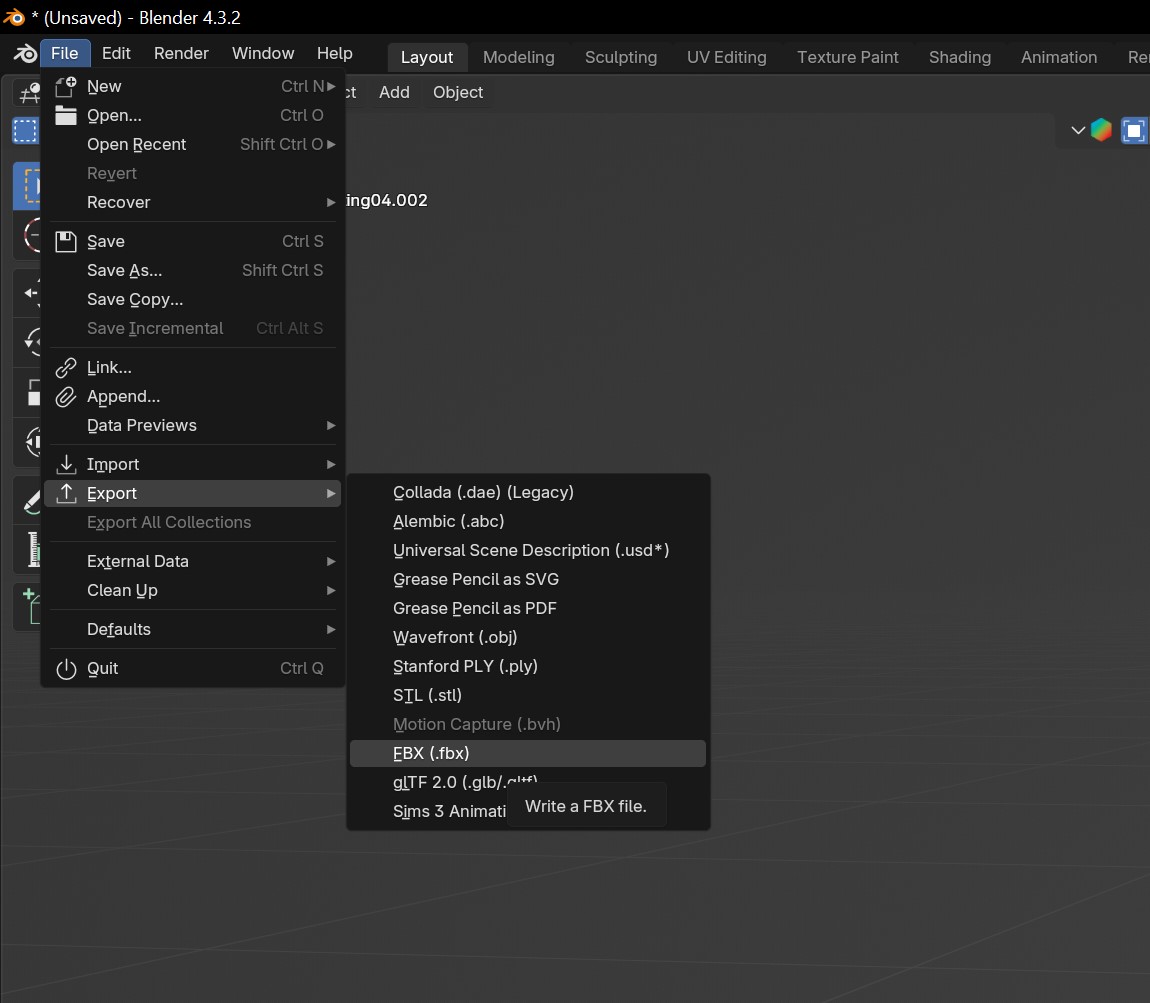
Now we go to "File > Export > FBX".
The reason we're going for FBX is because we are no longer concerned about seeing the material, since the modkit already takes care of this! 😉 It's also what the ModKit Docs recommend too.
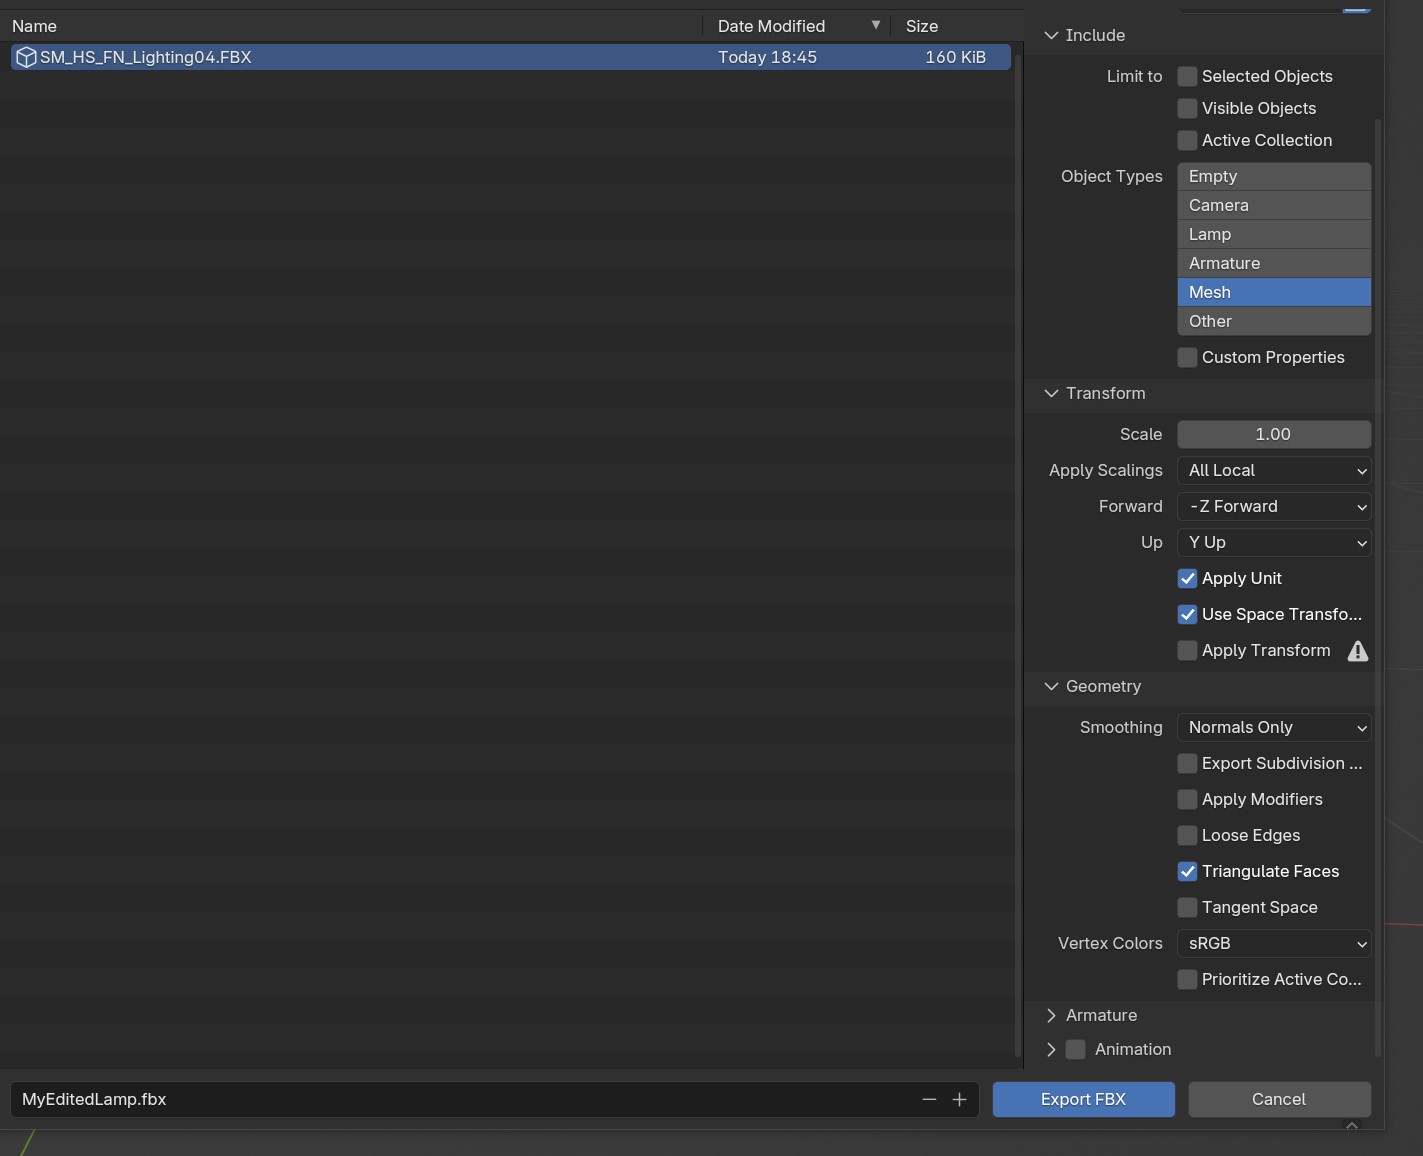
When exporting your InZOI mesh as FBX:
Make sure...
- Only "Mesh" is selected.
- Tick "Triangulate Faces" under the "geometry" tab (this might be closed by default, so you'll need to uncollapse it 😉)
- Untick "Animations" as our mesh is, well, static :p (and we're not packing any animations with it either)
- Tick "Apply Modifiers". Otherwise it will complain about not being able to find "Smoothing groups".
Importing our Mesh into the ModKit:
Yay! now that we have successfully exported out mesh... Let's import it into ModKit!

The downside is... our mesh is now gray :(
Now, what the documentation let's you believe, is that we need to make a new material. Except, the only thing we've changed is the mesh, and nothing about the UV map or the textures. So, to help optimization and for the game not having to decompile millions of new materials, we simply reuse the one it came with! :)
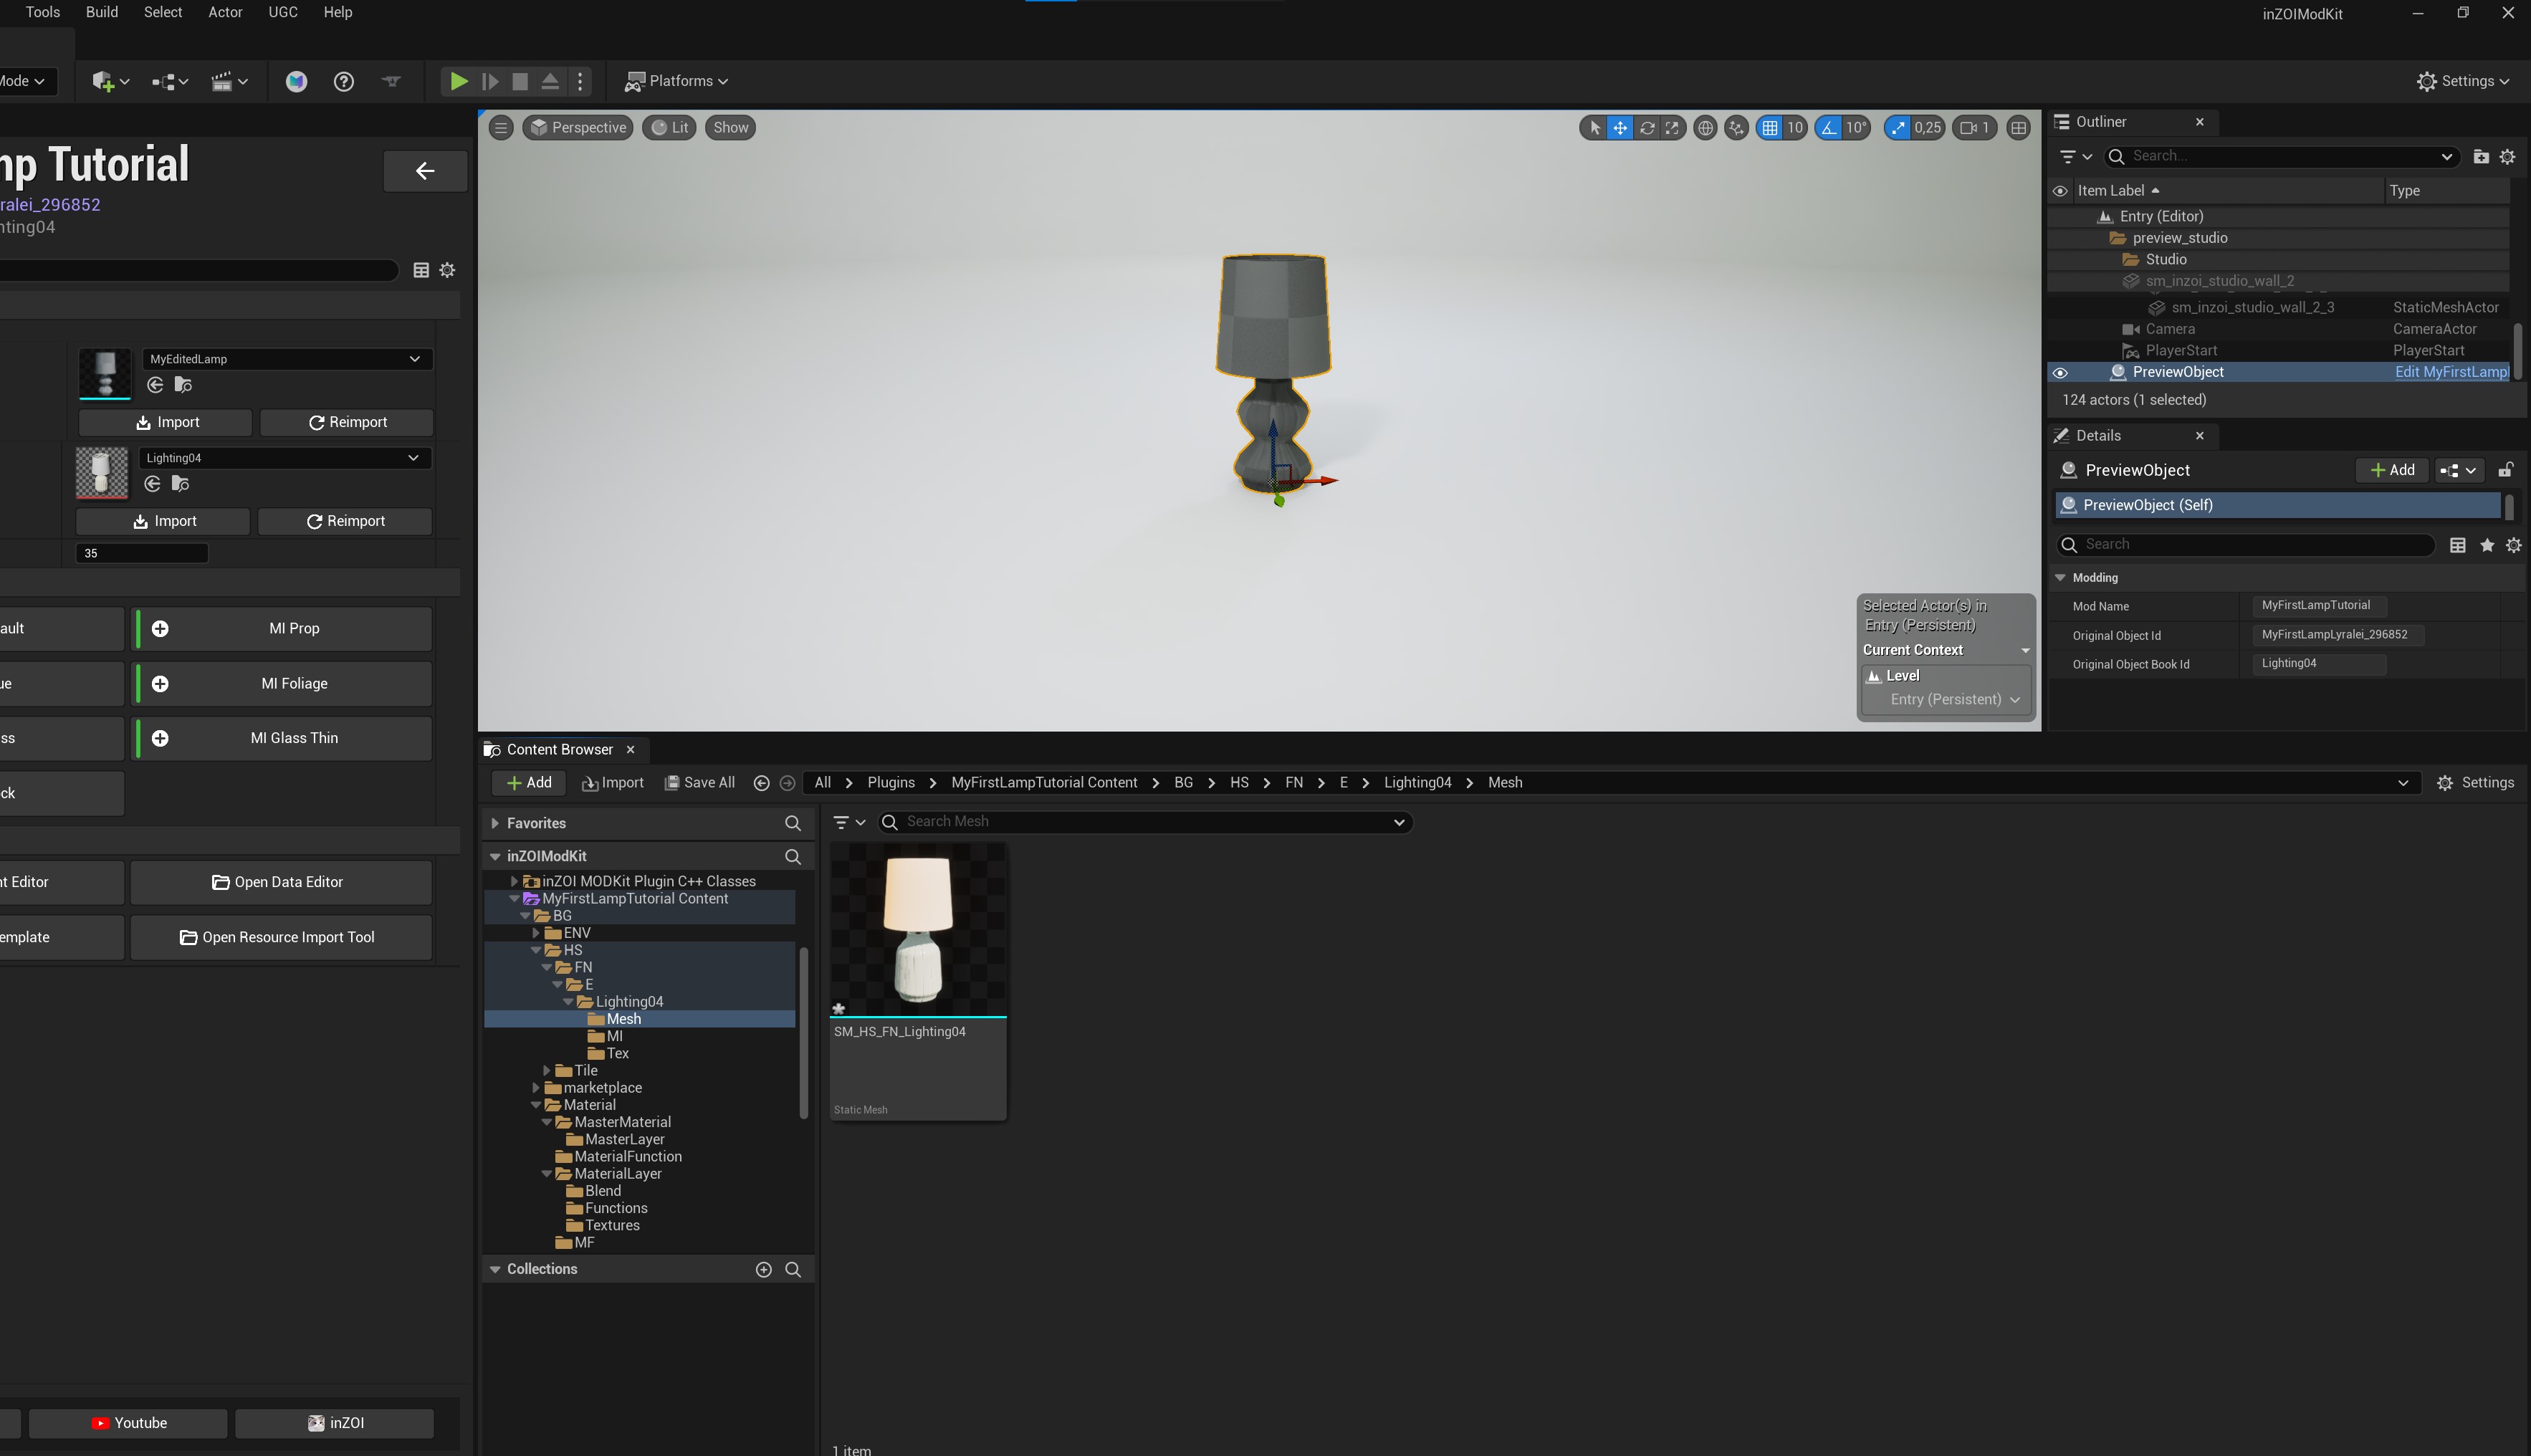
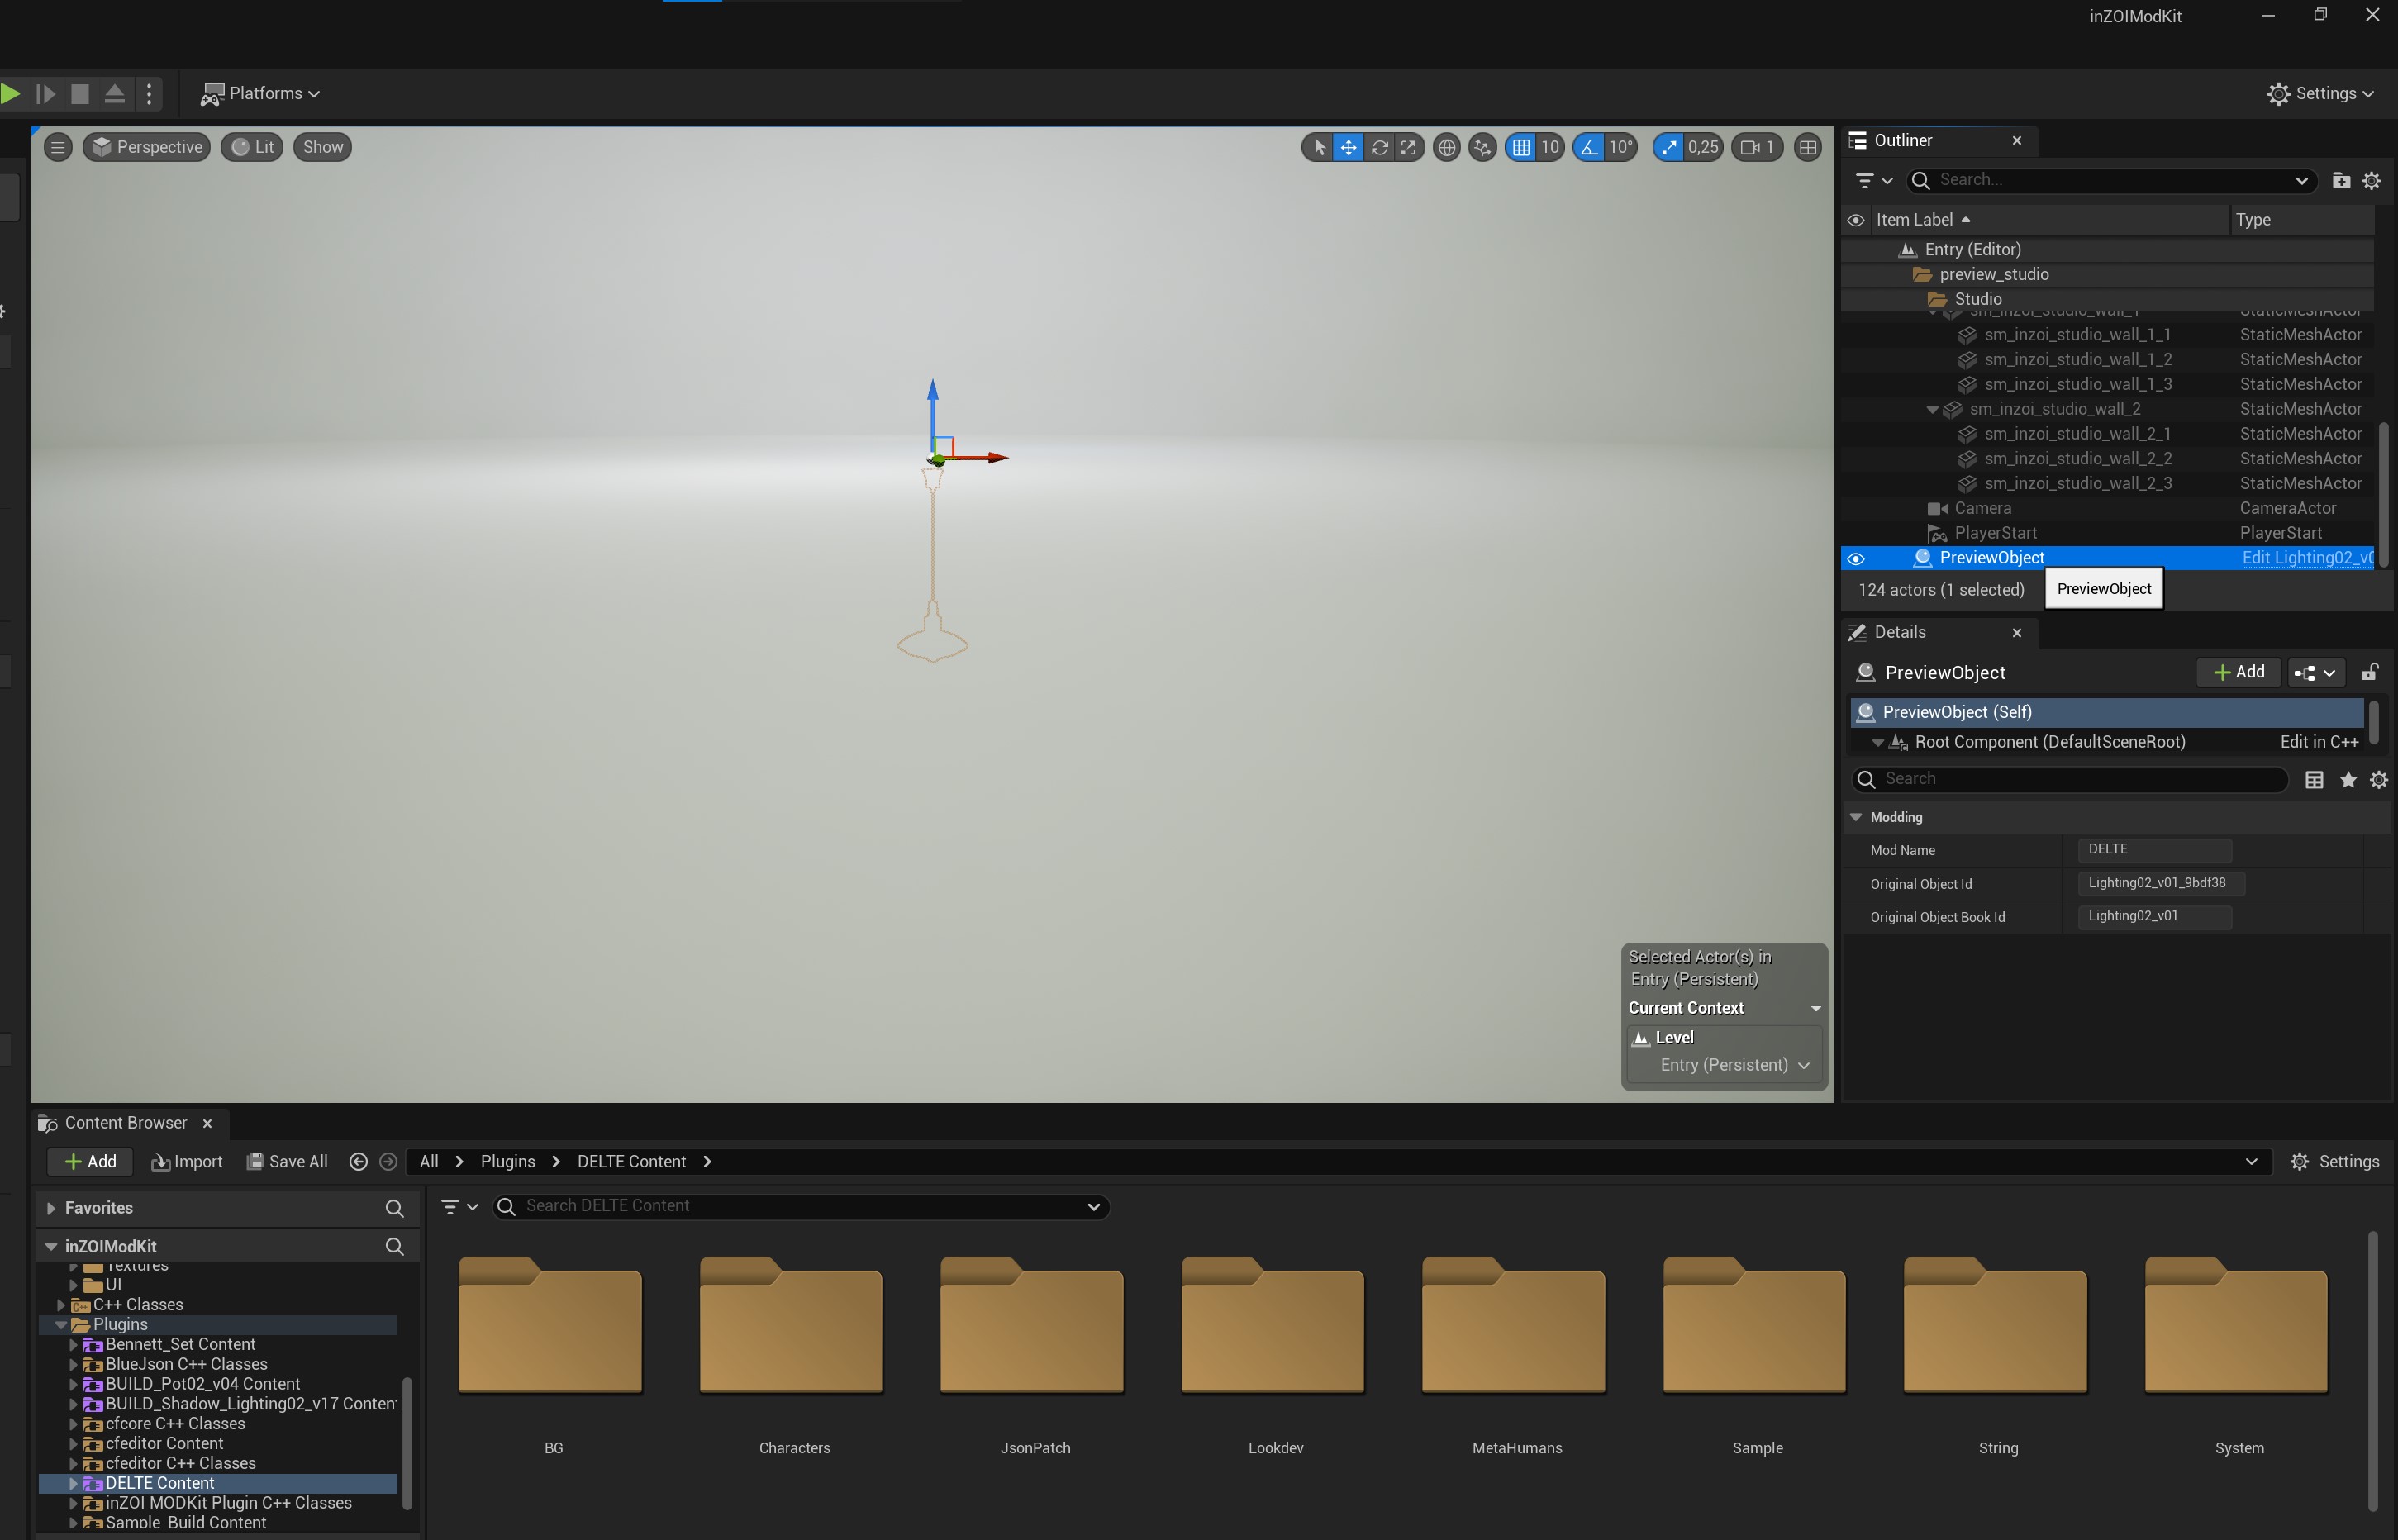
So to retrieve this back like in the picture, we want to:
- On the right hand side of the screen, we see a list of all sorts of items, but what we're looking for is "previewObject".
- Once found, click the blue text that's called "edit PreviewObject".
- Now wait for another screen to pop up.
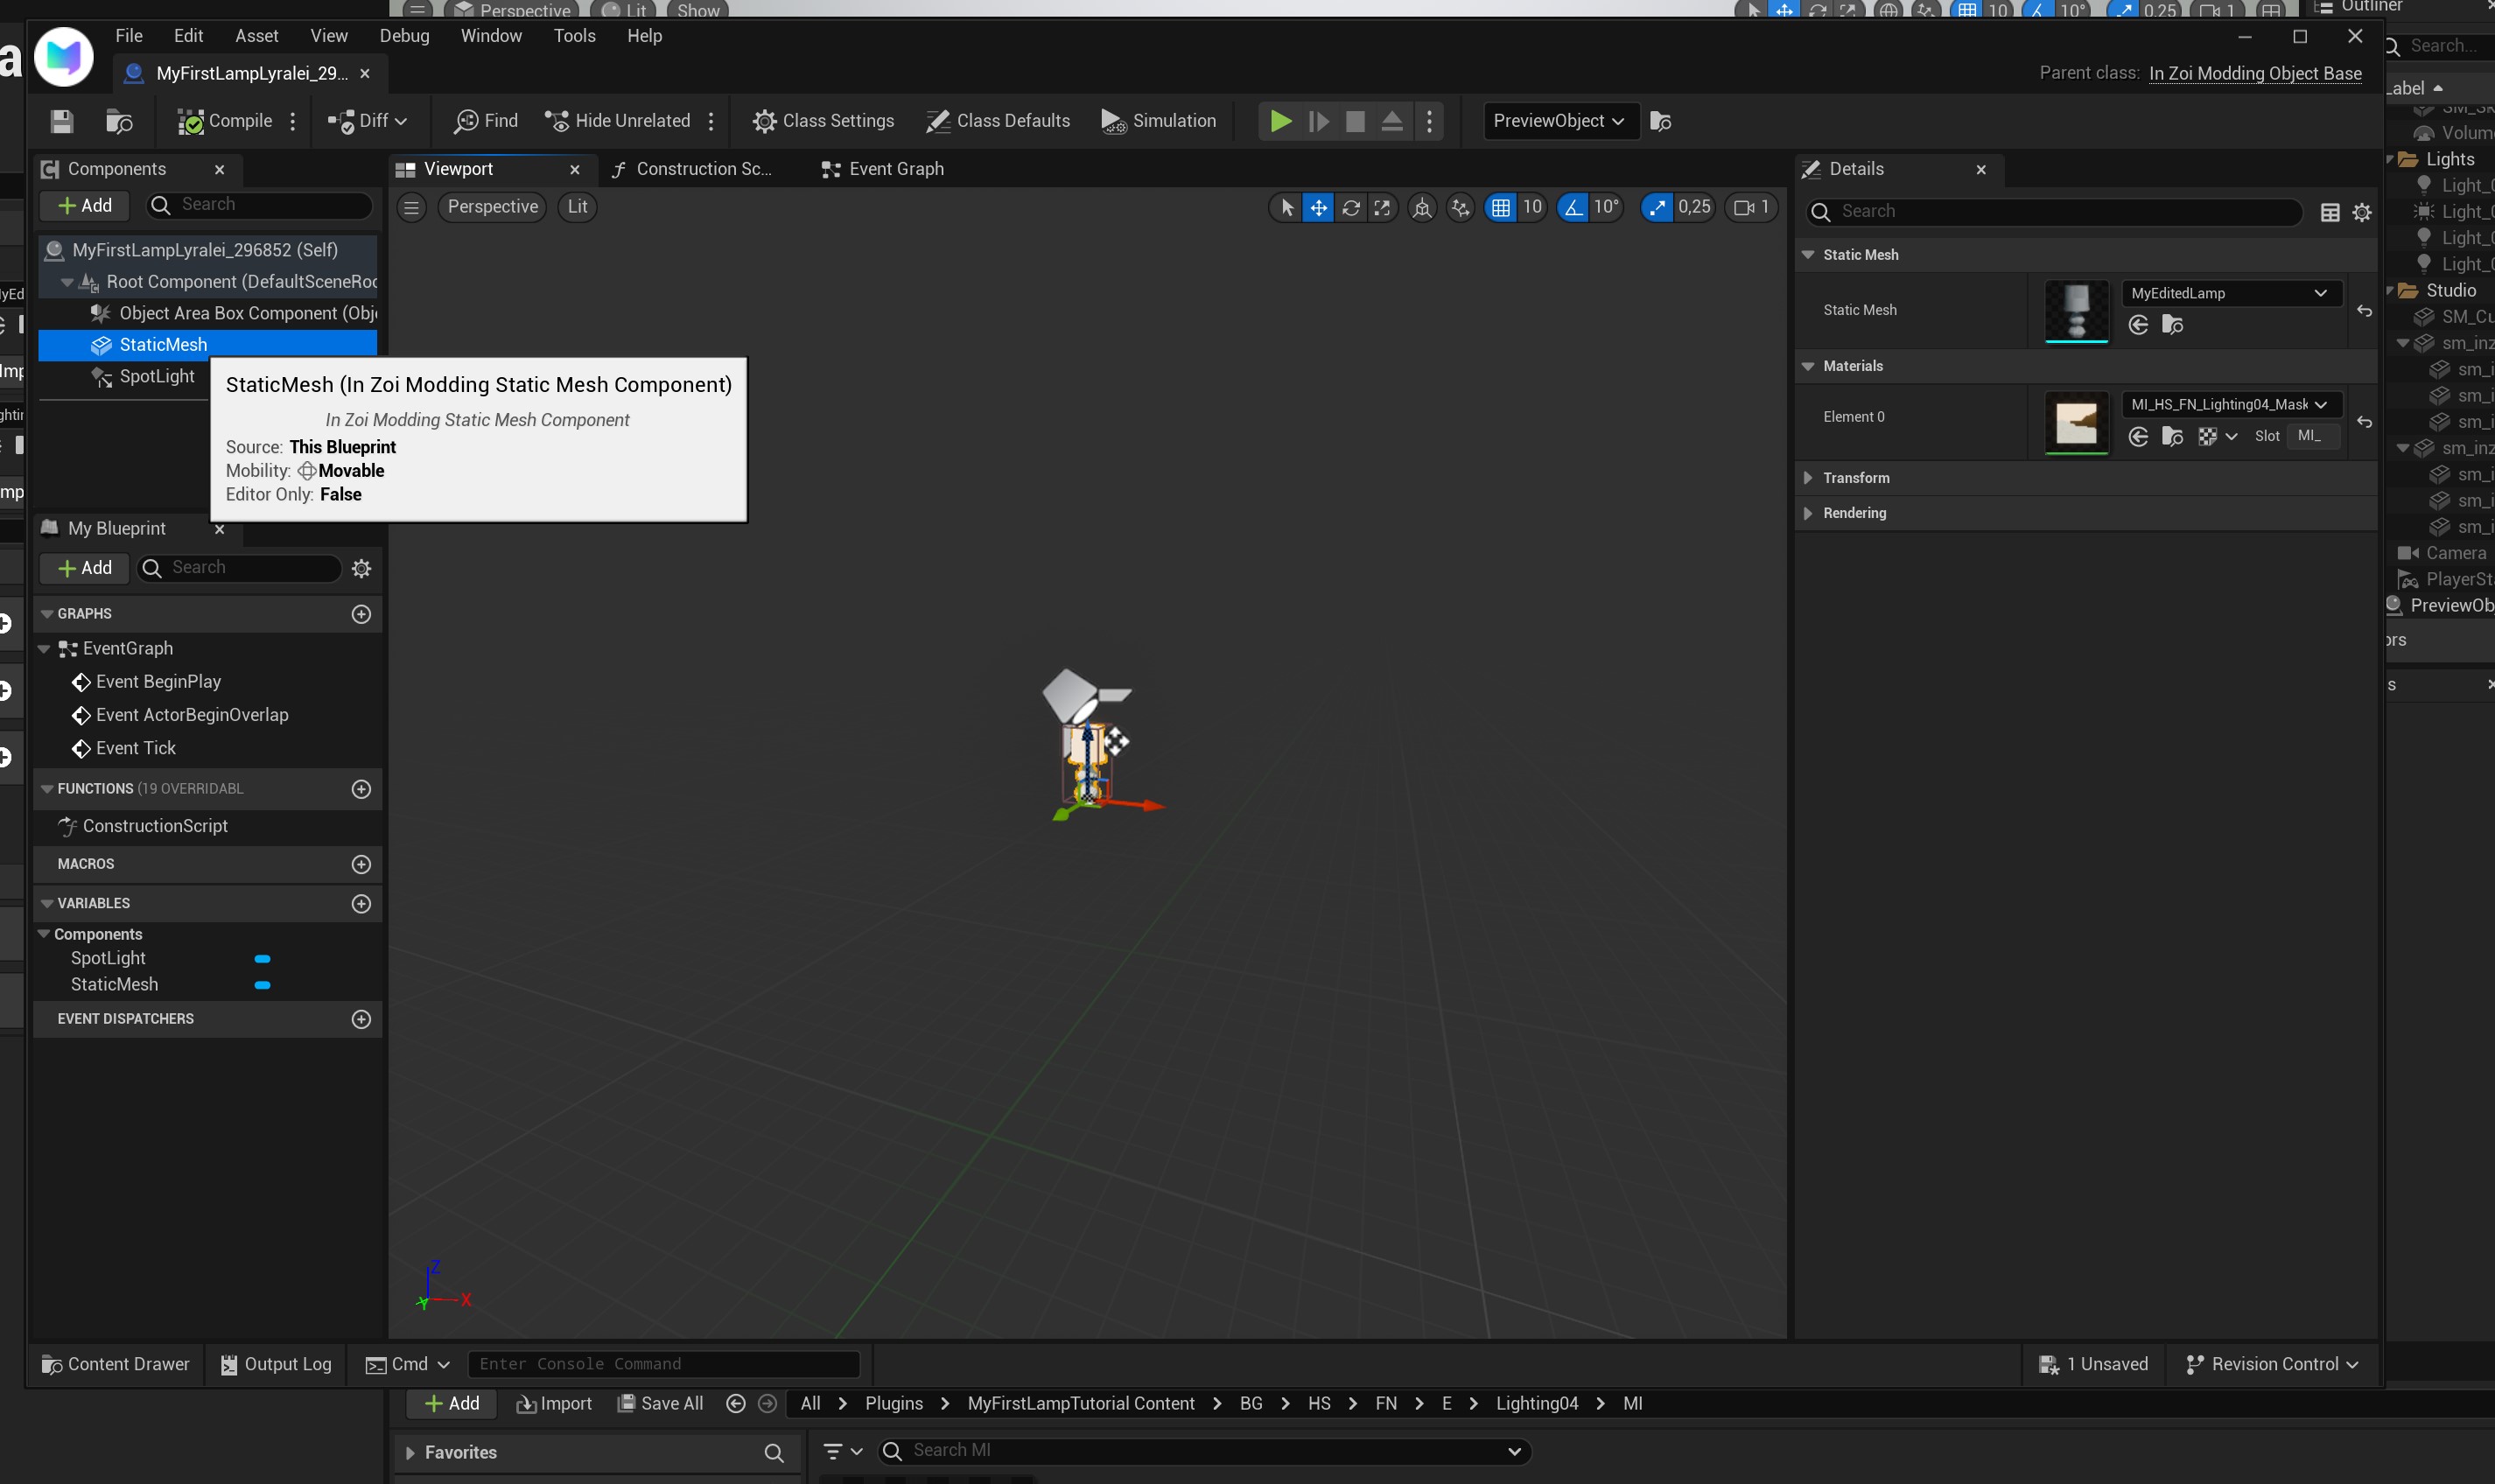
Now, this screen might be scary, but on the top left, we need to double click "StaticMesh".
Now, this is the important part. Remember how I said we needed to know the original unique Id chunk? This is where it comes in! Because our material uses exactly that beginning part!
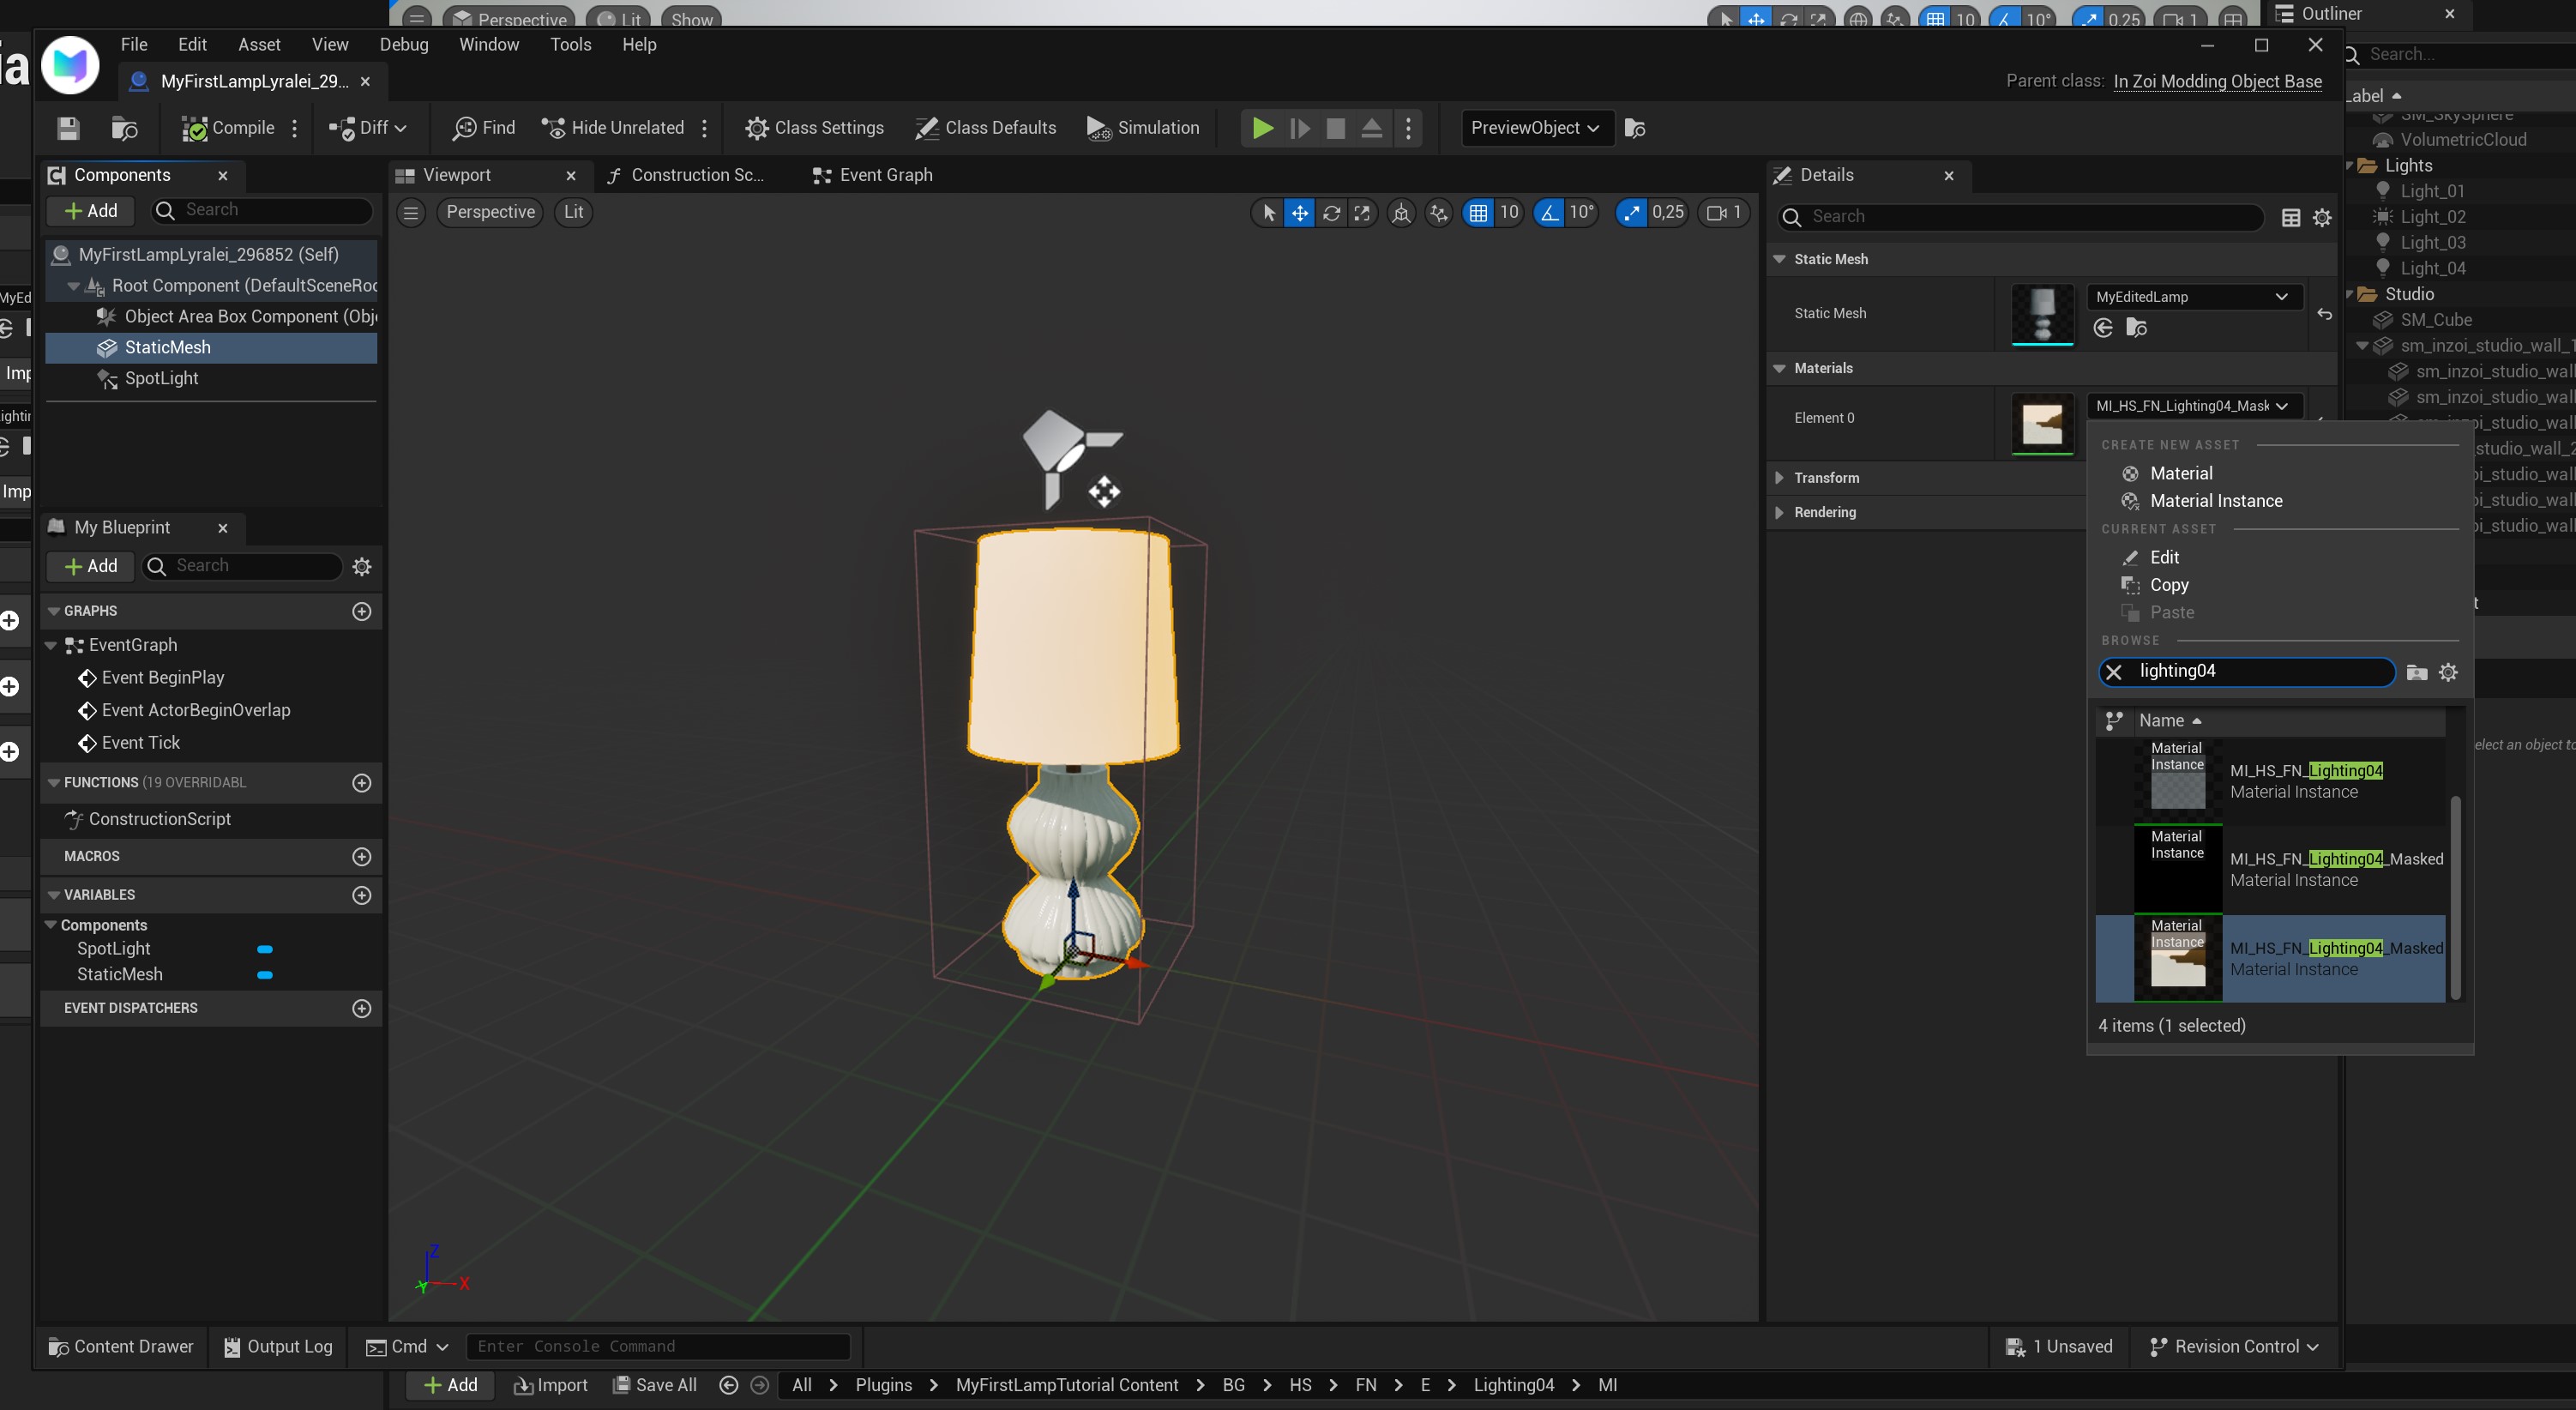
Locate the Material section, and click on the dropdown of where it currently says something like "WorldGridMap"
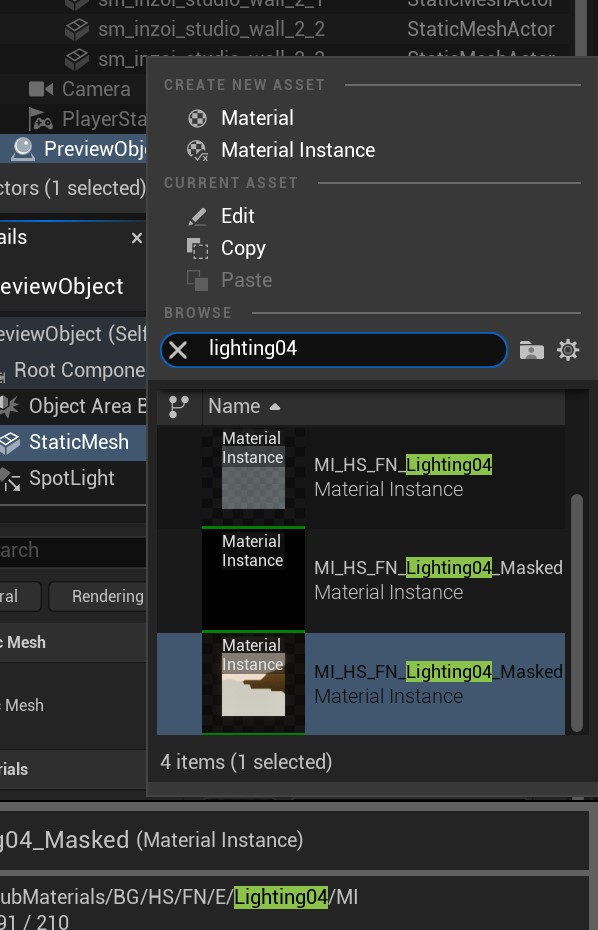
Cool! So now, we want to make sure to select the material ending with _Masked at the end! Masked in this case means that our object will stay recolourable, as a "mask" is exactly that! :)
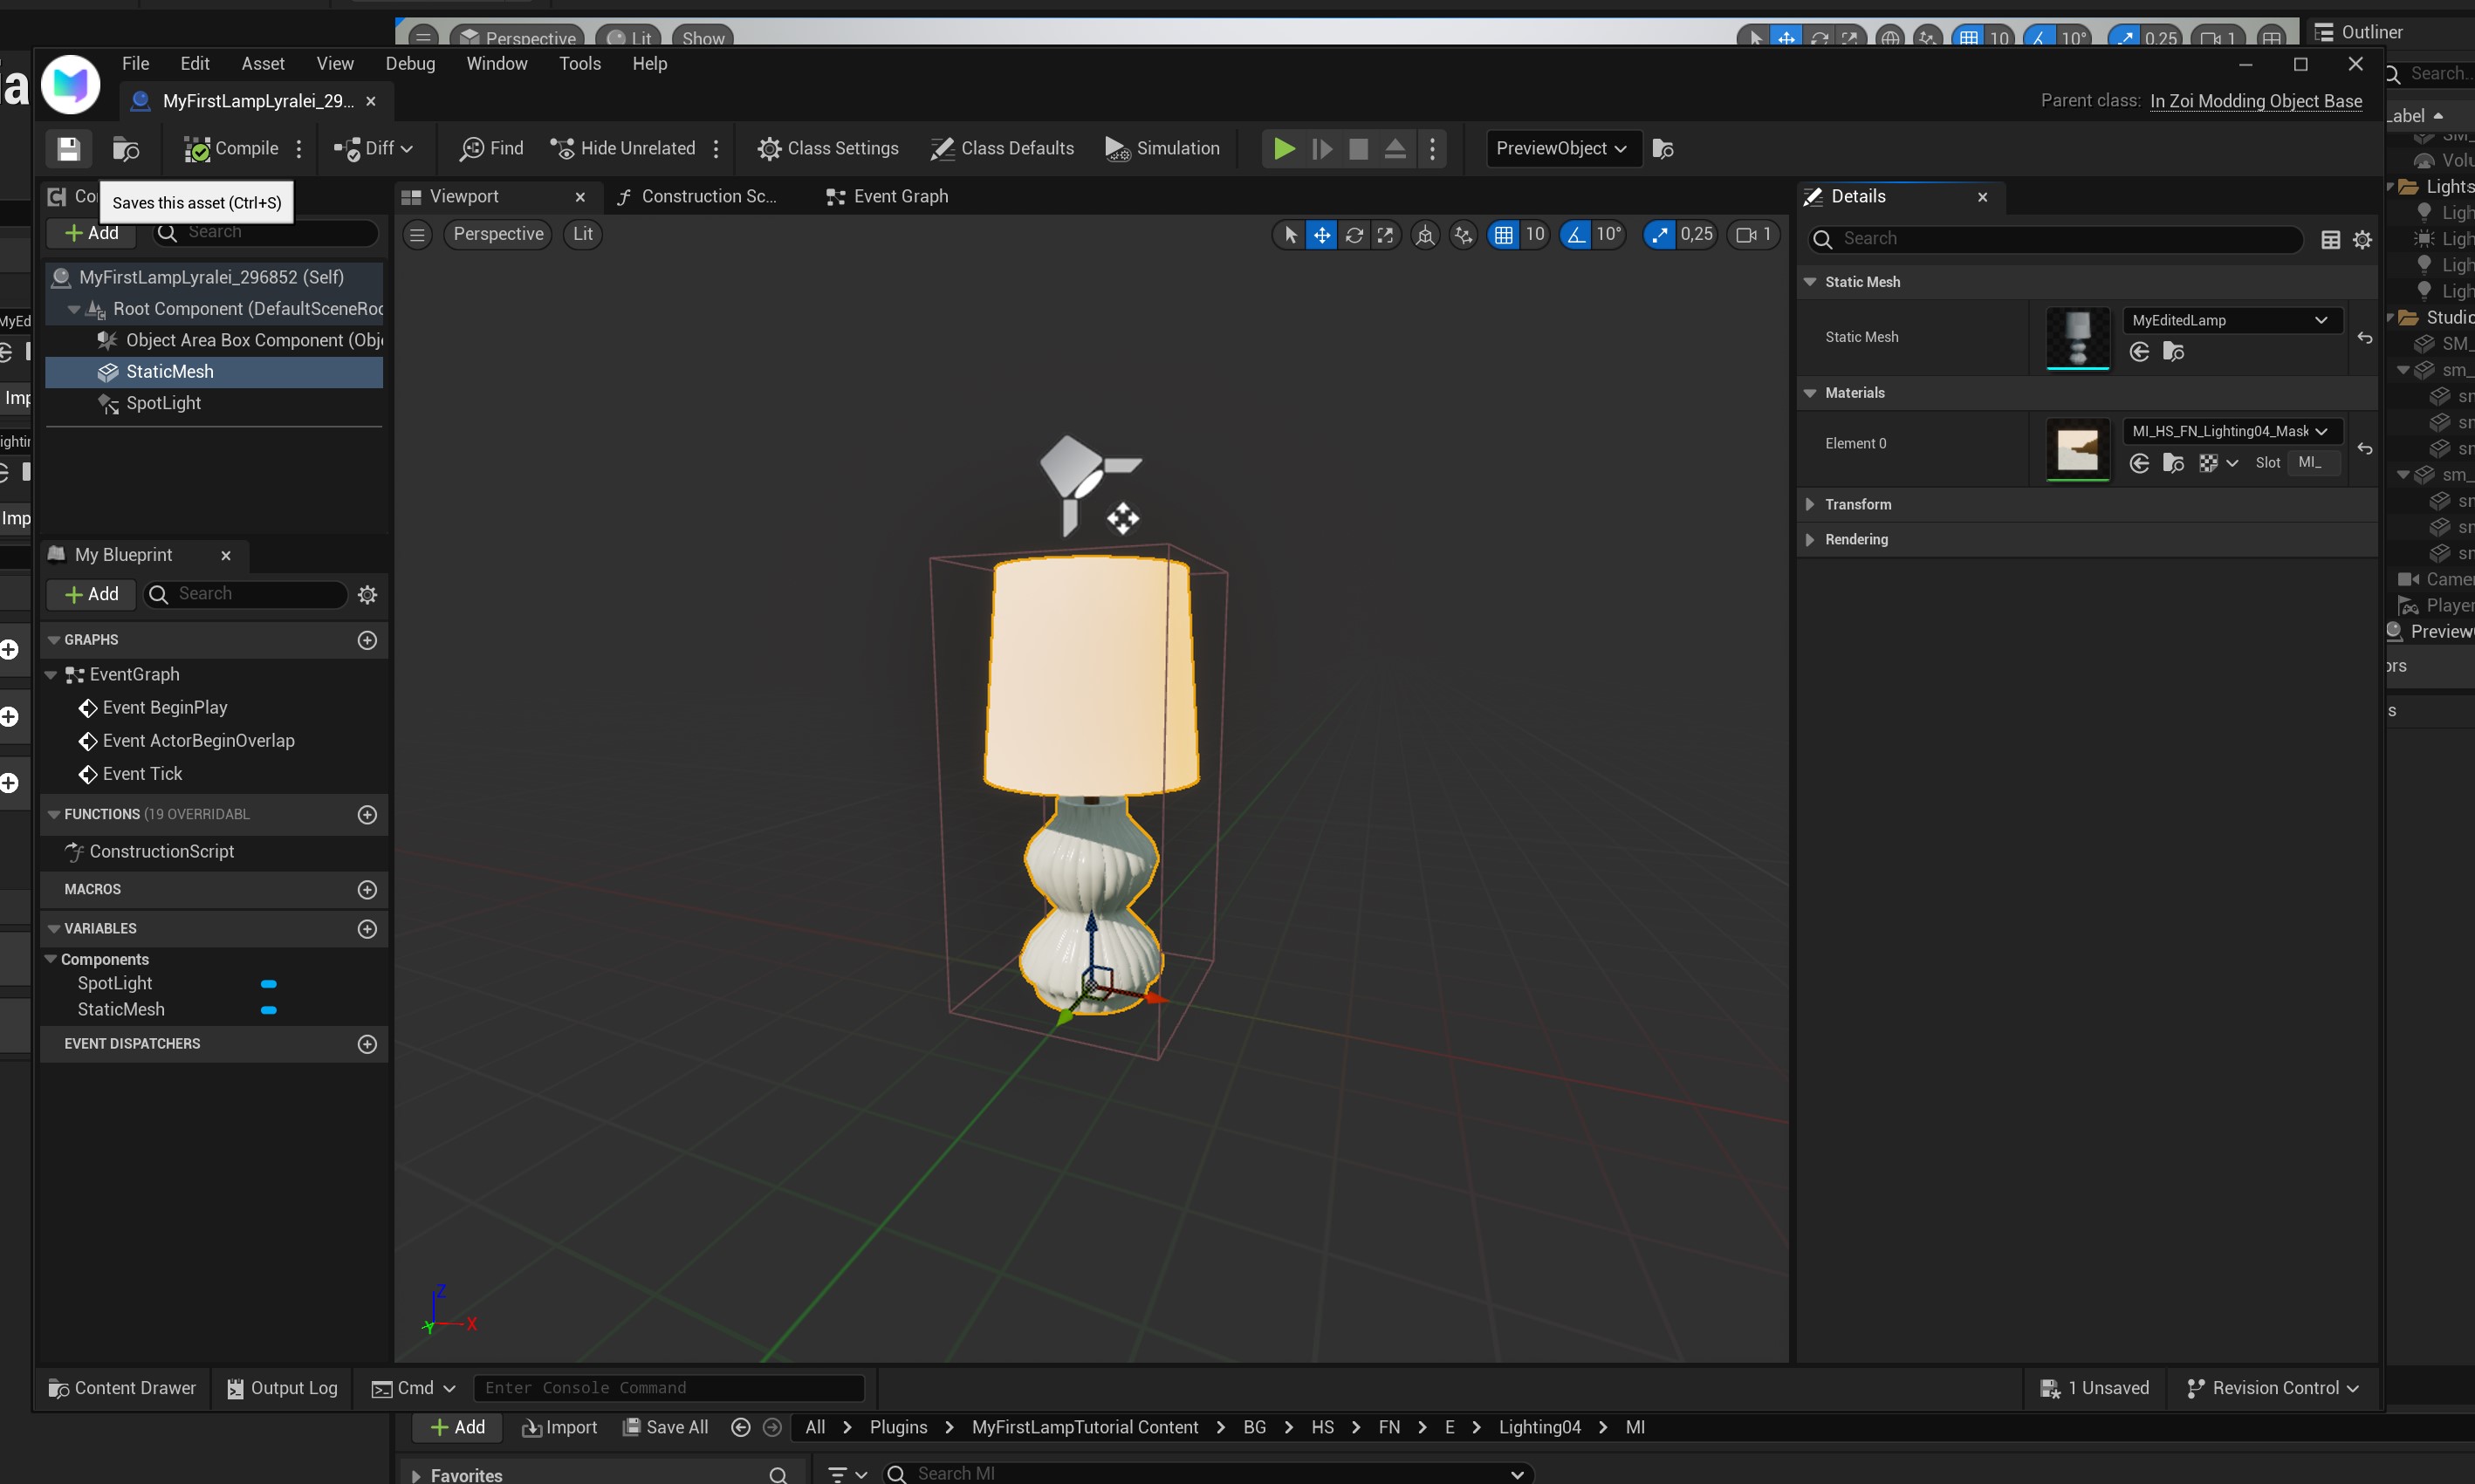
Now that we're done with that, press the floppy disk (save) on the top right.
Close the window.

And now you should be seeing the same texture for your mesh, wooh!
Exporting your mod locally
Now that we're done with our mod, we want to also make sure to test it first (and hopefully share our mod either here, on simblr.cc or some other place!)

First, press the big back button...
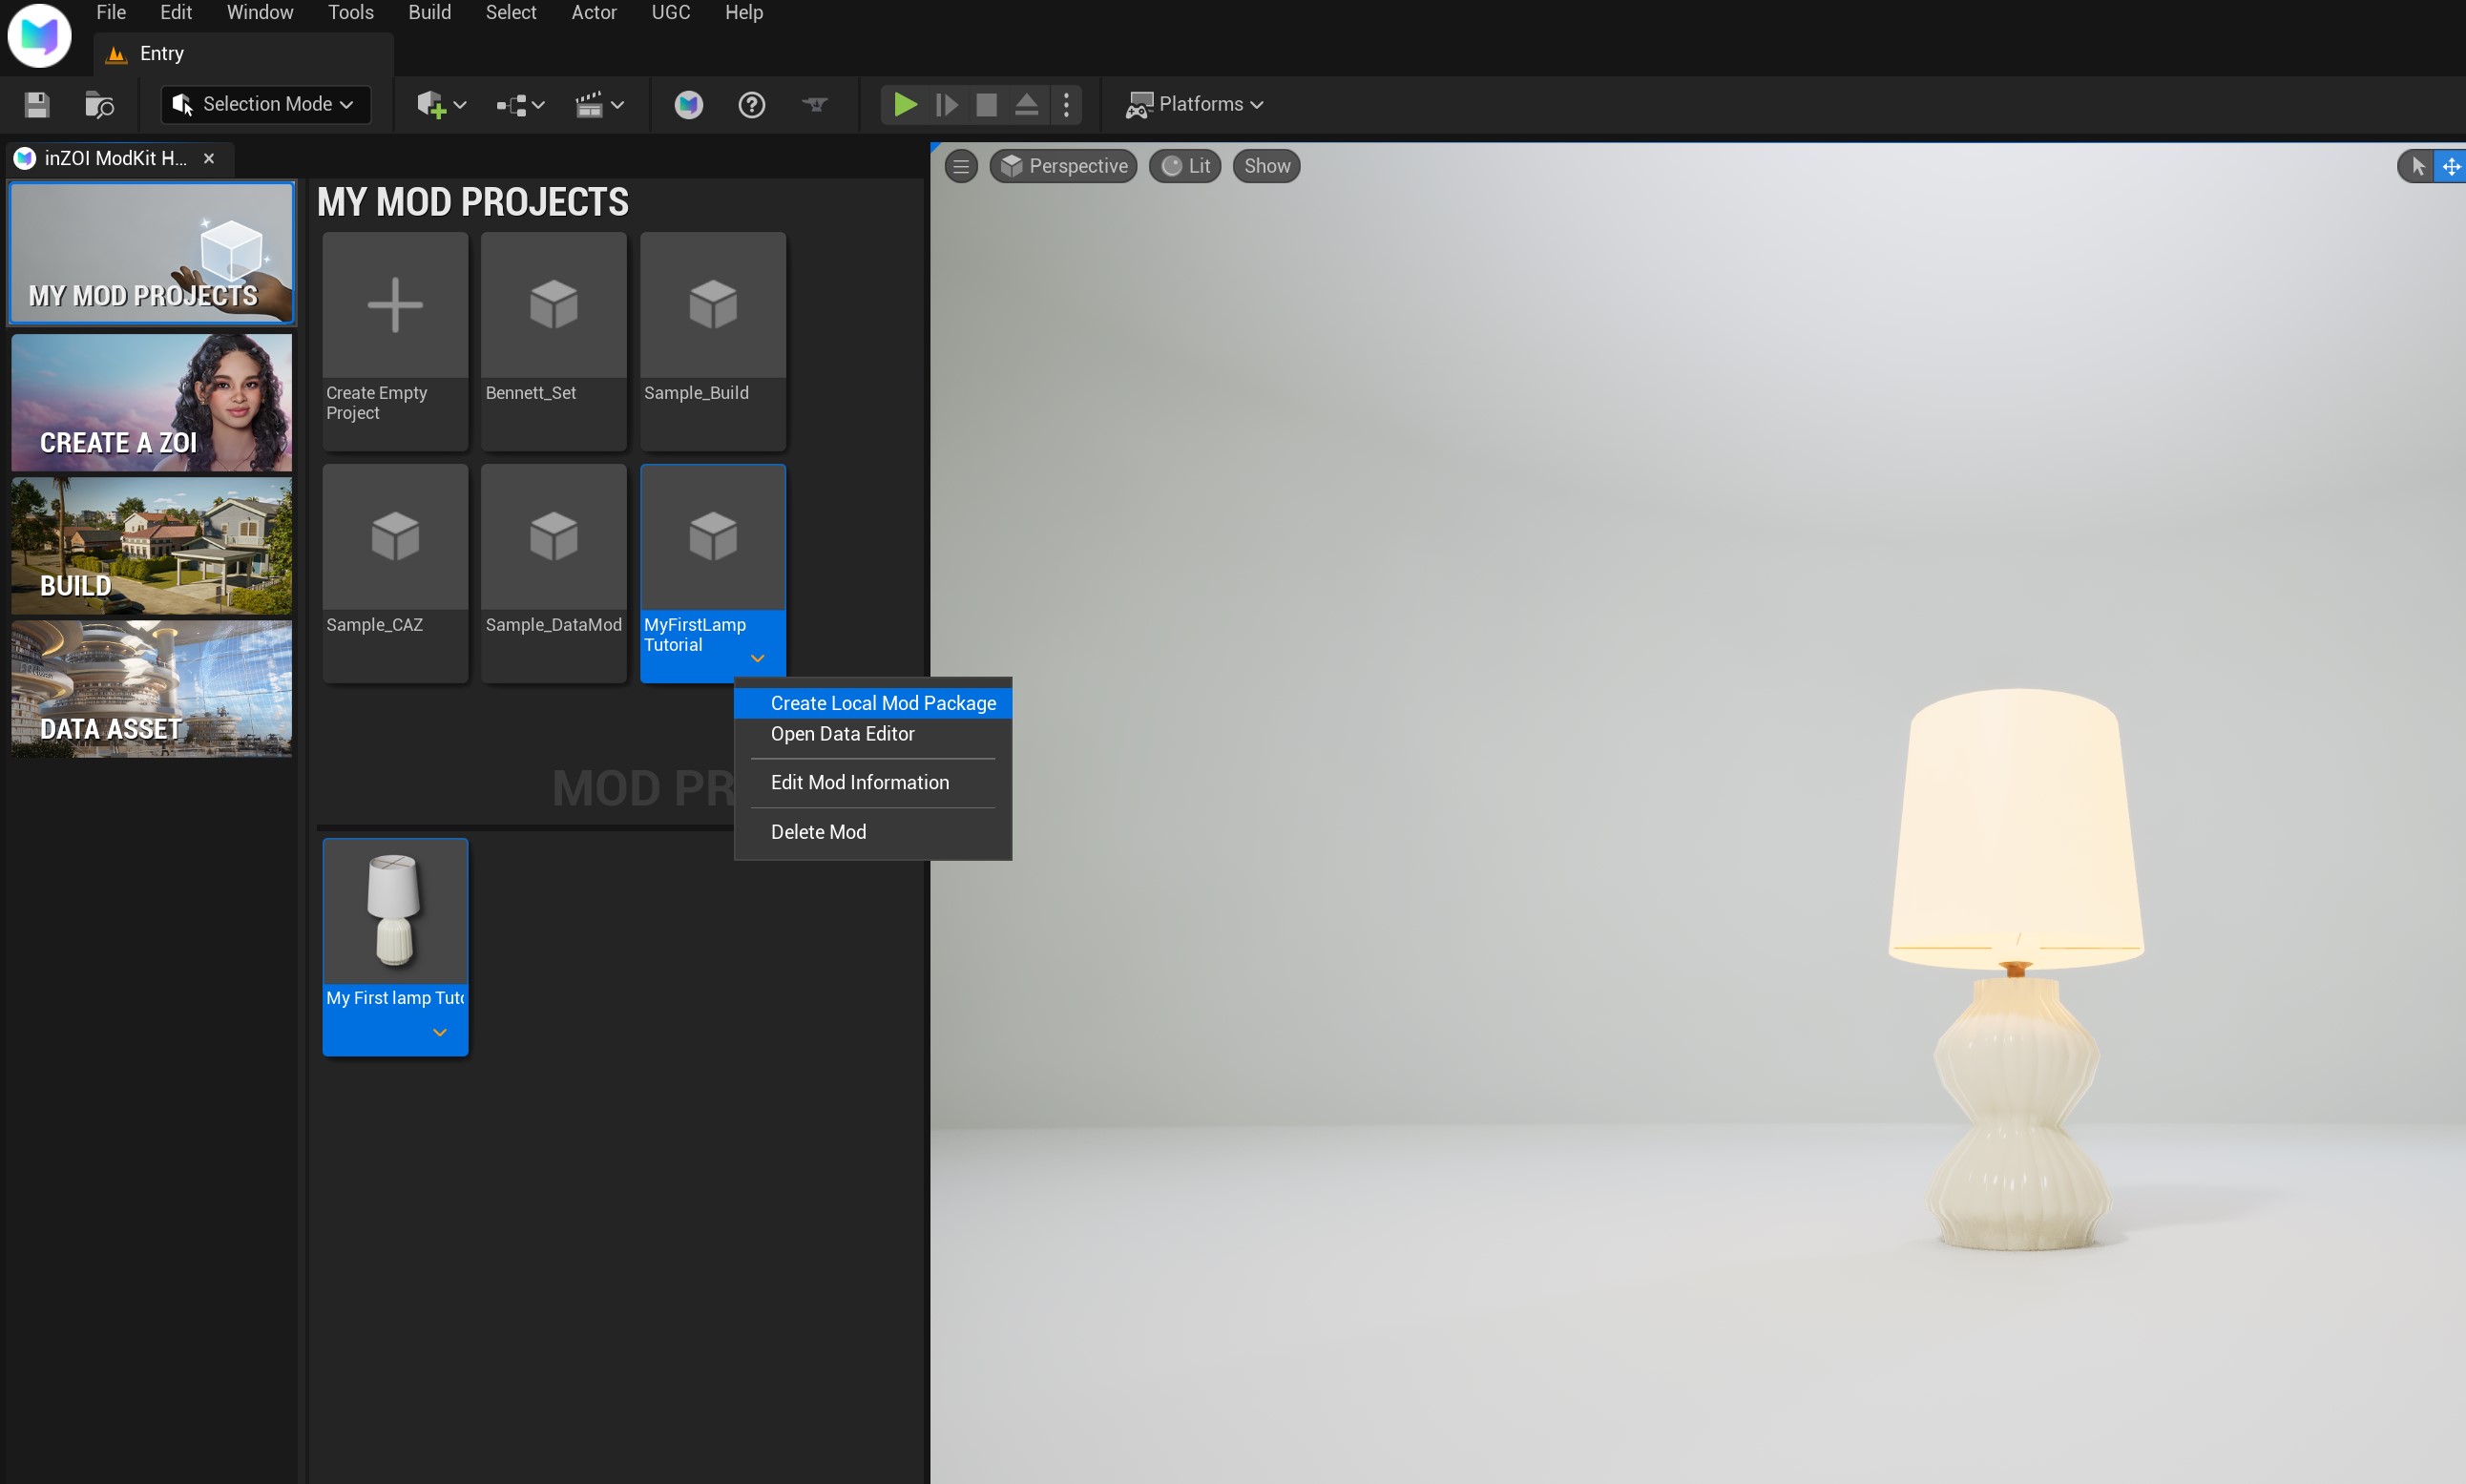
Then, right click on your mod project, and select "Create Local Mod Package"
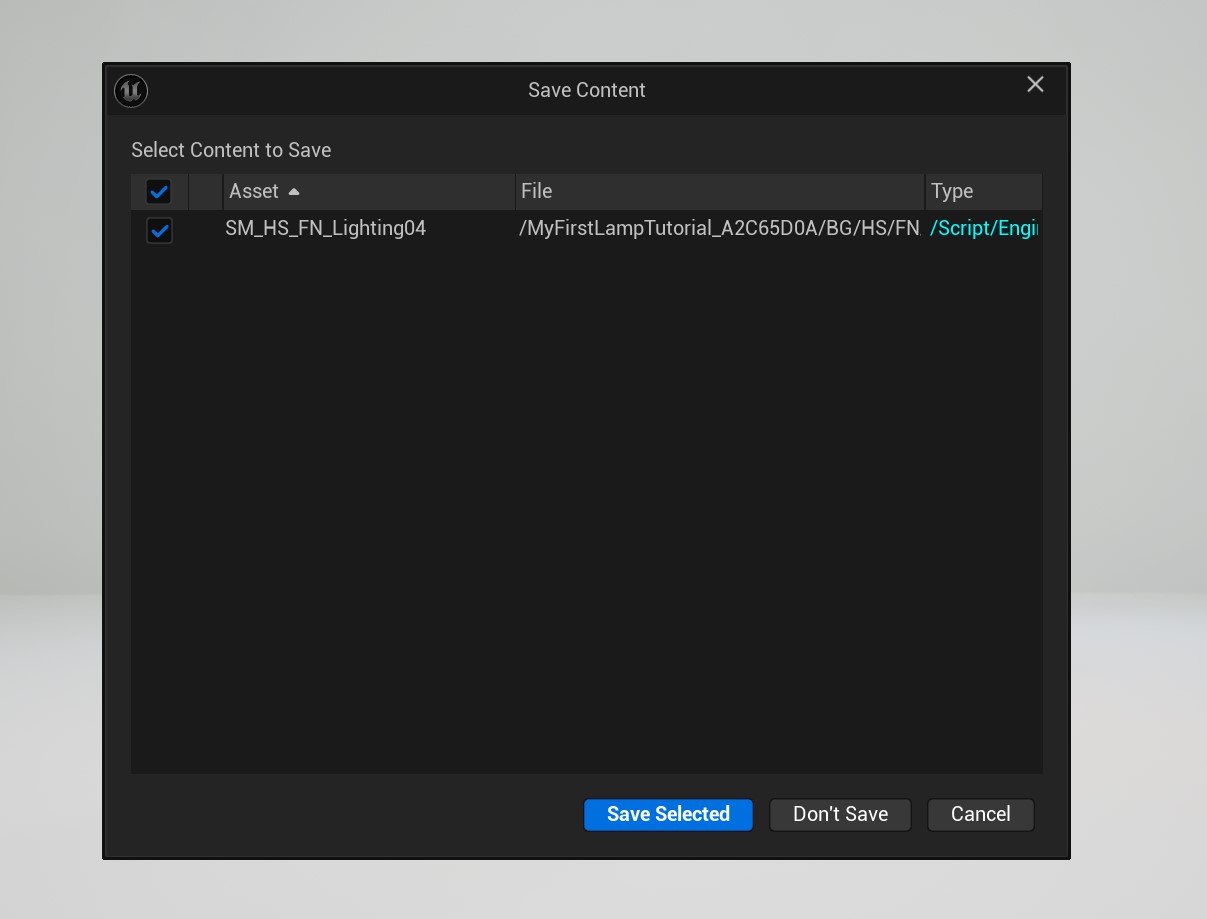
Then, as this window pops up, press "Save Selected"... In this window we're seeing all the objects we've made in our project. Right now, we only made one 😉
It should automatically open the inzoi mods folder, but if it hasn't make sure to navigate to: C:\Users\USERNAME\Documents\inZOI\Mods
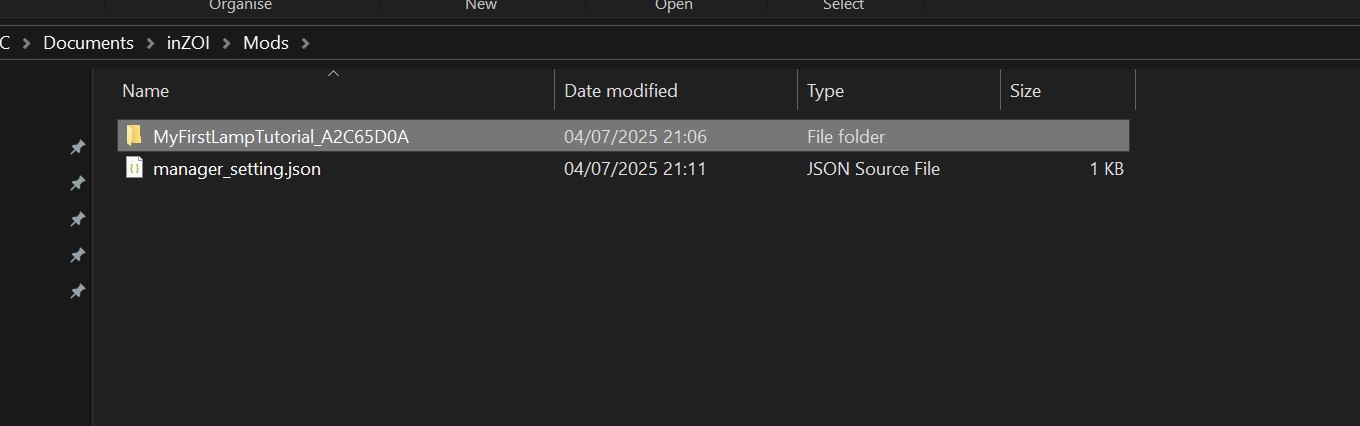
Before opening your game don't be like me and not wait till your folder is there!!!
I ended up being super impatient, but it can take a second before it will complete :p So double check if there is a folder with your project name before opening the game :)
Allright, let's open the game! :D
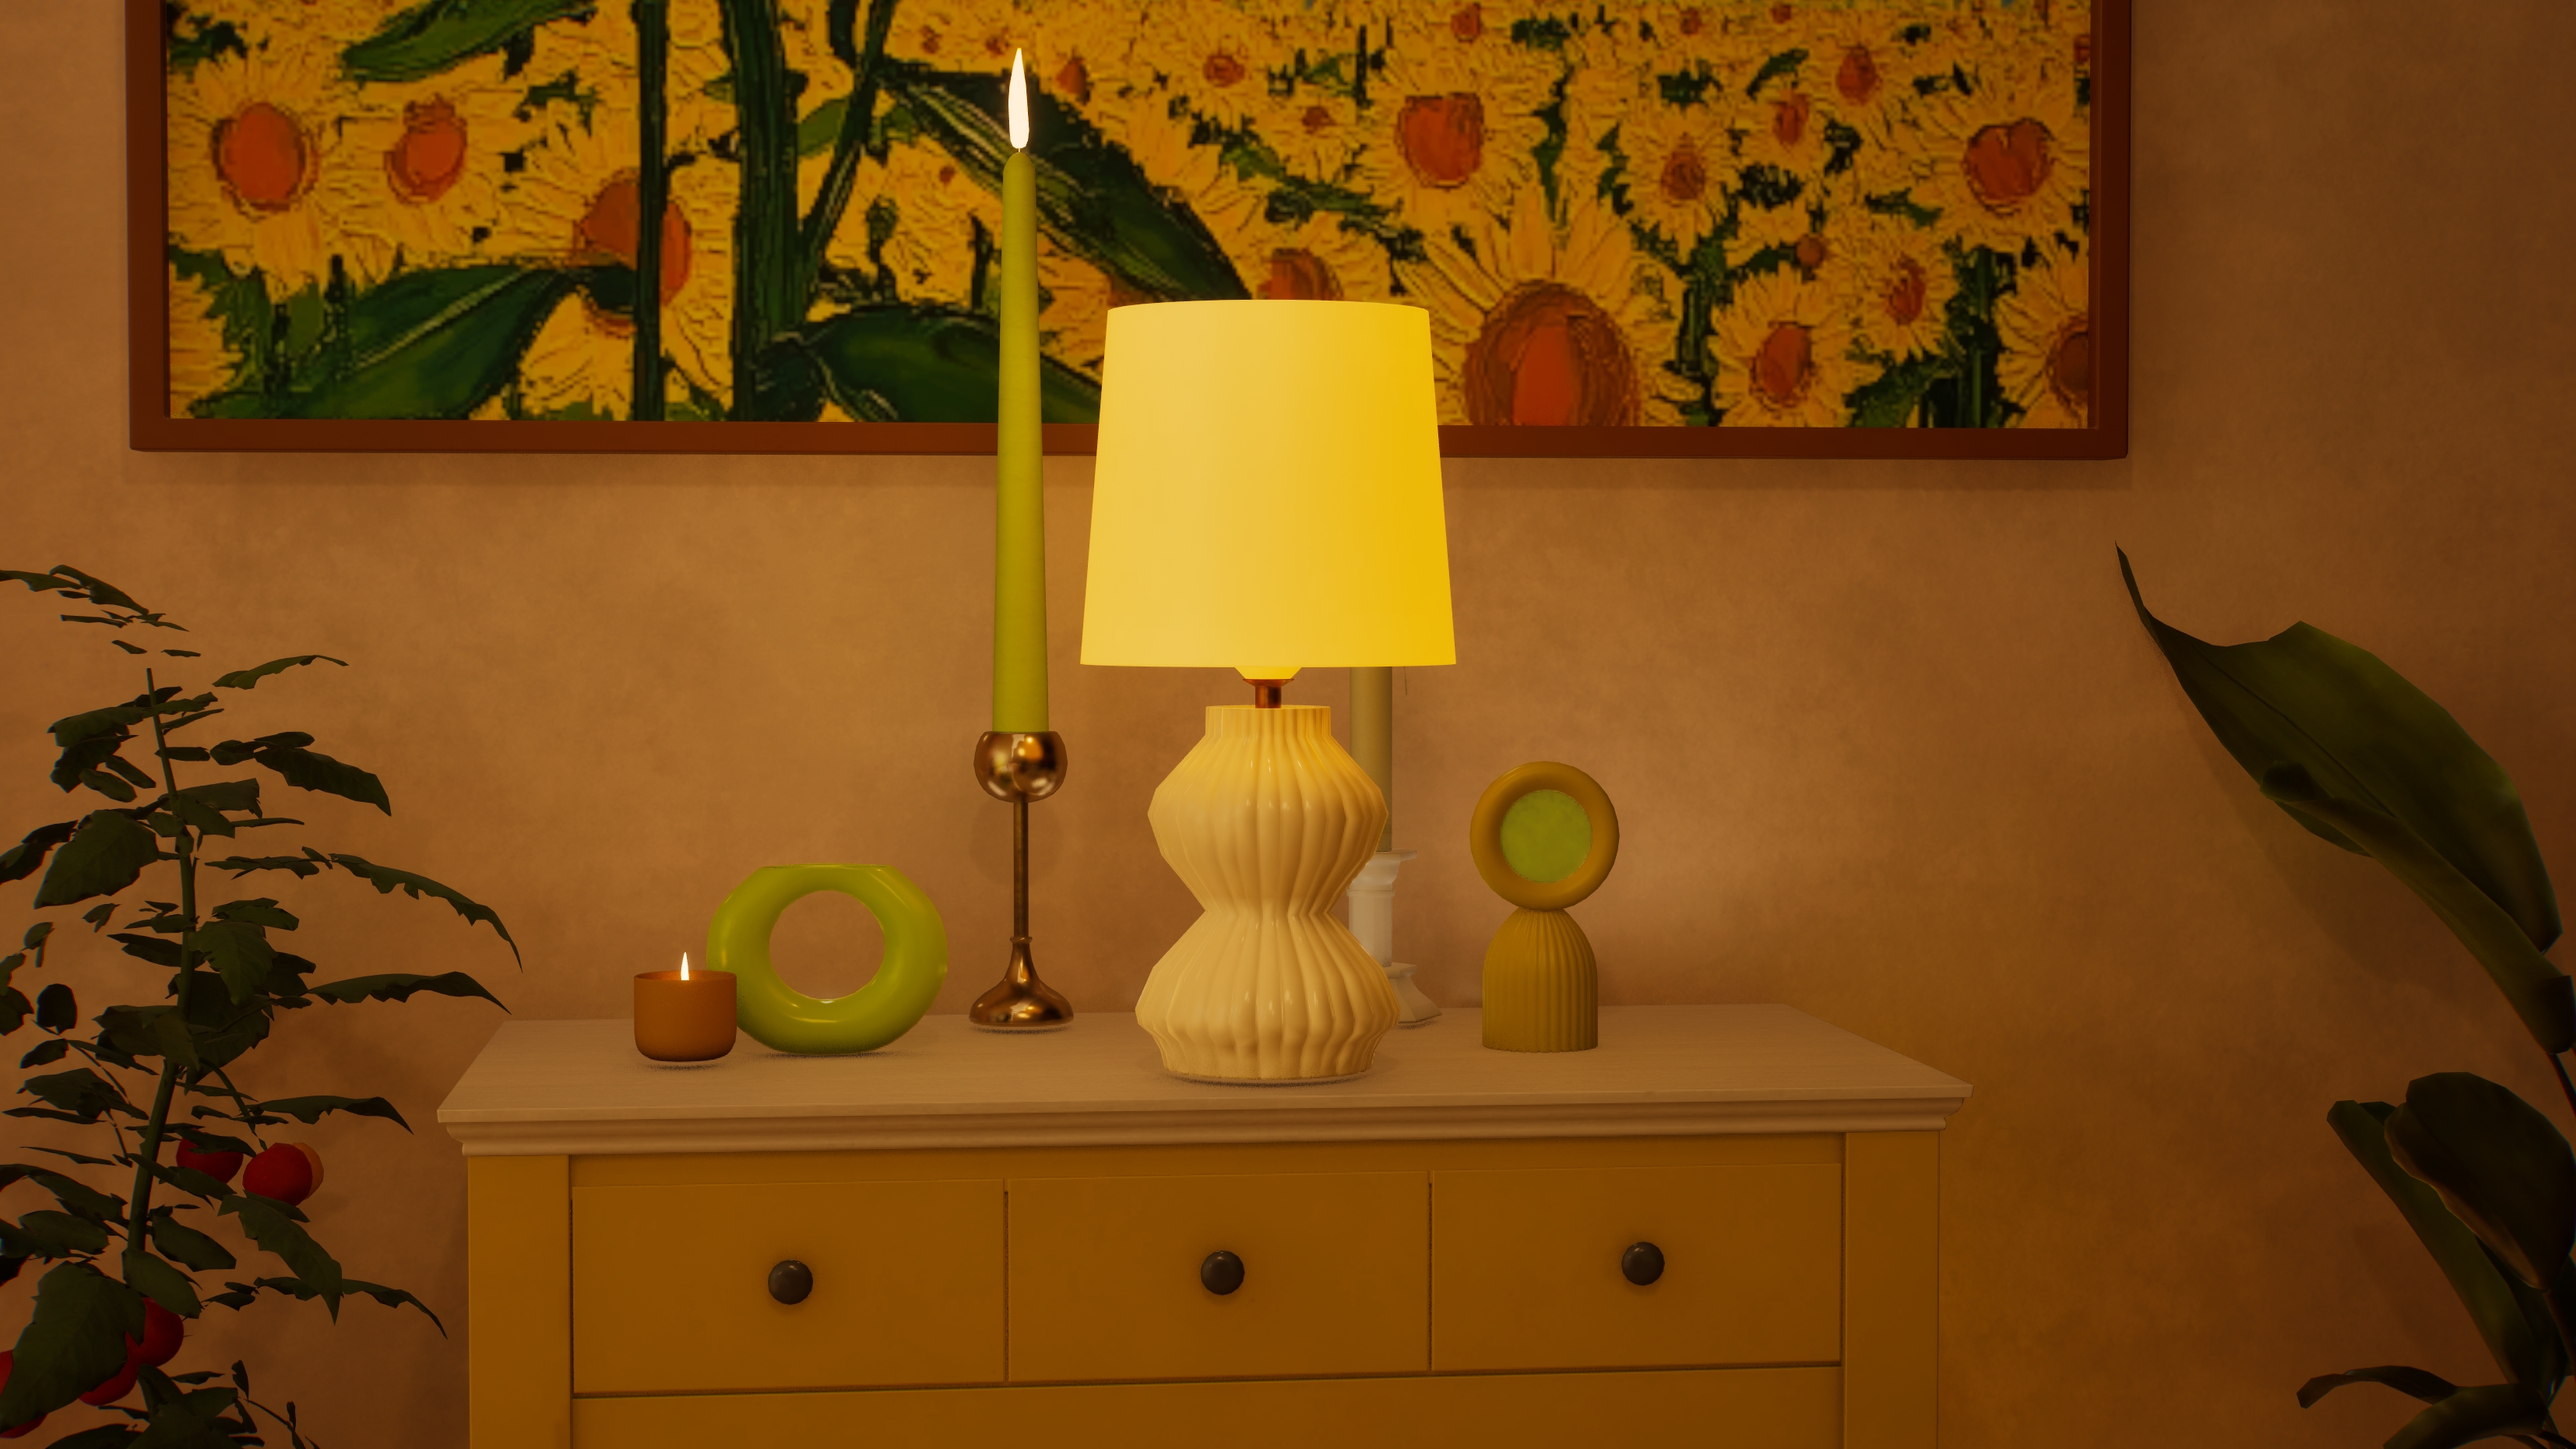
And there she is with all her glory!
If you want it in your game as well, I also uploaded it here: https://simblr.cc/inzoi/mod/5507-my-first-lamp-tutorial-as-a-mod.html
------
Troubleshooting
My mesh imported all black!
Make sure you're importing your mesh as a ".gltf" and NOT an ".FBX".
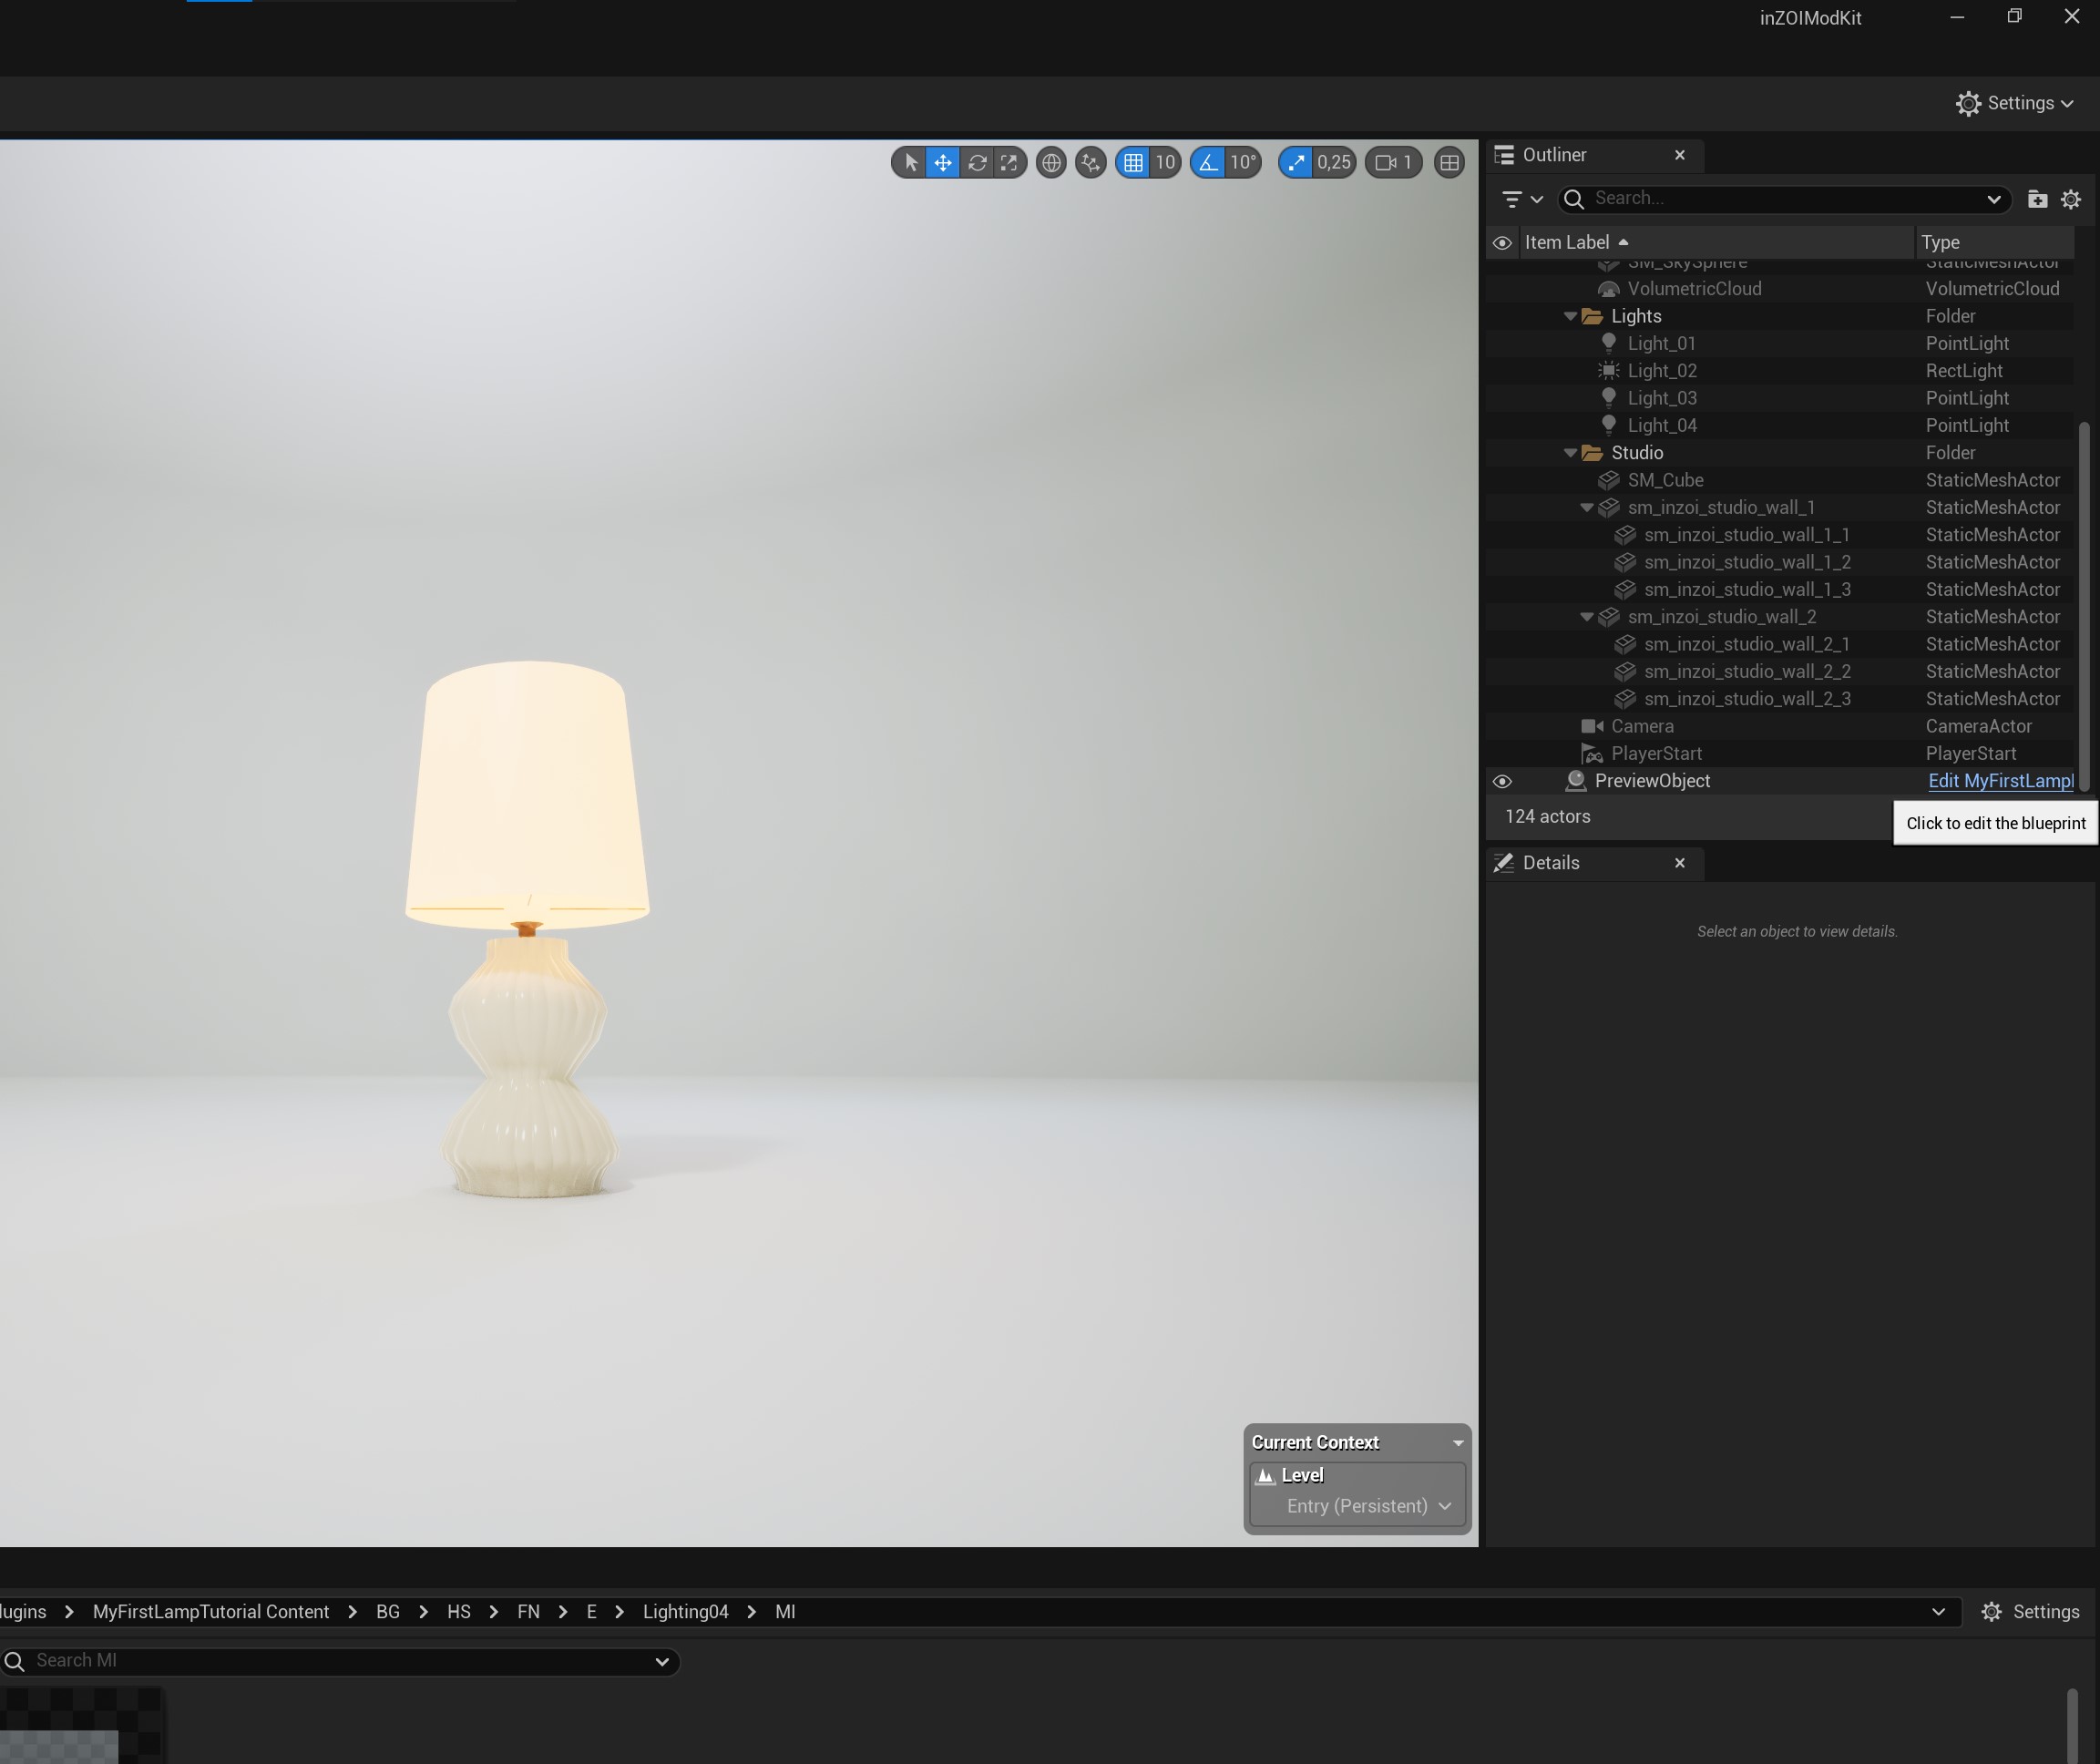
I can't see my cloned item!
It's possible that your item is a hanging lamp or something hanging-y and therefore can't be seen.
To see if it's there, check out the right hand side, and double press "PreviewObject". It will now zoom towards your mesh!
The original mesh looks really bad/low resolution/lowest LOD (level of detail)
Because Unreal Engine games these days don't really do LODs, but nanites (without boring you here :p), we need to disable the nanites temporarily when exporting our mesh! Make sure to re-read the export to blender part of the tutorial to see if you missed that step and how to do that :)
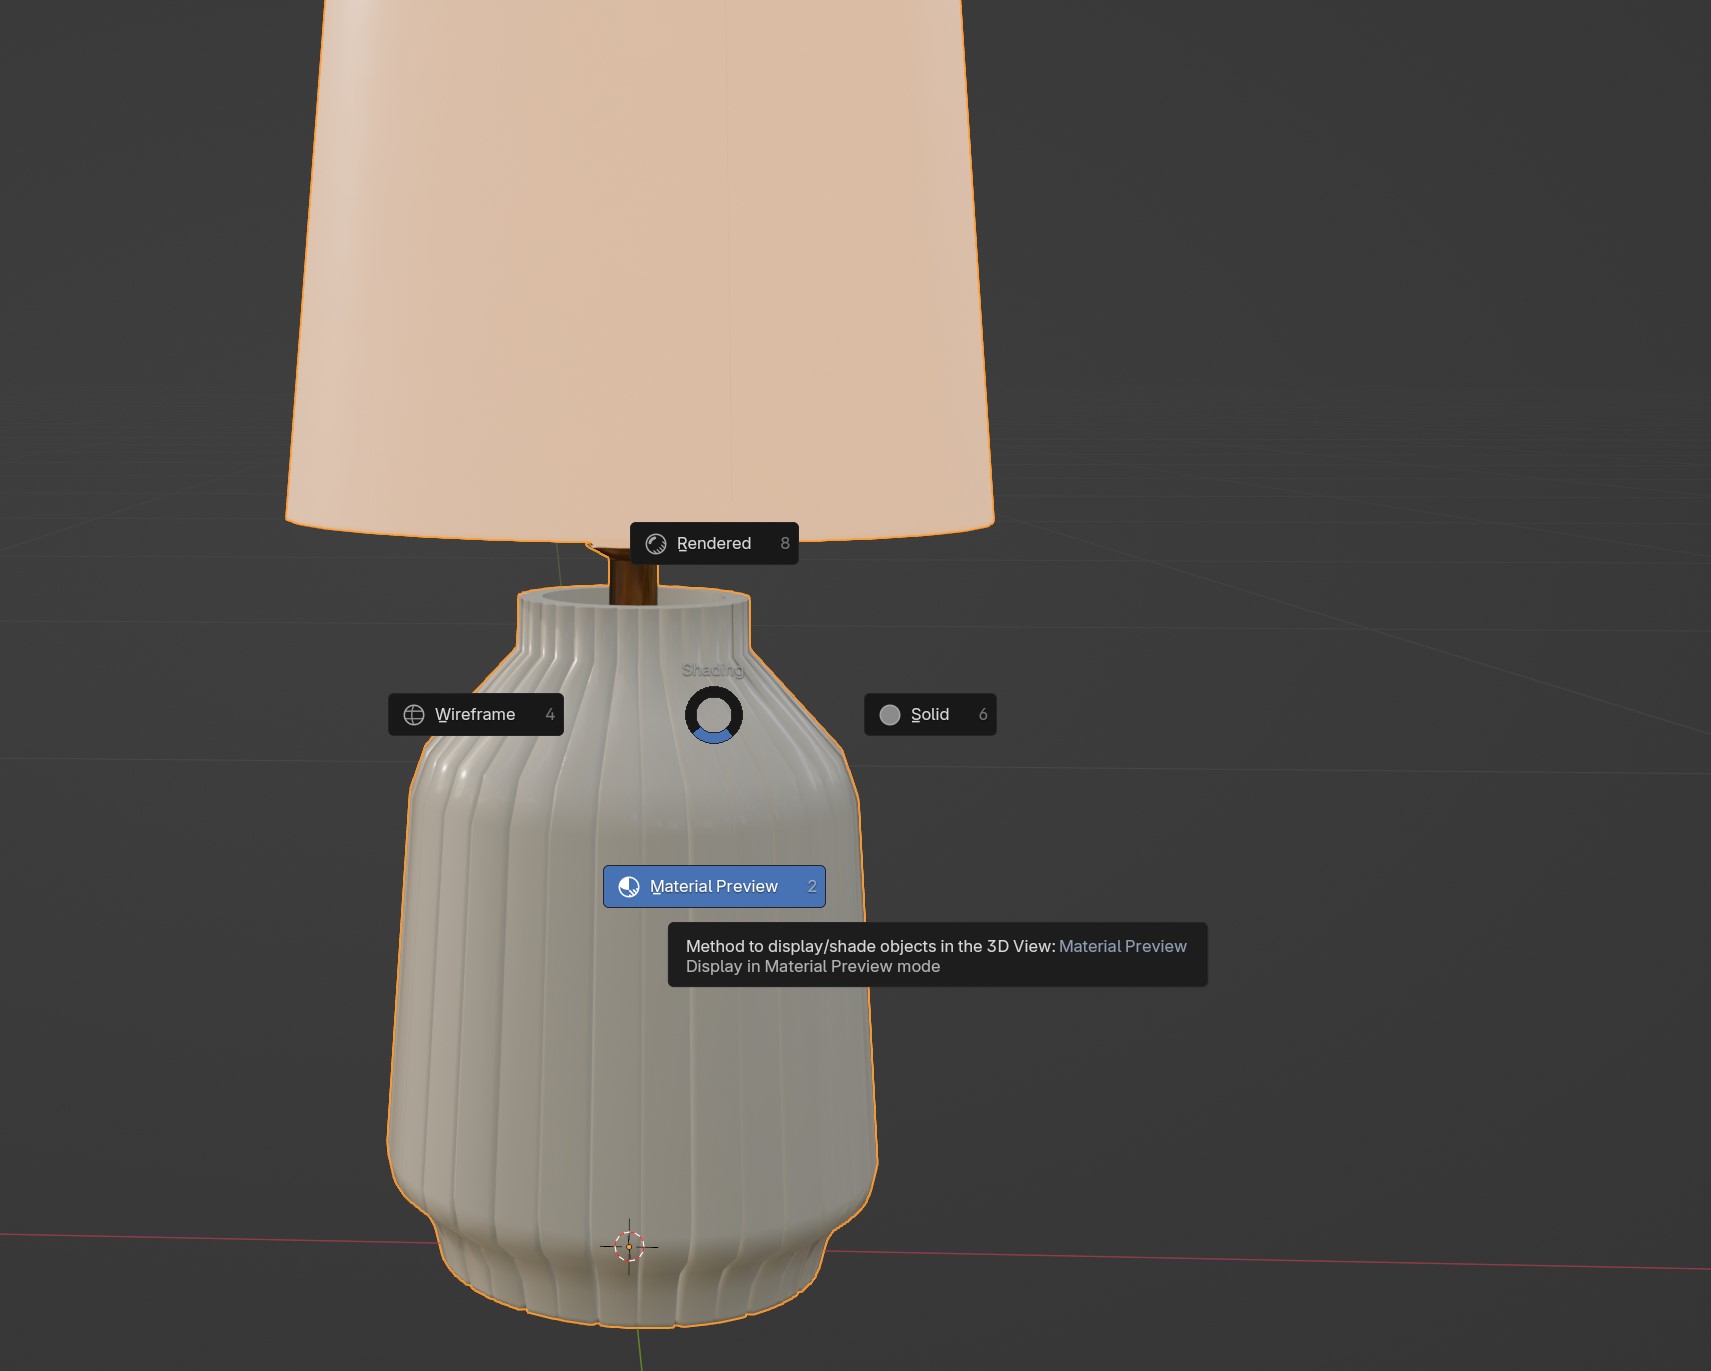
I can't see the original textures in Blender!

In Object mode (So yellow outline) Press "Z" on your keyboard and click Material preview.
(To be updated in the future if I find any bugs/FAQ/etc)


