InZOI Tutorial: Finding Meshes that are not available in ModKit and Edit them
Project: InZOI Tutorials
by Lyralei
Uploaded July 6, 2025, 10:43 a.m.
Updated July 6, 2025, 7:05 p.m.
Hey!
So, you might've read my tutorial on how to edit already available assets through the ModKit (if not, read it here).
But just like me, you may just want to edit a furniture piece that isn't available to get the mesh from. Well! There are ways to do this fortunately!
What you'll need:
- FModel
- .Net version that Fmodel asks you to get
- InZOI's ModKit
- Blender 4.3 or up.
Setting up FModel
(Full credits for this section go to this guide)
Once you've successfully installed FModel like you'd any program, we want to finally open it up!
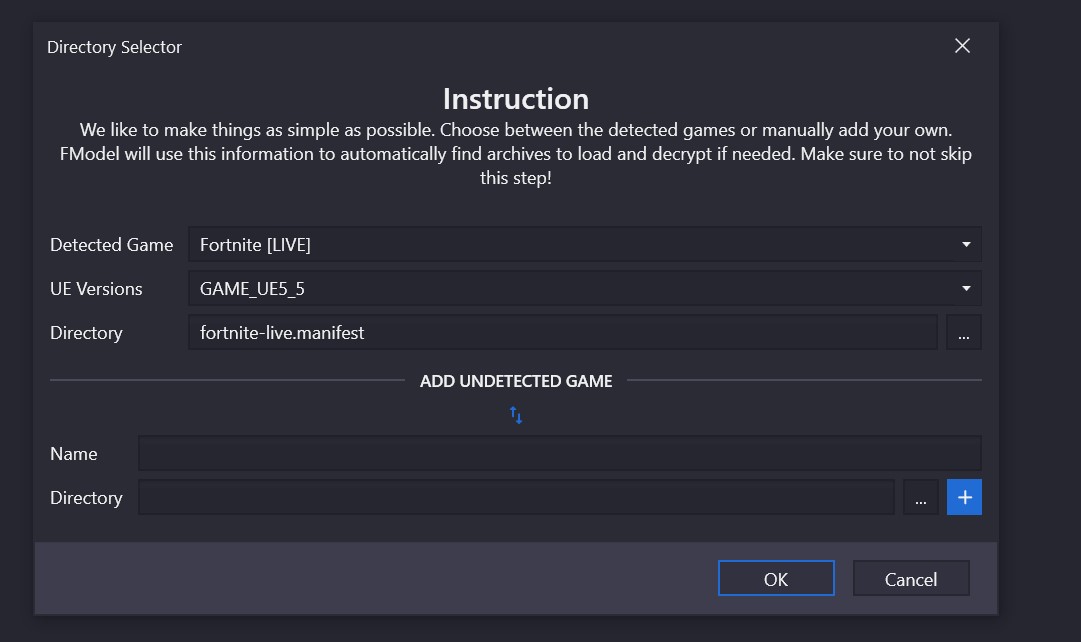
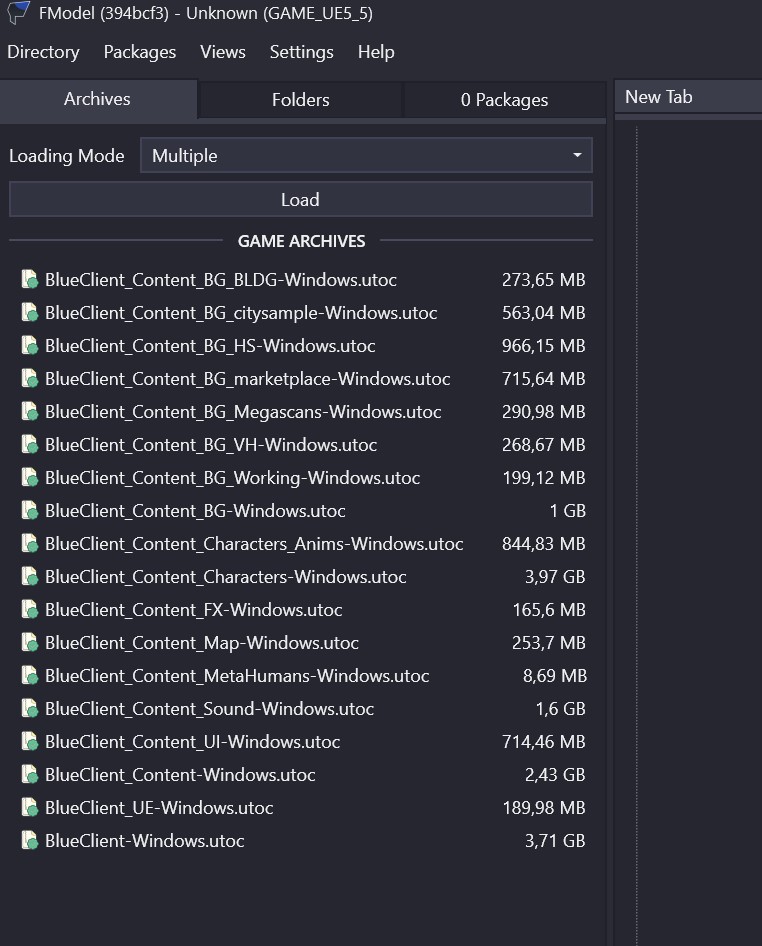
When opening FModel, this is the first screen you'll see. Now, it autodetects Fornite or whatever Unreal Engine Game you own, but it won't automatically for inzoi. (if it did, simply choose it from the "Detected Game" dropdown and use that instead 😉)
Click on the two arrows that go opposite so we can manually add it the game.
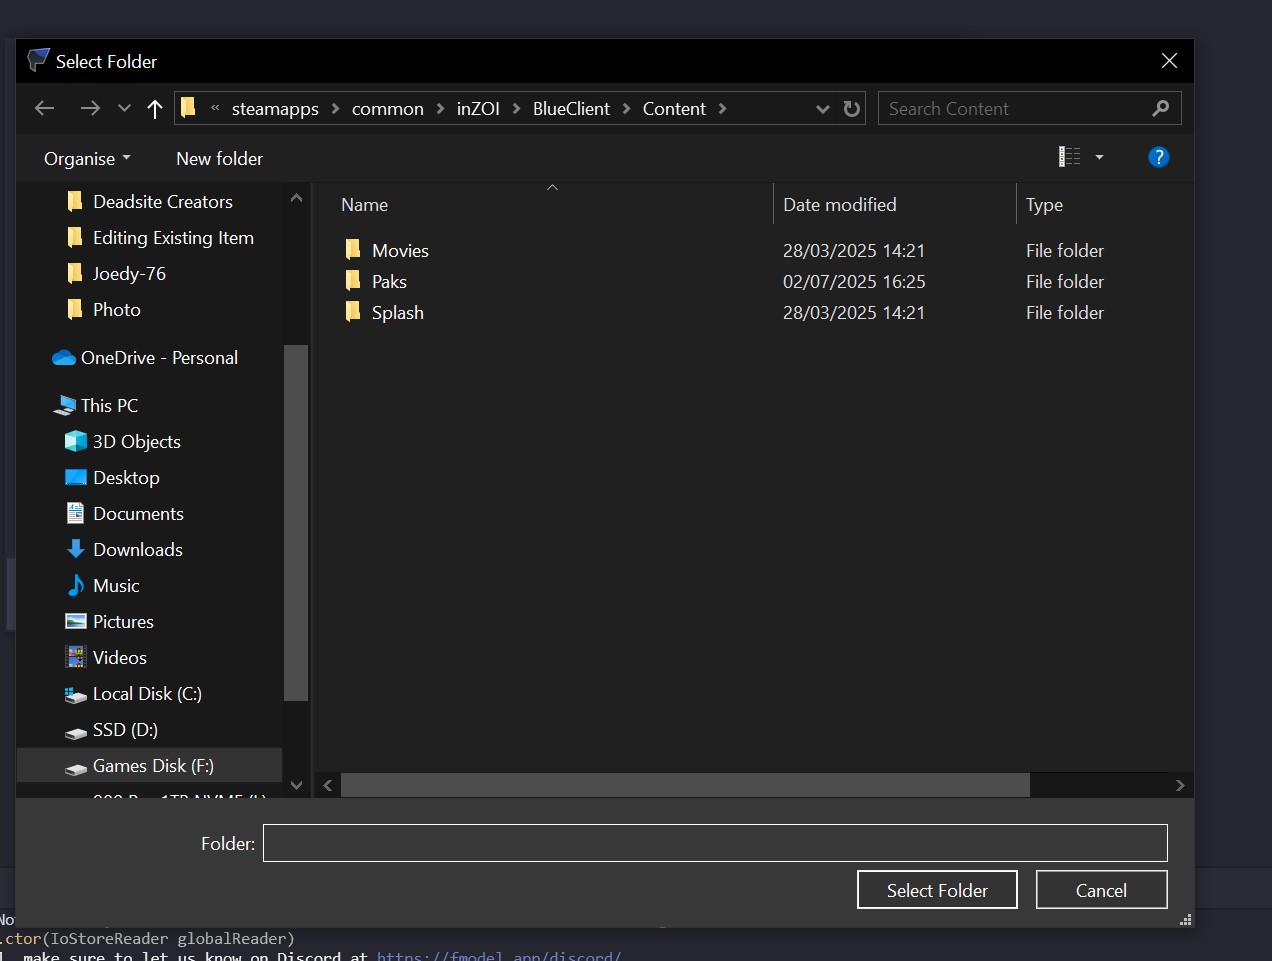
As we click "Directory", we want to navigate to: ..\InZOI\BlueClient\Content
And press "Select Folder".
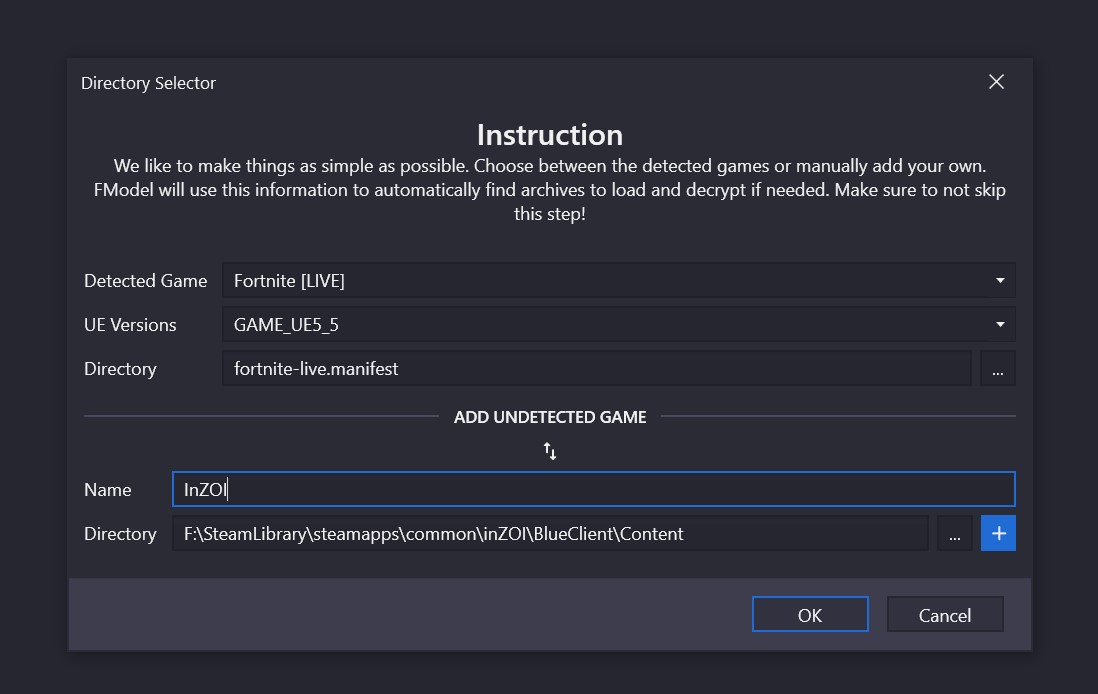
Now, in "Name" We put in "InZOI". This makes it easier to figure out later what contents of the game we're checking as it will show multiple different games for most of us.
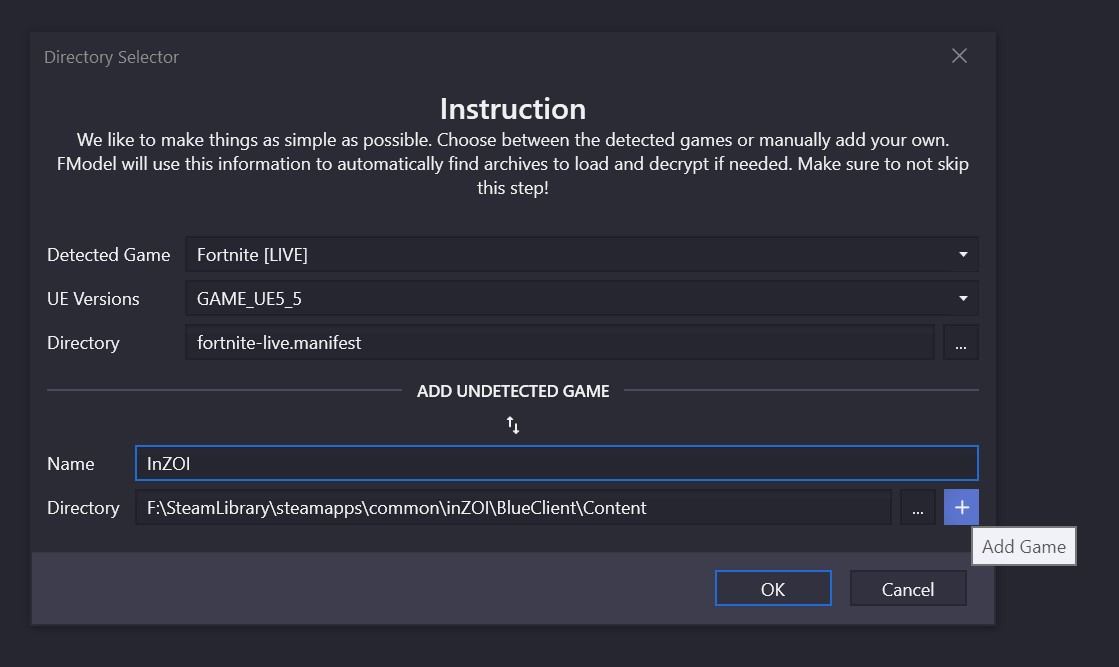
Now press the "+" Button next to Direction.
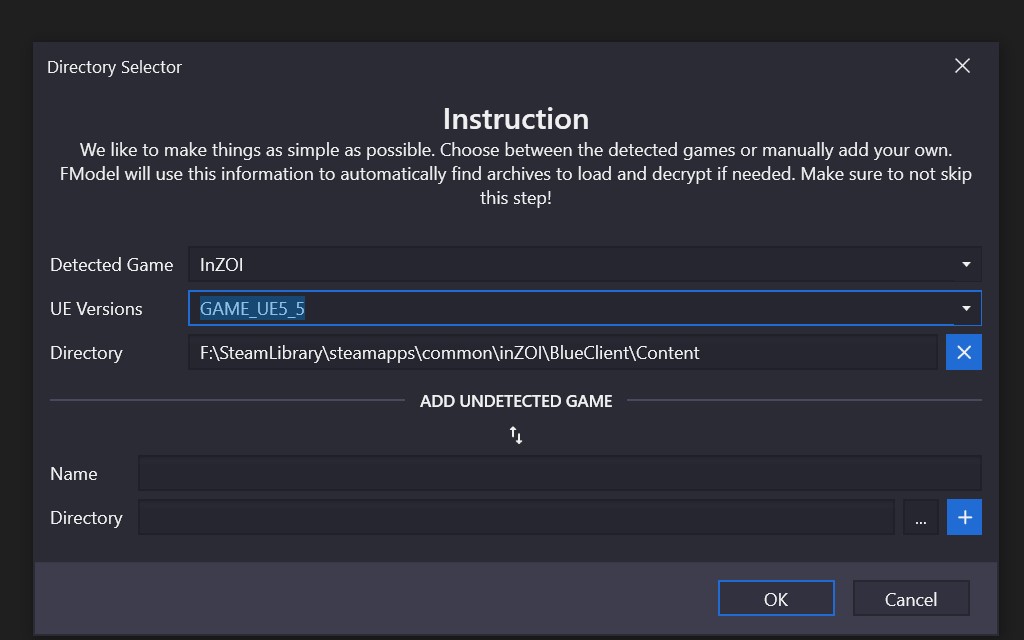
Now our InZOI game should load itself in the "detected game" section! Change the UE version from GAME_UE4_5 to GAME_UE5_5, as InZOI runs on UE 5 :)
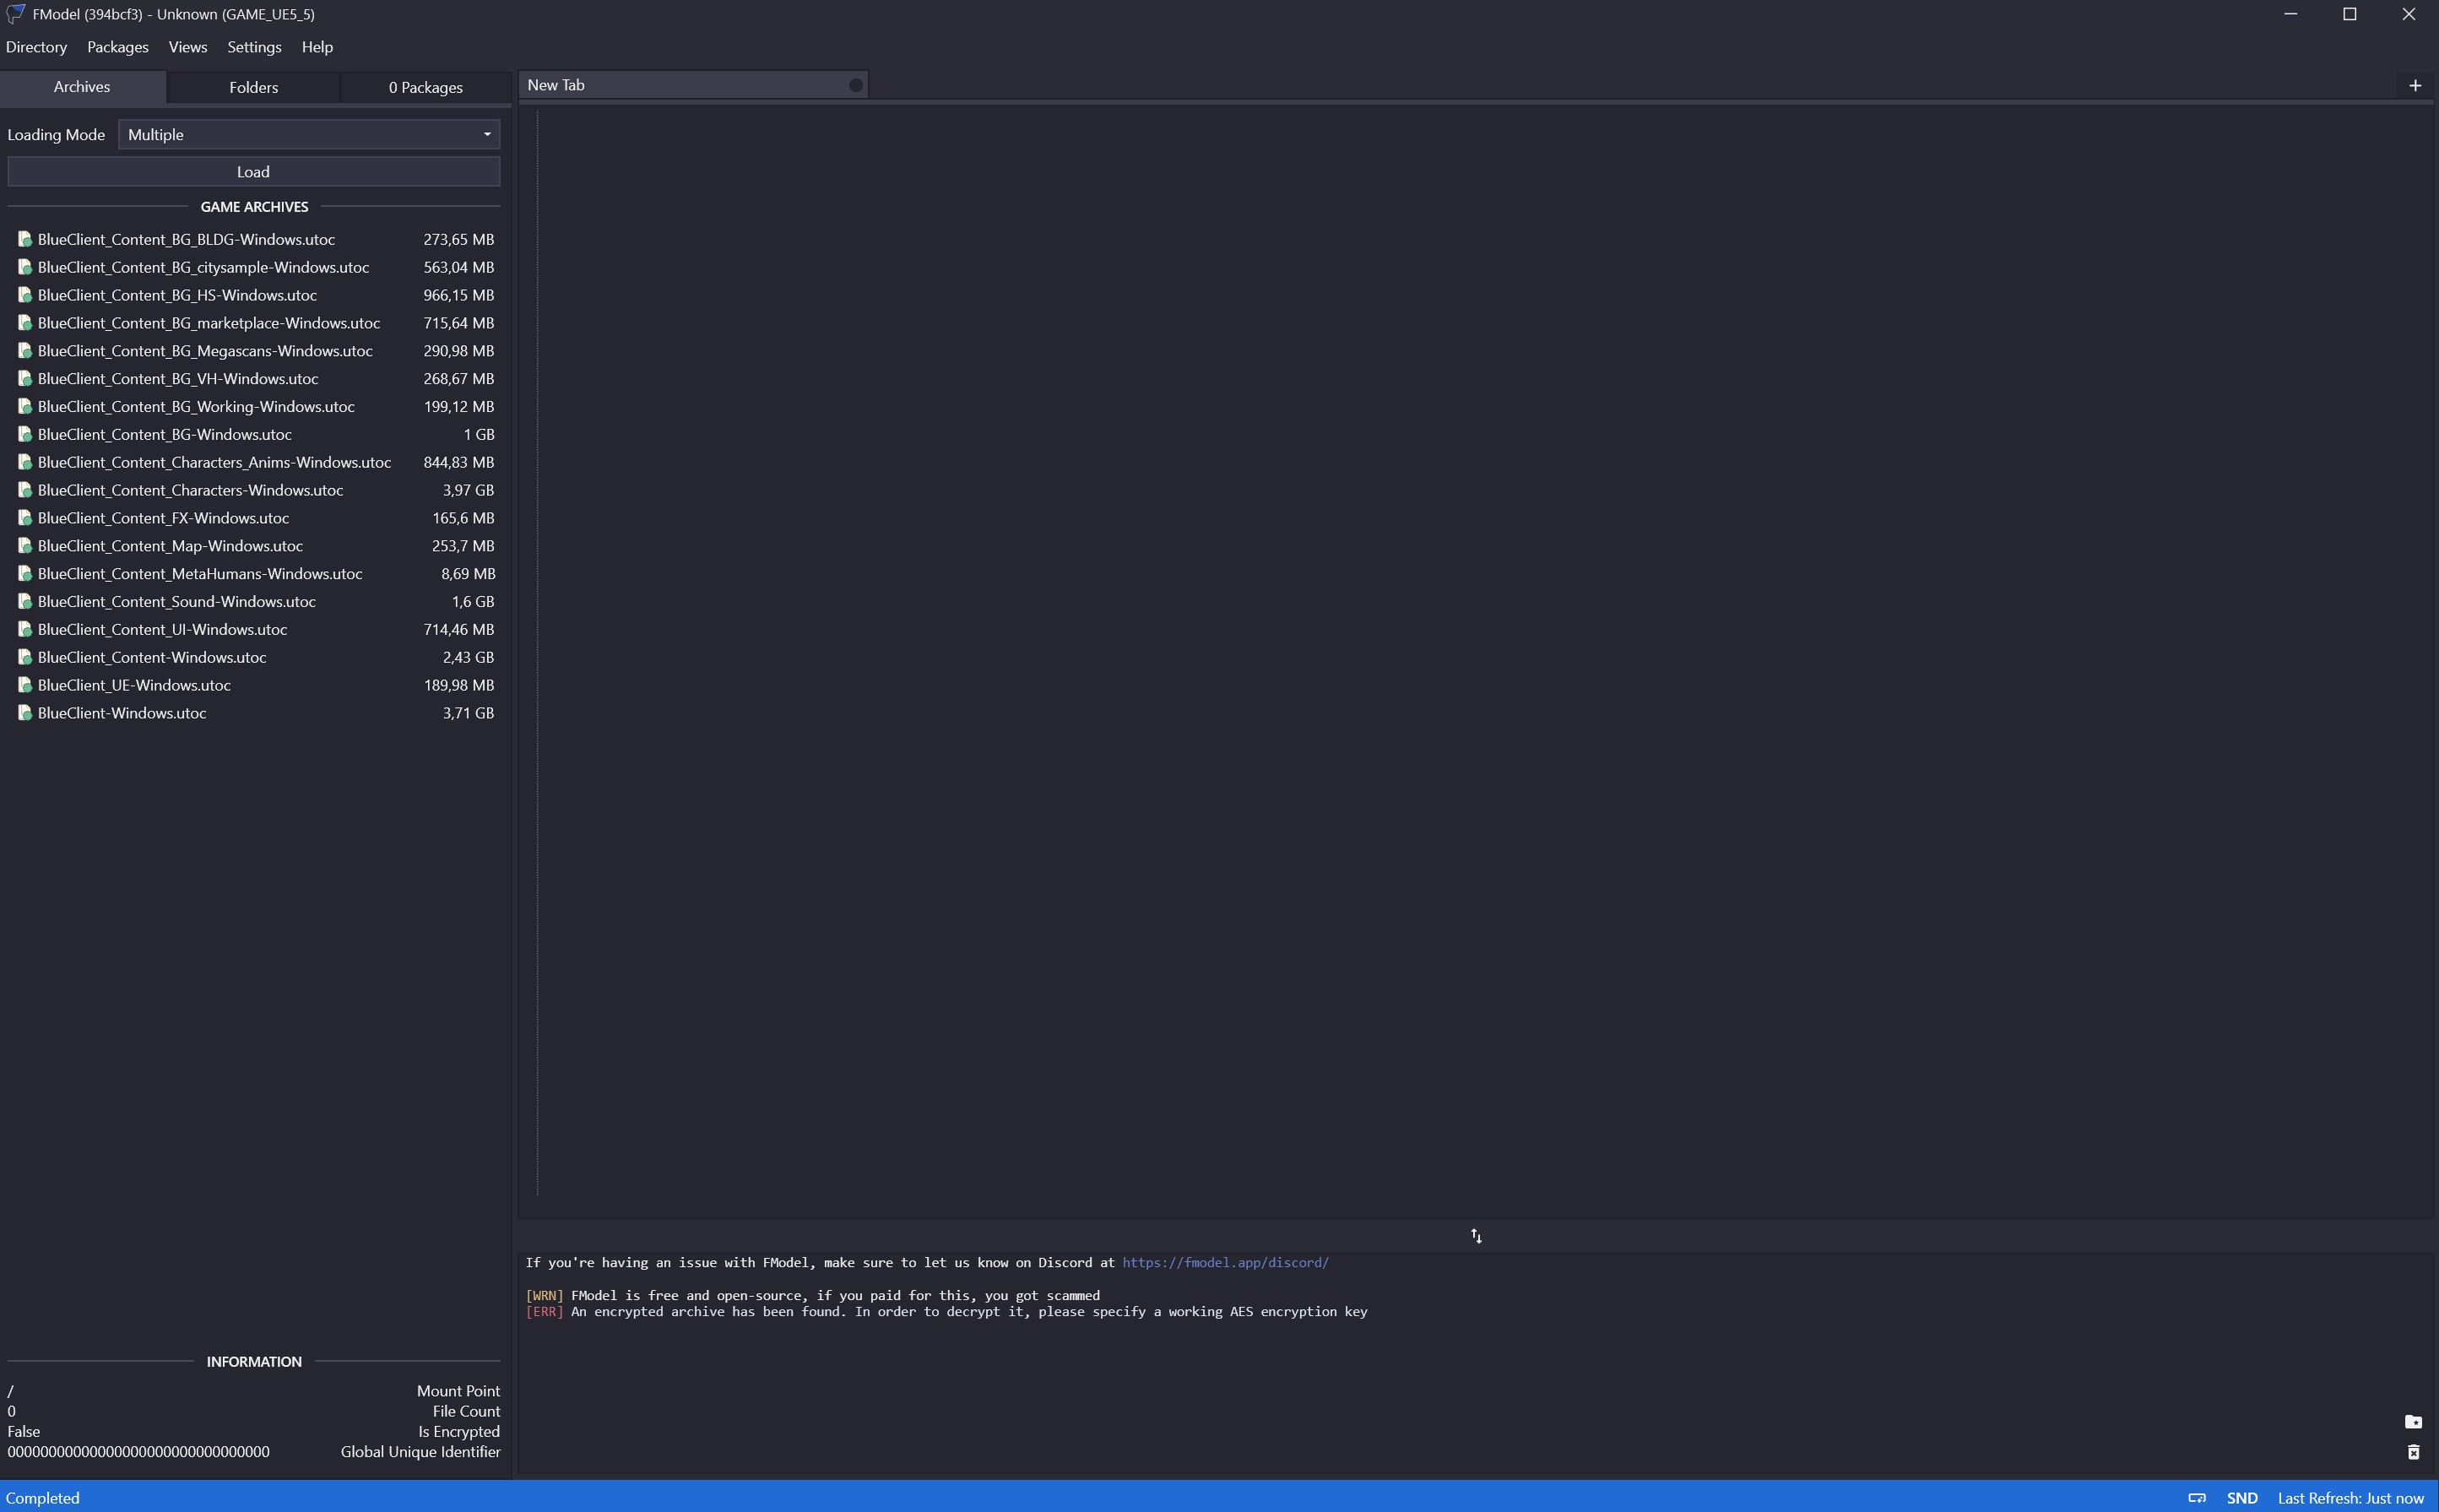
Cool! So now this is what you should be seeing! In my case, the files show with a green tick, but that's because I've already added the AES Key. yours will probably be red.
Decrypting the PAK files:
To actually grab our meshes, we do need to decrypt the files you see in the left. Luckily a group of smart people have already done this for us, and all we have to do is copy/paste the AES key.
To do so, we first need to get the key, which you can get from this forum post under "Keys".
Currently the key for InZOI is this though: 0x67711708C90DD8365863F40F660516BC60E16787C1FBB6E7AB07A91D7B8D6C64
Keep in mind that it can change upon updates! It's unlikely, but if it stops working, please check that forum post I linked if I haven't edited it yet.
I might not always be able to update this tutorial when that happens, so totally check out that link and copy it from there when the current one doesn't work!
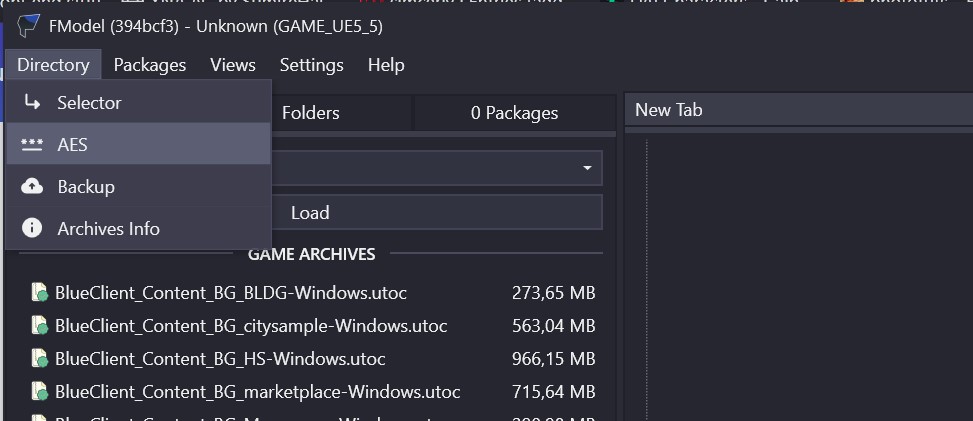
Click on "Directory > AES"
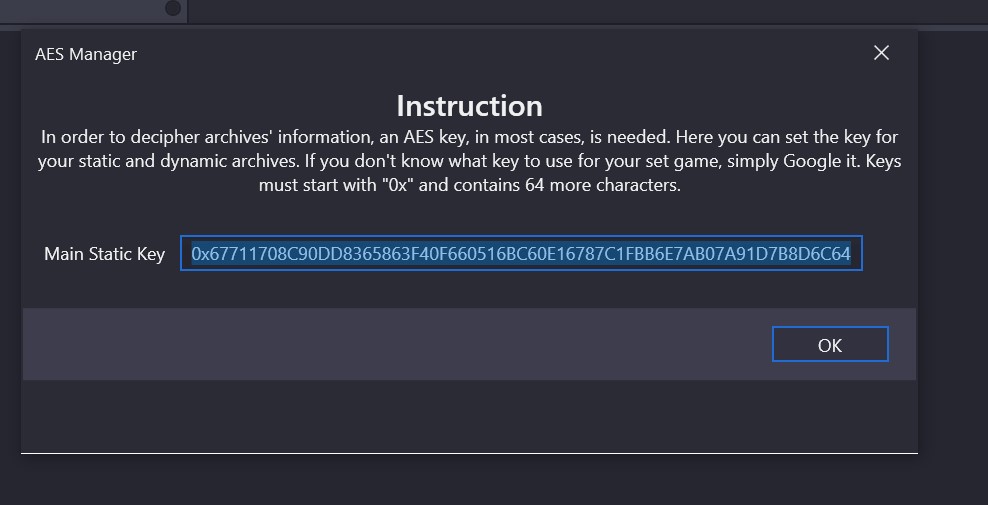
Paste the copied AES key here, and press "OK"
Now your files should look something like this! :D
Getting FModel to see our meshes
So before we can truly extract our mesh, we need to do one more thing and that's giving it some guidance on what it's looking at. For this, we need to download the latest mapping file. Luckily for you, I have uploaded that here! :D
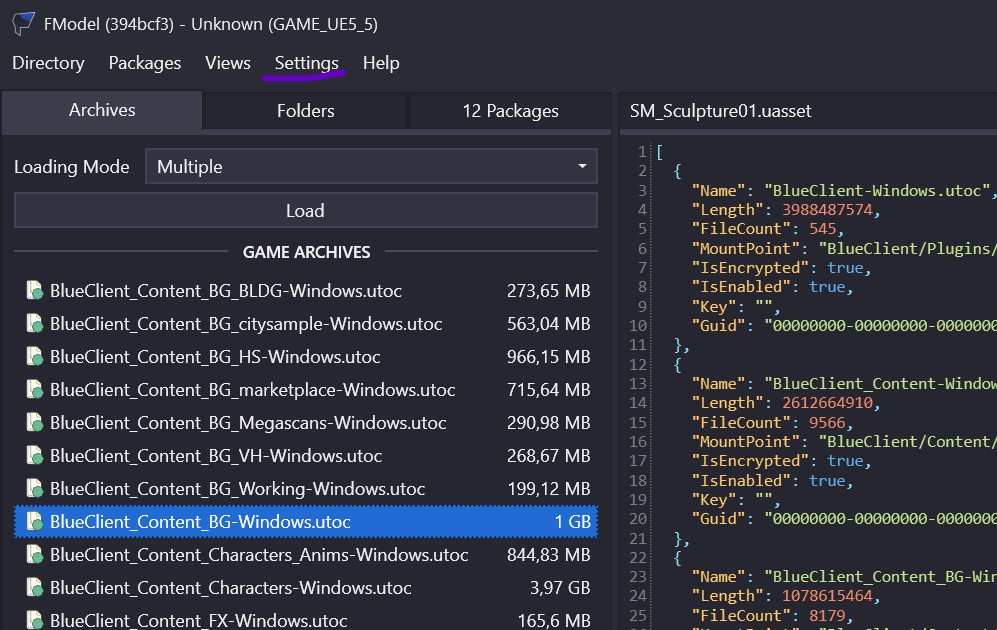
First we go to settings...
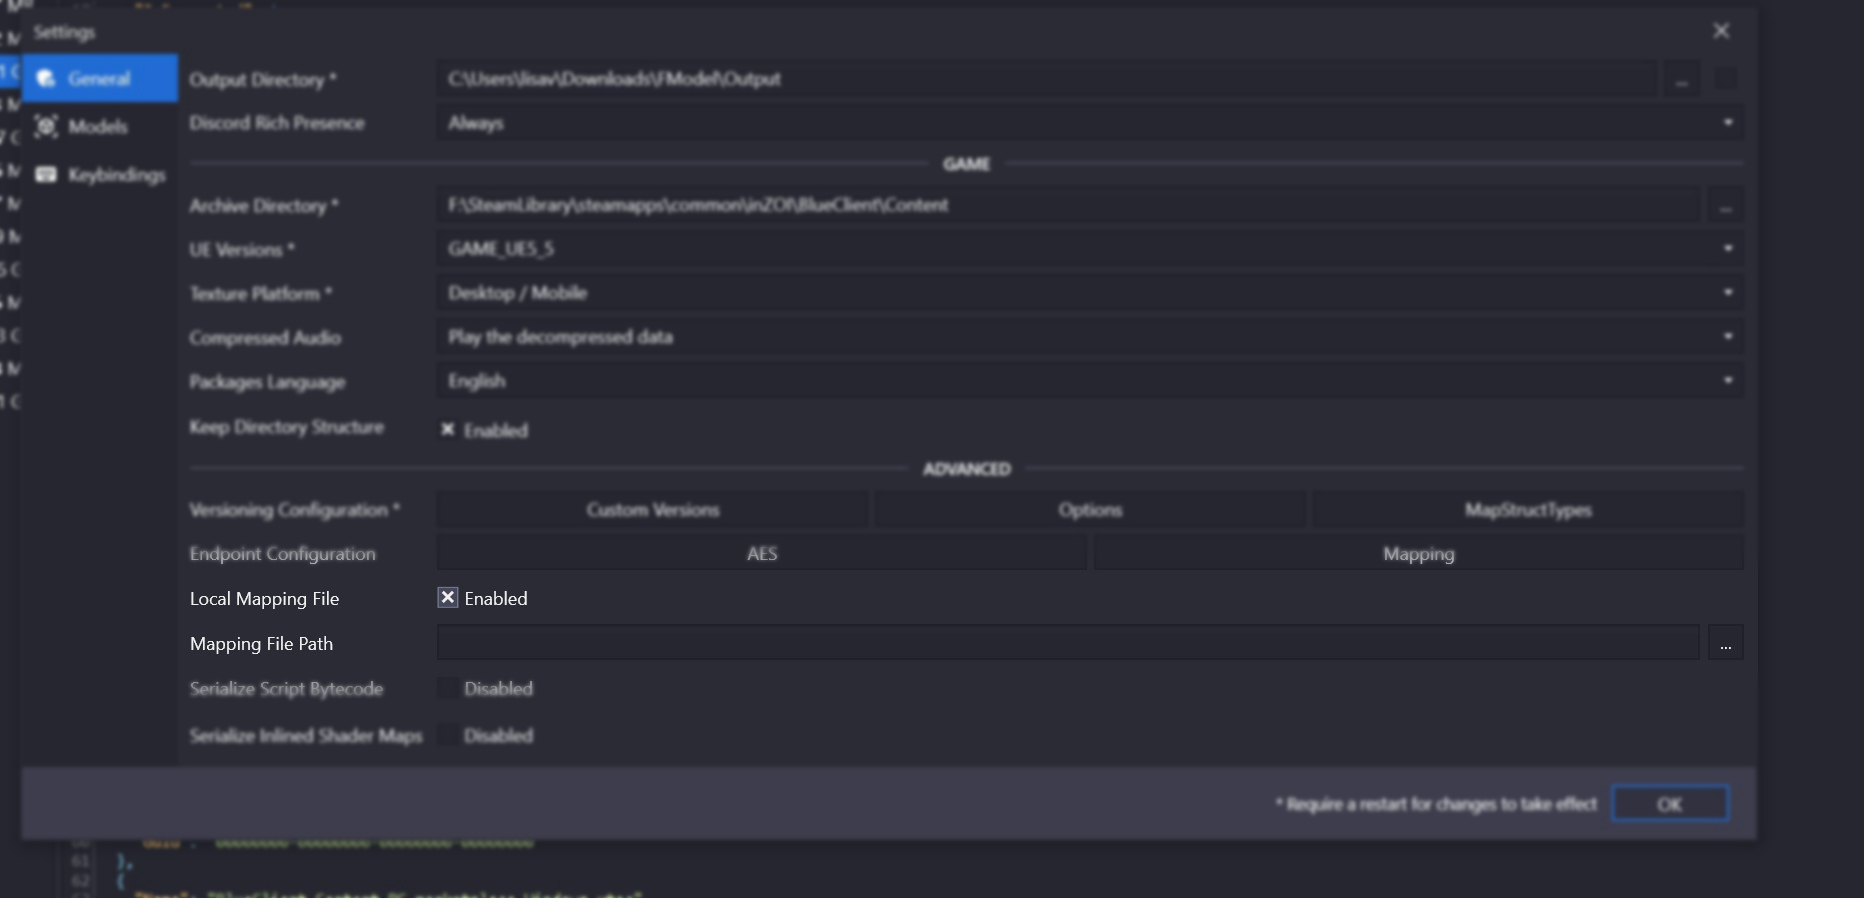
Then scroll down till we see a header saying "Advanced".
Now we tick the ' Local Mapping File' checkbox.
After that, we click on the "Mapping File Path" section, and tell it where the .usmap for the game is. This is that mapping file you've downloaded called "5.4.4-0+UE5-BlueClient.usmap".
Click "OK".
Extracting meshes
For this step, it's good to open ModKit for some references to our mesh we're looking for. Keep FModel open though! We need this in a second again!
The reason we want to open ModKit for this, is because the names of the items themselves are not really descriptive. We also can't figure out what, for example, "Pot01" would look like if we found it! However, the ModKit has them all with previews!
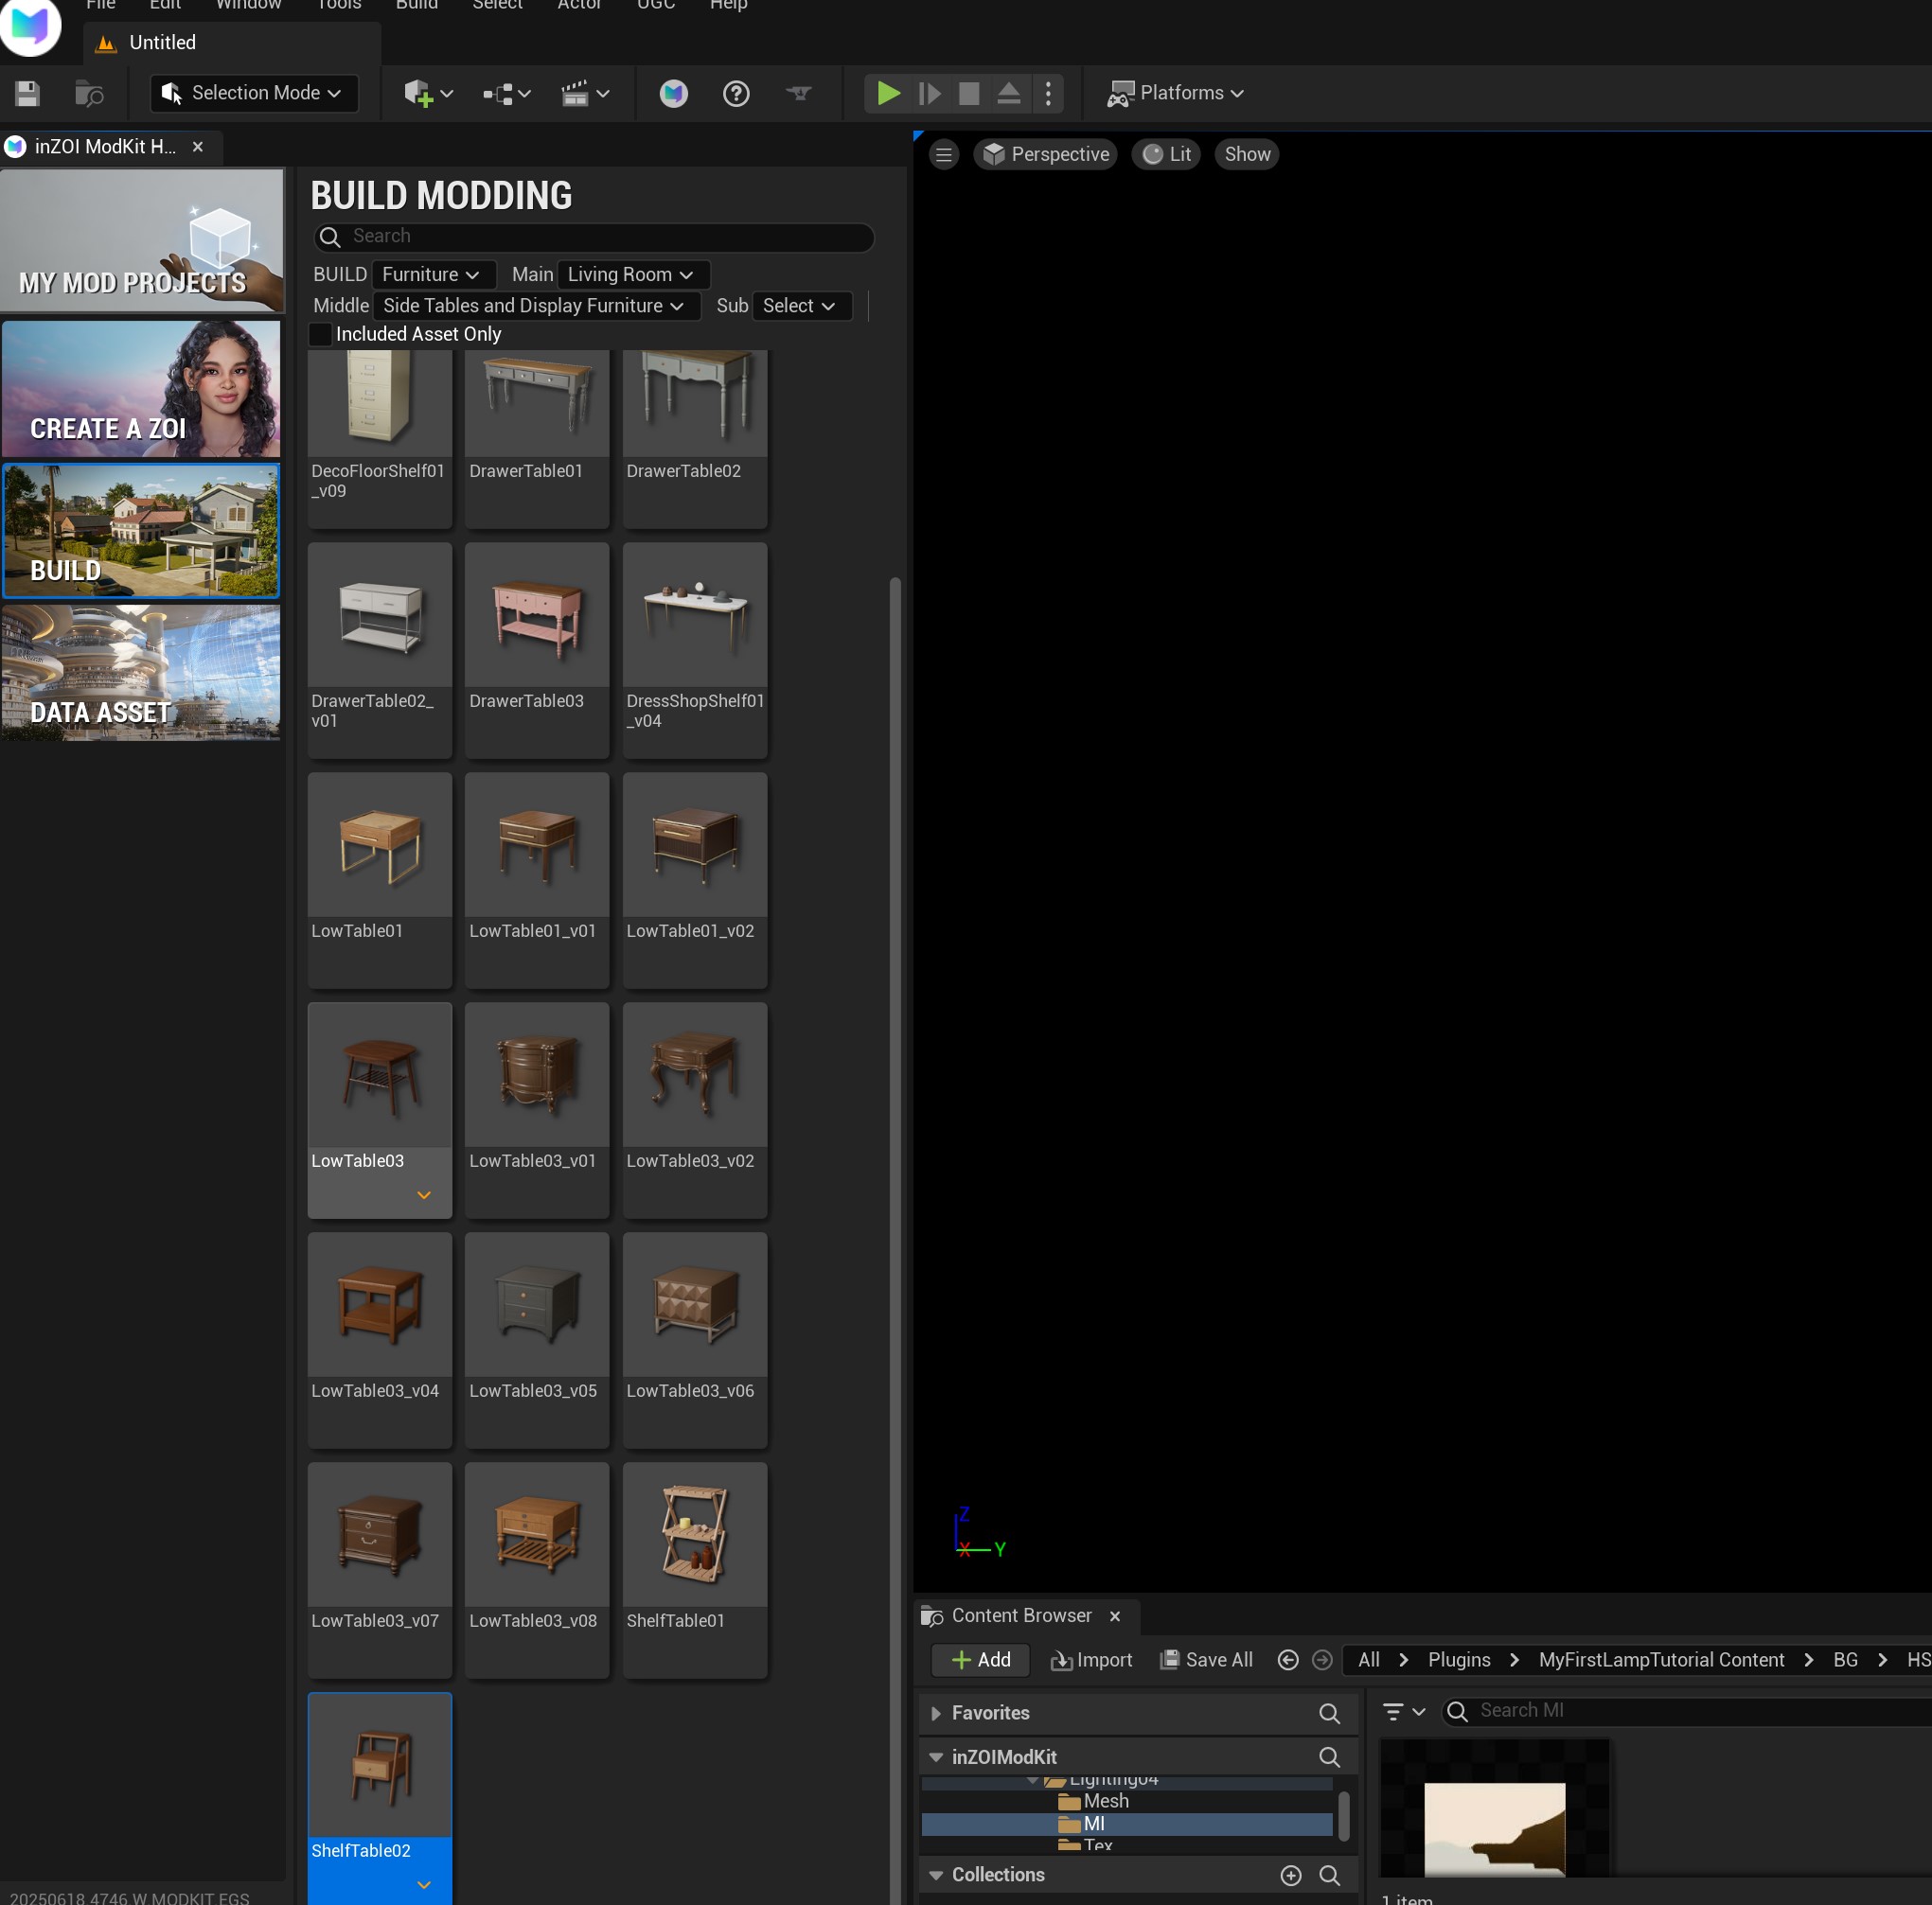
In my case, I am looking for "ShelfTable02". This is the in-game file name of the item so I will be noting this down so we can find it in FModel 😉
Finding our mesh through search:
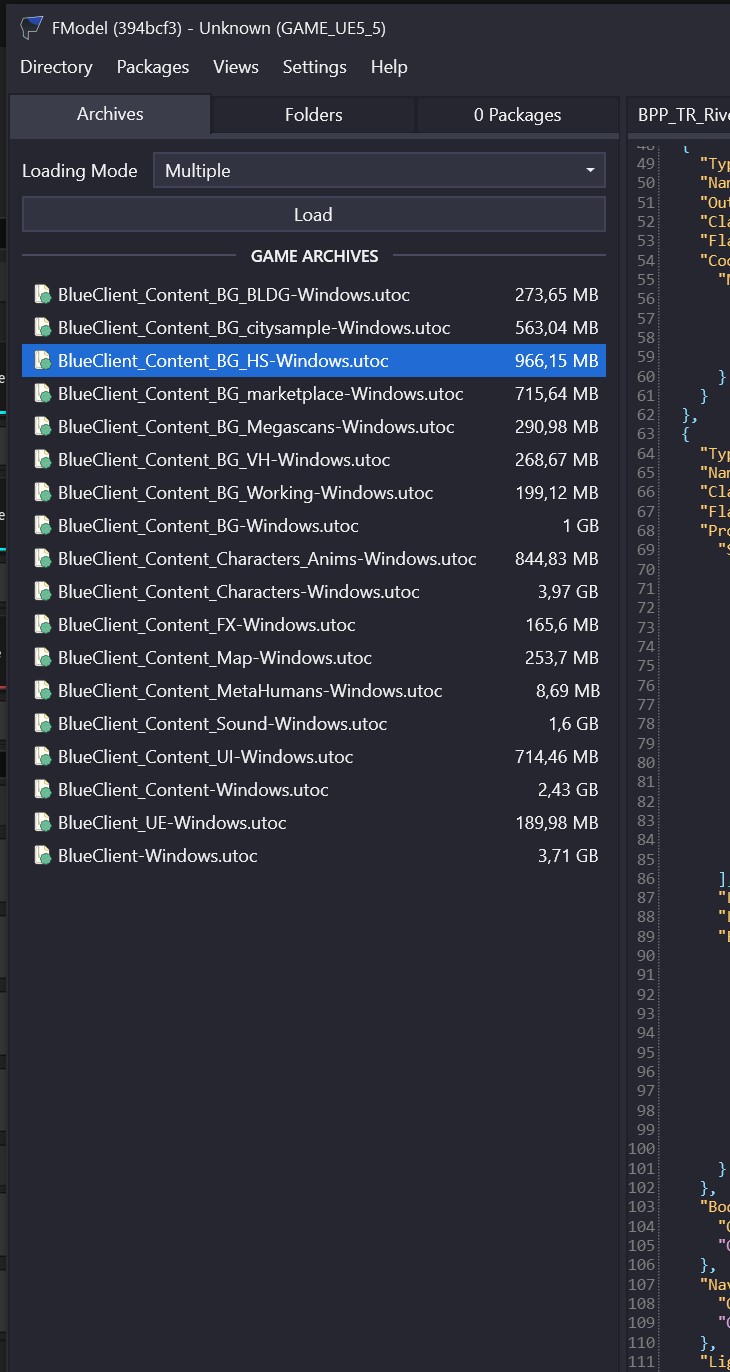
First, we double+click the "BlueClient_Content_BG_HS-windows.utoc" file. This is where ALL the Buy mode items are.
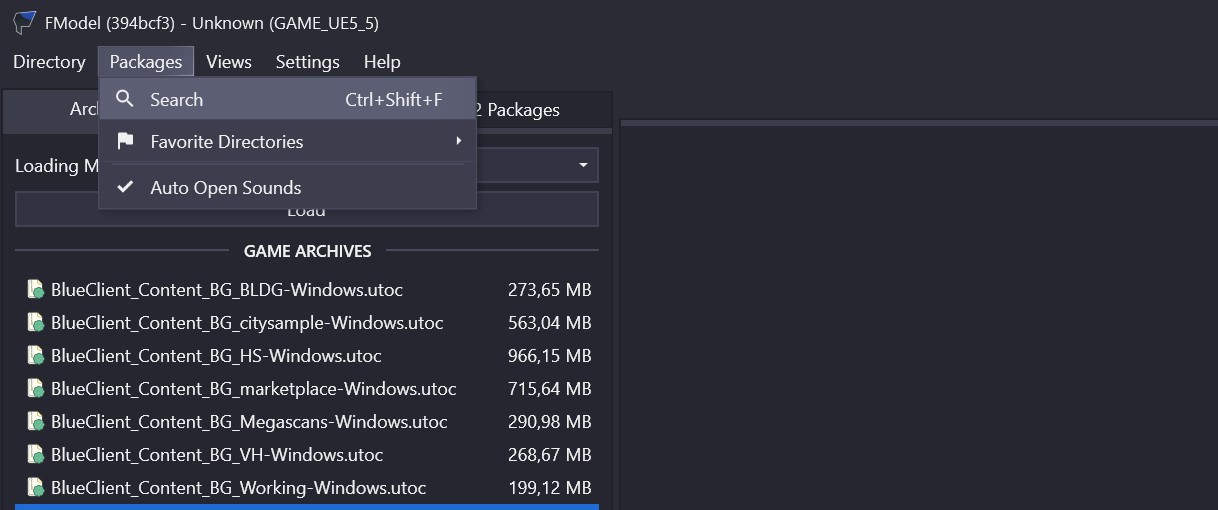
Now that I know the name of my item, which is "ShelfTable02", we want to go to go back to FModel, and go: "Packages > Search"

Let's assume I wanted "Table06", we want to double-click the version of it that has '/mesh/' in it's path name.
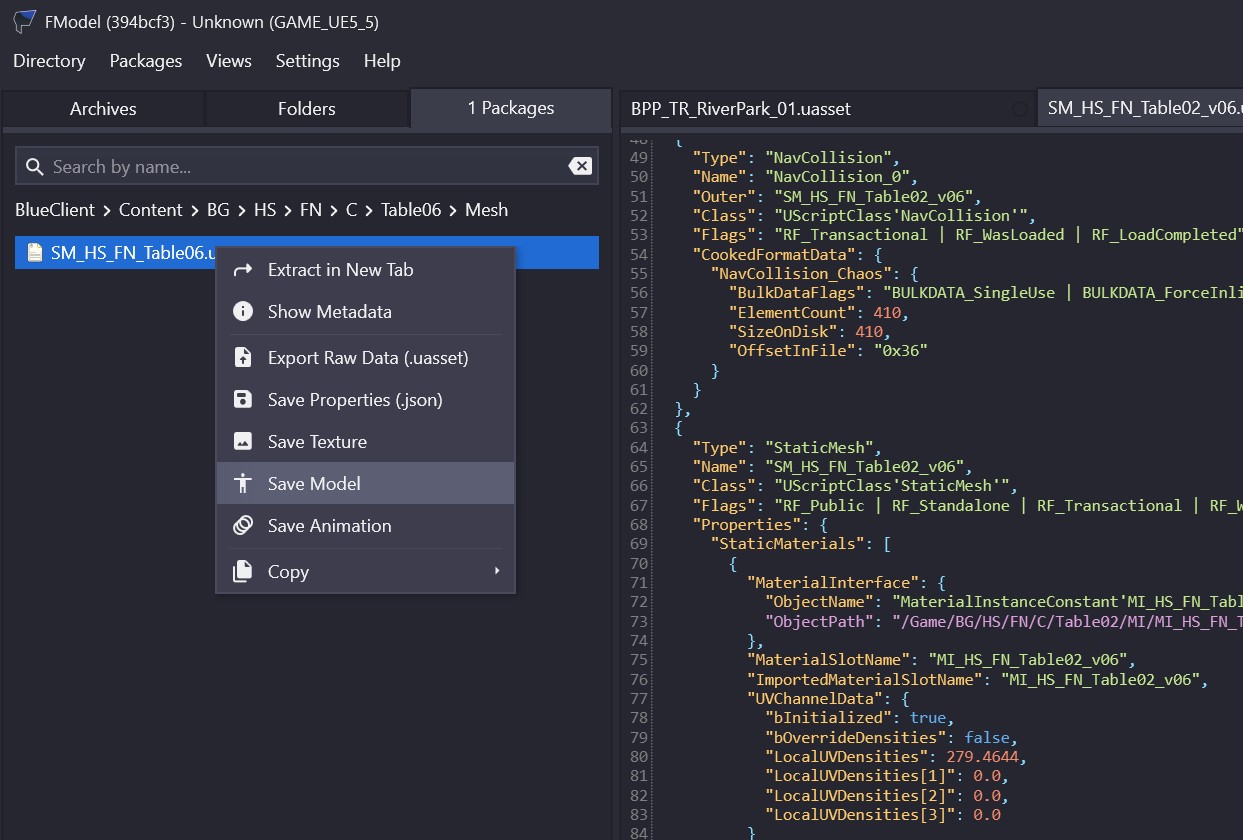
Right+Click on the .uasset file and "Save Model".

To get our file, we want to go to the log at the bottom!
You see where it says [INF] Successfully saved LOD0 as '.pskx' for 'SM_HS_HS_FN_ShelfTable02' ? Click where it looks like a link and it will open up where it is in your computer :)
Yay! Now we finally have our mesh!
Err, I see multiple versions? What should I do!
When this happens, it seems that the devs have left the previous versions in. Often these files have _V1 or _V2, etc in them. Just go with the highest V version and see if that works! If you end up having to export them all to see which one is the correct one, then that's fine too 😉
(Optional) Obtaining the textures
Now that we have the mesh, there might be a possibility you want the textures. ;) So, to do this, we do the same progress as we did in order to grab our mesh!
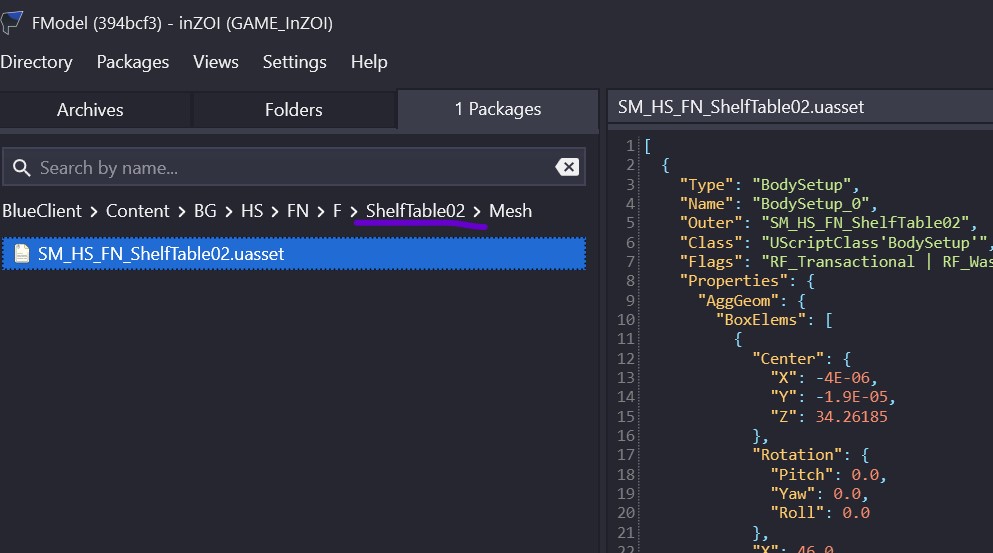
So when we look at the left side window, where our uasset file is, we see a "path" of some sort, correct? This is actually a folder structure, so it works just like how it is on your computer, just that this is for the game :D
Click whatever comes before "Mesh". For me that's "ShelfTable02" (You see how it's the unique ID of the item we obtained earlier?)
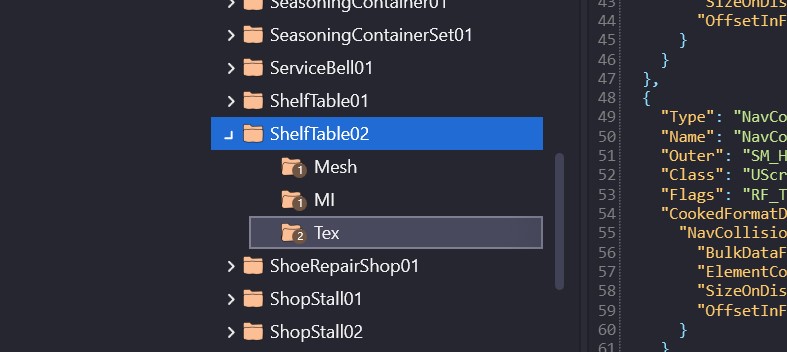
Now, we see all the resources the game uses to make this object, well, an object! Since we can't really do much with the material (which is in the MI folder), we instead want to Double+Click on "Tex".

Right click on the .uasset file(s) again and click "Save Texture" this time.
Why are the textures in weird colours?
You might've cliicked on one of these textures and noticed they look a bit... off. What developers essentially do, is that they pack multiple textures into each channel (red, green, blue, etc). And then use a shader or something within the engine that knows what it's doing :). That's what we're seeing here!
I will cover that a bit later, or in a different tutorial, but for now, save them :)
Opening our Mesh In Blender
You probably noticed that the mesh is not in a known format such as .fbx or .obj (or .gltf like in our previous tutorial). Instead, it's a .psxa file, which is basically unreal engine's version of the mesh file.
In order to actually make it work, we do need to install an extension, which we can install through Blender, rather than going to a website! :)
For this you do need Blender 4.3 or up!
Obviously, open your blender :p (as in, not your home blender, that would be bad!)
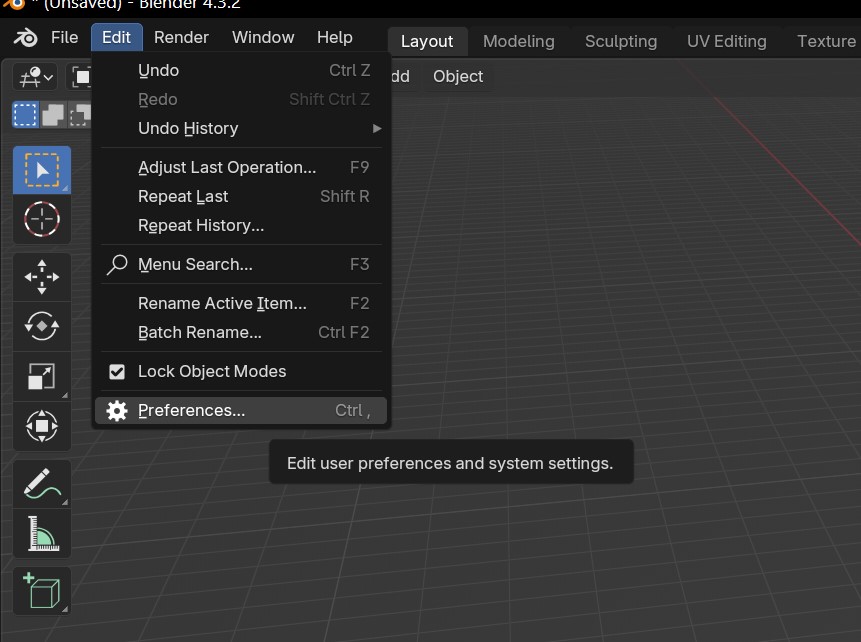
Go to "Edit > Preferences"
In the next screen, we see a whole lot of buttons and thingies. In our case, we only want to be concern us with the "Get Extention" Tab you see on the left.
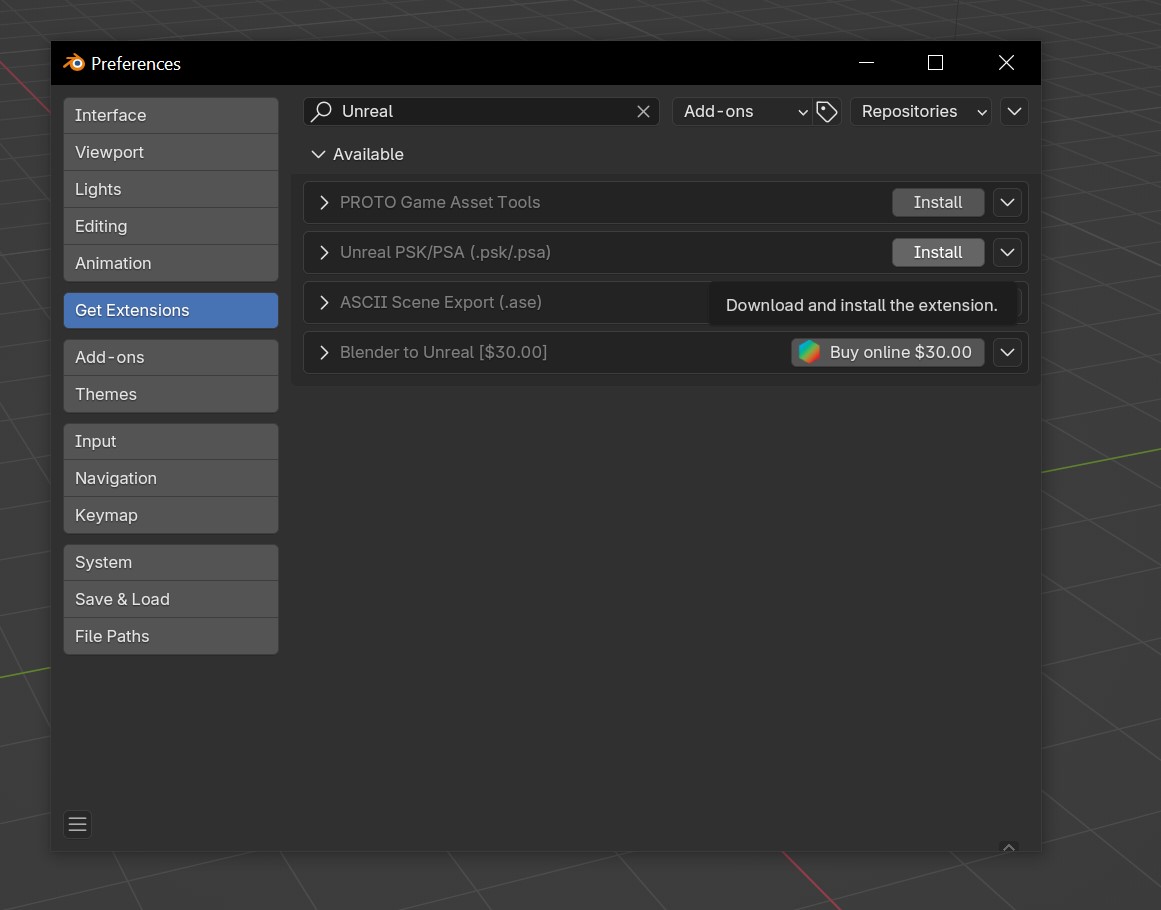
Now, in the search bar top, we type "Unreal", and it should show us some options. However, "Unreal PSK/PSA (.psk/.psa)" is what we want to install.
Press install.
Close the window and let's import our mesh!
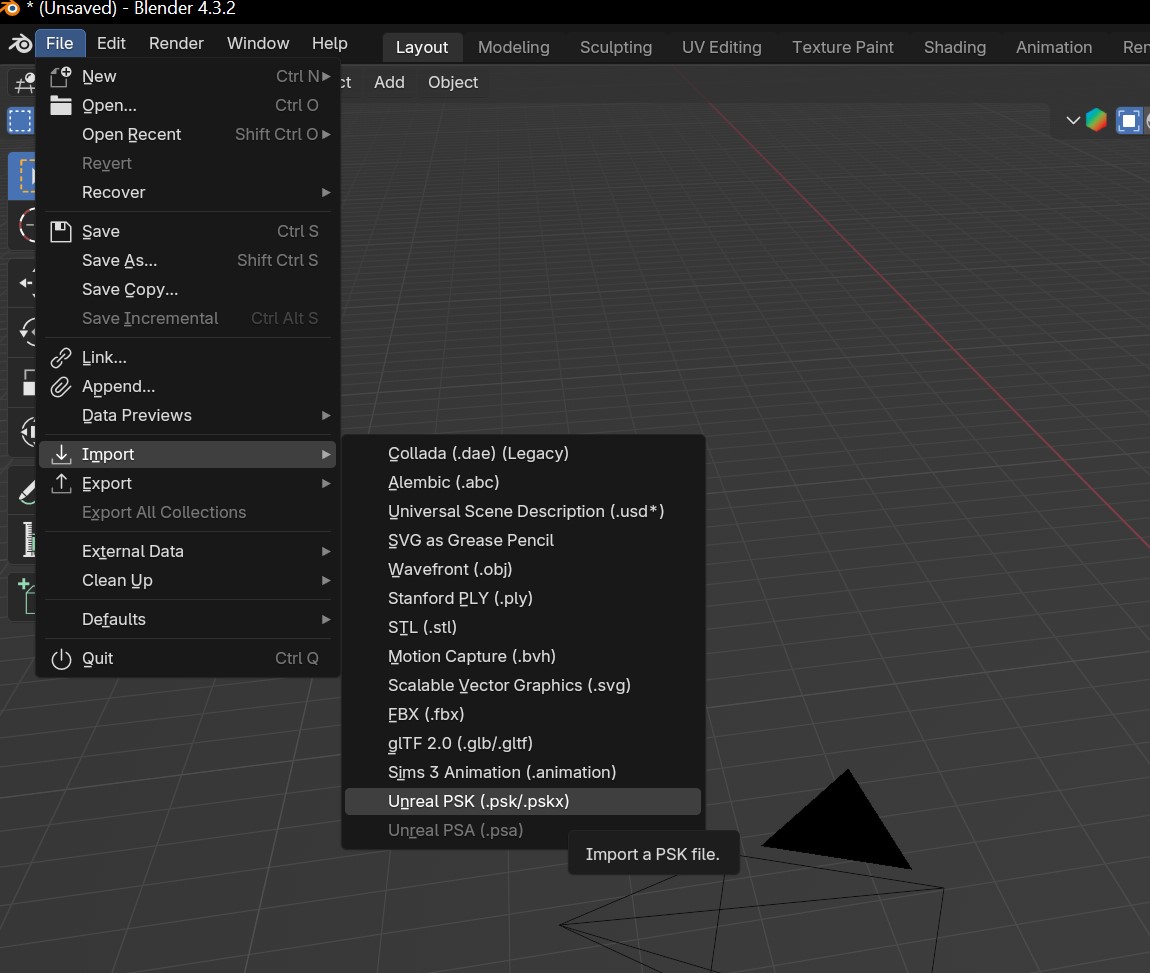
Now, assuming it's turned on (which 99% of the time should've happened! If not, check your blender version and install anything 4.3 or up!) we should now see it in our import menu!
Go to File > Import > Unreal PSK (.psk/.pskx)
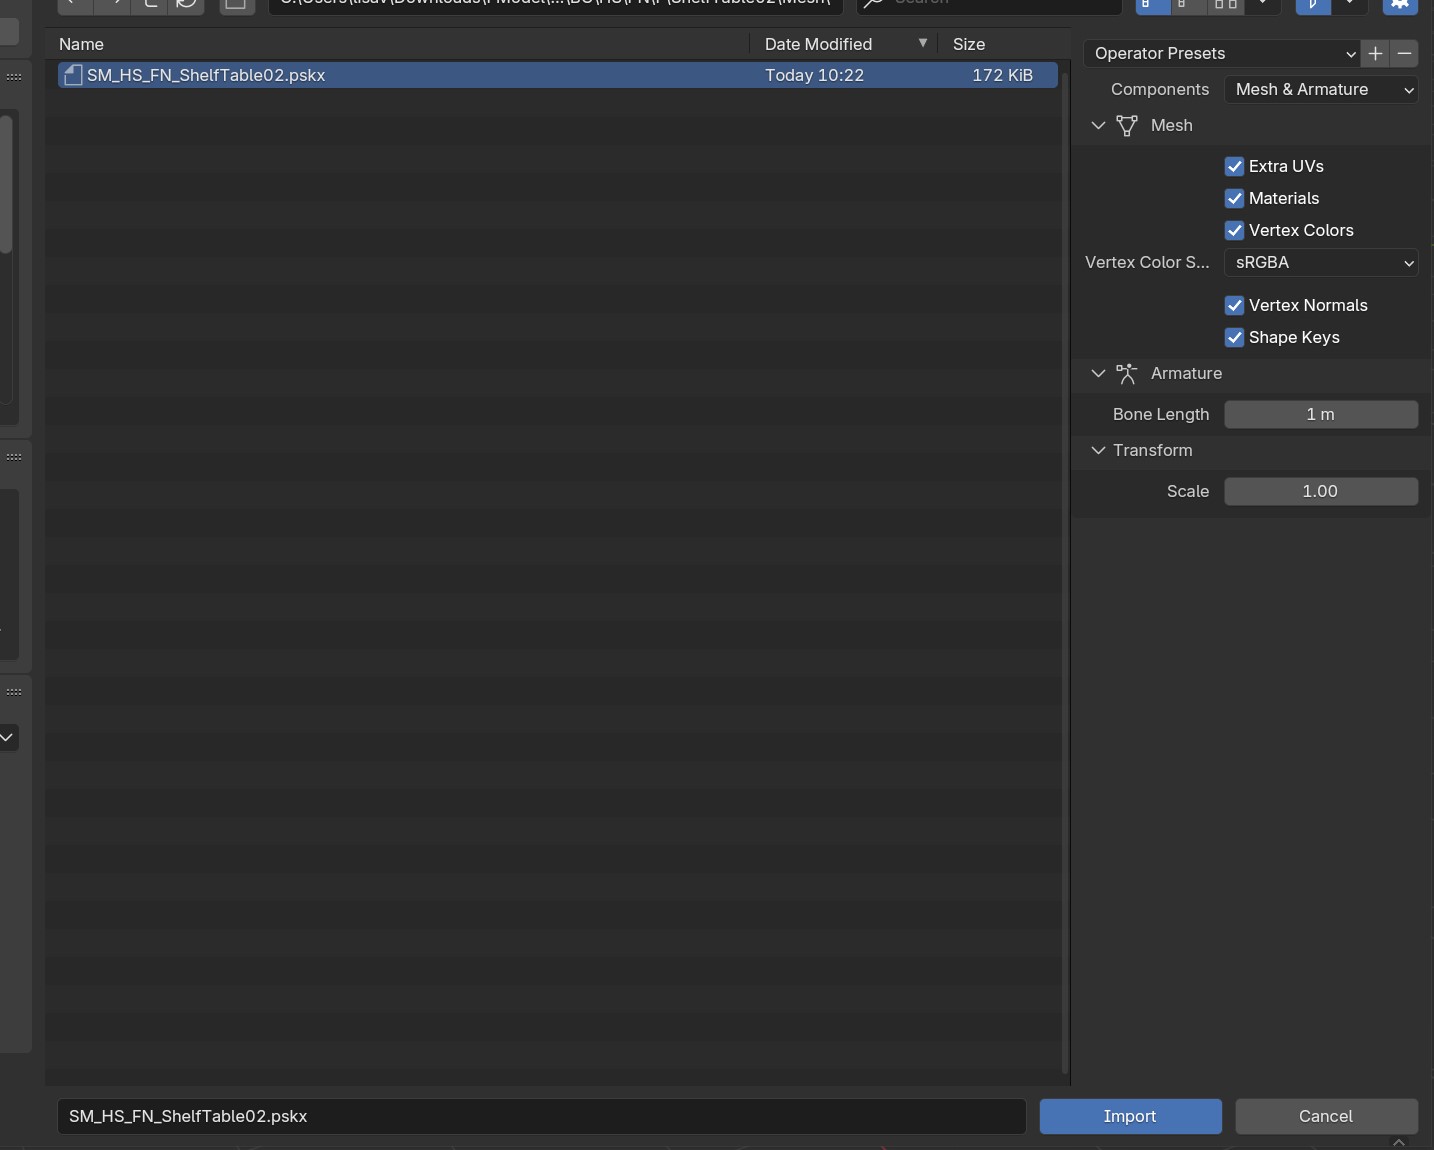
Navigate to our mesh.
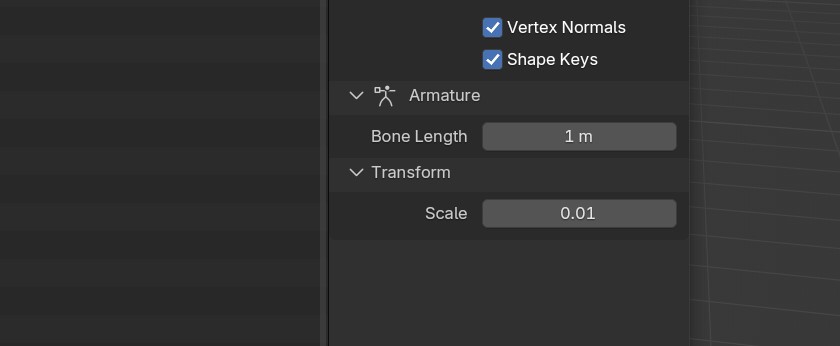
Before we can import it properly, we have to reset the dimensions to something that is more accurate to that of the game. To do so, we need to change the "Transform" Scale to 0.01 on the tab on the right-hand side.
Press "Import" at the bottom right.
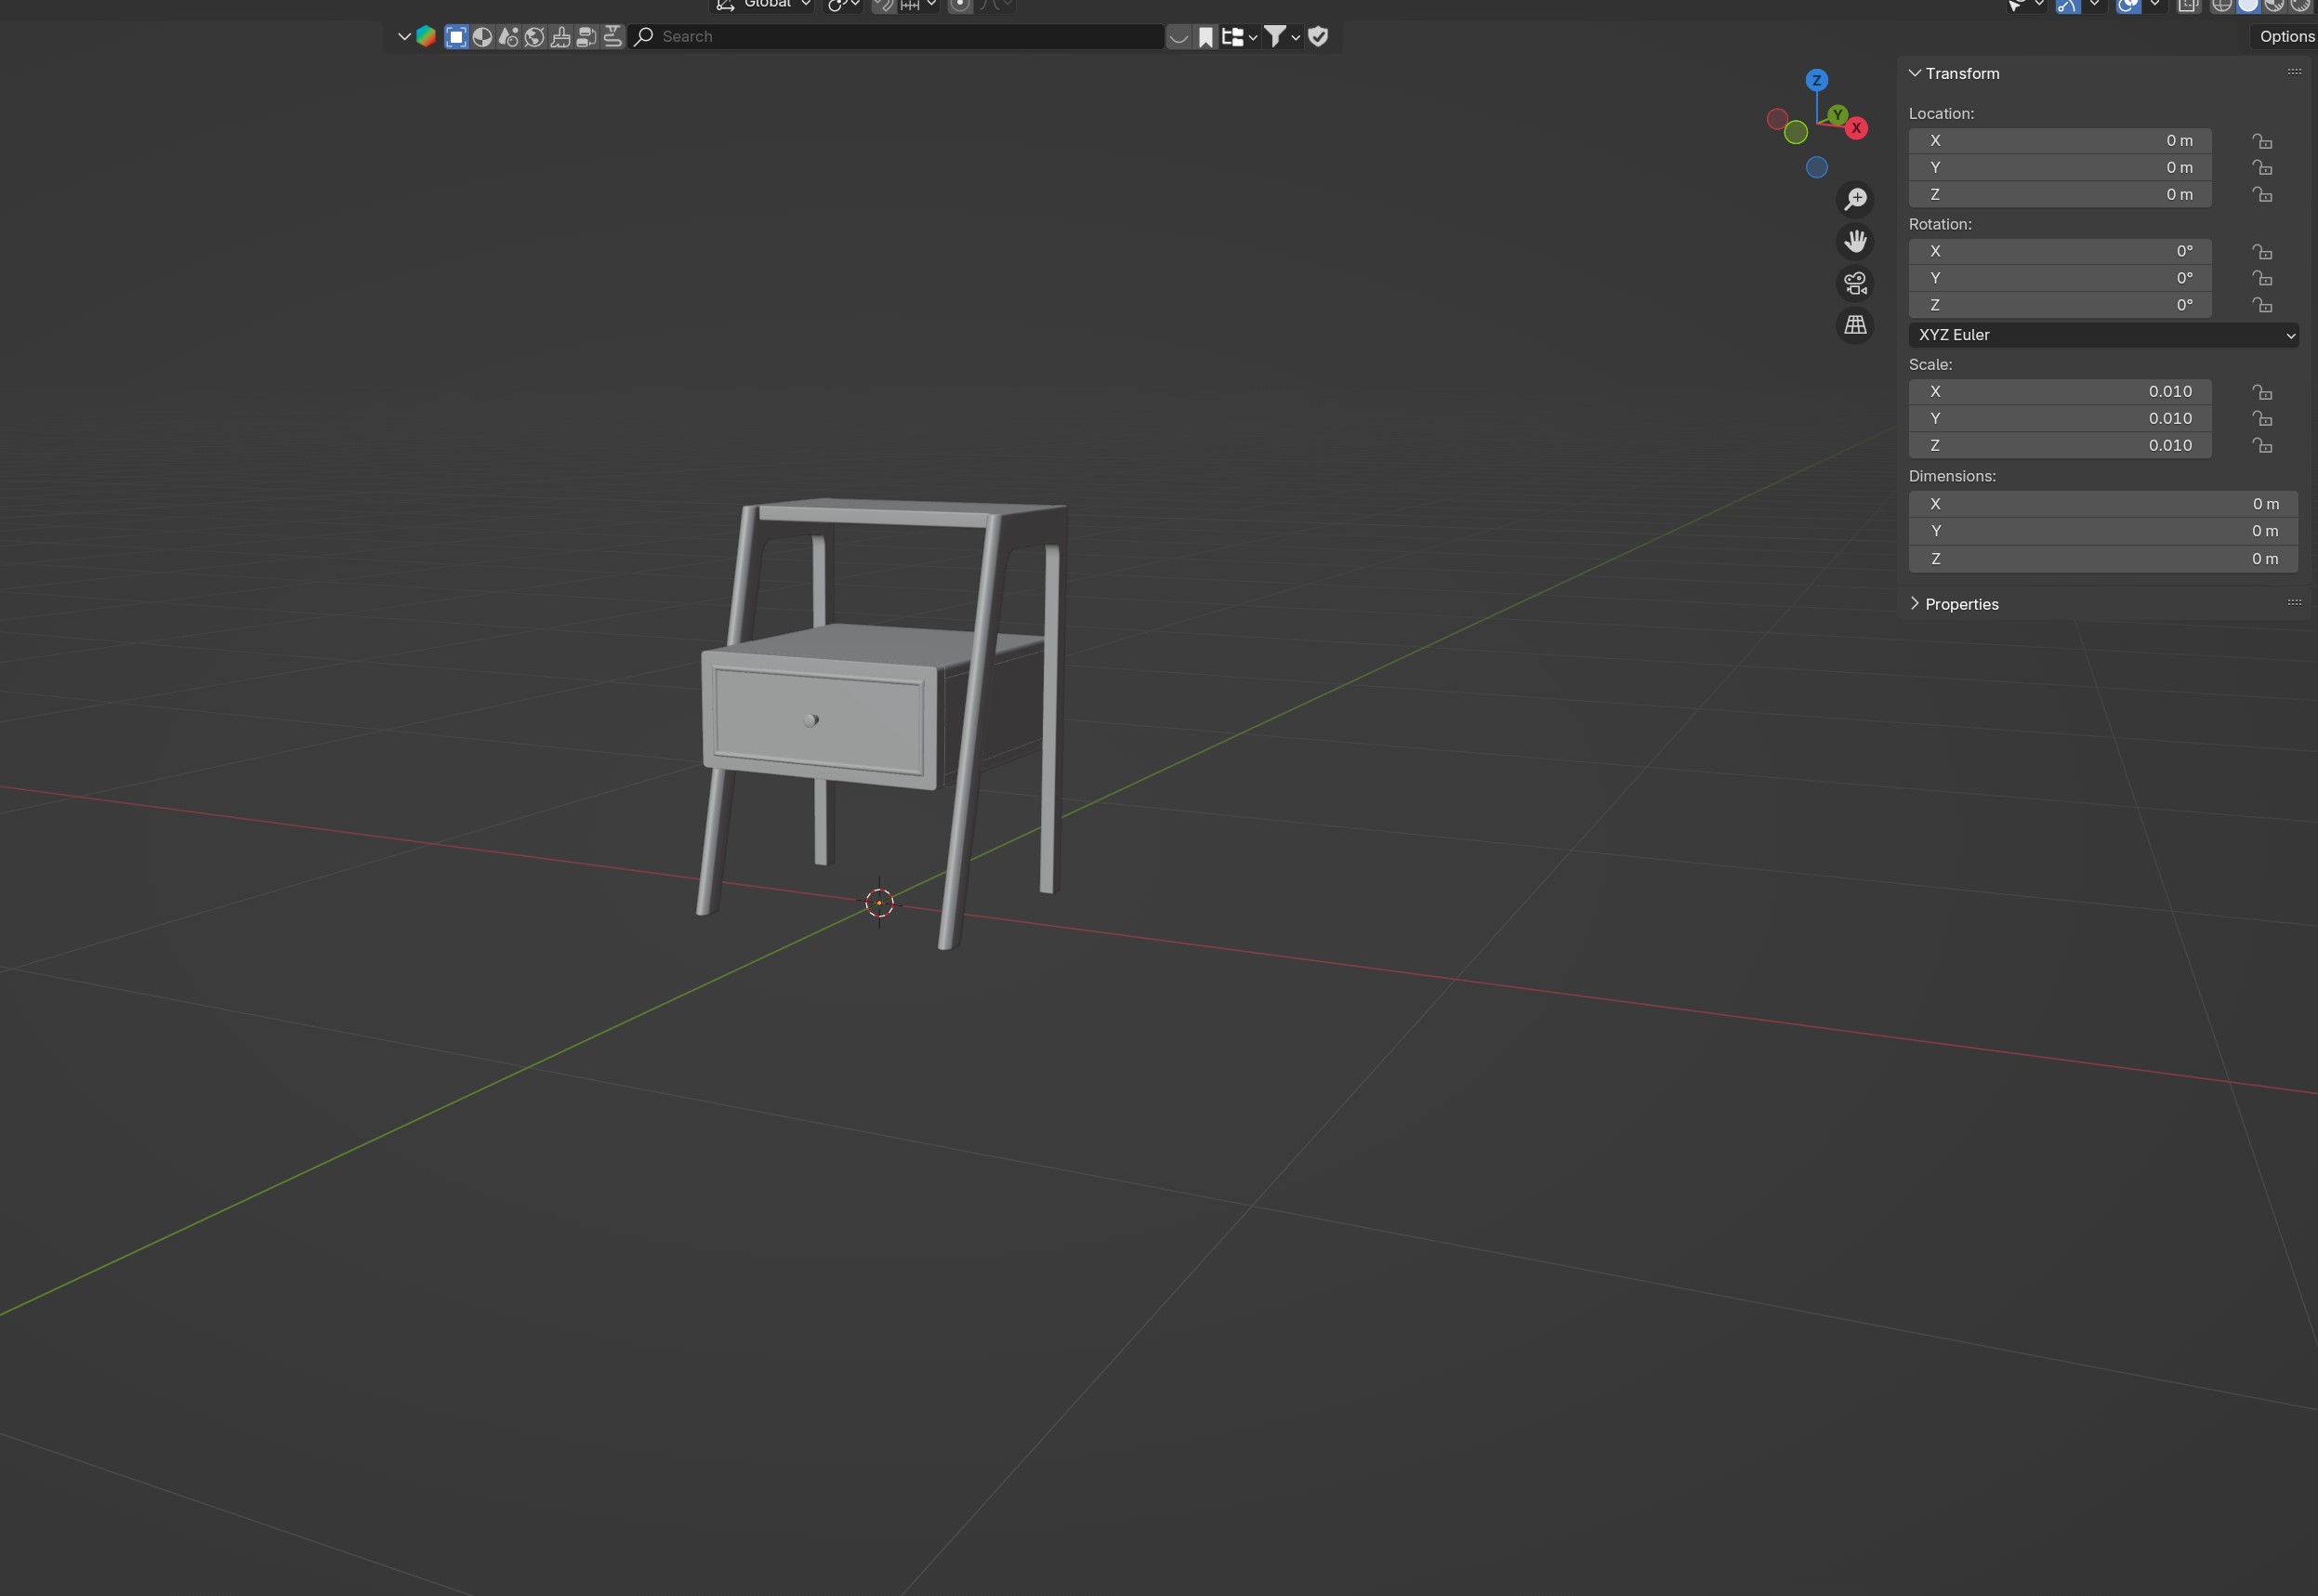
Tada! We now have our mesh in blender! :D
My mesh is HUGE/Gone
The mesh could appear gone, but as long as you see it in the list, it is there. However, it does mean you screwed up the settings in the transform scale upon importing it.
If that's the case, just delete the mesh in your blender scene and reimport it properly 😉
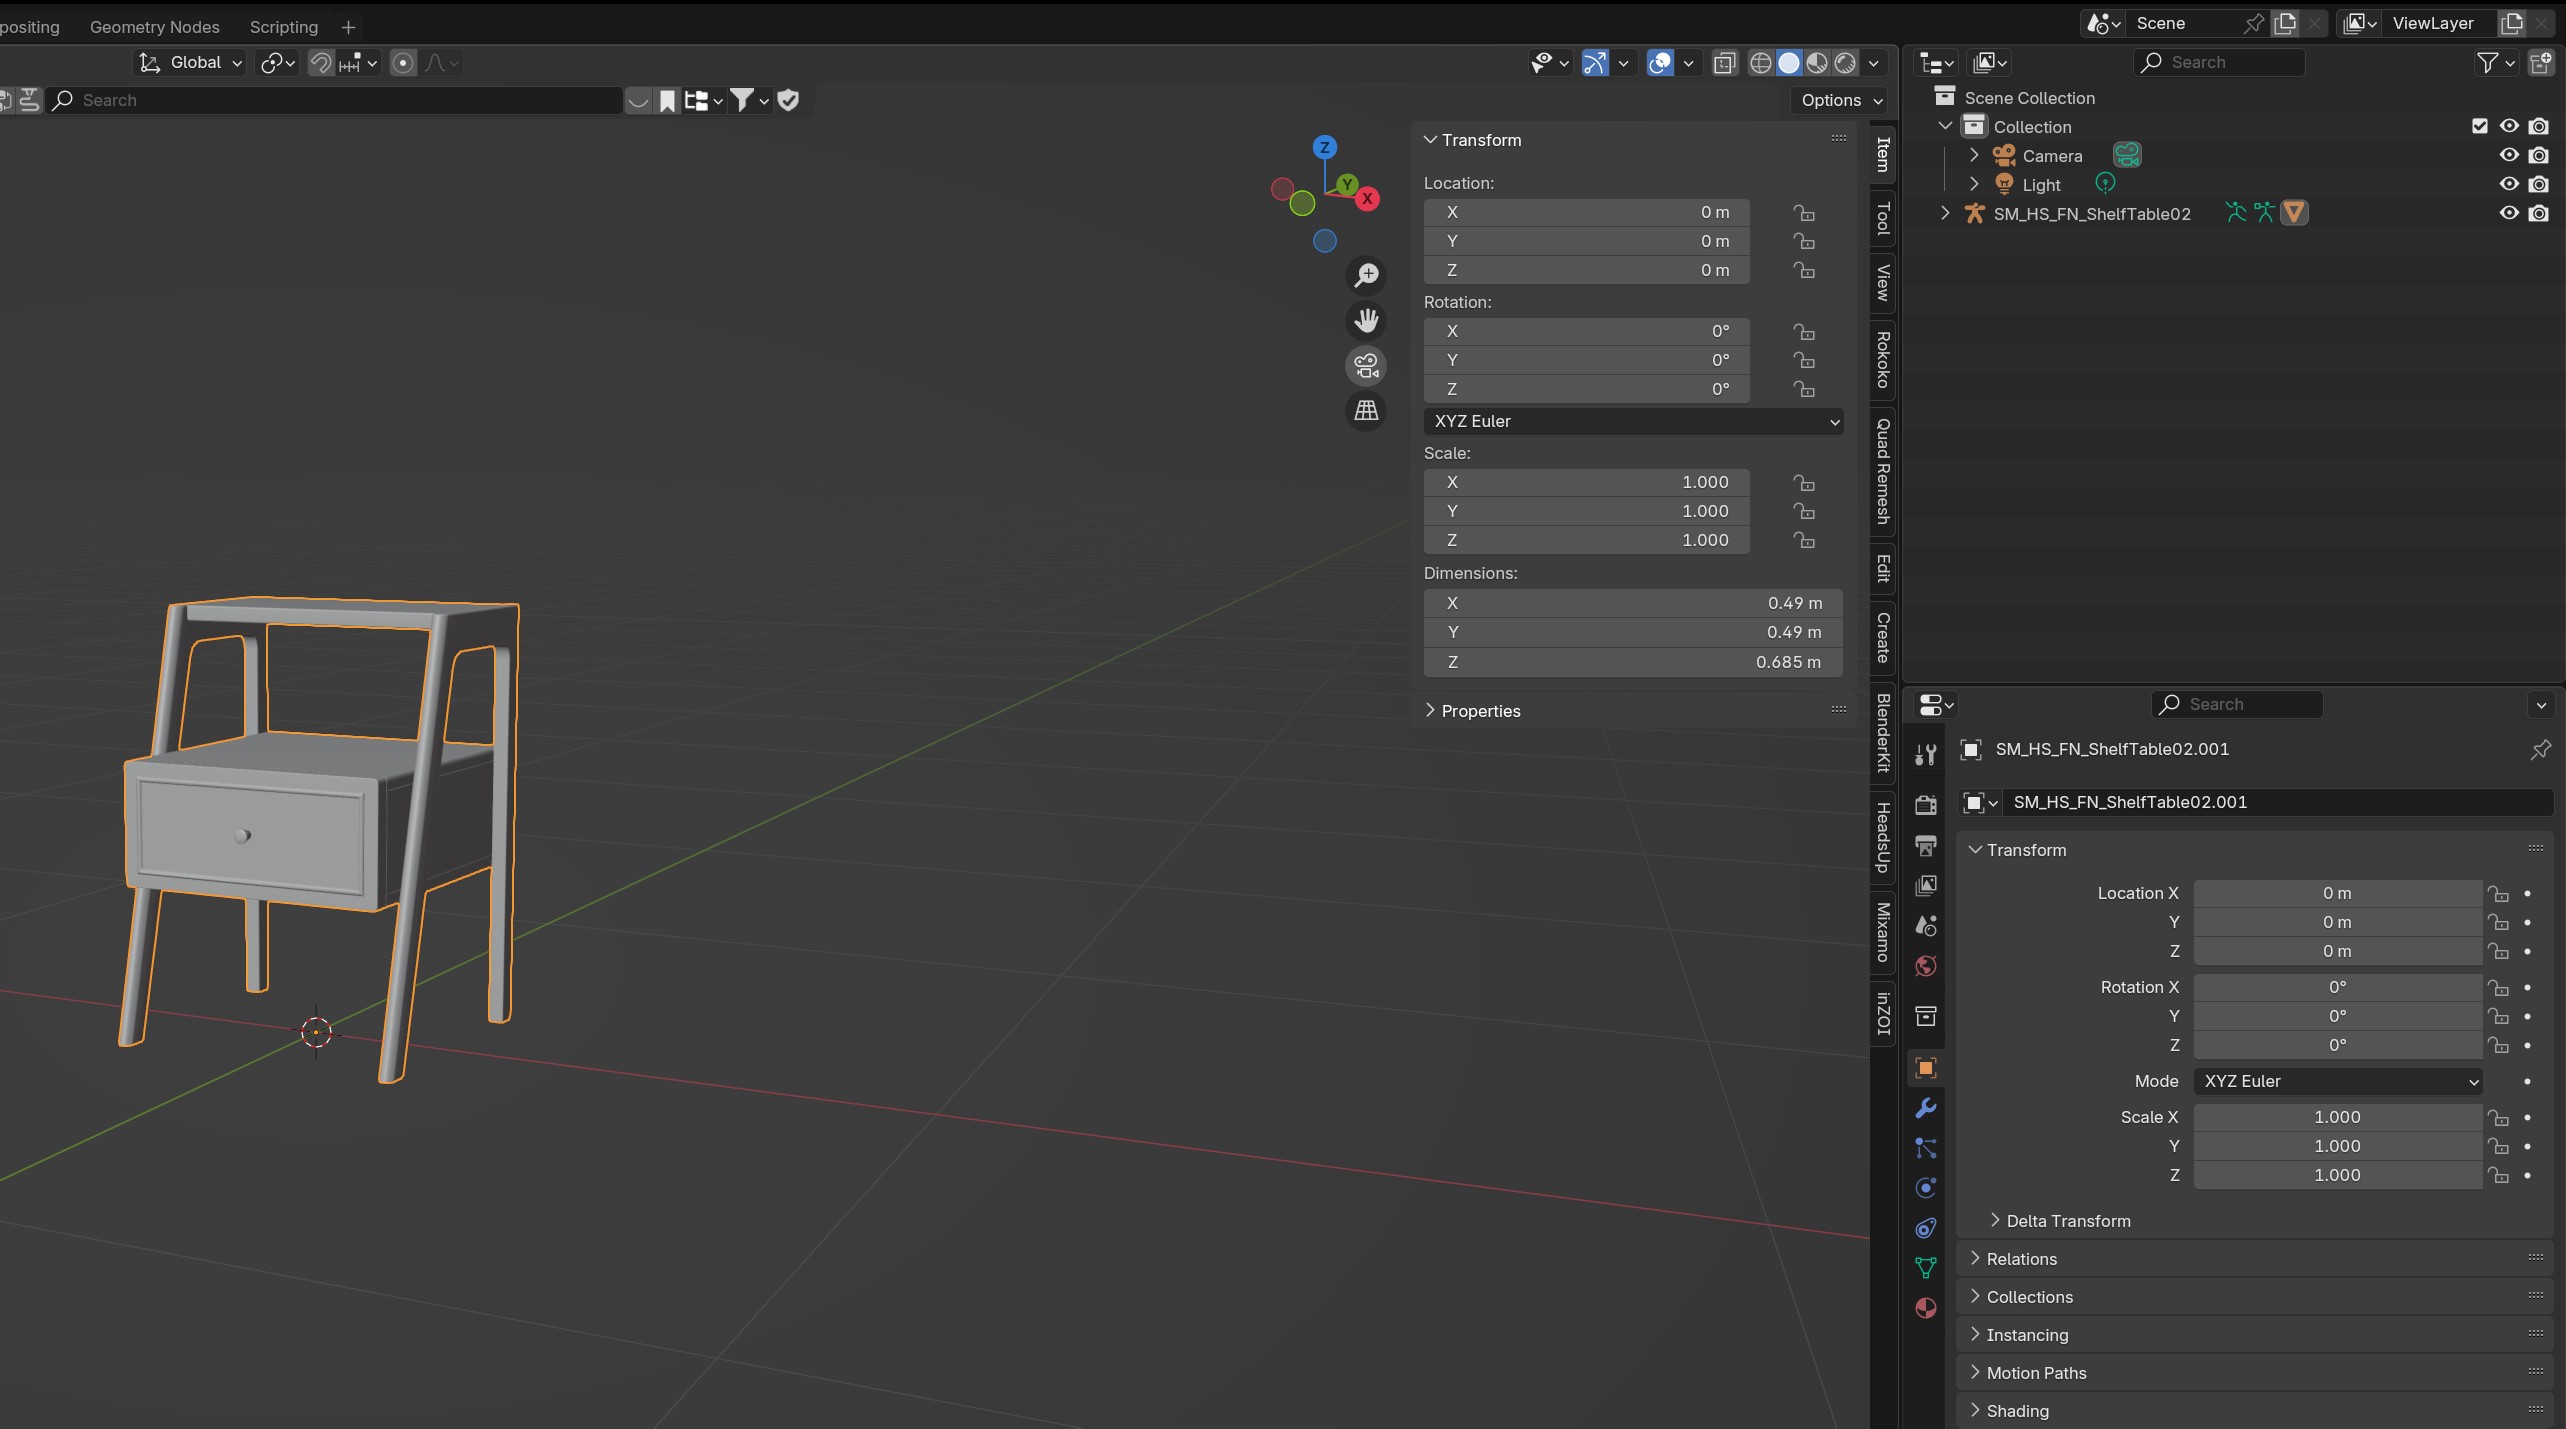
I'm not sure if my mesh it too big/small!
The Devs actually have some documentation about the size of each item! Which is super useful for us to figure out what it is supposed to be :)
See the dimensions specs here
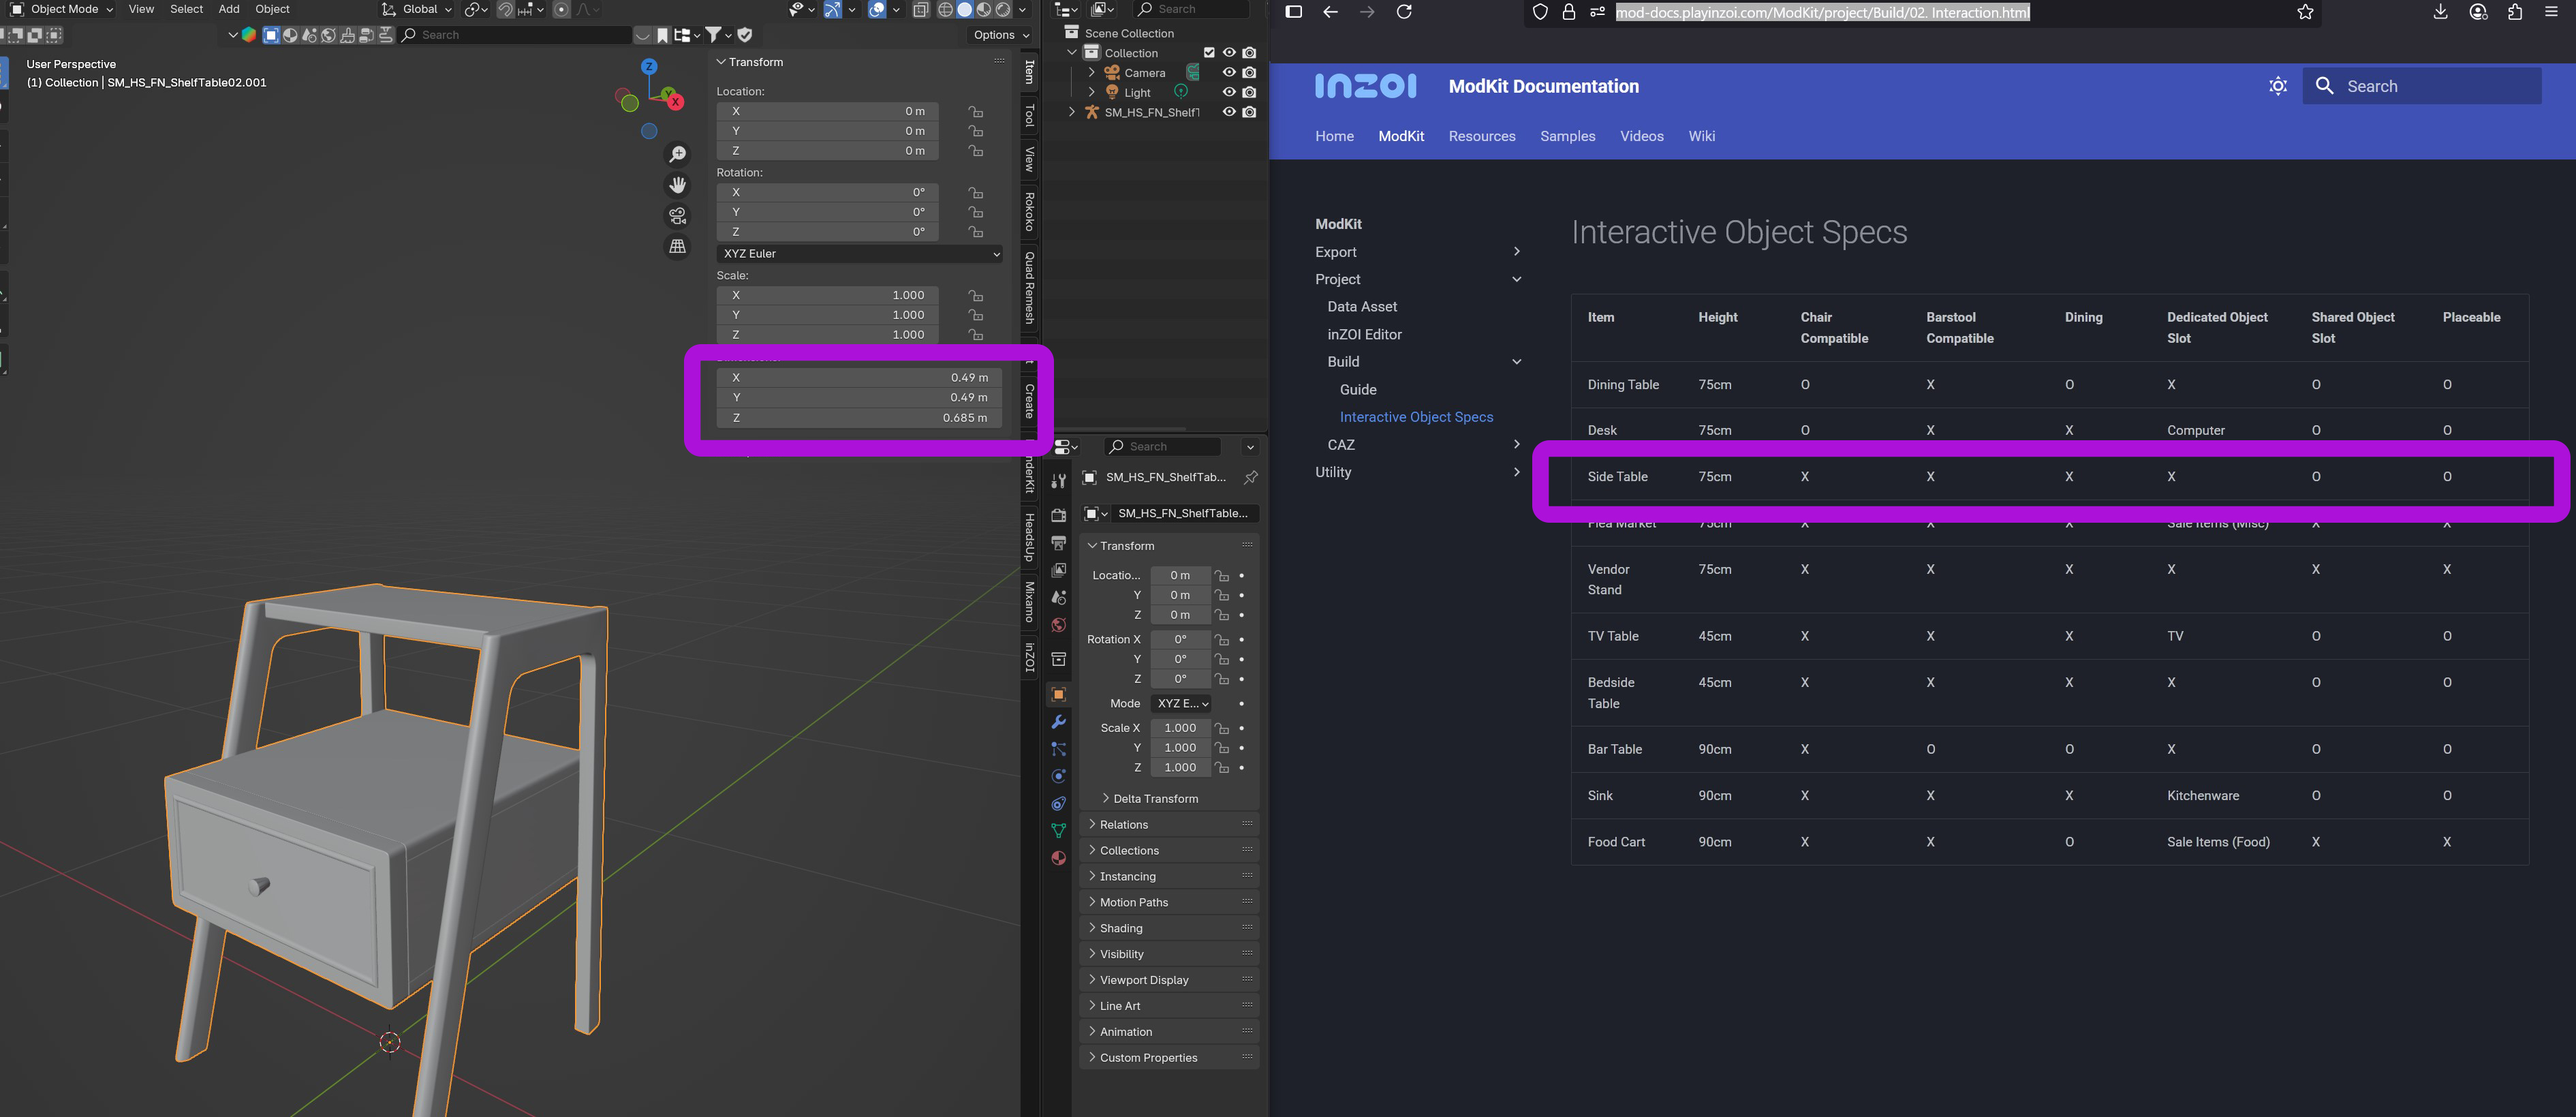
So, the dimensions are never going to be pixel perfect, but they'll have to be close to it. For the side table, it says they're about "75cm". Now, blender tends to use meters (you can change this, but I can't be bothered :p)
So, to know if our dimension is somewhat correct, it should in our blender dimensions have a 0. in front of it. Now I know 0.65m is nowhere 0.75m, but it's pretty close! Plus, I have a little bit of a suspicion that they didn't really properly made the sizes accurate across the board if we're looking at the size of the beds and desks, etc.
TL;DR: If in the dimensions section is had 0. in front of the numbers, you're good.
Handling our Textures
So, remember how we were talking about how the textures look... different. Well let's get to the bottom of why and how to extract the textures we'd like to see :D
You should have 2 textures. Though, if you're lucky you might've gotten the BaseColor texture too! That purely depends on how recolourable the item was from the start. (as in, can we completey recolour the object in-game, or is it just parts, or not at all?)
The "OC" Texture:
This file seems to be using a technique that's quite popular in games, called "Channel Packing". What this essentially is, is that our Rougness map and Ambient Occlusion get to live in the same "house" as it were, rather than seperately.
This often helps games use less VRAM and also processing power in a way, because it doesn't have to look for 5 different texture files and store them in memory. Instead, it just has to grab 1. Pretty smart right? 😉
- The Ambient Occlusion seems to live in the Red Channel.
- The Rougness Map seems to be in the Green channel.
- The Metallic Map seems to be in the Blue Channel.
- The Emissive Map seems to be the Alpha Channel.
Now that we know that, let's check out how to get our textures as seperate textures! :D
Unpacking our 'channel packed' texture:
There are multiple ways of doing this, like using Photoshop or even inside of Unreal Engine and/or Blender materials, but in our case we want simplicity! >:D
So, I present to you this awesome channel unpacking (and packing!) tool: Easy Channel Packing
But I need to pay for it?!
Gumroad sometimes makes it seem like this is the case for free items, but if you just put in "0 dollars" then it will still go through. However, if you wanted to make the developer feel happy and worth their effort of releasing this for free, totally feel free to donate/tip said creator :)
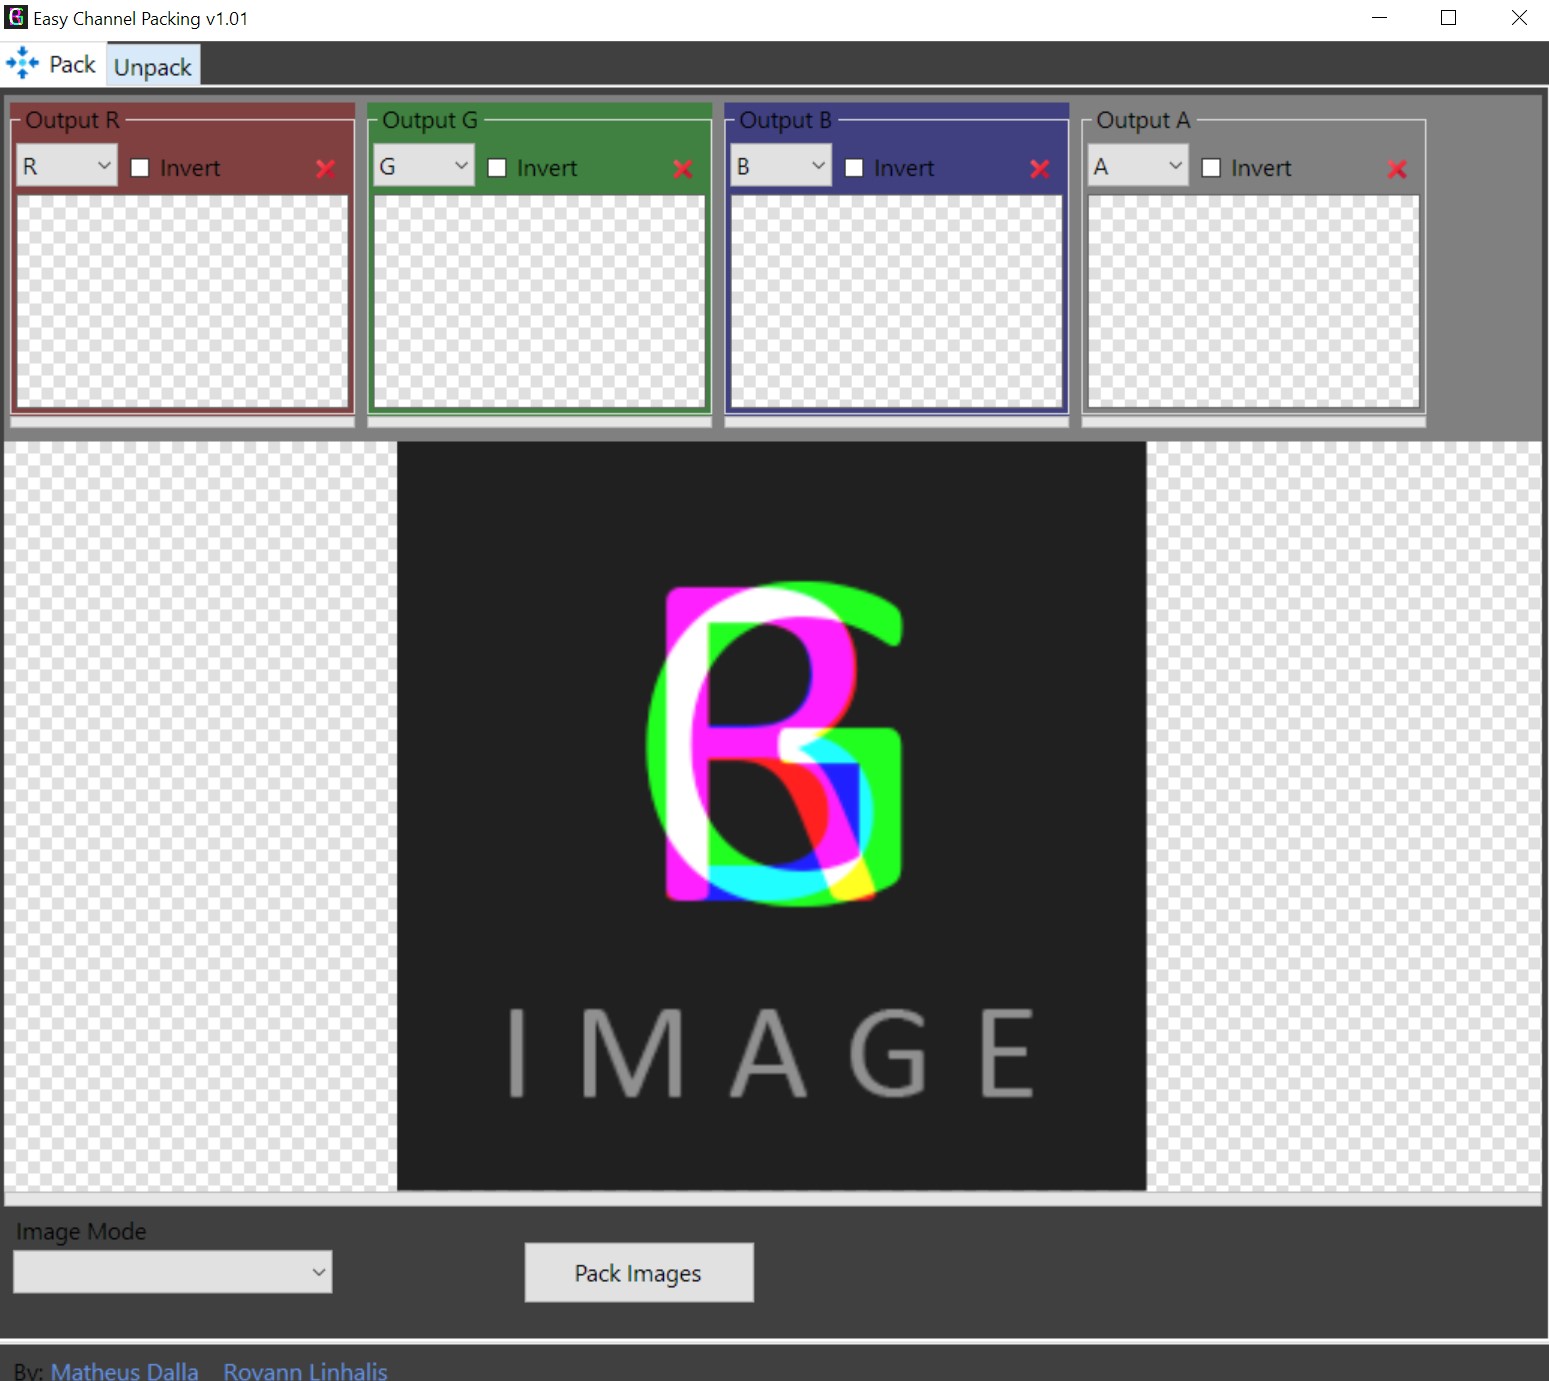
When you open the tool, we see this screen. This is the packing screen, which is not the screen we need.
Instead, go to the top of the program and press the "Unpack" tab!
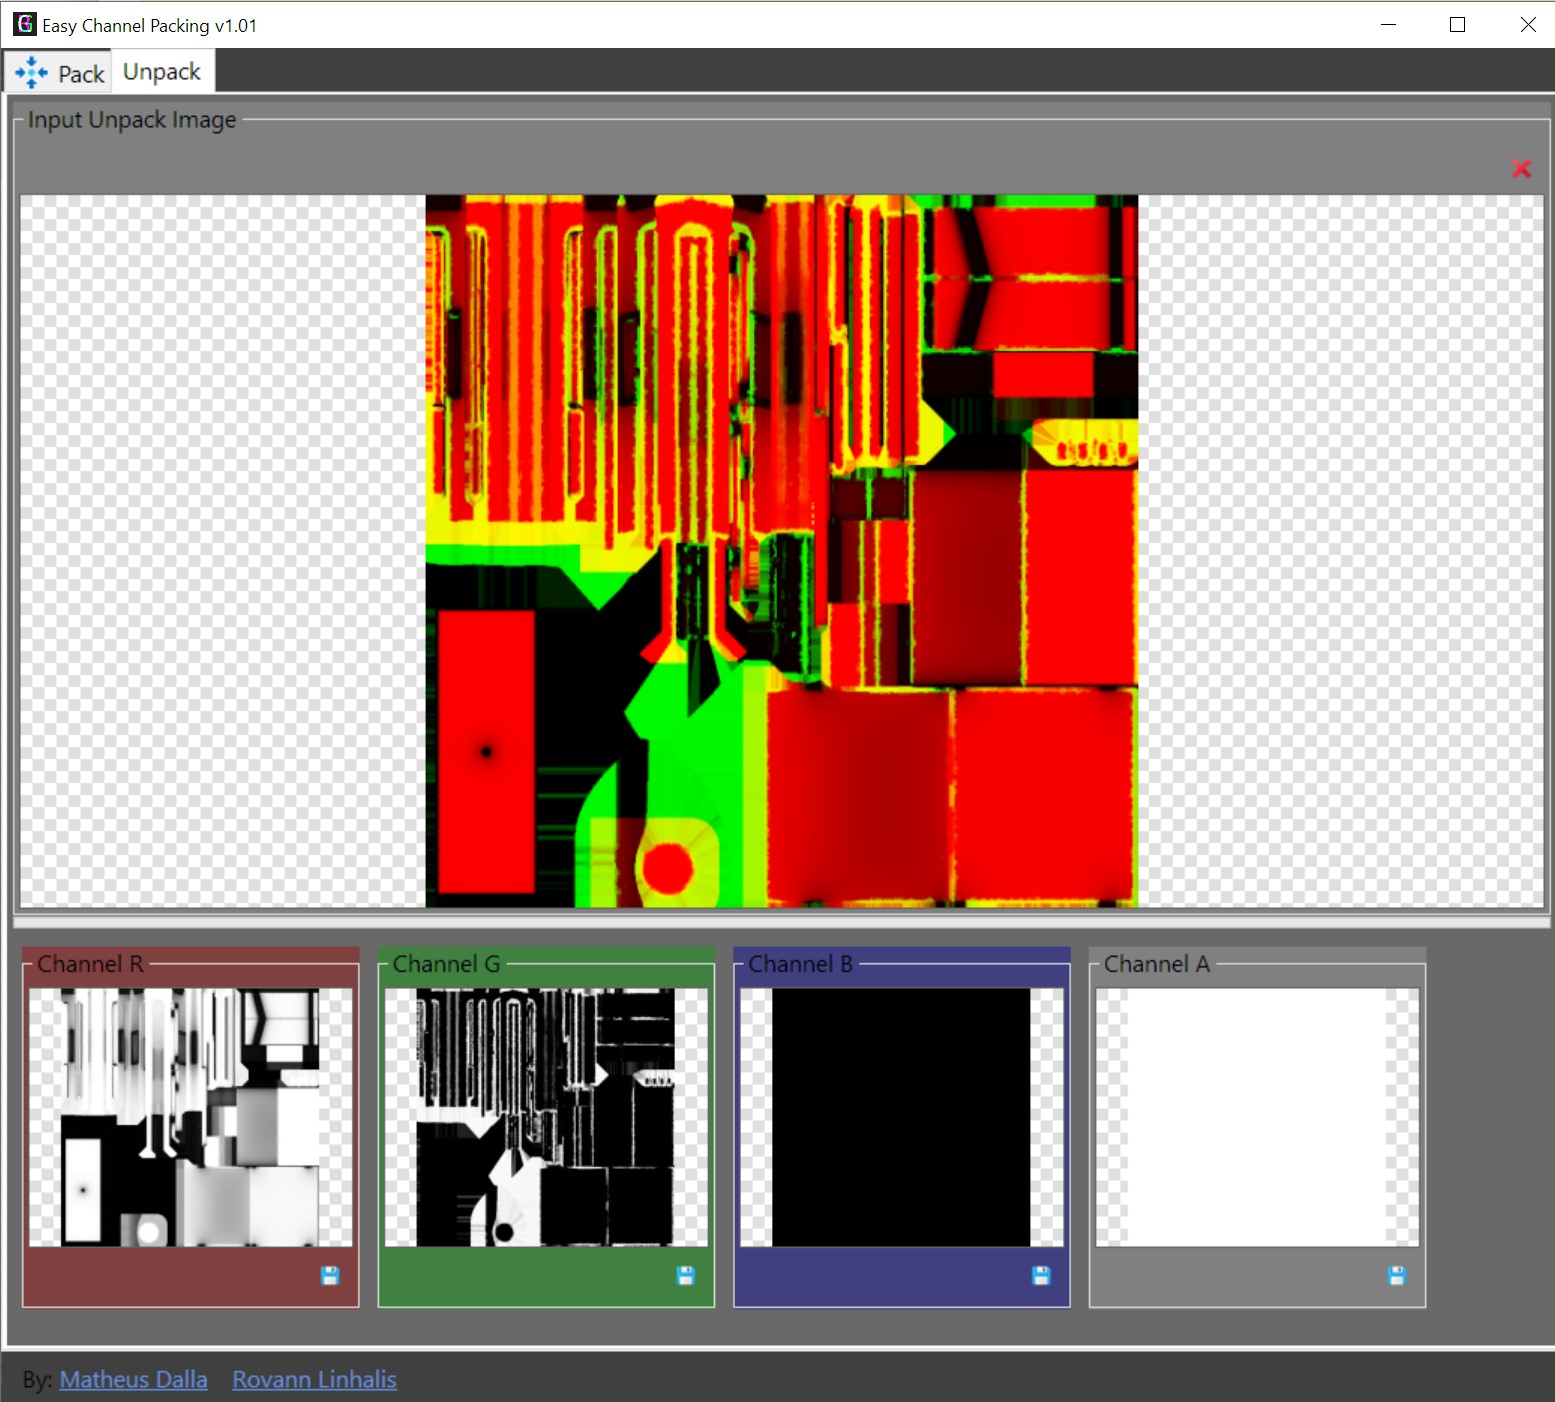
To import our OC texture, we press right in the middle of the big box (basically where now the OC texture is in the screenshot).
Navigate to your OC texture...
And now you should have the same result as in my picture! :)
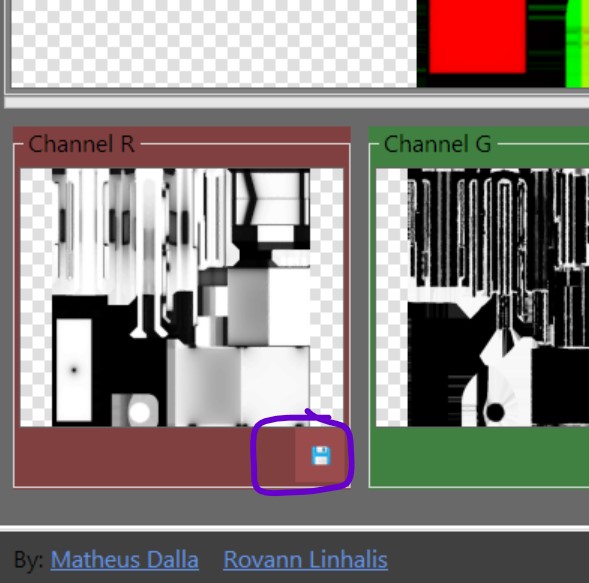
To save the result, make sure you press the save button on each channel. Even the blank one!
Now remember to save each file with their appropiate name for easier usage later!:
- The RED channel is the Ambient Occlusion
- The GREEN channel is the Roughness Map.
- The BLUE Channel is the Metallic Map.
- The ALPHA Channel is the Emissive Map.
Yay! Now we have our proper textures back :D. That's the downside of having to grab the textures without the ModKit, since the ModKit does this for us already it seems.
The "ID" Texture:
This one we don't need to do much with. It's a really cool texture though! if you're familiar with sims 3 modding, you probably know what a mask texture is, and that's essentially what it is.
If you don't know what it is however, it's basically a way for game artists to optimise the way of saying "hey, I want 4 different materials on this entire mesh, but only show that one material on red, and material 2 on the blue".
If you want to learn more about it, here's a great explanation of it: Youtube - What are Colour IDs and how to use them
Showing our textures in Blender
Before we start, I want to add that a recolourable item just like mine, is going to need some imaginary colouring so you have an idea what's going on. Because we don't have direct access to the wood materials that we use in-game (or any fabric, etc), this setup will just be a representation of it!
Though, if you do have your albano/BaseColor map, then you're lucky as that means you can get a better represented item out of it :)
I will also not be so hand-holdy in this part, since Materials in blender are, in a way, quite hard to understand as a beginner if you haven't touched it much or at all.
However, I can share you my setup and explain a little what I've done :) Also feel free to leave a comment on this thread if yours is different/need more help!
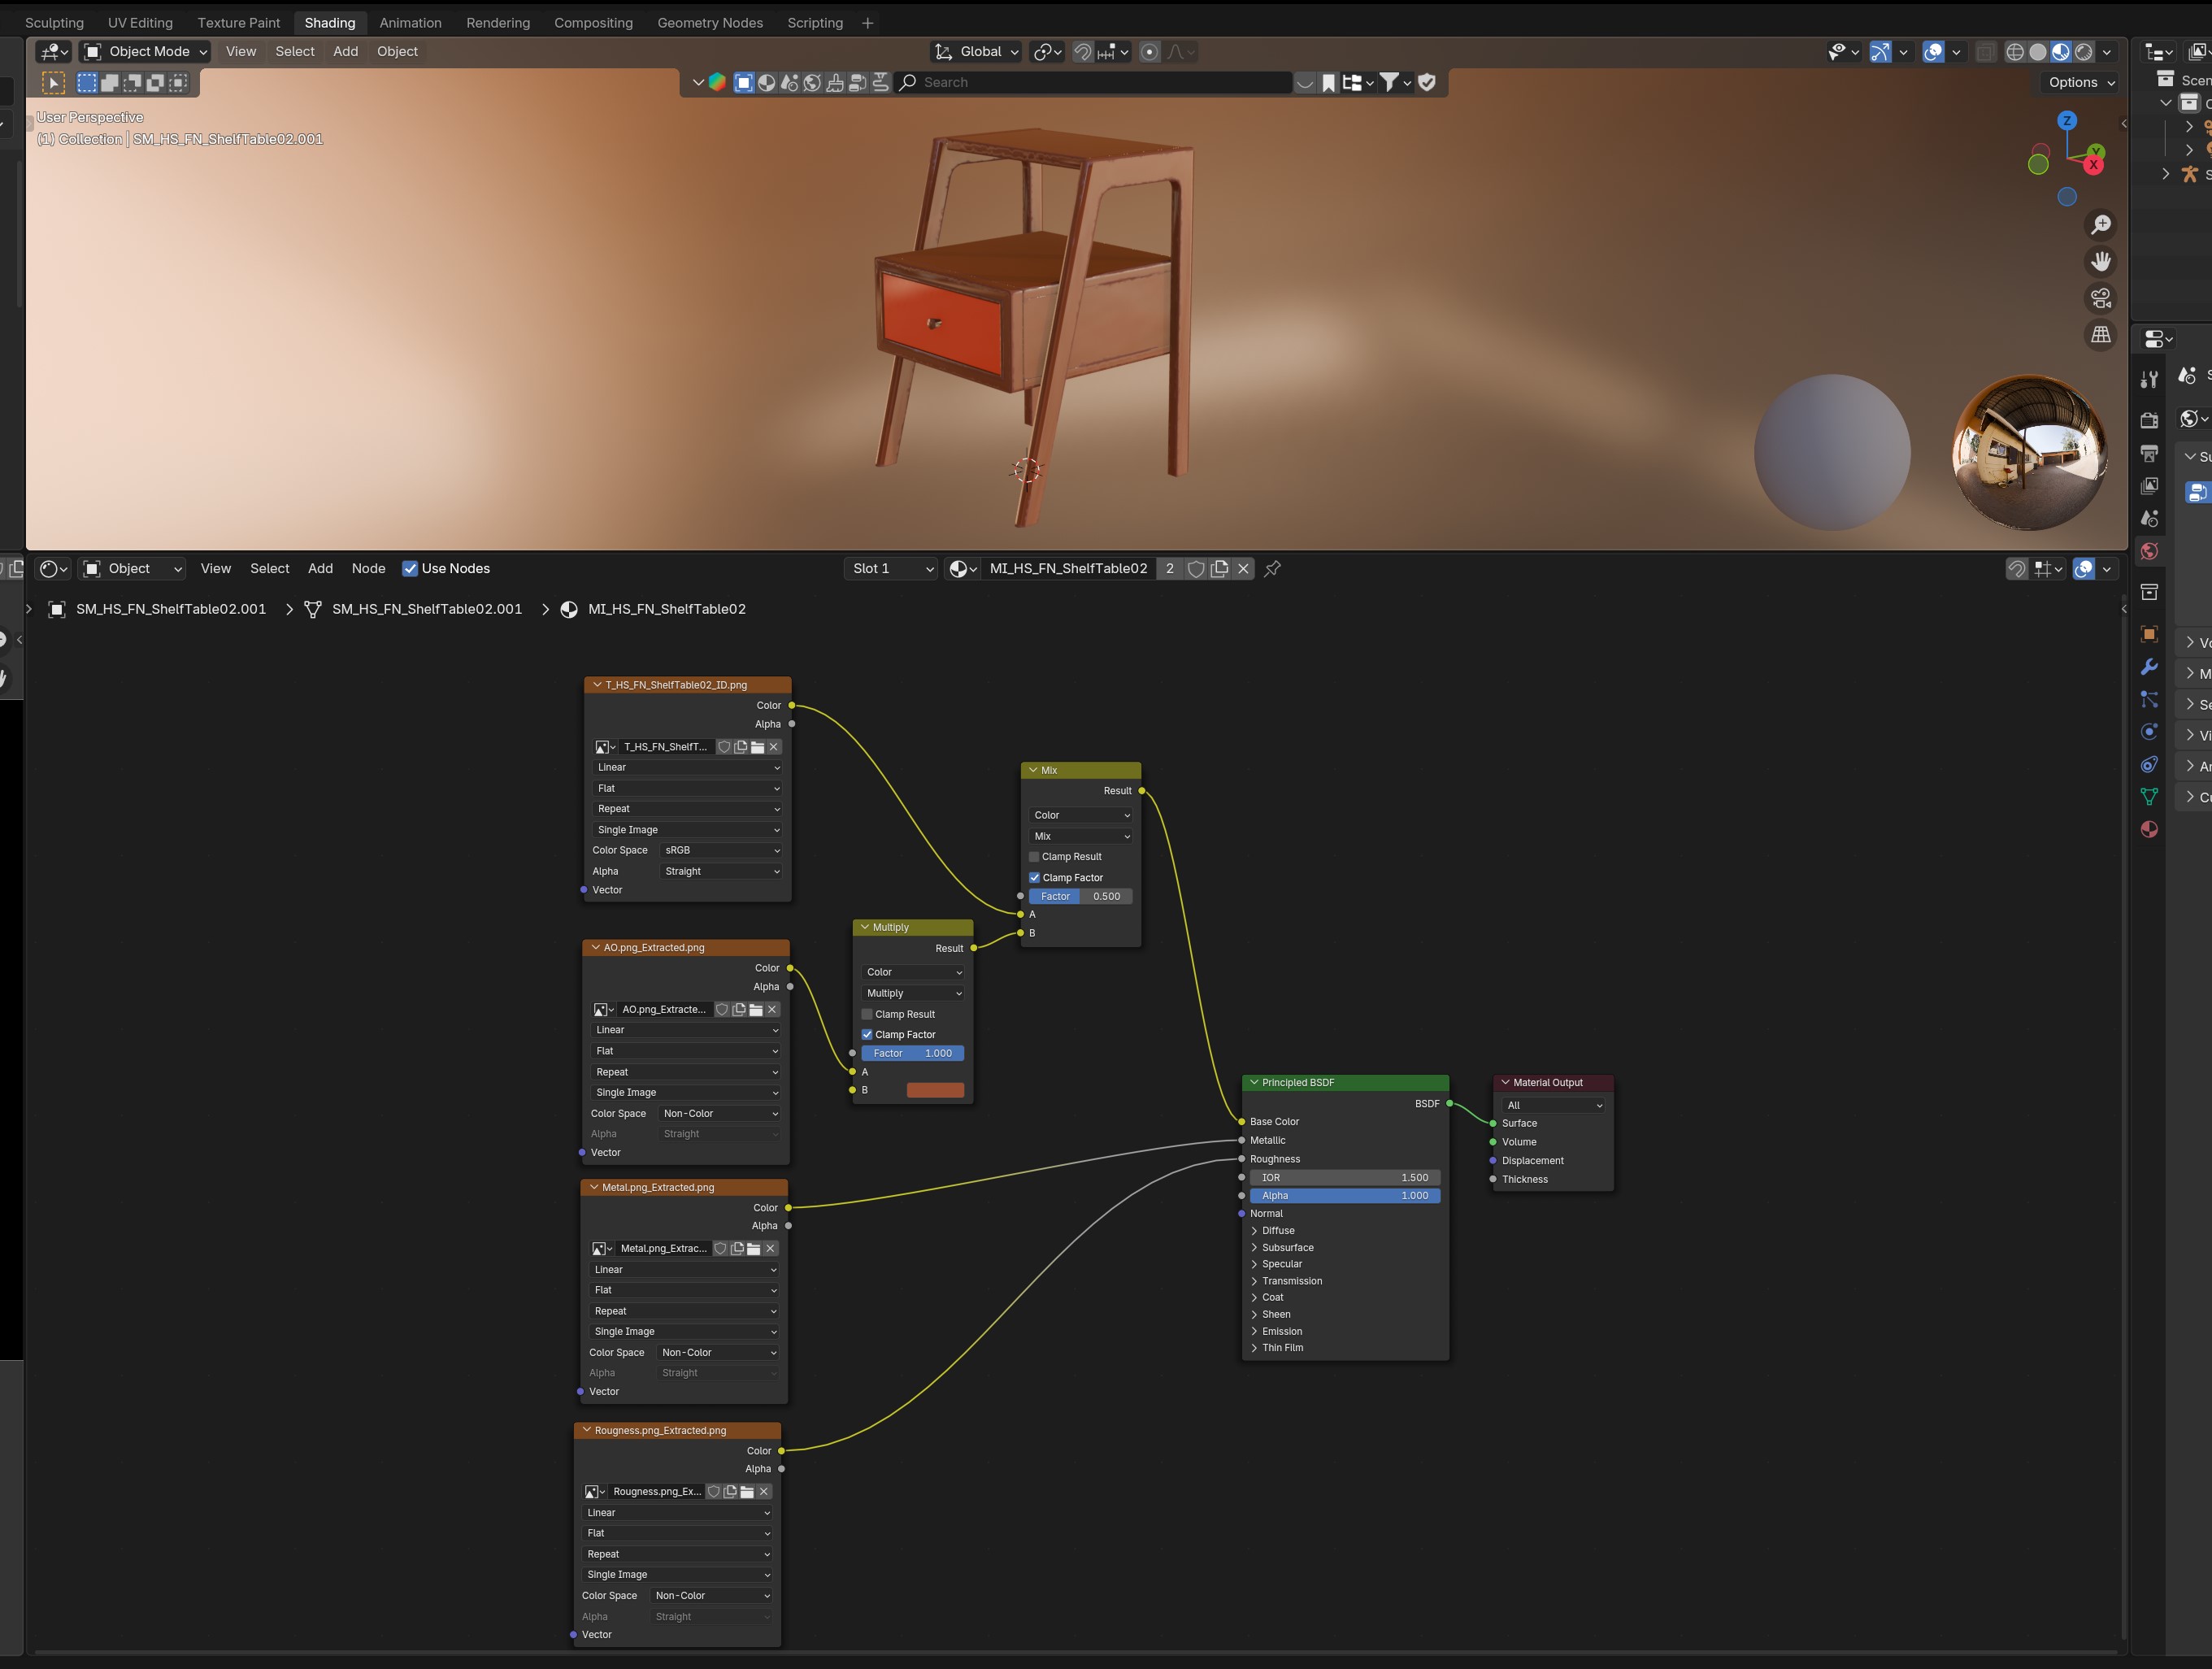
First, I imported all the maps:
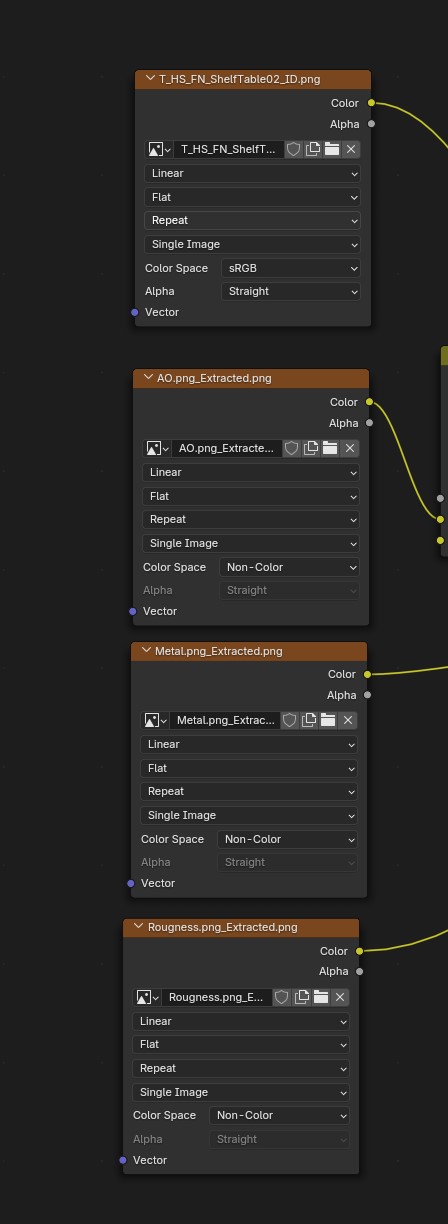
I did them in this order + changed the color mode for some as that's good practise;
- ID Map (Kept as RGB, don't touch the color mode on this one!)
- AO map (ambient occlussion) - Set to "Non-color"
- Metal map - Set to non-color
- Rougnness map - Set to Non-color.
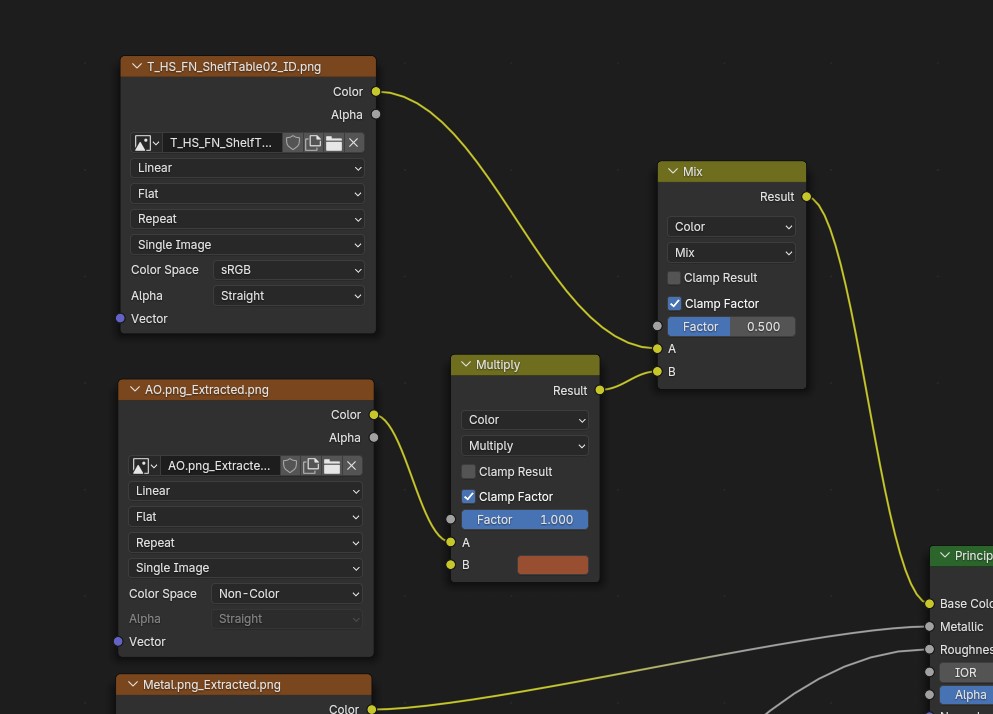
First, I combined the AO and ID map together. While I know this is technically not how one uses a ID map, it does make it easier to visualize it this way in a case of WHAT the game will not "recolour". In my case I only needed to worry about the red color, which is the case in a lot of the time.
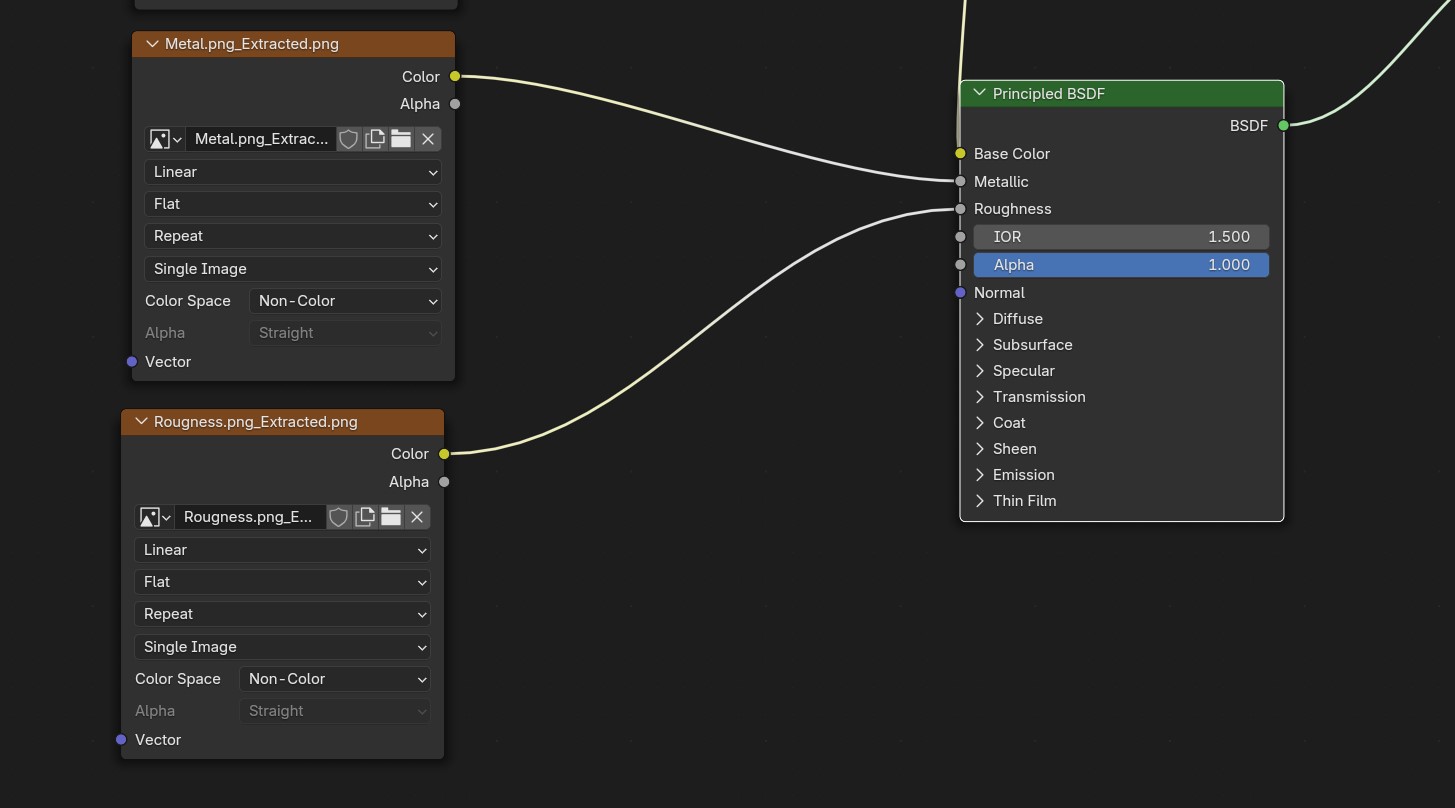
For the rougness and metal maps I didn't do much special, other than making sure those are "Non-colors".
Now I know I also have a "Emissive" map, which is pure white, but Blender's default for Emissive is already that and I felt it made no sense to assign a map for it. But! If you wanted to, you can always do that the same way as I did it for the Rougness and metal! Just make sure that is then also assigned as "Non-color".
The End:
You now know how to successfully extract meshes that were not (yet) available in the ModKit, nice!
If this was the first tutorial you encountered, you now want to continue on with the "Simblr.cc - How to Edit existing Furniture" tutorial.
From there just follow the steps of how to set up your mod, but instead of ticking "Include Asset Only" you instead untick that and find the item you extracted from Fmodel (in my case that would be the ShelfTable02).
Because you already have the mesh, you can simply skip the "Exporting the mesh from the Workspace" section, and continue on with "Cleaning up our mesh to make shiny things!"
For assigning your textures, instead of finding it in the game files (which it isn't available in), we instead want to do it the same way as the InZOI Modding tutorial tells us to: https://youtu.be/eKVeRV9Zupg?si=ZCYpuBNw6iFBjNaj&t=72
And after all that you should be ready to go! :D
If you have any questions, totally feel free to reach out either here or on the Simblr.cc discord. 👋🏻
Credits:
- Fmodel
- This tutorial would've been much harder to write without the Fmodel Discord! Thanks for sharing a working .usmap file with me :)
- The Nexus Modding Guide for getting me started.
- The gildor forums
- Blender 4.3
- QuickBMS
- The vampires the masquerade bloodlines soundtrack for keeping me focused lol.
