Maternity Morphs & Bone Deltas Tutorial + Resources

Maternity Morphs & Bone Deltas Tutorial + Resources for The Sims 3
♦︎ Tutorial on how to add maternity morphs and correct maternity bone deltas to CC, Store or EA clothing. Clipping hands begone!
♦︎ Resources include 60+ EA maternity morph references and 90+ EA maternity bone delta references. Yes, that's how many EA made! I simply exported all of these from the game files and organized them with thumbnails for easy use.
Tutorial and resources download link can be found under the cut!
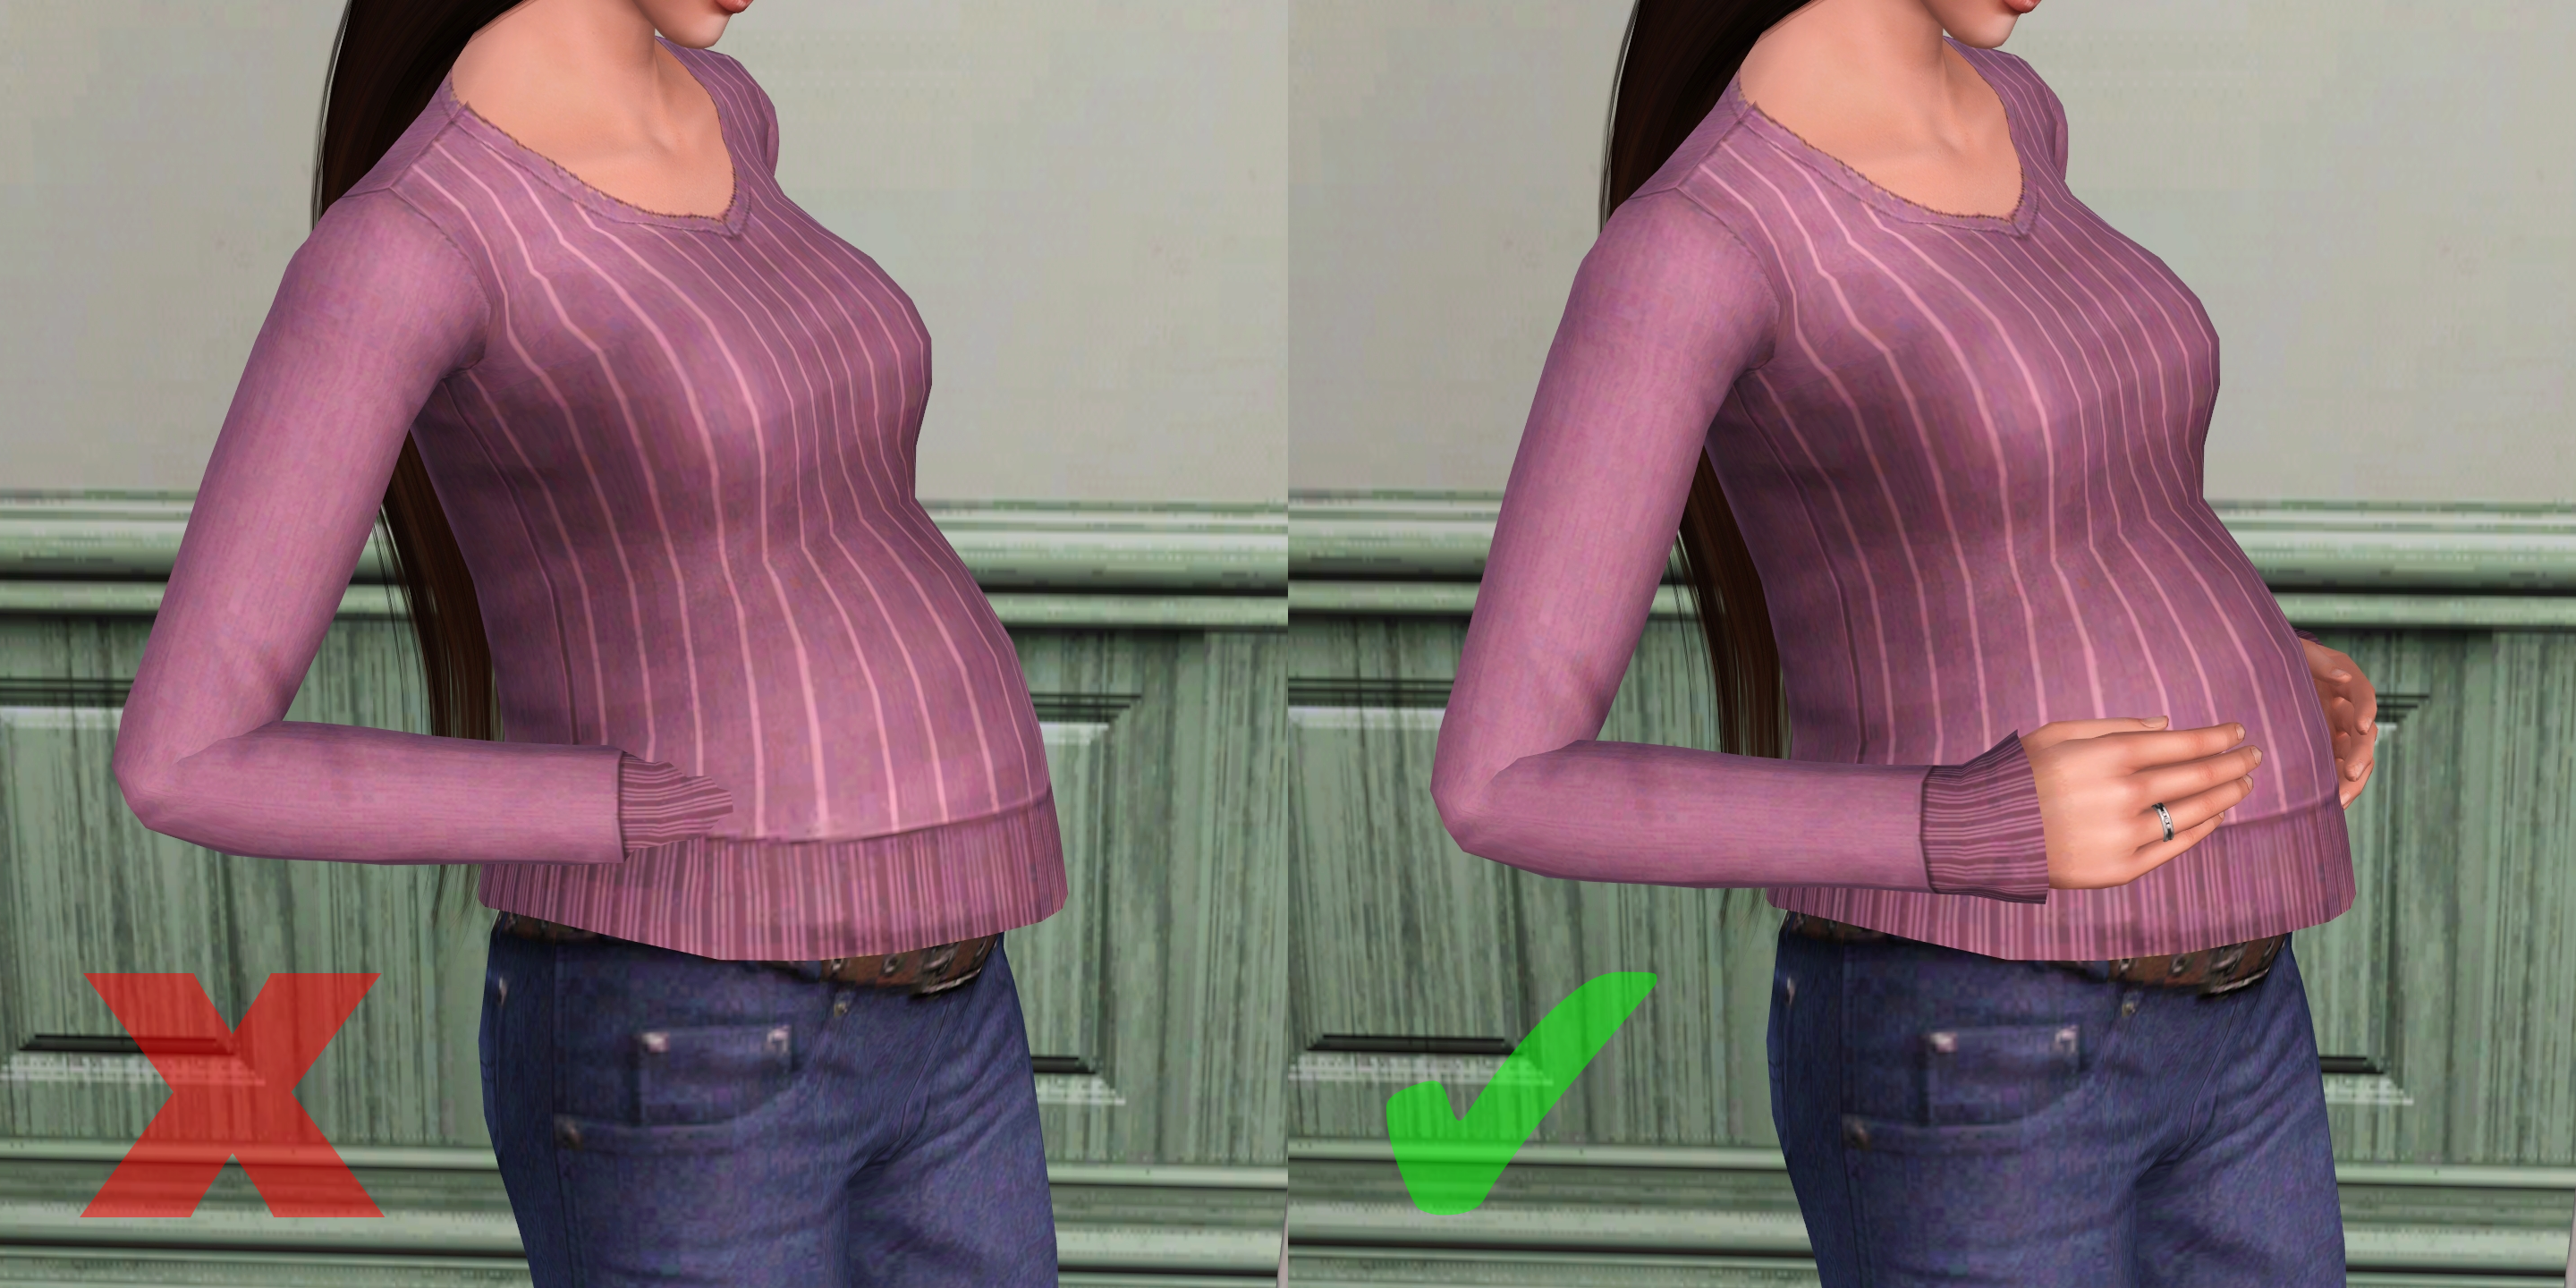
♦︎ You're probably surprised to learn that there are so many maternity references hidden in the game files, while in the actual game there's only a handful of maternity options. Well, EA was silly as usual and forgot to enable a majority of them for our preggo Sims to wear. What's even weirder is that there are a bunch proper maternity bone deltas for clothing without any maternity morphs. Even ones for female teens and elders! In case you didn't know, bone deltas are basically what communicate to the game the shape of a Sim's body. This is to prevent clipping issues like hands going through bellies.
♦︎ So most of the resources included here are for adult female Sims. Like I mentioned above there are some teen and elder maternity bone deltas too, but EA obviously never made any morphs. So for them I've included a few basic pregnancy morph references. These are edited by me, but based on and compatible with teen and elder maternity morphs by sweetdevil and SimplexSims. They should work alright for most clothing, but if you require more maternity morph references, then I recommend you use the ones from the EA conversions done by @sweetdevil-sims or by me. Nothing for males is included in the resources, but the tutorial does have a section for adding maternity bonedeltas to male Sims.
♦︎ Reminder that EA's maternity morphs don't just give your Sims a pregnant belly, but also make your Sims gain a small amount of weight overall. This is why it's very important to assign correct bone deltas alongside the maternity morphs. These not only prevents clipping issues with the belly, but also thighs, arms, hips, etc.
TUTORIAL START
♦︎ Required tools : S3PE | Mesh Toolkit | Blender + GEOM Tools Optional tools : BoneDeltaEditor | S3OC
♦︎ I've tried to make the tutorial noob friendly. As such it's pretty long. If you're an experienced CC creator/converter, then you'll probably know how to do a lot of what's explained here.
♦︎ This tutorial has been split into multiple sections. This first section explains how to add maternity morphs to a finished CC or EA clothing package. If you already know how to do this, you can skip to the section about adding maternity bone deltas.
Creating maternity morphs using EA references
♦︎ First, open the package file of the clothing item you want to enable for maternity with S3PE. If you want to enable an EA item for maternity, then clone it with S3OC (Cloning > CAS Part > Select one > Clone or Fix > Uncheck Renumber > Start).
♦︎ If your package has no internal names for the resources inside S3PE, then make sure to generate these using Mesh Toolkit: Package Tools > Name Those Files.
♦︎ In S3PE select all the LODs under the GEOM tag (lod1, lod2, lod3) and export them to your WIP folder. If you see any with a morph name, like lod1-fat, then skip those.
♦︎ If you see any LODs with multiple groups (like lod1, lod1-1), then in Mesh Toolkit go to: GEOM Tools > Combine Meshes. Combine lod1 with lod1-1. Combine lod2 with lod2-1, etc.
♦︎ Next inside Mesh Toolkit go to: Auto tools for GEOM > Auto-create Morph Mesh. First select your LOD1 as the GEOM base mesh to morph. Then click Select file for the reference mesh. Now it's time to select a good reference.
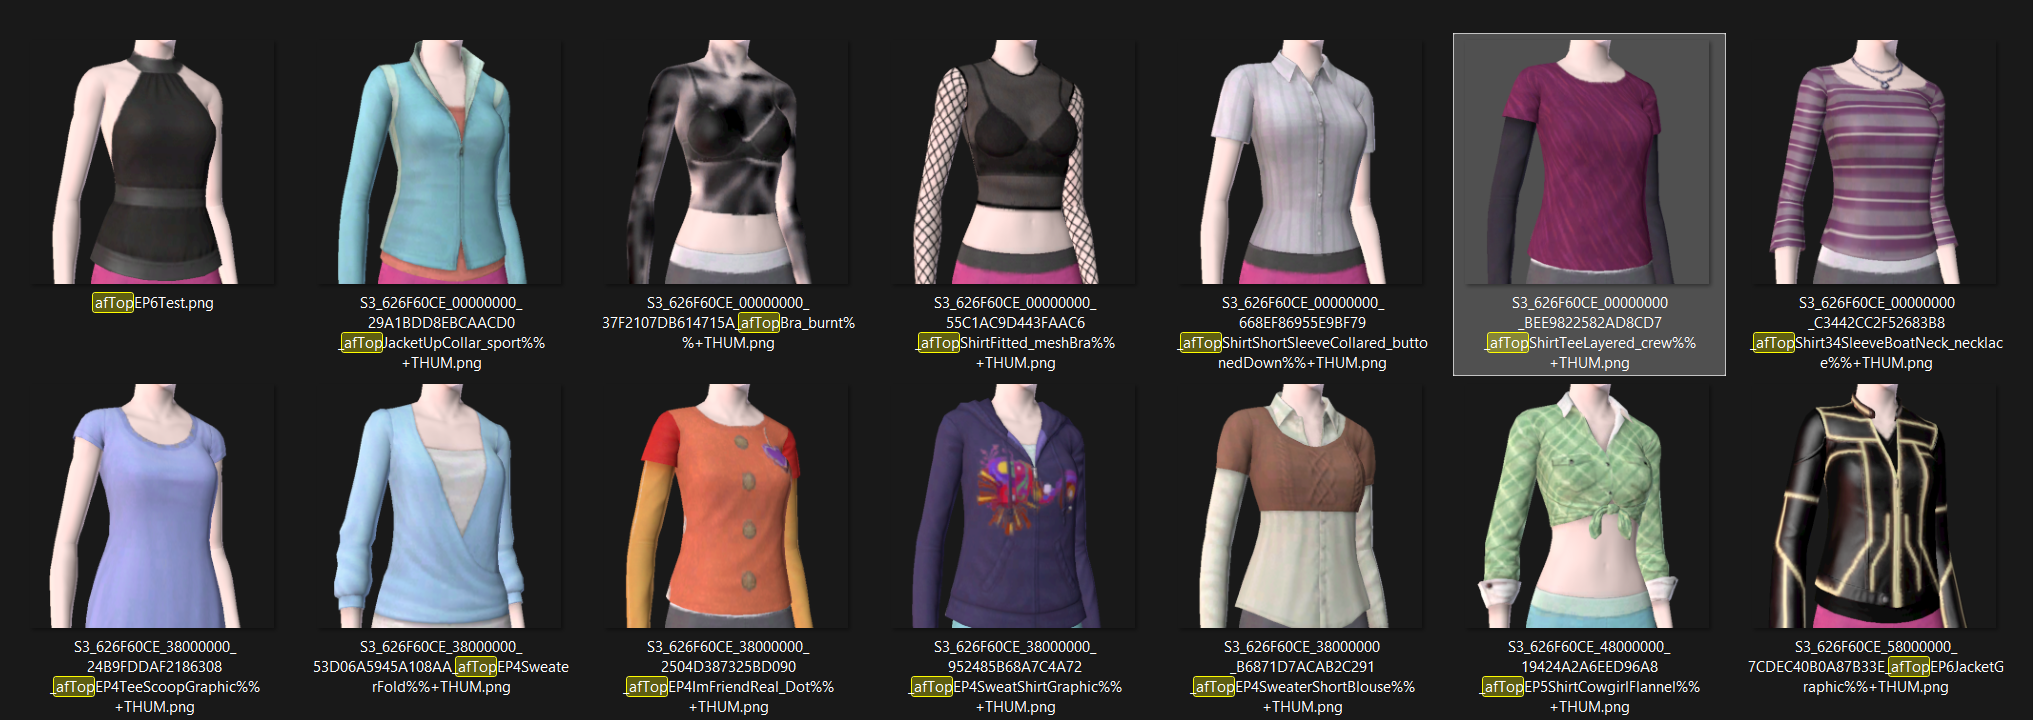
♦︎ This is the way I like to do it. If I'm creating a maternity morph for an adult female top, I'm going to look in the af_Morph_Refs folder, which is inside the resources folder that I've provided above. In the search bar I type: afTop. Right click inside the folder and 'View > Extra large icons' and 'Sort by > Type', then at the bottom right of the window switch from 'GEOM mesh files' to 'All files' so you're able to see the thumbnails of all the references. Then I usually like to start up TS3 and go into CAS so I can compare these in-game to the top I'm adding the morph to.

♦︎ You'll want to look for a similar shape overall, especially paying attention to which parts of the body are bare. Using a long sleeved top as a reference for a top with bare arms isn't the best idea, but the reverse could work alright. With tops it's especially important to pay attention to whether the lengths of the tops match up. For the top shown in the preview I ended up choosing the highlighted reference in the image above, as it matches that top the closest.
♦︎ Right click on the thumbnail of the reference you want to use > Open file location. Inside this folder you'll want to select the lod1 simgeom file. Next select the file for the reference morph. Which is either also a simgeom or a blendgeom file and should have SPECIAL in the filename. Now click the 'Create Morph Mesh' button and save your new maternity morph. I usually name it LOD1_SPECIAL.
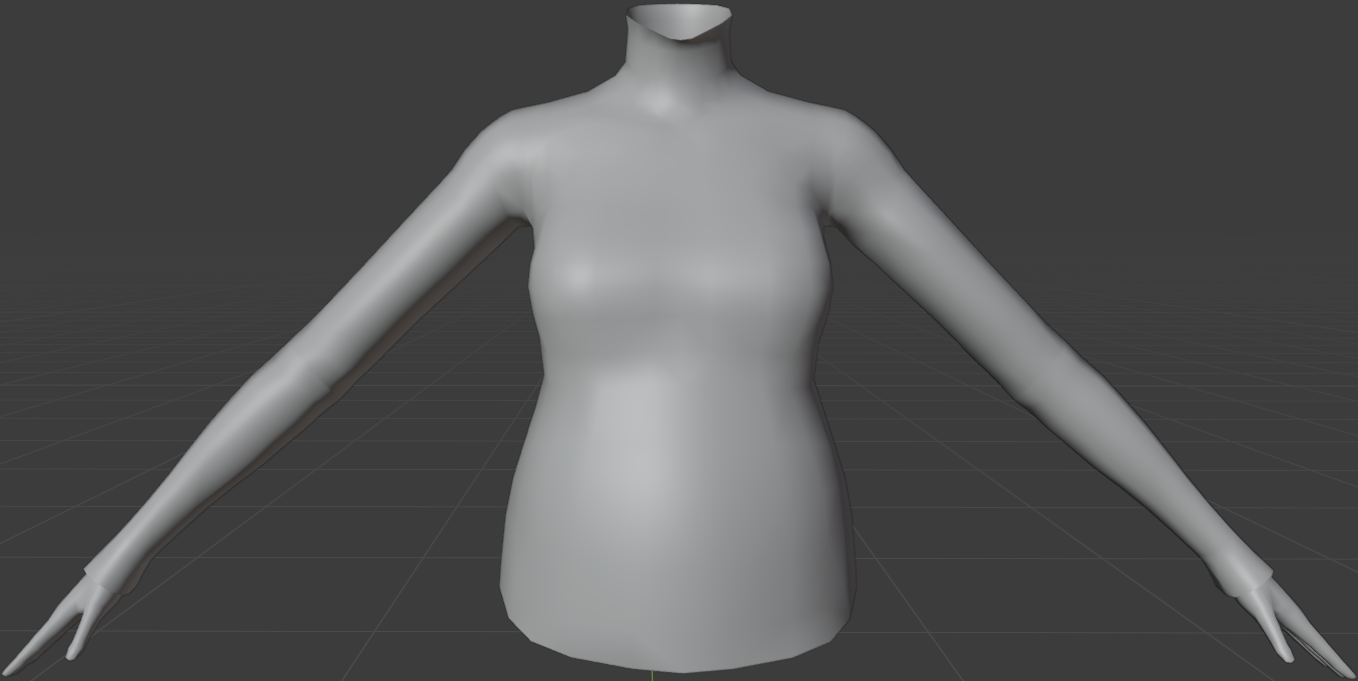
♦︎ Time to see how your morph looks. Open blender and head to Scene Properties. Under Sims 3 GEOM Tools click 'Import GEOM' and open your lod1. Then make sure to select it once it's imported and under GEOM Tools click 'Import Morphs'. In the window that pops up make sure to uncheck VertexID Lookup.

♦︎ Now it's time to inspect your morph mesh to check for any wonky geometry or messy normals. This mesh looks pretty smooth and requires no changes. If your morph has especially bad geometry, then you could try a different reference. It's likely that yours will at least have some weird normals (shadows) and you may want to fix that. I won't go over how to fix geometry in this tutorial, as that's more general blender knowledge, but I'll go over how to fix bad normals below. Lots of steps ahead, bear with me..
♦︎ Right, how to fix bad normals on a morph. First duplicate your morph in blender. Under modifier properties, select the 'Weighted Normal' modifier on the duplicate. Now take this duplicate into edit mode. Hover over and press the L key to select parts of the mesh which are supposed to smoothly join together. Press M > By Distance. Repeat until you're rid of the unnecessary seams. Next select all parts on which you'd see a Sim's bare skin, like hands and bare arms for example. Under Object Data Properties > Vertex Groups > Click + to add a new group. Now click on 'Assign' while you still have those parts selected. Now you'll want to import a bare reference. Import GEOM and choose from the resources folder an appropriate mesh. For tops I'd pick 'afTopBra_burnt'. Afterwards import it's morph too. Now on the duplicate mesh apply the 'Data Transfer' modifier. Source: the morph of the bare reference. Vertex Group: the group you added. Checkmark 'Face Corner Data', expand and click 'Custom Normals'. In the drop down below it select 'Nearest Face Interpolated'. Now exit edit mode and apply both modifiers. Go back to your original morph with the bad normals and apply to it the 'Data Transfer' modifier. Select the same options again, minus the vertex group, but this time Source: mesh with fixed normals, and under the dropdown select 'Topology'. Apply and the normals should be smooth now. To export the fixed morph you'll need to export it's base mesh. If you perform this method to smooth normals on a base mesh, then remember to delete the added vertex group before export!
♦︎ Now you'll want to create the morphs for lod2 and lod3. With maternity morphs it's generally fine to reuse the lod1 morph as a reference for the lower LODs. So repeat what you did before, but this time morph lod2, use lod1 as the ref mesh and then the lod1 morph as the ref morph. Now repeat with lod3 and you should have a morph for each LOD.
♦︎ In Mesh Toolkit go to: Morph Tools > Make Clothing/Hair BGEO. Here you'll put your new maternity morphs. Select your lod1, 2 and 3 morphs, then click 'Make BGEO'. Save to your WIP folder. Skip this if you're adding morphs to a clothing item from TS3 Store.
♦︎ Now inside your package file select the BGEO resource of the maternity morph. It's usually the last one and should end with '_special'. Right click > Replace > Select the BGEO you saved in the previous step. With clothing from TS3 Store morphs are saved as GEOMs, so to add those go to Mesh Toolkit > Package Tools > Add Morphs to Clothing/Hair. Tick 'Add as Morph Meshes' and untick the option above. If the LODs have multiple groups then you'll have to create the morphs again for each group, using the morph reference you just made.
♦︎ Congrats, your clothing item now has a maternity morph! Don't forget to click on the CASP resource inside the package > Grid > ClothingCategory > ValidForMaternity: True. You may now save your package or select the BGEO and export it to a new package to make it an override. Your clothing item will still need appropriate bone deltas, so make sure to follow the next section.
Replacing bone deltas using EA references
♦︎ Every clothing item enabled for maternity requires correct bone deltas to prevent clipping issues. You'll want to make sure the shape of the clothing item you're using it's bone deltas from is similar in shape. The shape at each area of the body matters. So for flared pants, you'll want to use the bone deltas of another pair of flared pants. It's NOT recommended that you use the bone deltas of a full body outfit for a top/bottom or vice versa. Teen and elder females have a lot fewer maternity bone delta references. In some cases the best option may be to use an adult female bone delta for them. You'll usually want to use the bone deltas of the clothing item you got your morph reference from, but this isn't always the case (some of them don't even have any, thanks EA).
♦︎ Open your package with S3PE. Select the maternity BOND (it's usually the last one and should end with 'BOND4' or 'special'). Right click > Copy ResourceKey. Then, right click > Replace. Go into the BoneDeltas folder inside the resources folder that I've provided above. Open the folder that matches your clothing item. So for an adult female top I'd look inside 'afTop'. Right click inside the folder and 'View > Extra large icons' and search '.png'. Make sure that at the bottom right of the window it says 'All files', so you're able to view the thumbnails of all the references. Pick one that matches your clothing item in shape. It helps to compare them in-game. Right click the thumbnail > Open file location. Now select the .bonedelta file. After it's replaced, click on Grid > Expand ChunkEntries > Expand again > Double click the value next to TGIBlock > Paste > Commit.

♦︎ Your clothing item now has correct maternity bone deltas, yay! You may now save your package or select the BOND and export it to a new package to make it an override.
There's a tiny summary of these steps inside a .txt included with the resources. Now, if you somehow still can't find the bone deltas you need along the 90+ references, then there's a painful process you can go through to convert the bone deltas of a full body outfit to ones suitable for a top/bottom or vice versa. This is only recommended if you're as tedious as I am. These steps are also included in the .txt file.
Custom bone deltas (male maternity clothing )
♦︎ If you'd like to give a male clothing item proper maternity bone deltas or if you'd like to edit female ones, then you'll want to use the BoneDeltaEditor tool. For males it will be a bit less straightforward without any already created references for you to use, but it's still doable. All existing male maternity clothes only seem give your Sim a pregnant tummy, without any weight gain on other areas of the body like with female Sims. Male maternity morphs are scattered all over by different creators, but they all seem to use the ones by our dear departed CmarNYC as a base. Right, let's get into it (yuh).
♦︎ First we'll have to replace one of BoneDeltaEditor's files. Otherwise the bones won't have proper names and it'll be impossible to determine what's what. At the bottom of this tutorial: LINK download the Pets_updated_bones.zip. Extract the bones.xml and replace the one in your BoneDeltaEditor folder with it.
♦︎ Open your package with S3PE and export the BOND that ends with 'BOND0' or 'normal'. Open BoneDeltaEditor.exe twice. Open the reference you want to use in the first window and the BOND that you just exported in the second one. Now, which bone delta reference to open in the first window is something you'll have to find out by doing a few comparisons. Either in-game or in blender. You must find a clothing item with a base mesh or morph that has a similar belly shape as your maternity morph. Which age or gender it's from and whether the rest of the body matches up doesn't really matter. You'll only be transferring over the bone delta values of the belly. Once you've found a match, it's time to transfer over some numbers. Copy and paste over the Offset values of R_frontBellyTarget_slot, L_frontBellyTarget_slot, R_BellyTarget_slot, etc. You get the deal. Make sure to do both R and L. Also don't forget to click Commit before selecting another bone. Repeat this with: R/L_carry_slot. Then File > Save (As). Now you'll have your male maternity bone delta ready for use. To correctly import it to your package, repeat the steps from the previous section.
That was a lot of yapping, but hopefully you'll find some of it useful! Feel free to ask me any questions if you have them. ✌


