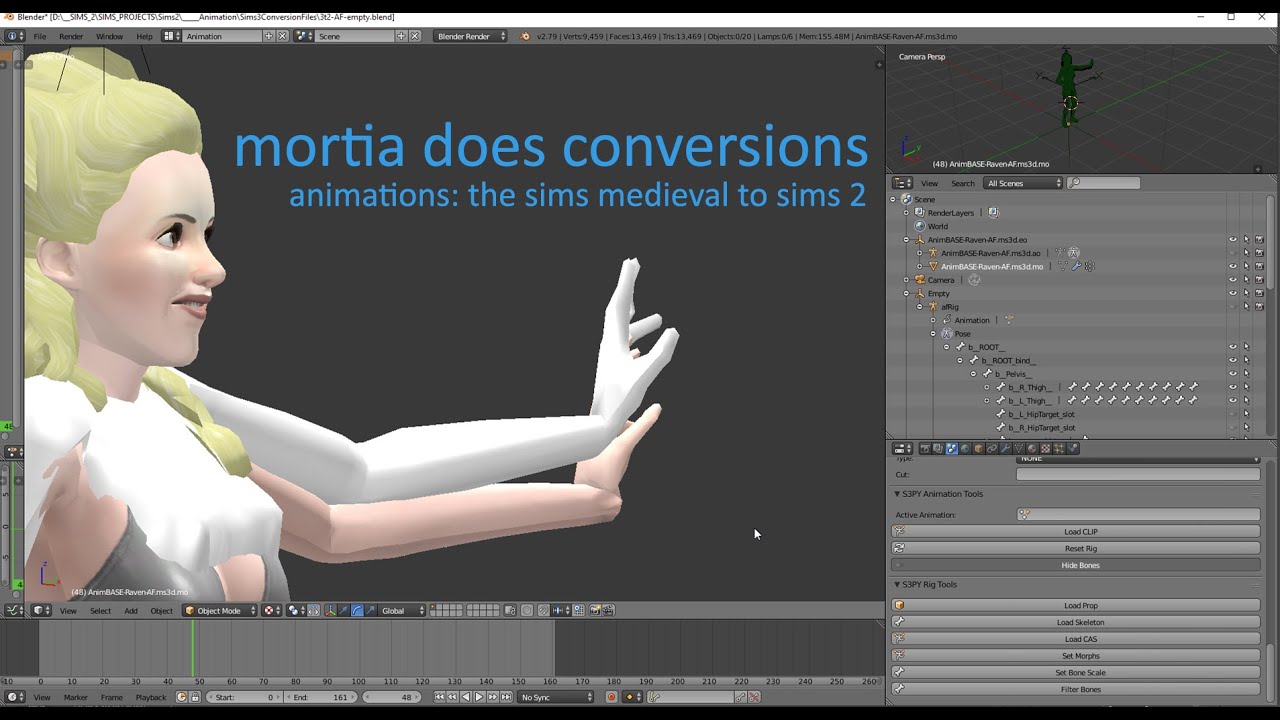
Converting Animations from The Sims Medieval/ The Sims 3 to The Sims 2
Project: Morita Livejournal Reuploads
by honowo
Uploaded Jan. 15, 2026, 3:22 a.m.
Updated Jan. 15, 2026, 4:10 a.m.


(The following is copied from Morita's Livejournal for preservation purposes.)
Hey all, With a tremendous amount of help and patience from omglo(MTS)/earlypleasantview(Tumblr) I've learned how to convert animations from both TS3 and TS4 to The Sims 2. I've also received a lot of asks about how I did it and I figured it would be helpful to document how I managed this here. The process is...interesting and involves a lot of potential cleanup and micro-tweaking, so be prepared for some work!
*If you're unfamiliar with Blender and/or Milkshape and how to navigate the viewport, I highly recommend doing a quick tutorial on the basics. You'll need to have at least a basic knowledge of 3D and an understanding of keyframing to get through this.
This time I'll cover TSM/TS3>TS2 conversions. Because I'm a hardcore TS2 Medieval player, I have to admit that I don't have TS3 installed on my comp right now...I know I'm a terrible person. But the method of extracting and converting should be the same for TS3 as it is for TSM, which is the game we'll be working with today.
To start with, you will need to download several programs and plugins, assuming you don't have them already.
-
The Sims 2
-
The Sims Medieval or the Sims 3 (in order to have access to all available in-game animations, you'll need to have the correlating DLC for the game installed)
-
Blender 2.79 or lower
-
Milkshape
-
Raw ANIM Frame importer plugin for Milkshape
You will also need to download rigs/meshes for the animations to be applied to.
Save these wherever you you will be able to find them easily later on.
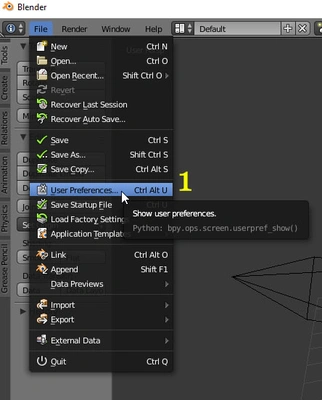
PART 1: SETTING UP BLENDER
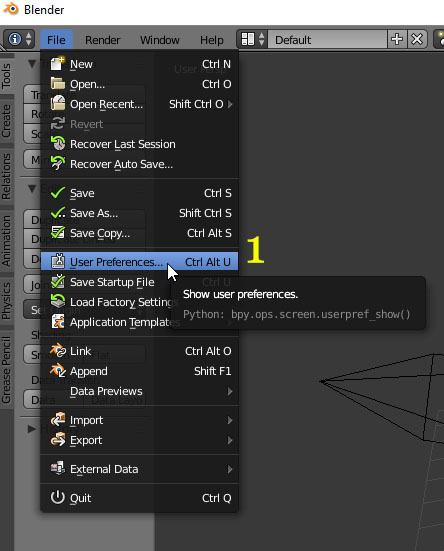
Open Blender and Navigate to File>User Preferences:

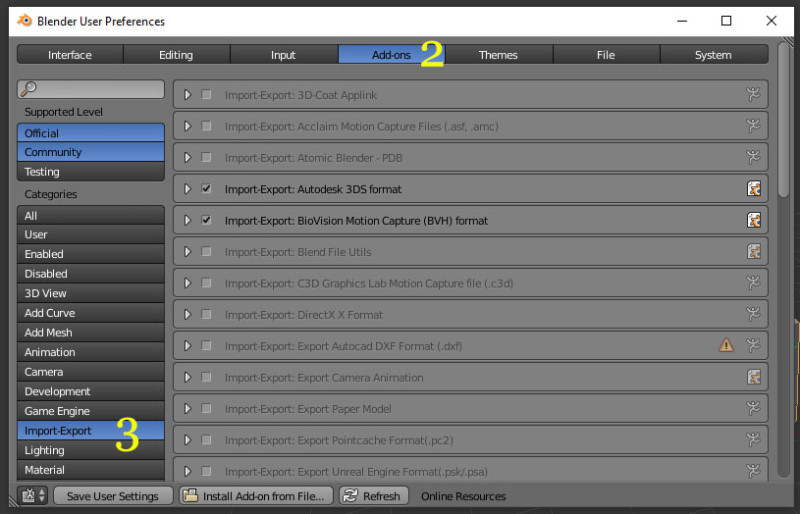
Click on the "Addons" tab and the "Import-Export" sub menu to narrow down the Categories.

Make sure that the two addons highlighted below are active.
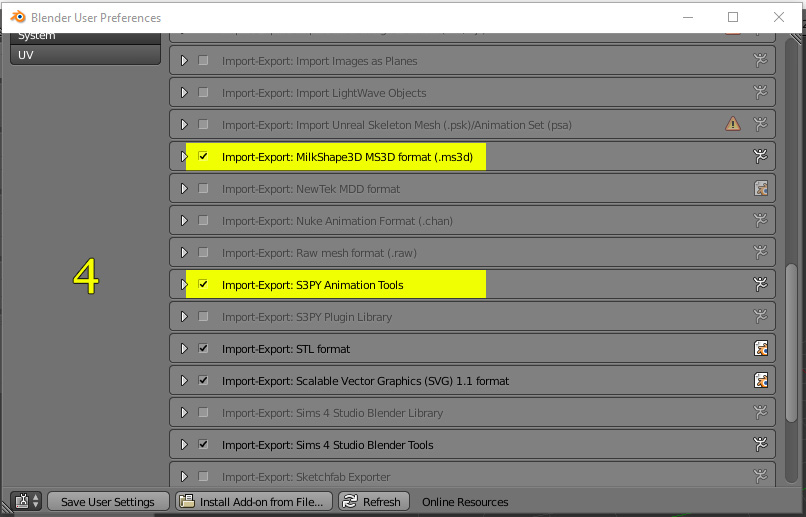
Once you check them, click "Save User Settings" to save preferences.
Minimize Blender for now.
PART 2: USING S3PE TO EXPORT A TSM/TS3 ANIMATION
Open up s3pe
Navigate to your Sims Medieval game install location and open this file:
"Your Install Location:TheSimsMedievalThe Sims MedievalGameDataSharedPackagesSASFullBuild1.package"
When you open up this file with S3PE you should see something like this:

Make sure that your items are grouped by filetype by first clicking on the "Tag". Scroll down until you find the items with the "CLIP" tag. Once you've found them click the "Name" header to sort by name.
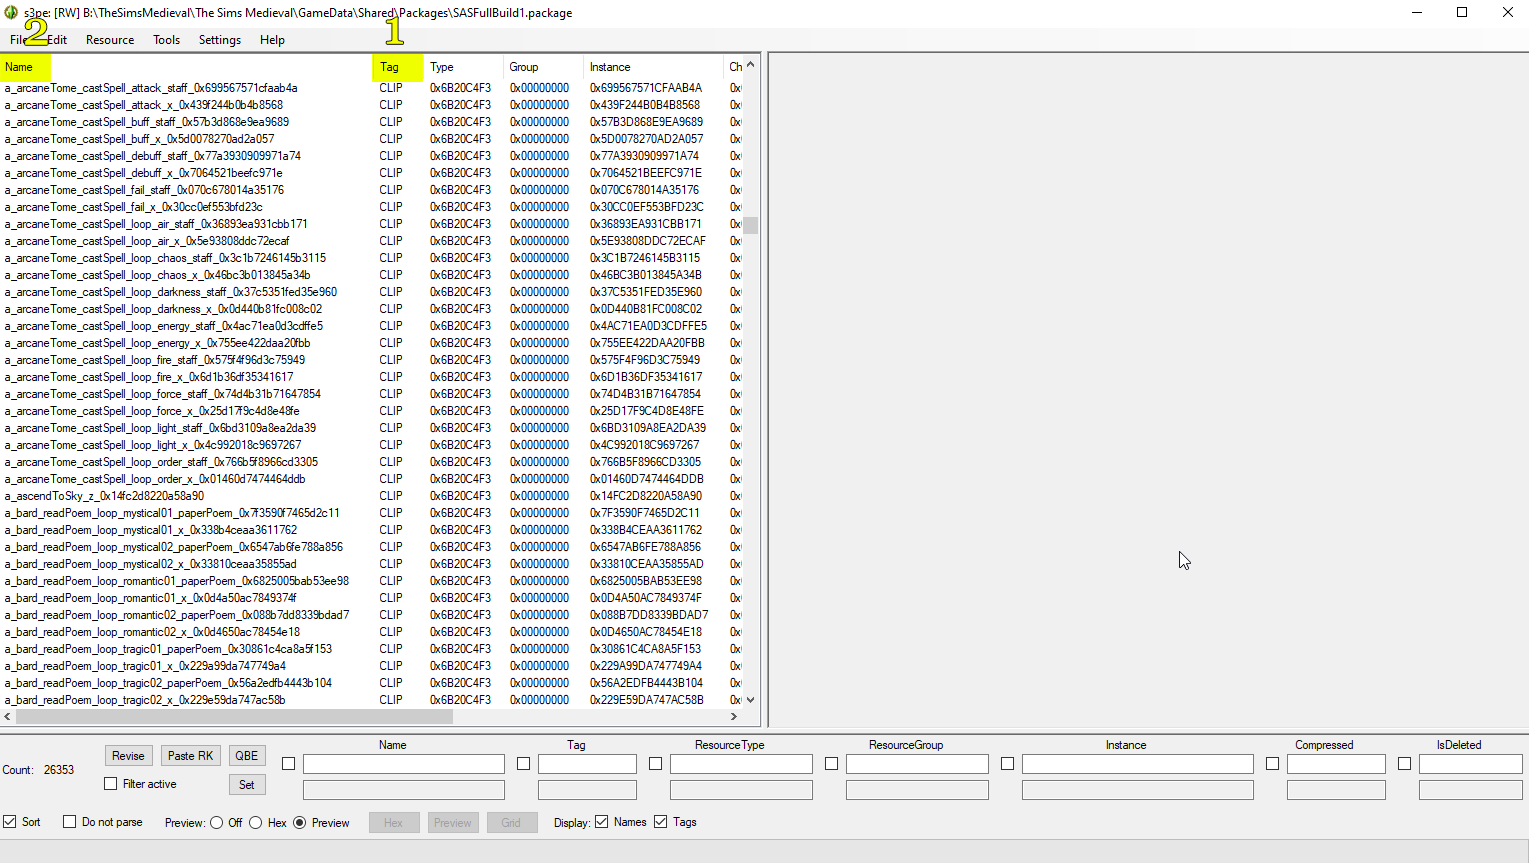
CLIP files are what we'll need to export in order to do our conversions. I haven't figured out a way to search by keyword for specific animations (I don't know how to use S3PE at all really outside of this), but you can scroll through all of the CLIP files to find the ones you want.
The abbreviations should be the same as the ones from TS4, though TSM only has Adult, Child and Object animations so you'll only see those here.
OK, let's find an animation to export. While the abbreviations I noted in the TS4 tutorial still apply, the naming conventions for these files are a bit more tricky so make sure to read to the end of each item you see. If it ends with an _x or _y suffix then it is probably the correct one to use. If it ends in a name of an object, then it is probably meant for object animation.
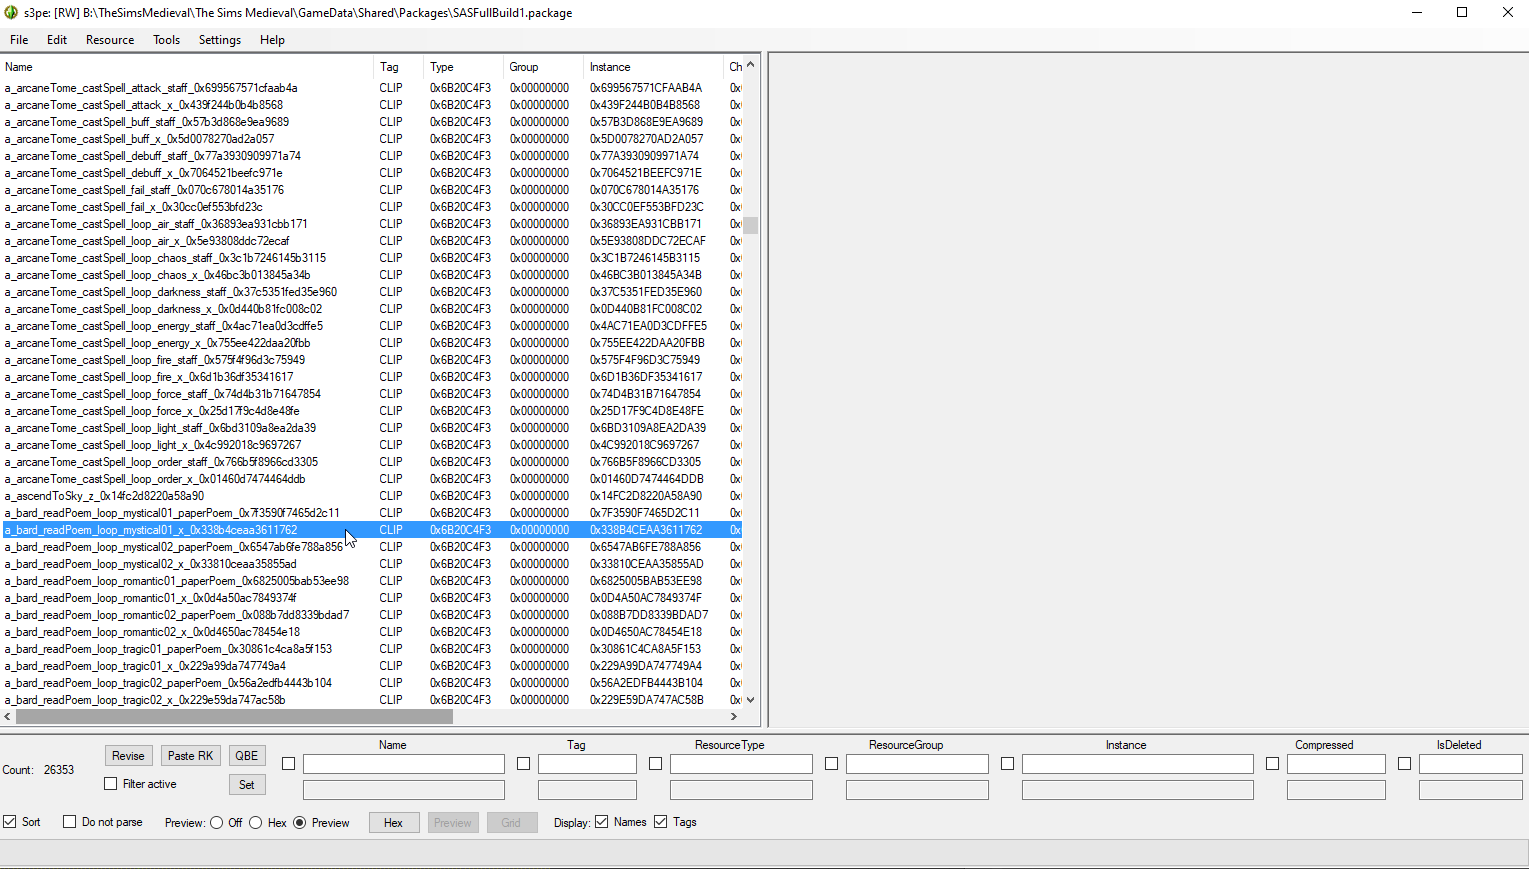
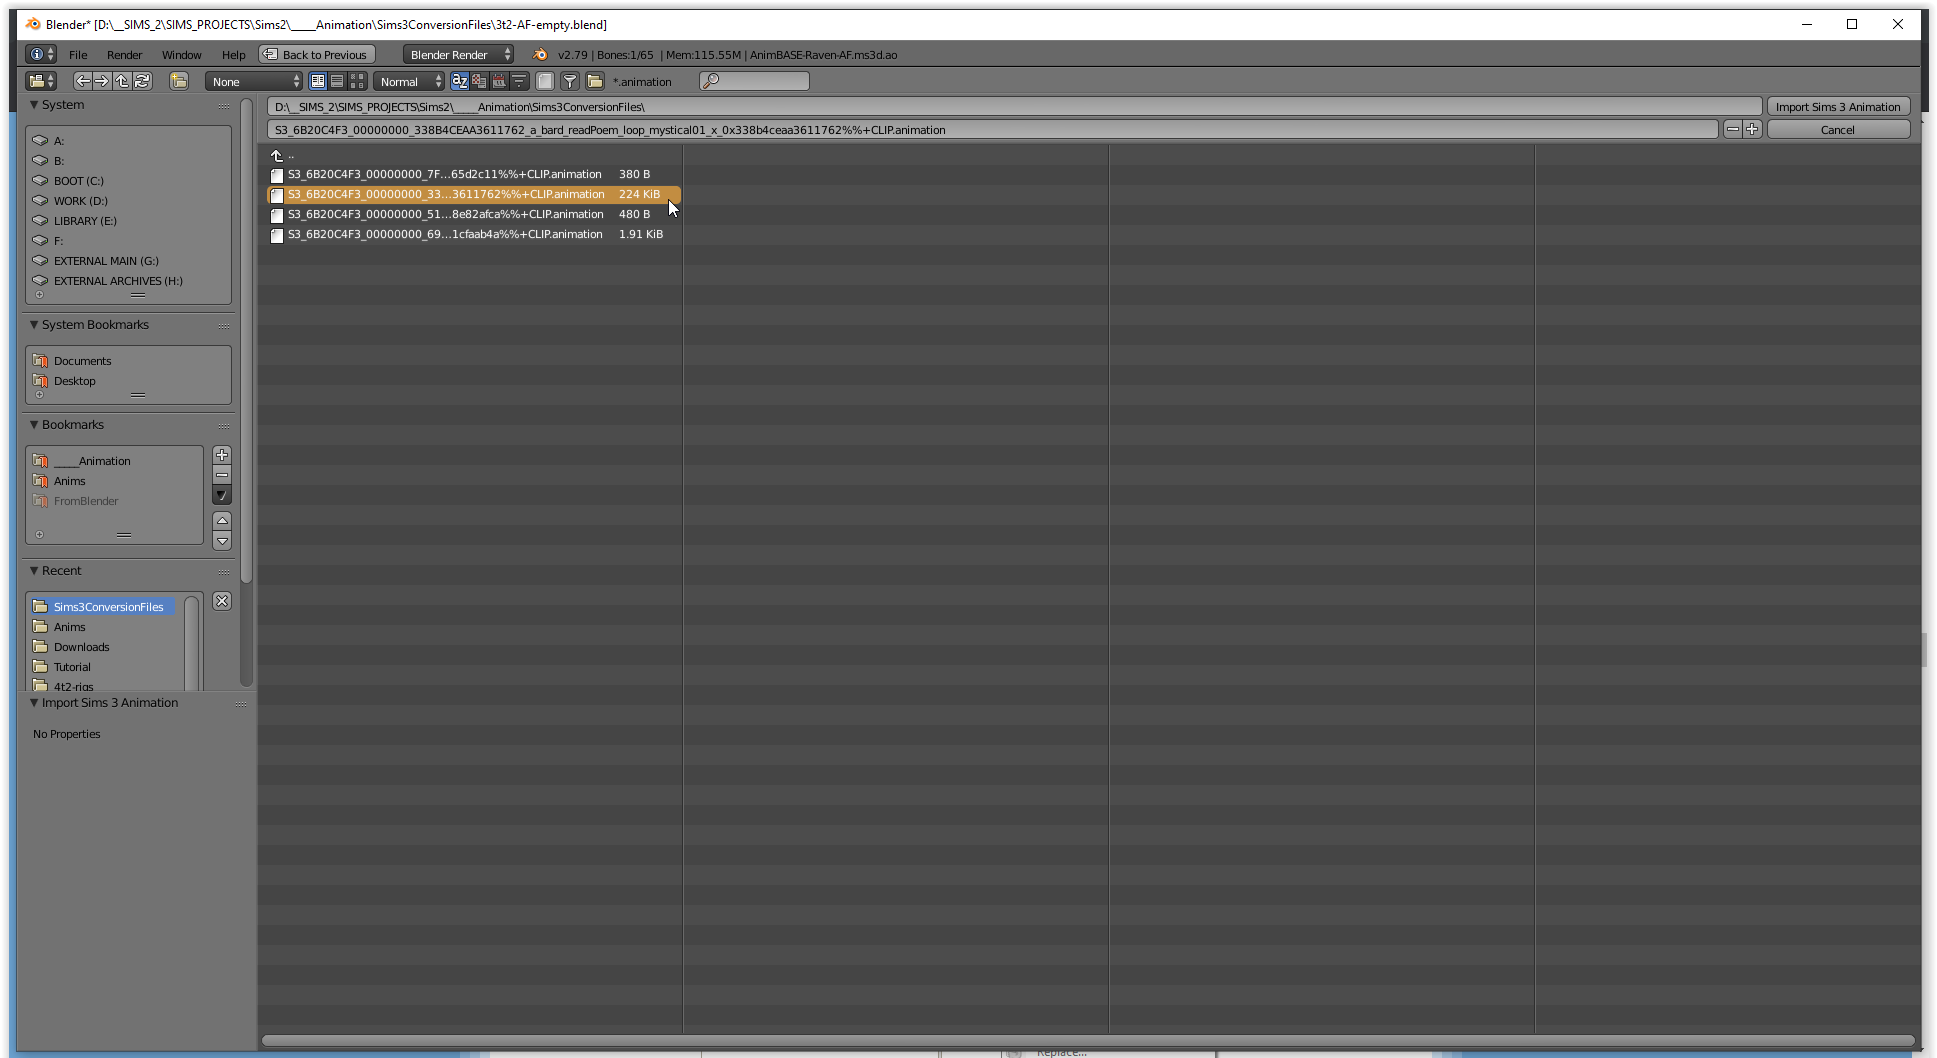
Let's try out the " a_bard_readPoem_loop_mystical01_x " animation. Scroll down until you find it.
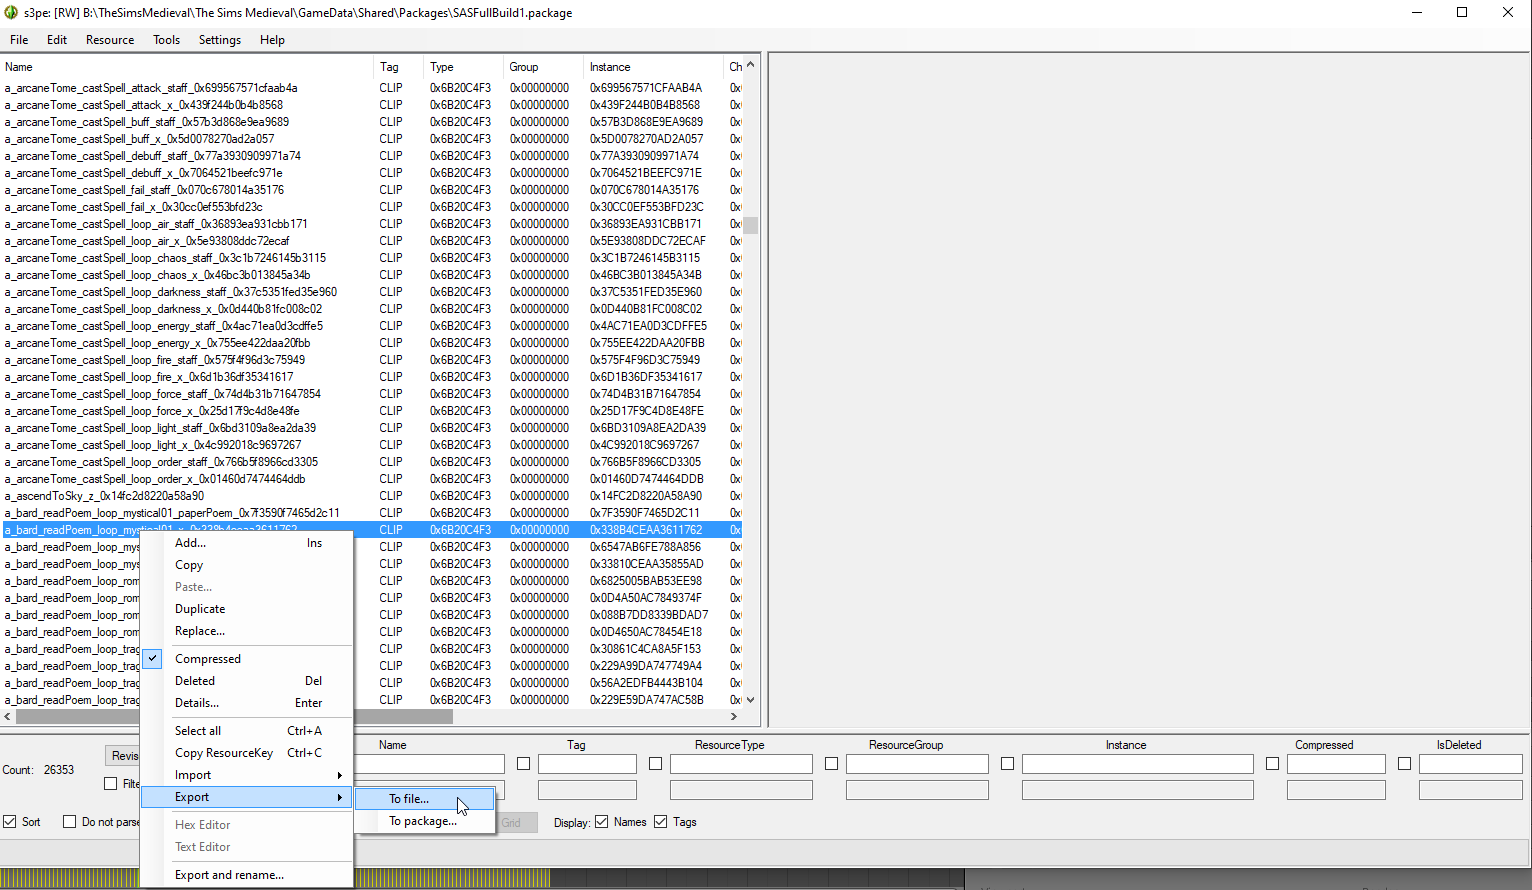
Right click on the CLIP you'd like to export and go to Export>To File. Save this file wherever you like.
Now we're headed back to Blender. I'll add a video to explain this portion as well.
PART 3: ASSEMBLING THE ANIMATION IN BLENDER
VIDEO TUTORIAL FOR THIS SECTION
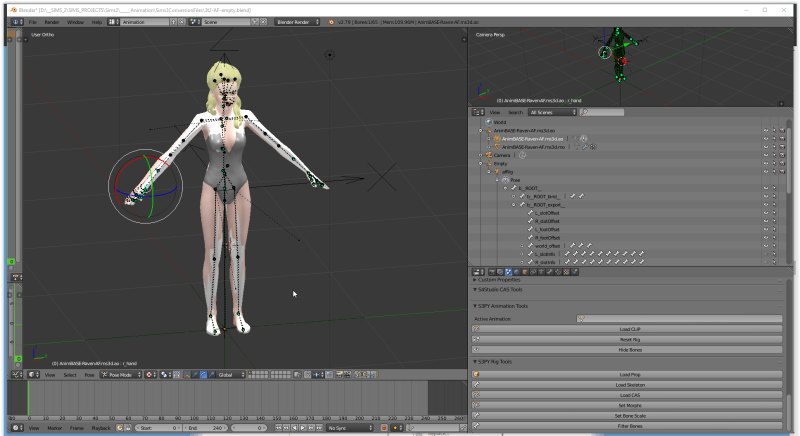
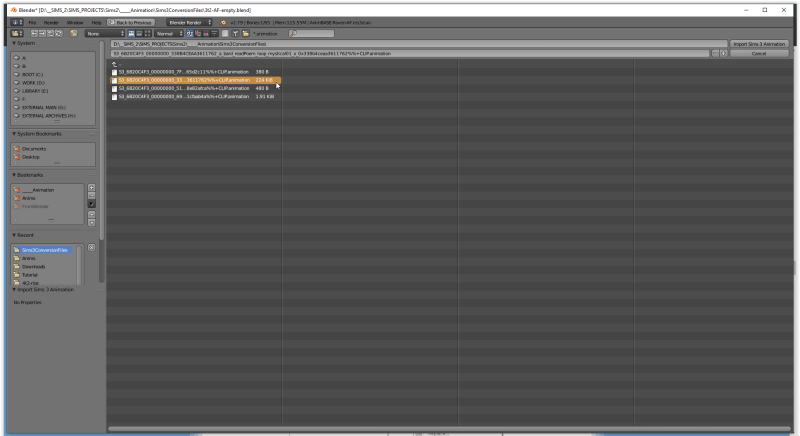
Navigate to wherever you've saved your 3 to 2 Conversion rigs and open " 3t2-AF-empty.blend "
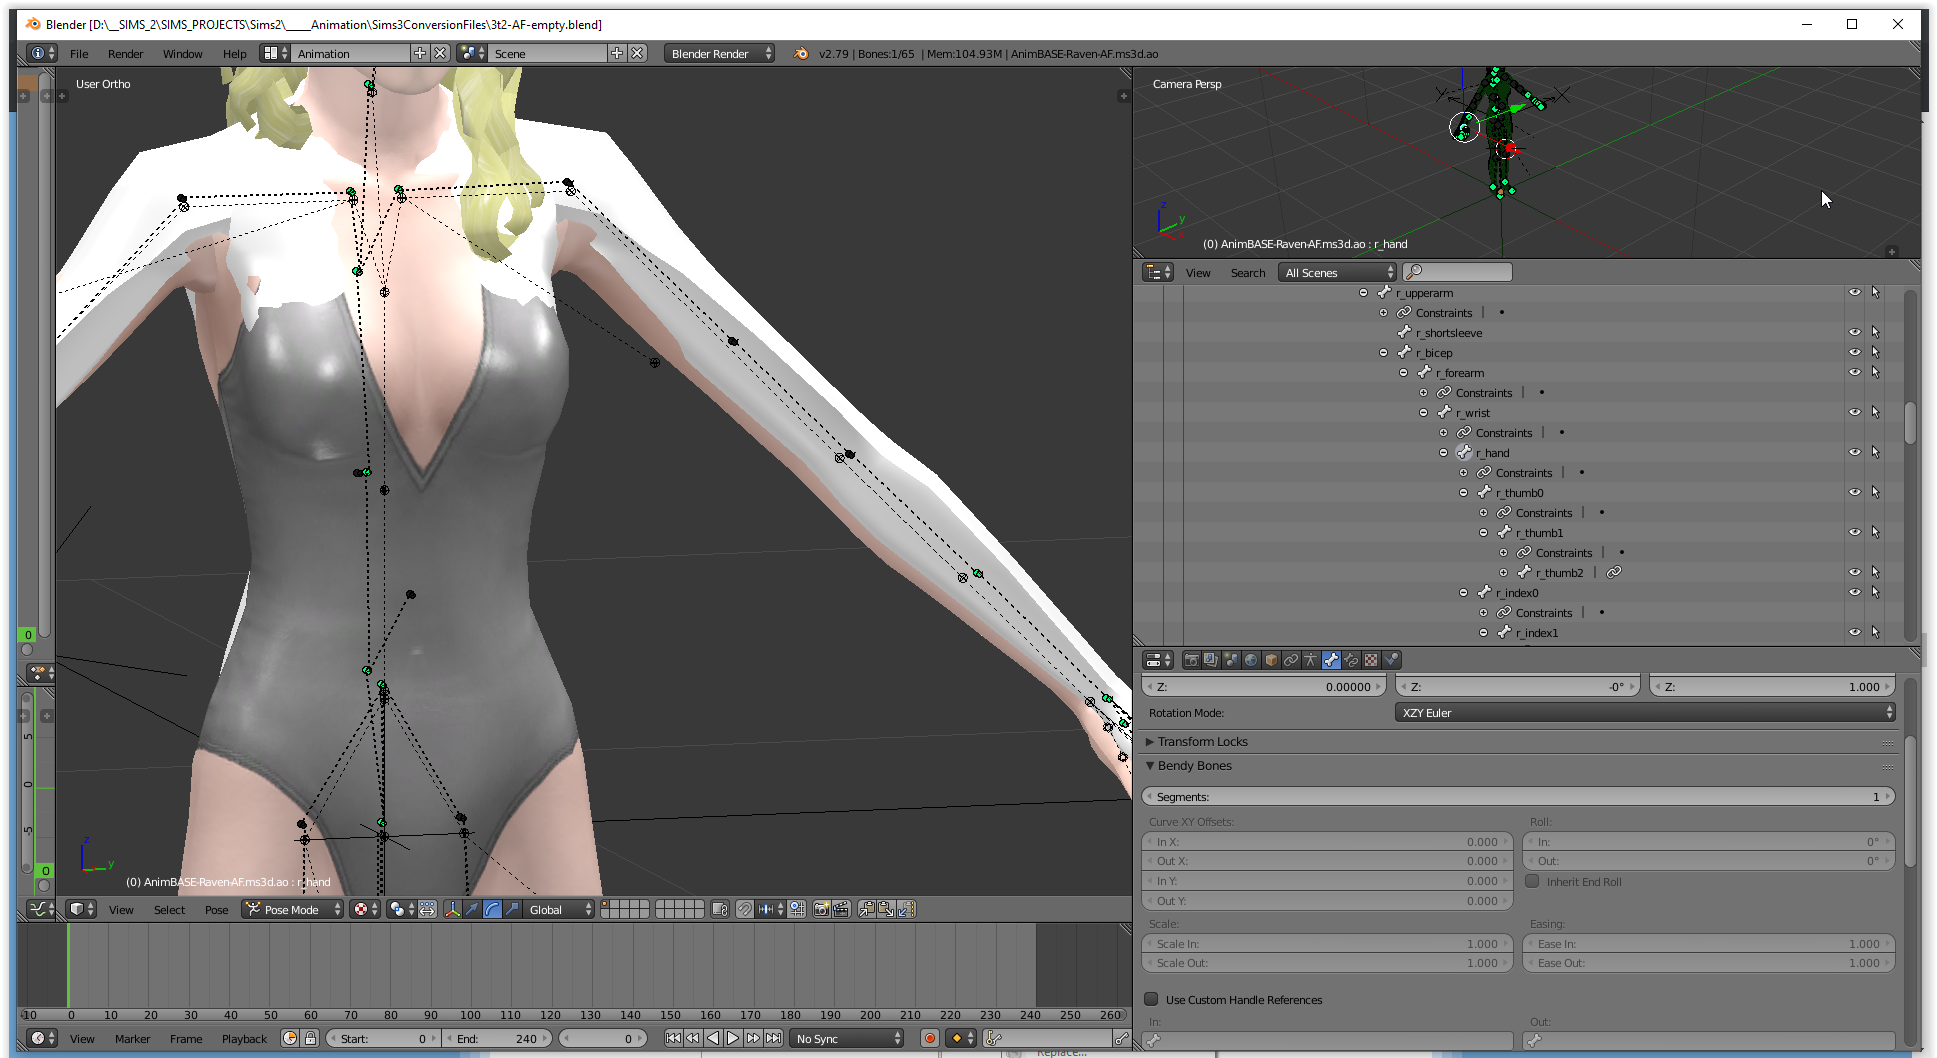
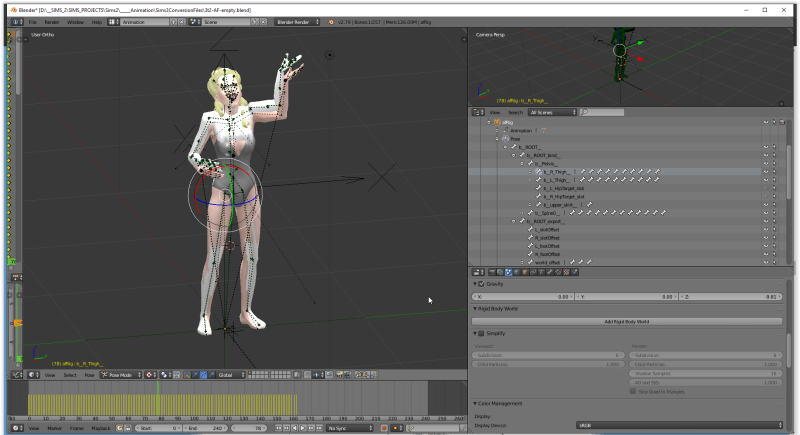
Arrange your workspace so it looks a bit like mine. We are primarily going to be working with the "afRig" in the Scene Tree this time, so you can tidy up your Window so that that is clearly visible to you.


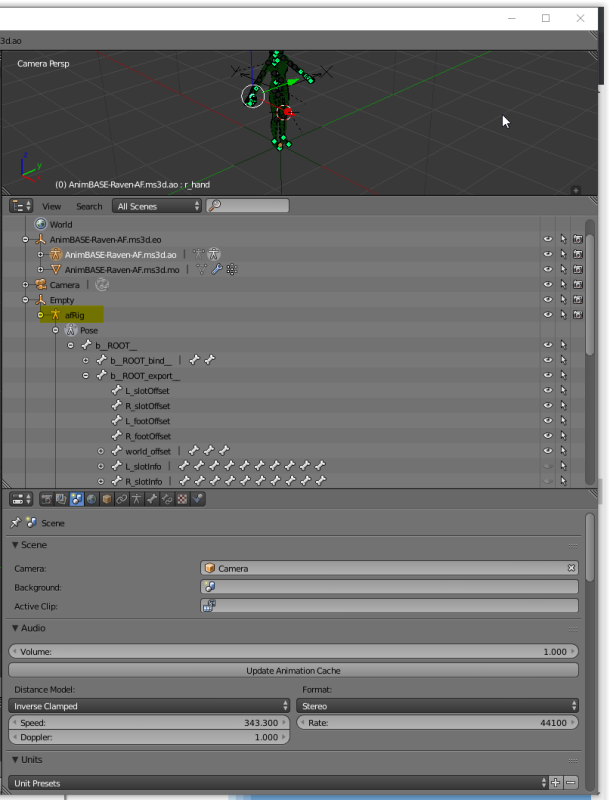
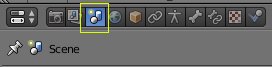
In the Window directly below the Scene Explorer you will see a series of buttons, Click the "Scene" tab, the third from the left. It looks like this:

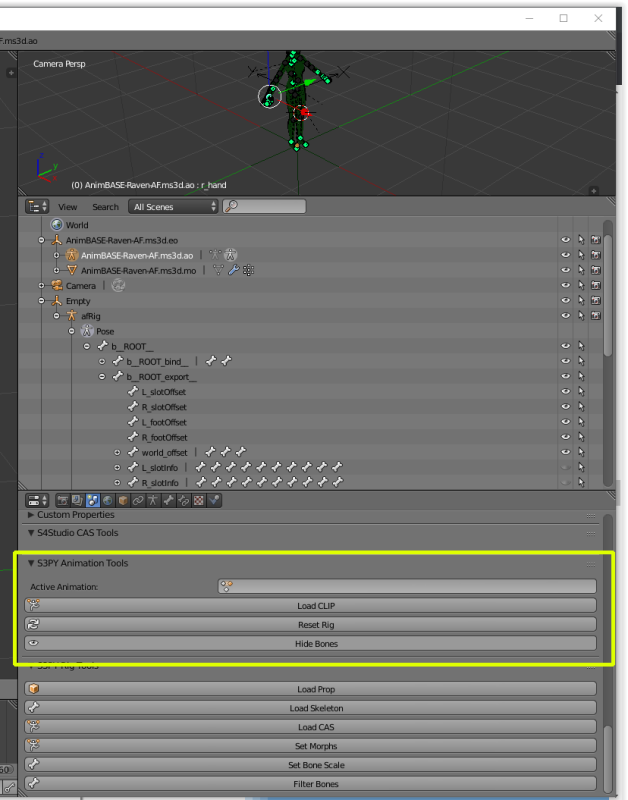
With that button selected, scroll down in that window until you find the "S3PY Animation Tools"
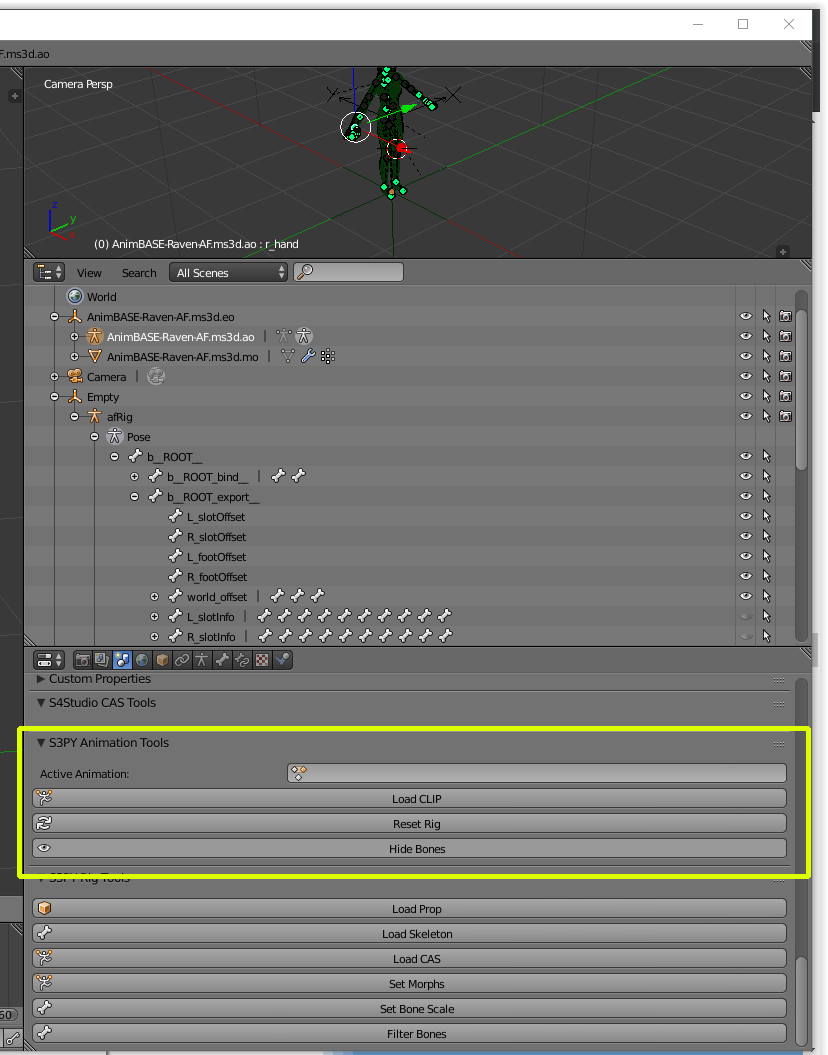
This is what we will be using to load our exported CLIP files!
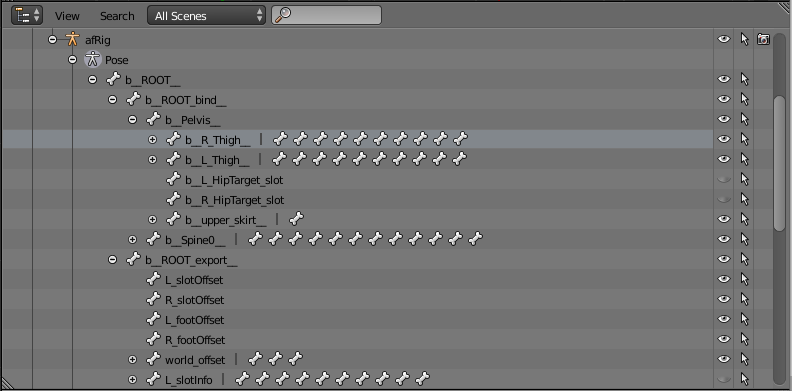
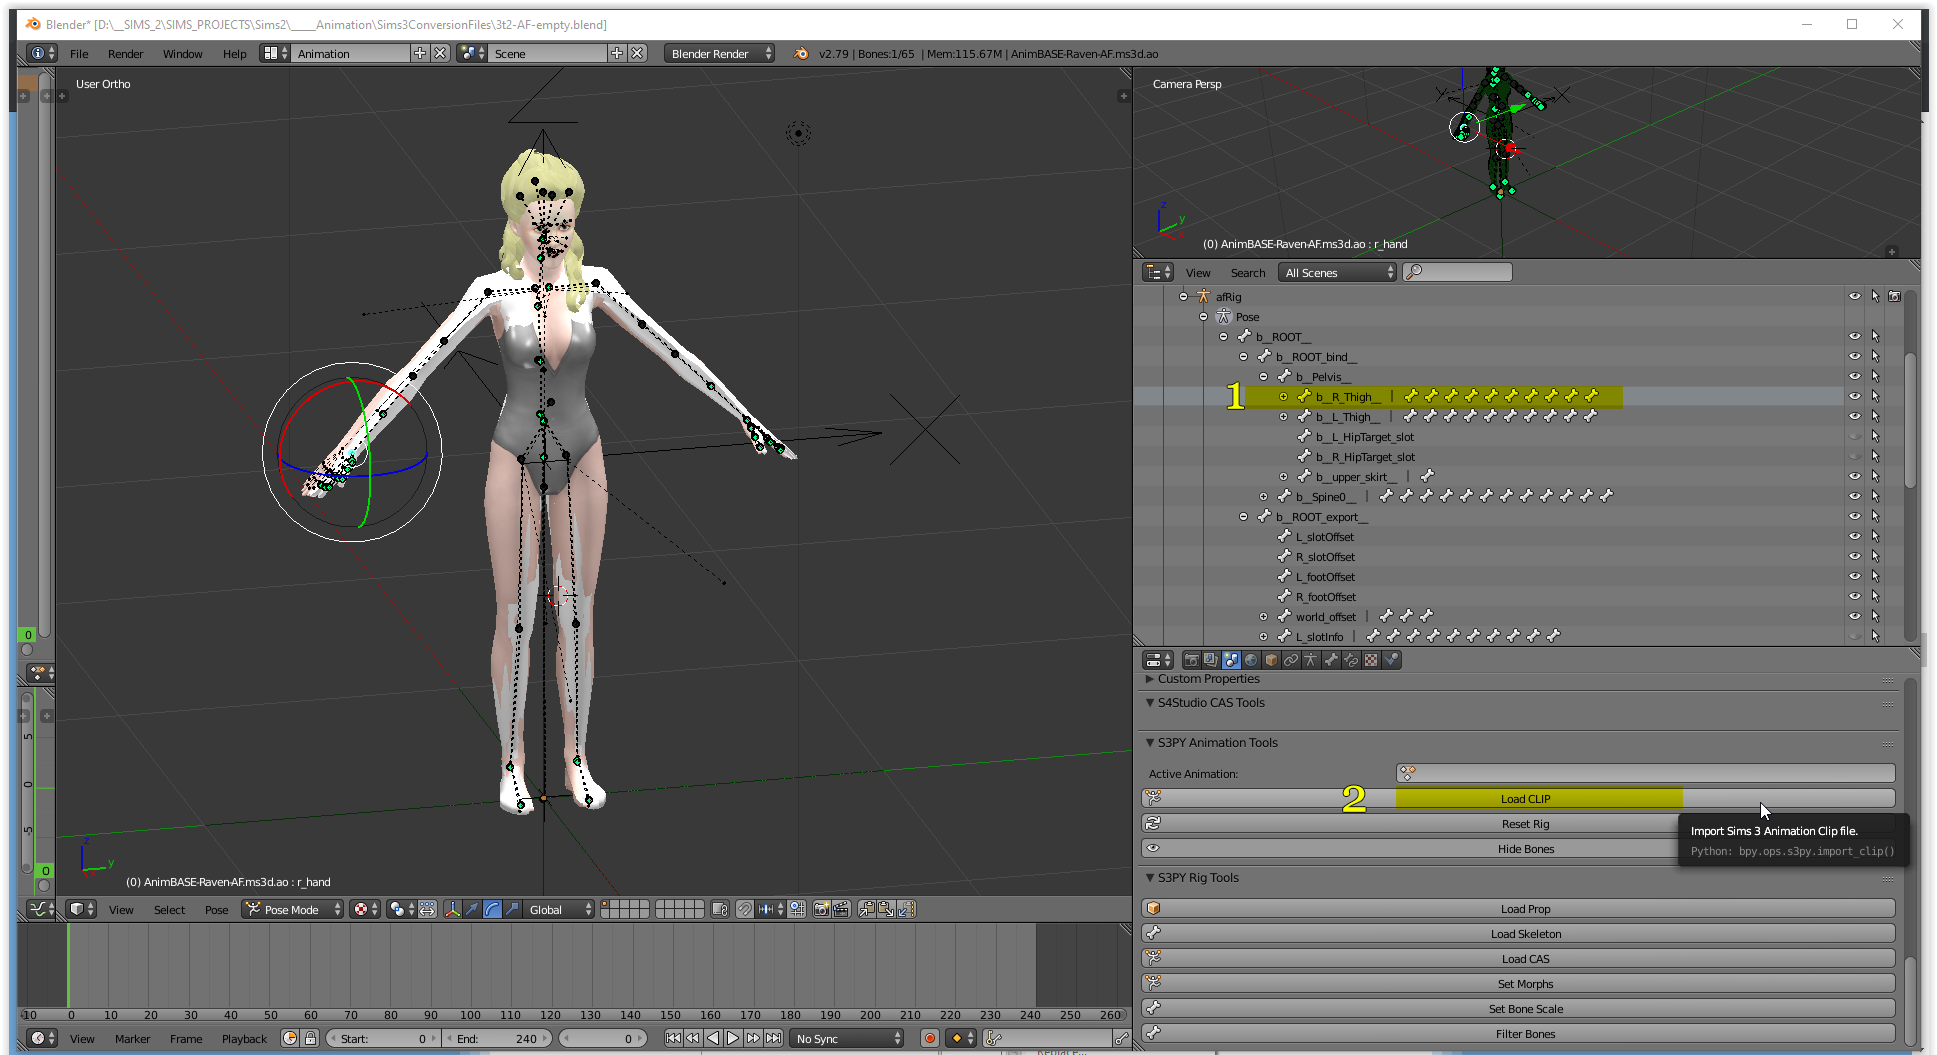
Let's go back up to the "afRig" in the Scene Tree. Expand the Nested Groups until they look like this.

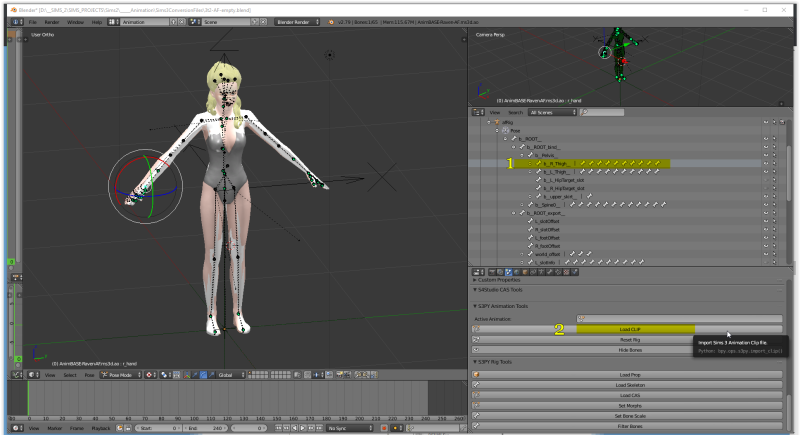
We need a joint to apply the animation to and limbs seem to work well. Left-click on " b_R_Thigh## " in the Scene Tree
Now head back down to the "S3PY Animation Tools" window and click "Load CLIP"
Navigate to wherever you have saved your CLIP file from TSM and load it. There will usually be a slight lag which tells you it's actually working!
When it's done you'll be brought back to your main screen and if you're succesful you'll see keyframes on the Timeline and your Sim in its new animated position.
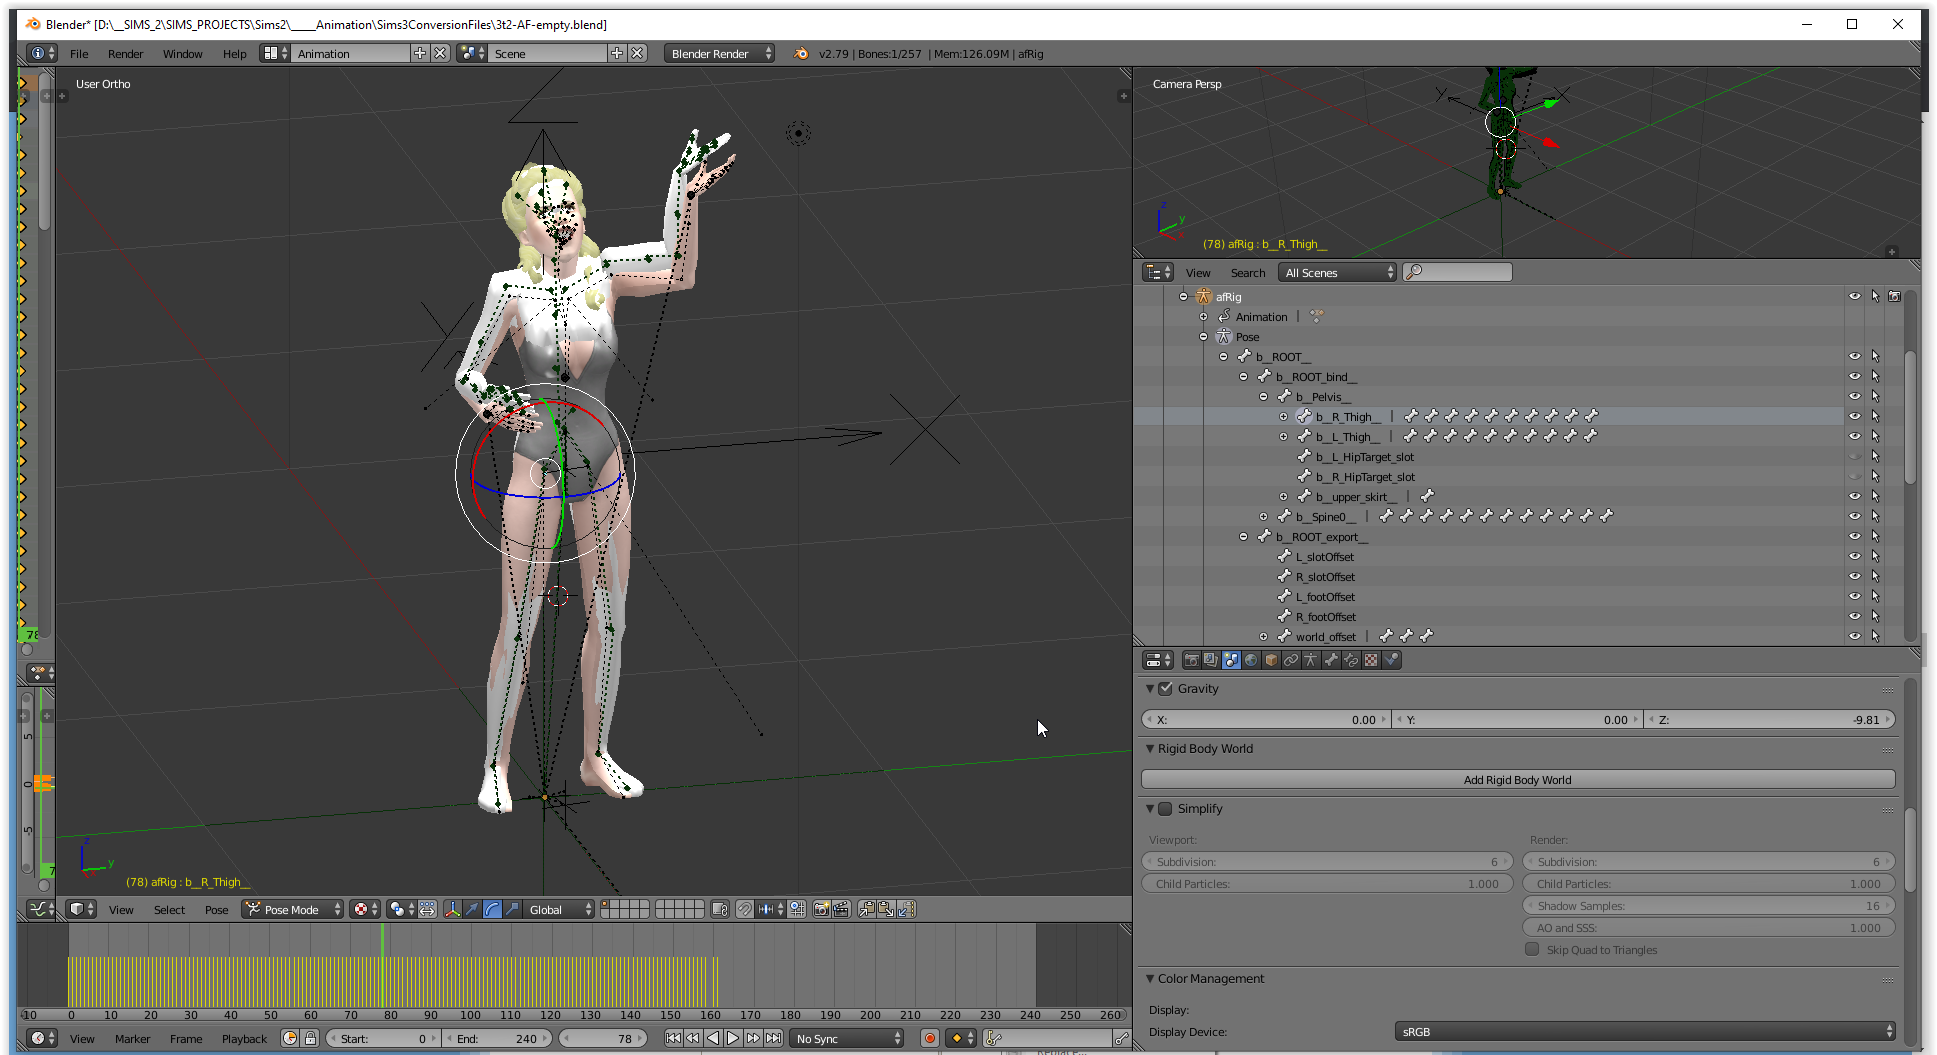
Make sure that your Timeline length is correct! You can see by how far out the light gray portion goes that the length needs to be adjusted. Use your cursor to scrub the Timeline to the very end of your animation and input that new number into the "End" parameter underneath the Timeline.

Now it looks correct!

Play your animation through to make sure it looks good to you.
From here on out the process is exactly the same as it was in the TS4 tutorial :)
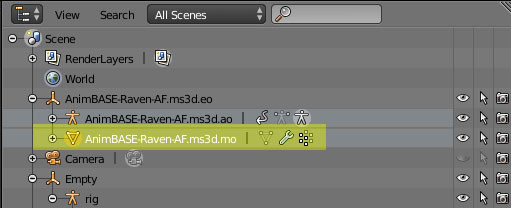
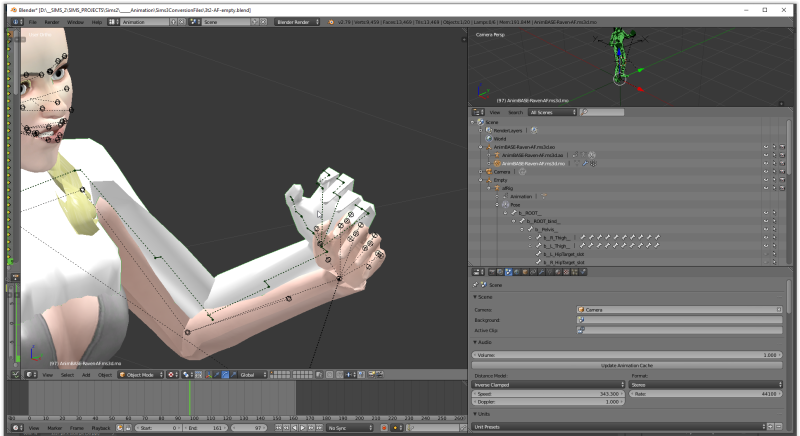
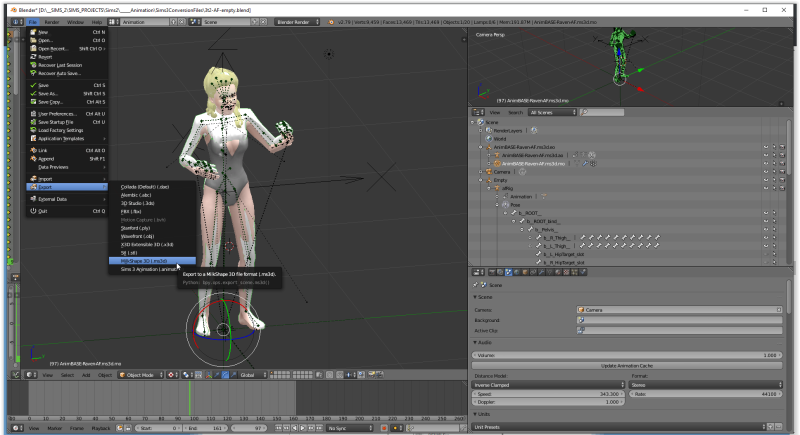
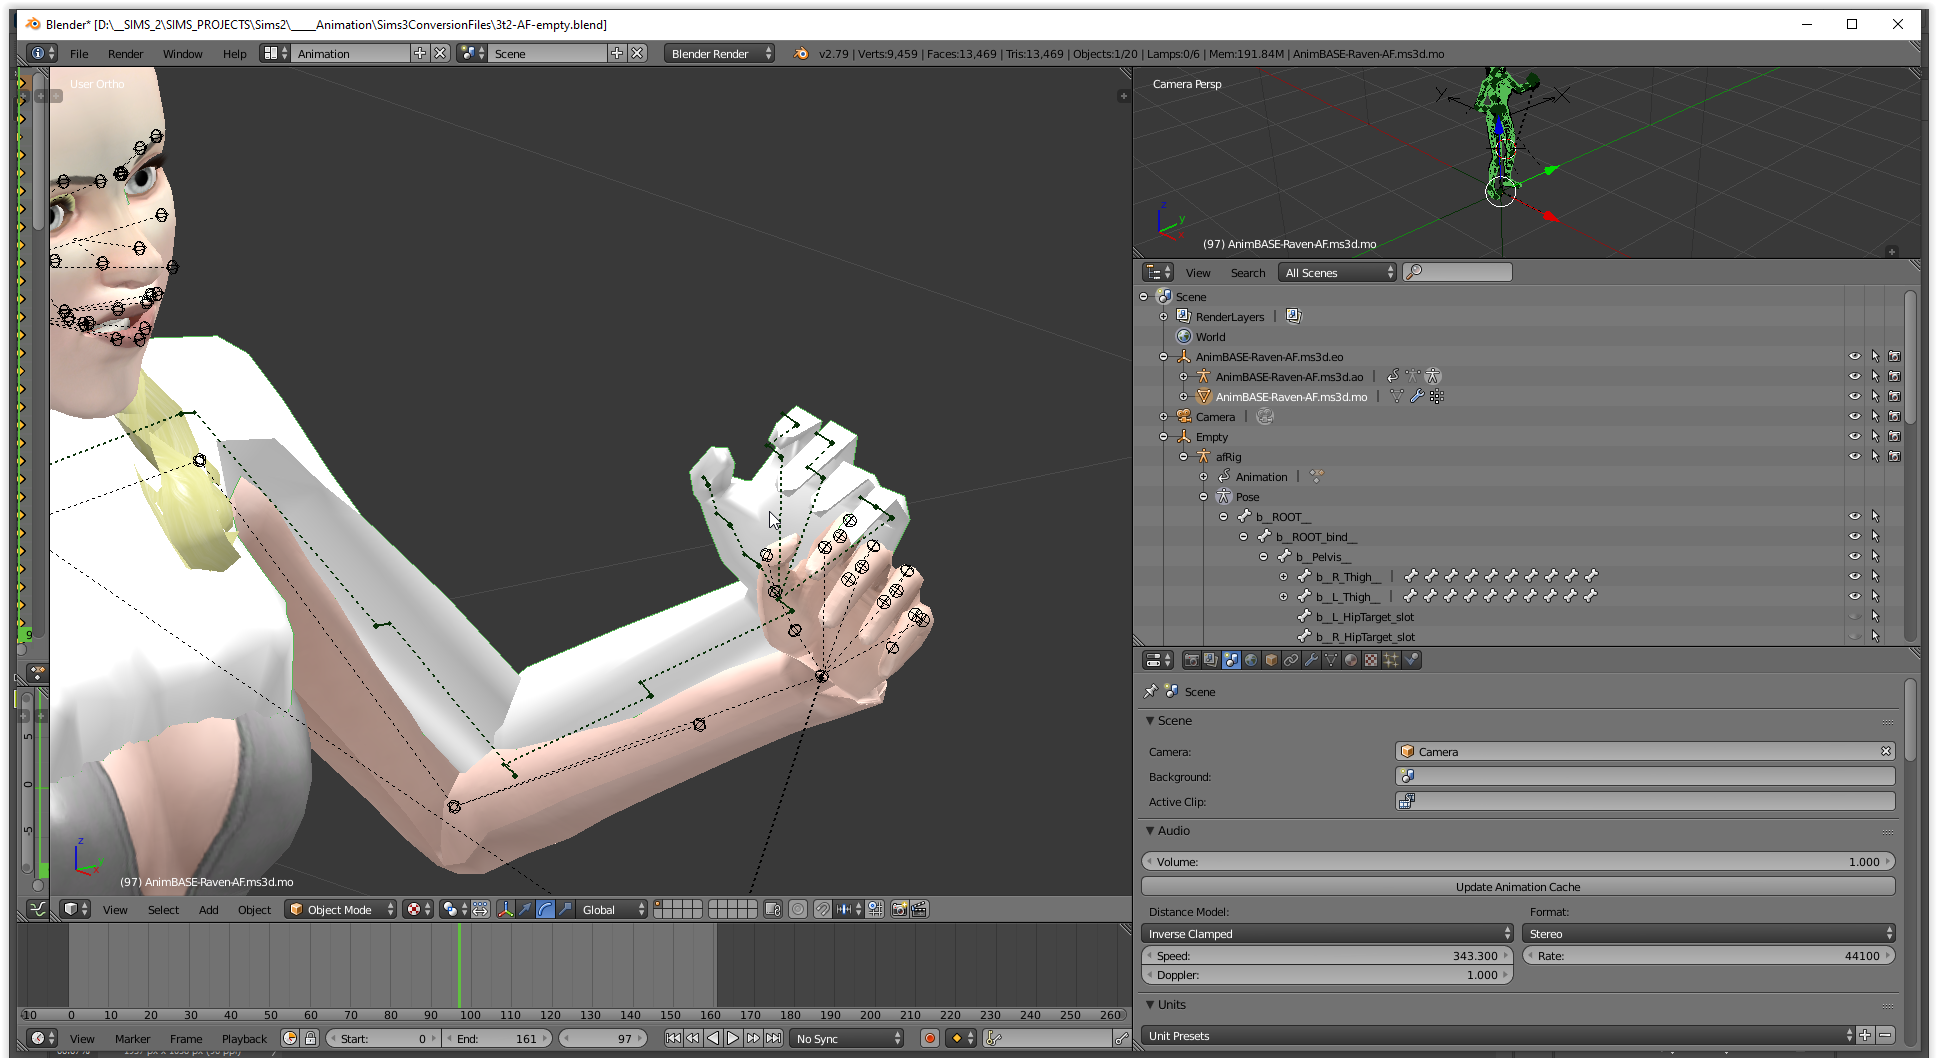
Click on the element labeled " AnimBASE-Raven-AF.ms3d.mo ".
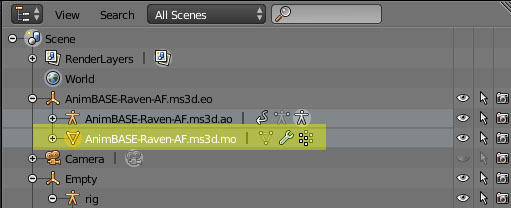
When its selected, you should see a green line appear around the mesh.
Go to "File">"Export" and export to Milkshape ms3d.
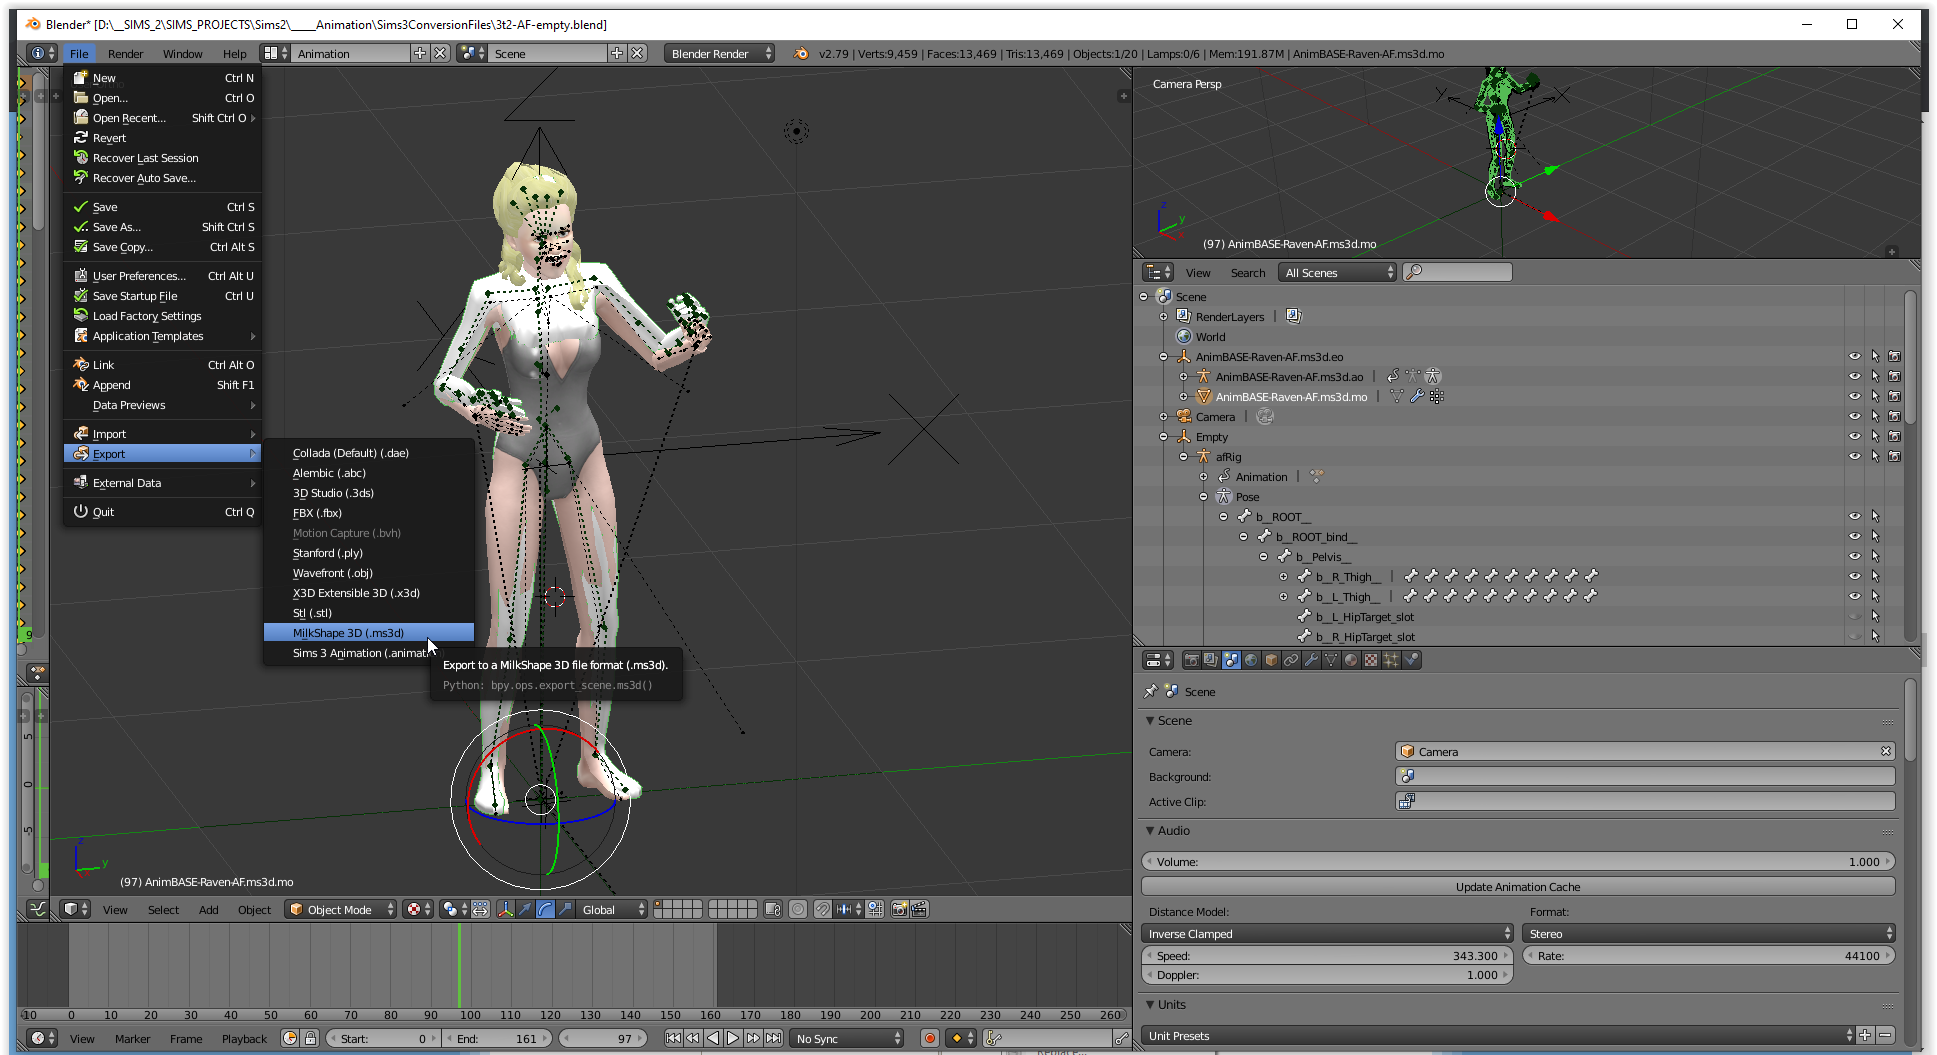
Save the file wherever you like. We're done with Blender for now.
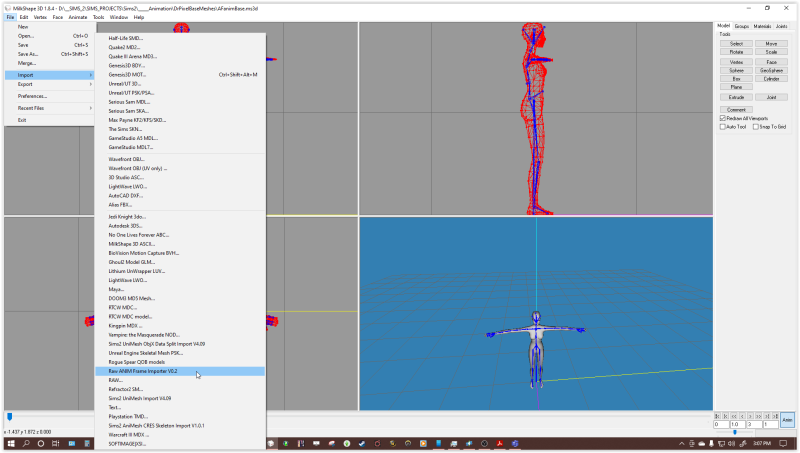
PART 4: ASSEMBLING THE ANIMATION IN MILKSHAPE
(Big Thanks to Meduza for help with figuring out this part)
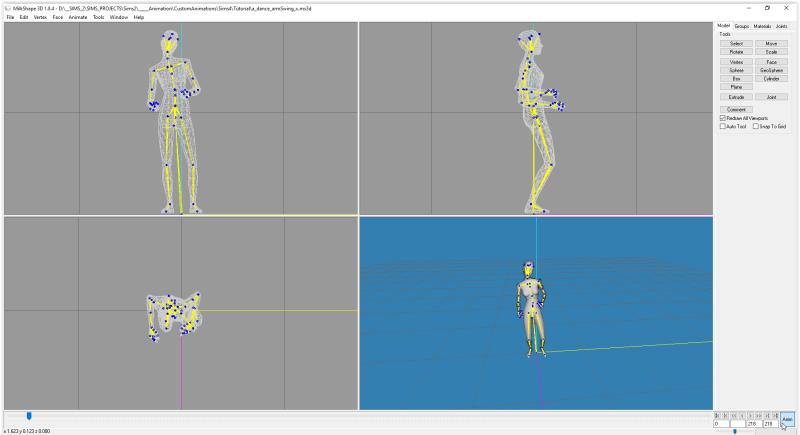
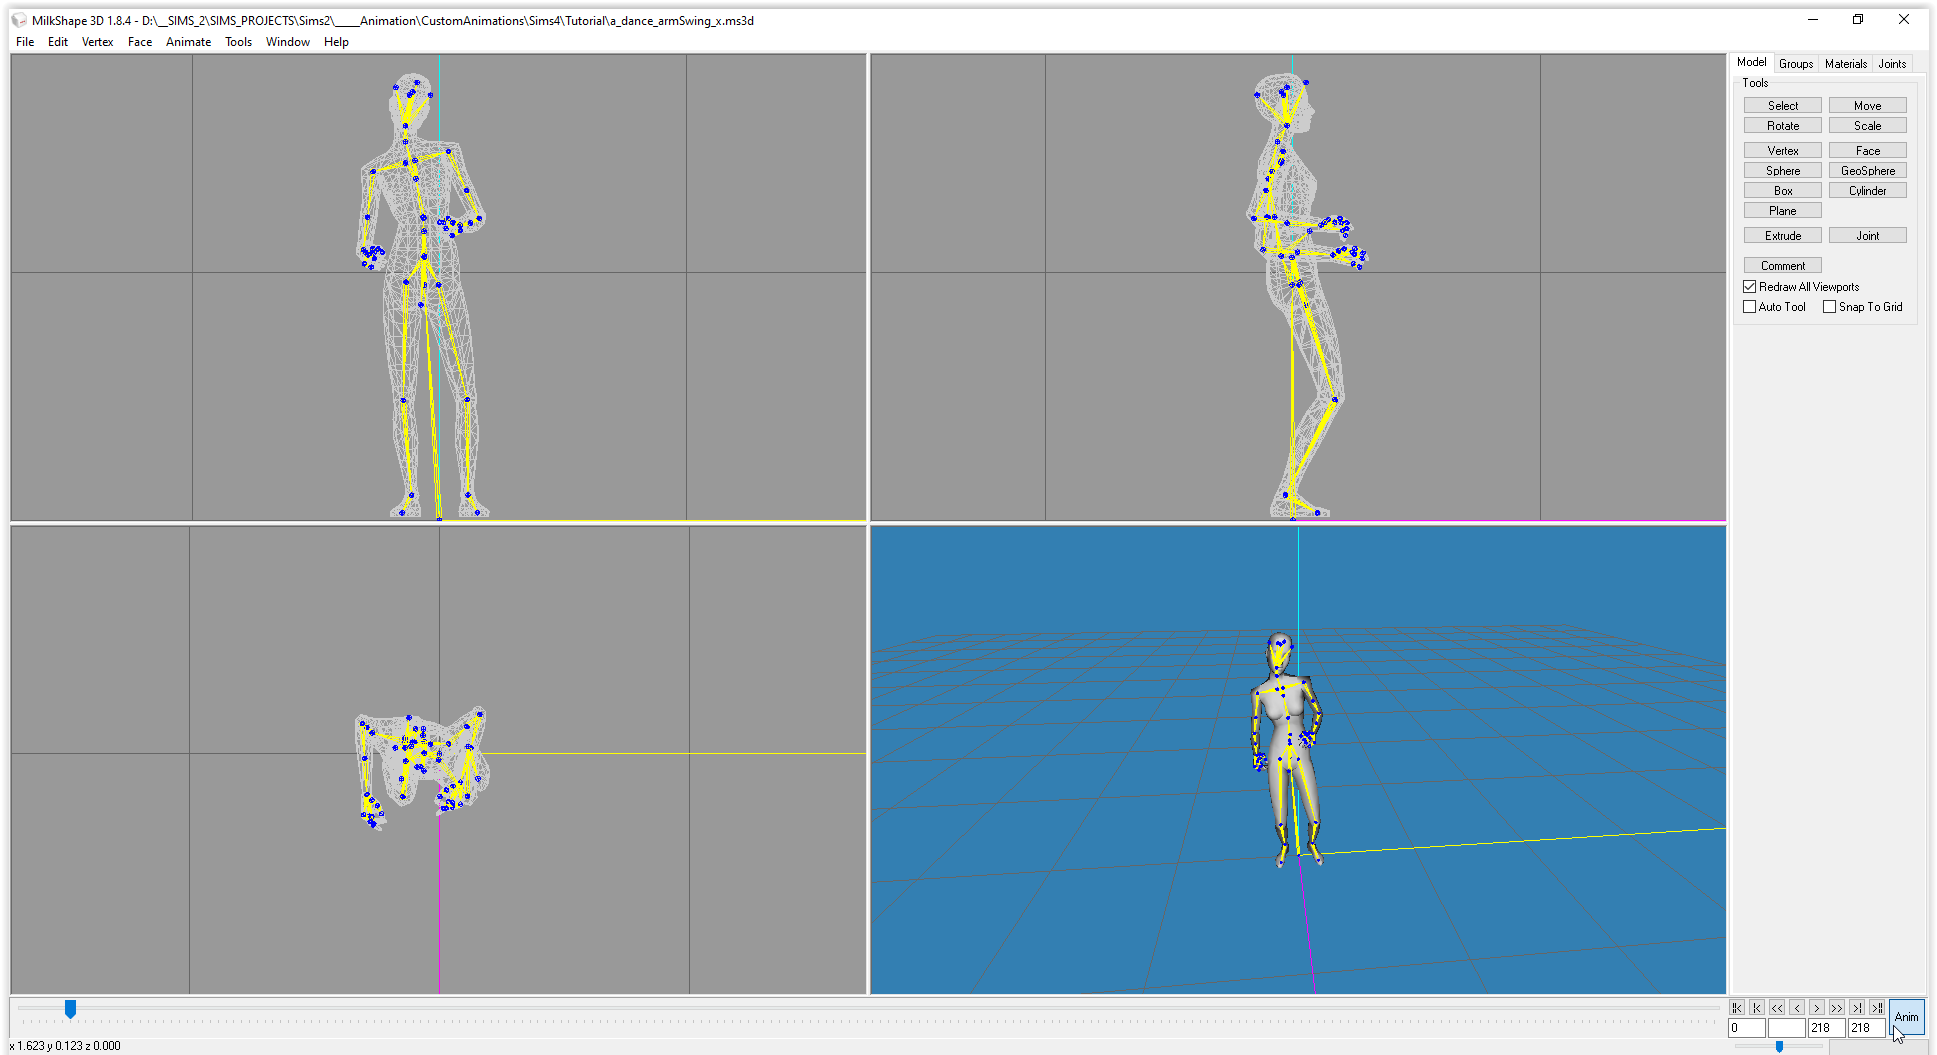
Open your file that you just exported from Blender in Milkshape. Click the "Anim" button in the lower right to activate the keyframed animation.

Scrub through to see how it looks!
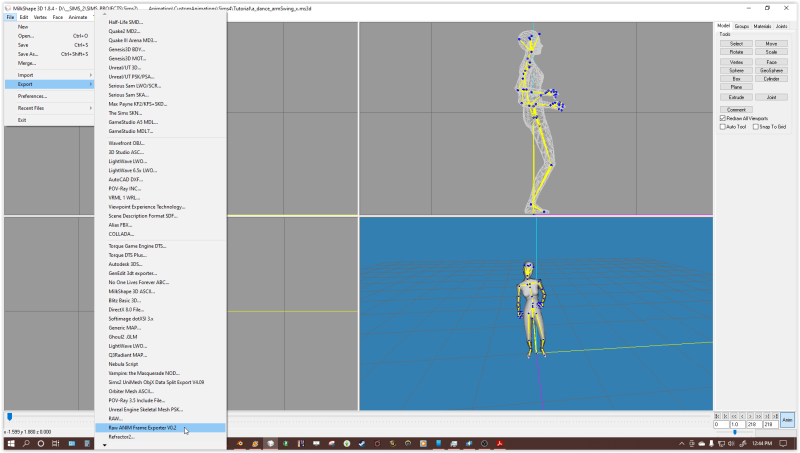
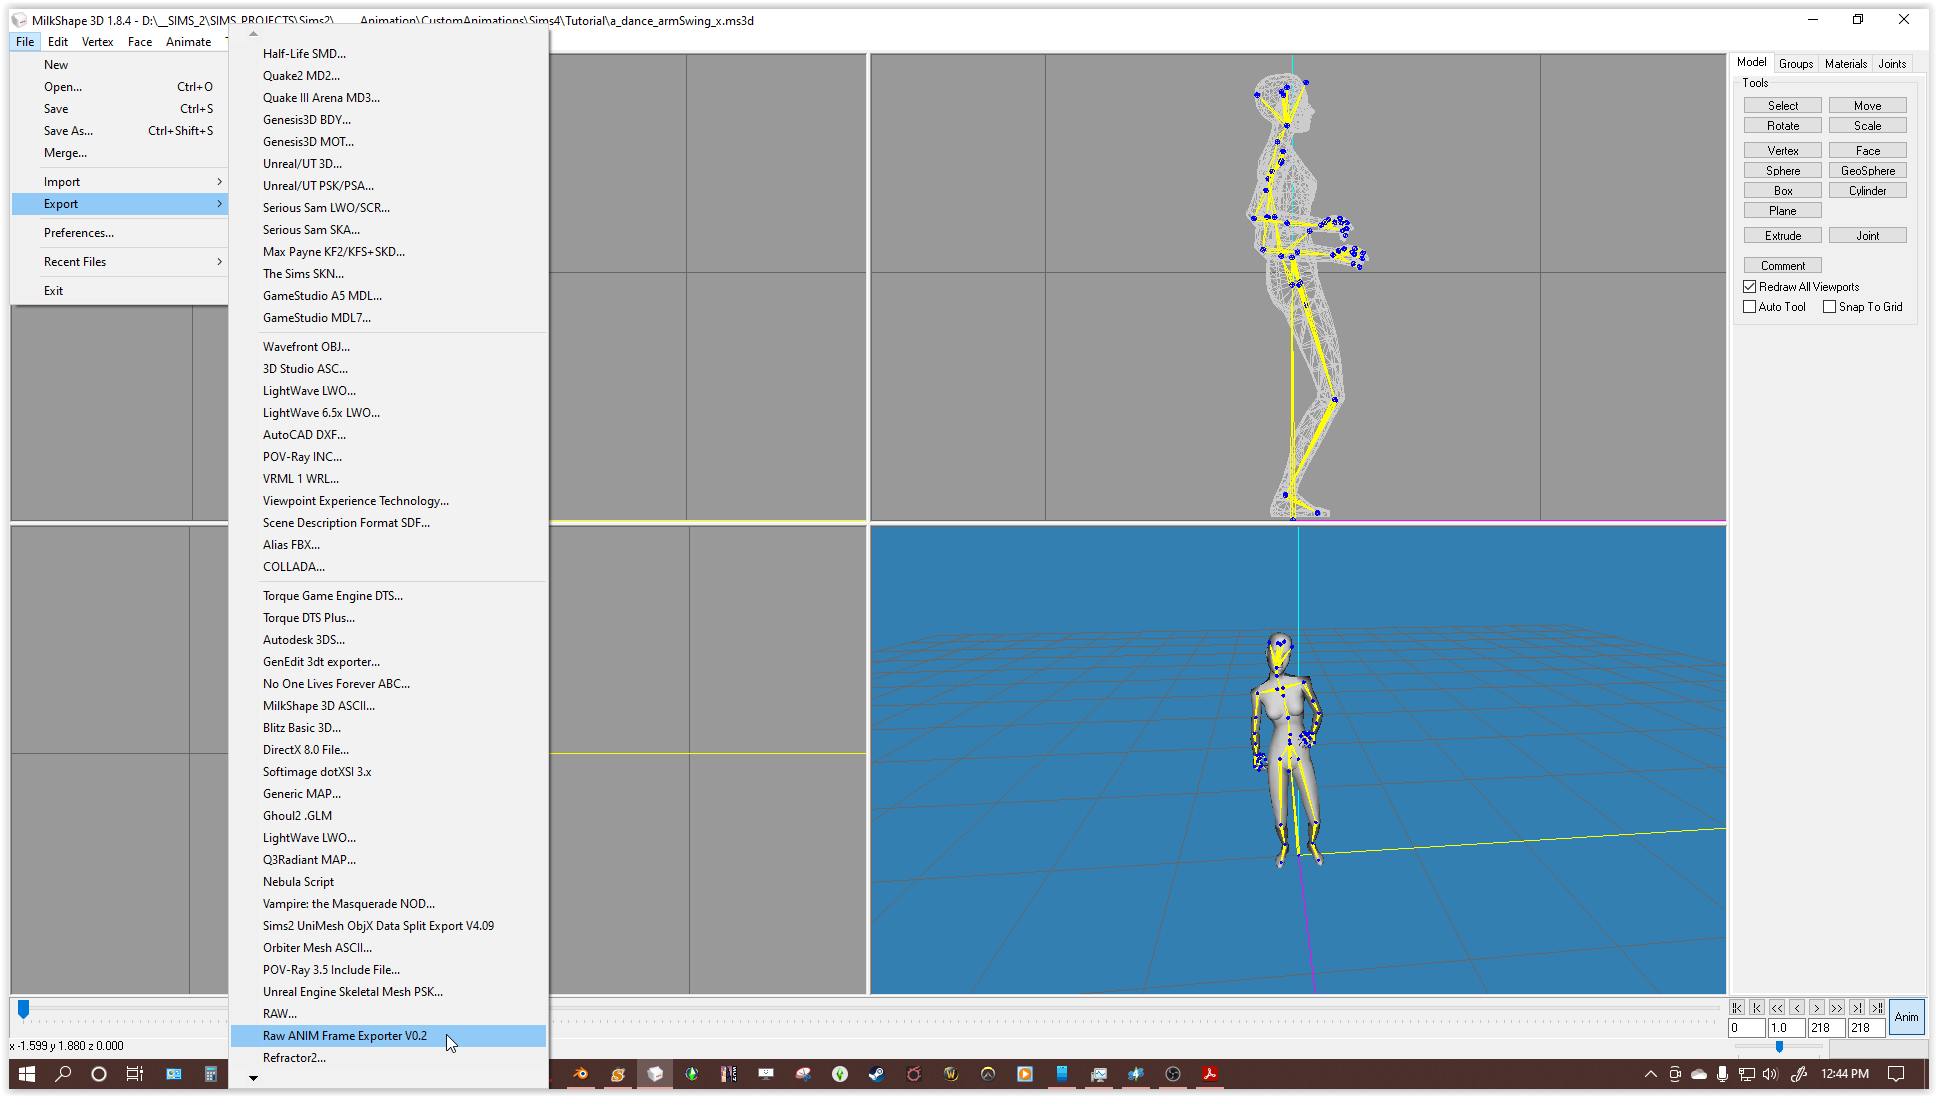
Export the Raw ANIM file by going to File>Export>Raw ANIM Frame Exporter V0.2
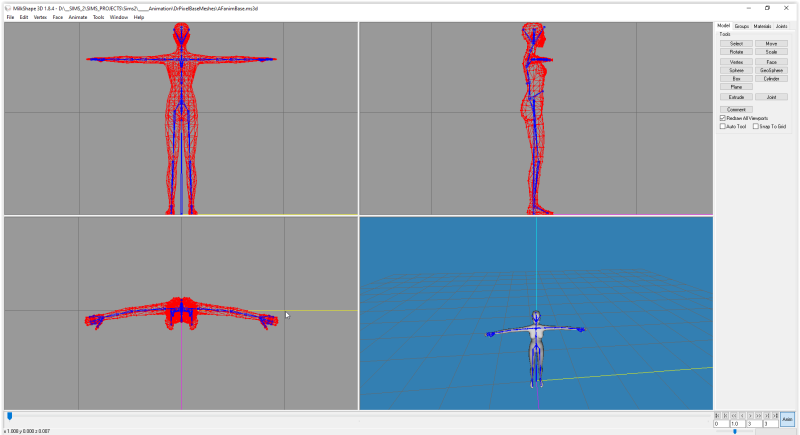
Now open up one of Dr. Pixel's Base Meshes that you downloaded at the start. Since this is an Adult Rig, let's just use the Adult Female file.
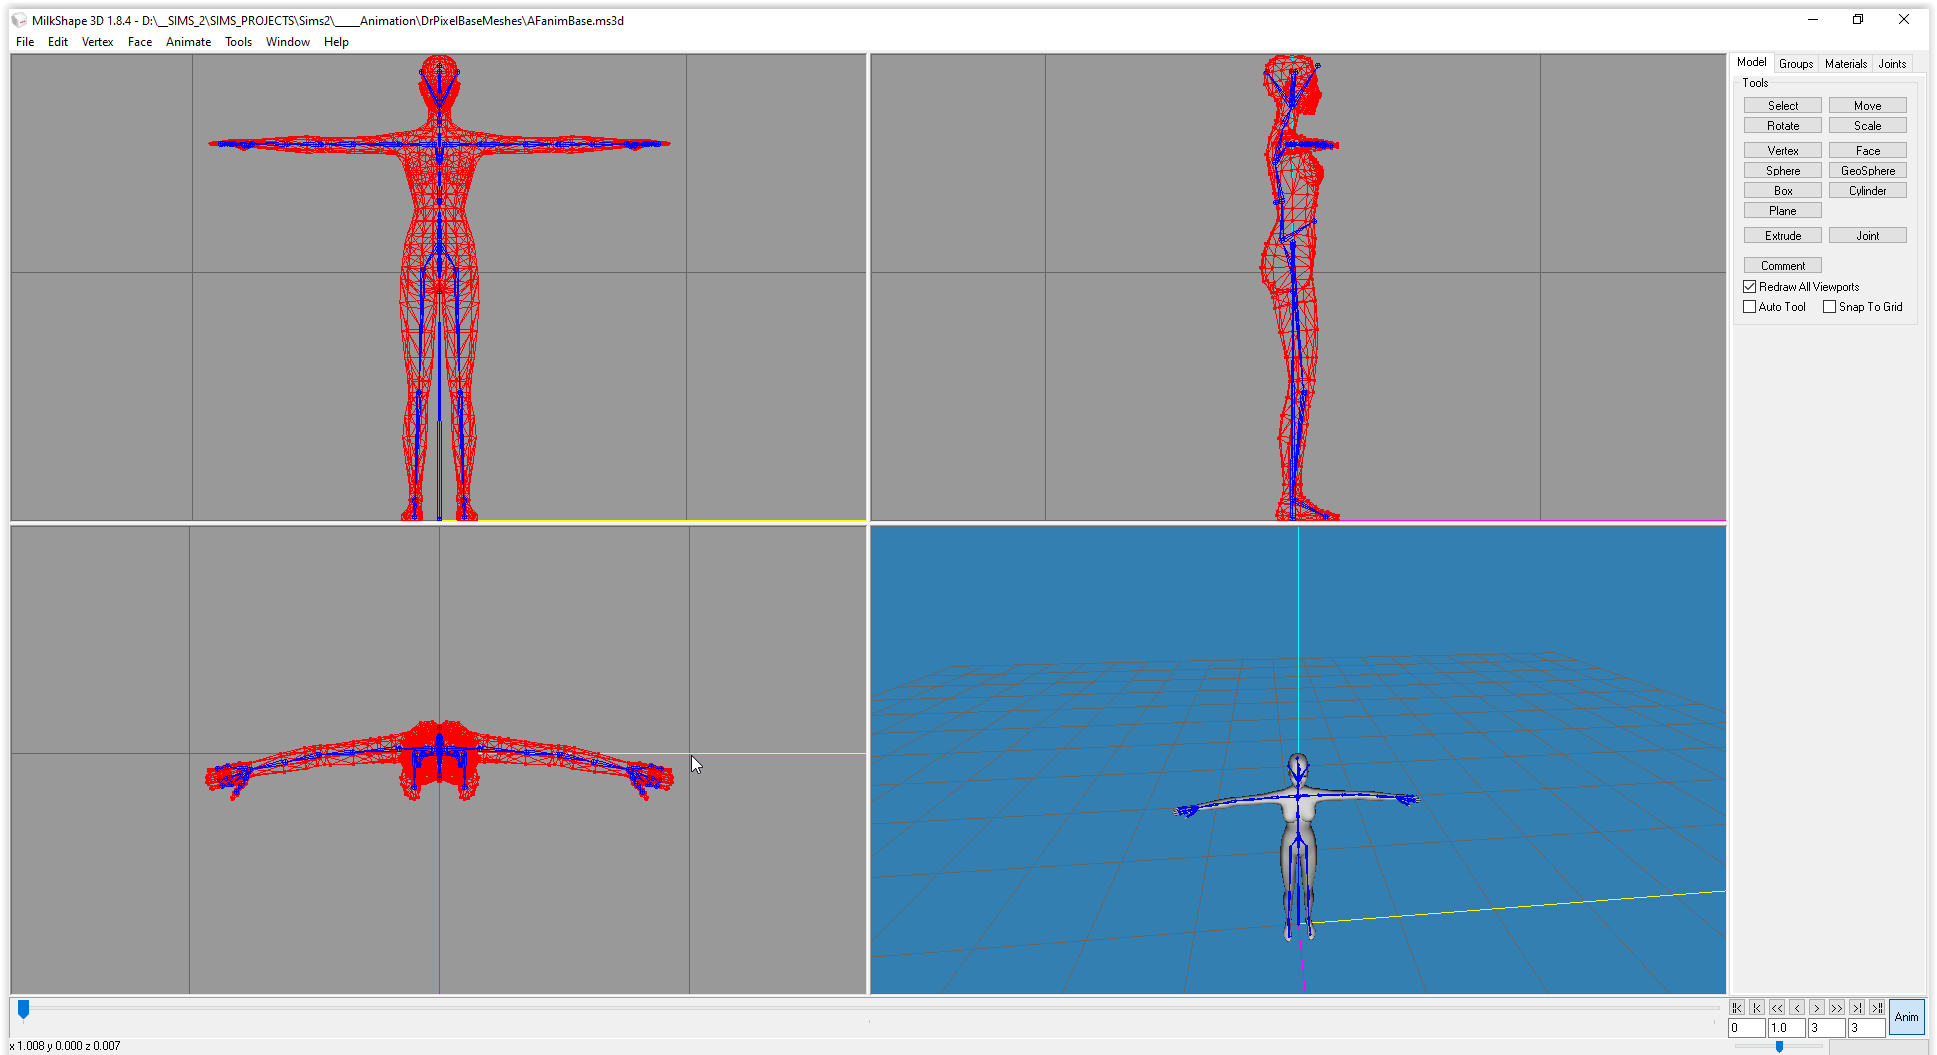
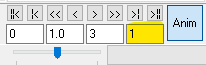
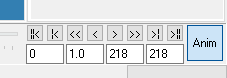
In the lower right corner, to the very left of the "Anim" Button is the "Total Frames" number. Change that to 1.
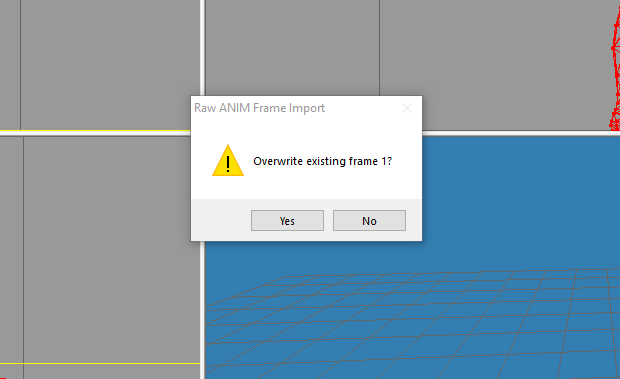
Go to File>Import>Raw ANIM Frame Importer V0.2 to import our Raw ANIM file to the base mesh.

Milkshape will ask if you want to overwrite the existing frame 1. Click "Yes"
The Total Frames number should update to reflect the application of our custom animation.
Scrub through the Timeline or press Play to view your animation.

Now we're going to export this animation to something that SimPE can read.
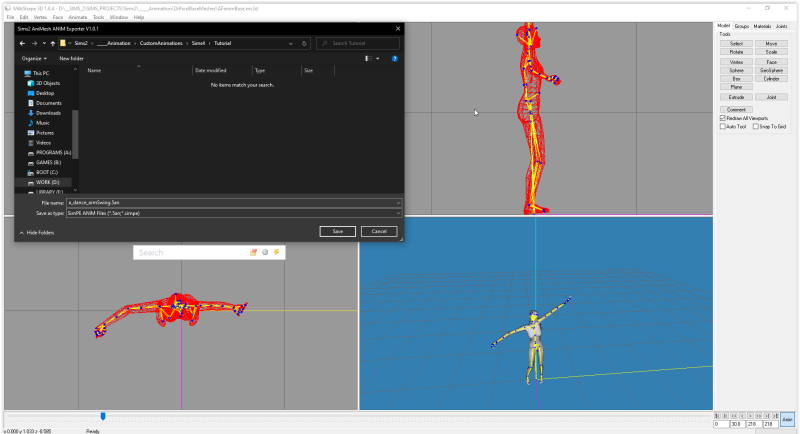
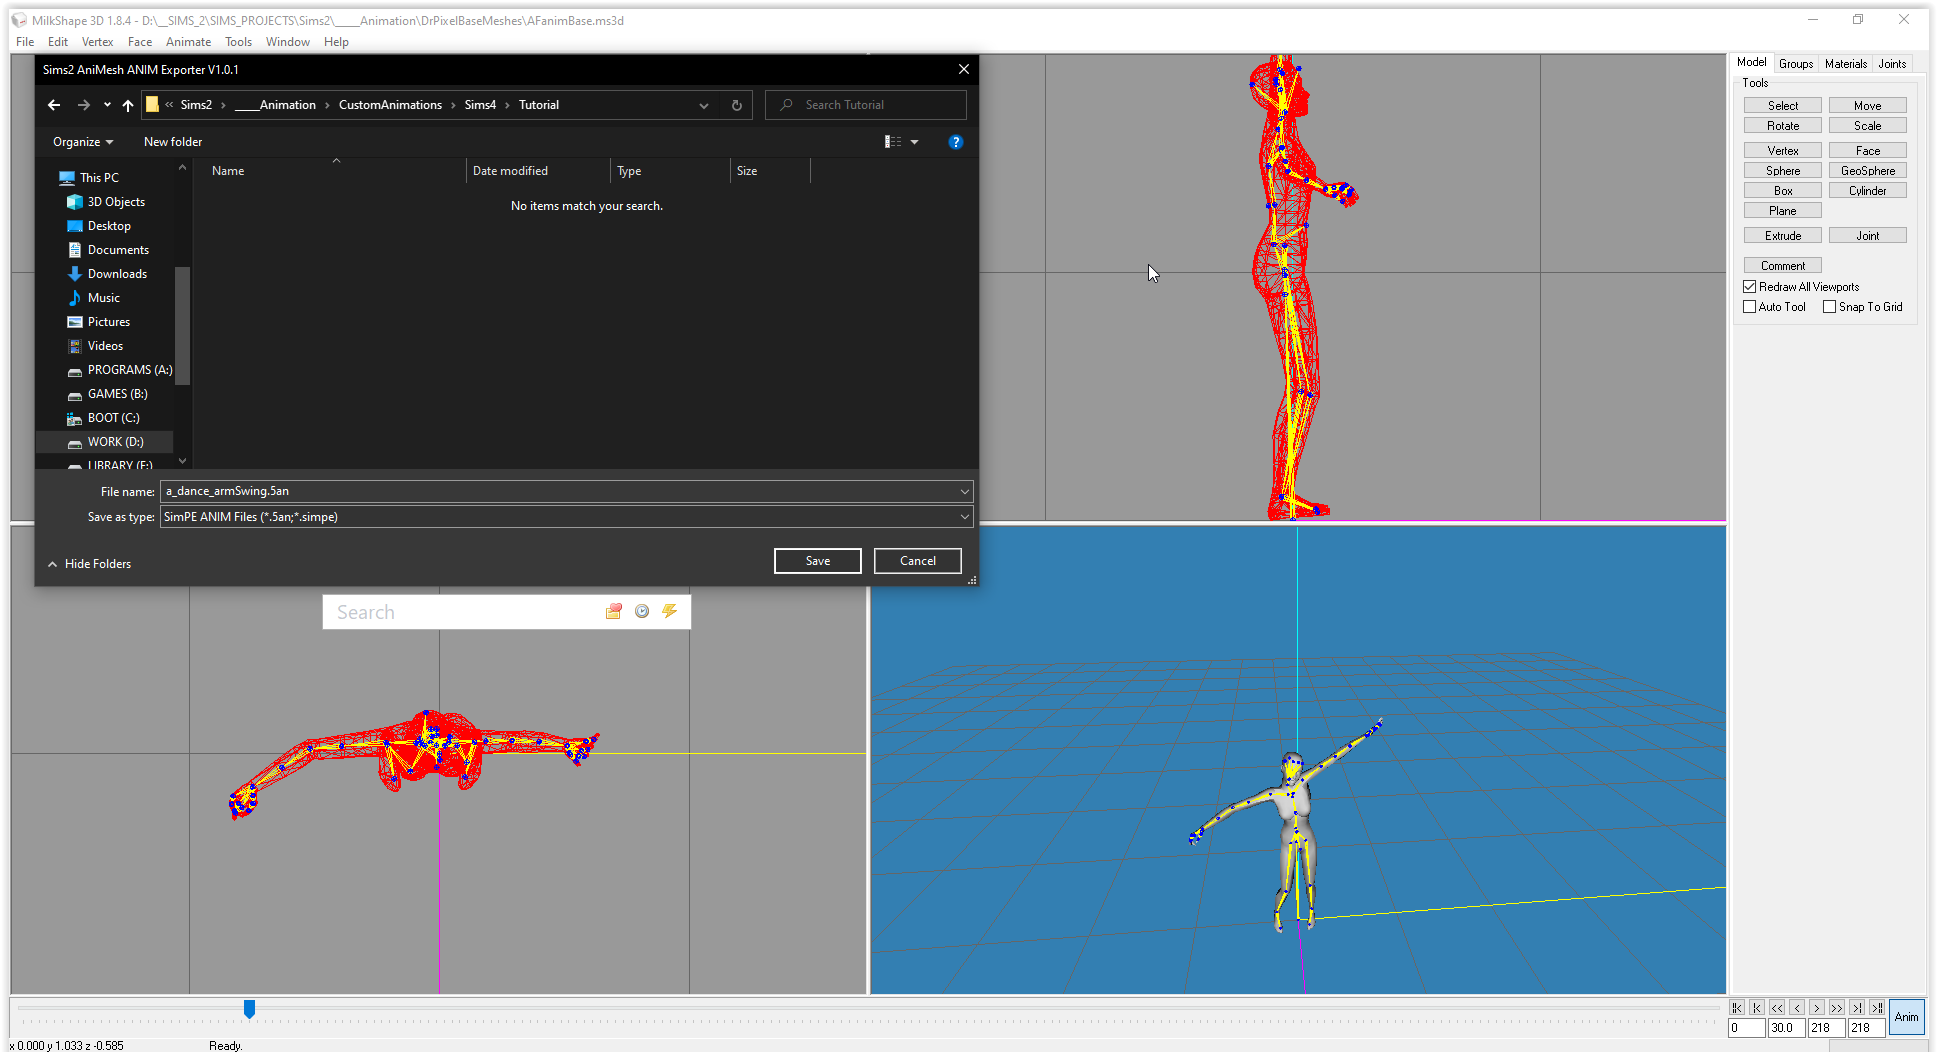
Go to File>Export>Sims2 AniMesh ANIM Exporter v10.1

Name the file whatever you like. I tend to stick with the "a_" format that Maxis uses as it makes the file easy to understand at a glance. Save your file.
The TS2 AniMesh ANIM Export Options box will pop up. I believe this is what it looks like by default:
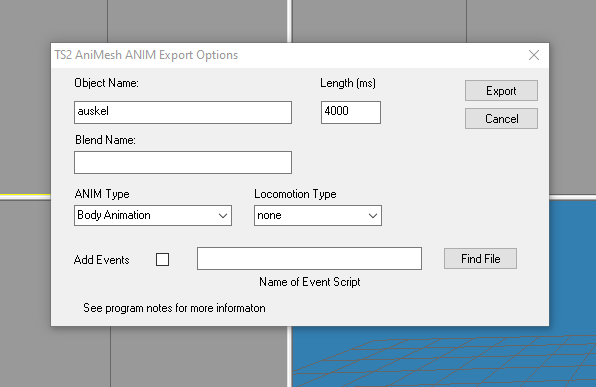
You're going to leave most of those values as they are. The only one I change is the "Length (ms)" value. This is what determines the length of your animations in-game. I looked it up and apparently one Frame=50 Milliseconds (MS), so to be more accurate, I always multpliy the number of frames x 50 to get an accurate length.
In this case you'd enter 10,900 in the Length value instead of 4000. This is really your call, though, the animation won't NOT work if you leave it at 4000. It will just play more quickly.
And that's it, folks. You will now have an .an file that you can import into SimPE to use as a custom animation.
I won't go through the process of importing an ANIM file to SimPE as it has been covered elsewhere. I found this tutorial by @hermit_fox to be a very clear and detailed method of importing them. https://hermit-fox.livejournal.com/524.html
Tutorial: Creating a Posebox
Though it's primarily a tutorial for creating a posebox, the principles for custom animations still apply. Scroll down to Part 2 to begin the relevant instruction.
I need to reiterate that this is far from being the end of your work on this. This is just the process to get these animations into SimPE and thus into your game, there is more that needs to be done before you could consider them useable for the game. Also, not all animations will convert properly. Sims 3 and Sims 2 skeletons are different, and those differences don't always translate so well. I've never seen a single animation that converted perfectly and didn't require a TON of fixing. Reading omglo's thread that"started it all" would be a good place to look for troubleshooting tips as a start. Common issues like leg kicks can be solved by researching the issue. It's almost guaranteed to happen on every custom animation so others have solved that problem already. There are a lot of resources found by some quick Googling, but here are some that I found very helpful to get you started.
LEG DOES 360 WHEN GOING IN AIR PROBLEM (How to fix leg-kicking)
INCORRECT JOINT ROTATIONS IN-GAME
COMMON MISTAKES AND ISSUES IN ANIMATION
Thanks so much again to omglo for their guidance, and Meduza for answering all my panicked questions.