Tutorial: Multi-Road Neighborhoods
Project: Archive
by hypersaline
Uploaded May 17, 2025, 7:29 p.m.
Updated May 17, 2025, 7:29 p.m.
Tutorial: Multi-Road Neighborhoods
My last couple of posts have been about neighborhoods with more than one type of (working, real, actual) road in them. It does take a decent amount of SimPE fiddling to get this working correctly, so be warned, but here’s how you can add a second kind of road to a neighborhood.
So, the first thing you need is a mod. Here’s a stripped-down version of mine at SFS, with just a single secondary road type -- @criquette-was-here‘s Rural Charm roads with Maxis sidewalks added on -- for just the temperate neighborhood type. You’ll still need Criquette’s roads so that the “primary,” unedited roads match the ones you edit. (First, please note that this conflicts with @simnopke‘s SkyFix and Criquette’s Seasoned Lot Skirt Fix but incorporates them both.) I’ll go into more detail about how to customize the mod to your liking in a later post; for today, just install it as-is. Two years later, here’s the promised tutorial!
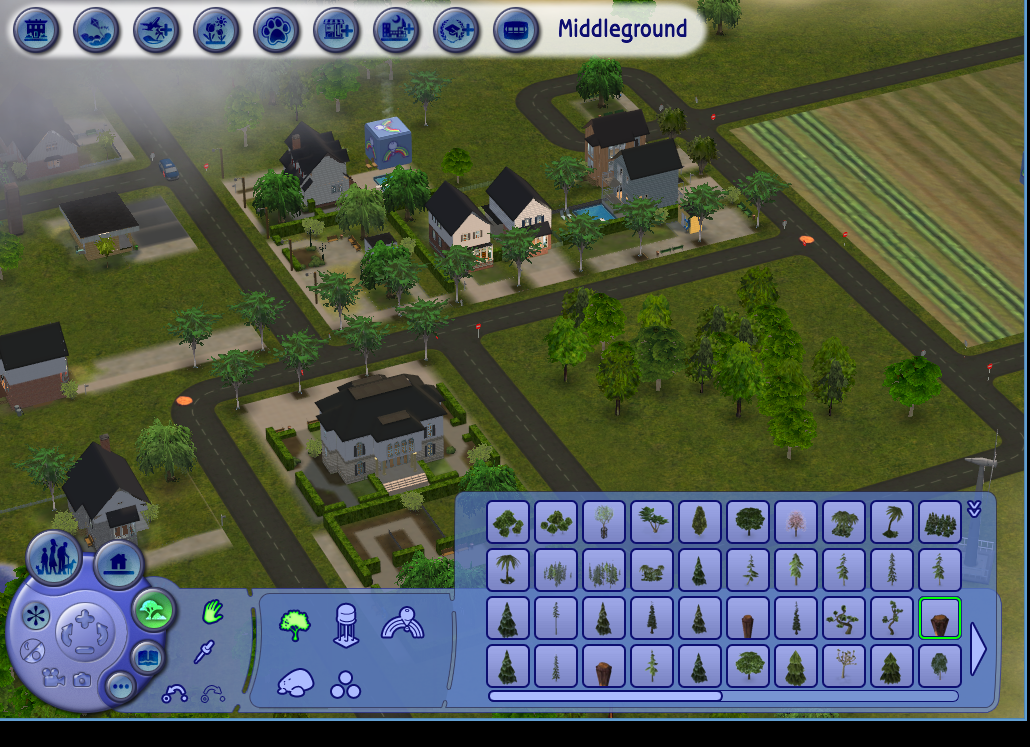
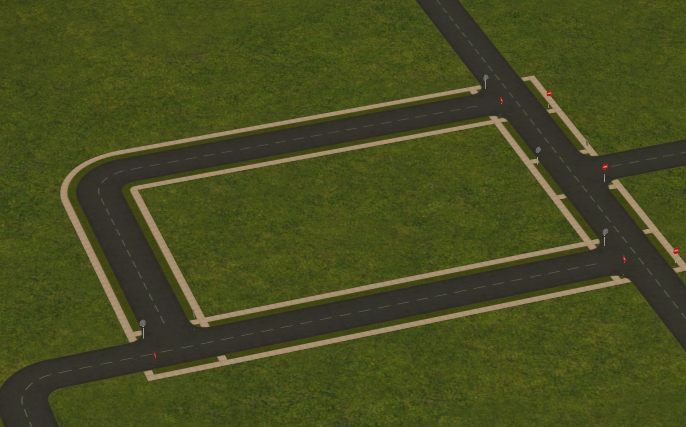
I’m going to add sidewalks to the main street of Plasticbox’s Middleground neighborhood. See those orange circles in the middle of the intersections at the left and right? Those are tree stumps, and we’re going to use them to figure out which road tiles to edit.
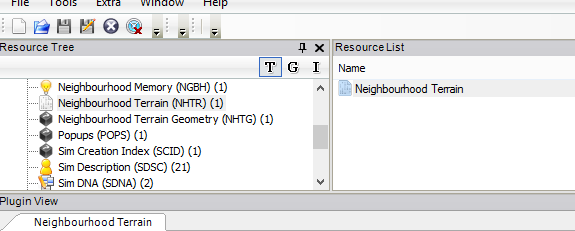
Open up the neighborhood in SimPE and click on the Neighborhood Terrain resource (not the Neighborhood Terrain Geometry). You must be in advanced mode for this to work; you can enable it under Extra>Preferences>SimPE Settings. If you don’t have a Commit button somewhere on the plugin view tab, then you’re not in advanced mode, and you’ll have no way to save your work.
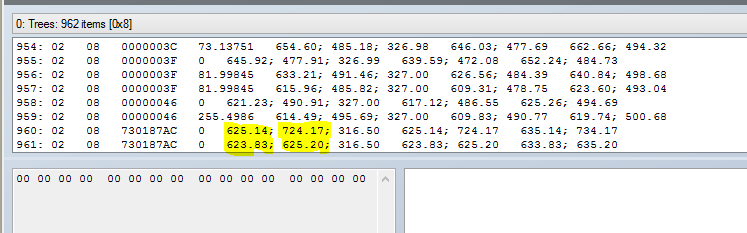
The Trees dropdown item should automatically be open when you select the Neighborhood Terrain resource. Scroll all the way down to the bottom and find the last two entries; those are our tree stumps. Look at the highlighted numbers and mentally round them to the nearest number ending in five. (In our case, that’s 625, 725, 625, and 625.) Those numbers mark the middles of the two tiles at the ends of the line segment we want to edit.
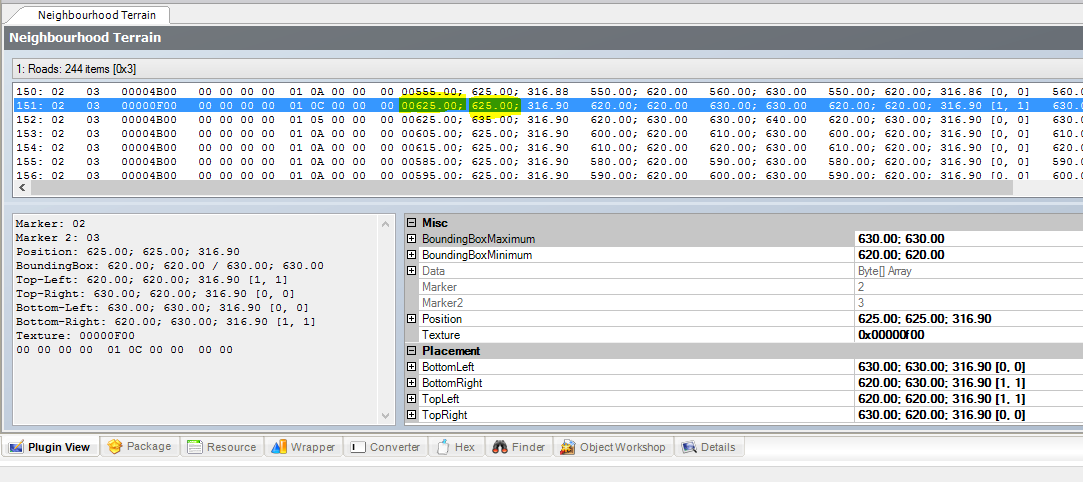
Open up the Roads dropdown. The numbers here are in a different order, but you want to look at the first columns with decimals. Those correspond to the highlighted numbers in the previous picture. Since the points are (625,725) and (625,625), we’ll be looking for lines where the first of those numbers is 625 exactly and the second of those two numbers is somewhere between 625 and 725. You’ll just have to scroll until you find a line that matches our parameters -- there’s no way to sort or search through this list.
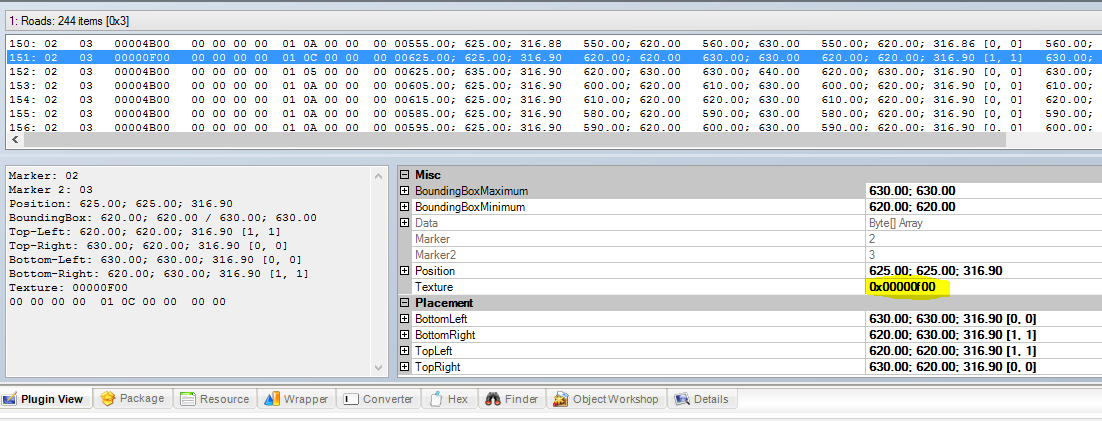
So, now that we’ve found a matching line, you’ll need to look at the highlighted GUID. See how it says Texture to the left? That number tells the game what kind of road tile belongs in the (625,625) spot. Change the third digit after the 0x to a 1. (That is, you’ll end up with 0x00100F00.) Then -- and here’s the tedious part -- you have to keep scrolling through the list until you’ve found all of the matching lines. On each line, you’ll change the third digit of that highlighted GUID to a 1. Don’t forget to commit and save once you’re done.
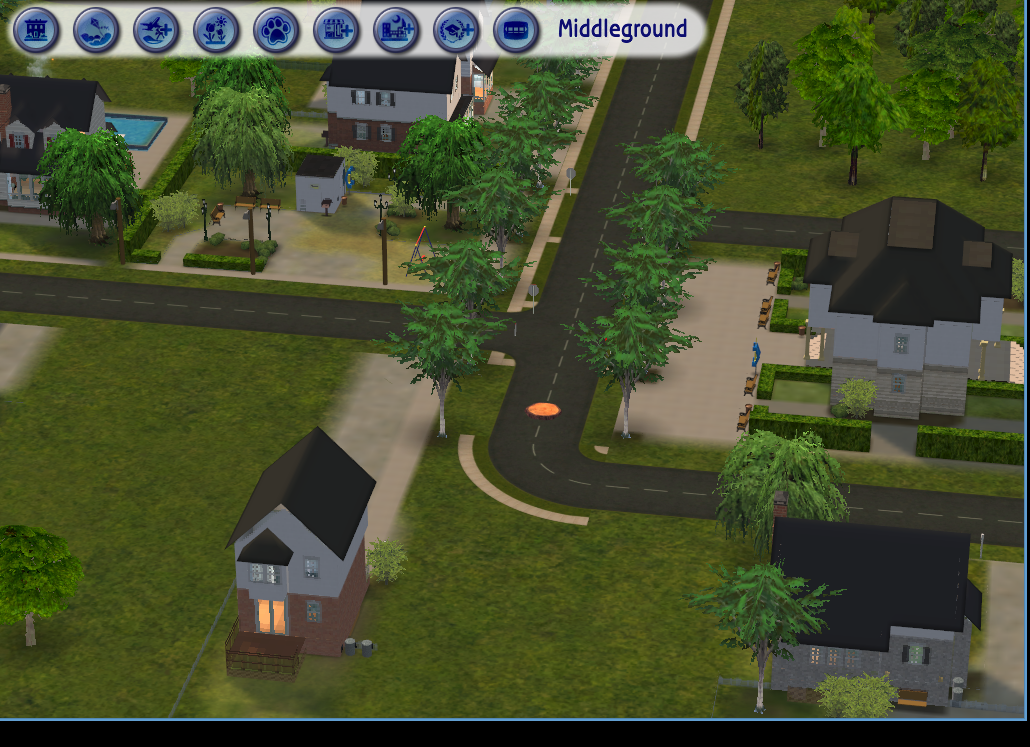
The next thing to do is load up the game and check that everything worked. In this case, it looks like I missed one line -- you can see that there’s one tile without sidewalks on our road. No problem; we’ll just mark it with one of our stumps, delete the other, and go back into SimPE to find the line that matches the one remaining stump’s position.
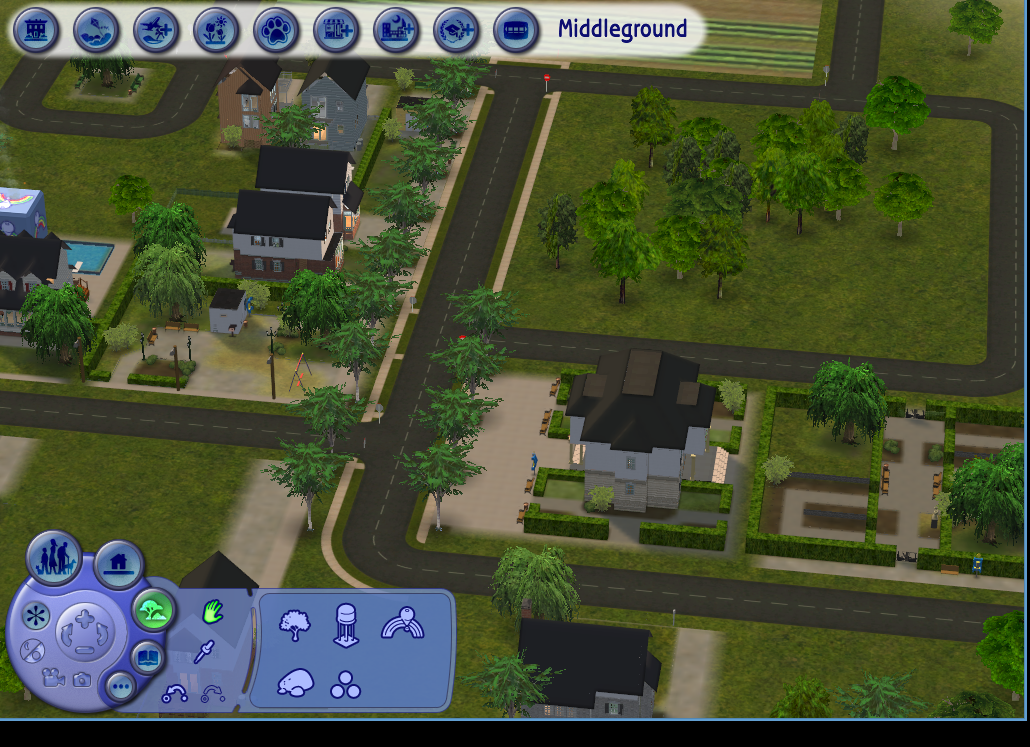
Okay. Now that the last tile is taken care of, and once we’ve deleted the stump...
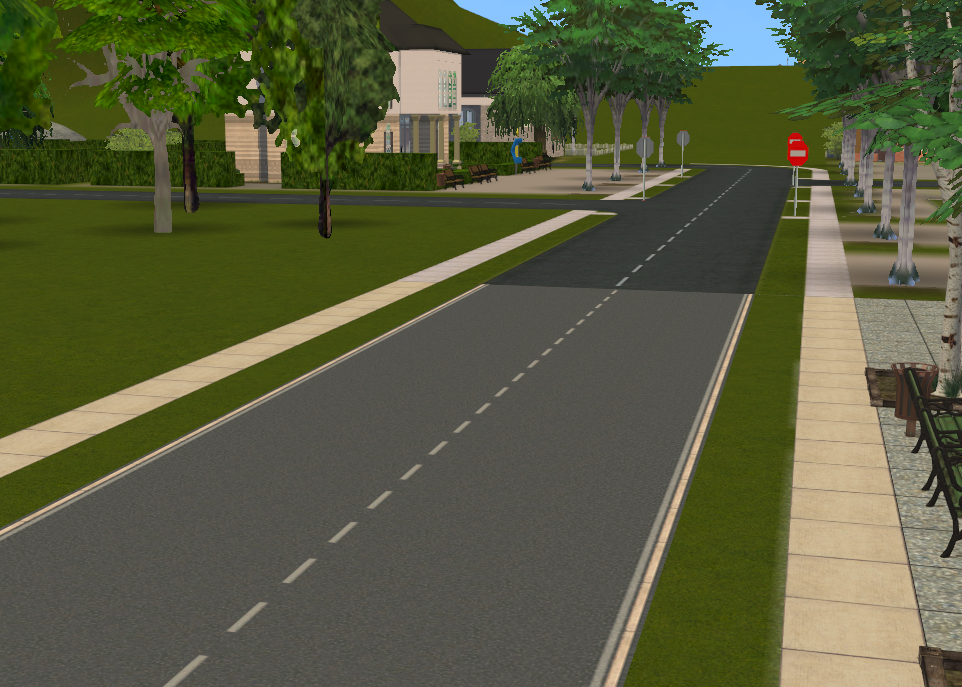
Let’s check lot view. Everything looks right! (Besides the Maxis road on the lot, of course.) So, if you want sidewalks on other roads, you can repeat the process; if not, the neighborhood is ready to play.