Tutorial: Editing the multi-road mod
Project: Archive
by hypersaline
Uploaded May 17, 2025, 7:34 p.m.
Updated May 17, 2025, 7:34 p.m.
Tutorial: Editing the multi-road mod
Here are instructions for adding new tile types to the existing multi-road mod. This tutorial is applicable to unique tiles like a partly-dirt/partly-asphalt intersection, but it's equally applicable if you want to add a tertiary or quaternary road type.
However, please keep in mind that if you don't need extra tile types but only want a different kind of secondary road (like asphalt and dirt instead of asphalt and asphalt-with-sidewalks), you can skip all of this and just replace the textures inside the Textures.package file.
First things first: make sure you have textures for the new kind of tile. You'll need five versions of it, three solid (heavy/light/no snow) and two semitransparent (snowy/clear). If you open up the Textures.package file and look at the Texture Images already present, you can use existing road pieces as templates. I've uploaded what I could find of the textures I made for dirt/asphalt intersections here at SFS, but it doesn't look like I finished them; feel free to use what's there if it's helpful. (Edit: whoops, forgot to say this originally, but those textures are mashed-up versions of ones by @nimitwinklesims and @criquette-was-here.)
Second: you need a hexadecimal ID number for each new tile type. The best way to do it is to take the vanilla tile IDs (00000300, 00000f00, 00004b00, 00005700, and 00020700) and change the third digit of each one while keeping the type the same (like using 00400300 for a dead end, 00400f00 for a straight piece, etc.). In this case, I used 00205700 for a T-intersection. Be aware that the ID number will sometimes need to end with zero and sometimes with four.
When you're ready to start, open up the Textures.package file from the multi-road mod.

Inside the Textures.package file, click on one of the two Maxis Material Shader files in the list. You need the one that says "Shaders for lot skirt" near the top.
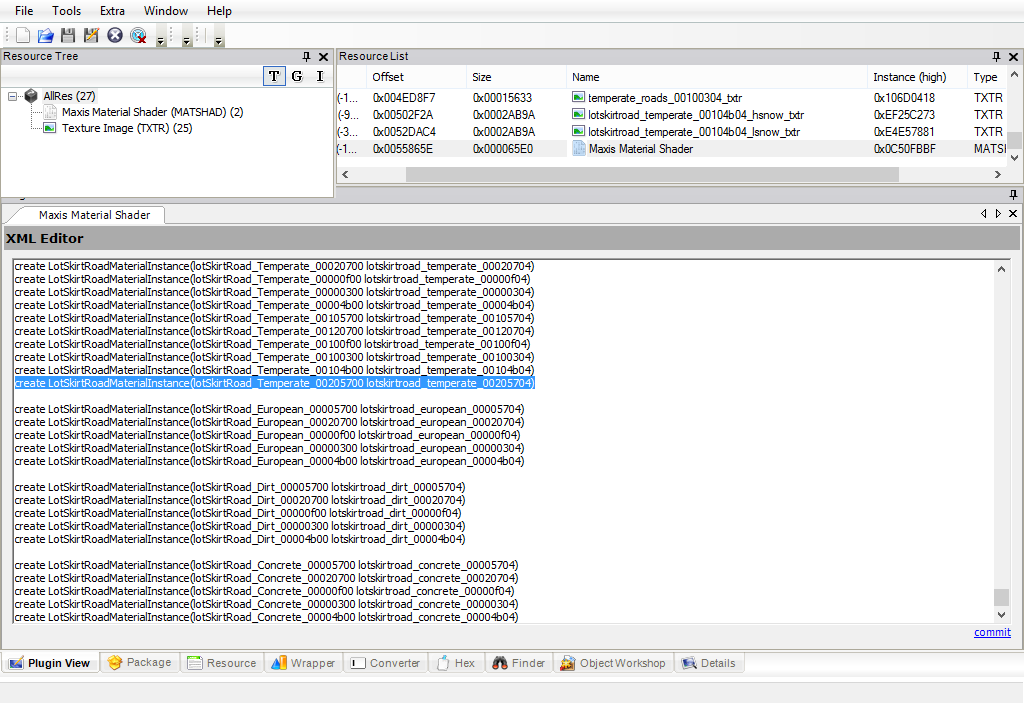
Once you've got that open, you'll need to scroll all the way down to the bottom and find the Temperate entries that look like this:
create LotSkirtRoadMaterialInstance(lotSkirtRoad_Temperate_00205700 lotskirtroad_temperate_00205704)
...and copy and paste that whole line at the end of it.
Then hit the little blue "commit" at the bottom right.
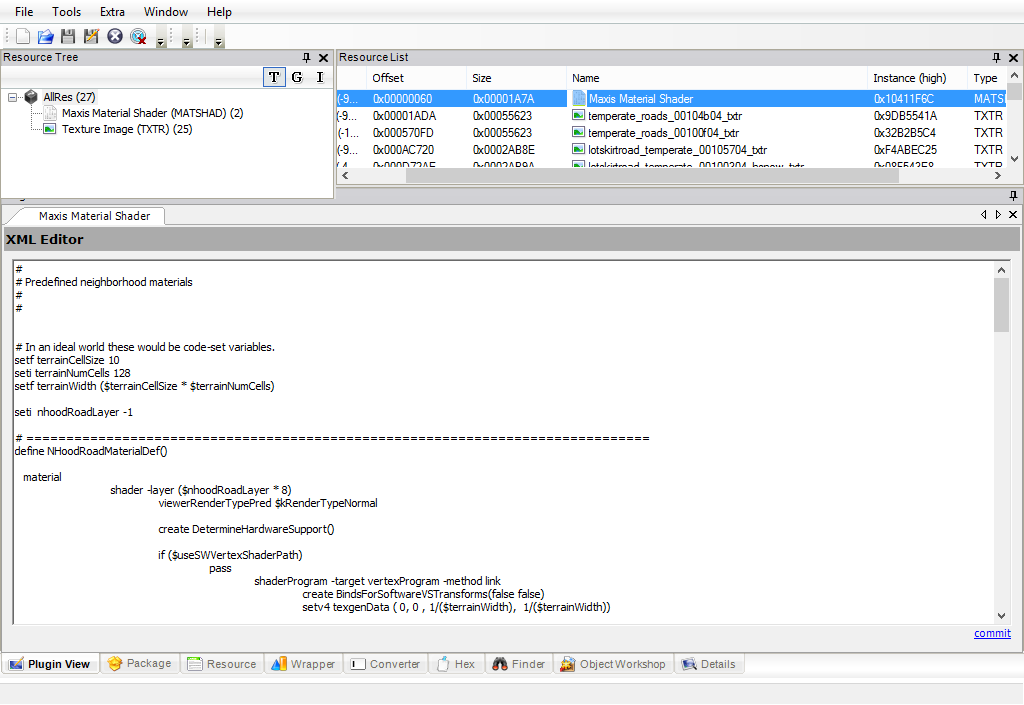
Next, open up the one that says "Predefined neighborhood materials" near the top, and scroll down to the end of it. The version of the mod currently up on SFS already has a line for '00205700' in it - looks like I forgot to delete that (and several others, whoops). If it weren't there, you'd paste this line in and commit:
create NHoodRoadMaterial(neighborhood-roads-Temperate-00205700 Temperate_roads_00205704)
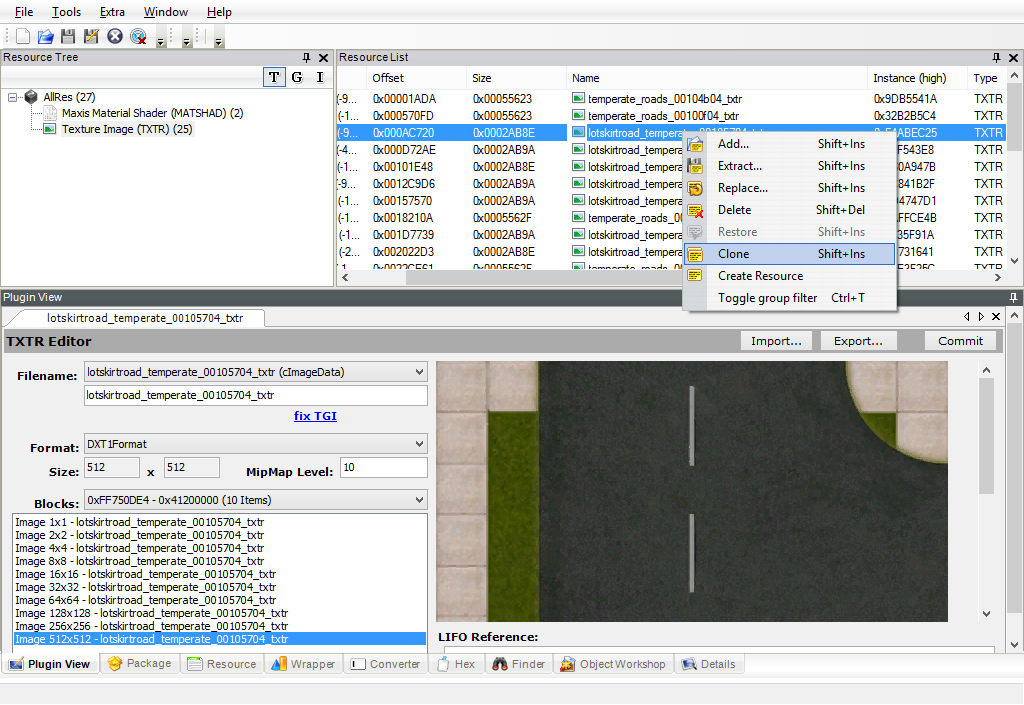
After that, look at the Texture Image files. Go down the list one-by-one. You should find five with the number "00105704" in their names. Each time you find one, right-click on its name and choose Clone.
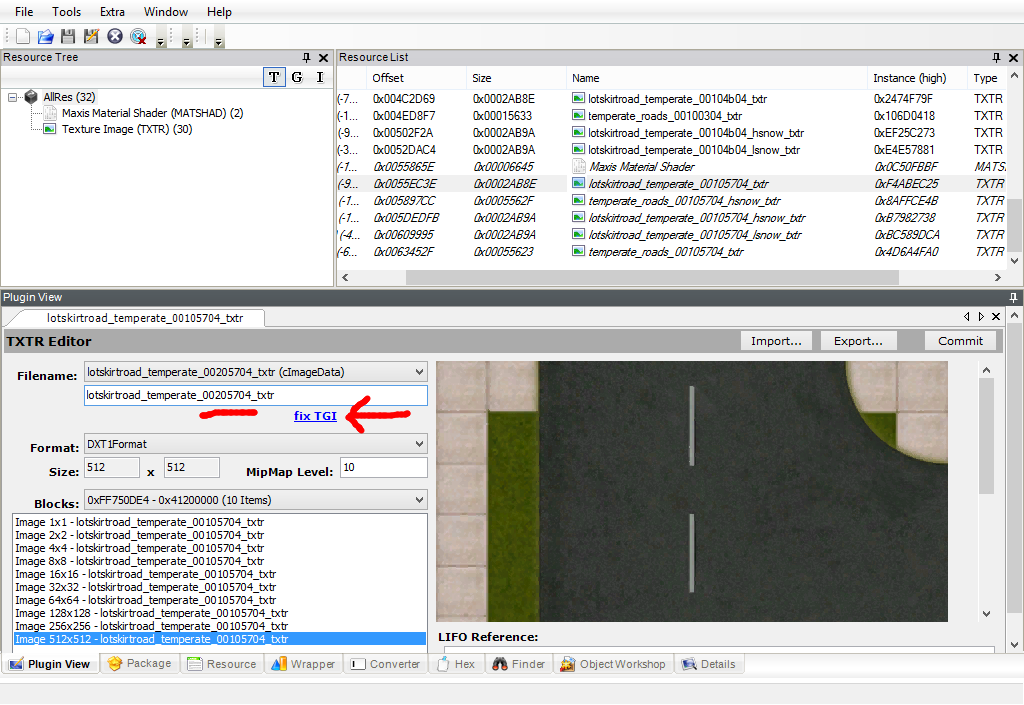
The five clones will be italicized in the list. For each one, click to open it, go to the Filename box and replace the "00105704" with "00205704", then click the little blue "fix TGI" just below it. Then click the "Commit" button in the top right.
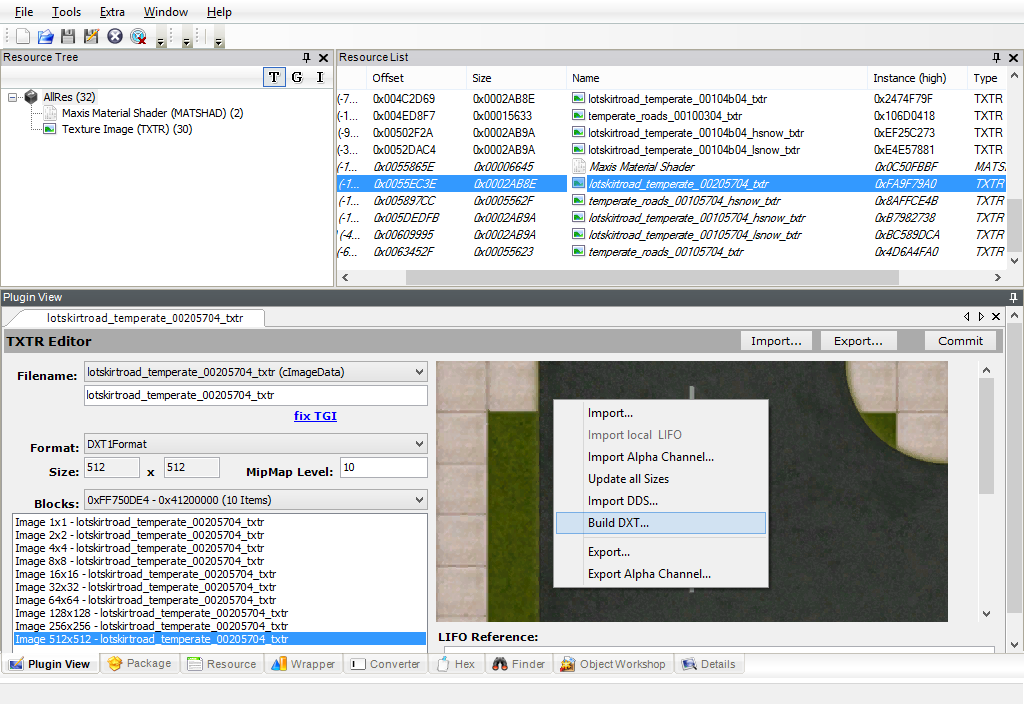
Click away to another resource and come back; this is just to make SimPE reload it. Right-click on the texture box and choose "Build DXT...". (If it's greyed out, SimPE can't find the Nvidia DDS Utilities on your computer, and you'll need to go install them and/or point SimPE to them.)
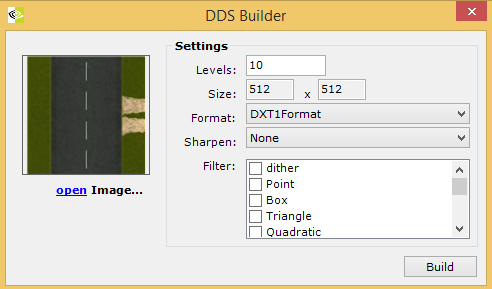
Click on the little blue "open" link and browse to the texture you created. Don't change any of the options, just open the image and hit "Build." Once the DDS tool is done doing its thing and you can see that your new texture has been imported, hit the "Commit" button again.
When you've done all of them, save the package and close. Now you'll be set up for the previous tutorial that directs your neighborhood to actually use the new tiles. You'll just be changing the ID numbers from "00005700" to "00205700" instead of "00105700" (or whatever).