InZOI Tutorial: How to set up slots on Furniture item
Project: InZOI Tutorials
by Lyralei
Uploaded July 6, 2025, 8:38 p.m.
Updated July 6, 2025, 8:38 p.m.
So! You created that lovely mesh of yours, maybe a table, or a nice side-table... maybe it's a cross object of something like a microwave that you want to be able to add clutter to?! Well, let's check out how to do that! :)
First, we want to make sure our Mesh is ready. While it doesn't have to be textured like my version, using the old reference mesh you may be using is not a good start. So if you don't have your own mesh imported yet, do this first!
What are slots?
If you've modded for the sims 3 or the sims 4 before, you are probably familiar with this.
Slots is in a way a very broad thing. So, if you've played the game you probably know that you can put stuff on a table, correct? And that it tends to "snap" to a designated section of the table?
That's a slot you found!
Now slots can be used in many ways other than just putting plants and pots down :)
Here is a known list you can add slots:
- An Object
- For special effects to slot to it and play (smoke, sparks, etc).
- Interaction (aka, if a radio is on a table, being able to use it).
- Audio (where is the sound supposed to come from from the object?)
- Require Extra Space (?)
Adding our Slots.
First, we need to "edit" our object in order to change the position of a slot and/or add one :)
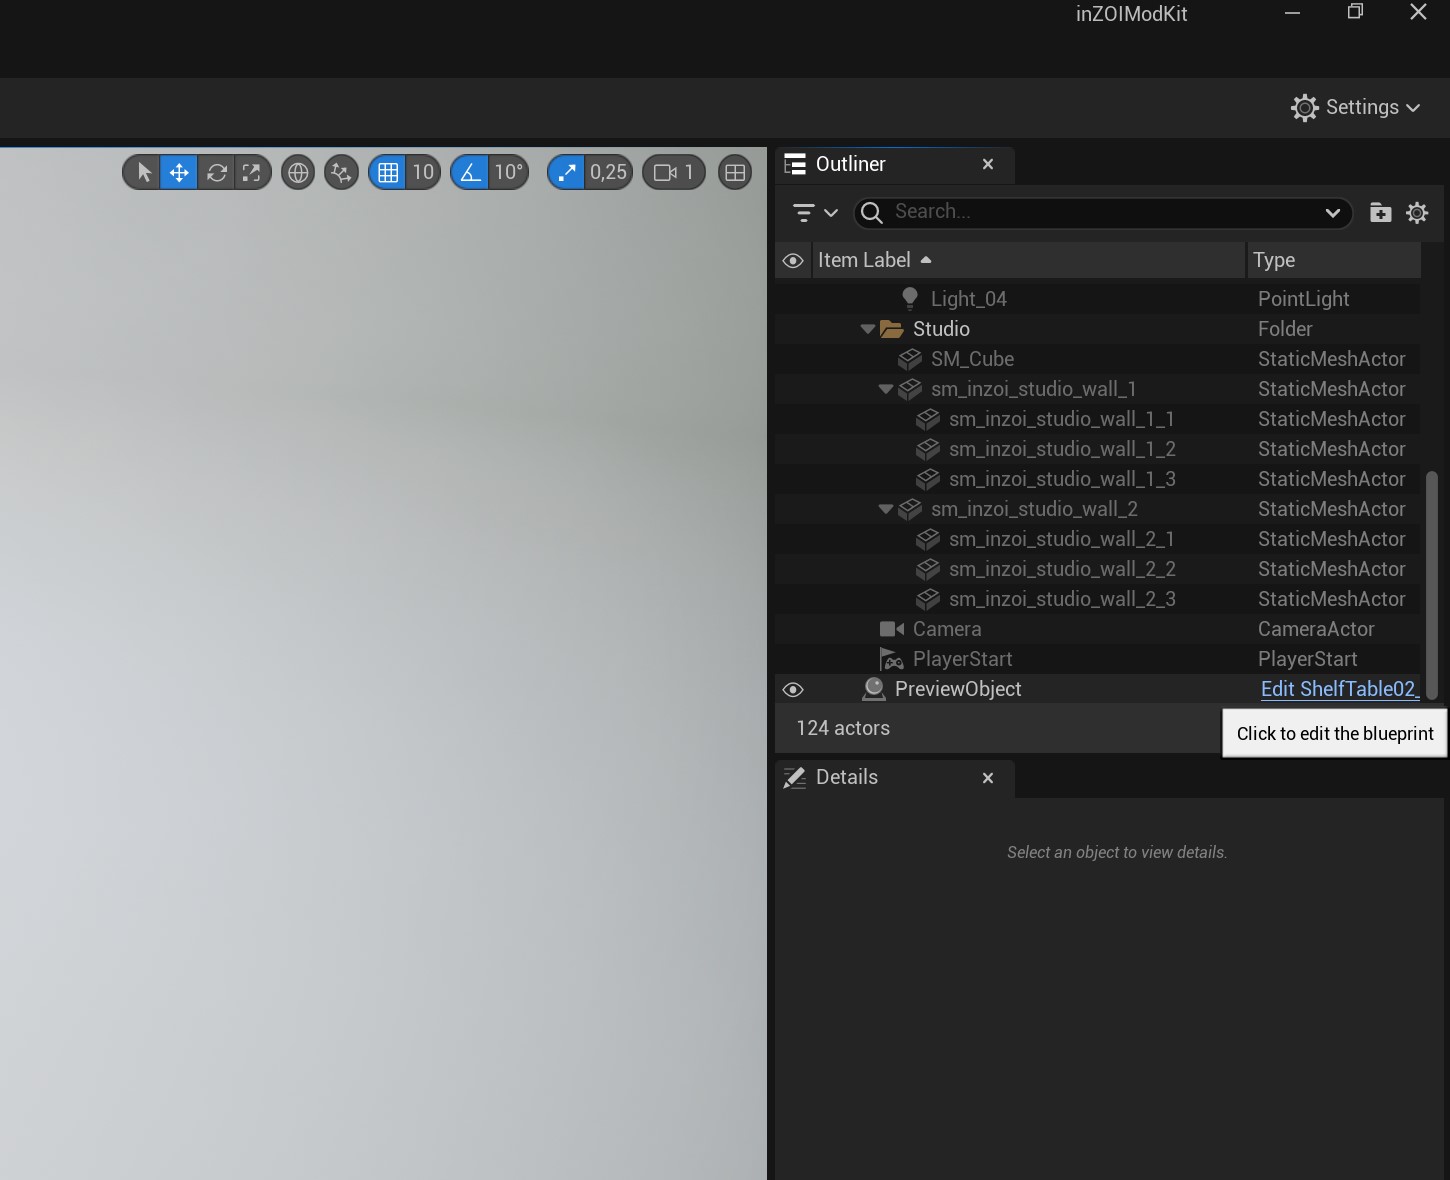
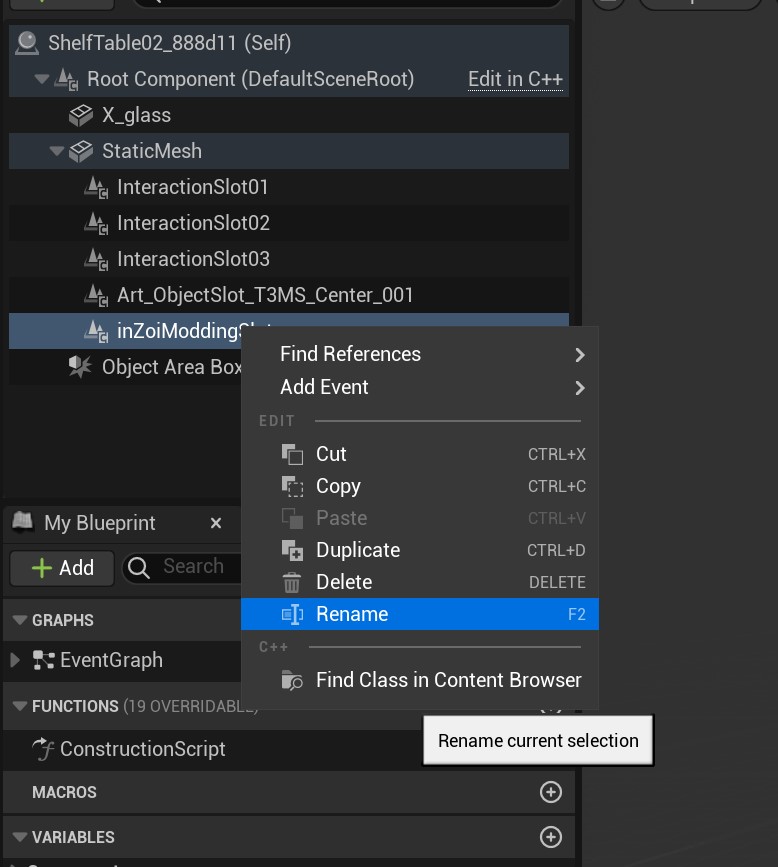
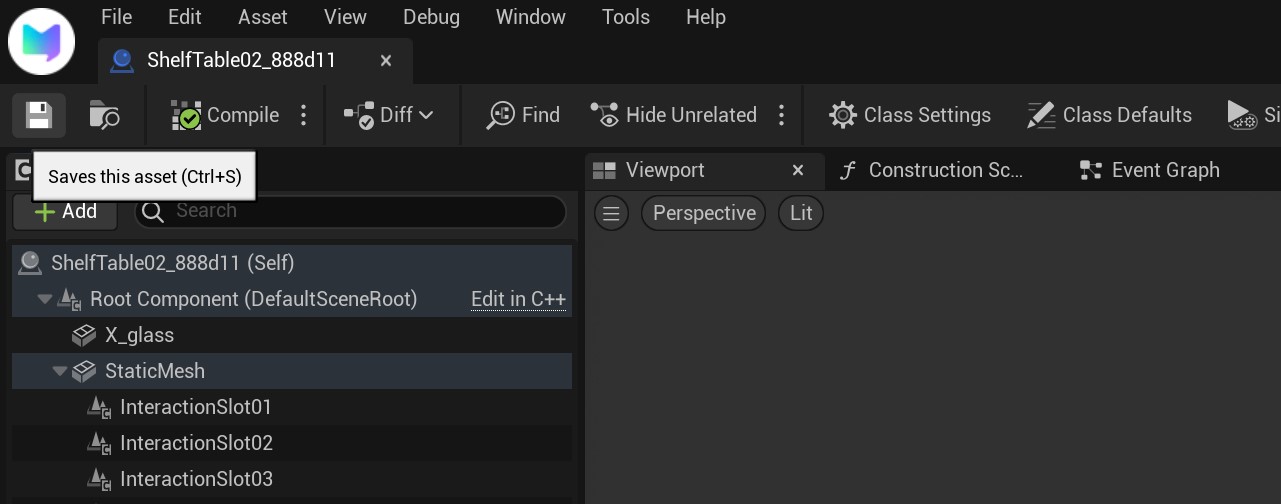
On the right, we need to click our good friend "Edit MESHNAMEHERE". In my case it says "Edit ShelfTable02".
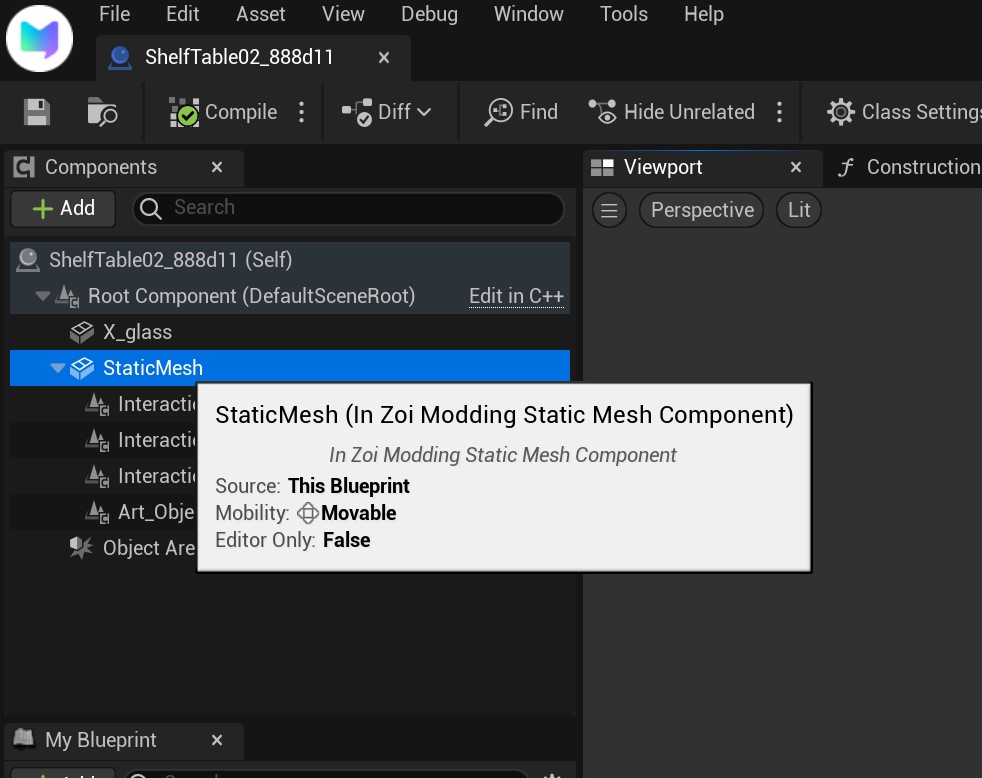
If you're seeing anything other than your mesh right now, simply double+click the StaticMesh :)
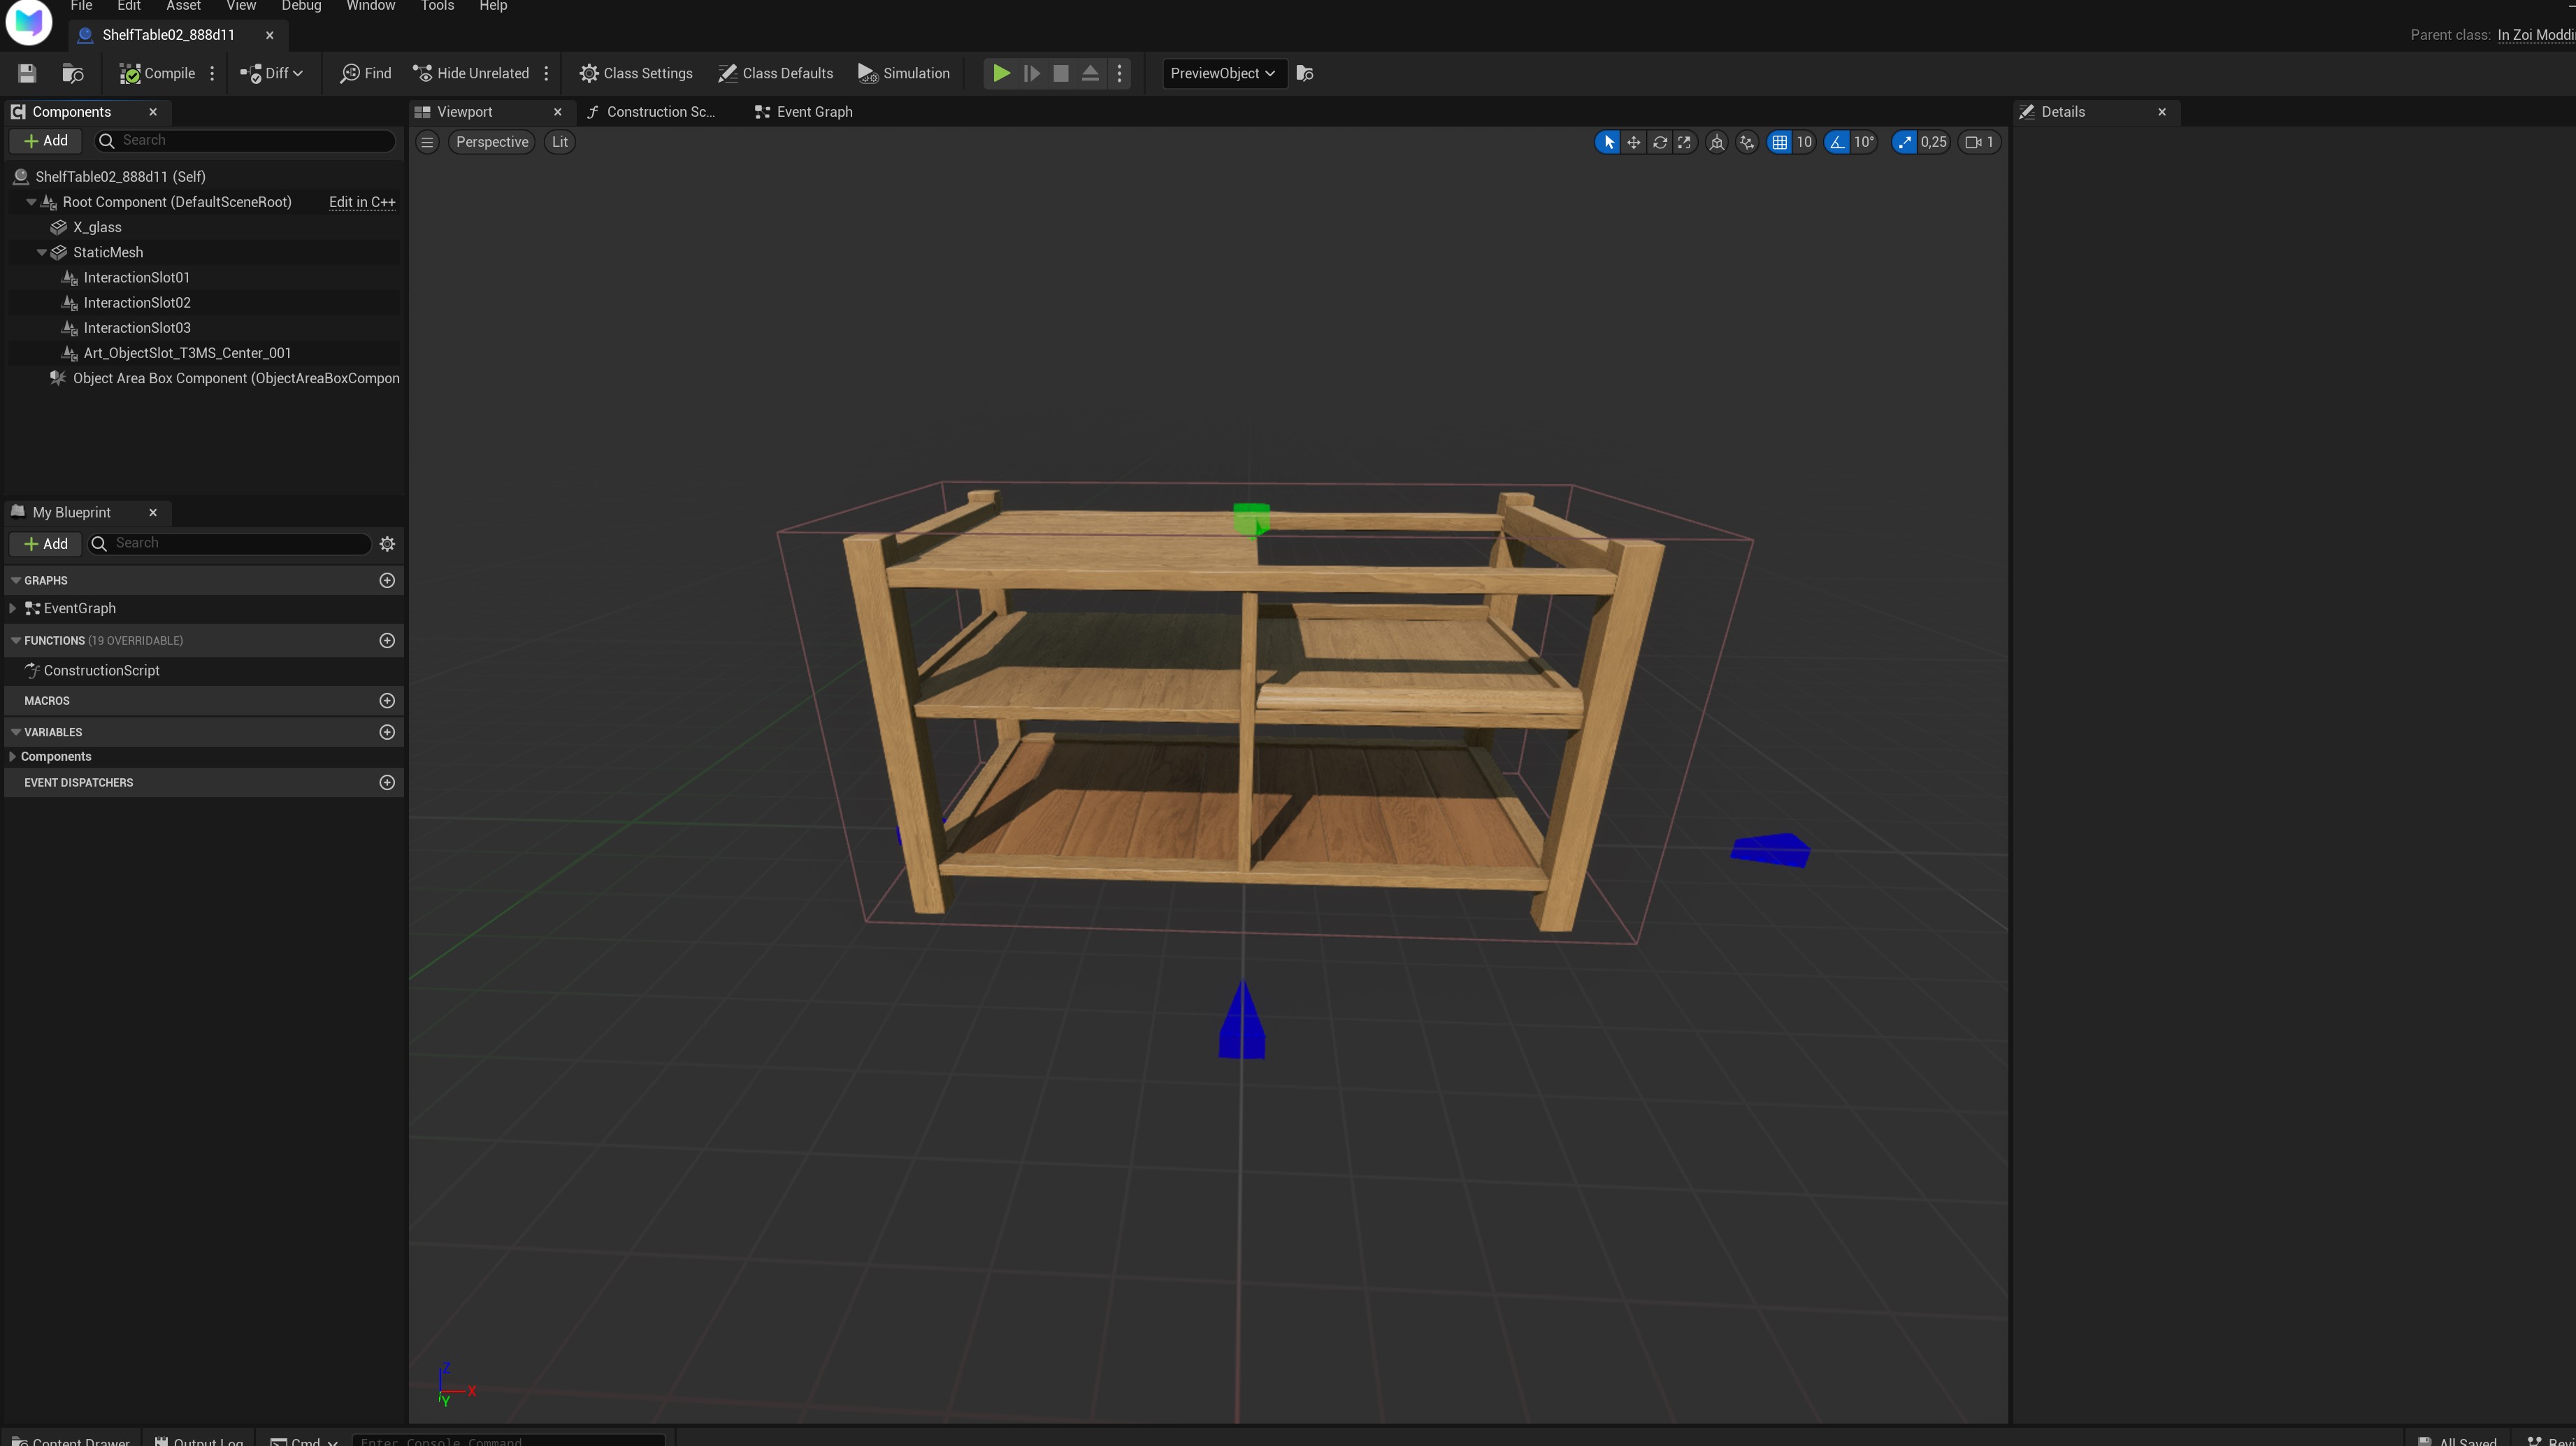
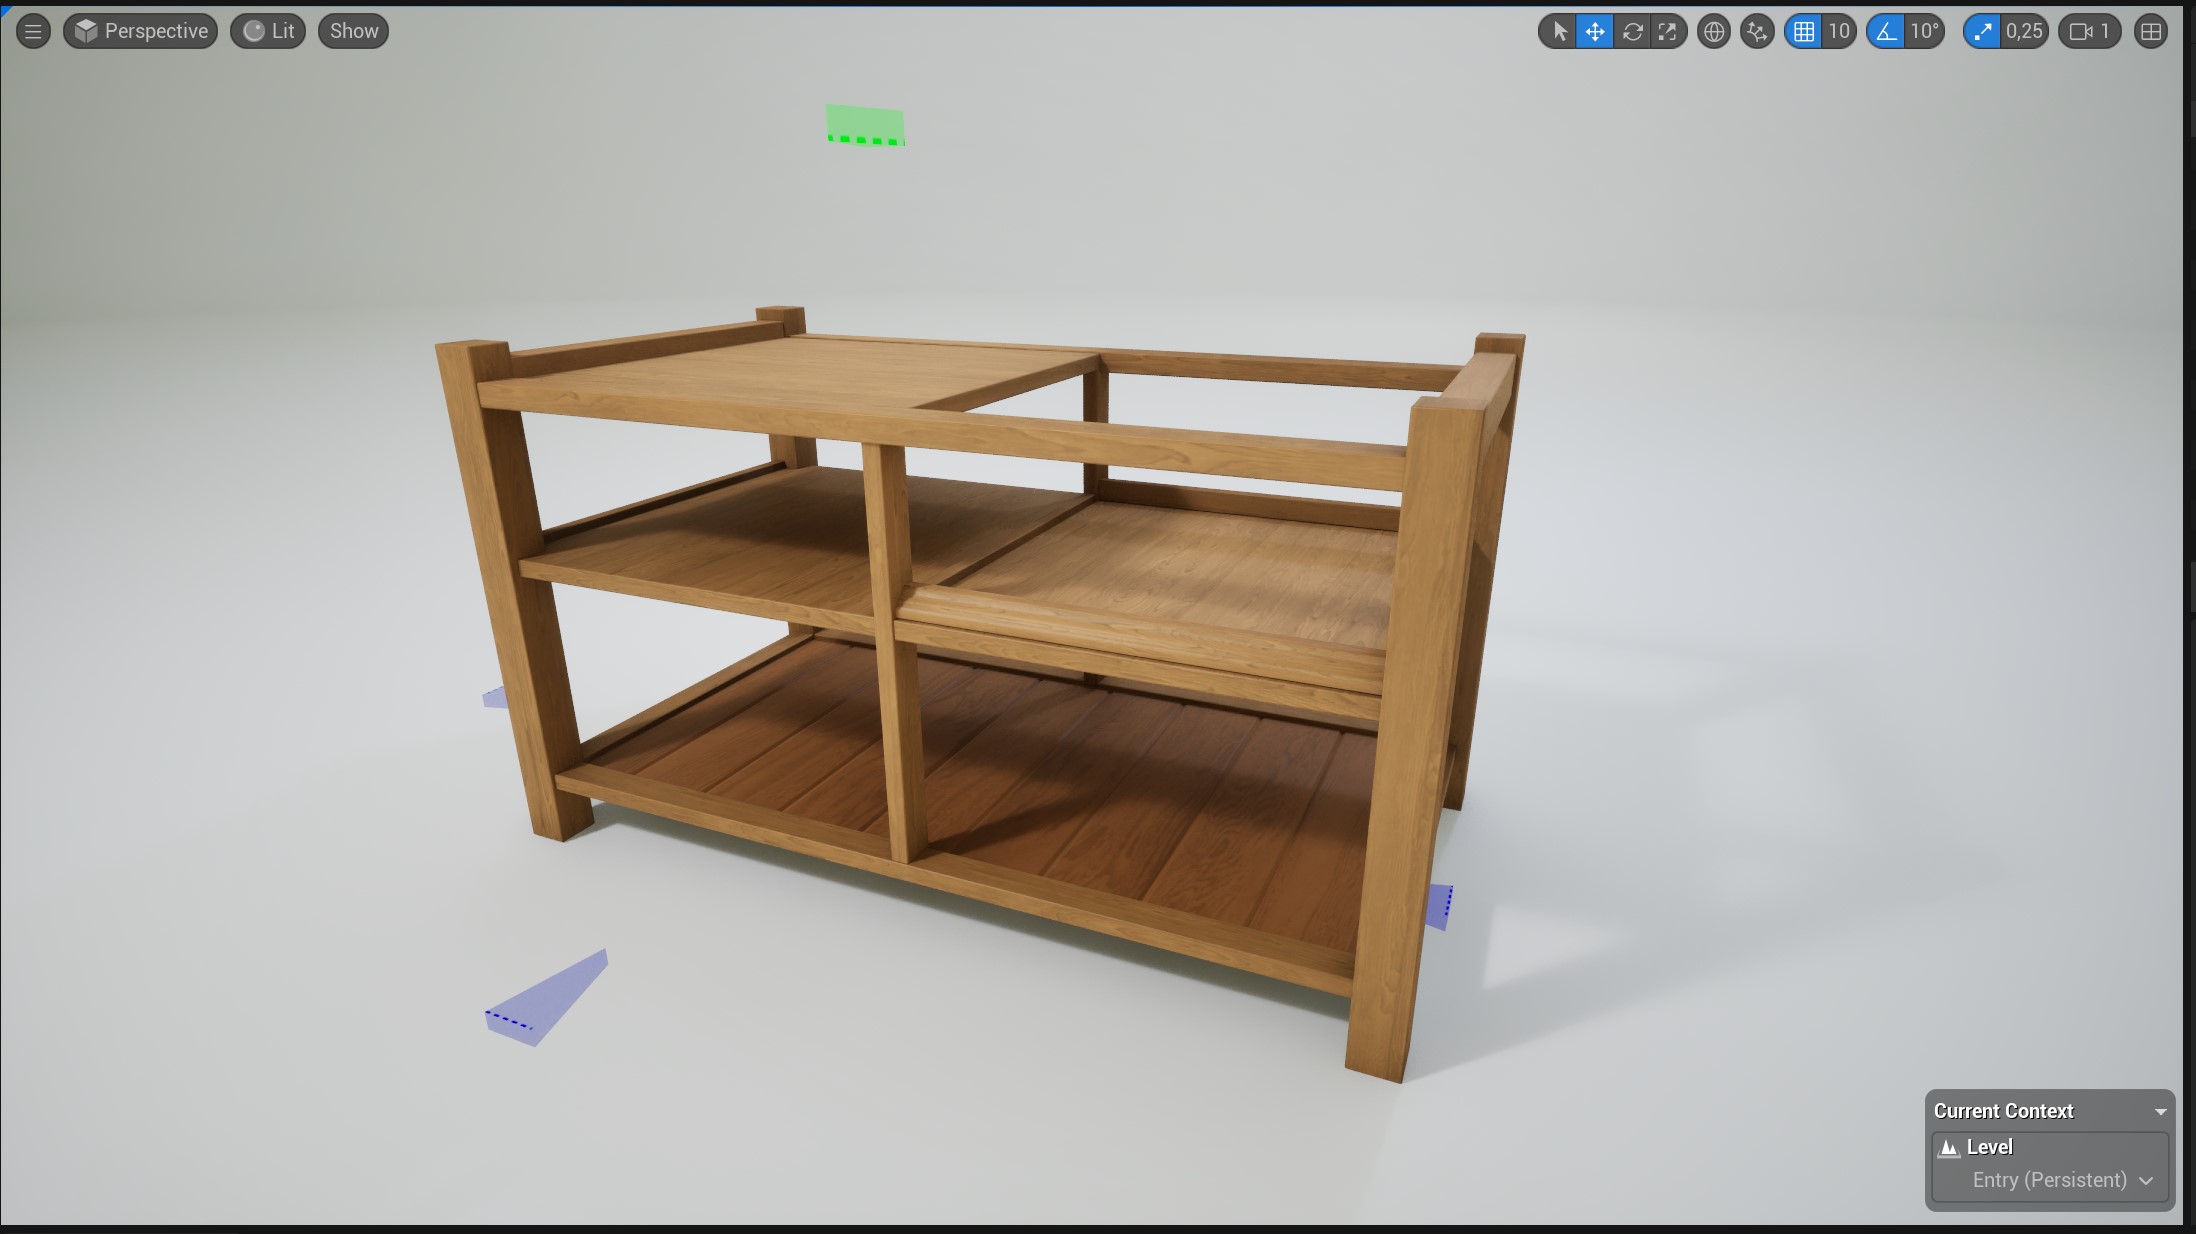
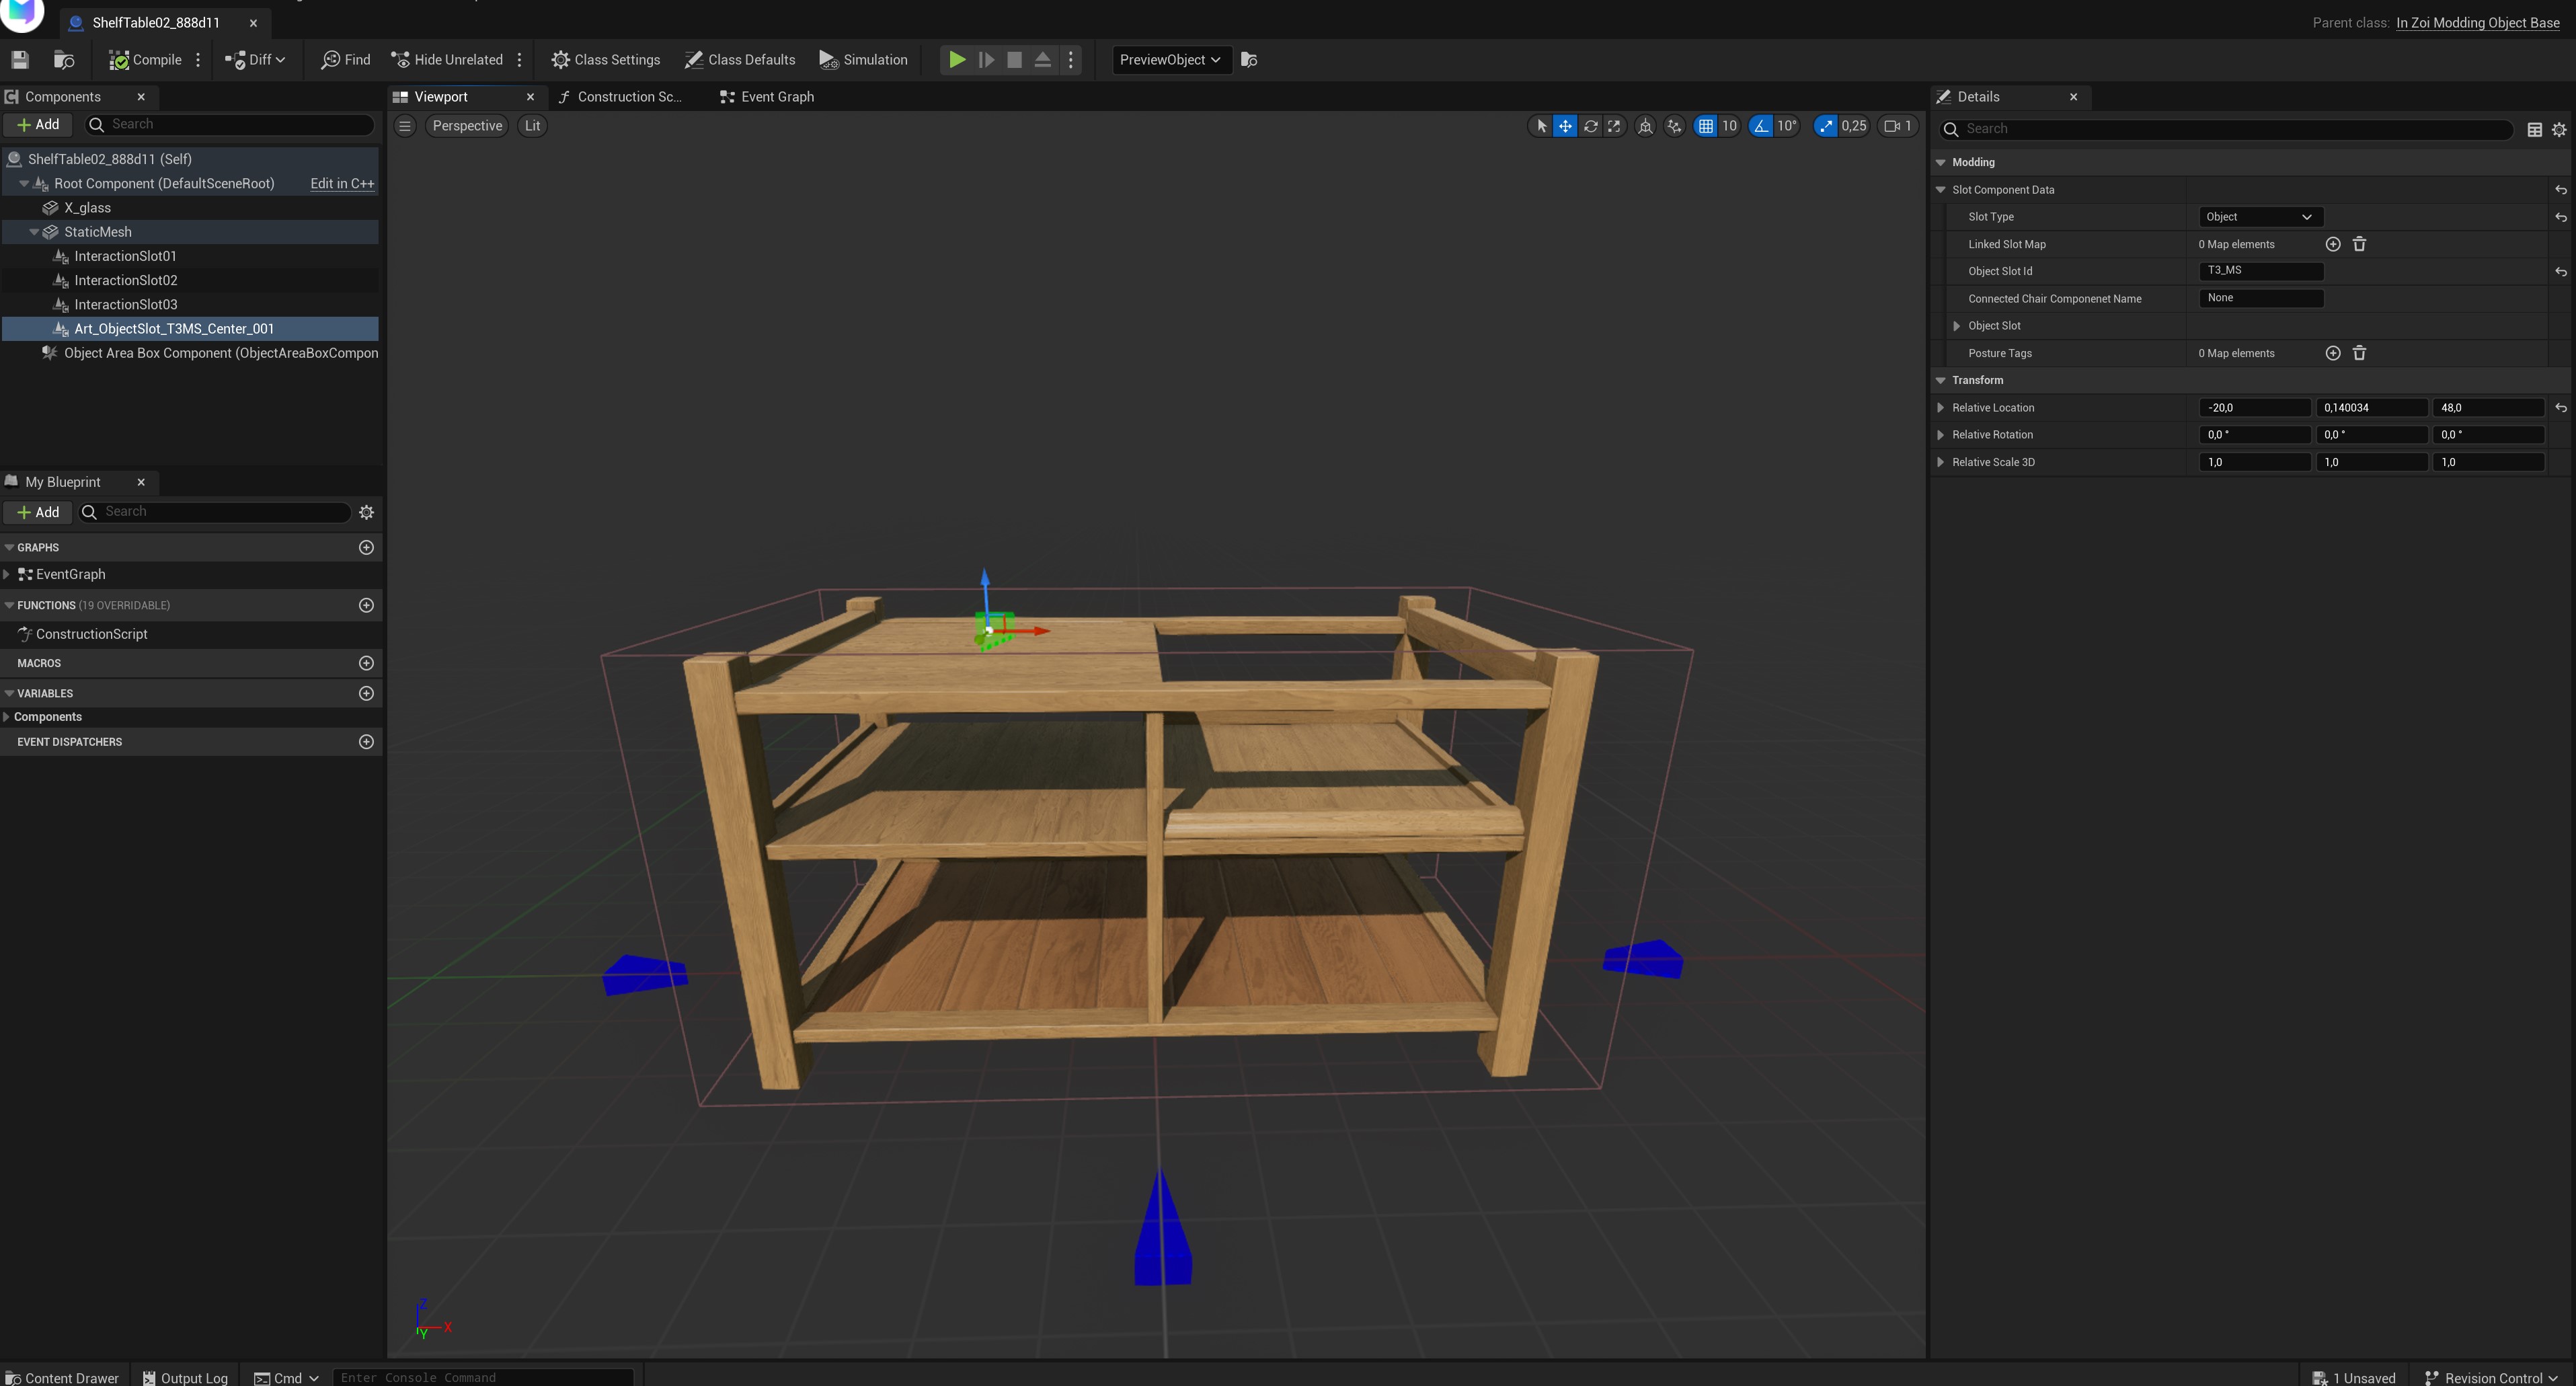
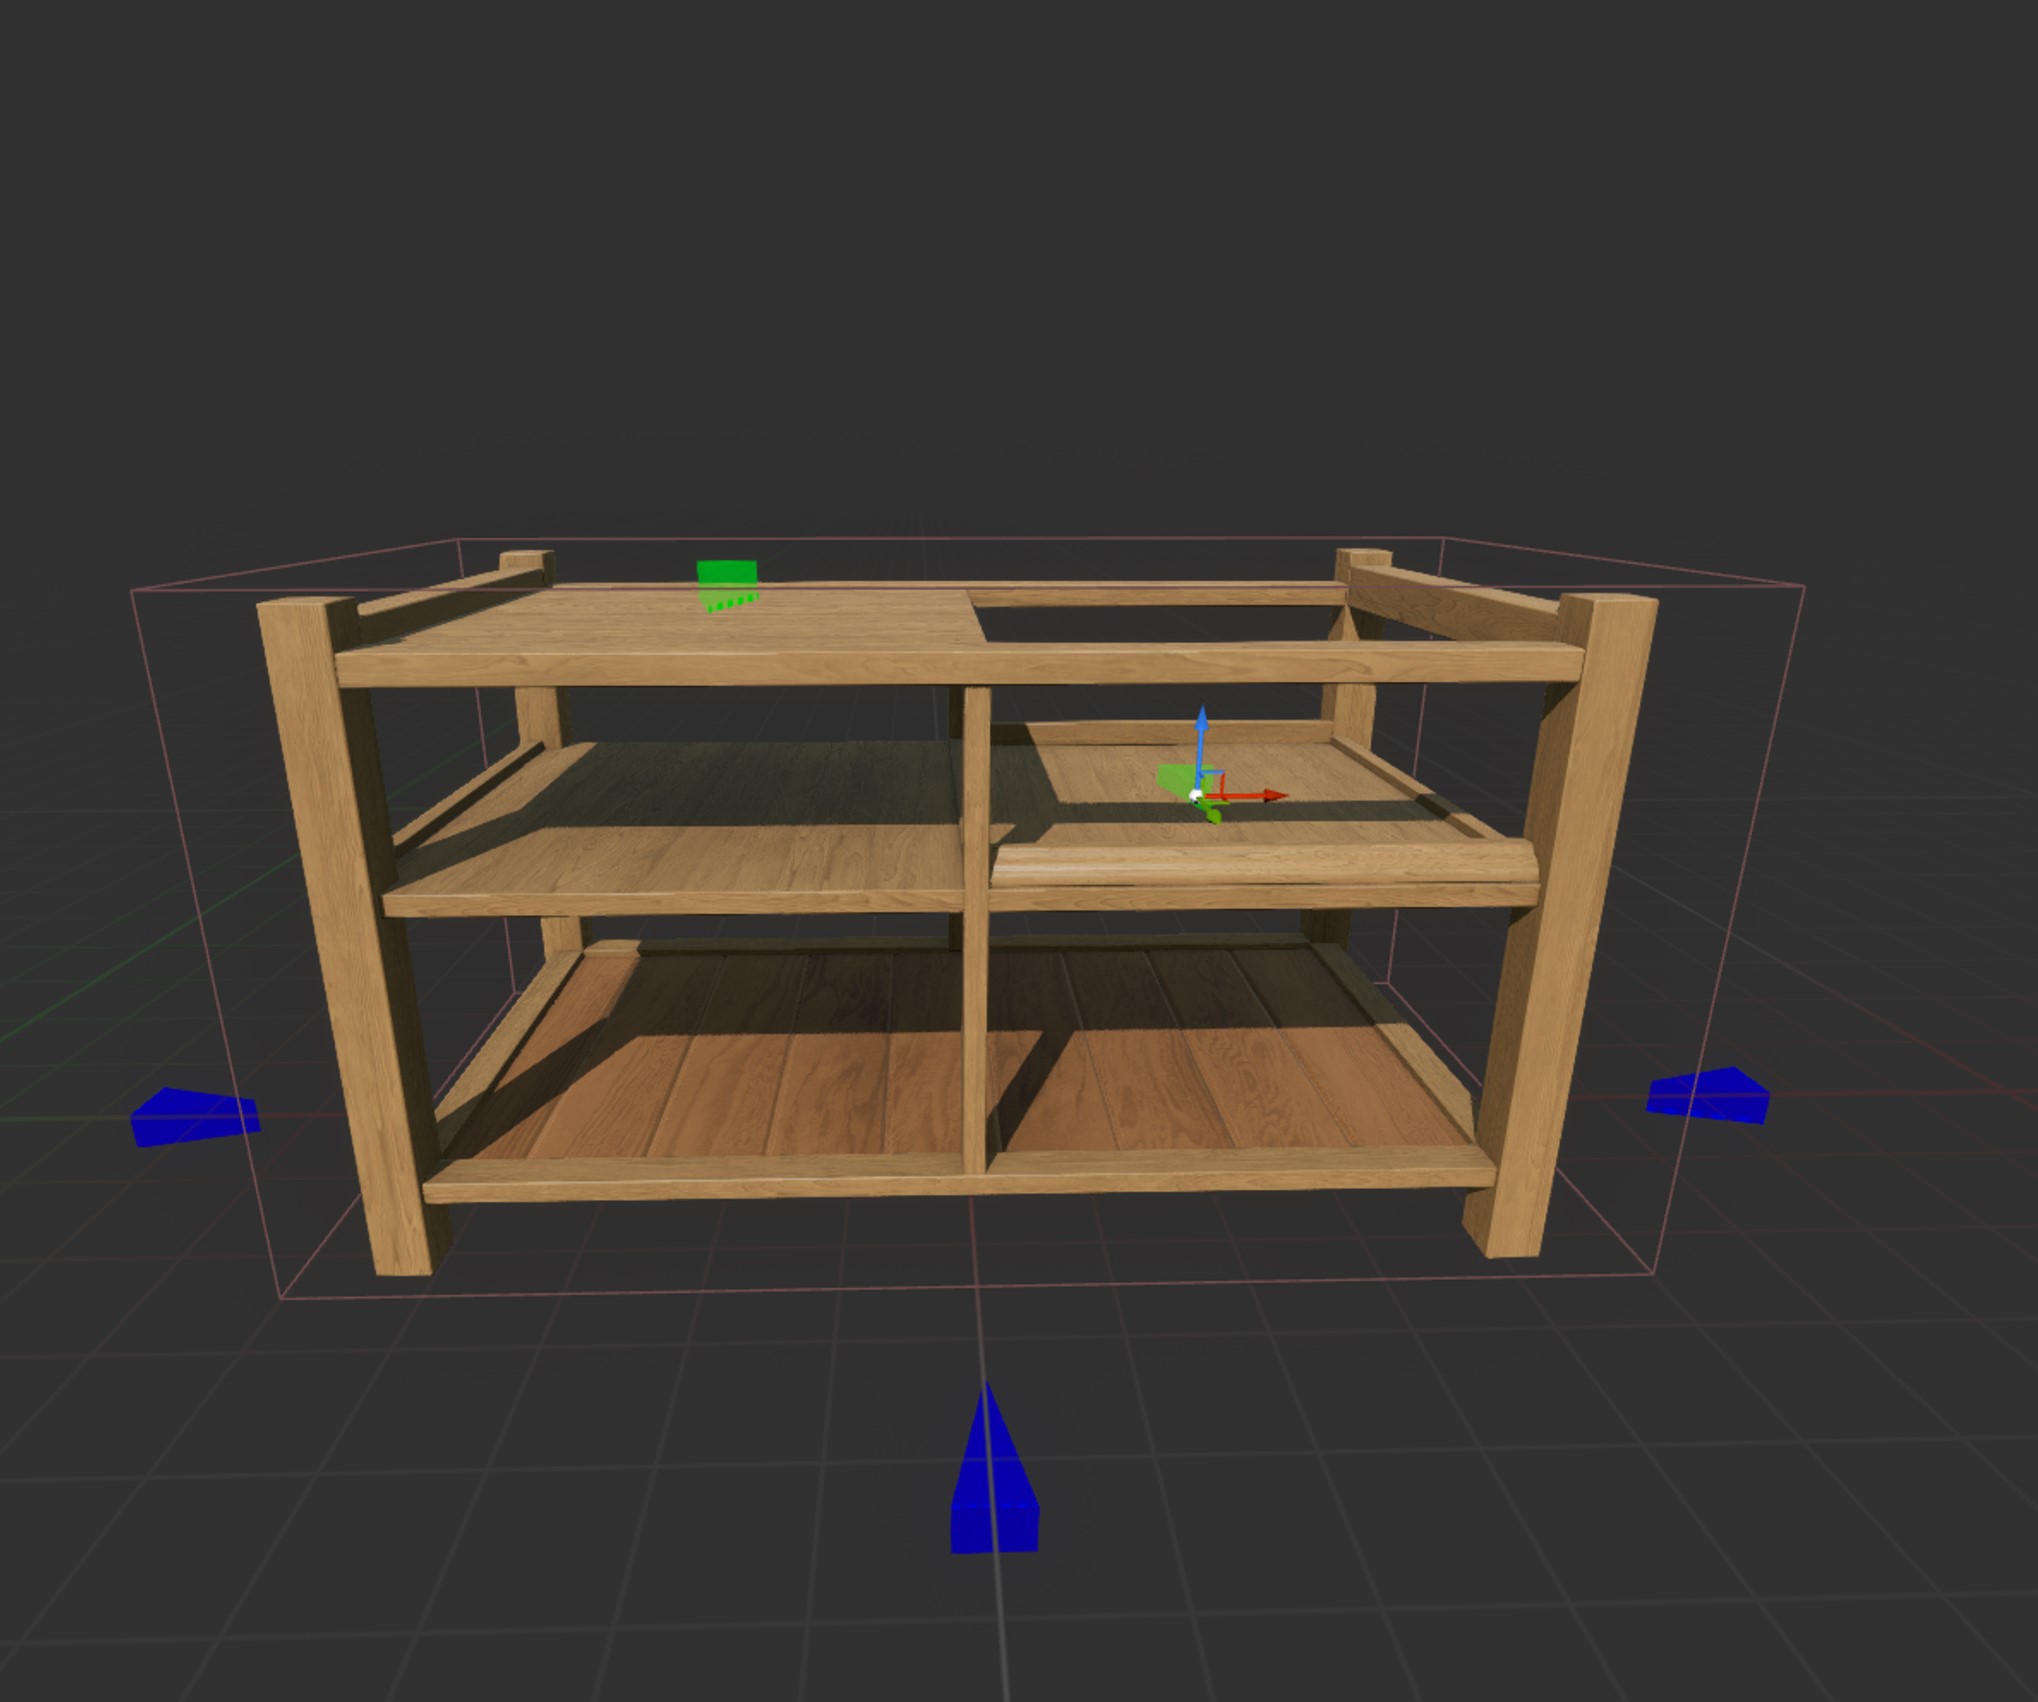
This is what you should now be seeing. On the left, you probably notice it says something like "InteractionSlot" and "ObjectSlot". That's exactly the slots we're looking for!
InteractionSlots
Every object comes with a InteractionSlot. (If you cloned a bigger table or counter this may be harder to see, but they are there ;)) Those are the blue arrows we see in the 3D view.
What those are is so that our ZOI can 'route' (walk) to the object from different sides. This can be because there is something on the table they want to grab, or maybe just to turn on the radio or TV 😉
It is important to move these a tad if they happen to be INSIDE your mesh! So let's try doing that now.
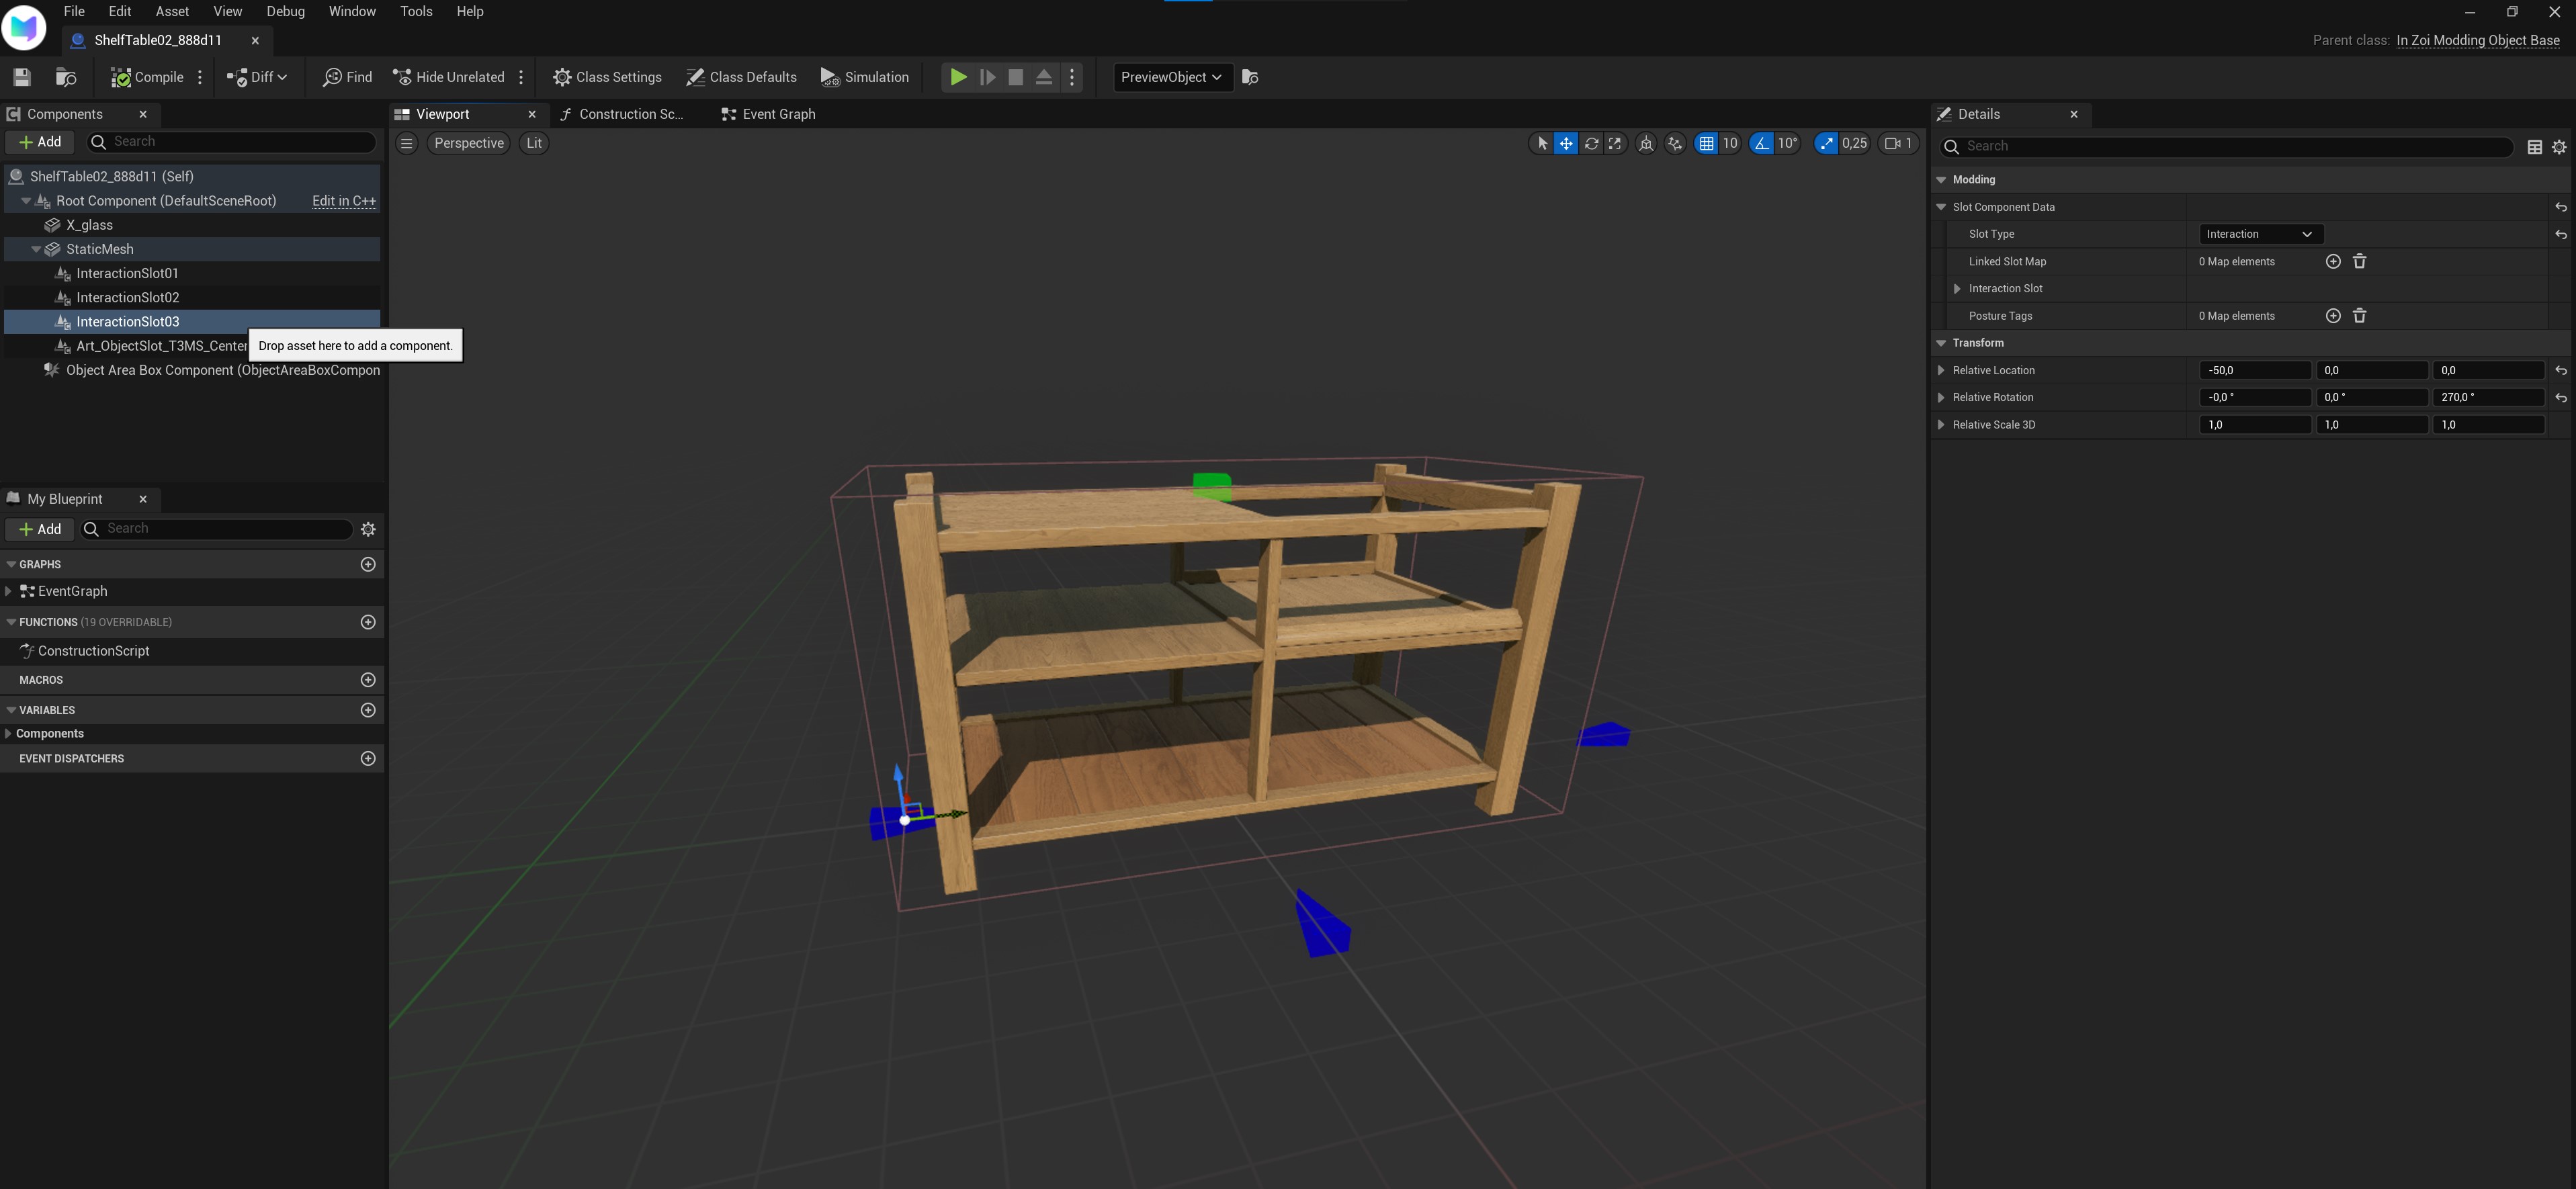
Here, I'm noticing InteractionSlot03 is a tad too much into my object. So I want to move this one a bit more outwards.
Click on the InteractionSlot you want to move around...
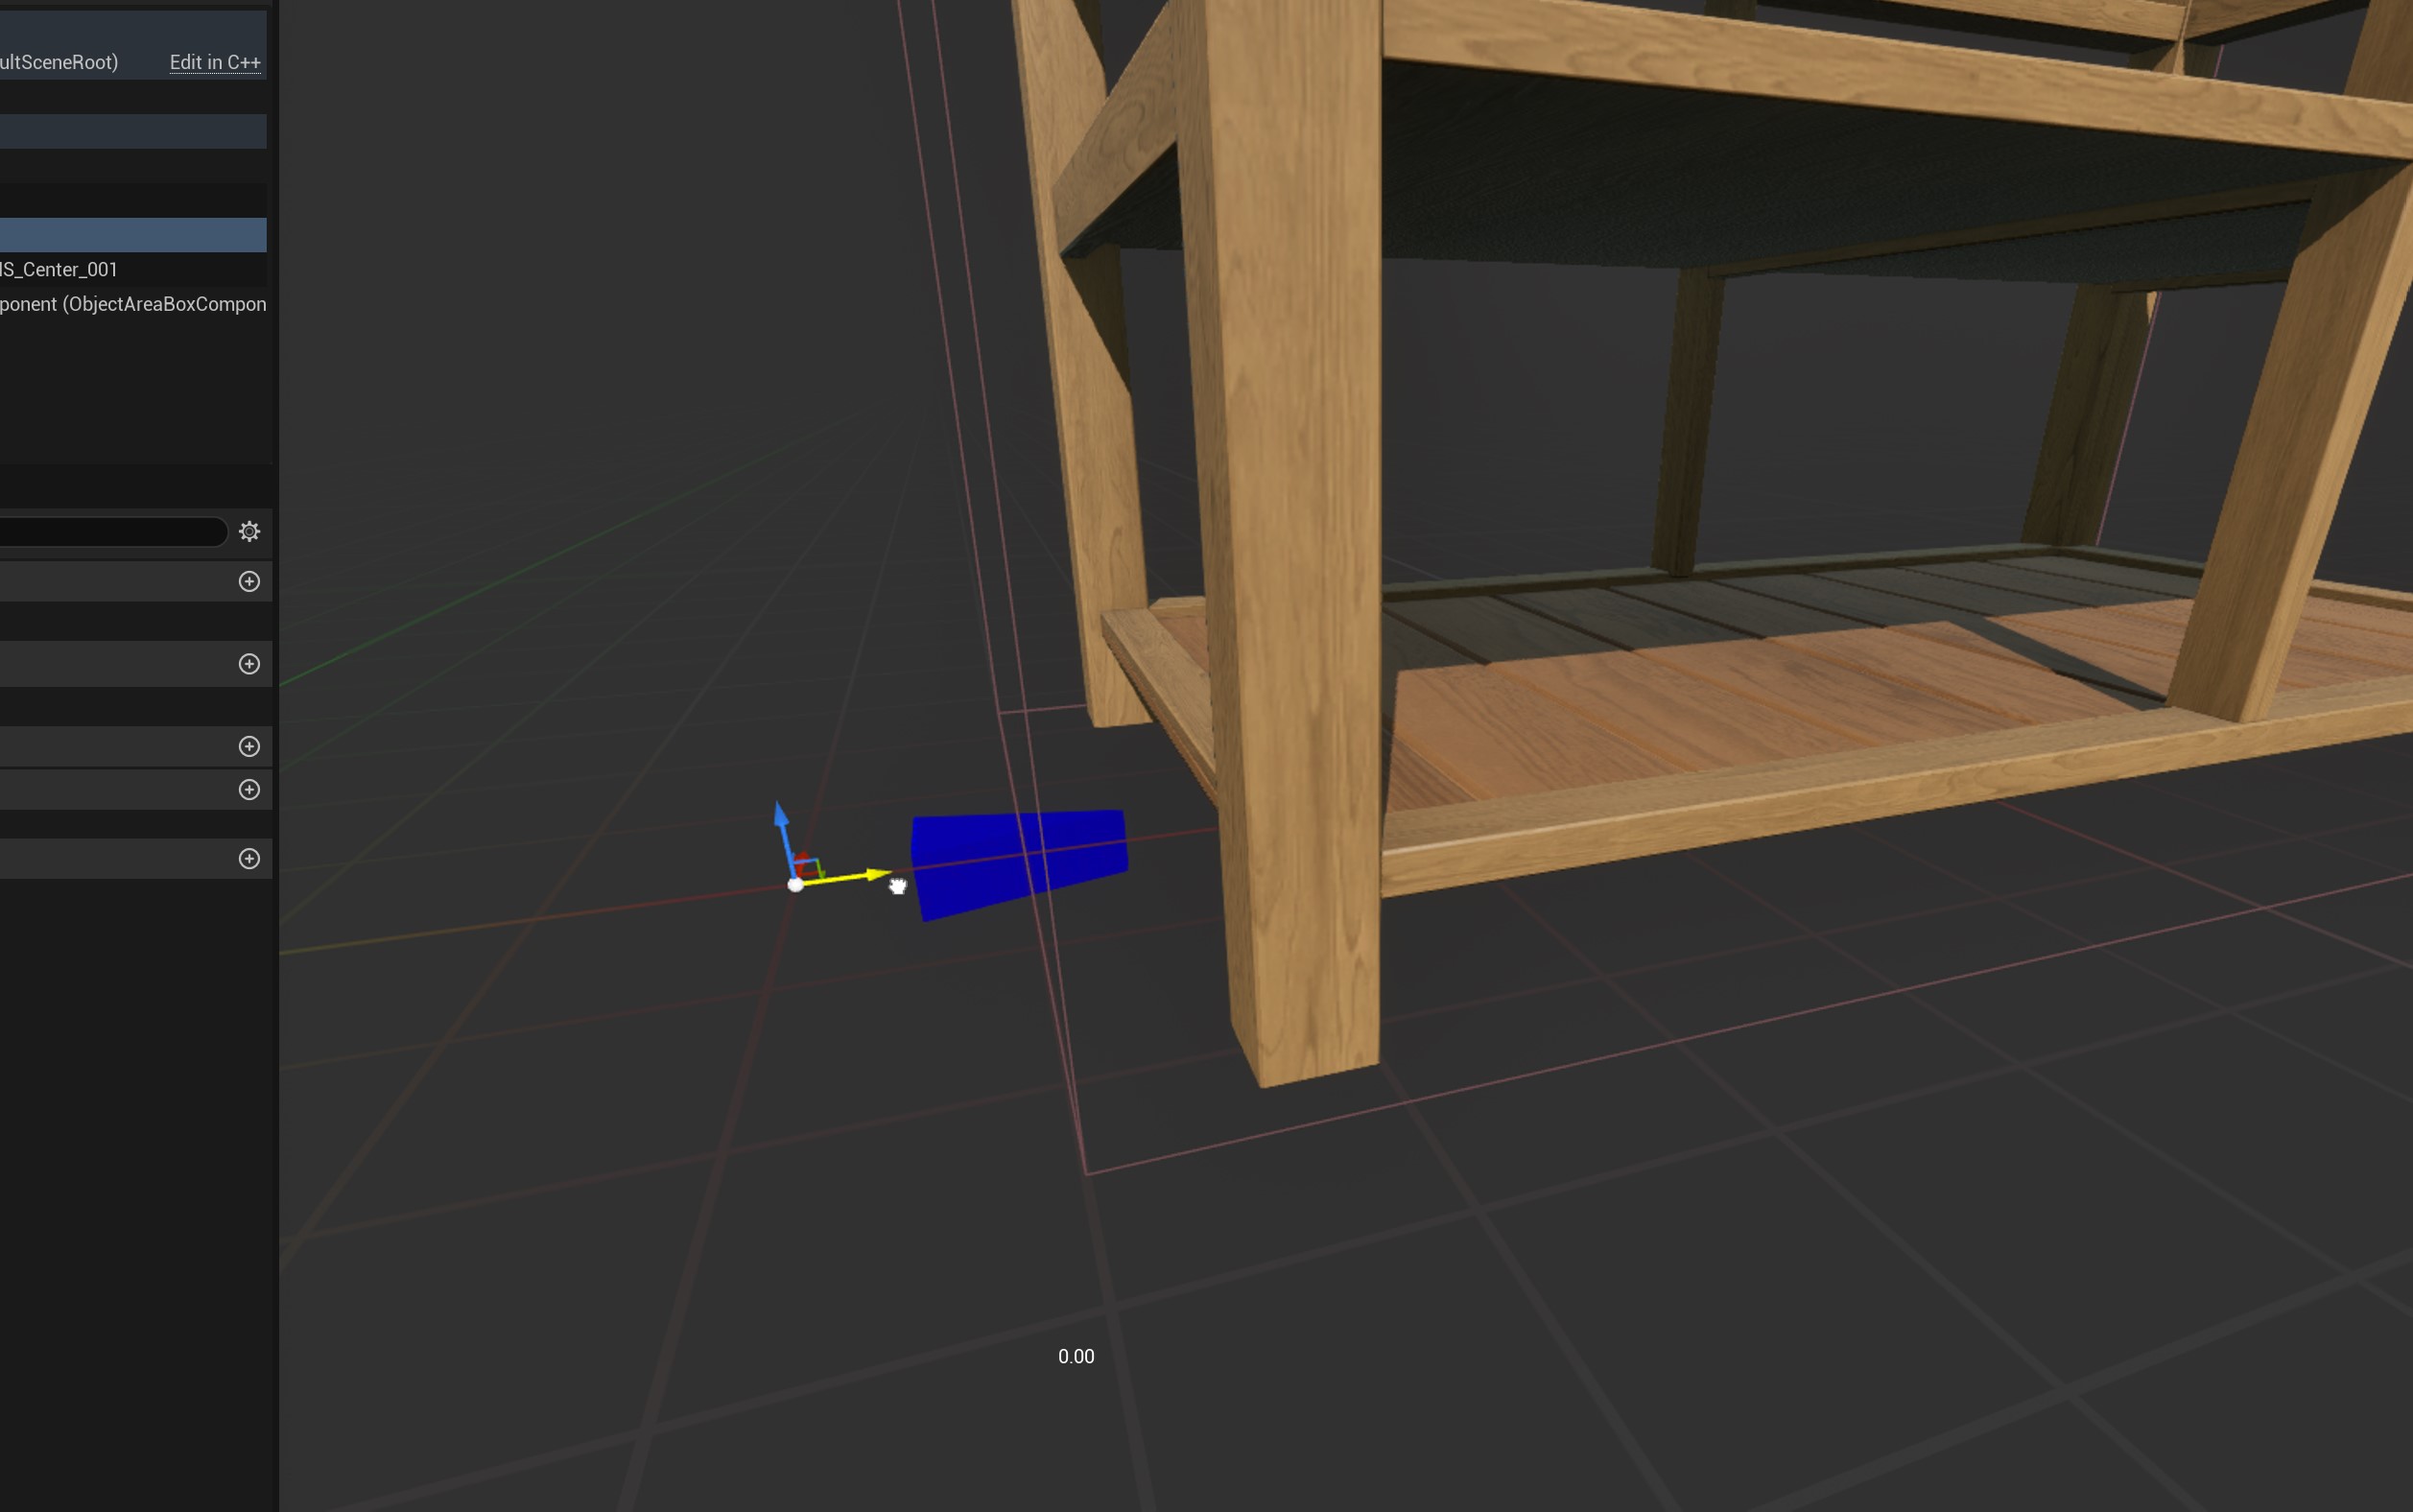
Here I'm moving it to the right, so for moving it to the left/right we want the green arrow. Depending on the way the slot is facing, the arrow you need could be blue or red even! :)
Drag it and let go. If nothing happens, give it a second to update! Things in this screen have a tendancy to want to take their time 😬
Cool! now our ZOIs should be able to route to our table better :)
If you wanted to know how to make a slot interactable, I will explain that in a different tutorial that's more focused on scripting. For now, feel free to follow along as it might teach you more about slots!
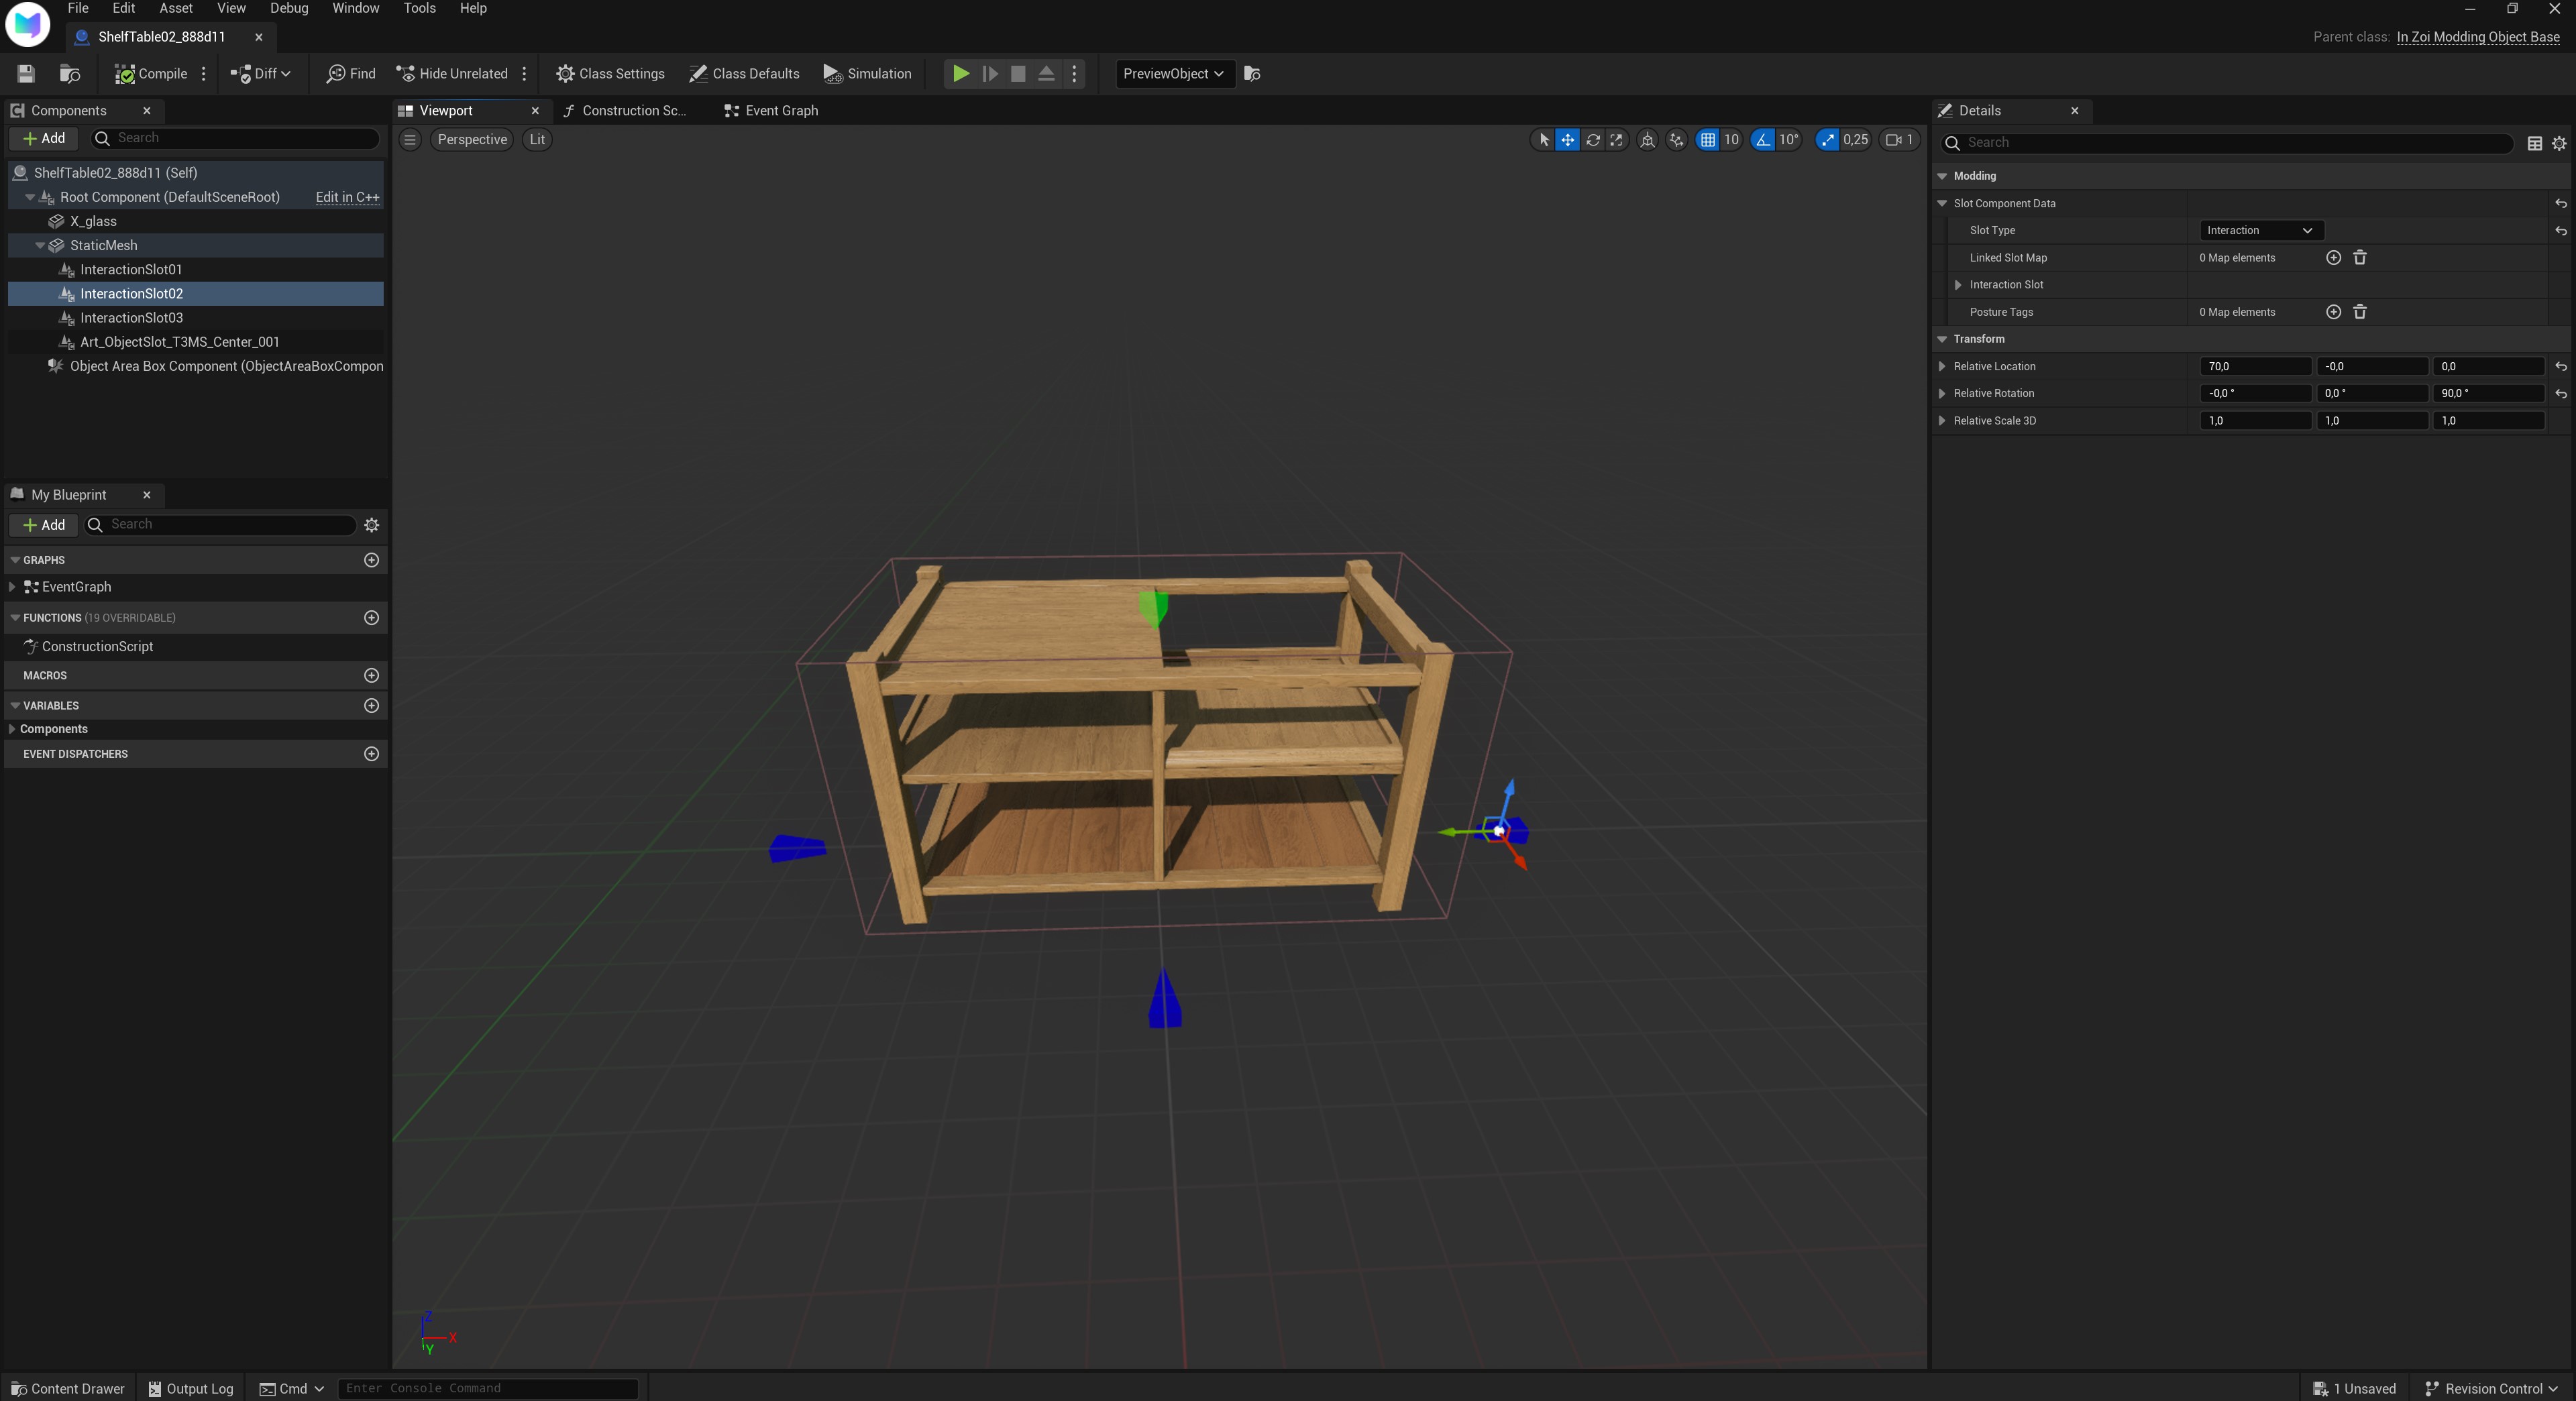
ObjectSlots
This is the slot you want to use/edit when wanting to add flowers! Because my mesh is a clone from a smaller side table, I only have one slot... except that's not what I want :(
Let's start by moving our existing slot first!
Just like with out InteractionSlot, we want to click it in the hierarcy on the left, and move it around with the arrows (in my case, the red arrow).
And here it's positioned correctly! Because this is a vinyl table, I want that green arrow to hold a LP player. Obviously if the player wanted something else on there, they could do that too!
Adding a slot to our mesh:
Now we finally got to the exciting part, adding our object slot!
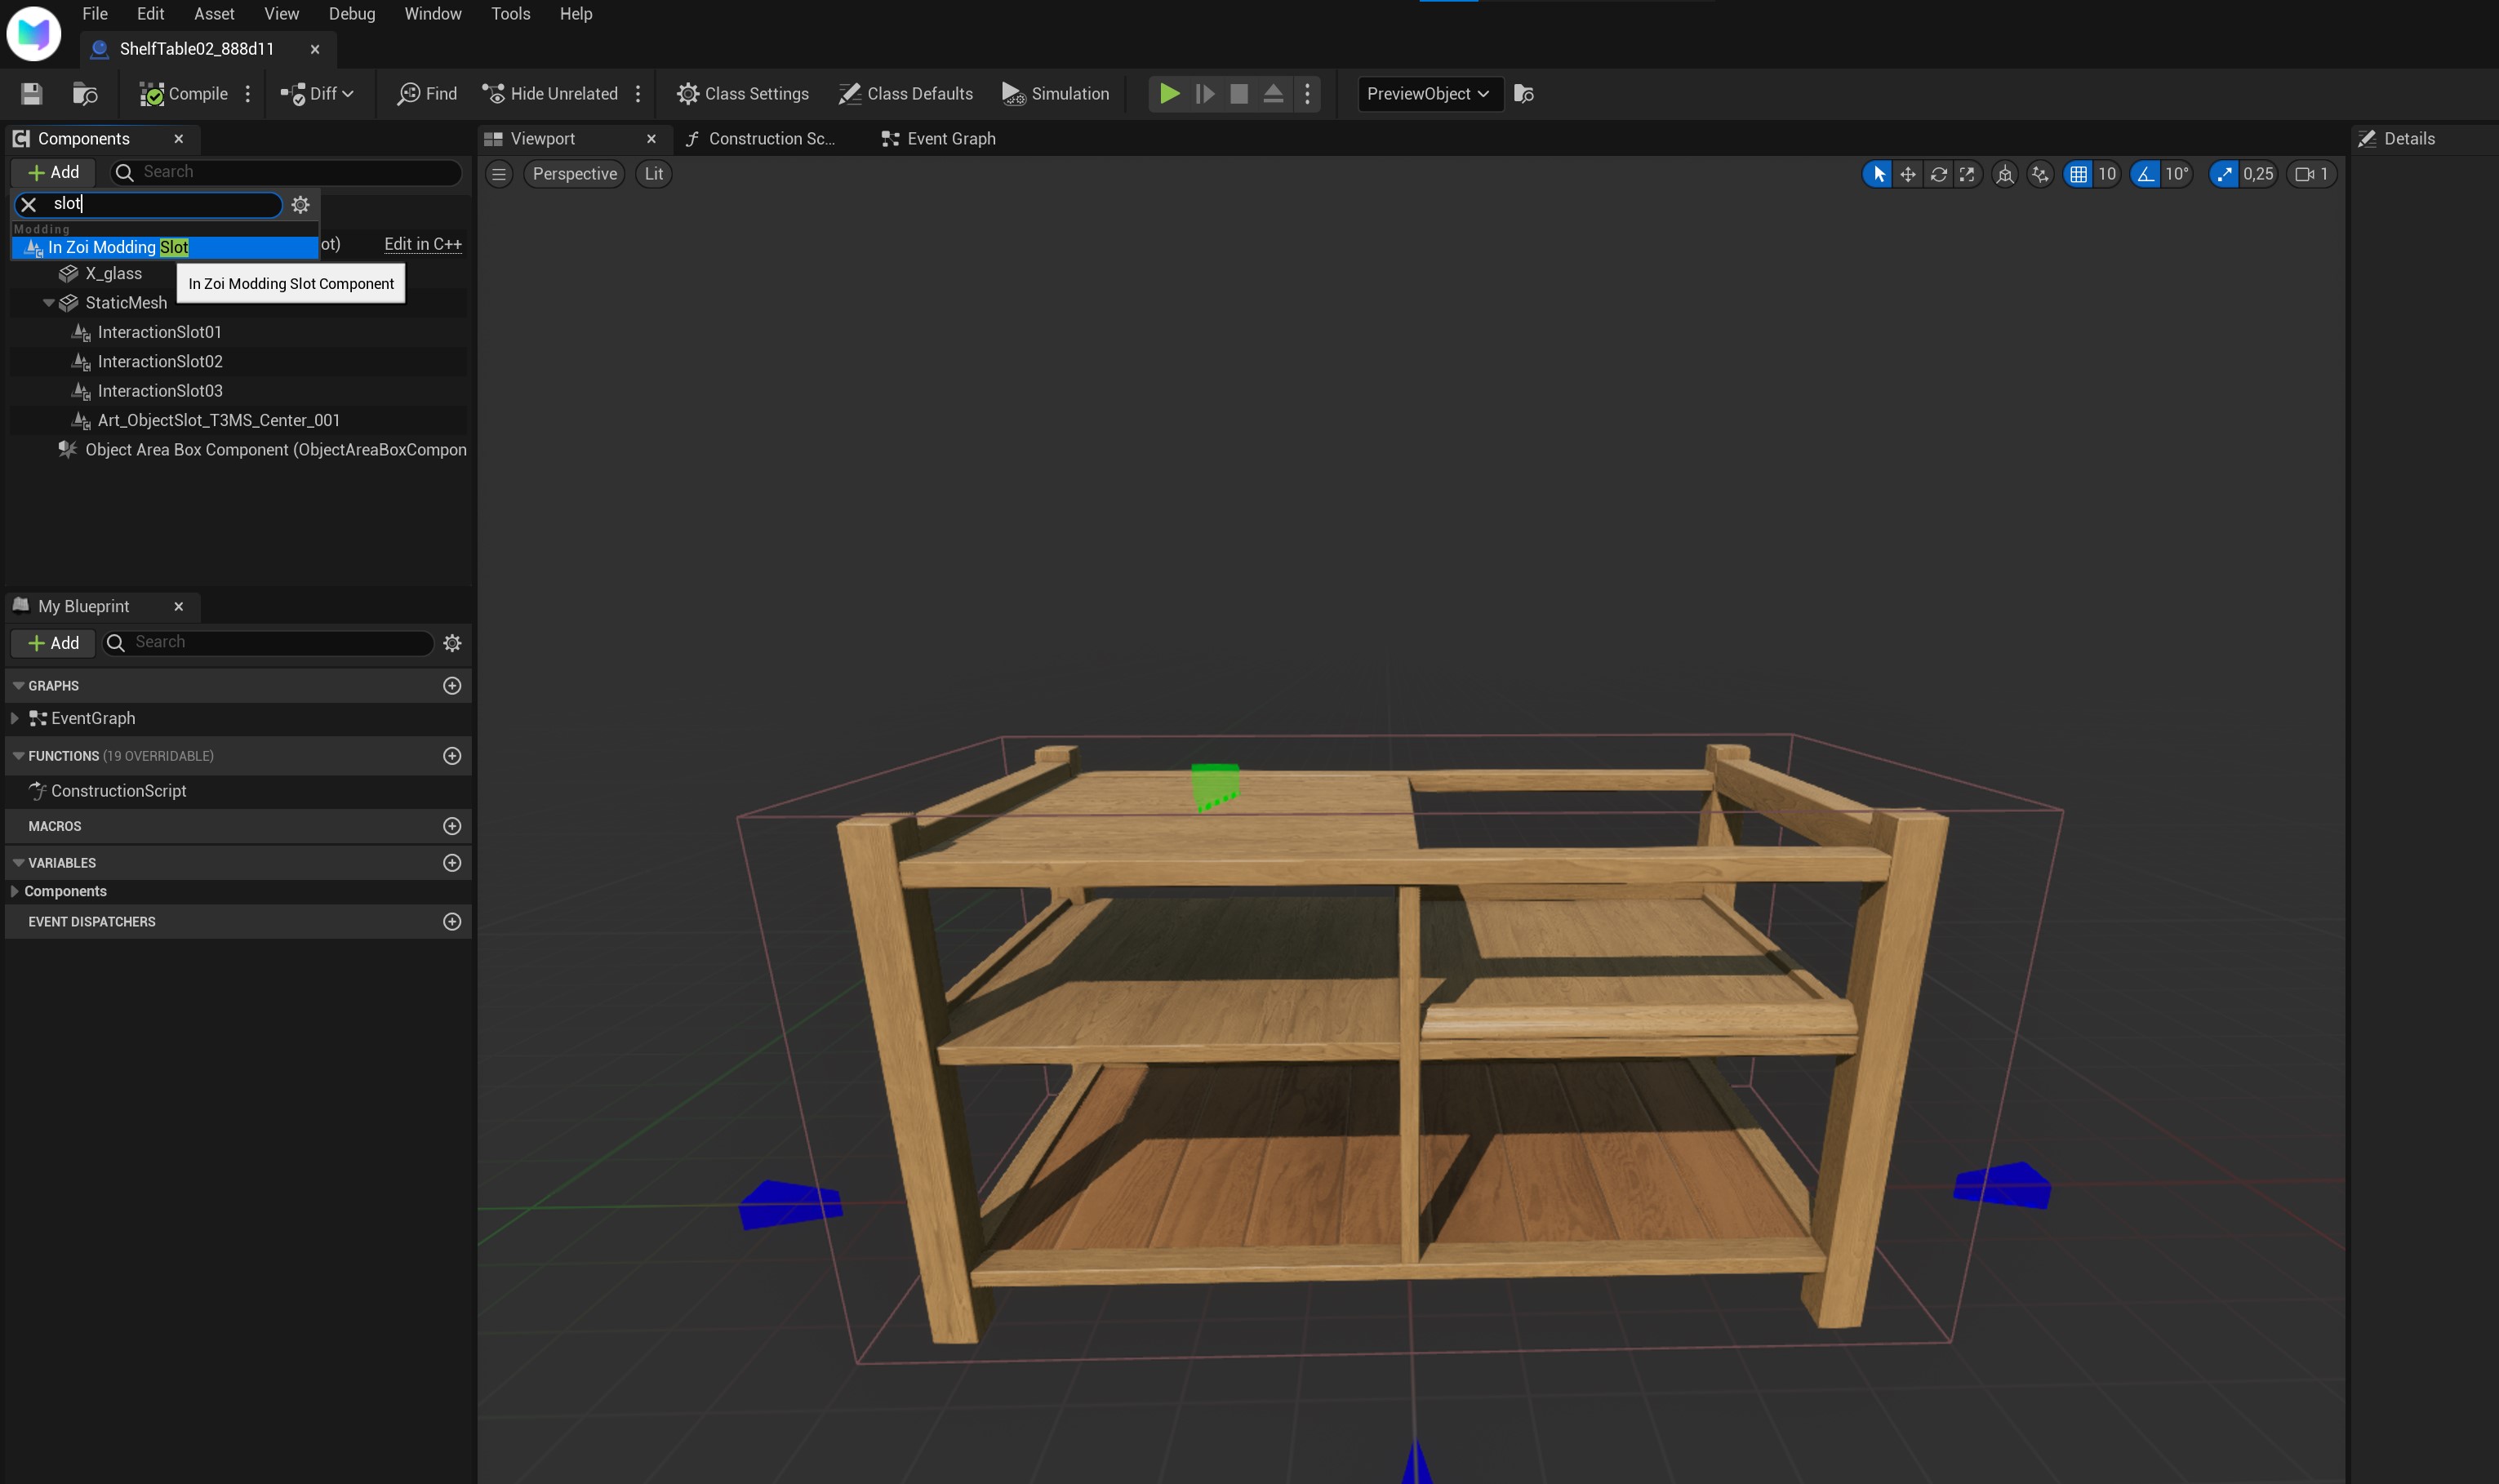
First, to add a slot, we want to.. well, click the + Add button! :p
In the search box, we put in "Slot"...
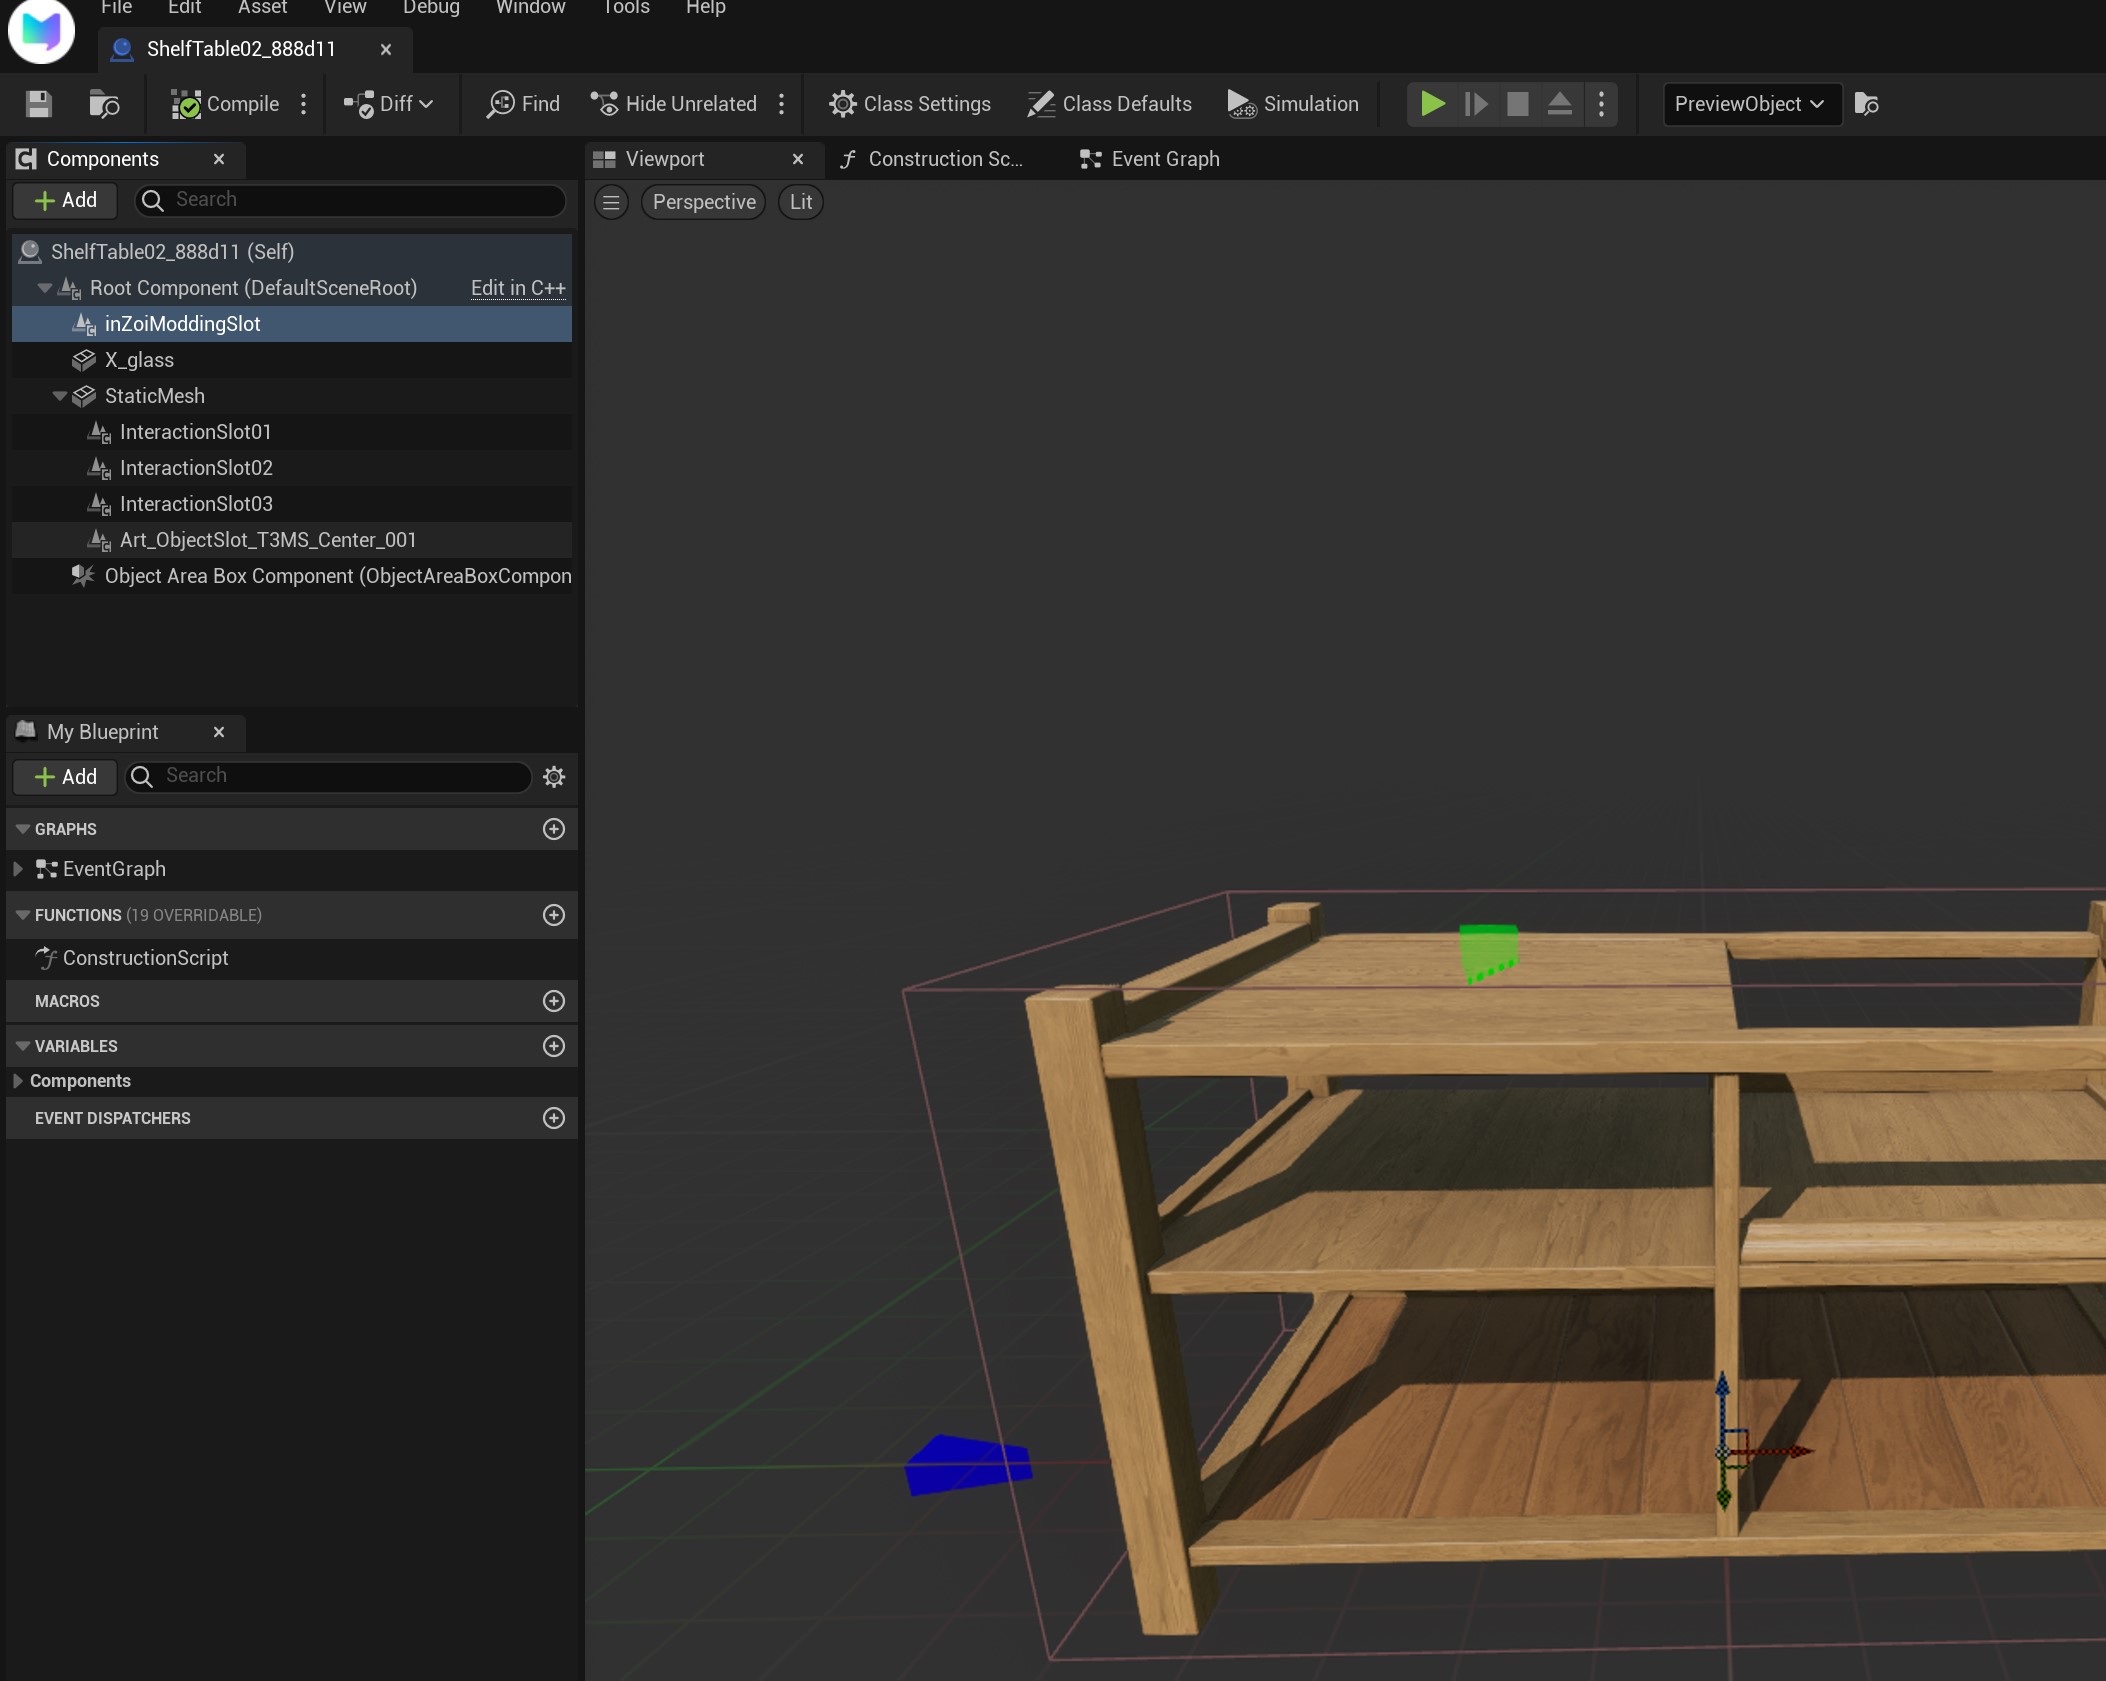
Yay! We have a slot! Except that it's not quite in the right place of the hierarcy where it is supposed to be. It's supposed to be under StaticMesh.
To fix this, we drag/drop it into StaticMesh.
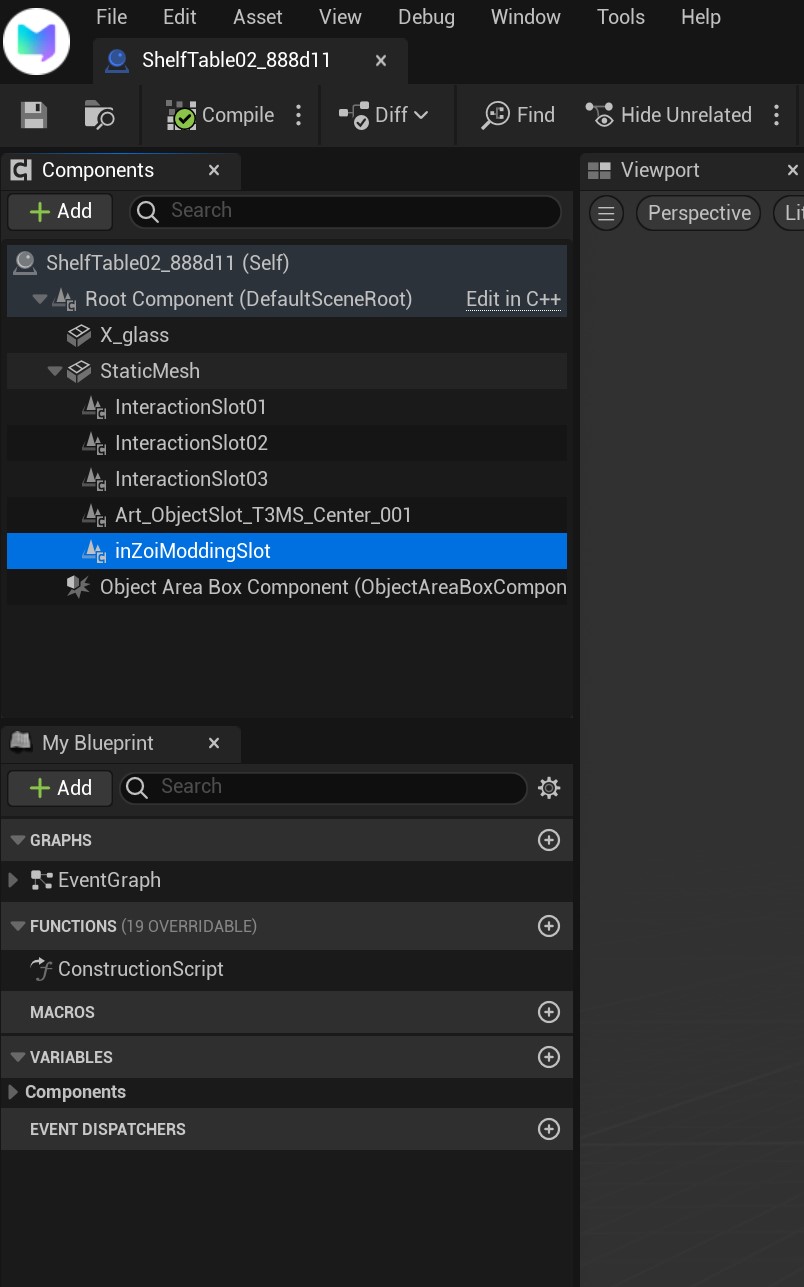
If done correctly, it should now be here :)
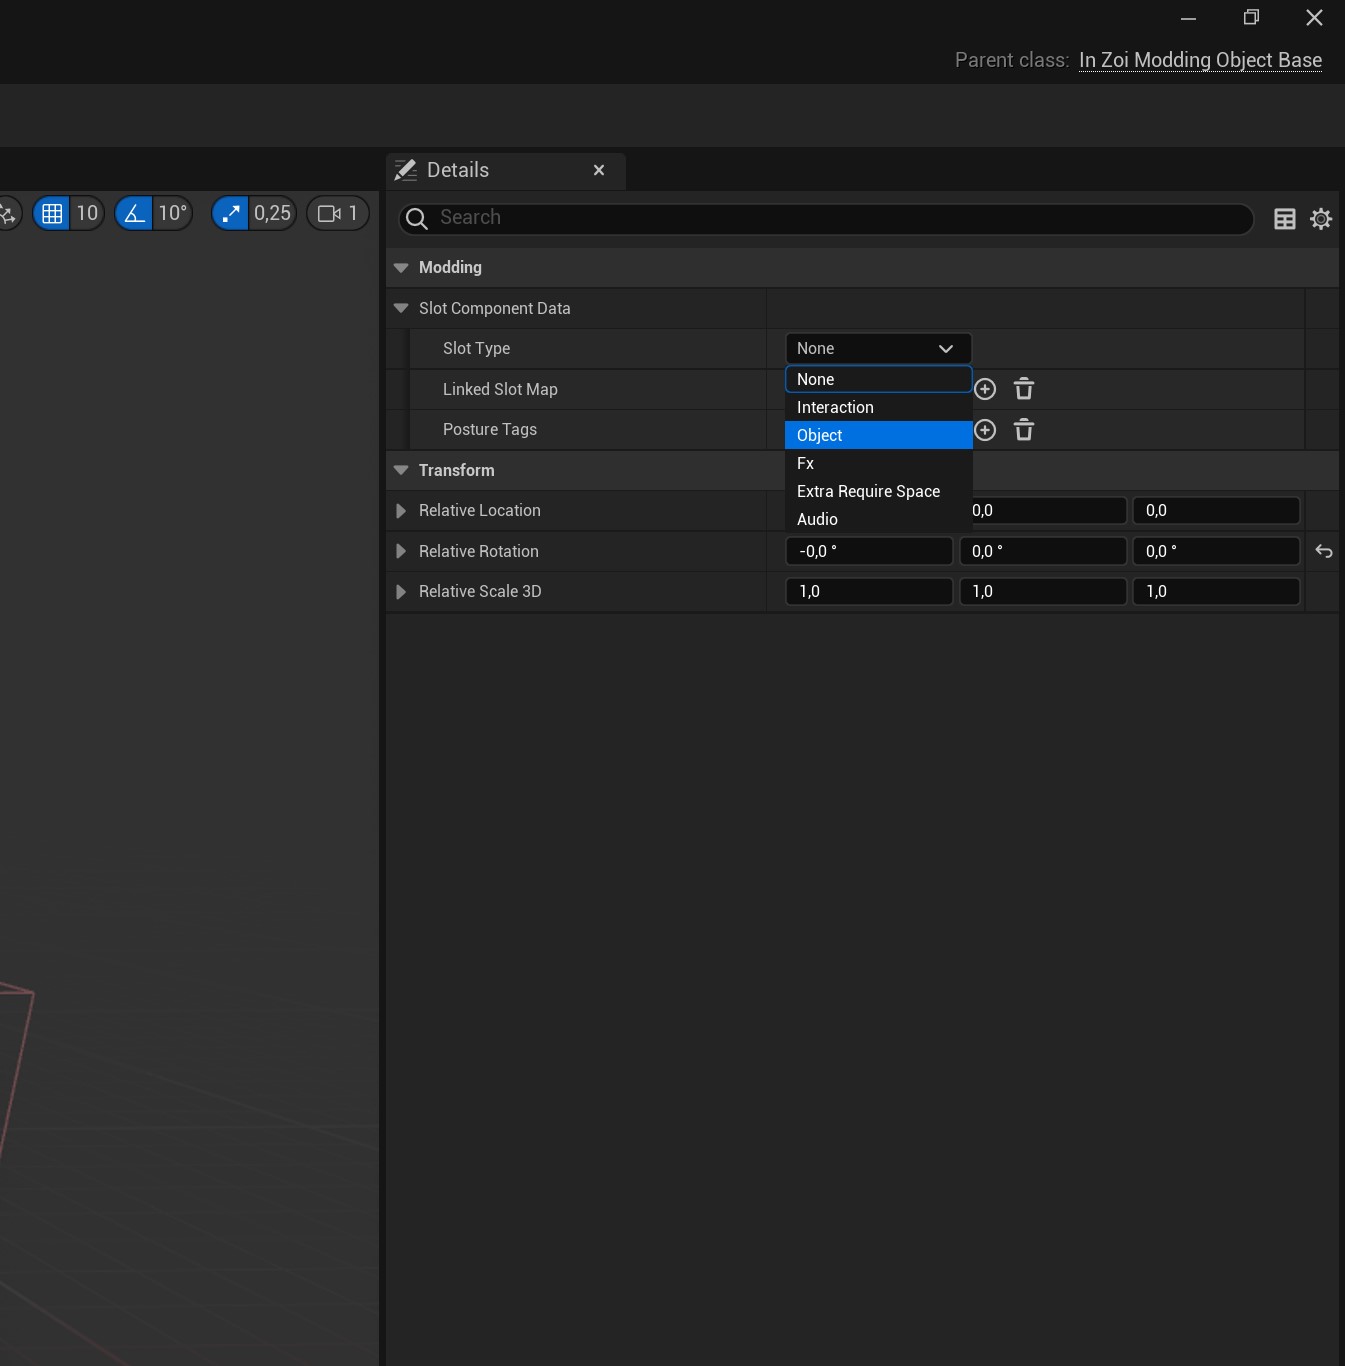
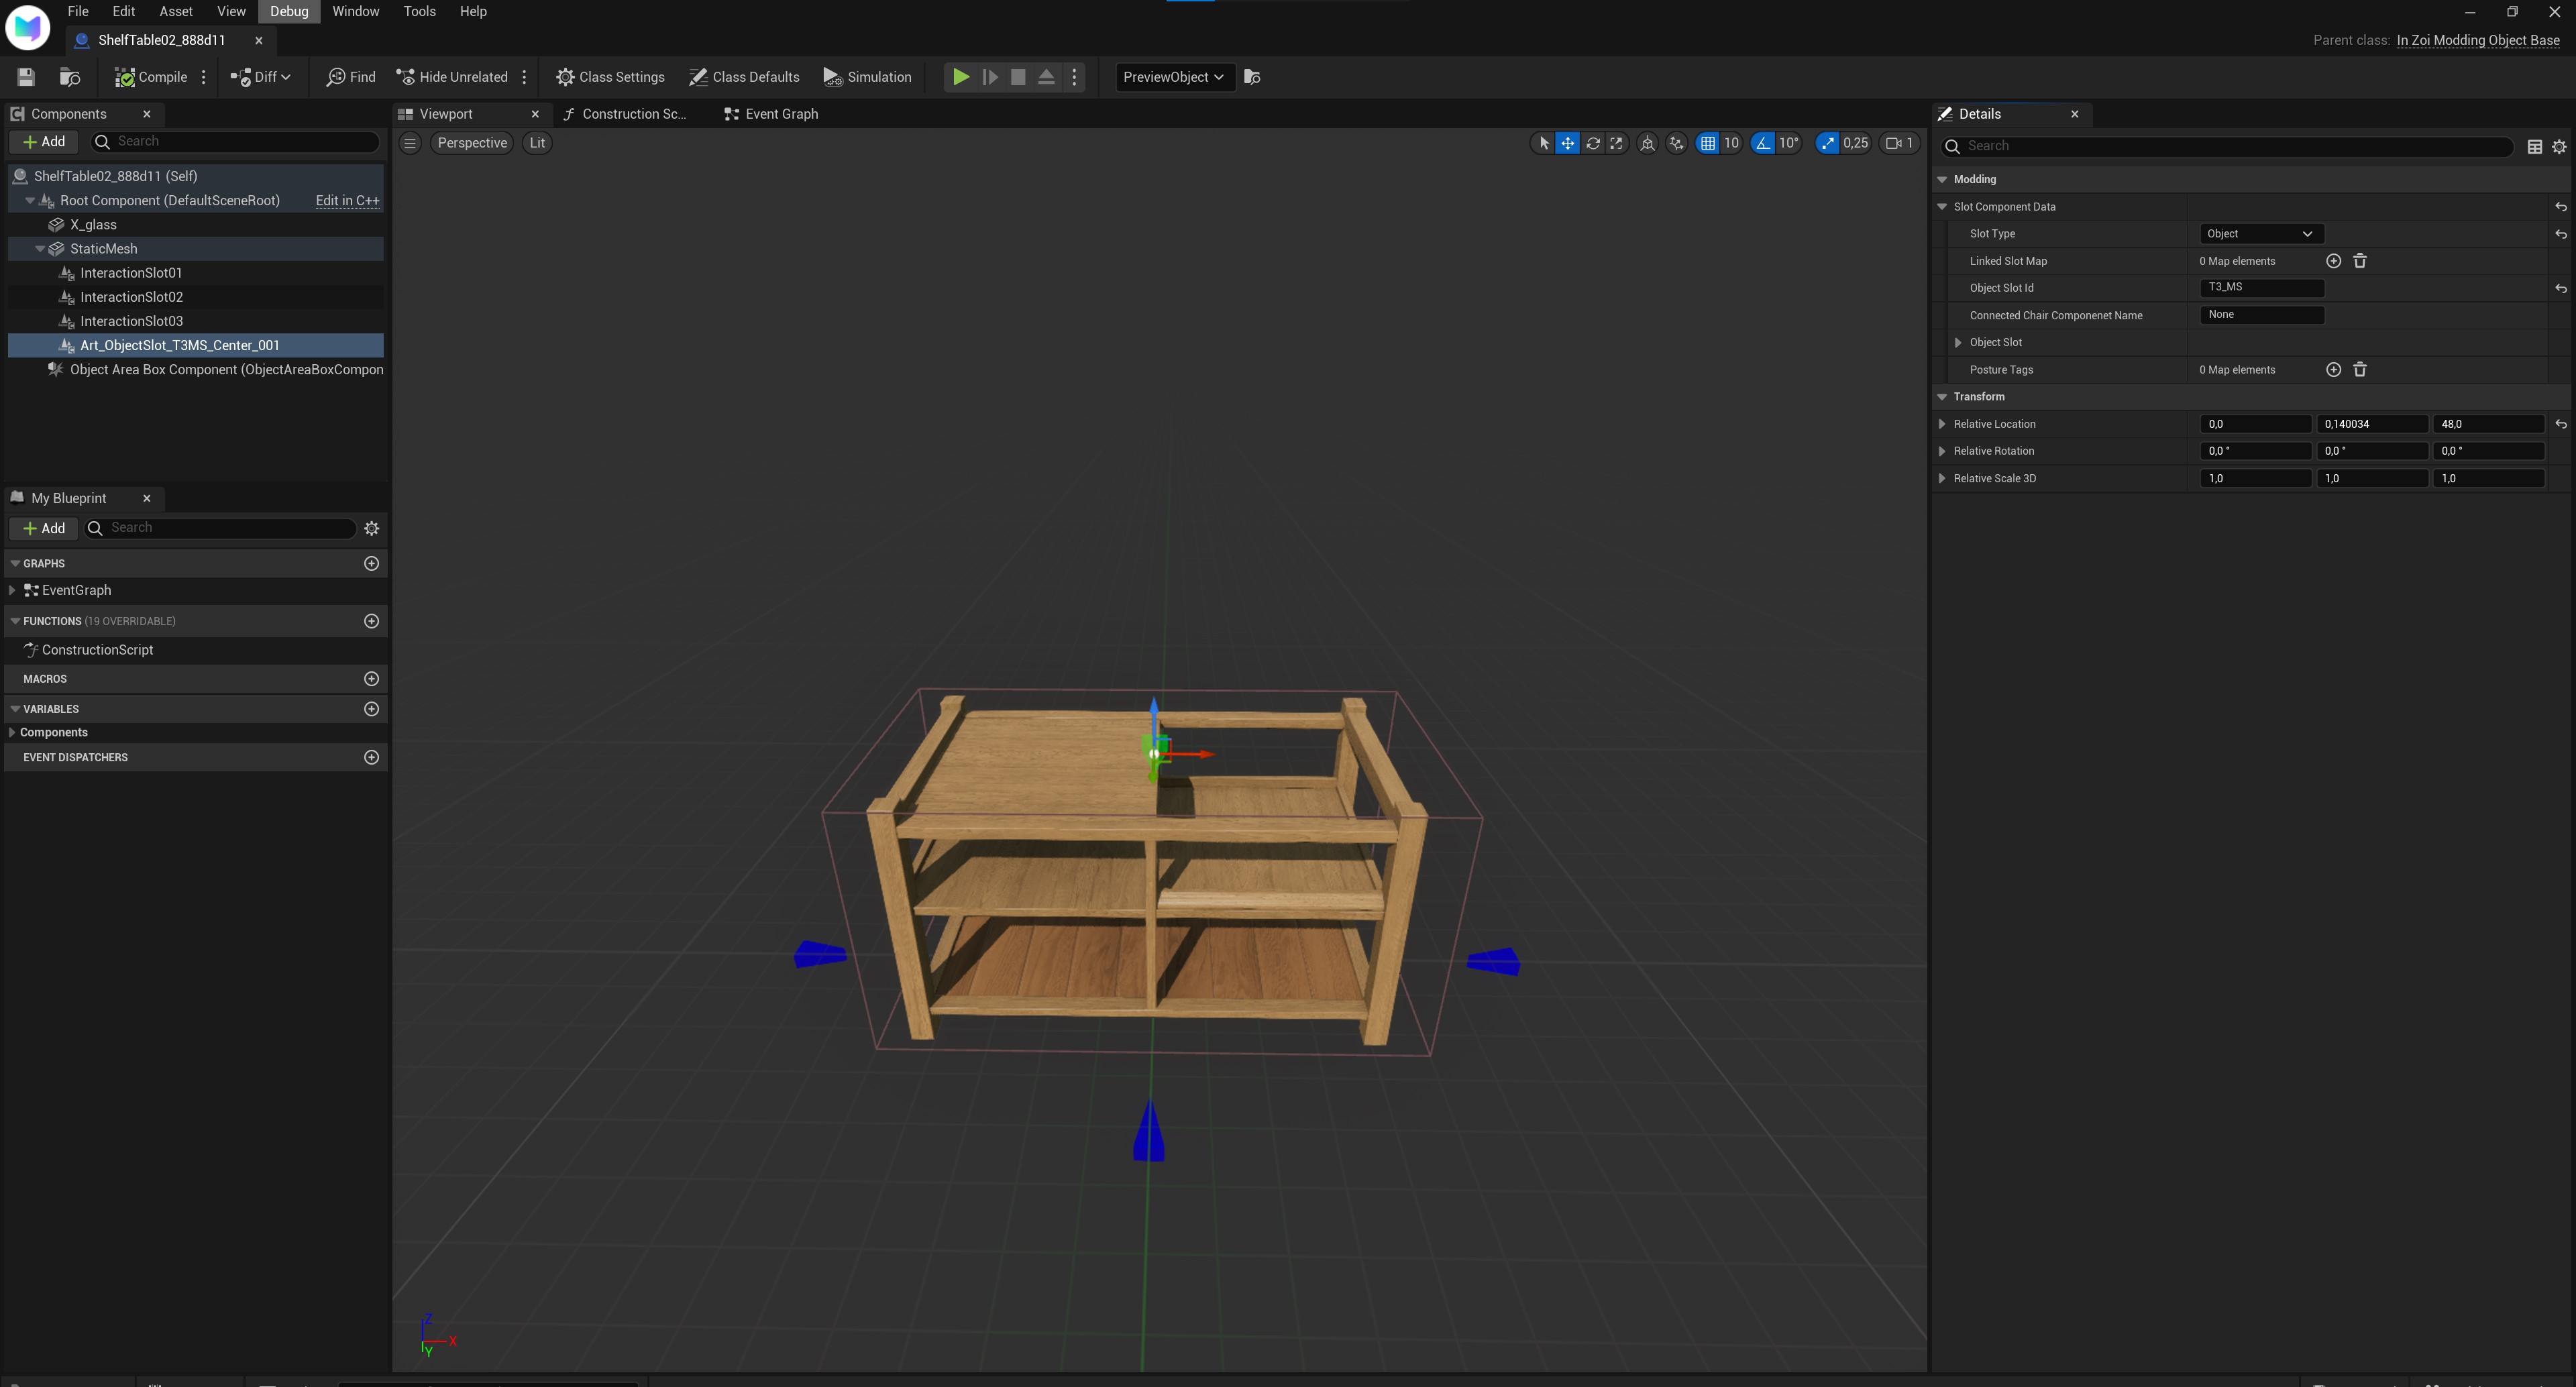
Now to the real deal! Now we have to setup our slot properly to hold objects.
To do so, we choose object from the dropbox.
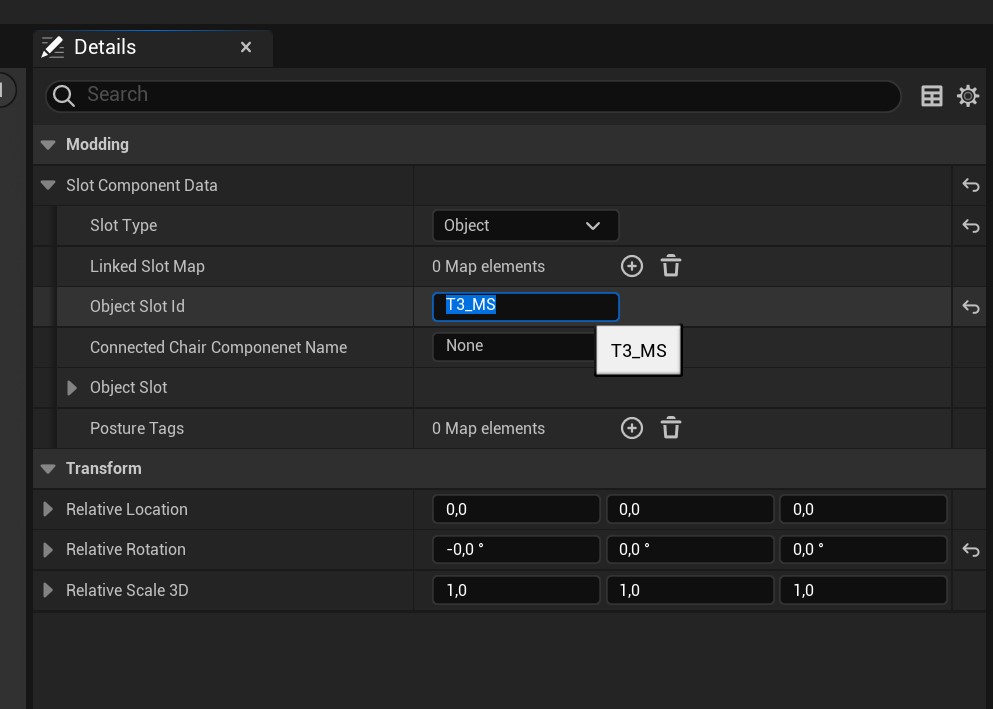
Now, we want to rename "Object Slot Id" to T3_MS. This is important! So make sure you've done this!
Now all we have to do is move our slot in the position we want it to be! :)
While not strictly necessary, if you wanted to rename your slot to something more in-game-y, then you can always do it through here 😉
If you're done editing the slots, we now want to save our asset! Click on the floppy disk icon on the top left to save it, and then it's just a matter of pressing the X button on the top right.
Now go ahead and add all the slots you want! Make them slot overlords proud! >:D