Written version of @thornowl's baking texture-based items for 4t3 conversion tutorial.
 Backup of original tutorial from my Tumblr, change description width and/or open images in new tab, they are aren't cut.
What You Will Need:
- Knowing the basics of converting process: how to extract ts4 meshes and textures, how to make your own multiplier/mask/specular, how to import stuff to TSRW, etc. (@nightospheresims has a good tutorial for beginners: here or here, also don't forget about Sims3TutorialHub!).
- Knowledge of basics blender controls and navigation: how to move and rotate the camera, basic shortcuts, how to change mode, editor type, viewport shading, rendering type, etc. (check Grennie's tutorial here, and "Helpful guides when you're a noob" from there too).
- Required programs and resources:
- Sims 4 Studio.
- TS4 body mesh & texture(s), that you want to convert, I use @atomiclight's mix gloves for this tutorial.
- Blender (I use version 2.79).
- Photoshop (or any other 2D editor, that supports masks and .dds format).
- TS3 Bodies template & UV map templates.
- Plain normal & specular map (and 1-channel mask), if you don't want to make your own.
- TSRW.
STEP 1: ADDING MESHES AND TEXTURES IN BLENDER, PREPARING MESH FOR BAKING
- I already exported all the gloves presets that I want from S4S. And because they don`t have their own mesh, I exported base game swimsuit (you can also export mesh from any other stuff, that 100% is painted on body) I exported it like this: Open S4S → Create 3D mesh → Find it with filters→ Next → Save the package wherever you're want → go to Meshes tab and press Export.
- Open .blend file with ts4 swimsuit, delete the "rig" (you don't need it) and merge all other groups - Shift + click on them and press Ctrl+J on 3D viewport.
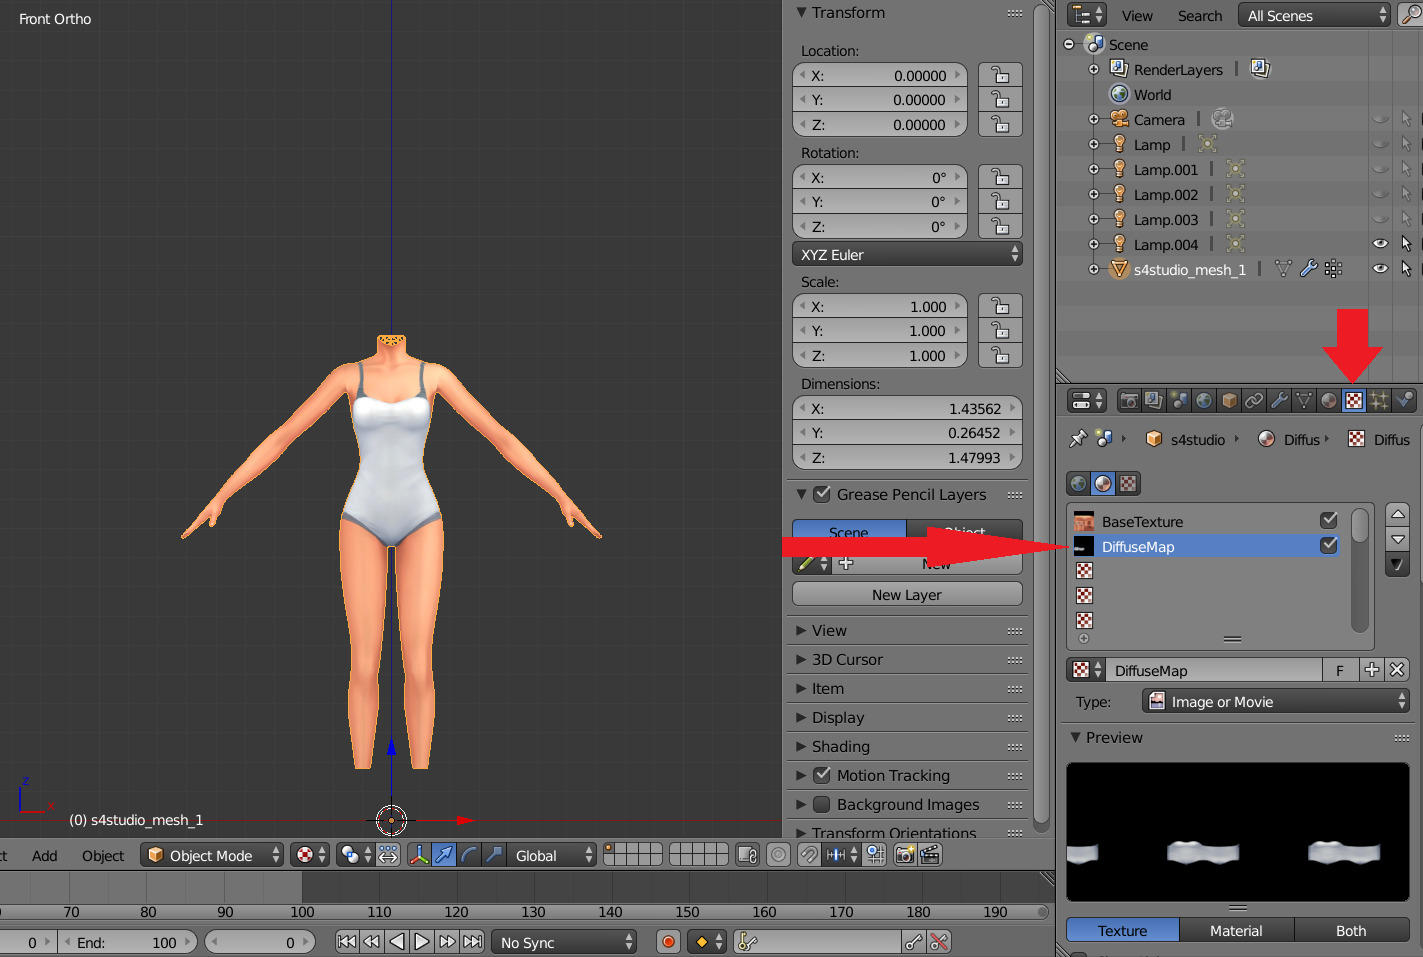
- You need to export our gloves texture and remove swimsuit texture, go to the Textures tab and in small window select "DiffuseMap":
- If you don't see DiffuseMap texture, switch type of texture data to "Show material textures" (brown-ish circle).
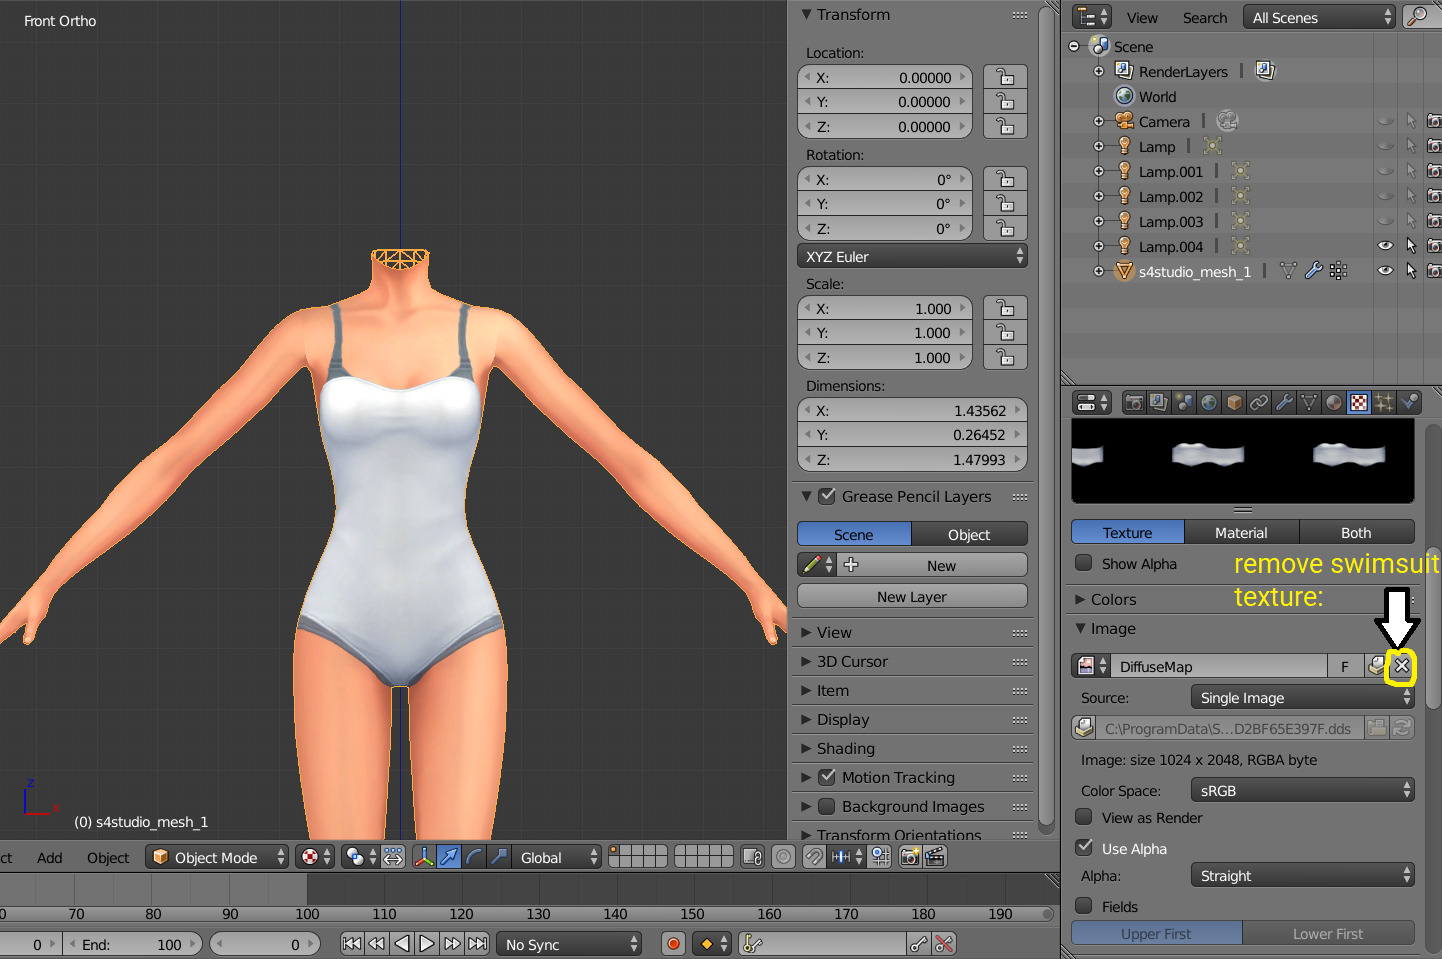
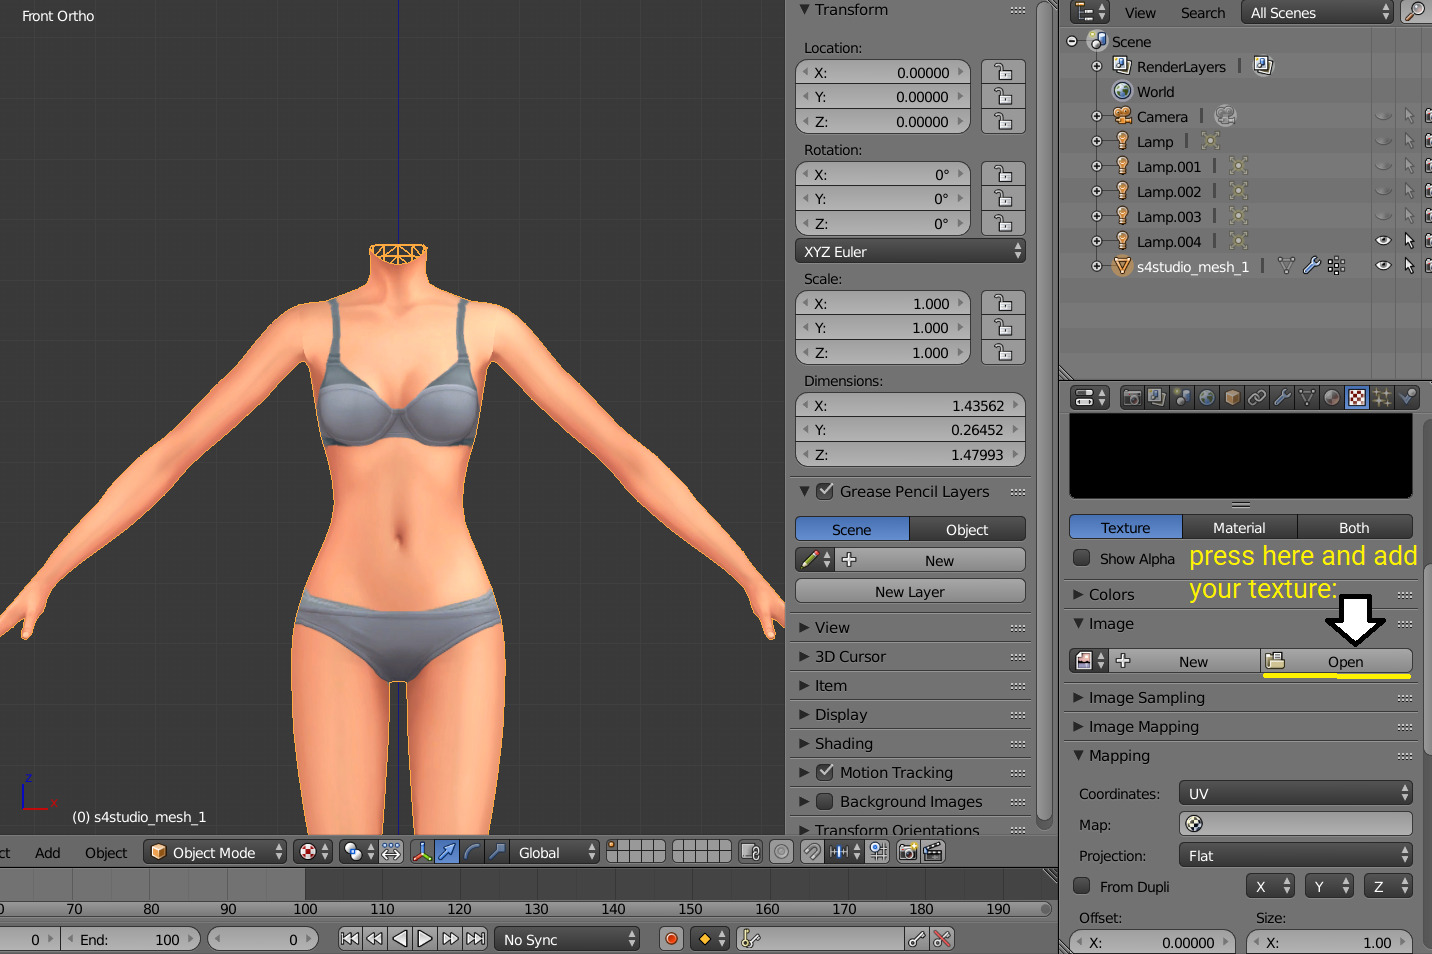
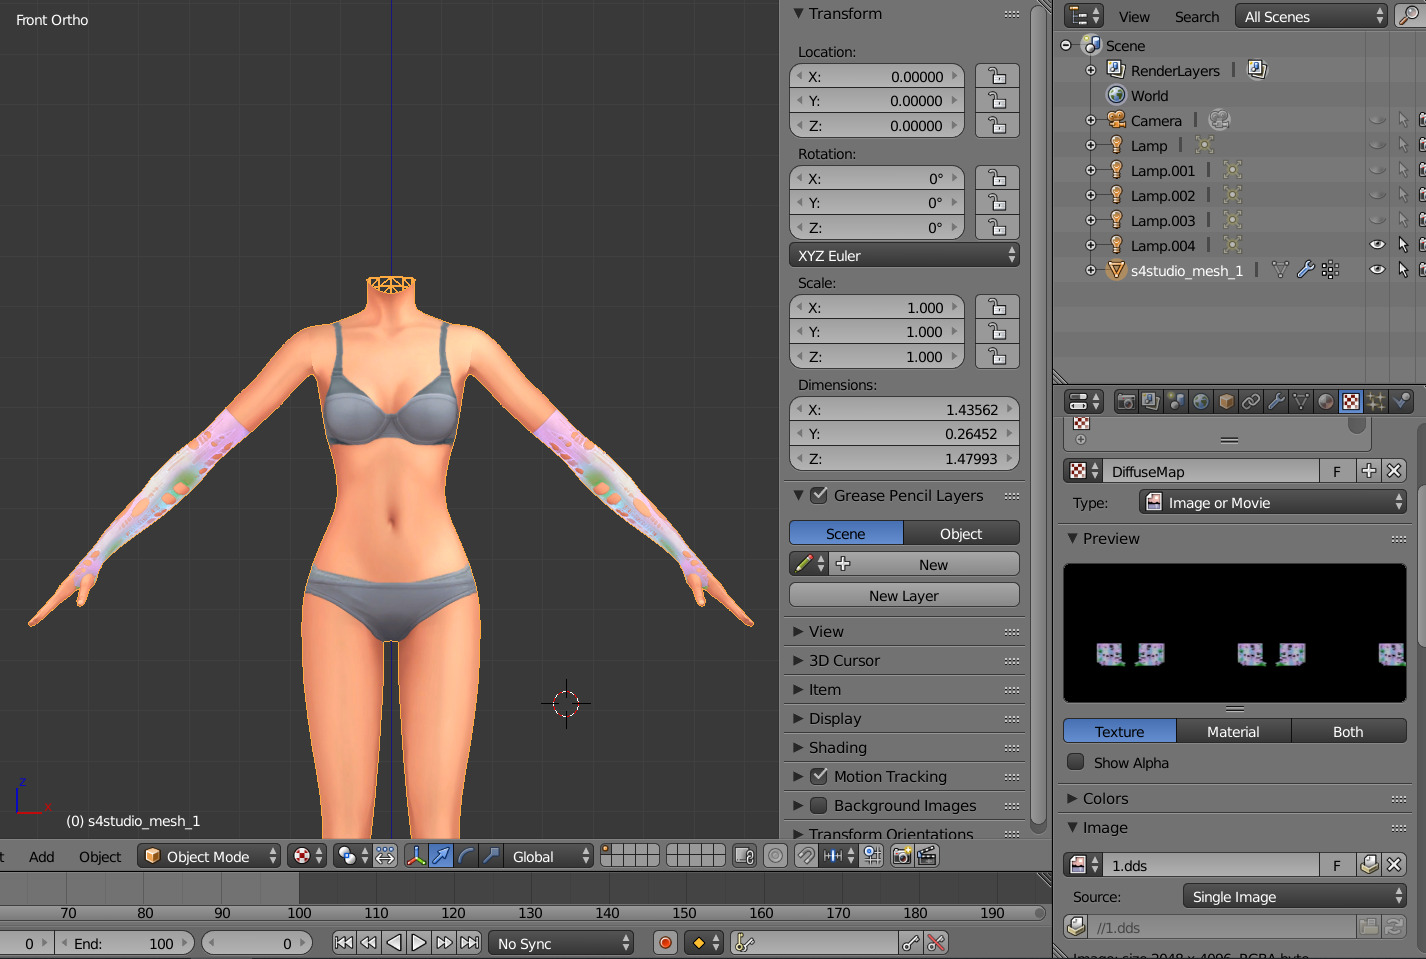
- In the same way you need to remove skin texture, because you don't need it, only select BaseTexture instead of Diffuse:
 .
. - Import your Sims 3 body, also I merged the top and bottom, because TS4 mesh is full body too
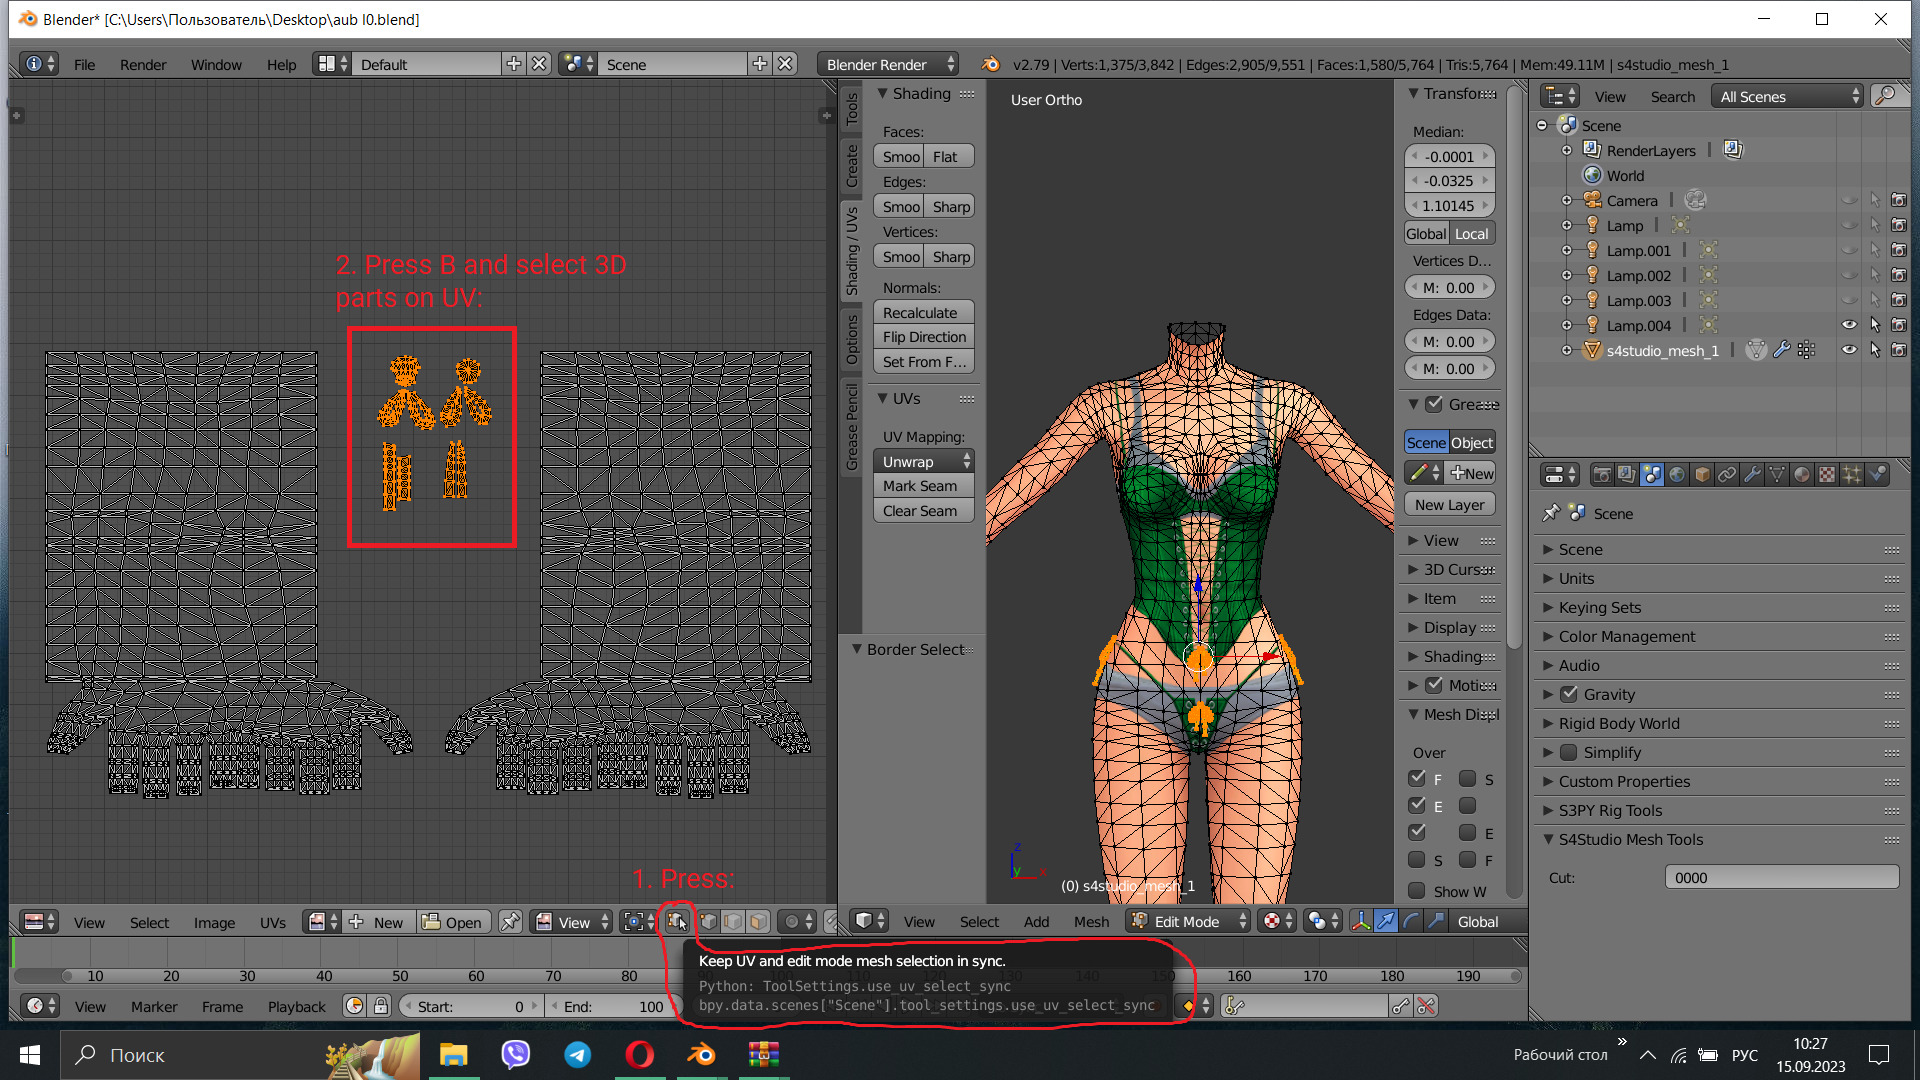
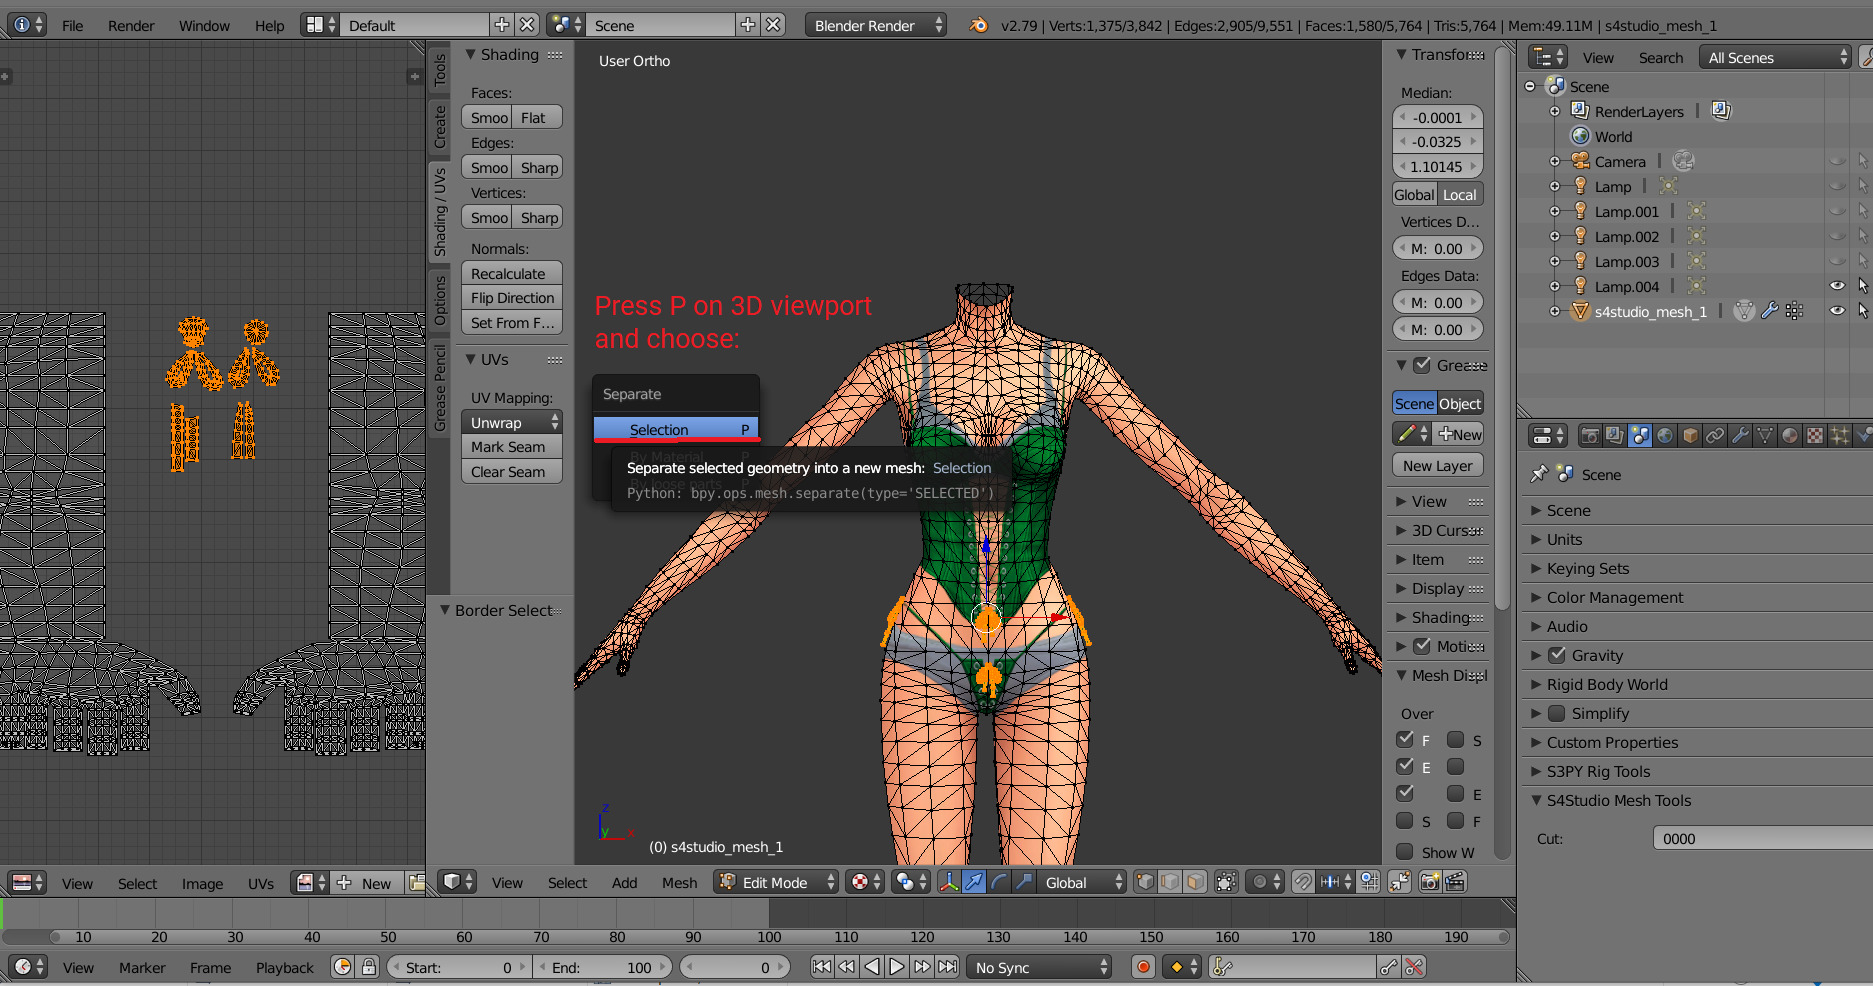
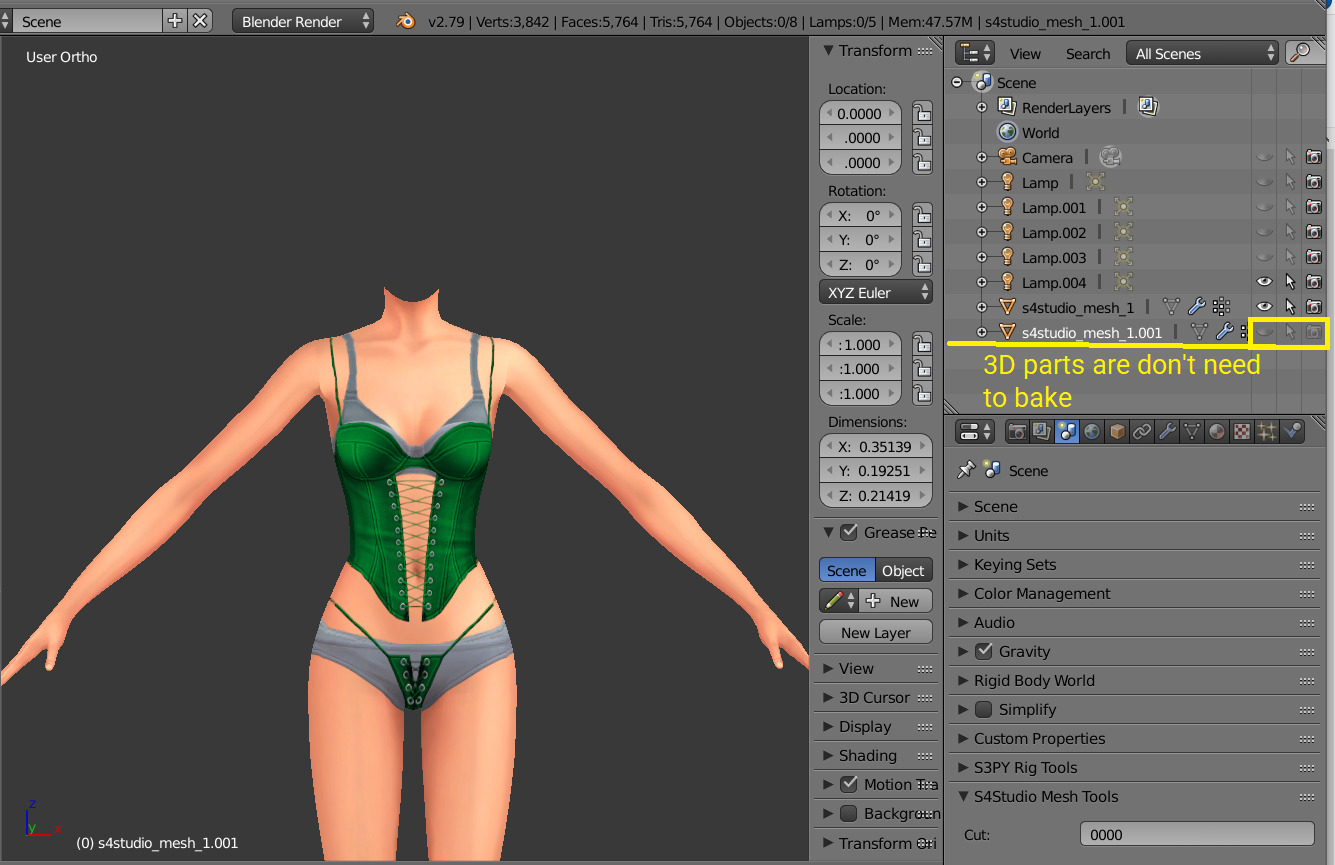
- if your stuff have 3D parts, separate them in their own group(s) and hide them from baking (you can bake them separately and/or tweak them in Photoshop):
STEP 2: SHRINKWRAPPING THE TS4 MESH
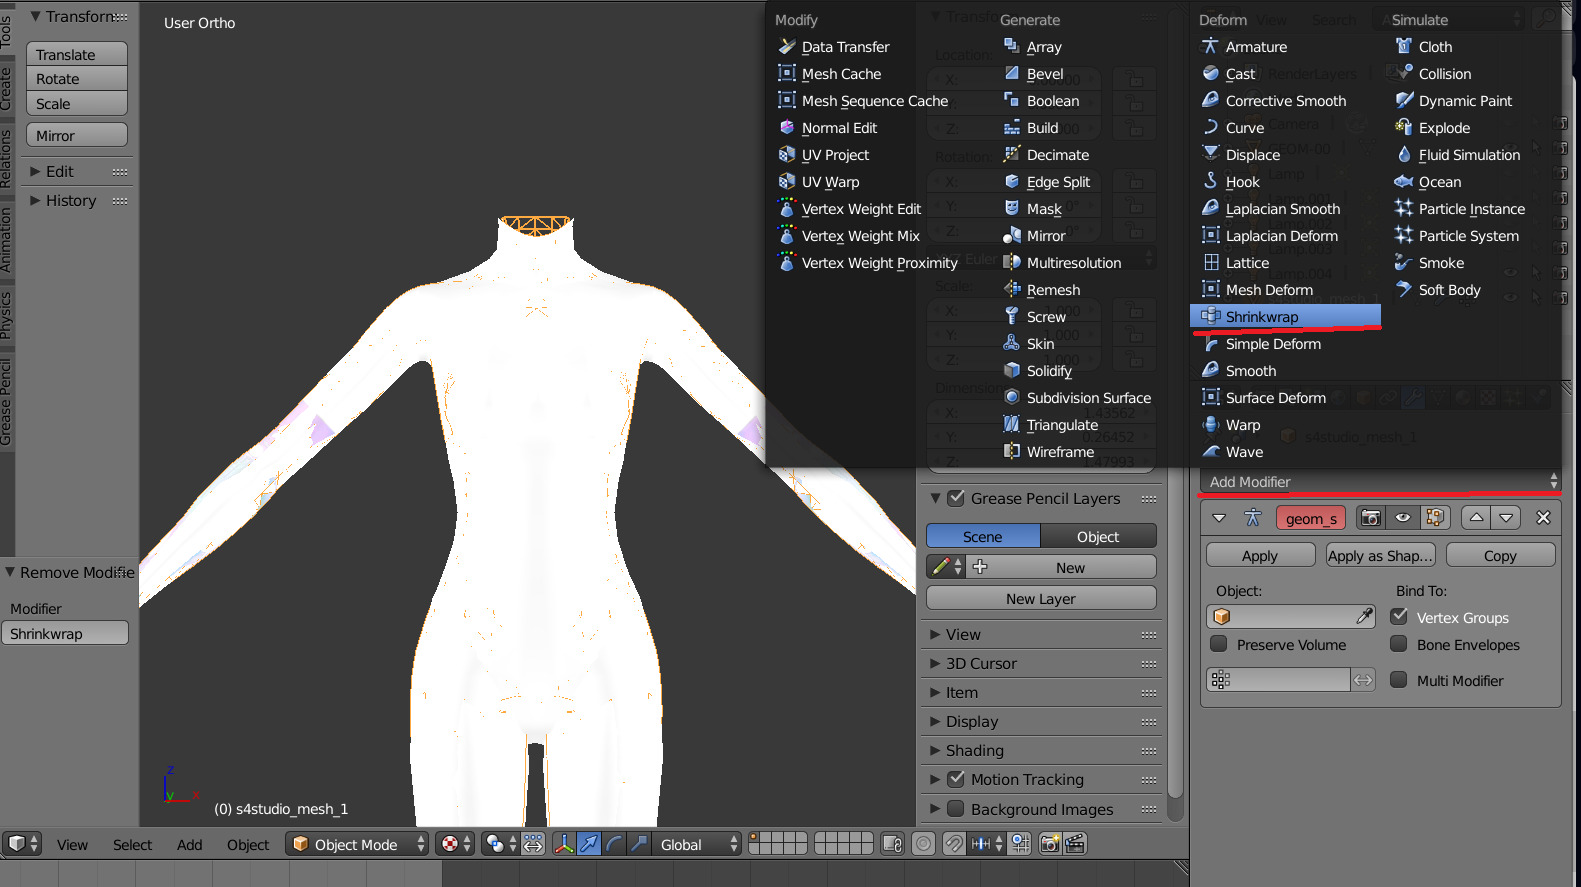
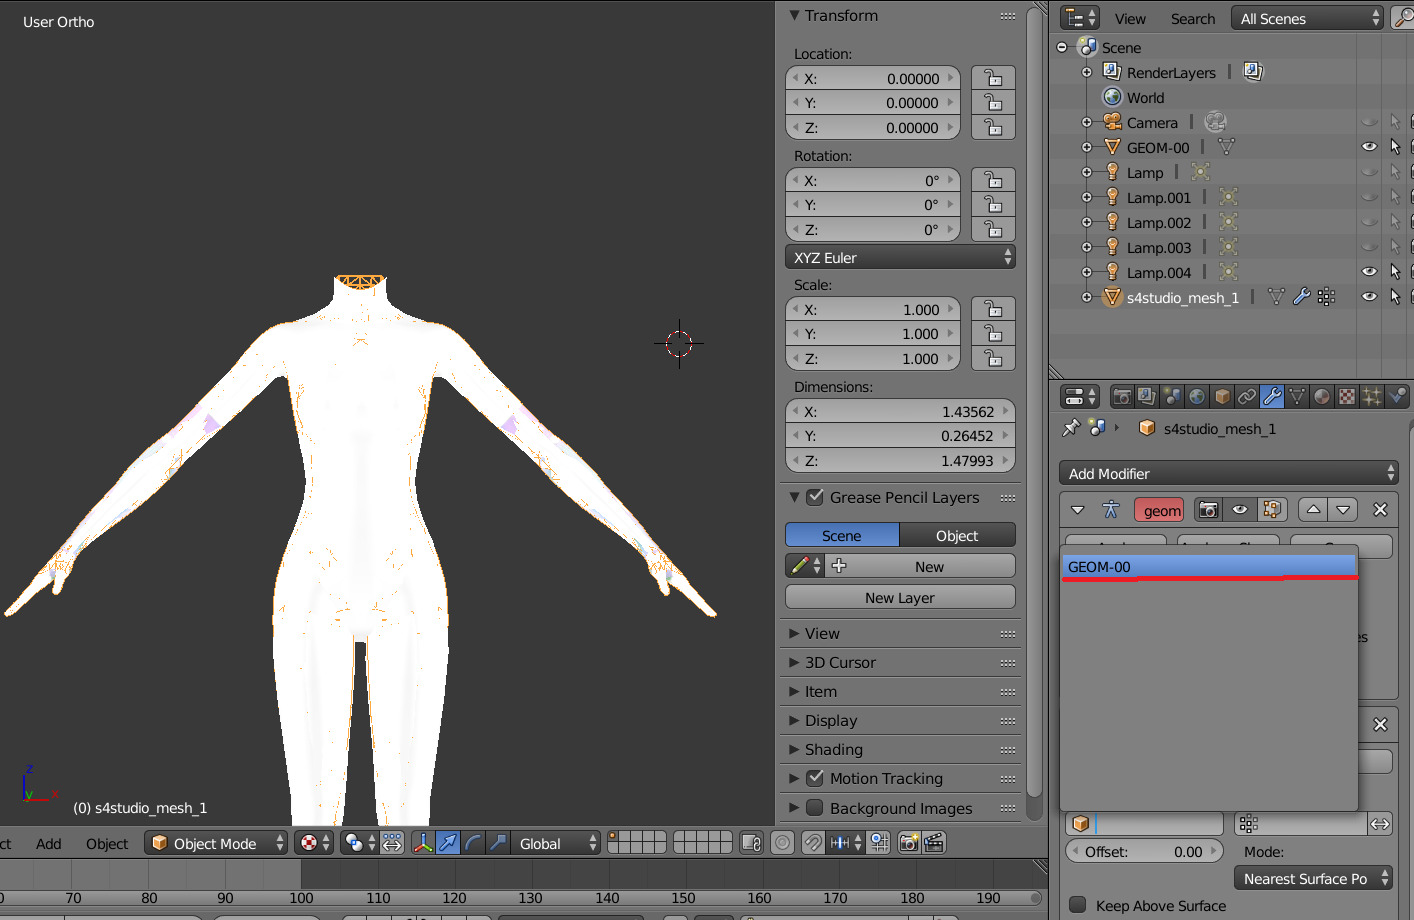
- Select TS4 body, go to Modifiers tab, usually there are already applied modifier "geom_skin", just ignore it and in the "Add Modifier" window select Shrinkwrap modifier.
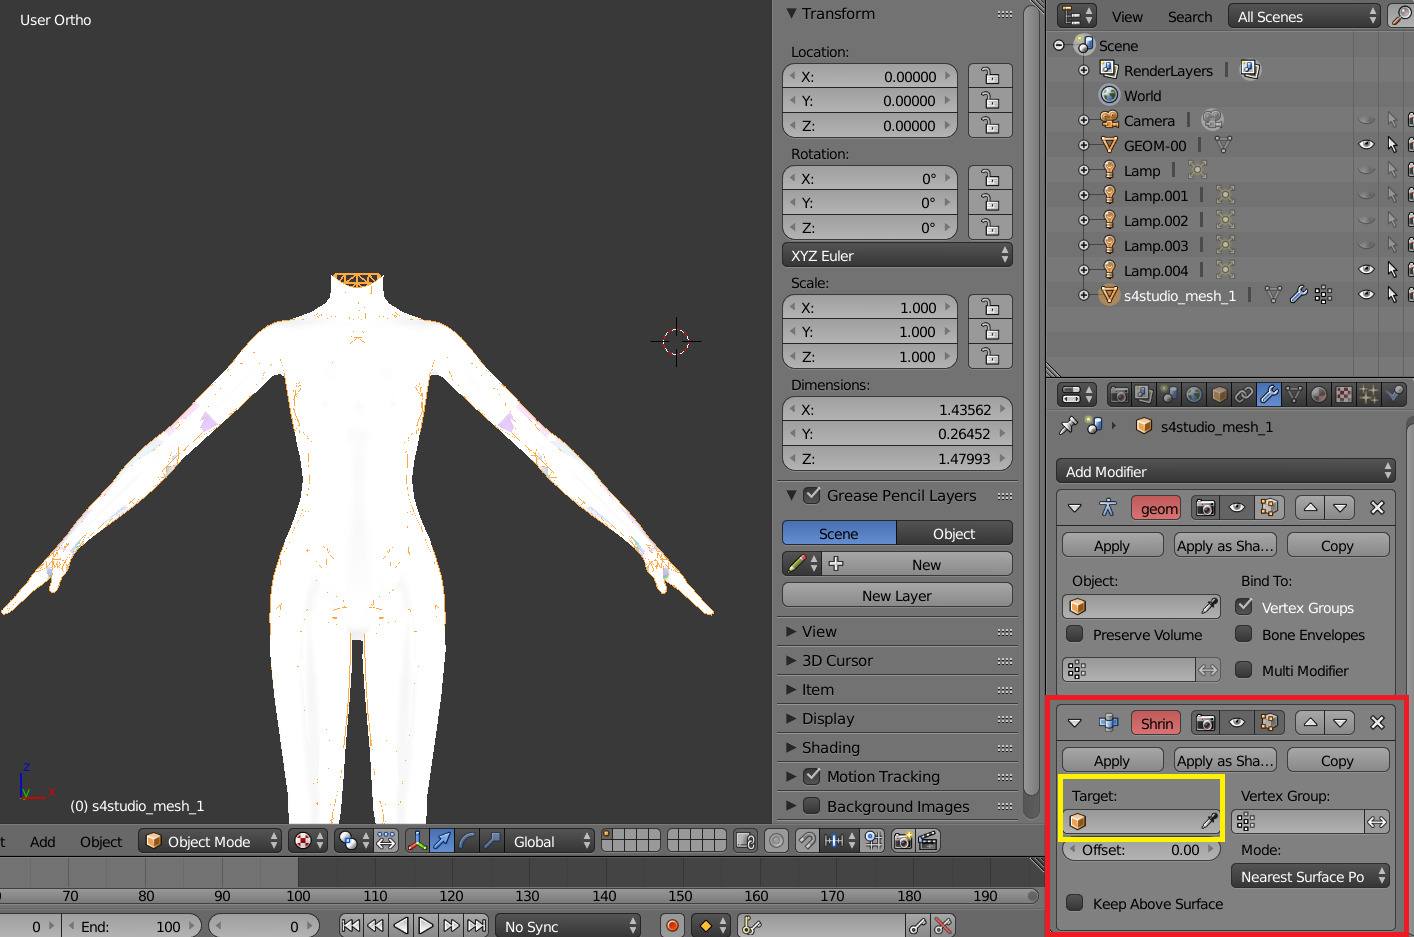
 This is how TS4 mesh is supposed to look with this modifier, you may also apply modifier, but it's not necessary:
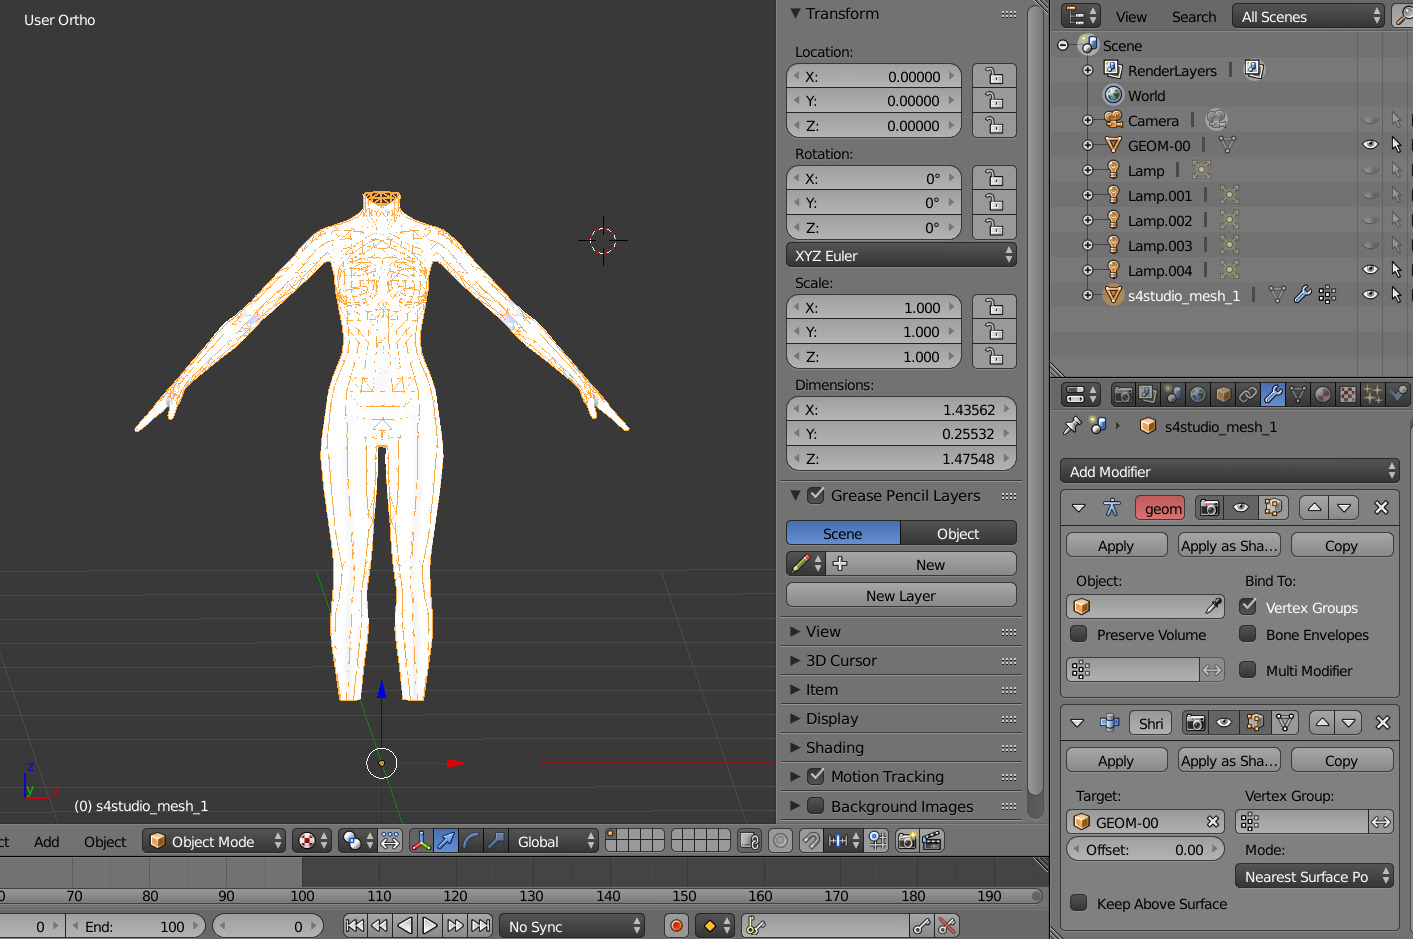
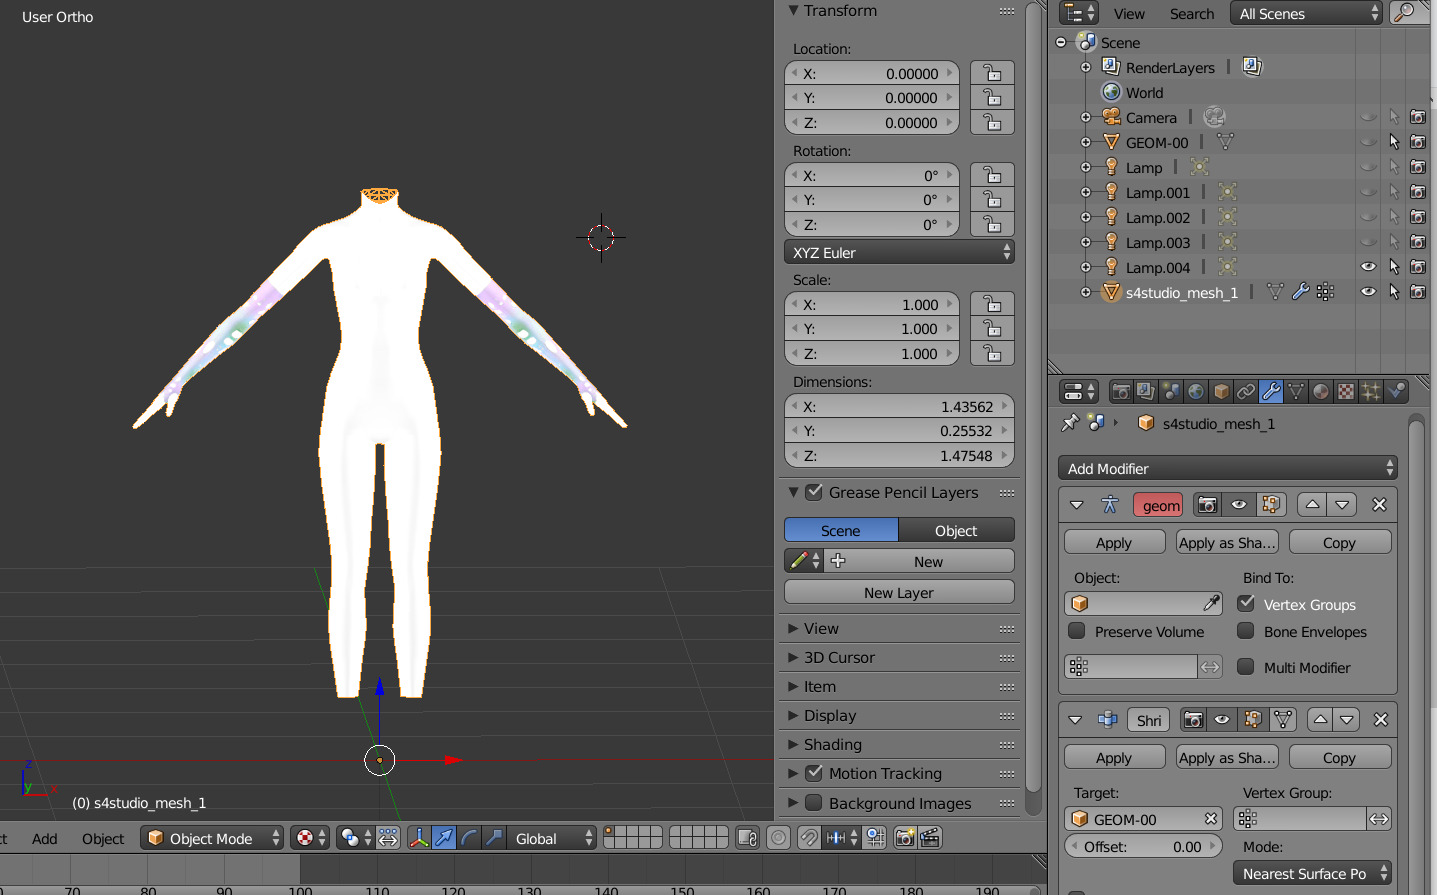
- After that you need to hide TS3 Body mesh and now we're going to baking.
STEP 3: ASSIGNING MATERIALS
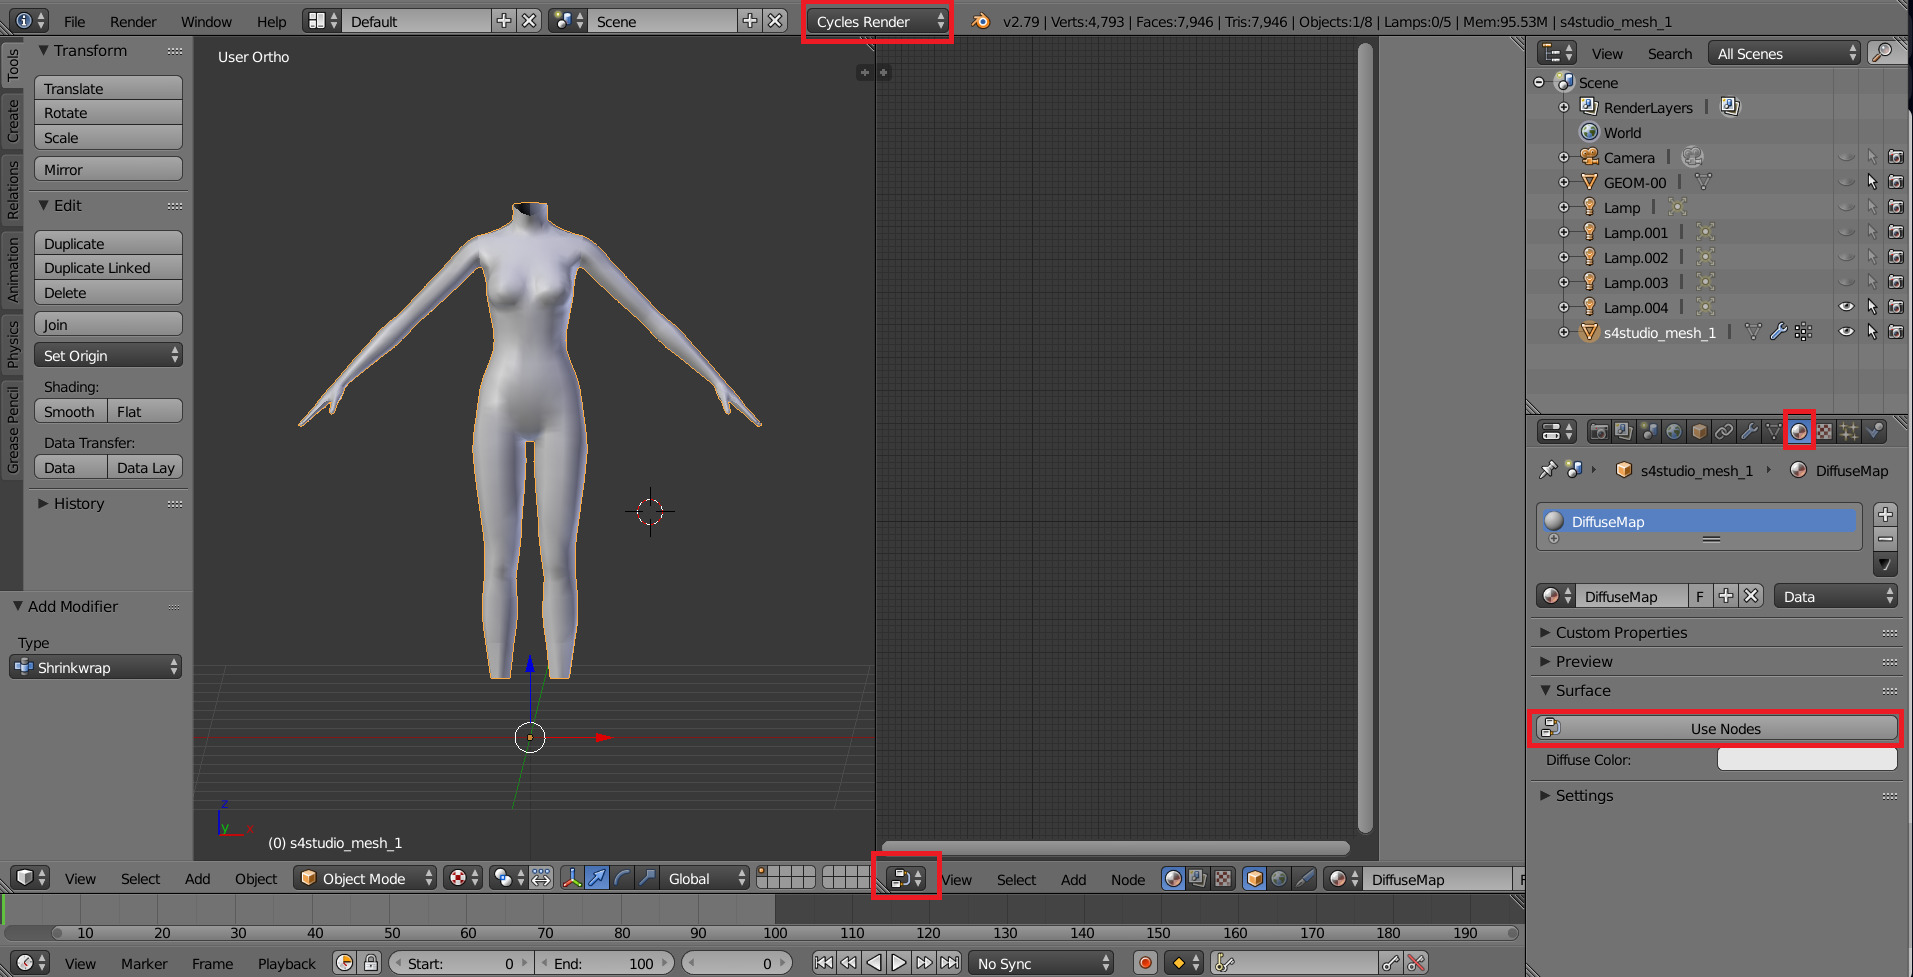
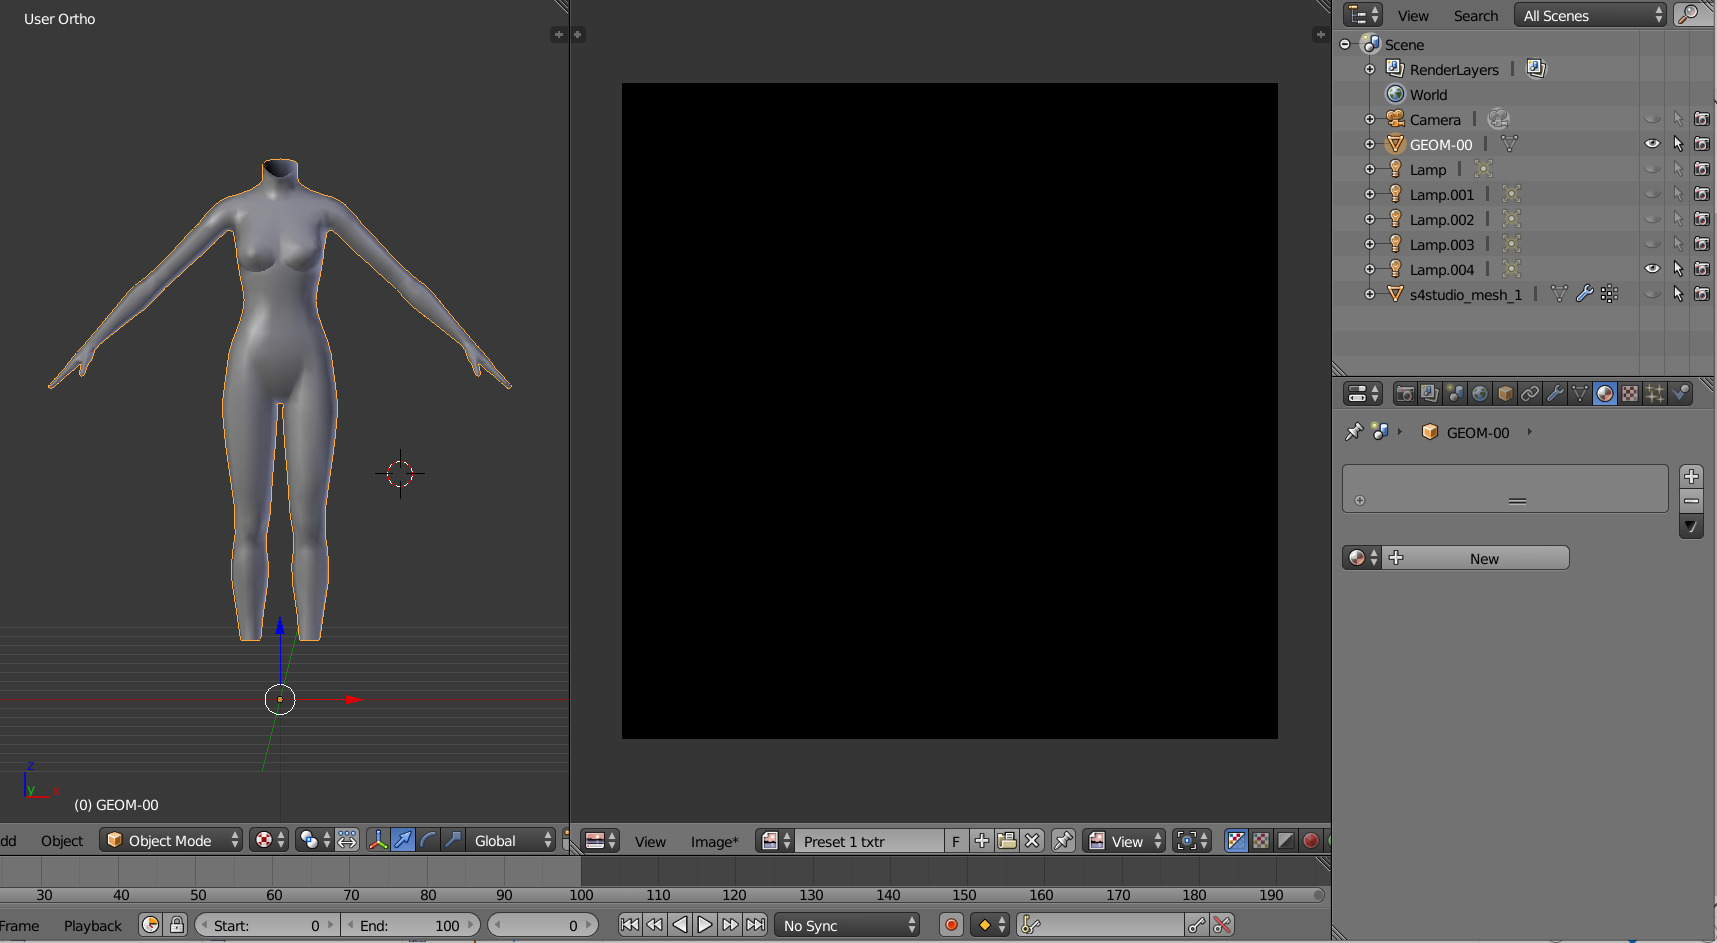
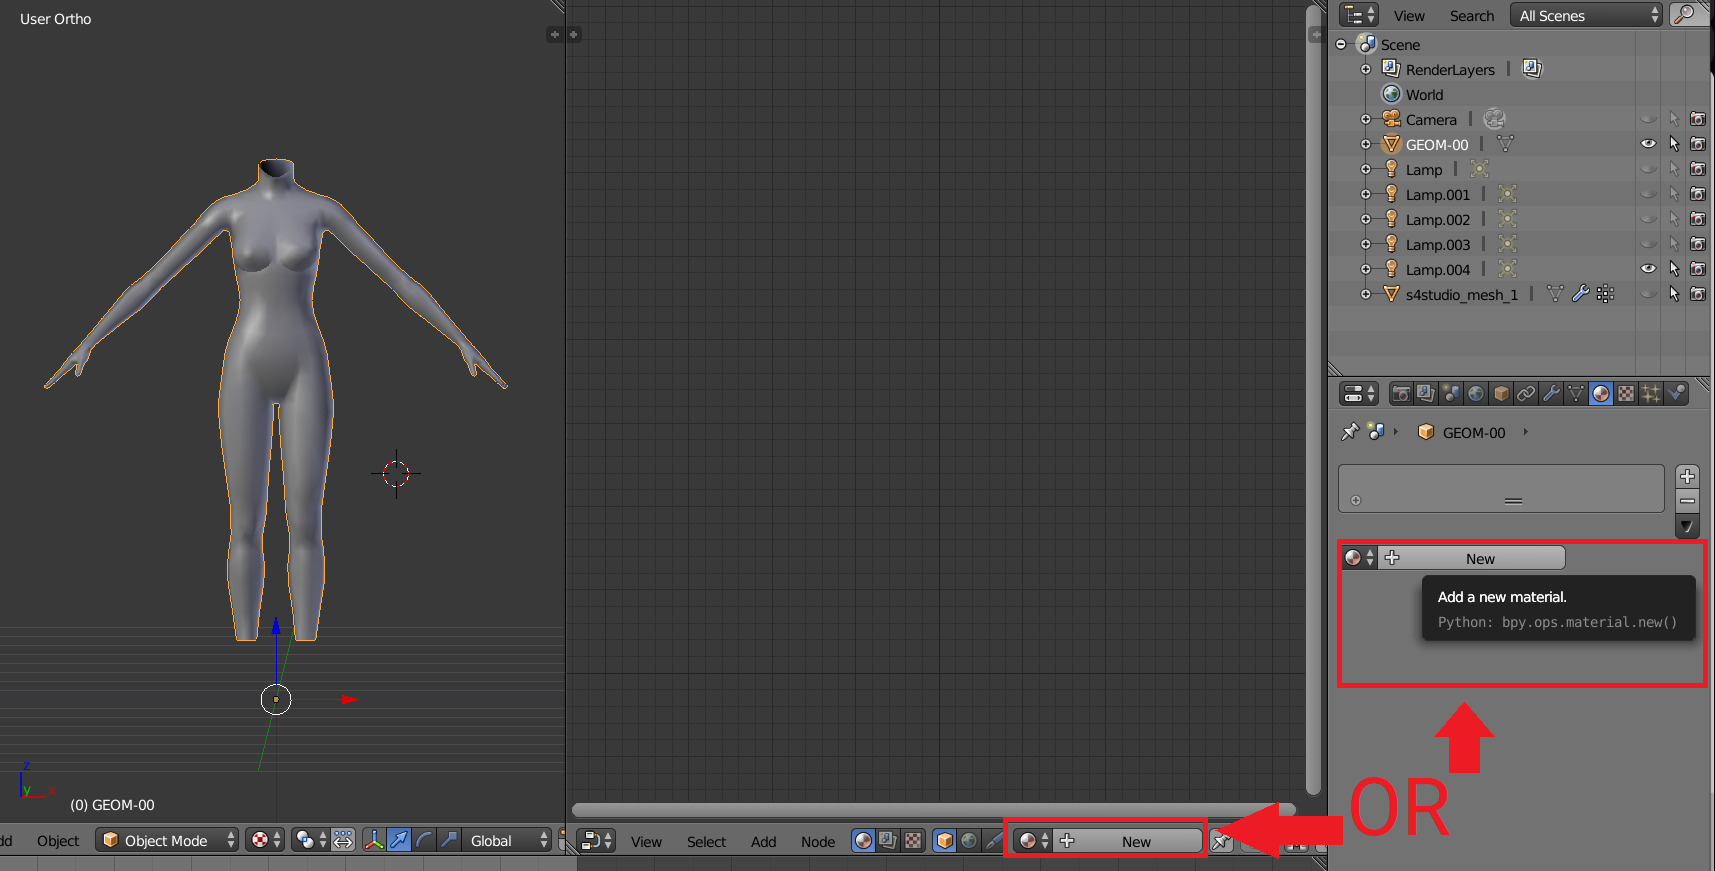
- First of all, you need 2 windows — with your 3D viewport and with Node Editor, also you need to switch rendering type to Cycles Render. After you set it, select TS4 mesh, open Materials tab and press Use Nodes button:
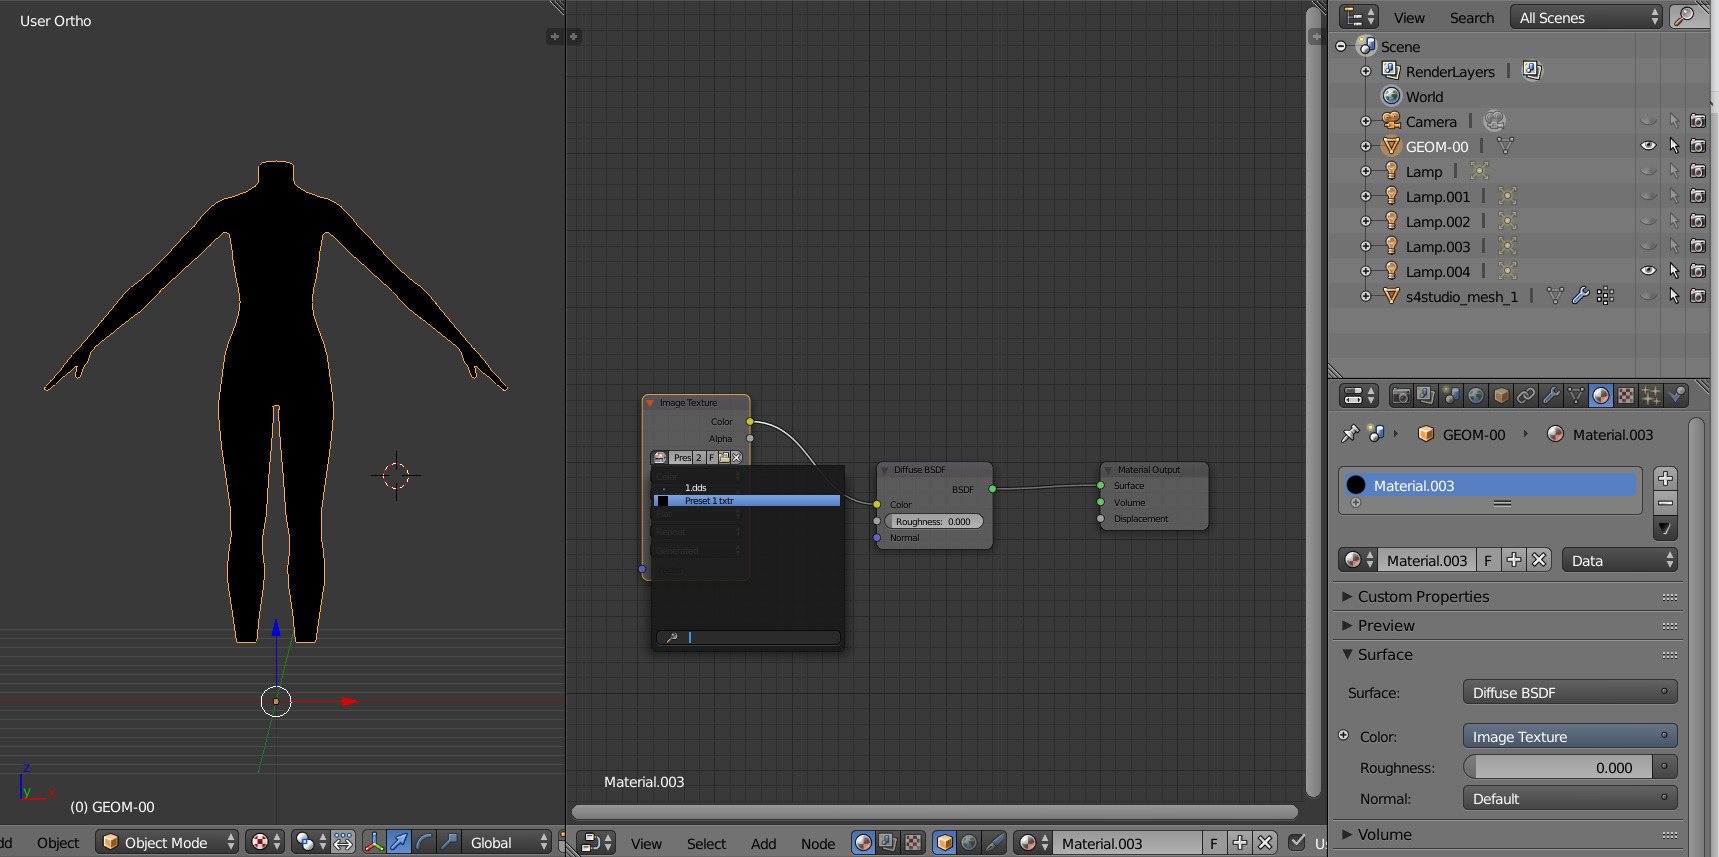
- After that two small boxes should appear on the Node editor tab. Then press Shift+A and select Texture → Image texture:
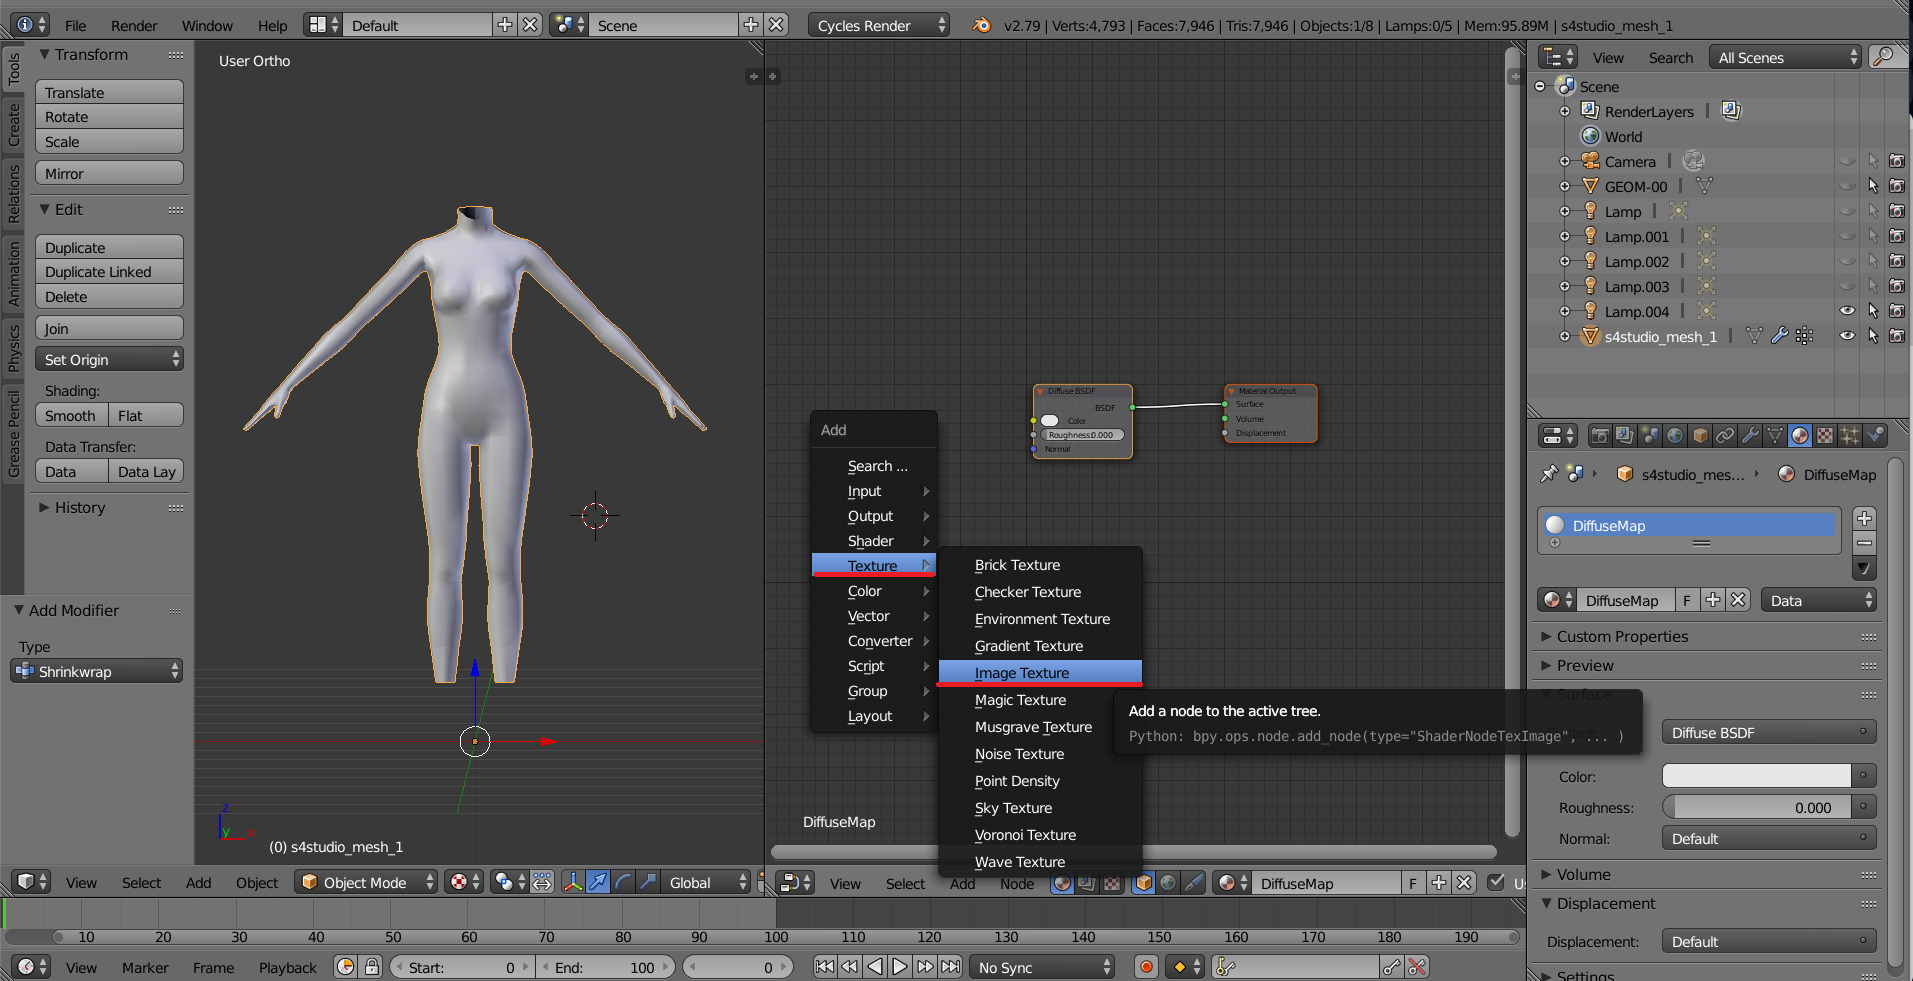
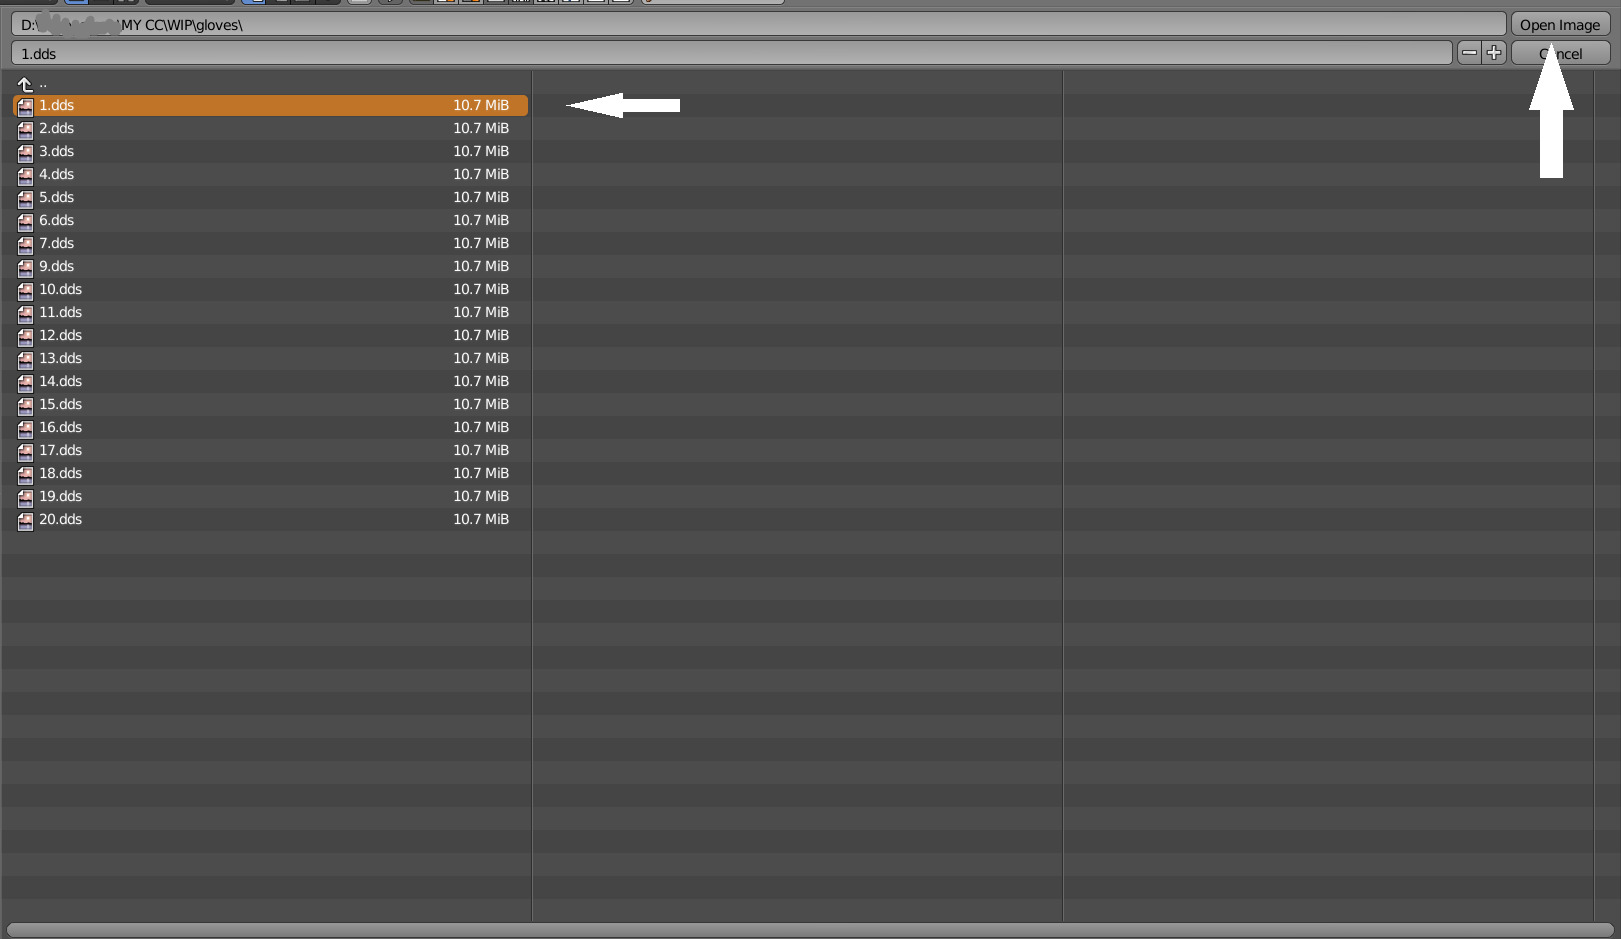
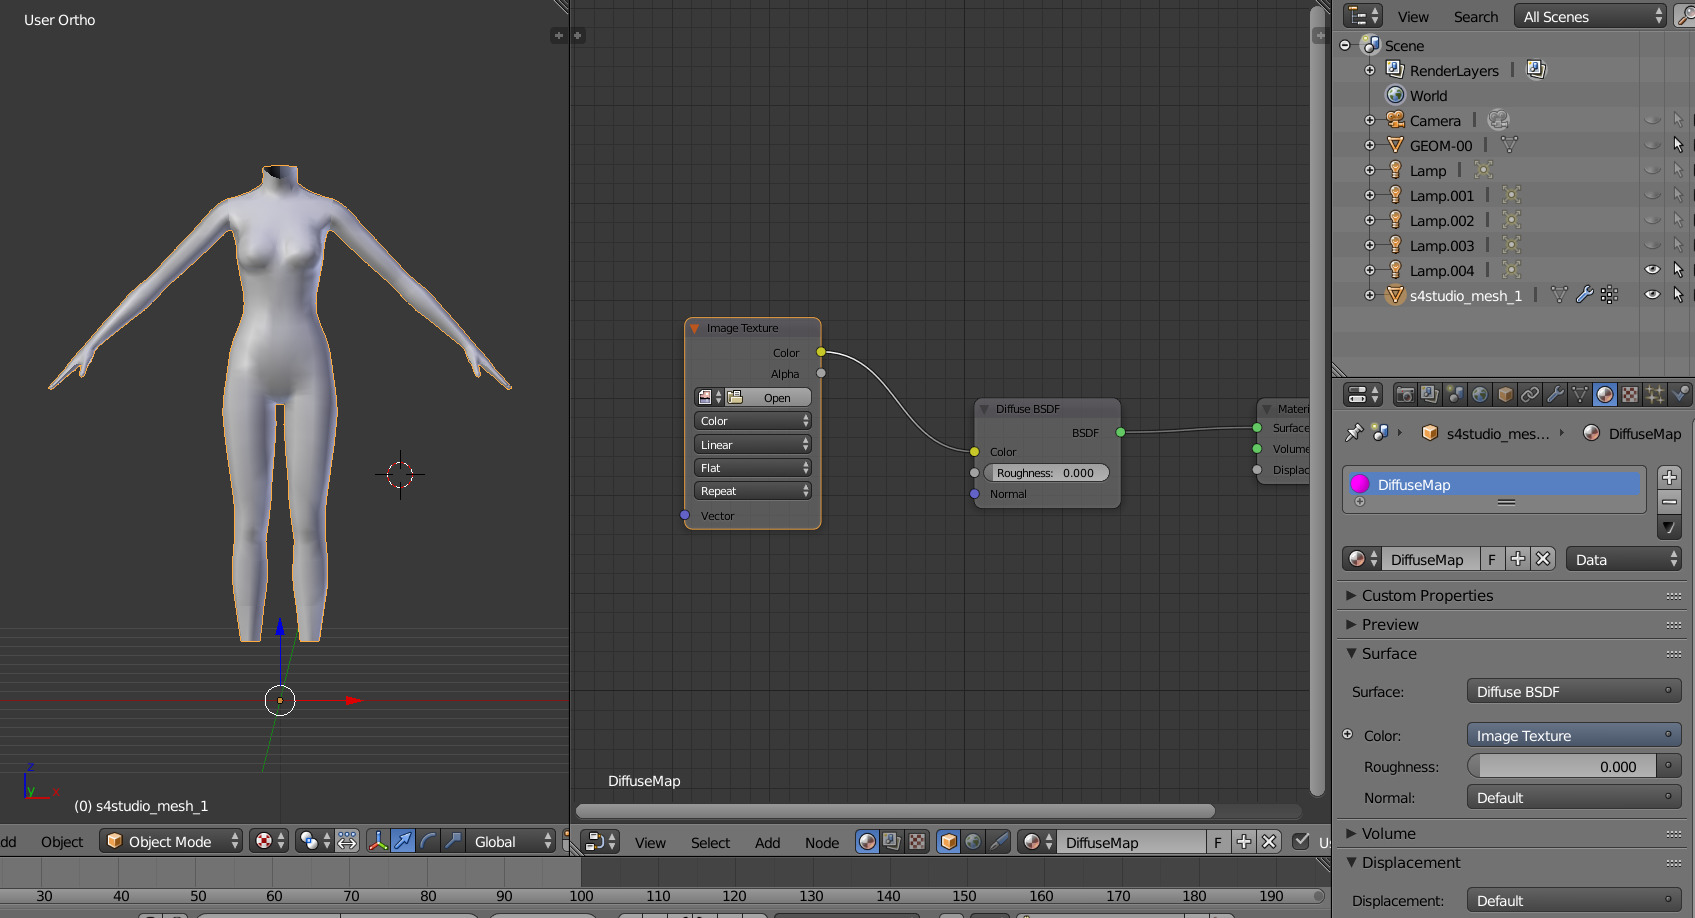
- Connect node that you already added with Diffuse BSDF node, by connecting yellow dot (socket) named Color of Image texture to the same socket of Diffuse BSDF node. After that click on the image icon and find your texture:
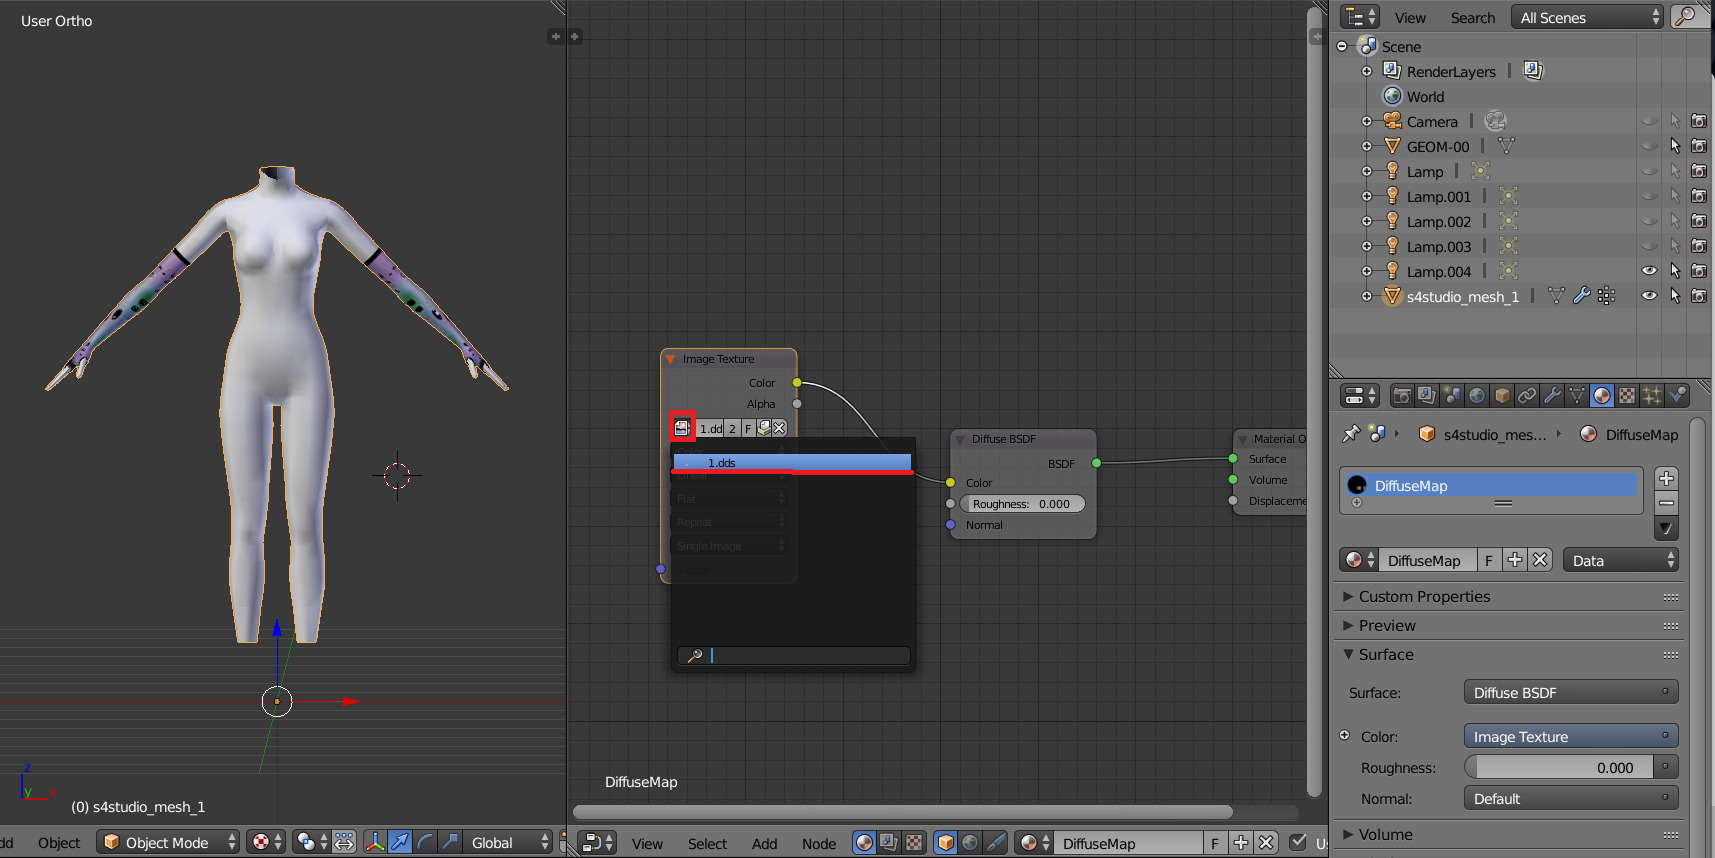 Don't worry about the black spots, we will fix that later.
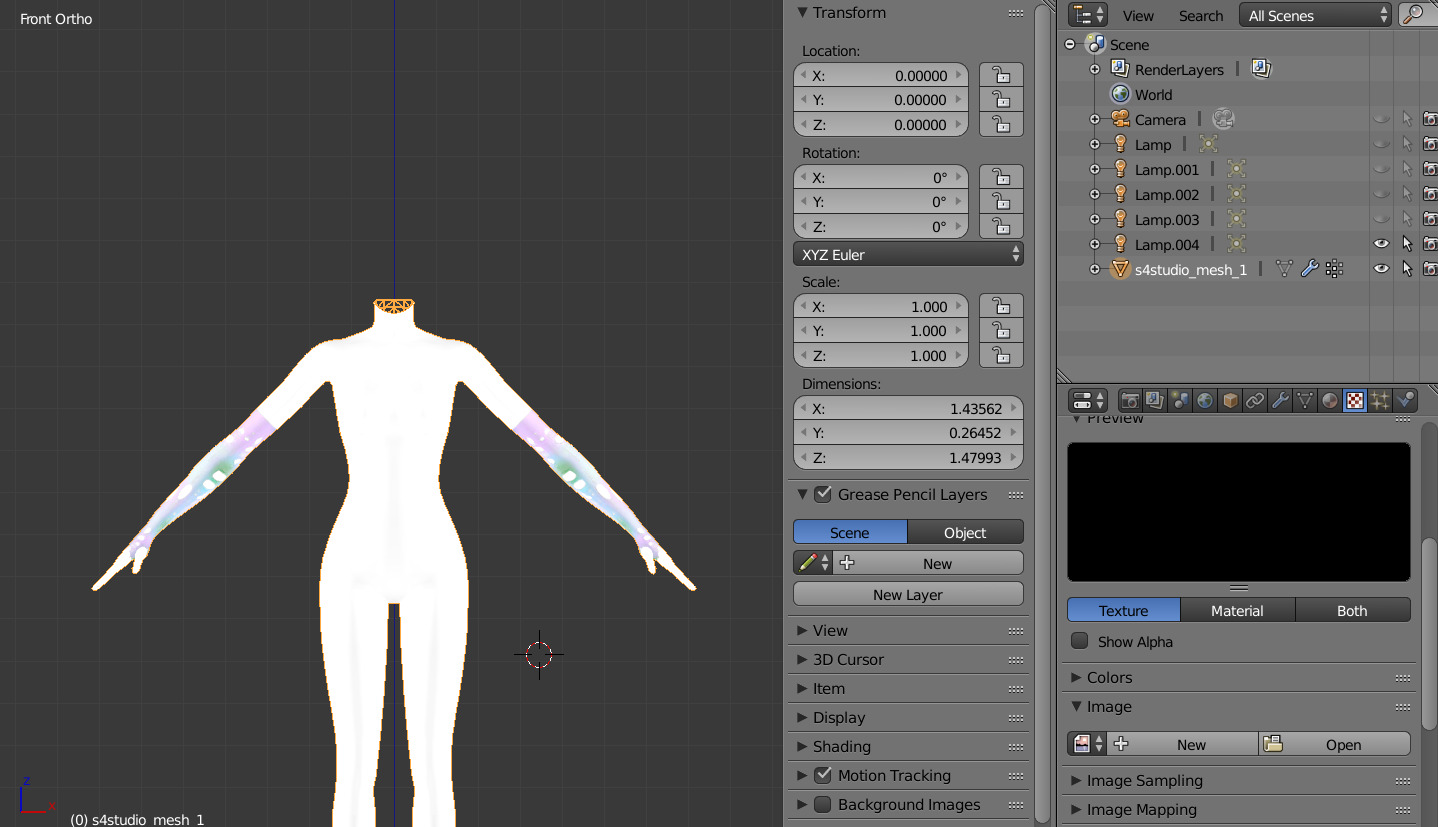
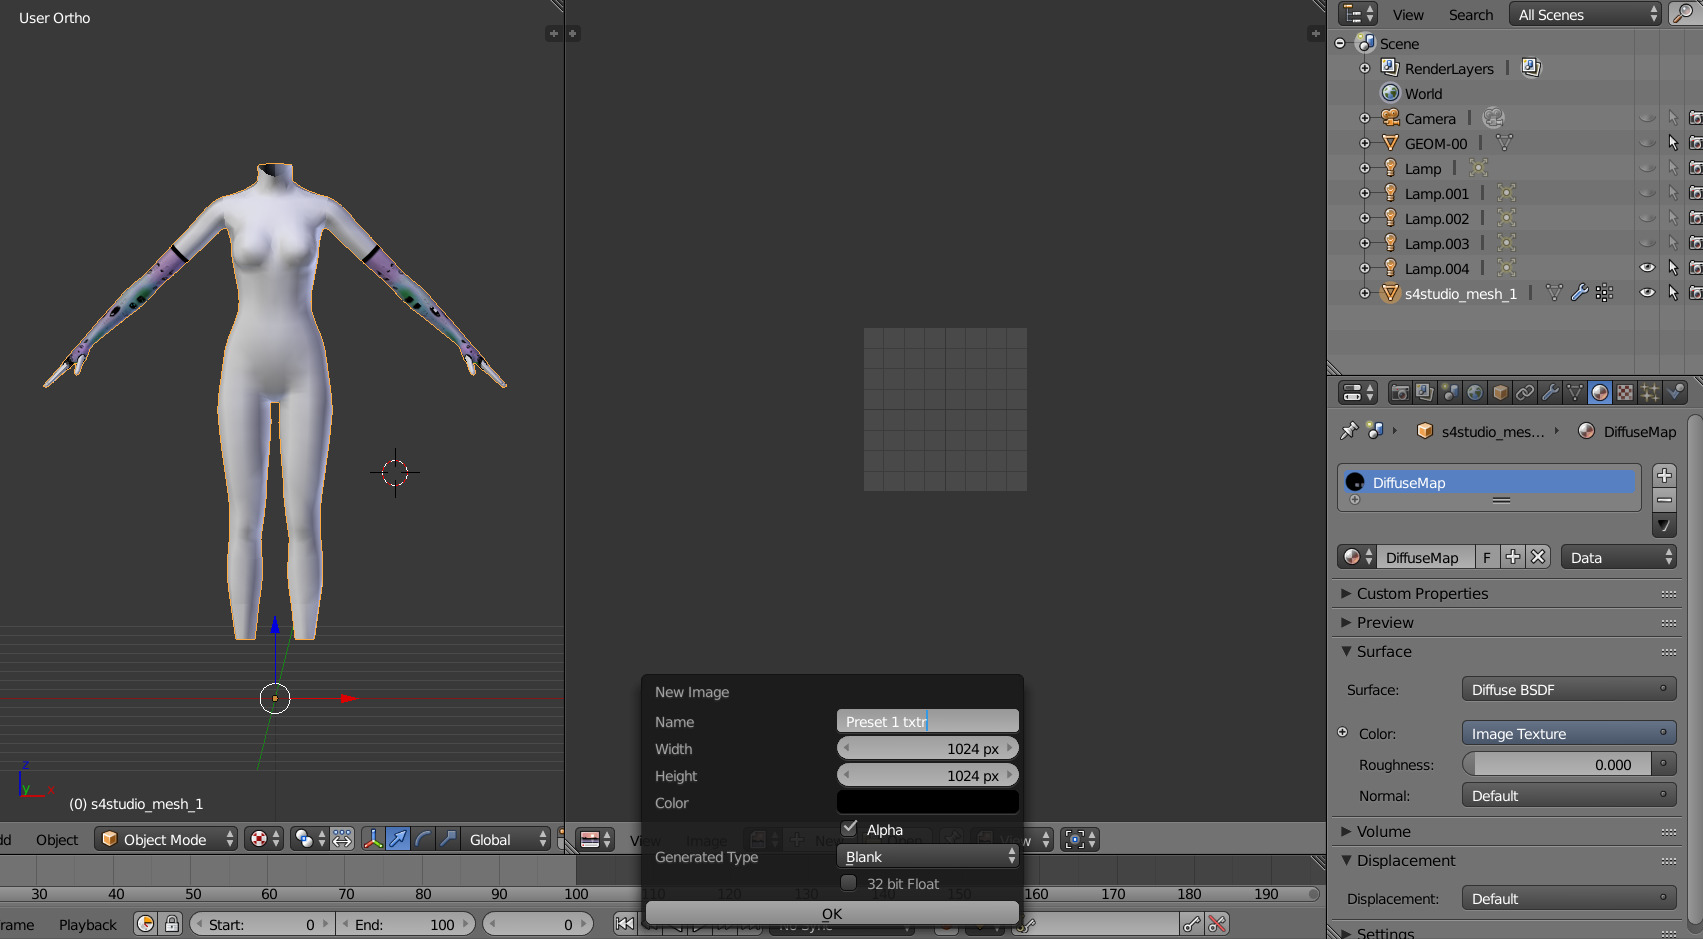
 - Go to UV/Image editor and create new image for your bake, it must be 1024x1024 size or, if you want HQ texture - 2048x2048 or 4096x4096, but today I use non-HQ. After that, hide TS4 body and unhide TS3 body:
- Go to Node Editor, create new material and assign our newly created image to ts3 body the same way, that we did with ts4 mesh and original texture:
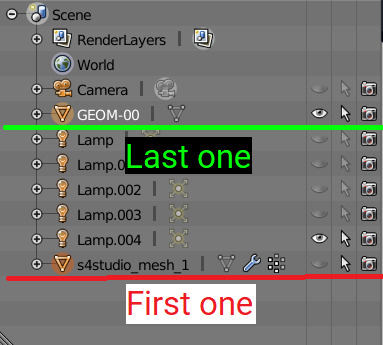
- Press Shift + Click on the TS4 body firstly, and TS3 body lastly. It`s an really important step, because without it baking wasn't work right way.
STEP 4: BAKING THE TEXTURE.
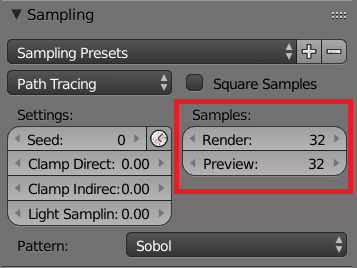
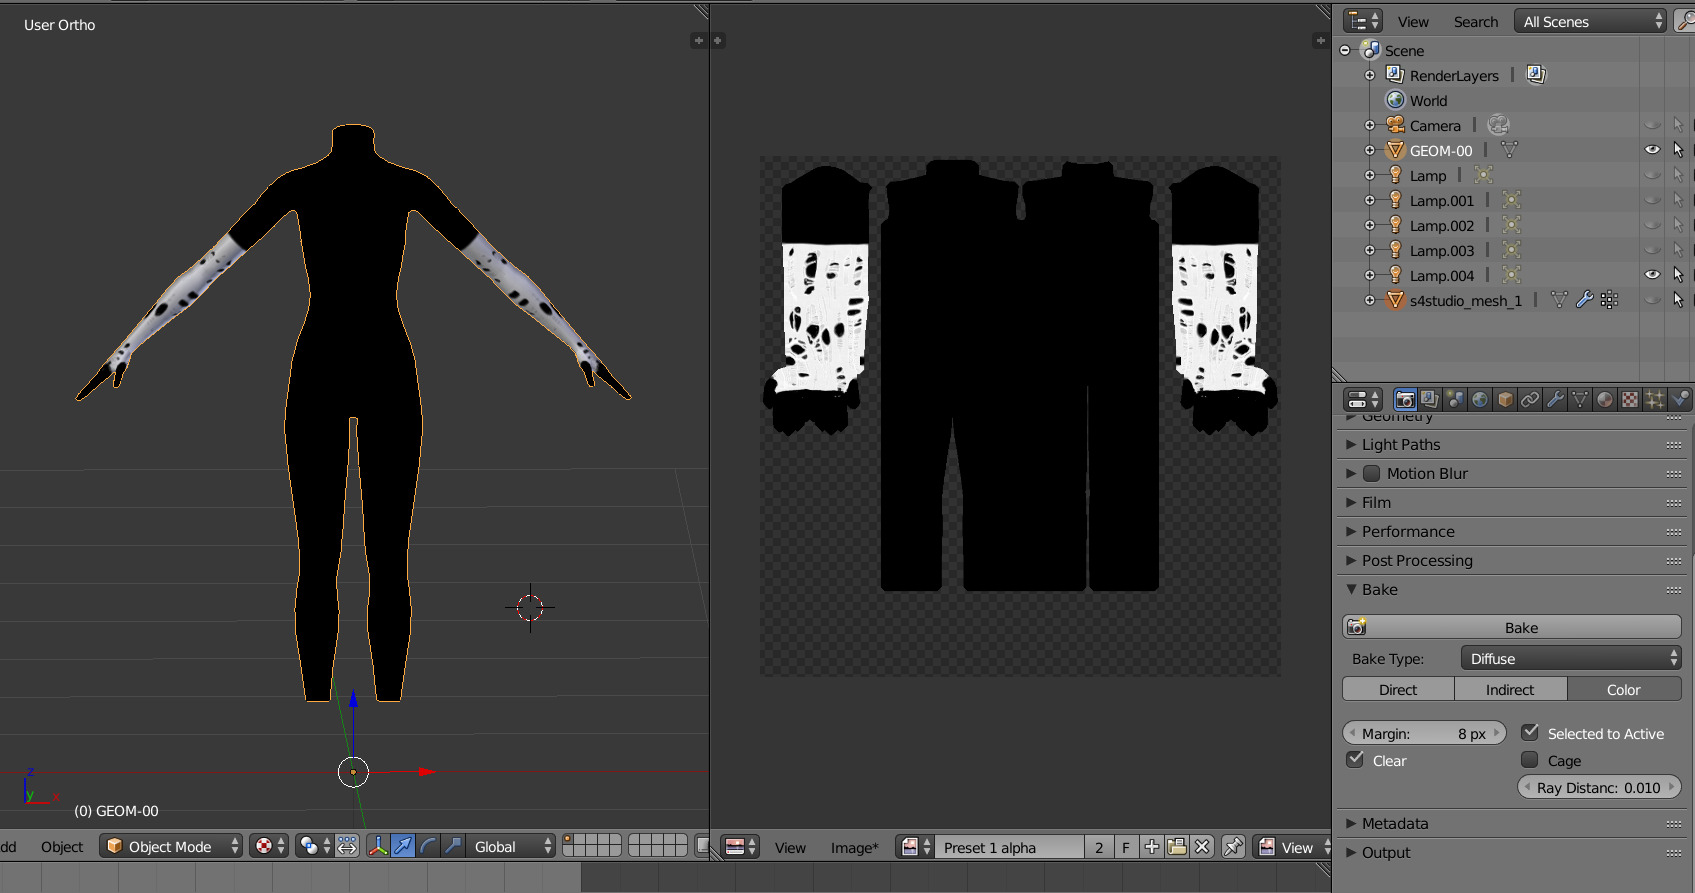
- First of all, go to the Render tab and change default settings to the following:
Sampling Tab:
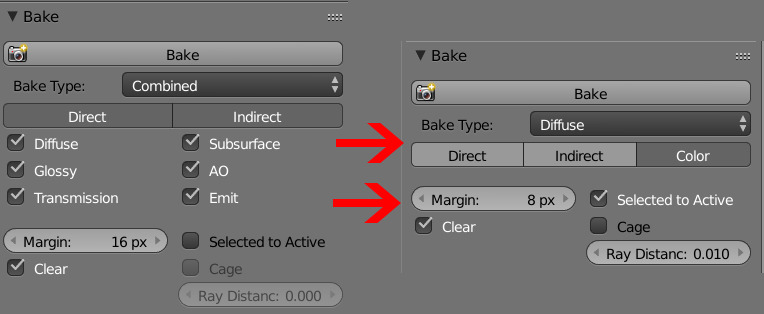
Bake Tab:
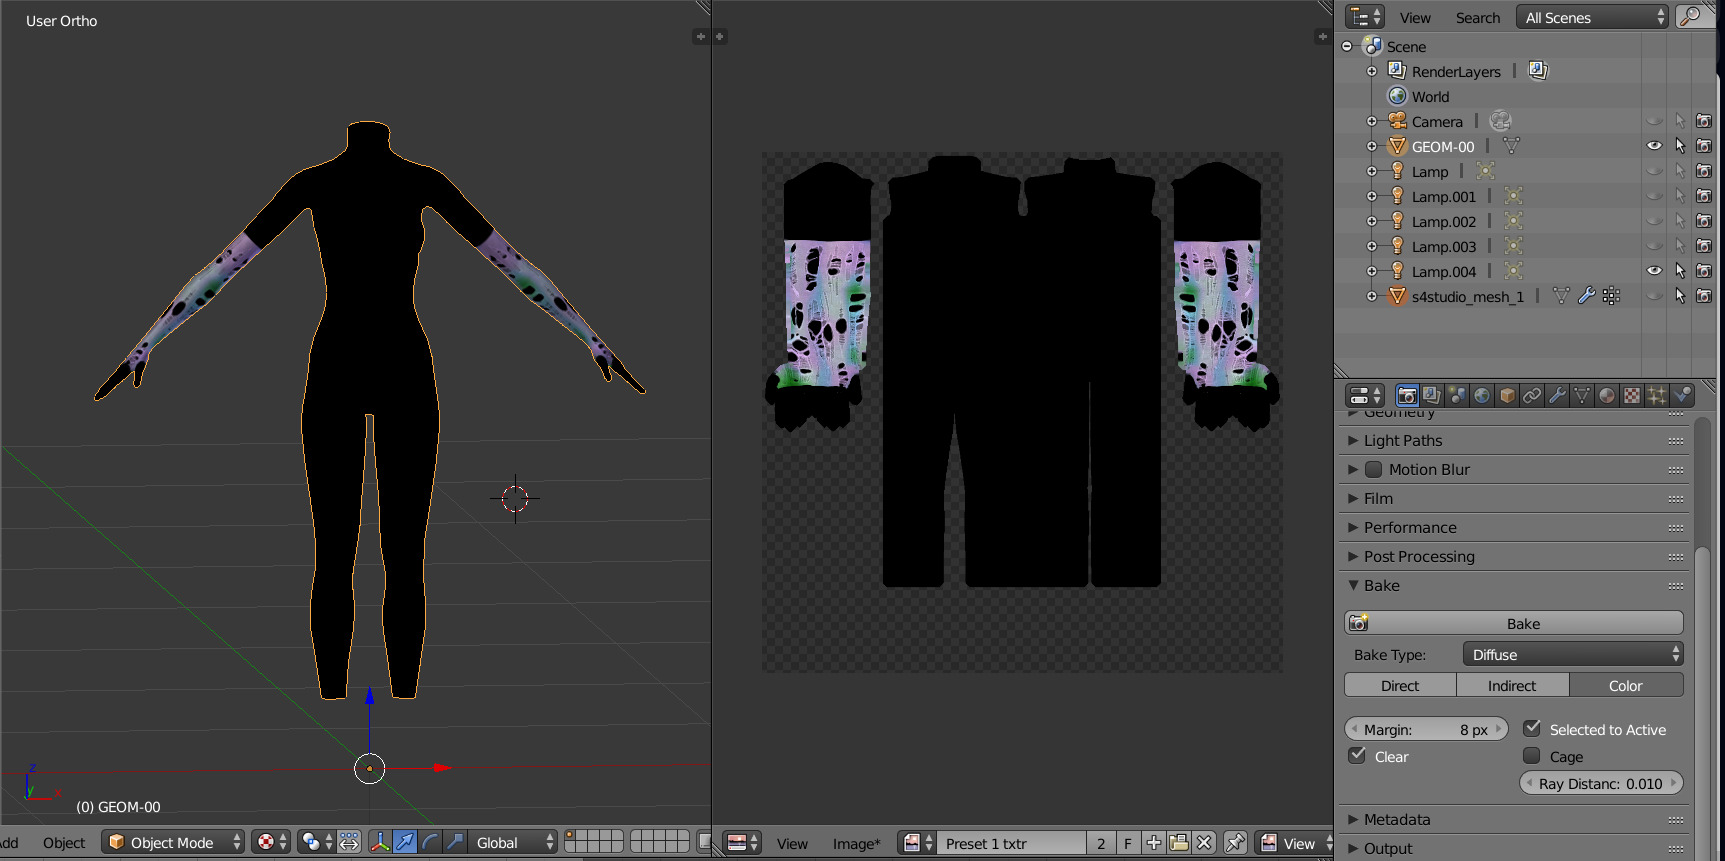
 8.After that press Bake button and wait for it.
9. Look at the result, great, isn't it?:
8.After that press Bake button and wait for it.
9. Look at the result, great, isn't it?:
 10. Save this texture as .png... But wait, that's not all! we need to bake alpha, so we can remove that black body texture in Photoshop later.
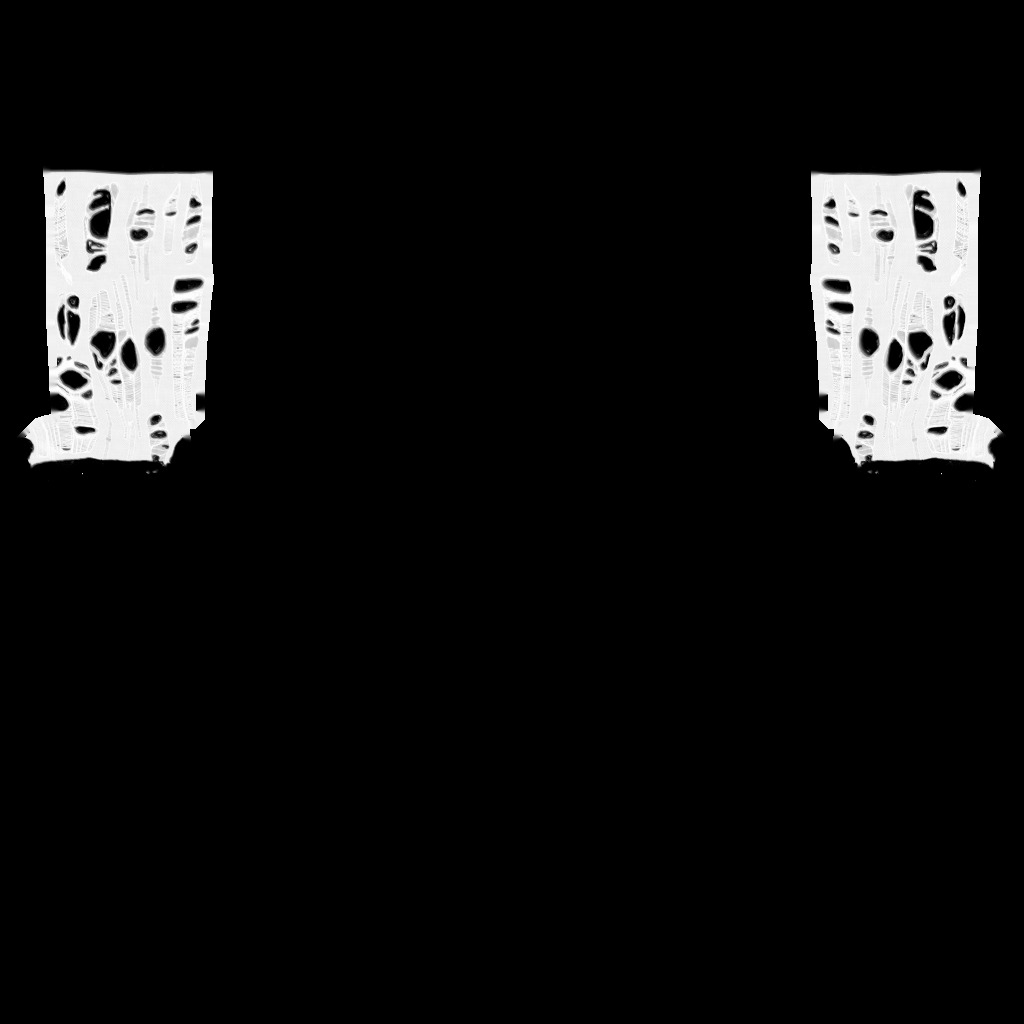
STEP 5: BAKING ALPHA.
- Create new image for alpha. select TS4 body group.
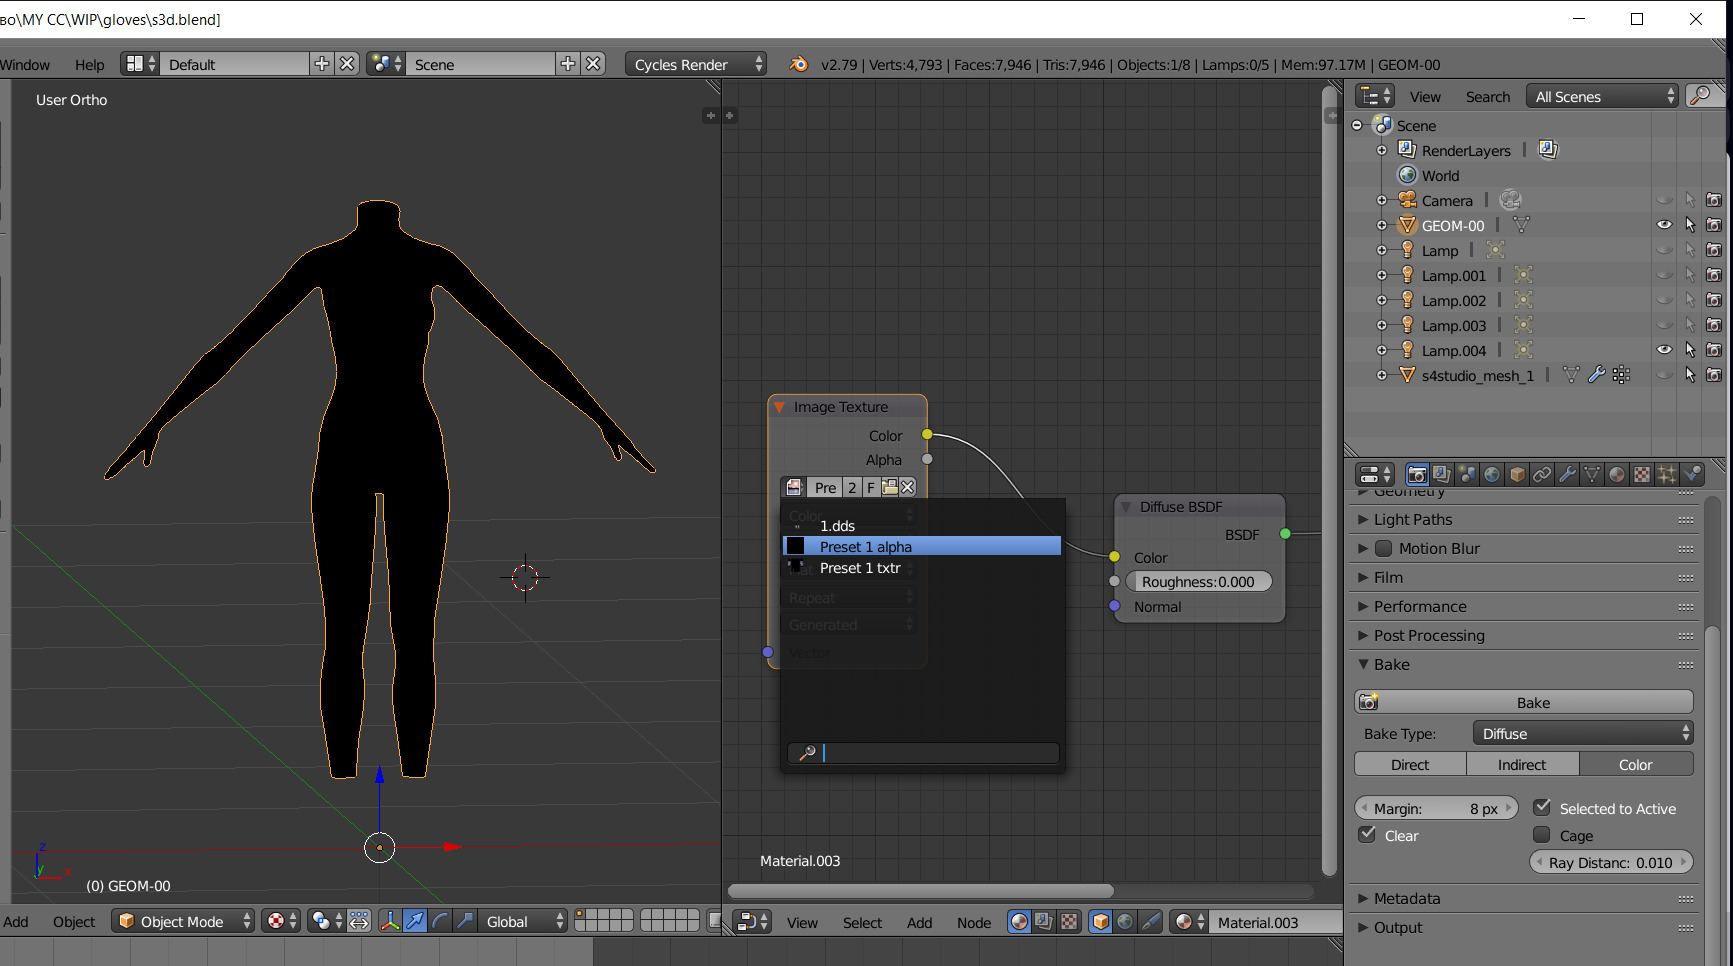
- Select TS4 body group. Go to Node editor, in the Image texture node change Color socket to Alpha and connect it to Color socket of Diffuse BSDF:

- Select TS3 body group, In the Image texture node change your old image, that we used for bake, to a new image:
- Use Shift + click to select first the TS4 group and then the TS3 group:
- Go to the Render tab, settings are the same as the previous one, press Bake and wait:
- Finally, we are ready... at least for one swatch (I have 20 of them, but that's not important right now). Now we need to save that image and remove with it all the black stuff from the texture in Photoshop. STEP 6: CREATING MULTIPLIER AND MASK IN PHOTOSHOP.
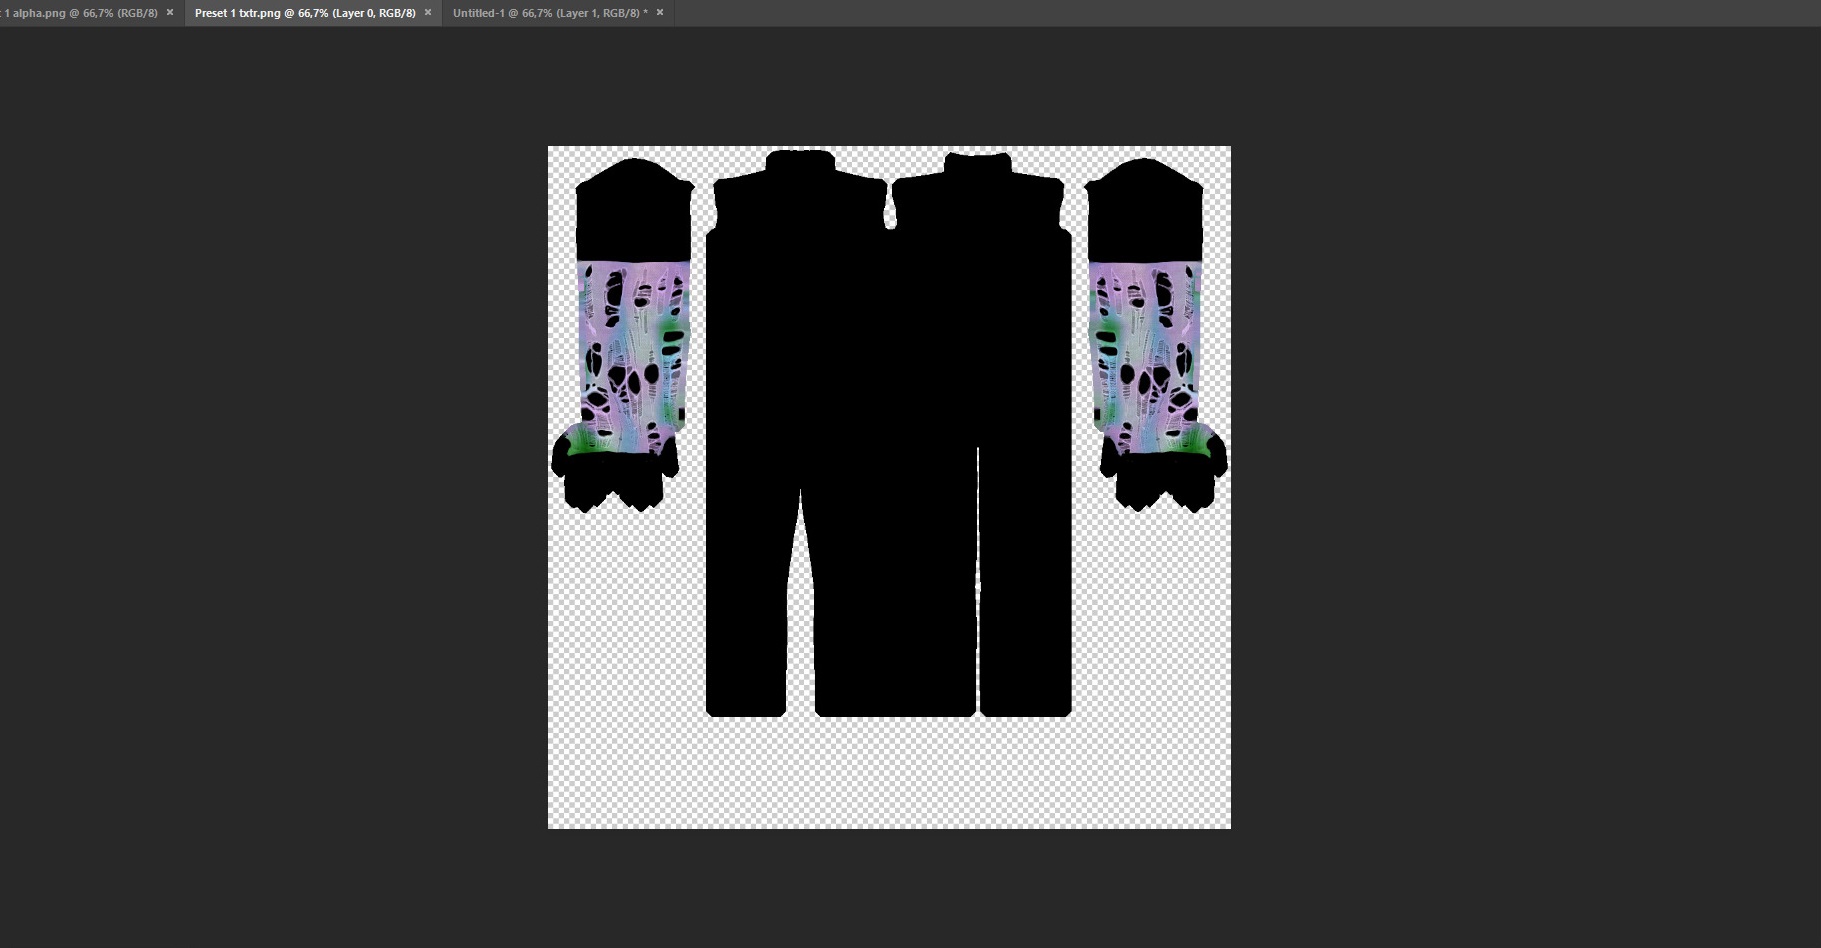
- Open your both baked textures. in my case alpha image is having transparency, that isn't normal:
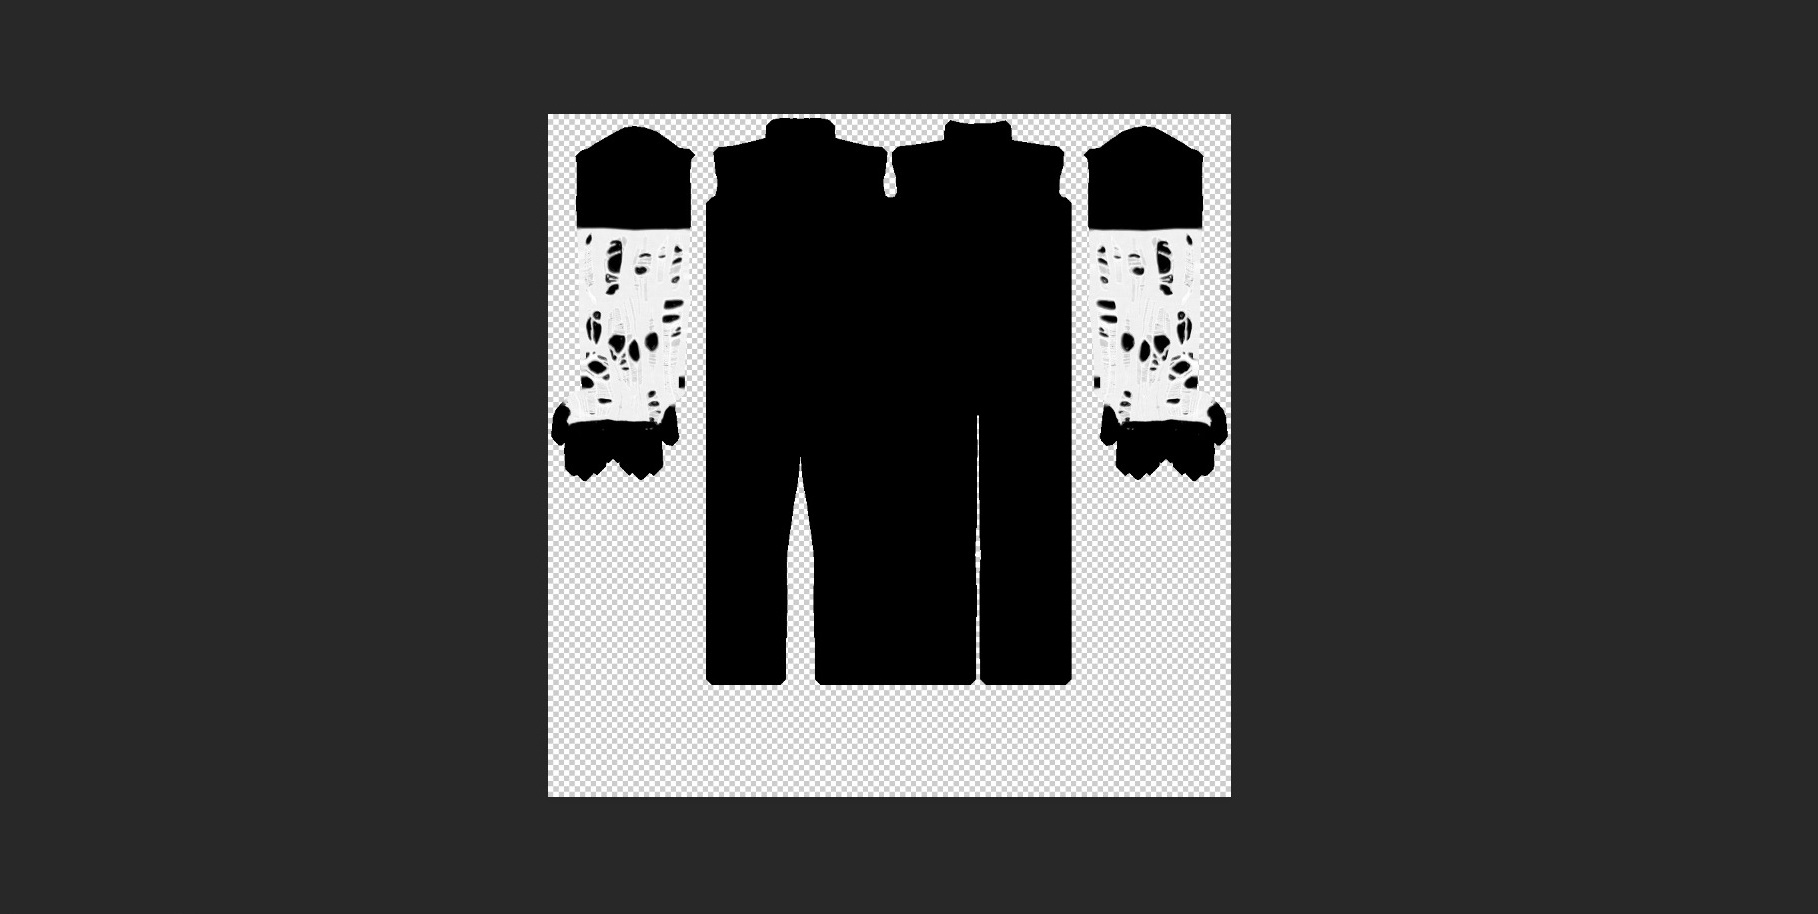 You can easily fix it, just use paint bucket tool with black color (#000000) for the background:
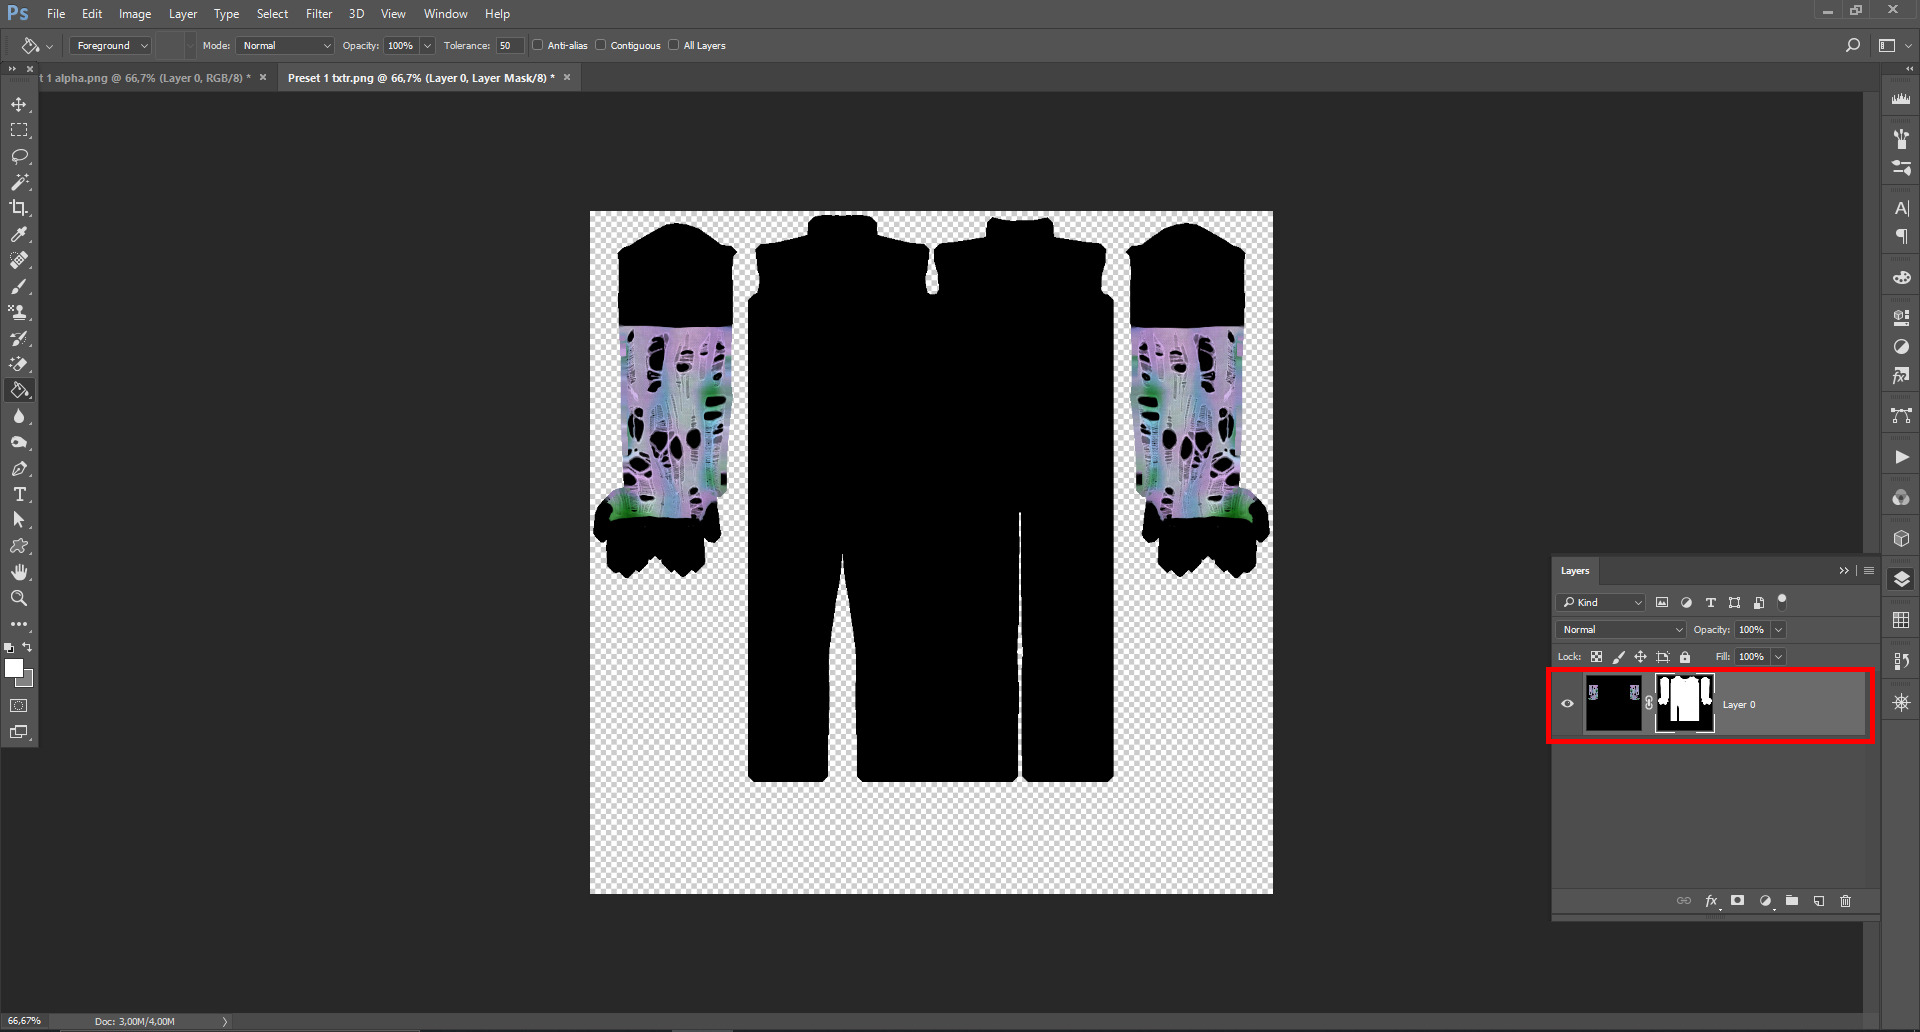
- After that, open your multiplier and create mask for the layer:
Open Layer tab → Layer mask → From transparency:
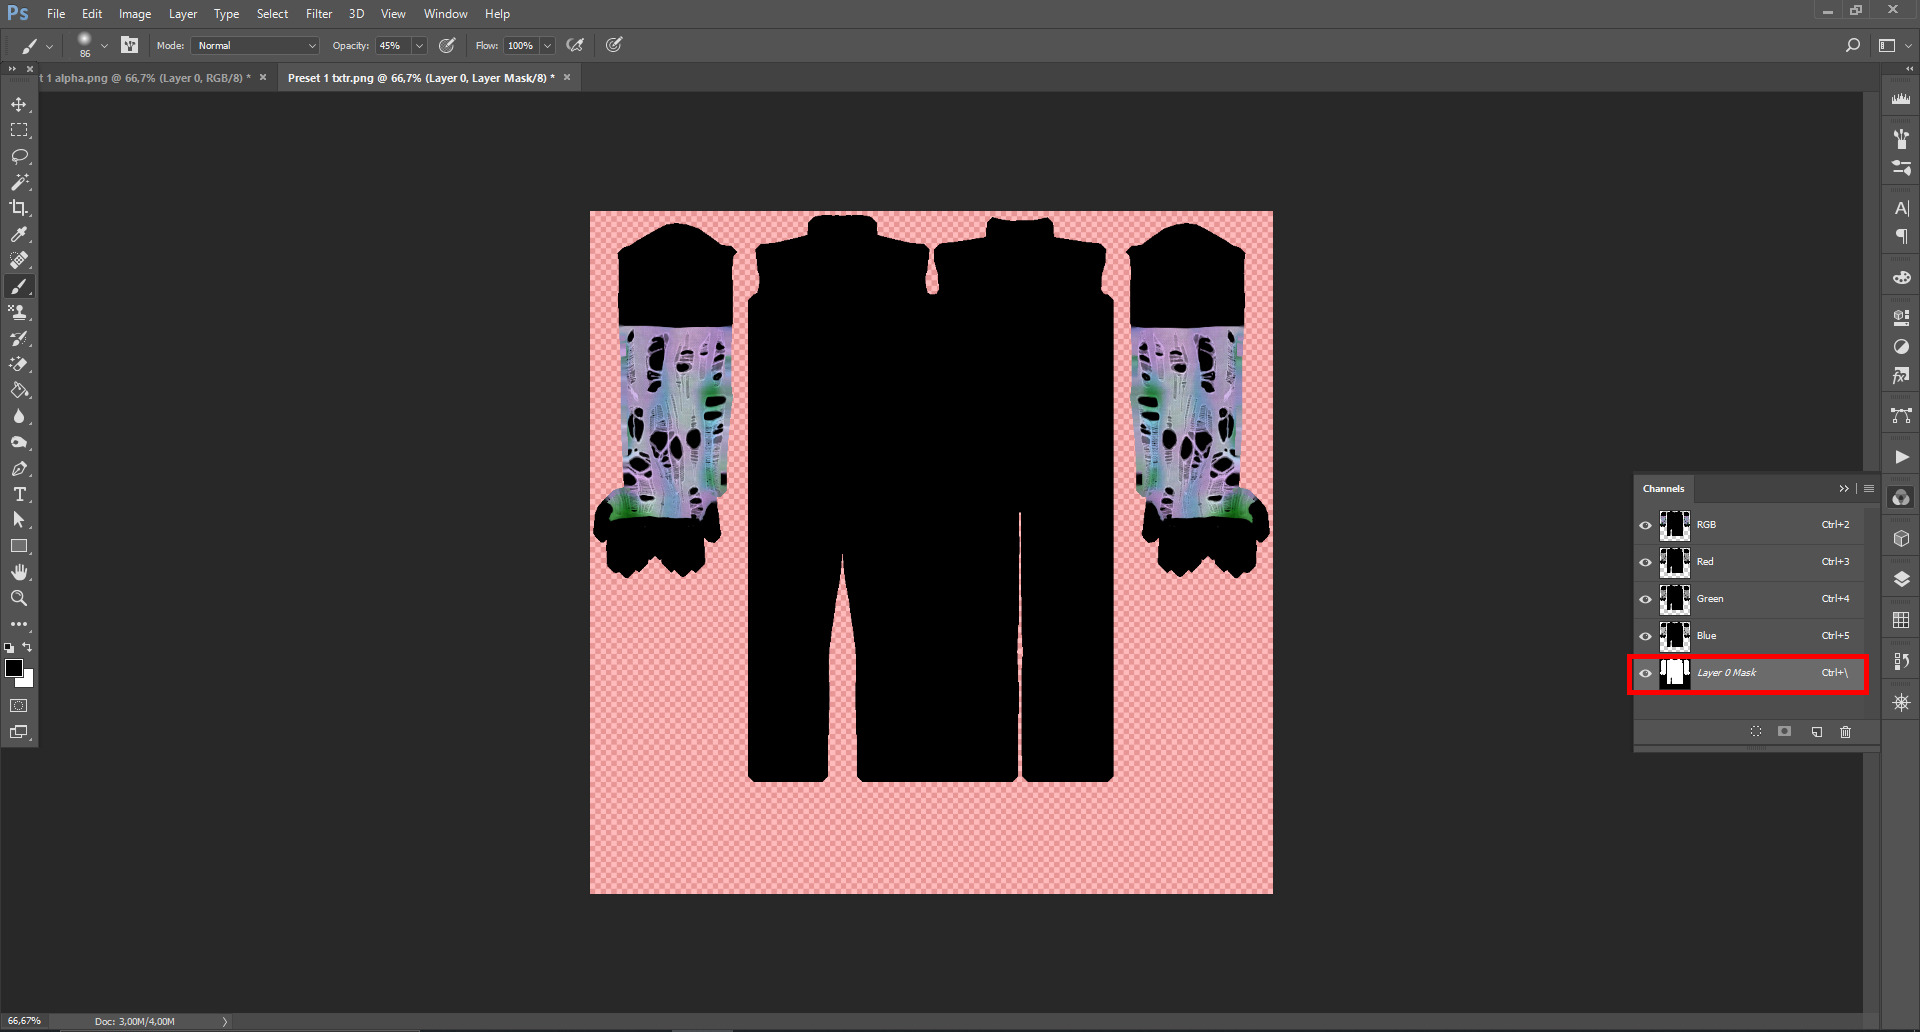
- Open the Channels tab, our mask is supposed to be the fourth channel, Select it and make visible:
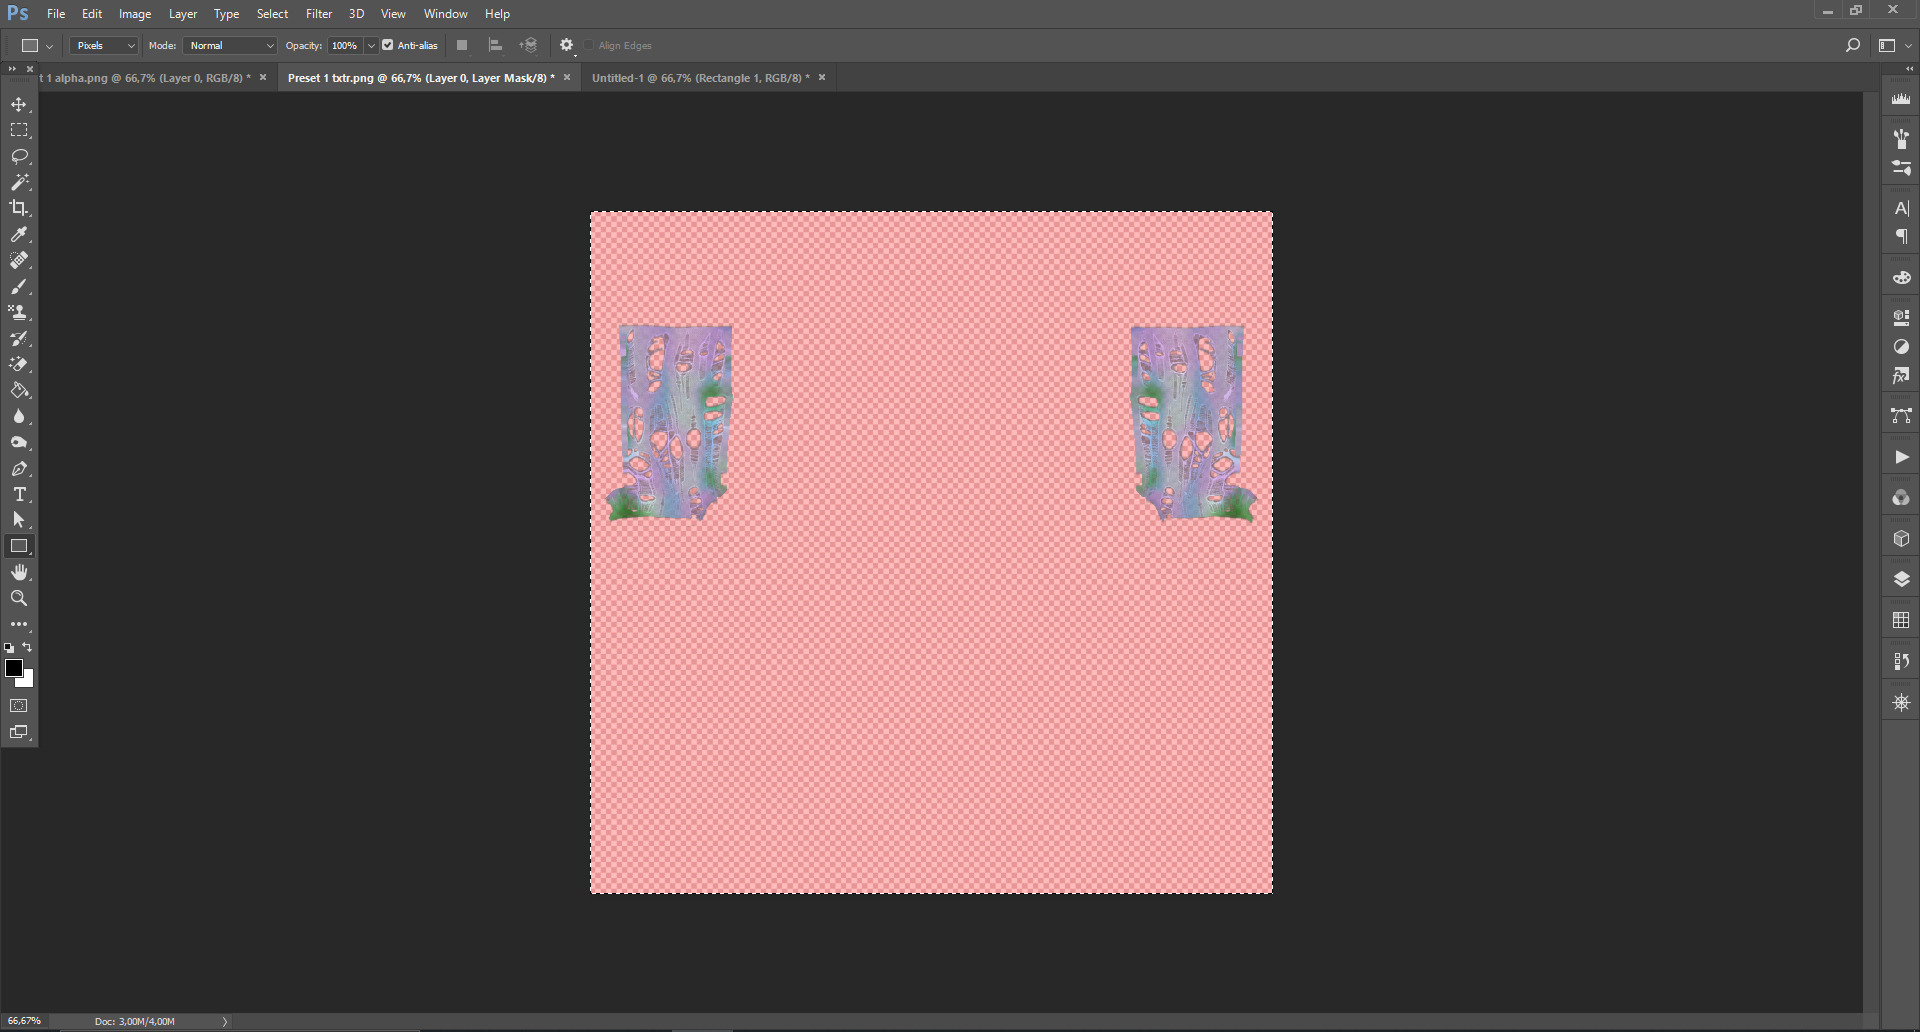
- Open fixed alpha image, select it with Ctrl+A, copy and paste:
- I actually saved the original texture, as additional non-recolorable preset, but you need to make your stuff recolorable. And I tweak the texture with Black&white and Curves, so I can make it gray and created mask with Match color adjustment:


- I don`t want to create specular and normal map for this but you can check tutorials for it on @sims3tutorialhub, but I created simple thumbnail with this template. After that I opened TSRW, created project from afAccessoryGloveBurglar clone and imported all textures. For whatever reason, TSRW doesn't show texture-based accessories (like gloves and socks), so you need to check it in-game.
It's the end of the tutorial! I want to thanks @thornowl for creating original video and wish all beginner (and experienced) creators the best of luck <3
Tags:
Accessories:
#Gloves & Nails
#Misc
#Stockings & Socks
|
Clothing:
#Bottoms
#Swimwear
#Tops
#Underwear